Table of Contents
Dark red text has been formatted as certain heading types. To ensure the table of contents is rendered correctly, make sure any edits to these fields does not change their heading type. |
Name: Min Lim
Date and Time:
Location: Chandler 260 (M&K Lab)
Subject: Making objects to cast
Weather: Rain, 8°C
Humidity: 90%
Materials:
Beeswax (M&K Lab)
Silicone moulds (M&K Lab)
Portable stove
Pot
Chopstick
Newspapers
Procedure:
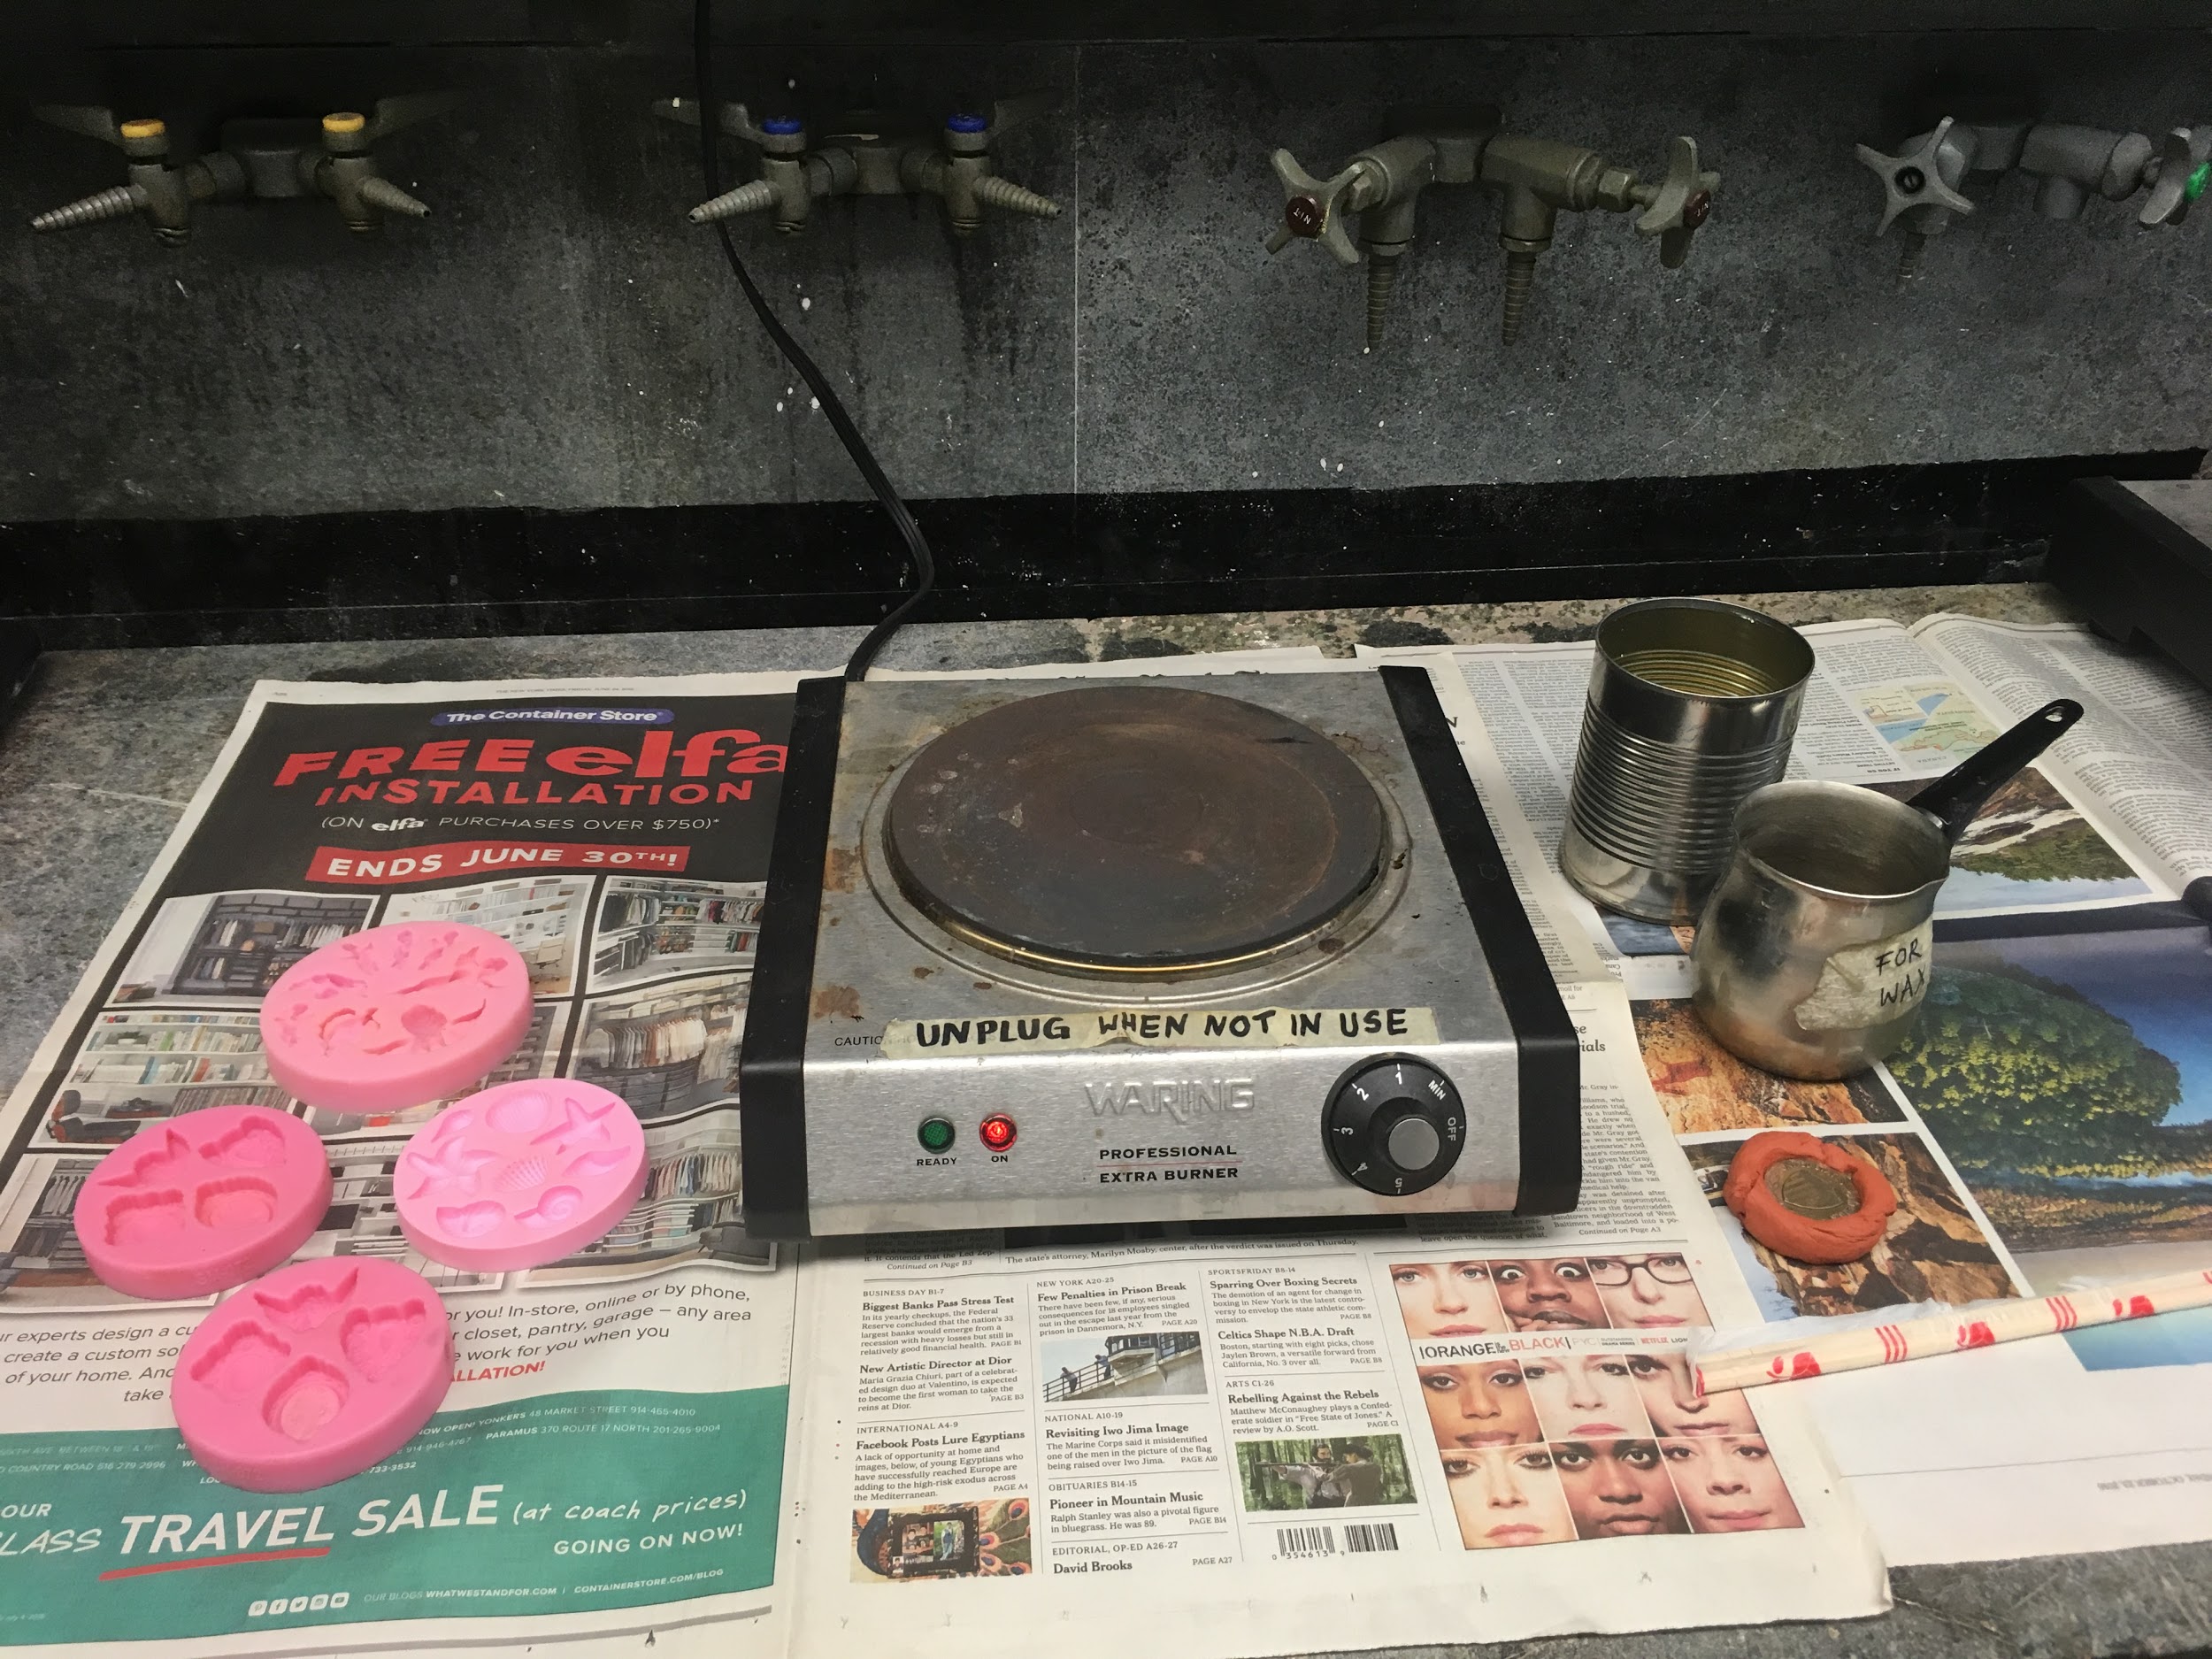
I wanted to make multiple copies of brooches as objects to form the impression on my bread moulds, as I will be testing out different variations of object casting from a single loaf. Buying these brooches would not only be costly, but may also not arrive in time.
I found some silicone moulds from the M&K Lab, and decided to use beeswax - which is much safer compared to sulfur - to cast my brooches from the moulds. I first took safety precautions by wearing my lab coat and gloves, though beeswax is non-reactive.
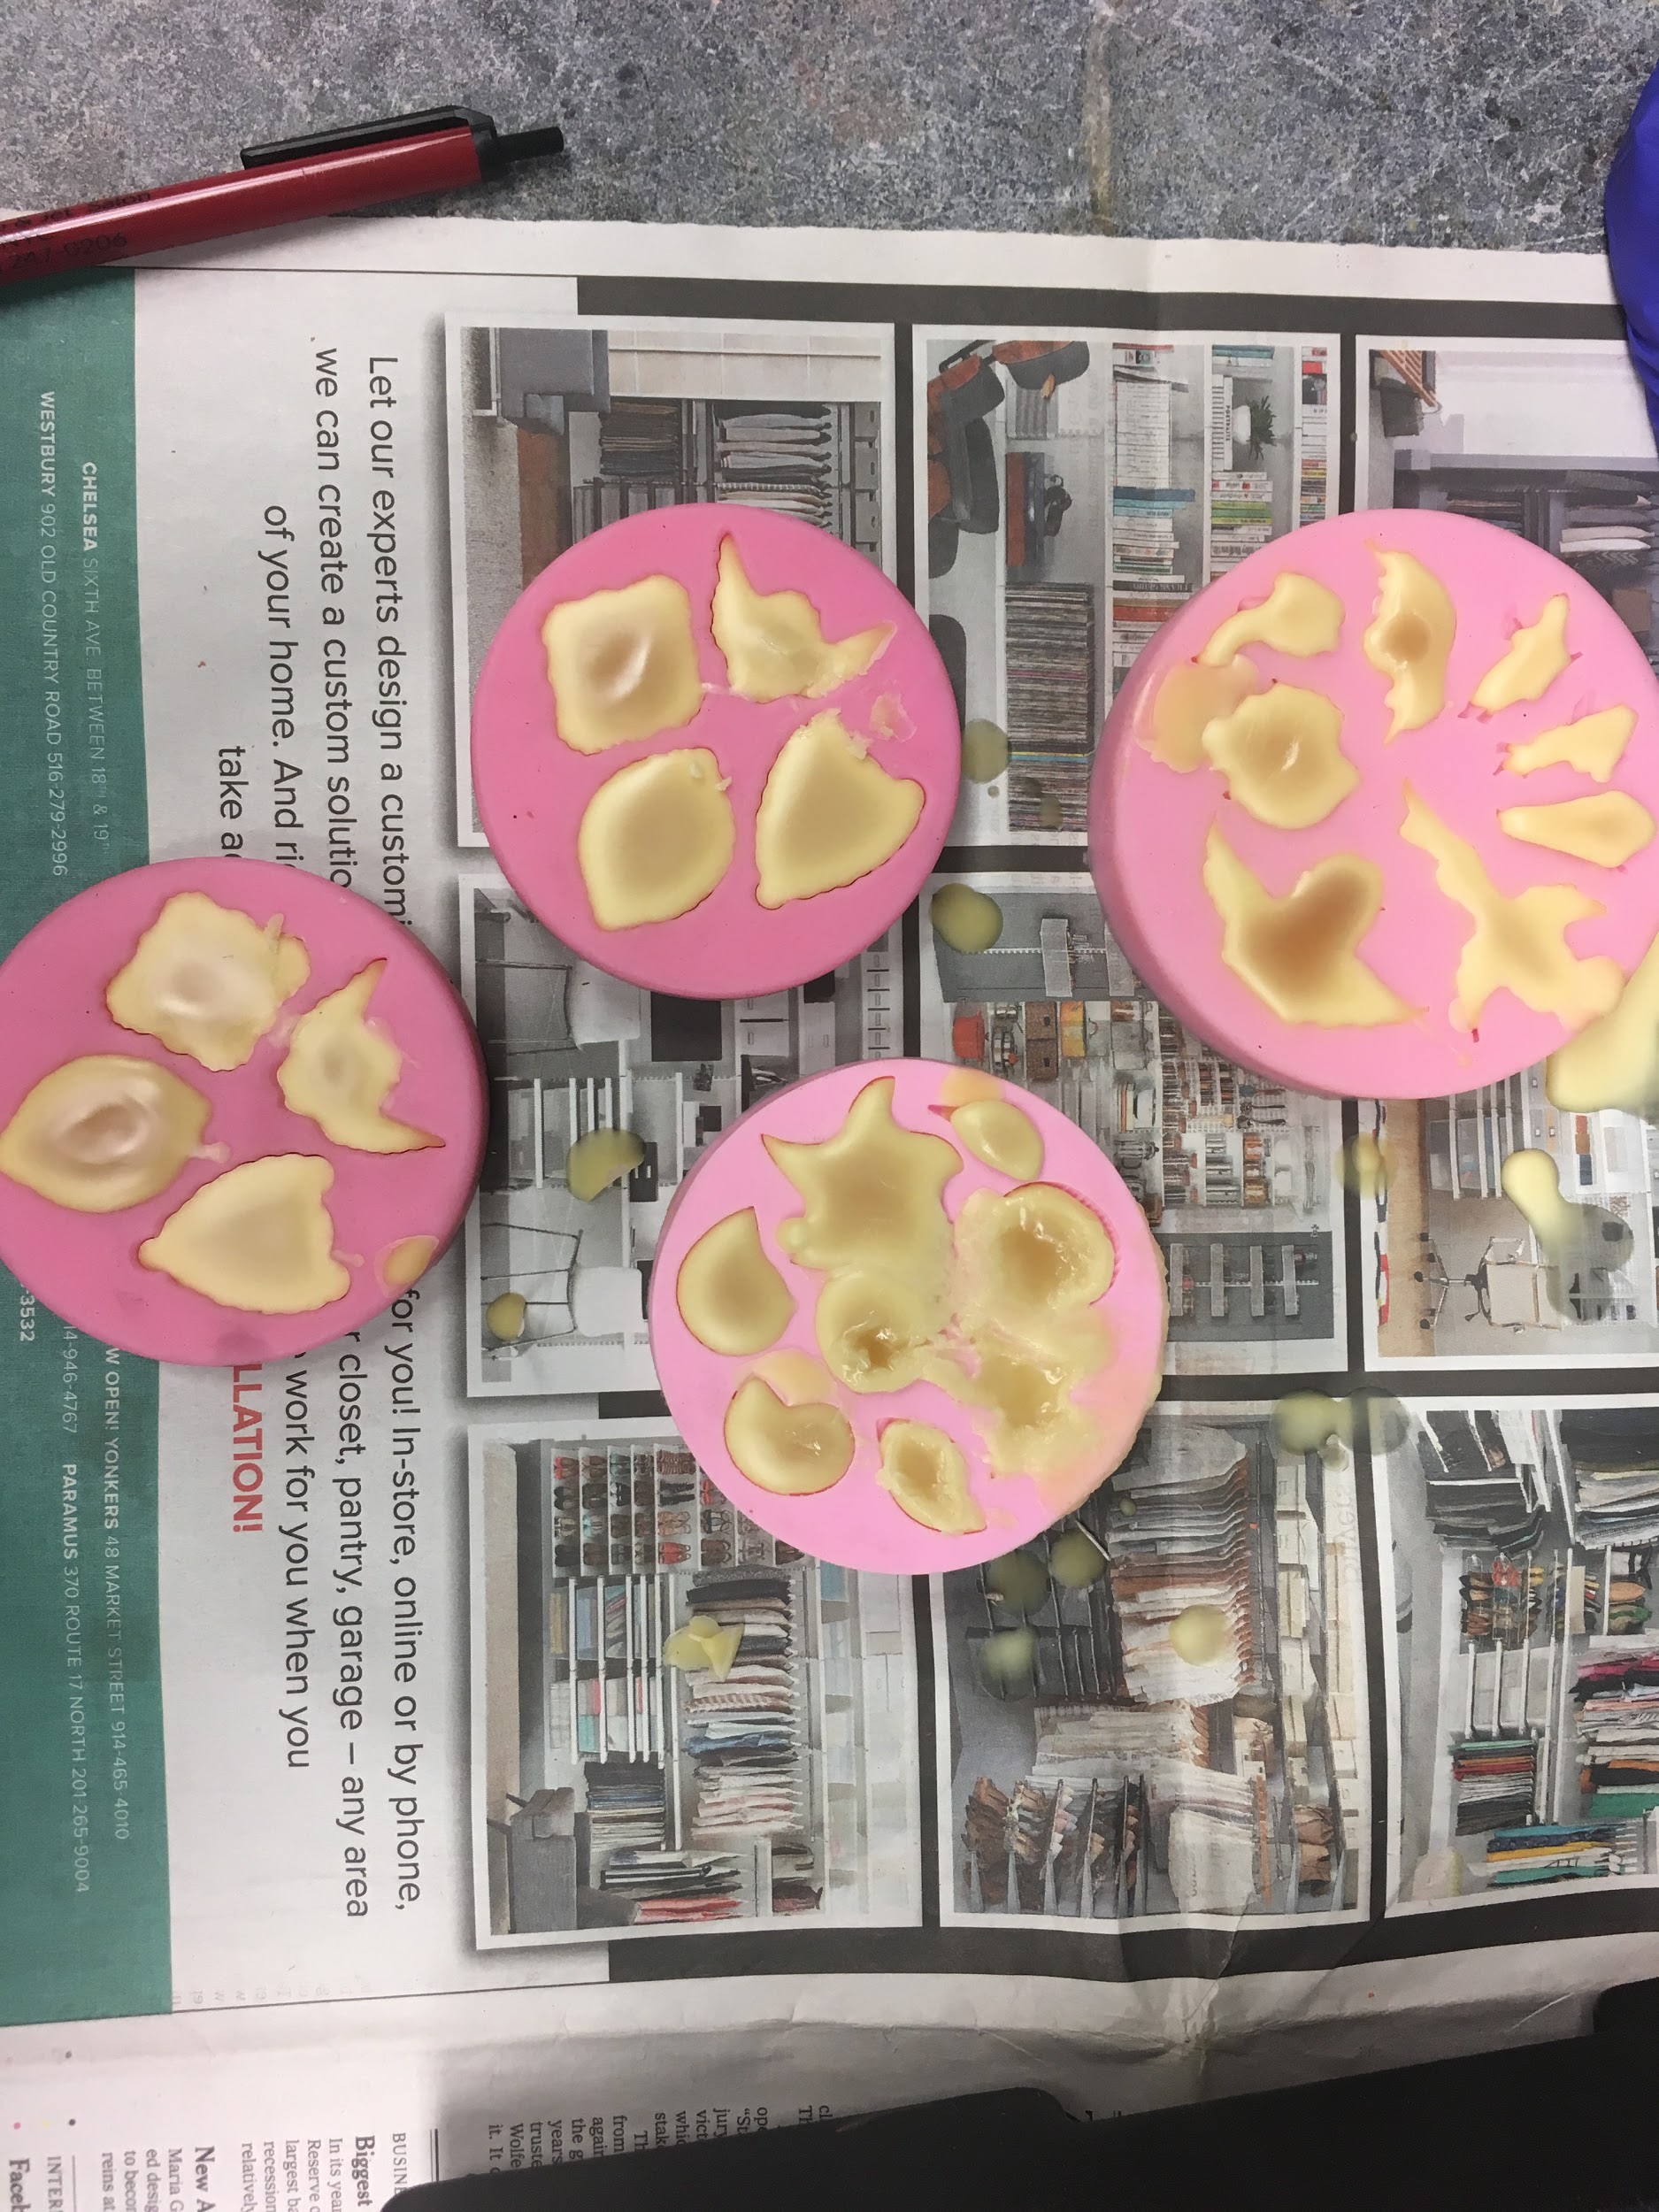
12:15pm: I laid my workstation with newspaper, placed a portable stove on top, and placed a pot on top of the stove, filled to about a quarter with beeswax pellets. At heat 1, I melted the beeswax, which took about 5 minutes, and then poured the melted wax into the moulds.
| Image URL: |
|---|
|
12:30pm: I waited 15 minutes for the beeswax to set, before repeating the process.
| Image URL: |
|---|
 |
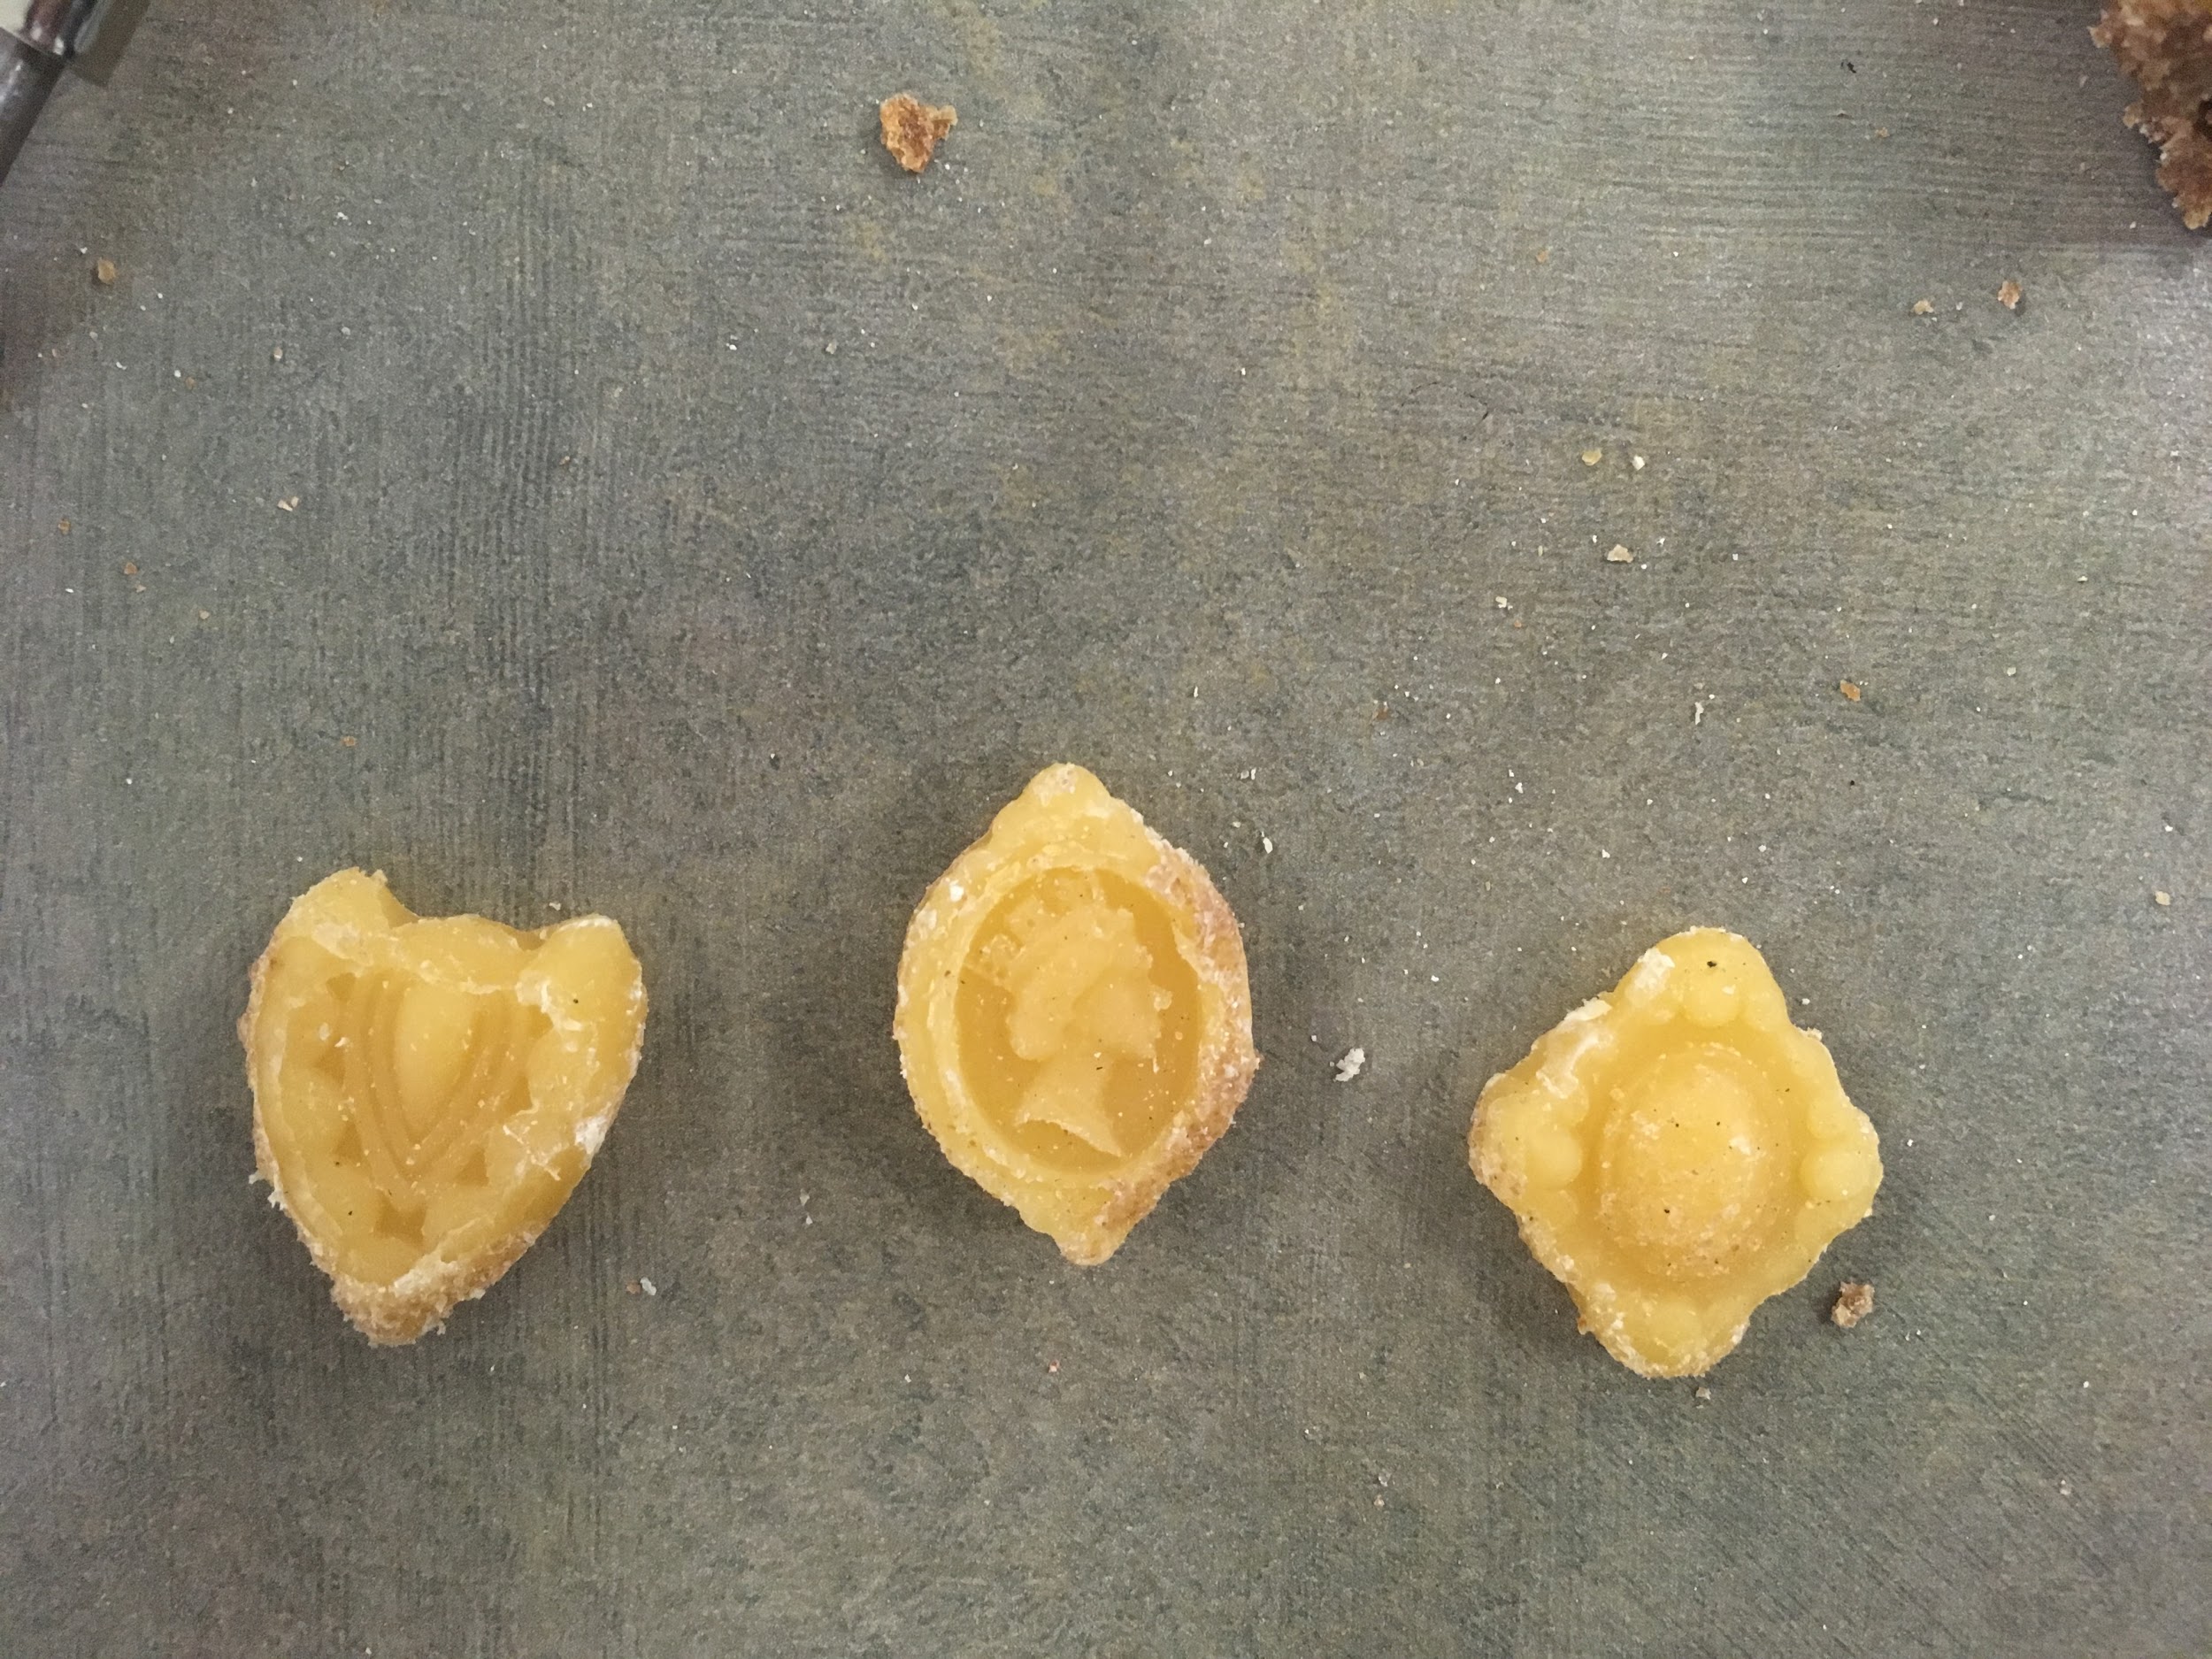
12:45pm: Produced some objects to use for the bread moulding assignment. I chose a few variations to test out the level of detail that the bread mould can capture, and whether the amount of “holes” (as indicated by Le brun) would’ve affected the impression.
| Image URL: |
|---|
 |
12:50pm: I began clearing my work station (waste into -- solid, non-hazardous, oil) and packed the casted objects for use at home. I am slightly worried that the beeswax (melting point 60-65C) may melt when in contact with the piping hot bread moulds, but we shall find out. I also took a few metal medallions back, should the beeswax objects prove unsuccessful.
Name: Min Lim
Date and Time:
Location: Personal Apartment Kitchen
Subject: Bread-making (100% all-purpose - loaf #1, 50% all-purpose 50% rye - loaf #2)
Weather: Cloudy, 6°C
Humidity: 73%
I will be using bread baking terminology that may be unfamiliar to individuals without specific bread baking knowledge. I’ve explained my terms in my field notes for the Bread moulding assignment, which can be referenced here.
Materials:
80g Sourdough starter #1 (composition unknown - received in class)
170g Bob’s Red Mill Organic Stone ground Dark Rye Flour
510g KAF All-Purpose (AP) Flour
520g Tap water (lukewarm)
2 plastic 1.25-quart containers with lid, 5.47 inches (H) x 6.19 inches (W) x 6.19 inches (D) (Ziploc, medium square)
Redman electronic measuring scale (to nearest whole number)
Redman stainless steel bowl
Procedure:
Following my recipe and bread-baking protocol from my bread molding assignment (see field notes here), I decided to start on loaves #1 and #2 from Table 1 of my annotation, simply due to the availability of ingredients I had in my apartment. I had already fed my starter the night before with equal parts AP flour and tap water (113g) to test its vigor. Given that it was successfully bubbling and doubled in volume this morning, I decided to go ahead with the loaves.
While my original recipe called for 250g of water, I was slightly worried given the change in weather and dryness. The rye/AP mix would also likely require more water (and a longer kneading time) given the weak gluten structure of rye. The flour also absorbs more water.
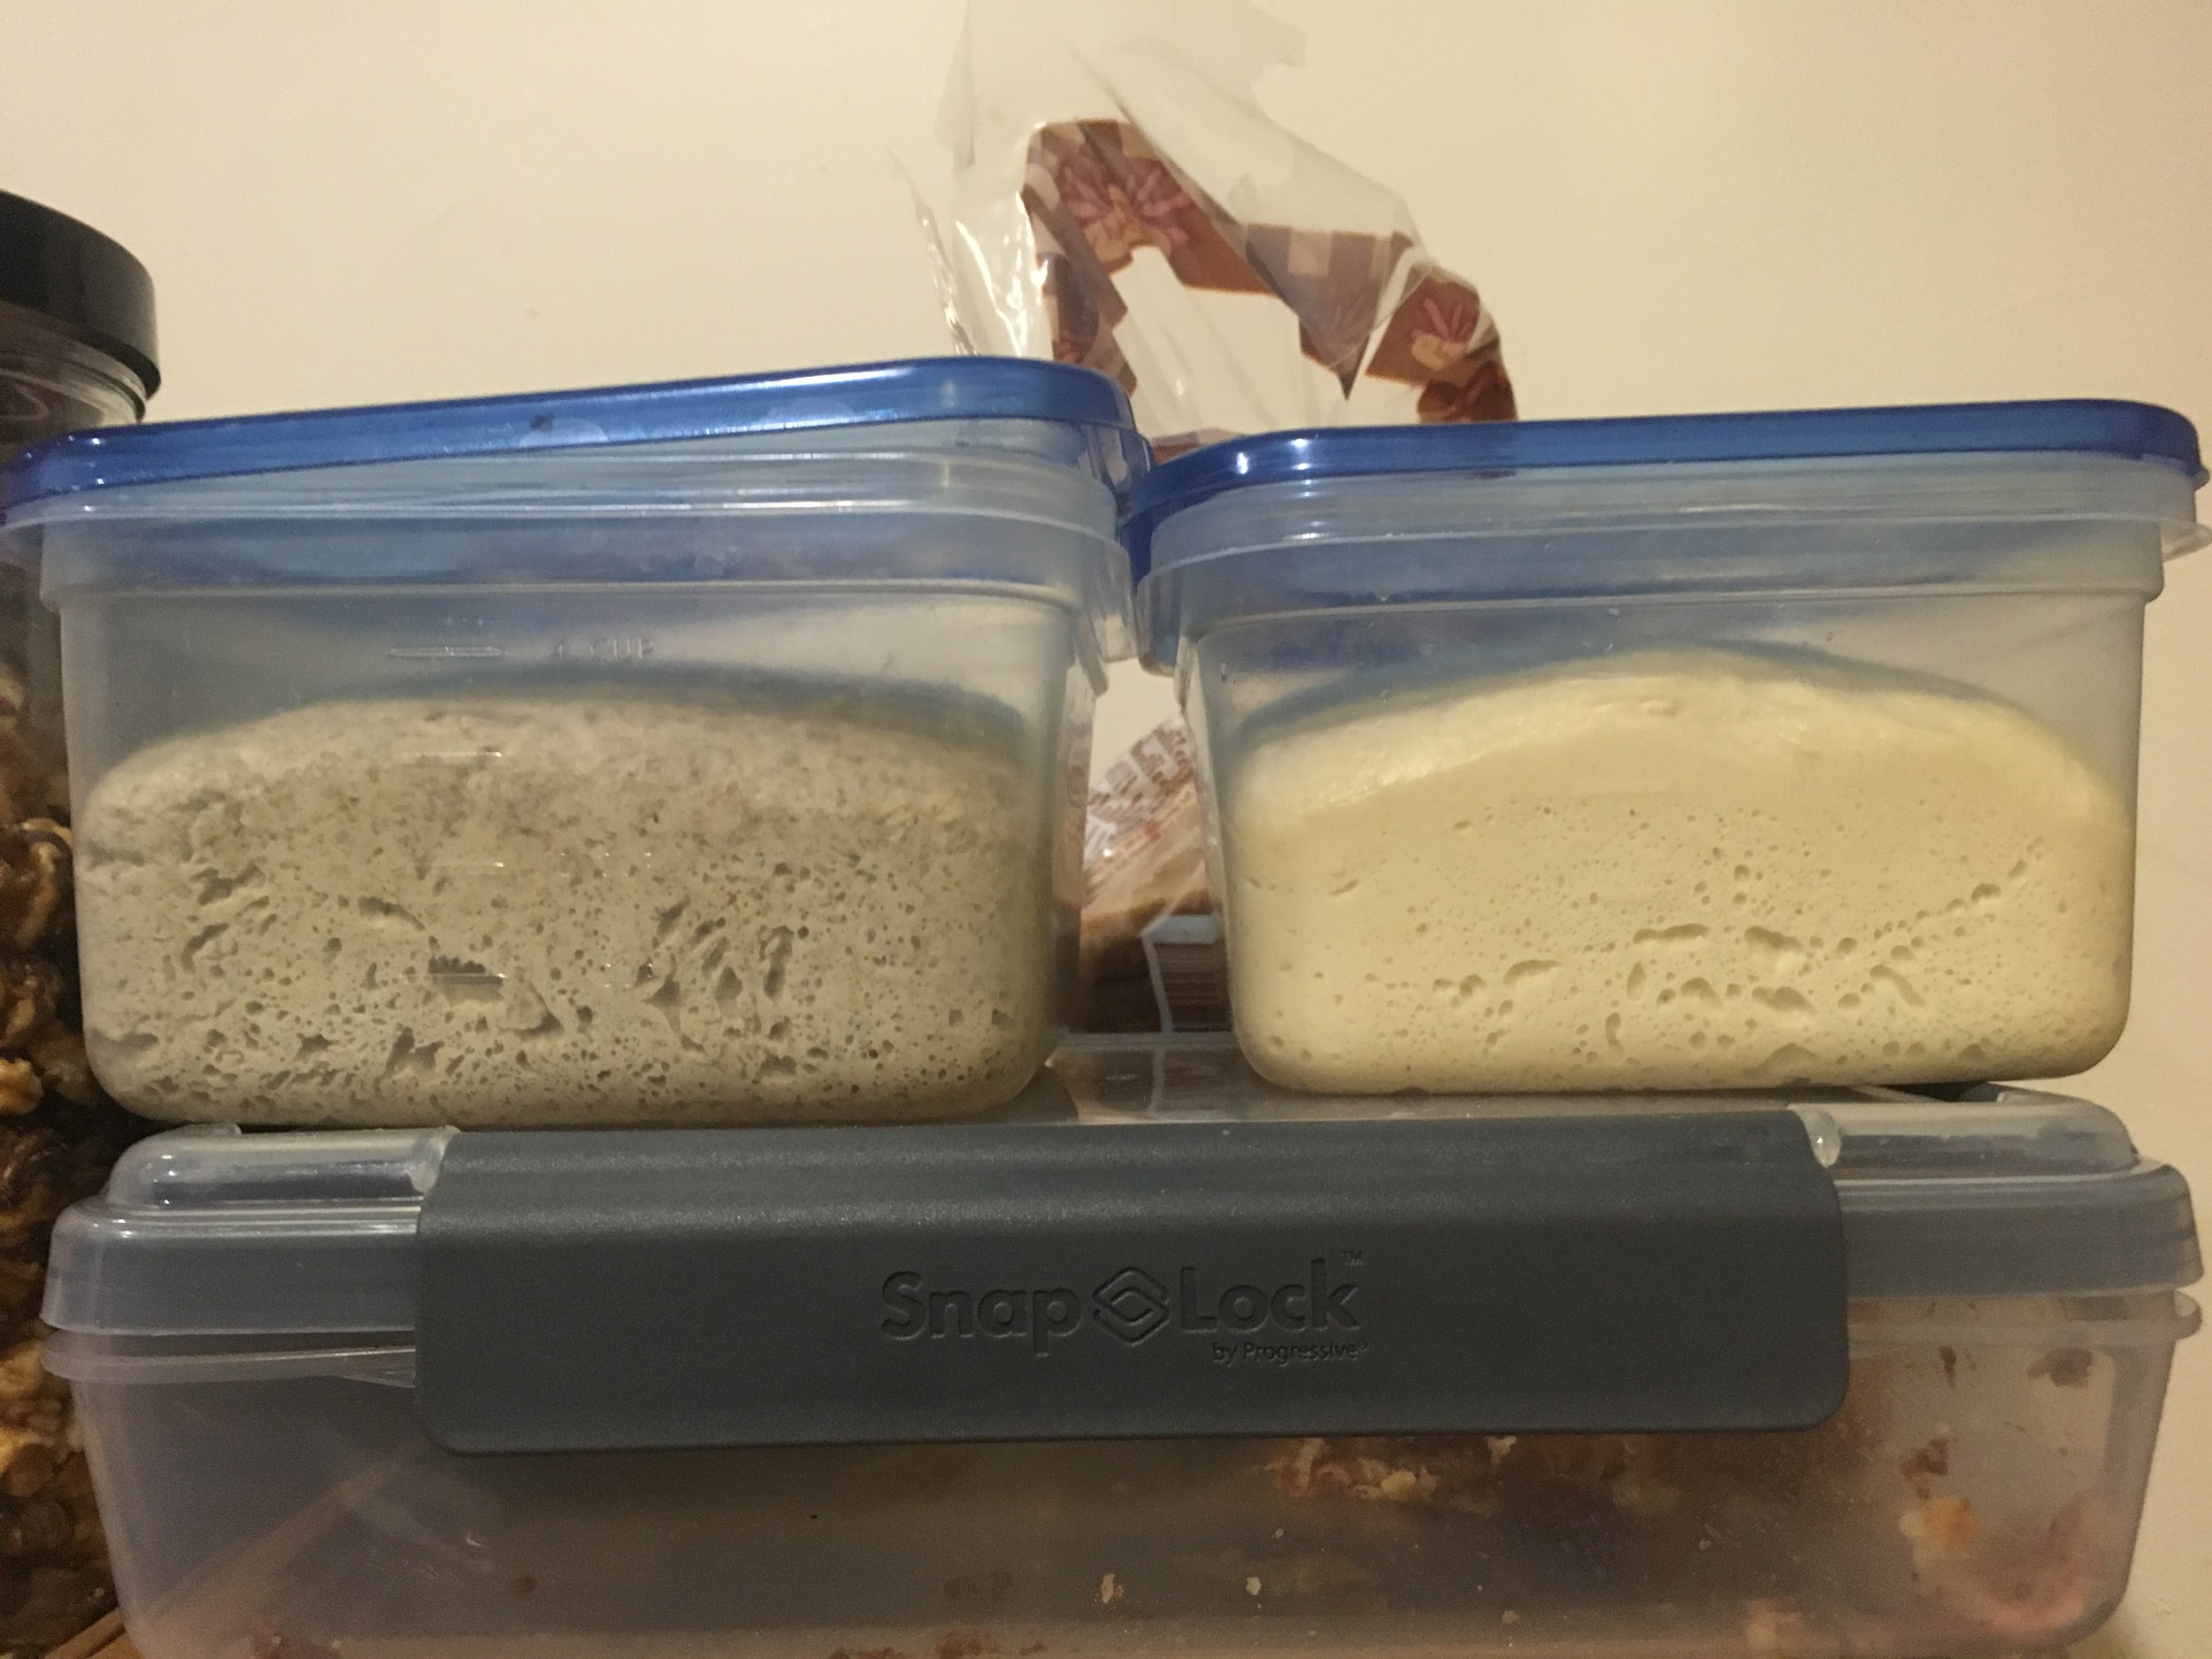
7:00am: I measured out the ingredients for loaf #1 (see qtys in Table 1 of annotation) and kneaded the dough for 10-15 mins until supple and the dough passes the window-pane test. As per my instinct, the dough wasn’t as slack with 250g of water, so I added another 10g as I kneaded, until it reached the right consistency. I laid the dough in a plastic ziploc 1.25 quart container until it doubled in size.
7:30am: in the meantime, I got started with loaf #2 as well. I also wanted to confirm my instinct about working with rye flour. After following the steps I took for loaf #1, I began kneading the dough on the counter top. The dough was extremely slack and wet, and came apart easily while kneading. It took another 20-25 minutes with some additional dusting of flour to form a cohesive dough. I laid the dough in a plastic ziploc 1.25 quart container until it doubled in size.
| Image URL: |
|---|
 |
Notes:
I am worried about the test loaf with 100% rye flour. I suspect loaf #2 will have a denser crumb and a much longer rising time than loaf #1. While 50% rye isn’t usually a conventional proportion of rye flour in modern bread (usually 10-25%, even when making rye bread), I believe it would be closer to the bread baked in early modern Europe, which also had a low gluten content.
Name: Min Lim
Date and Time:
Location: Personal Apartment Kitchen
Subject: Bread-making (loaves #4), Bread-baking (loaves #1, #2), Bread-molding (loaves #1, #2)
Weather: Cloudy, 3°C
Humidity: 65%
Baked loaves #1 and #2 in a 450F oven (preheated 525F) for approximately 45 mins until golden brown and bread sounds hollow when knocked.
| Image URL: |
|---|
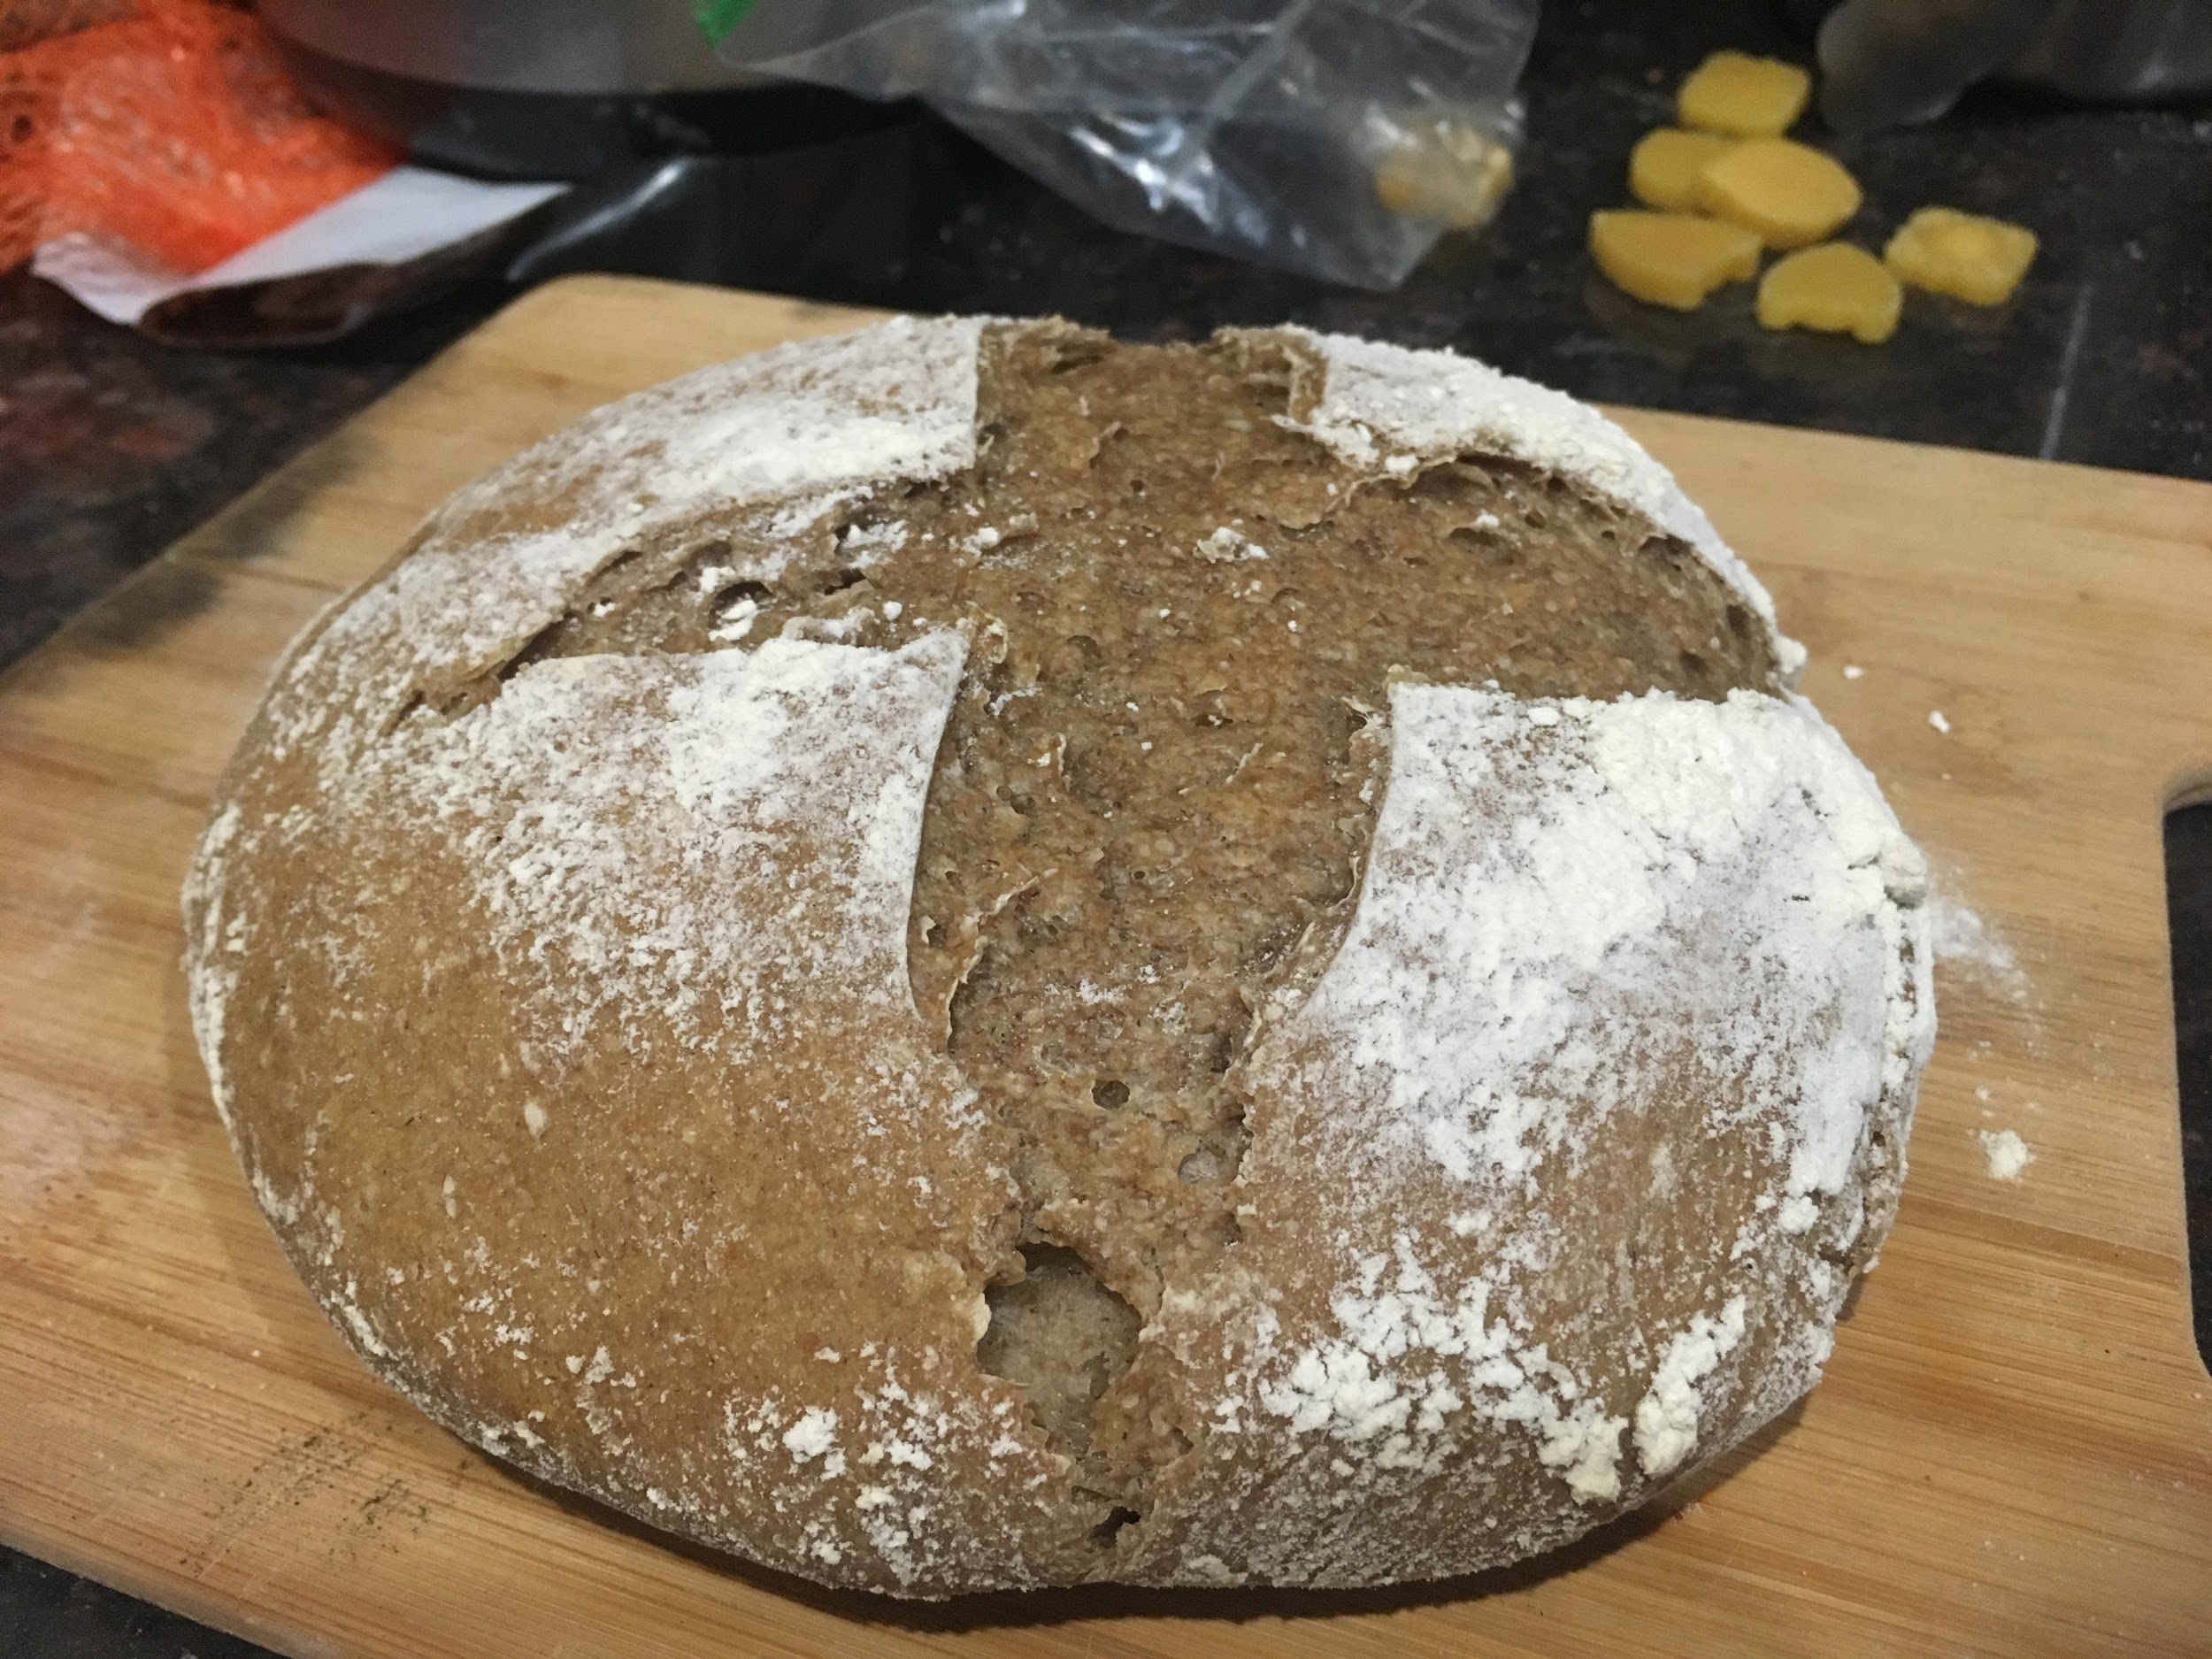 |
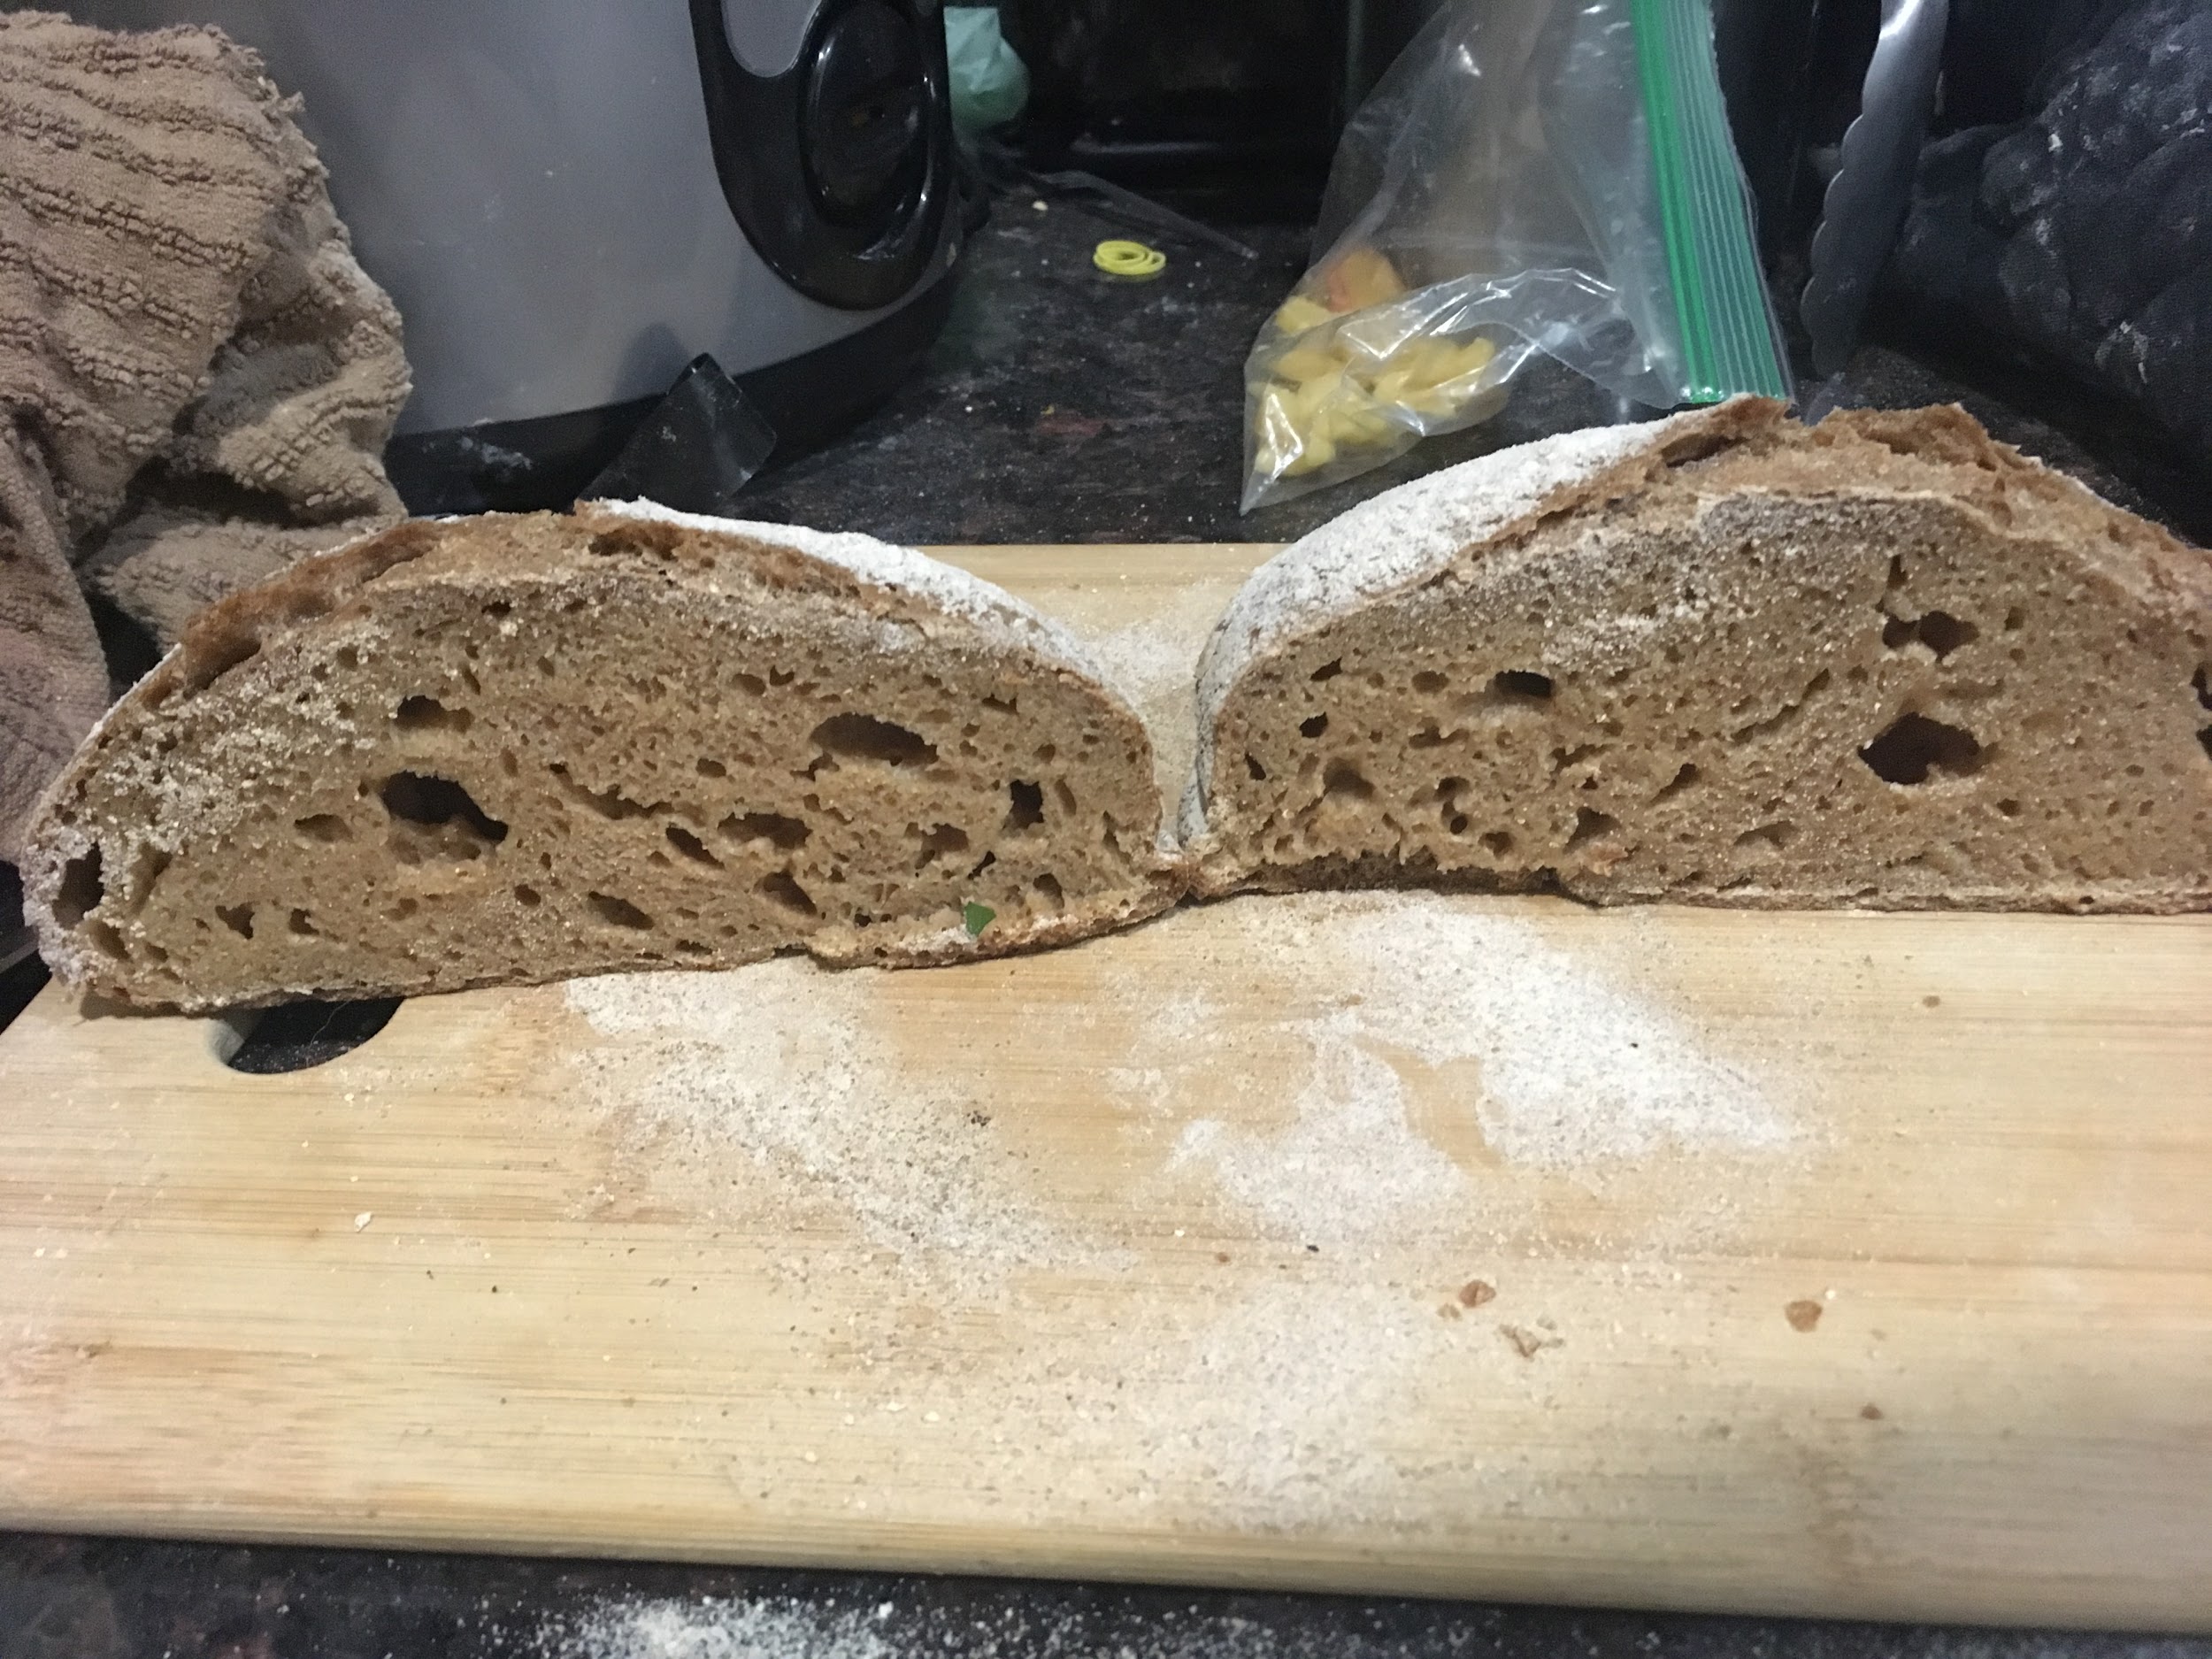
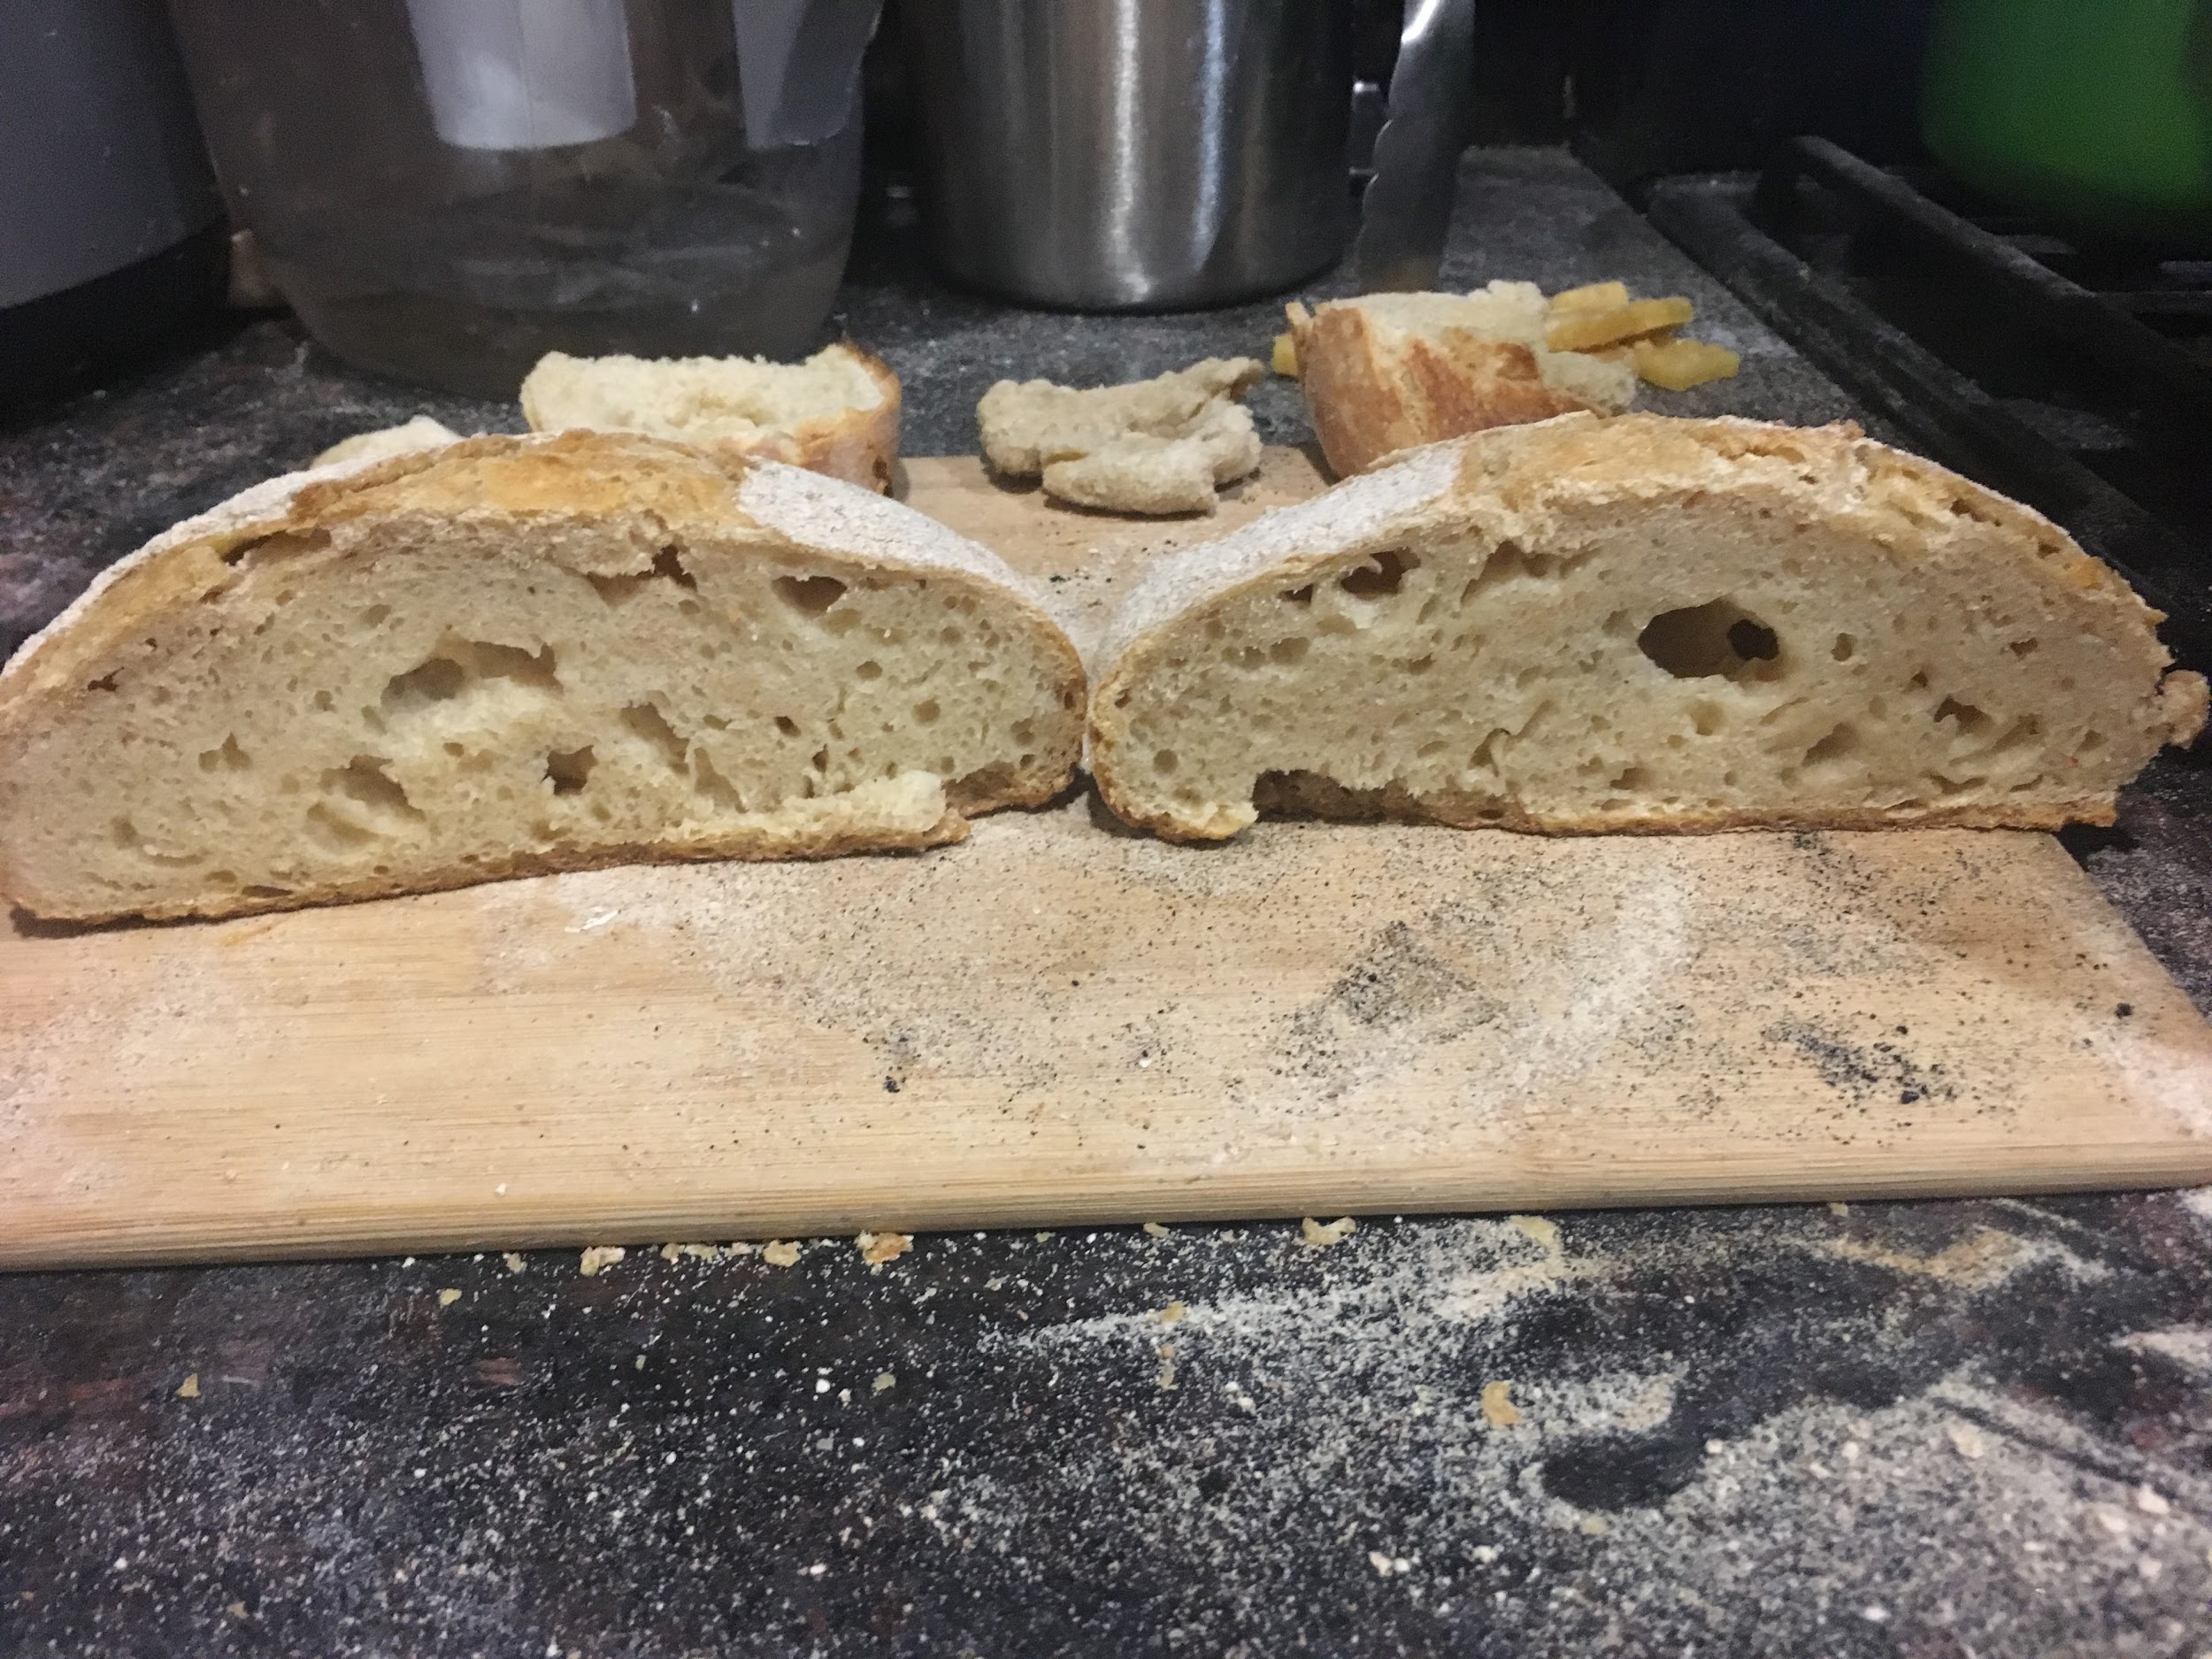
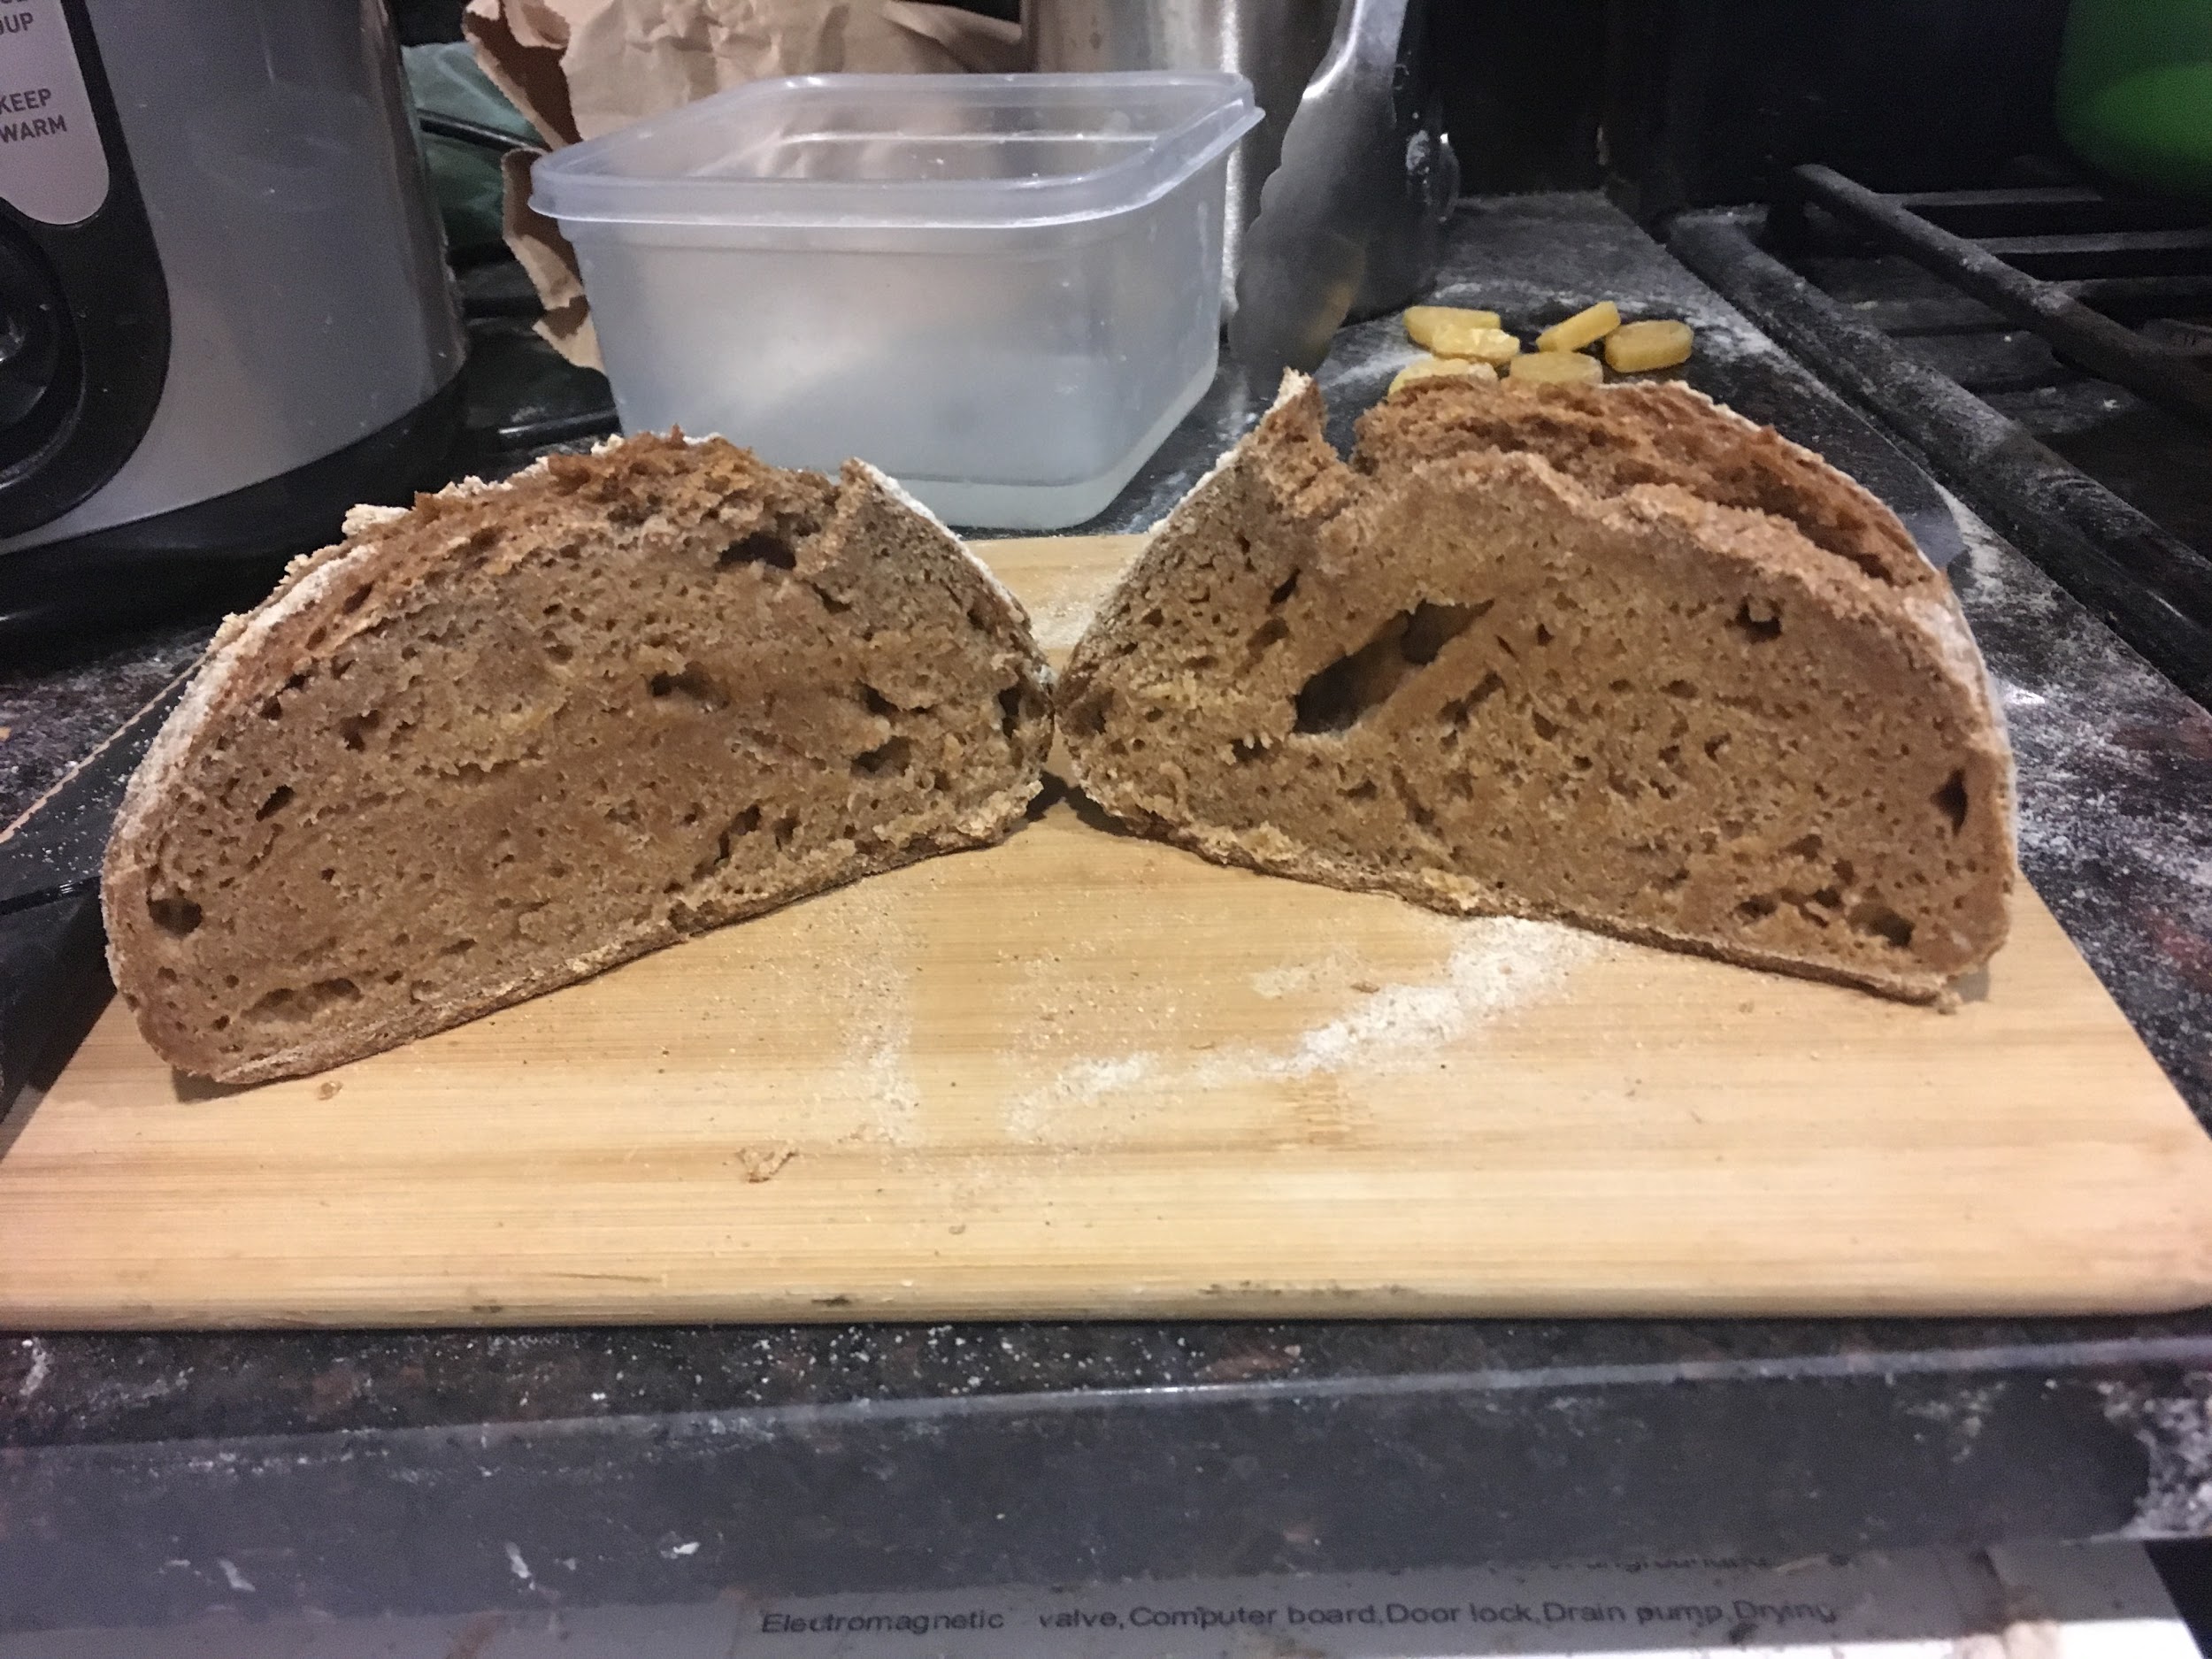
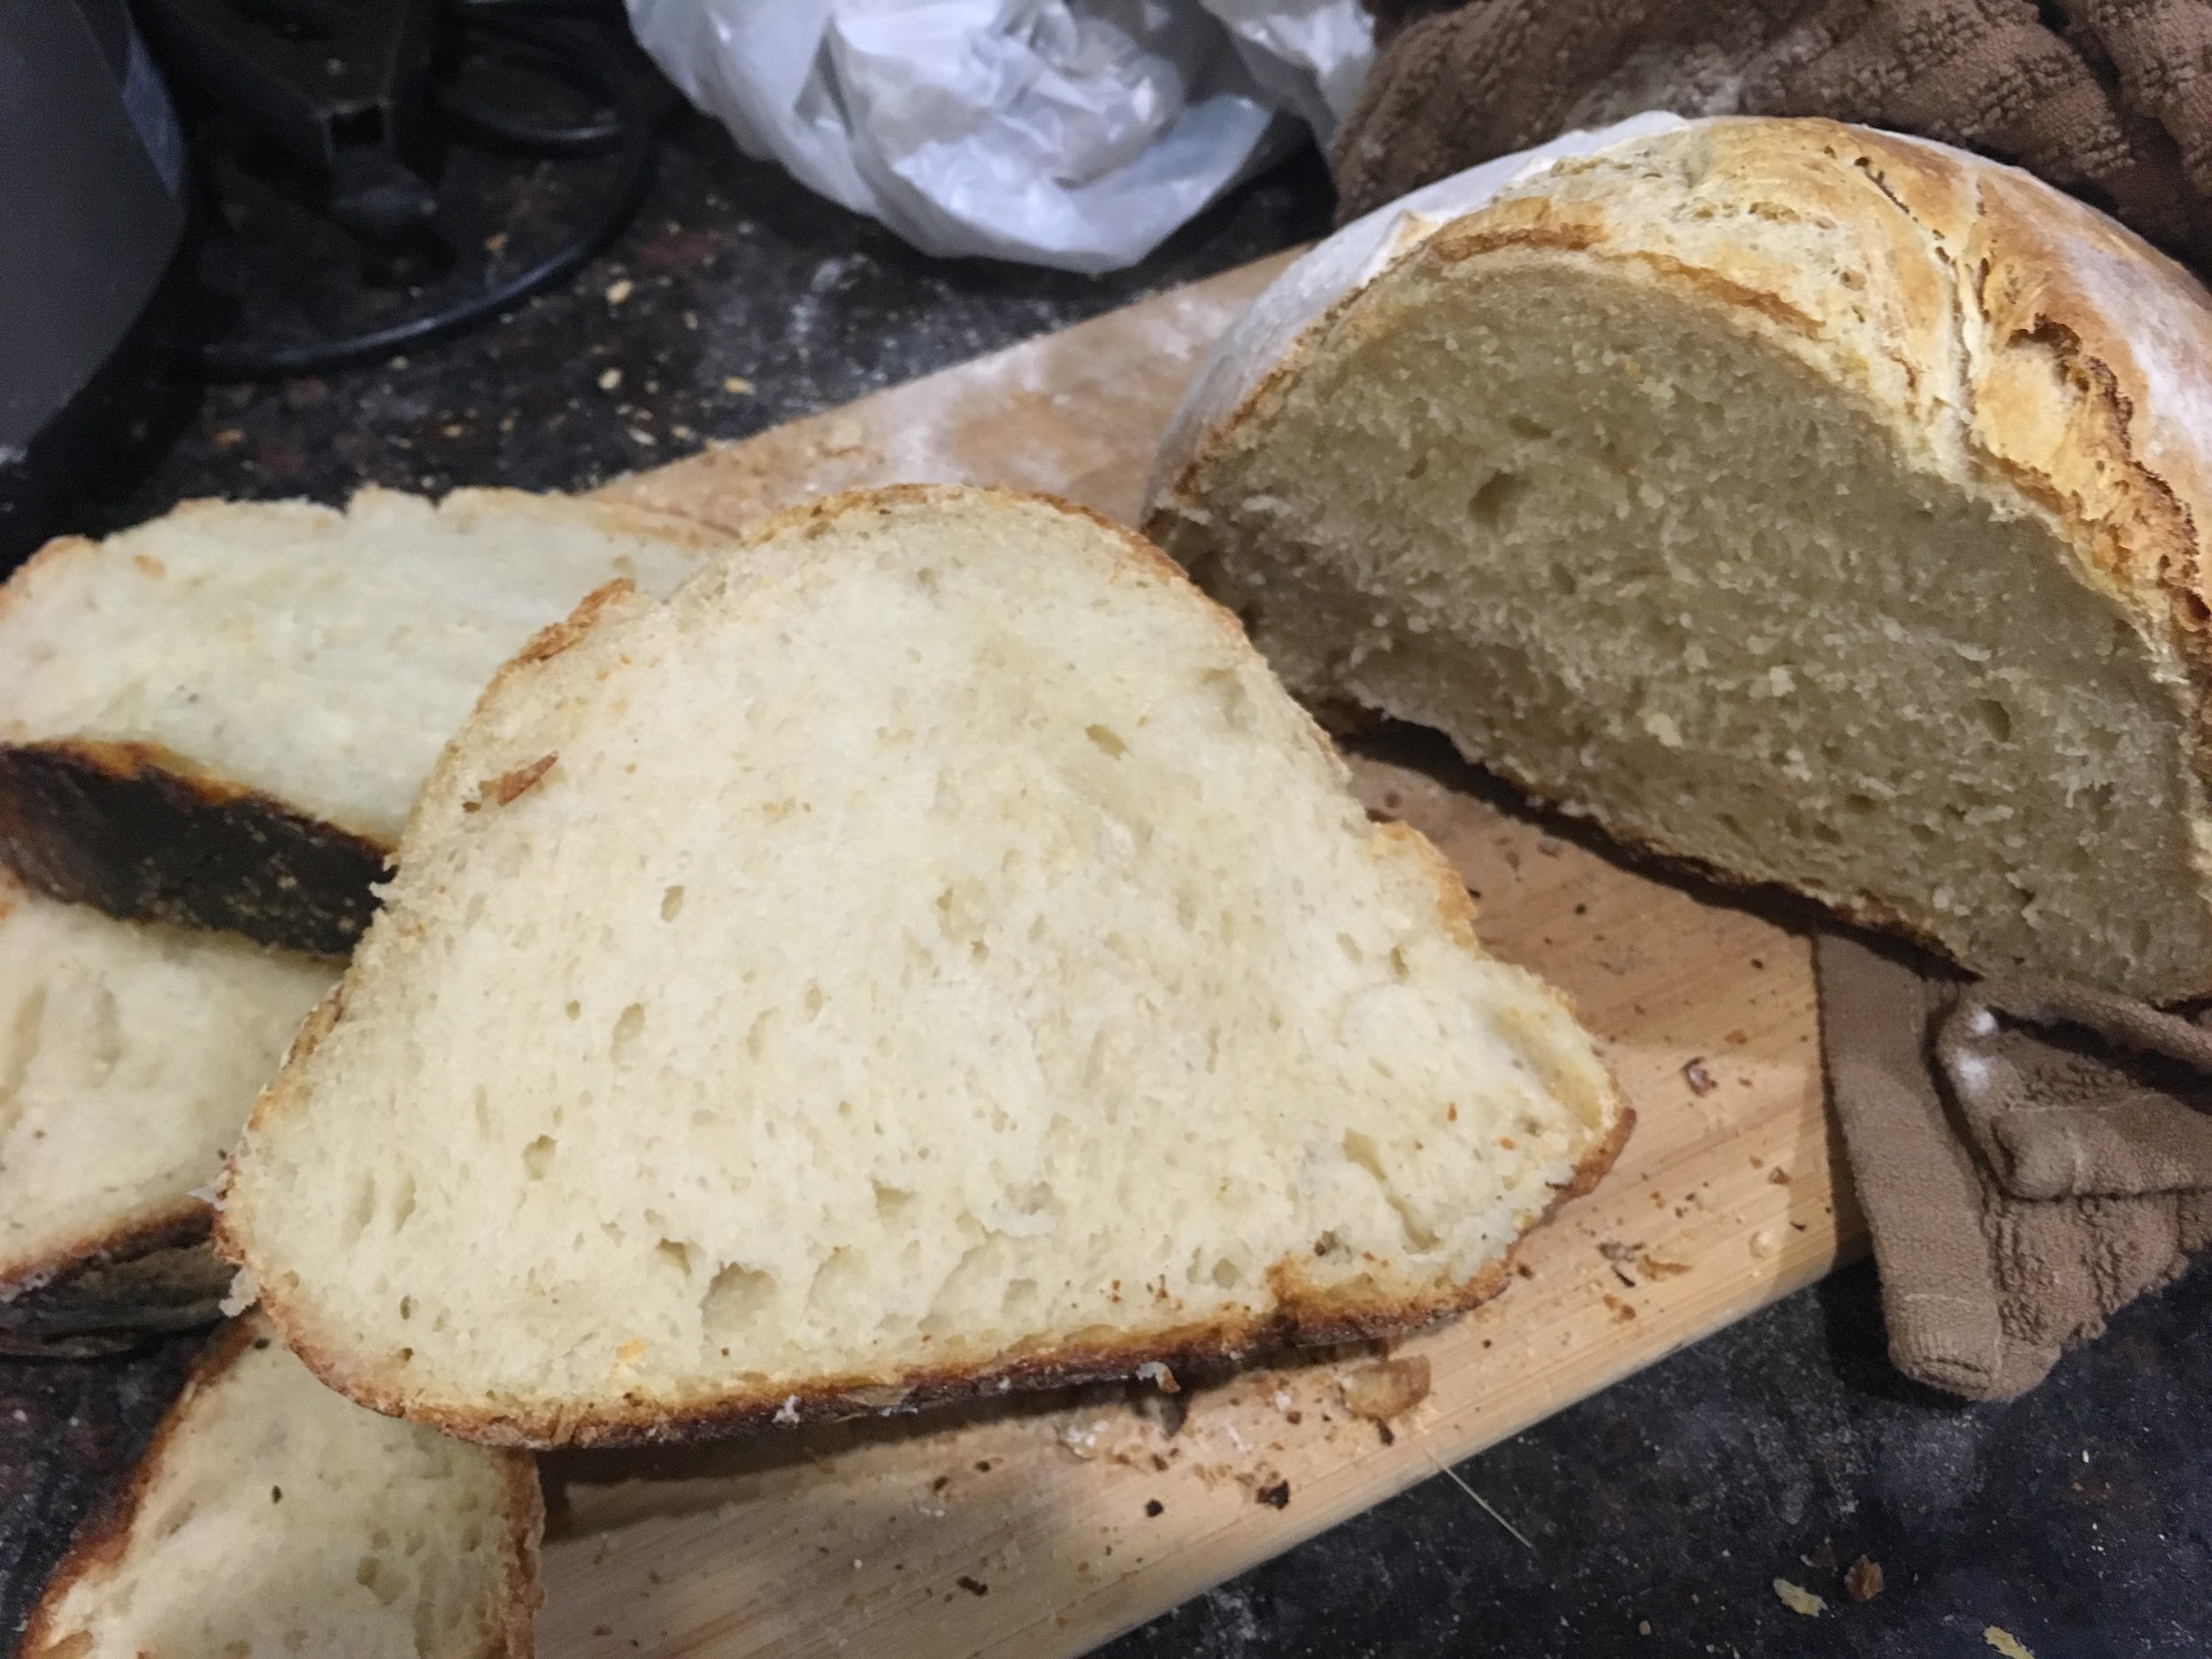
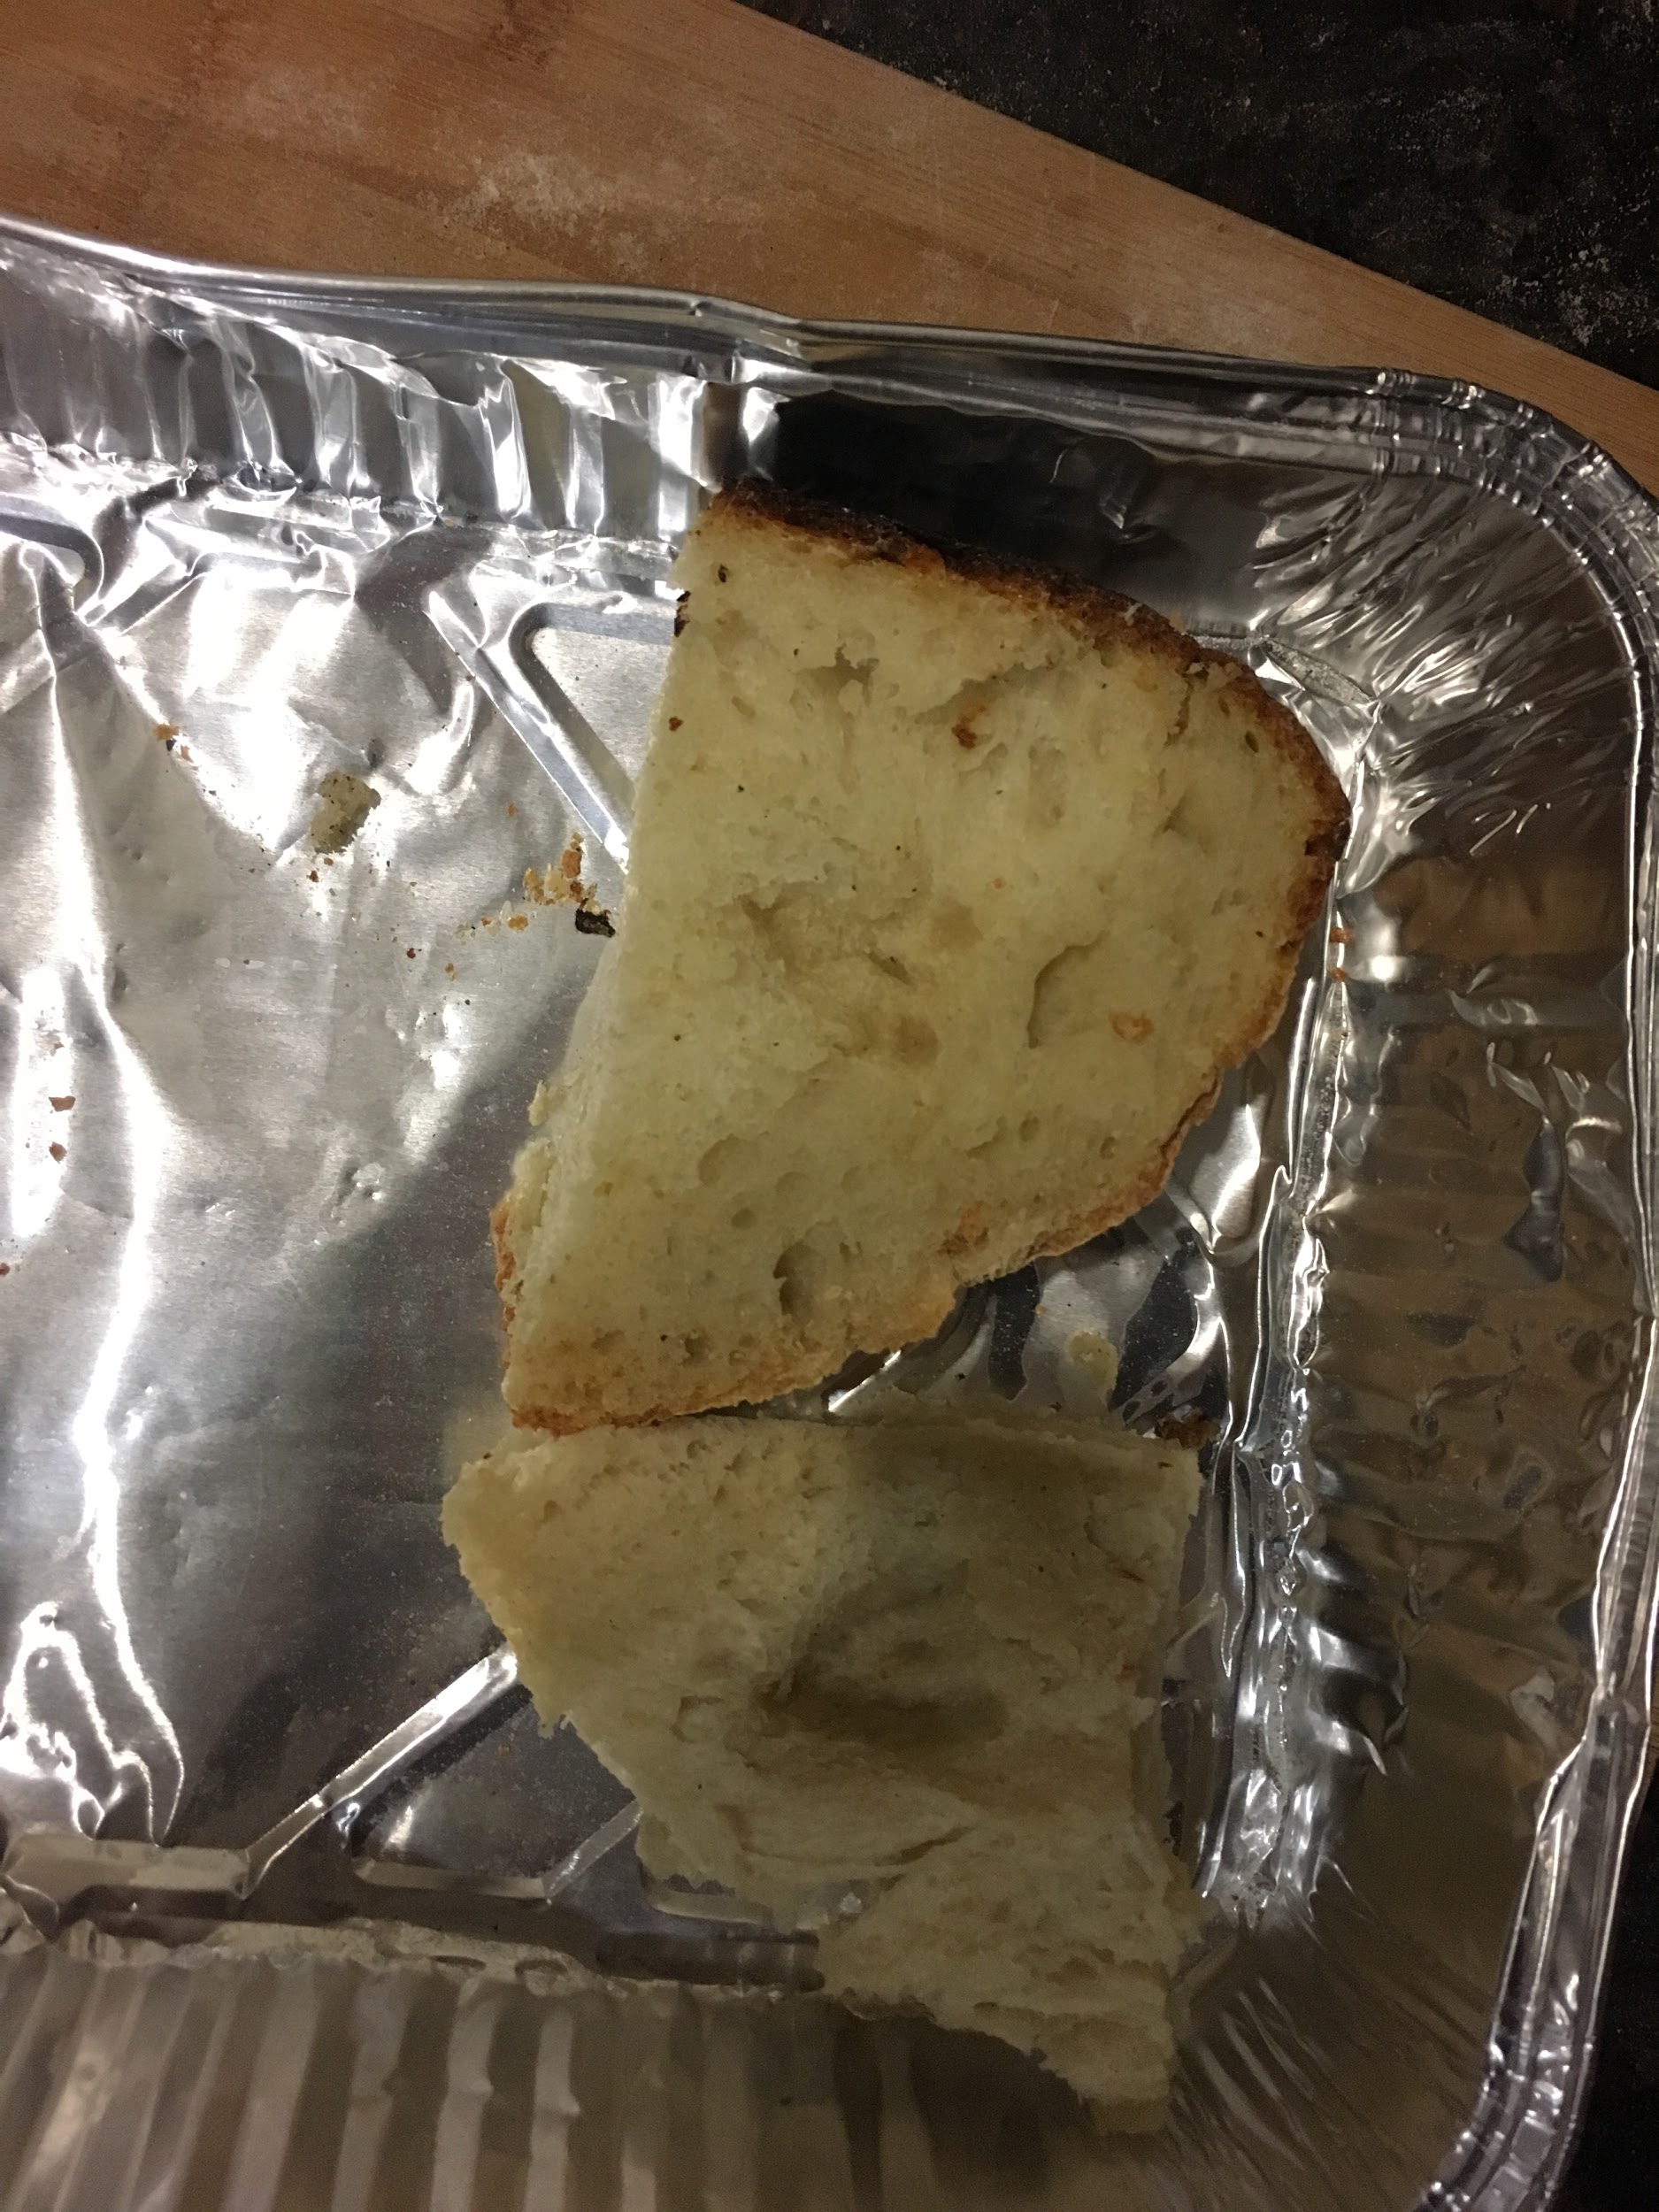
Sliced loaf into half with a bread knife as soon as it came out of the oven. Surprisingly, both loaves produced a tight crumb structure despite the different gluten content of both flour mixes.
| Image URL: |
|---|
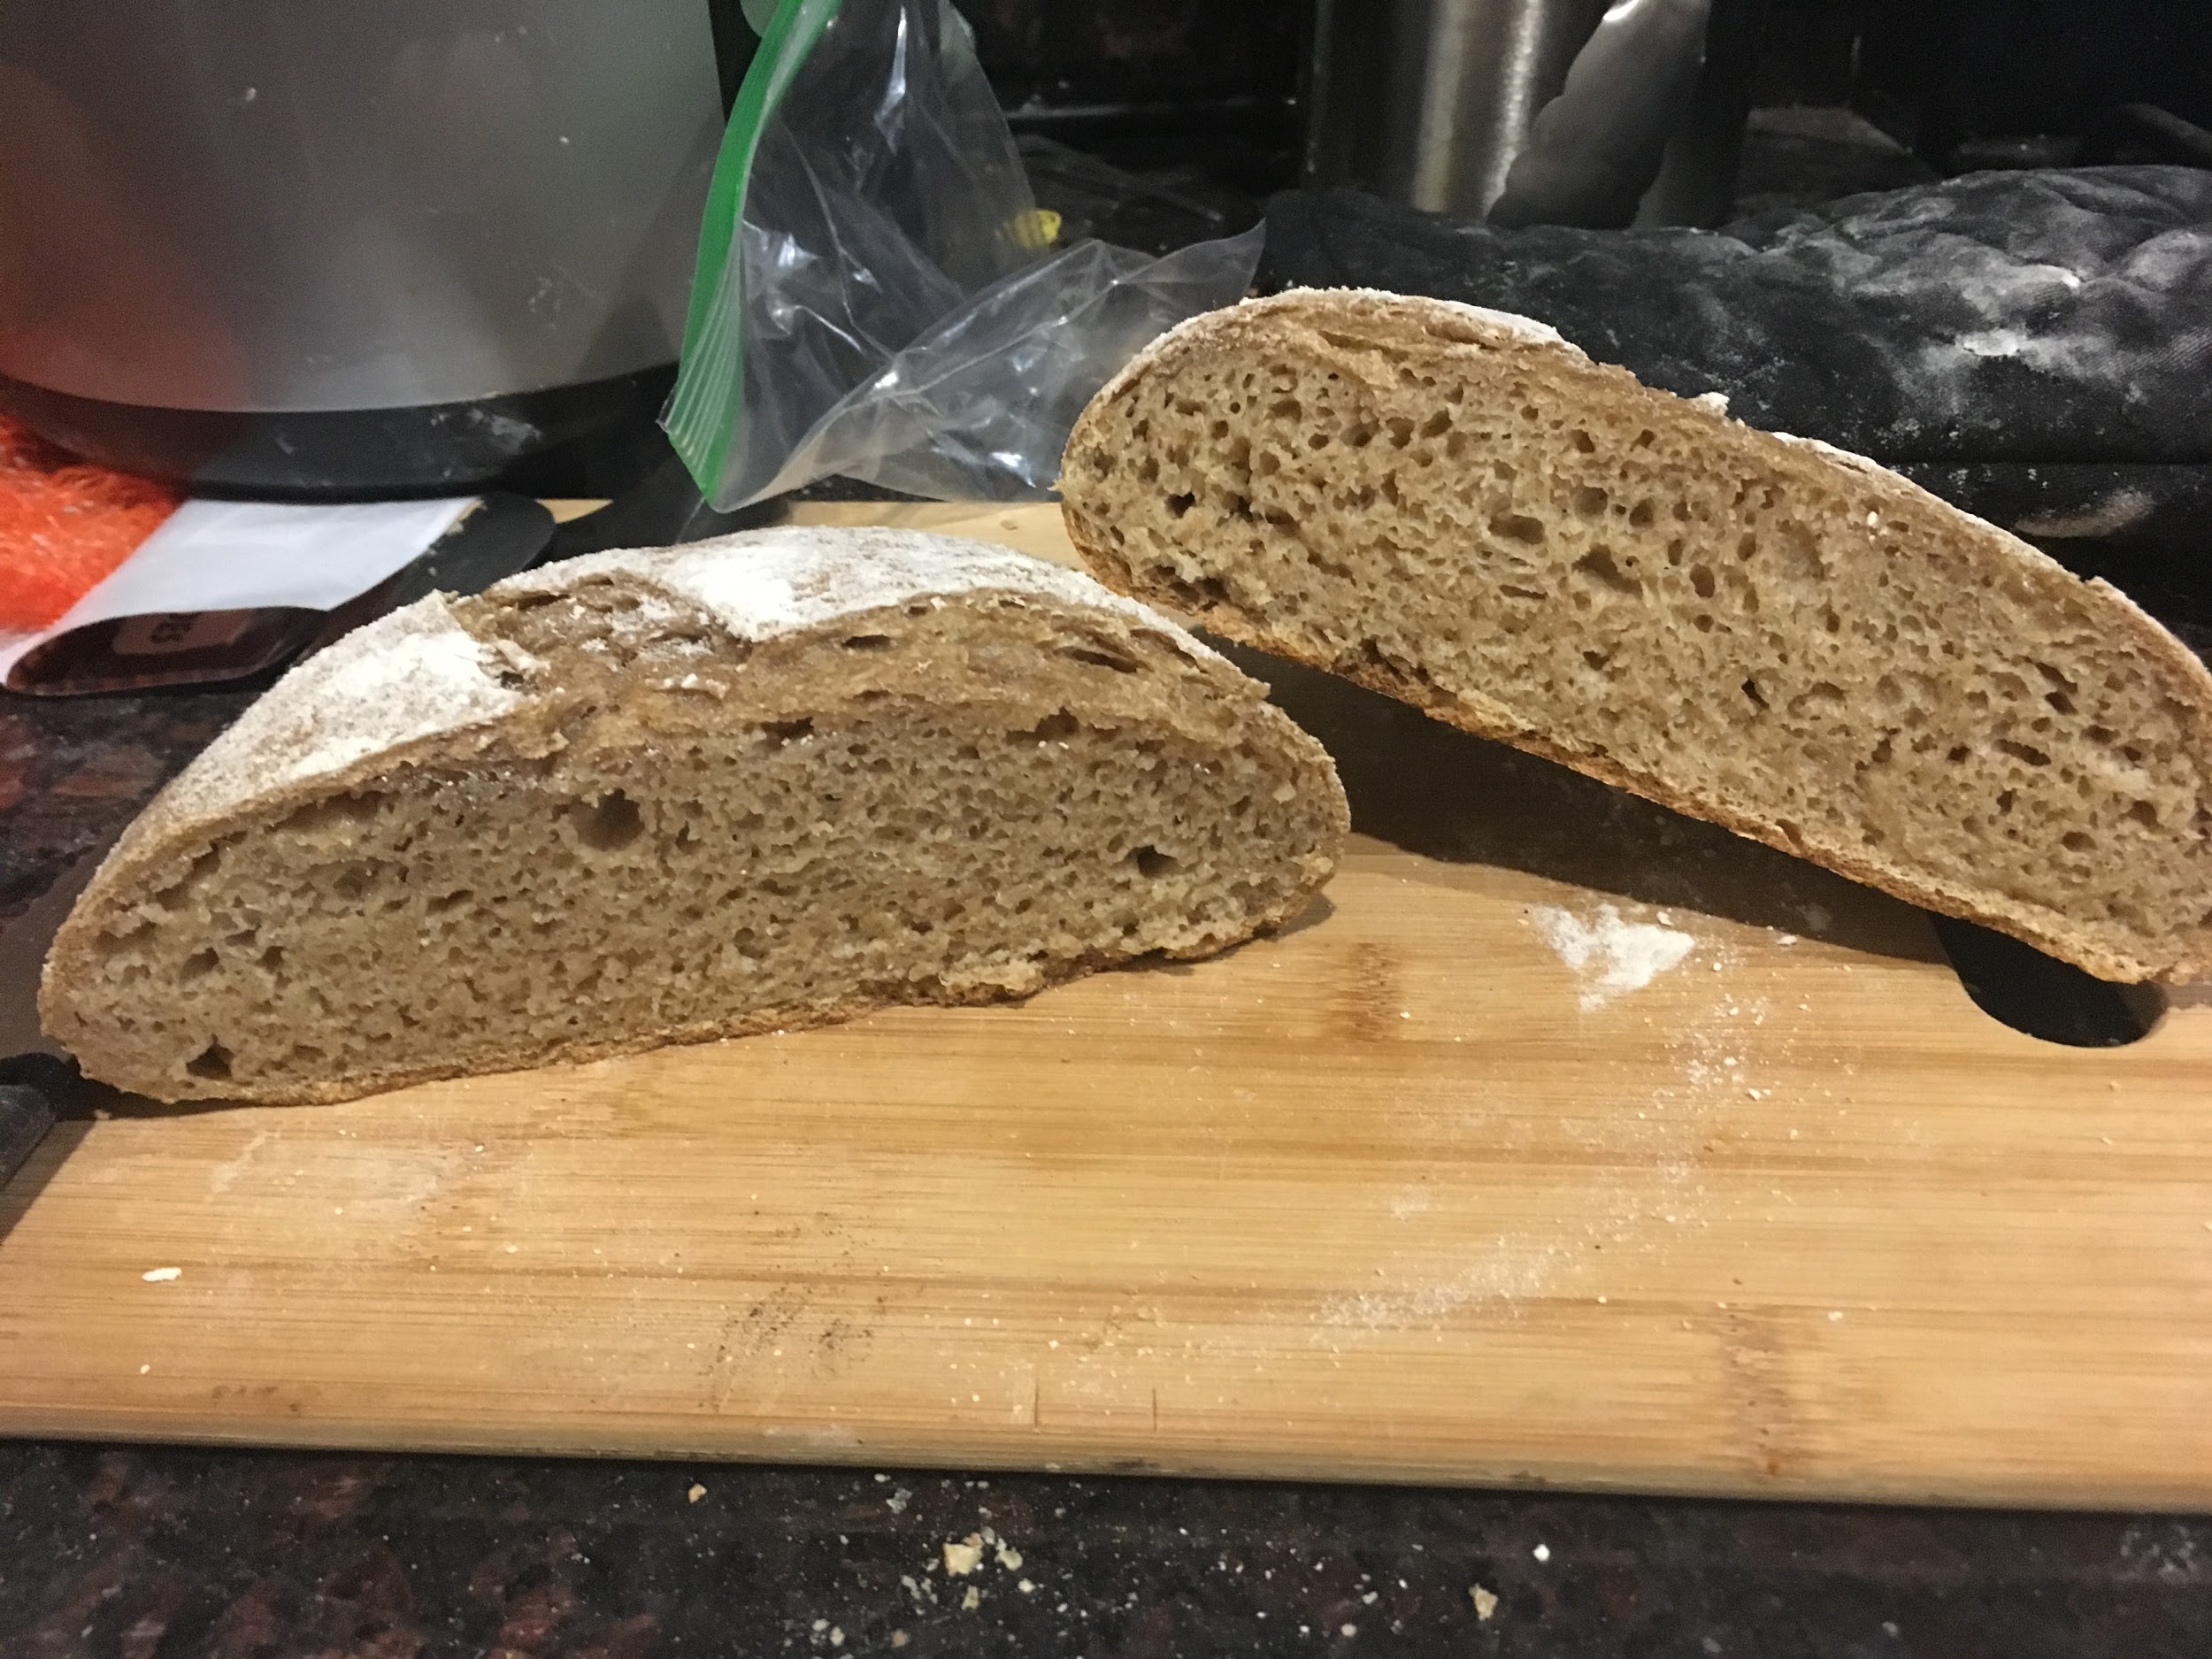 |
I expected loaf #1 to have a more open crumb due to the high gluten content in AP flour vs. a 50% ap/50% rye mix. I suspect its due to deflating the dough after the first rise and having a short second proof, as well as the low hydration content of the loaves.
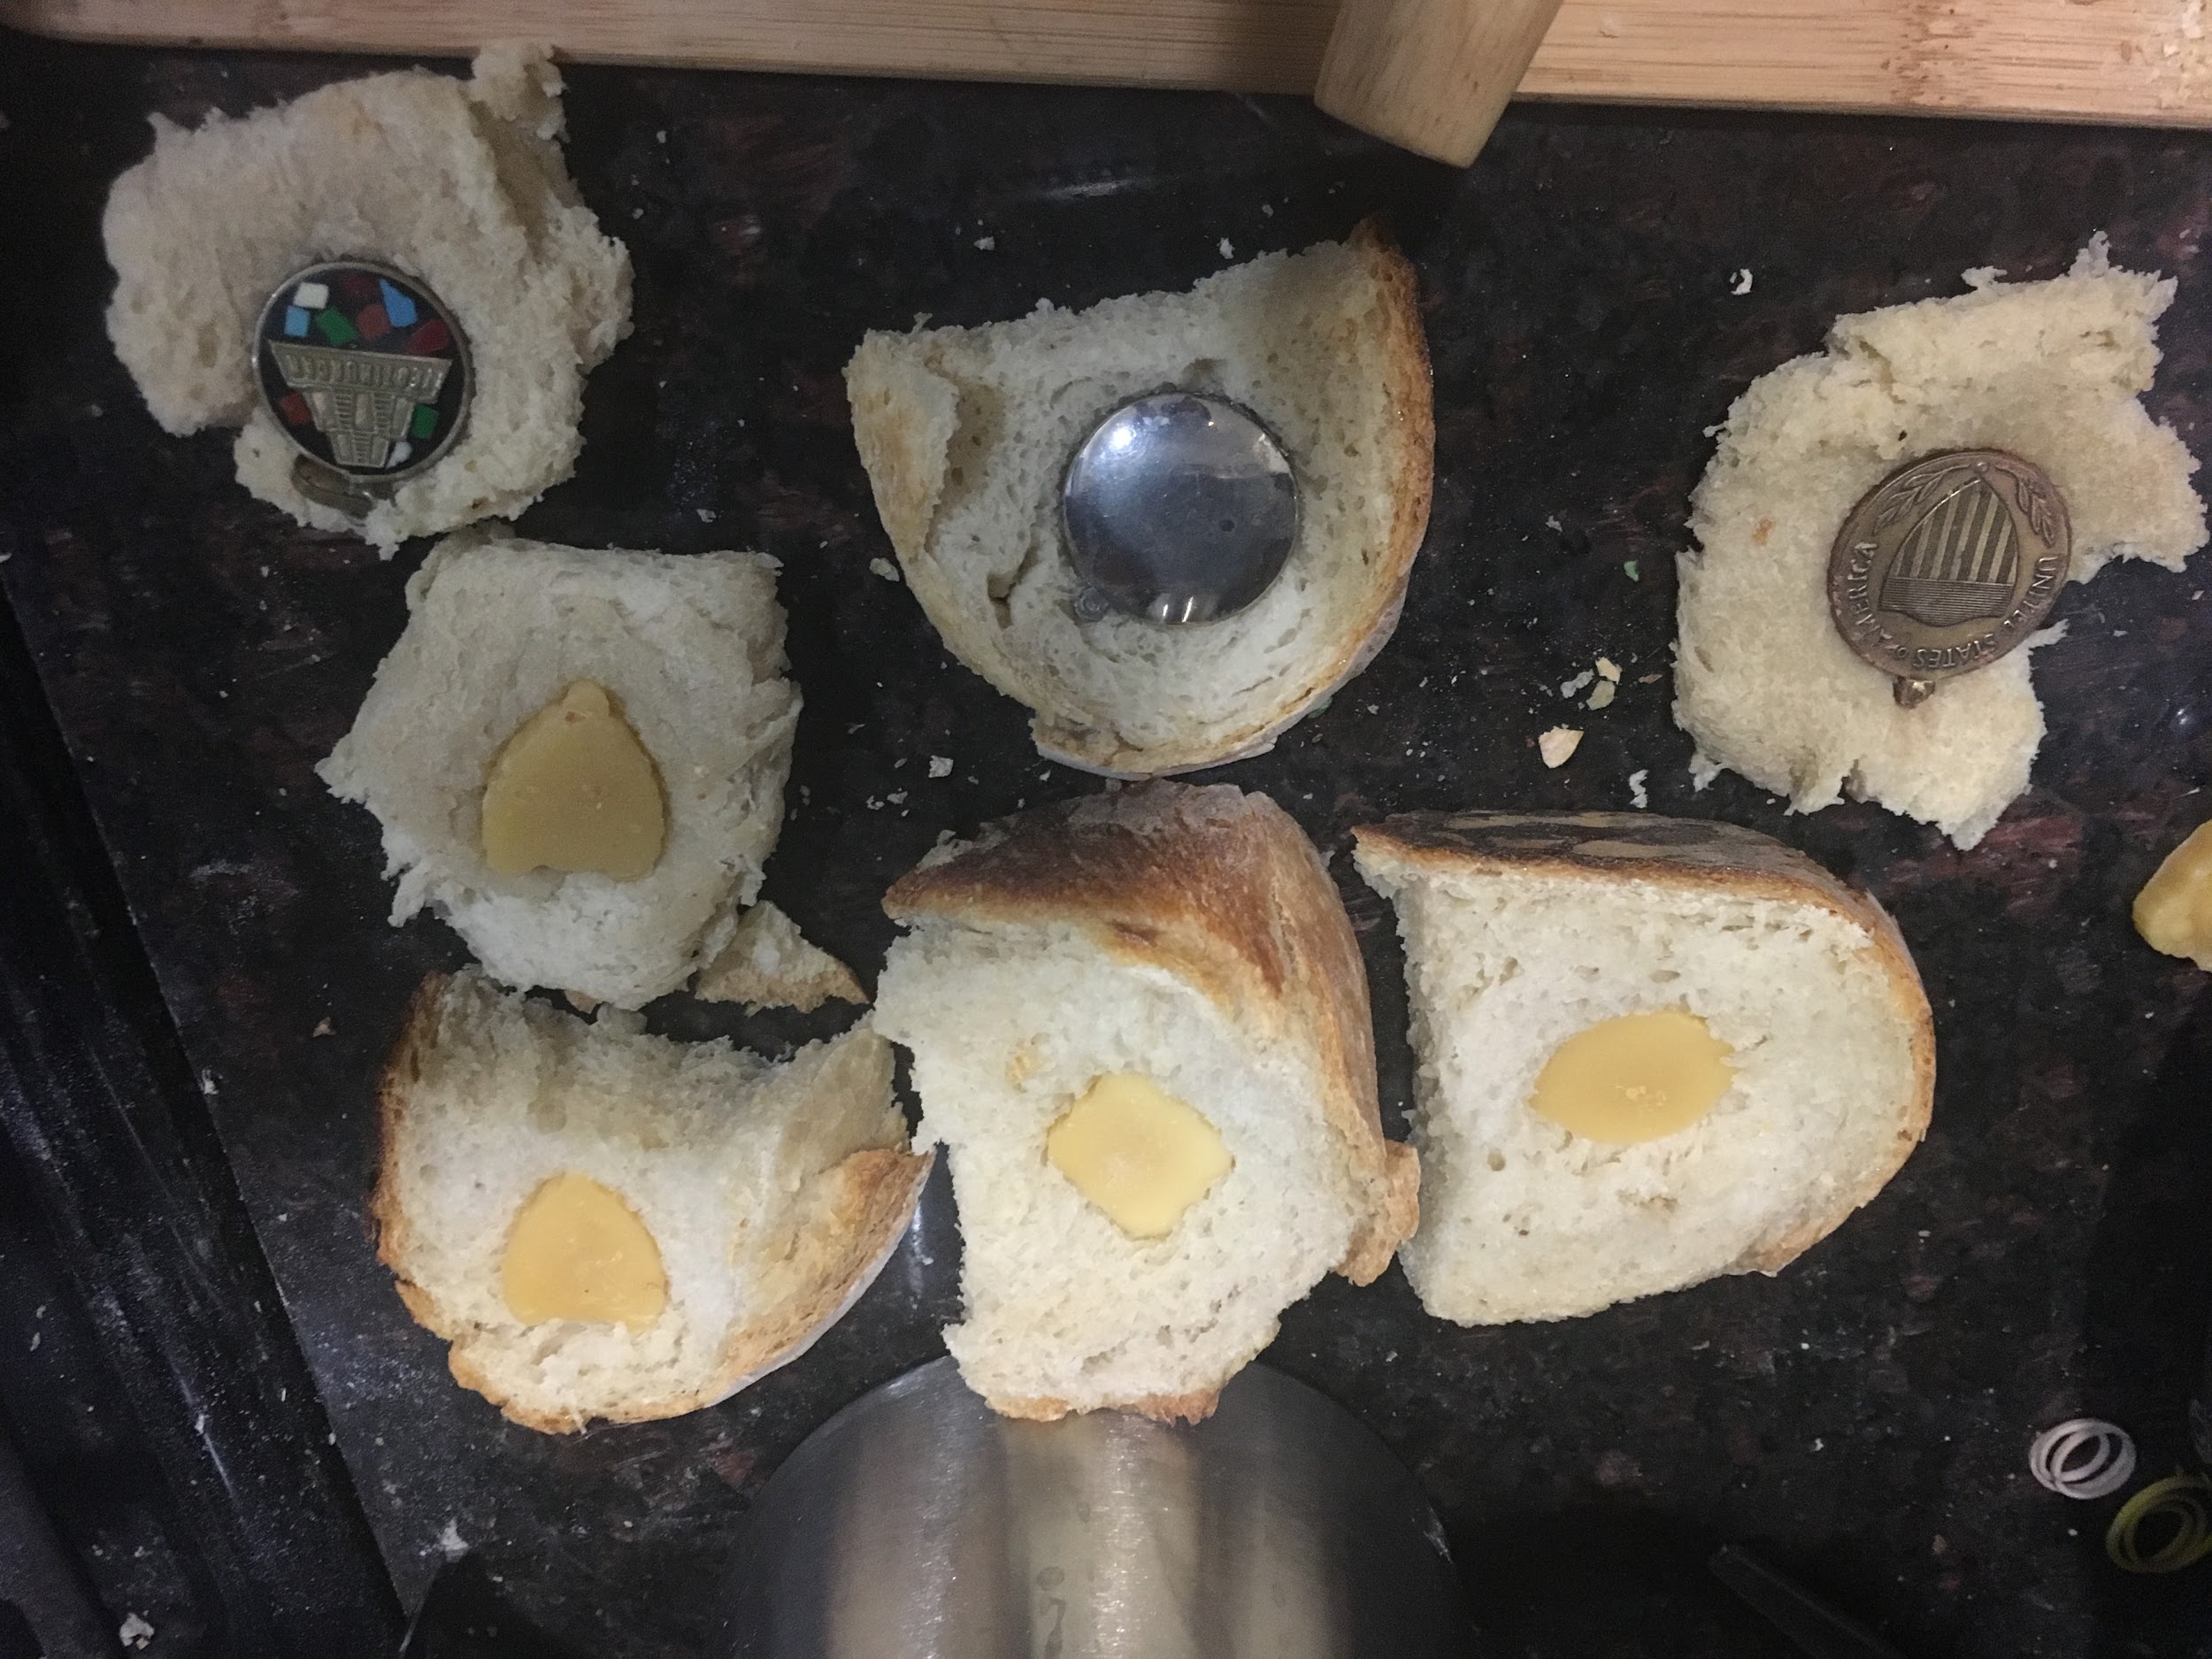
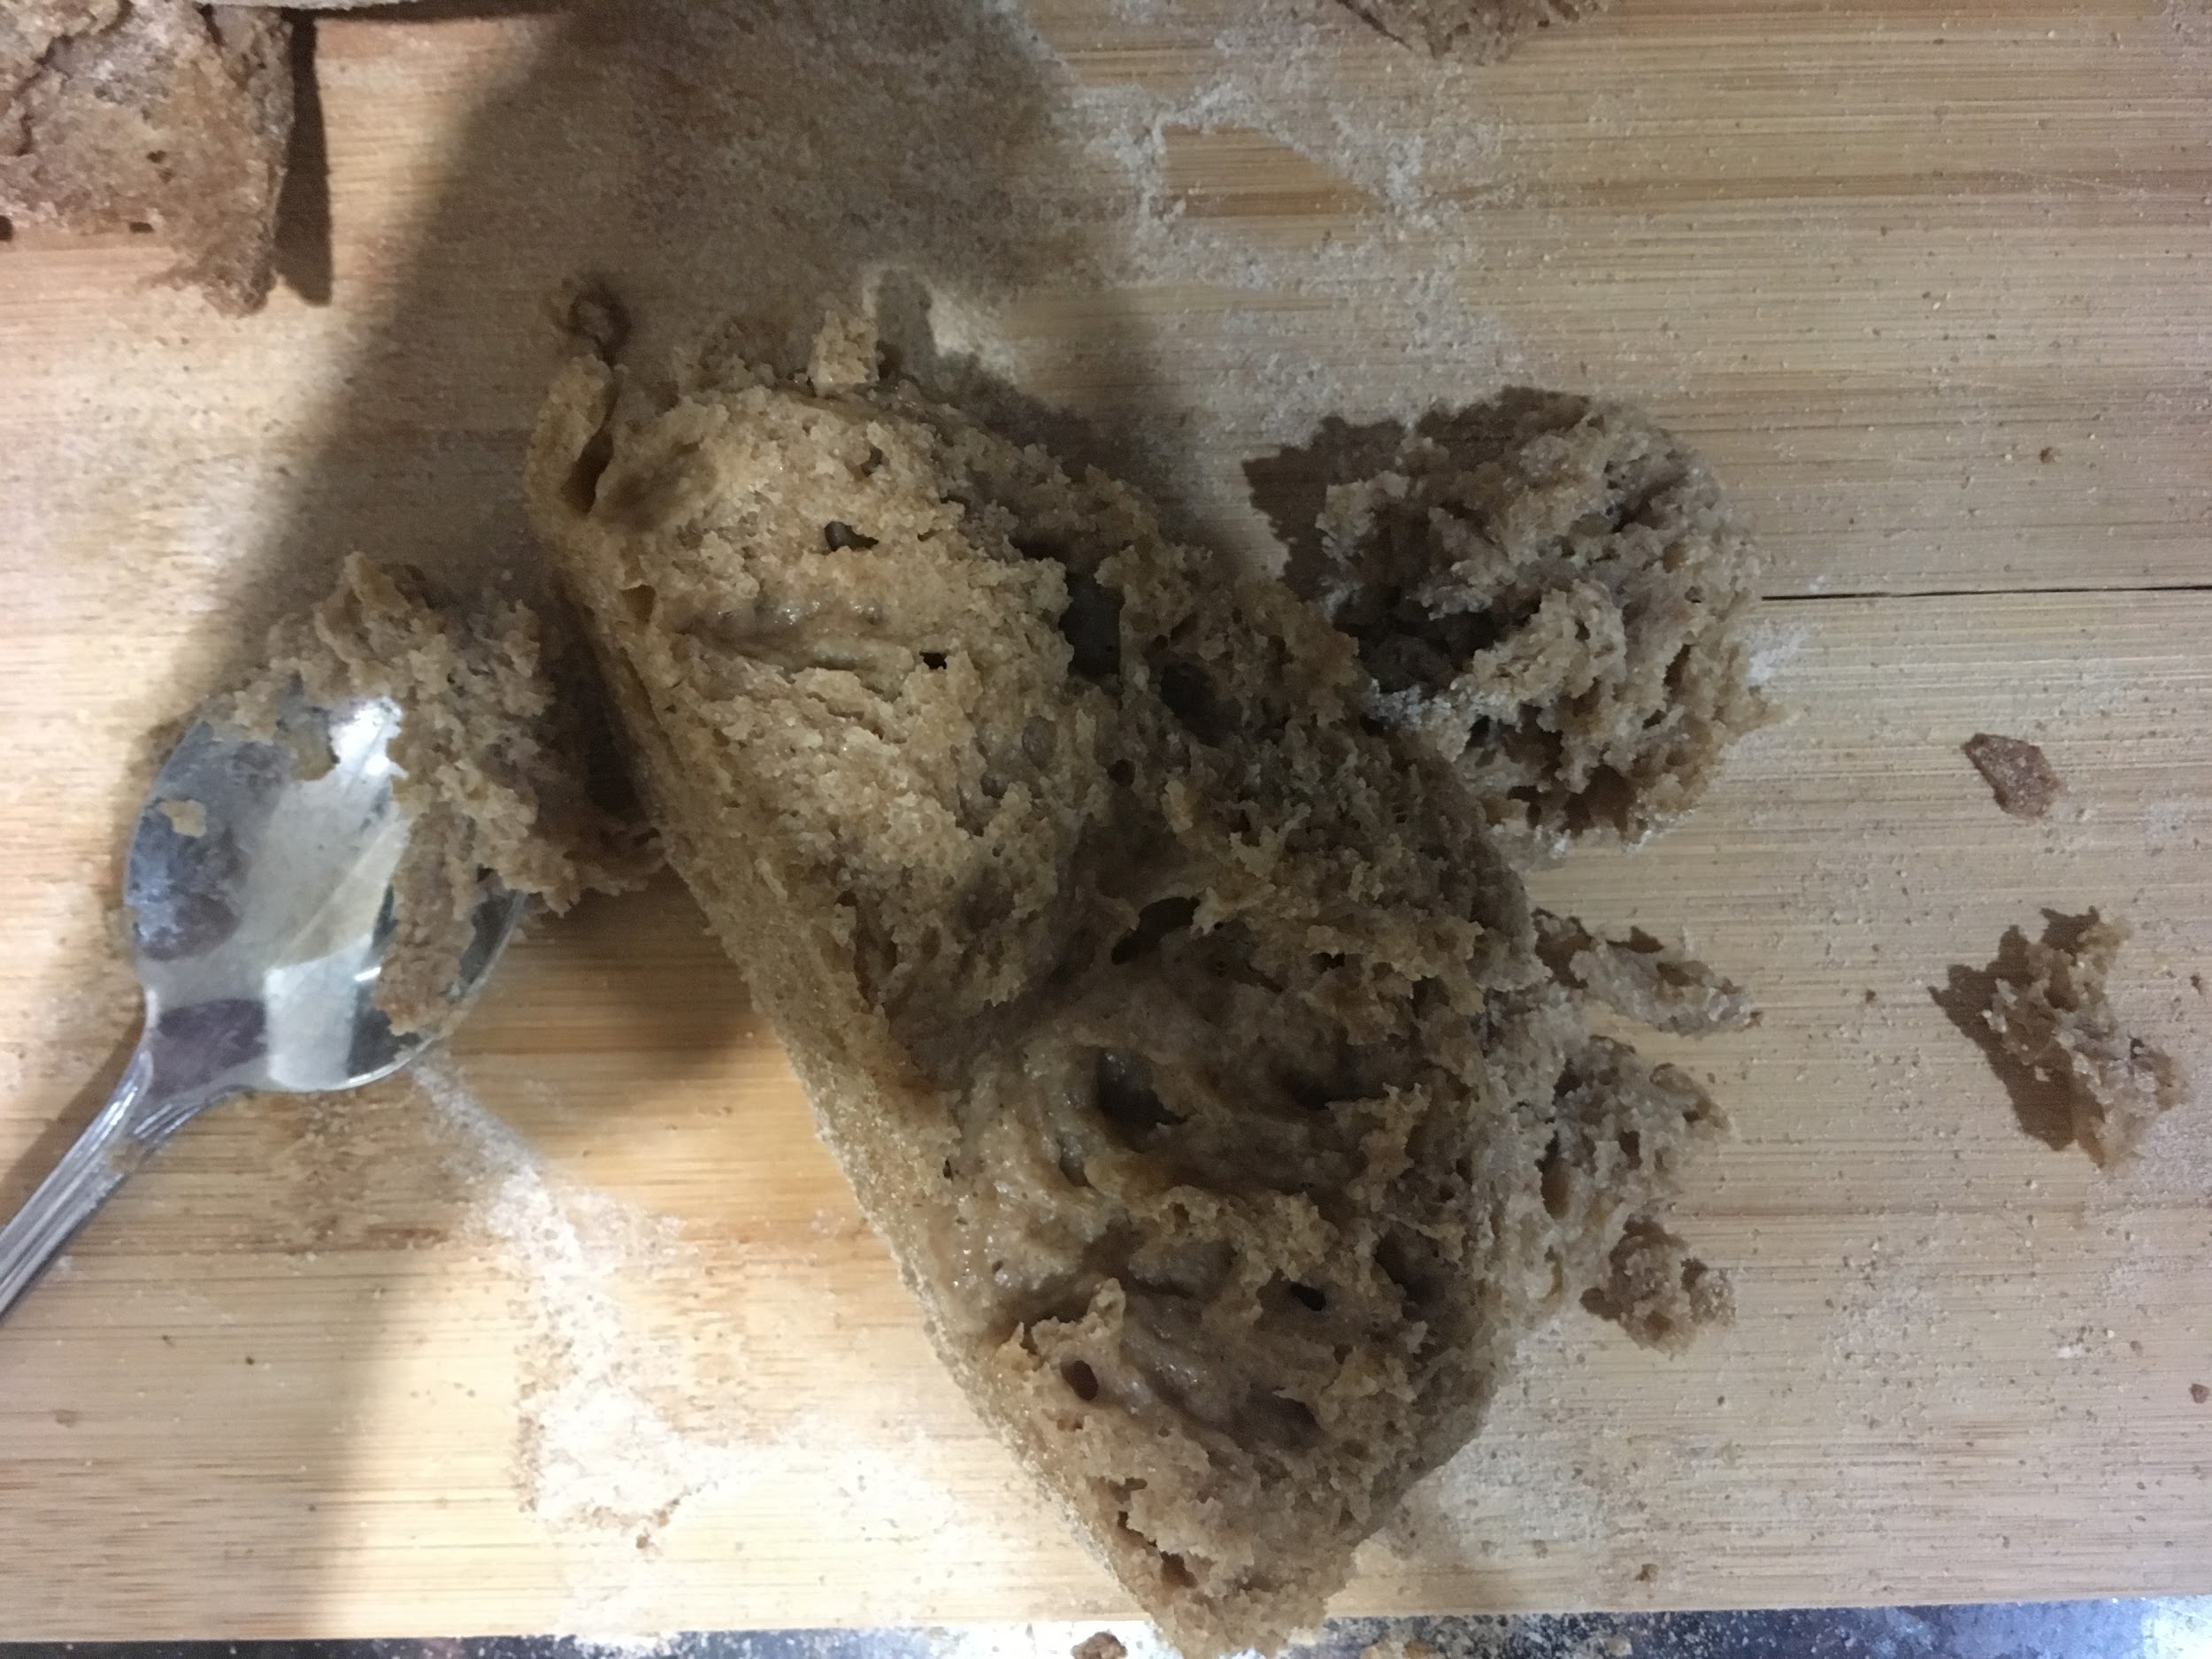
Took the brooches and imprinted onto loaves. I removed the bread pith from its crust for half of the loaf, immediately as it “came from the oven.”. I then kneaded it with a rolling pin until it “no longer stuck” to the pin.
| Image URL: |
|---|
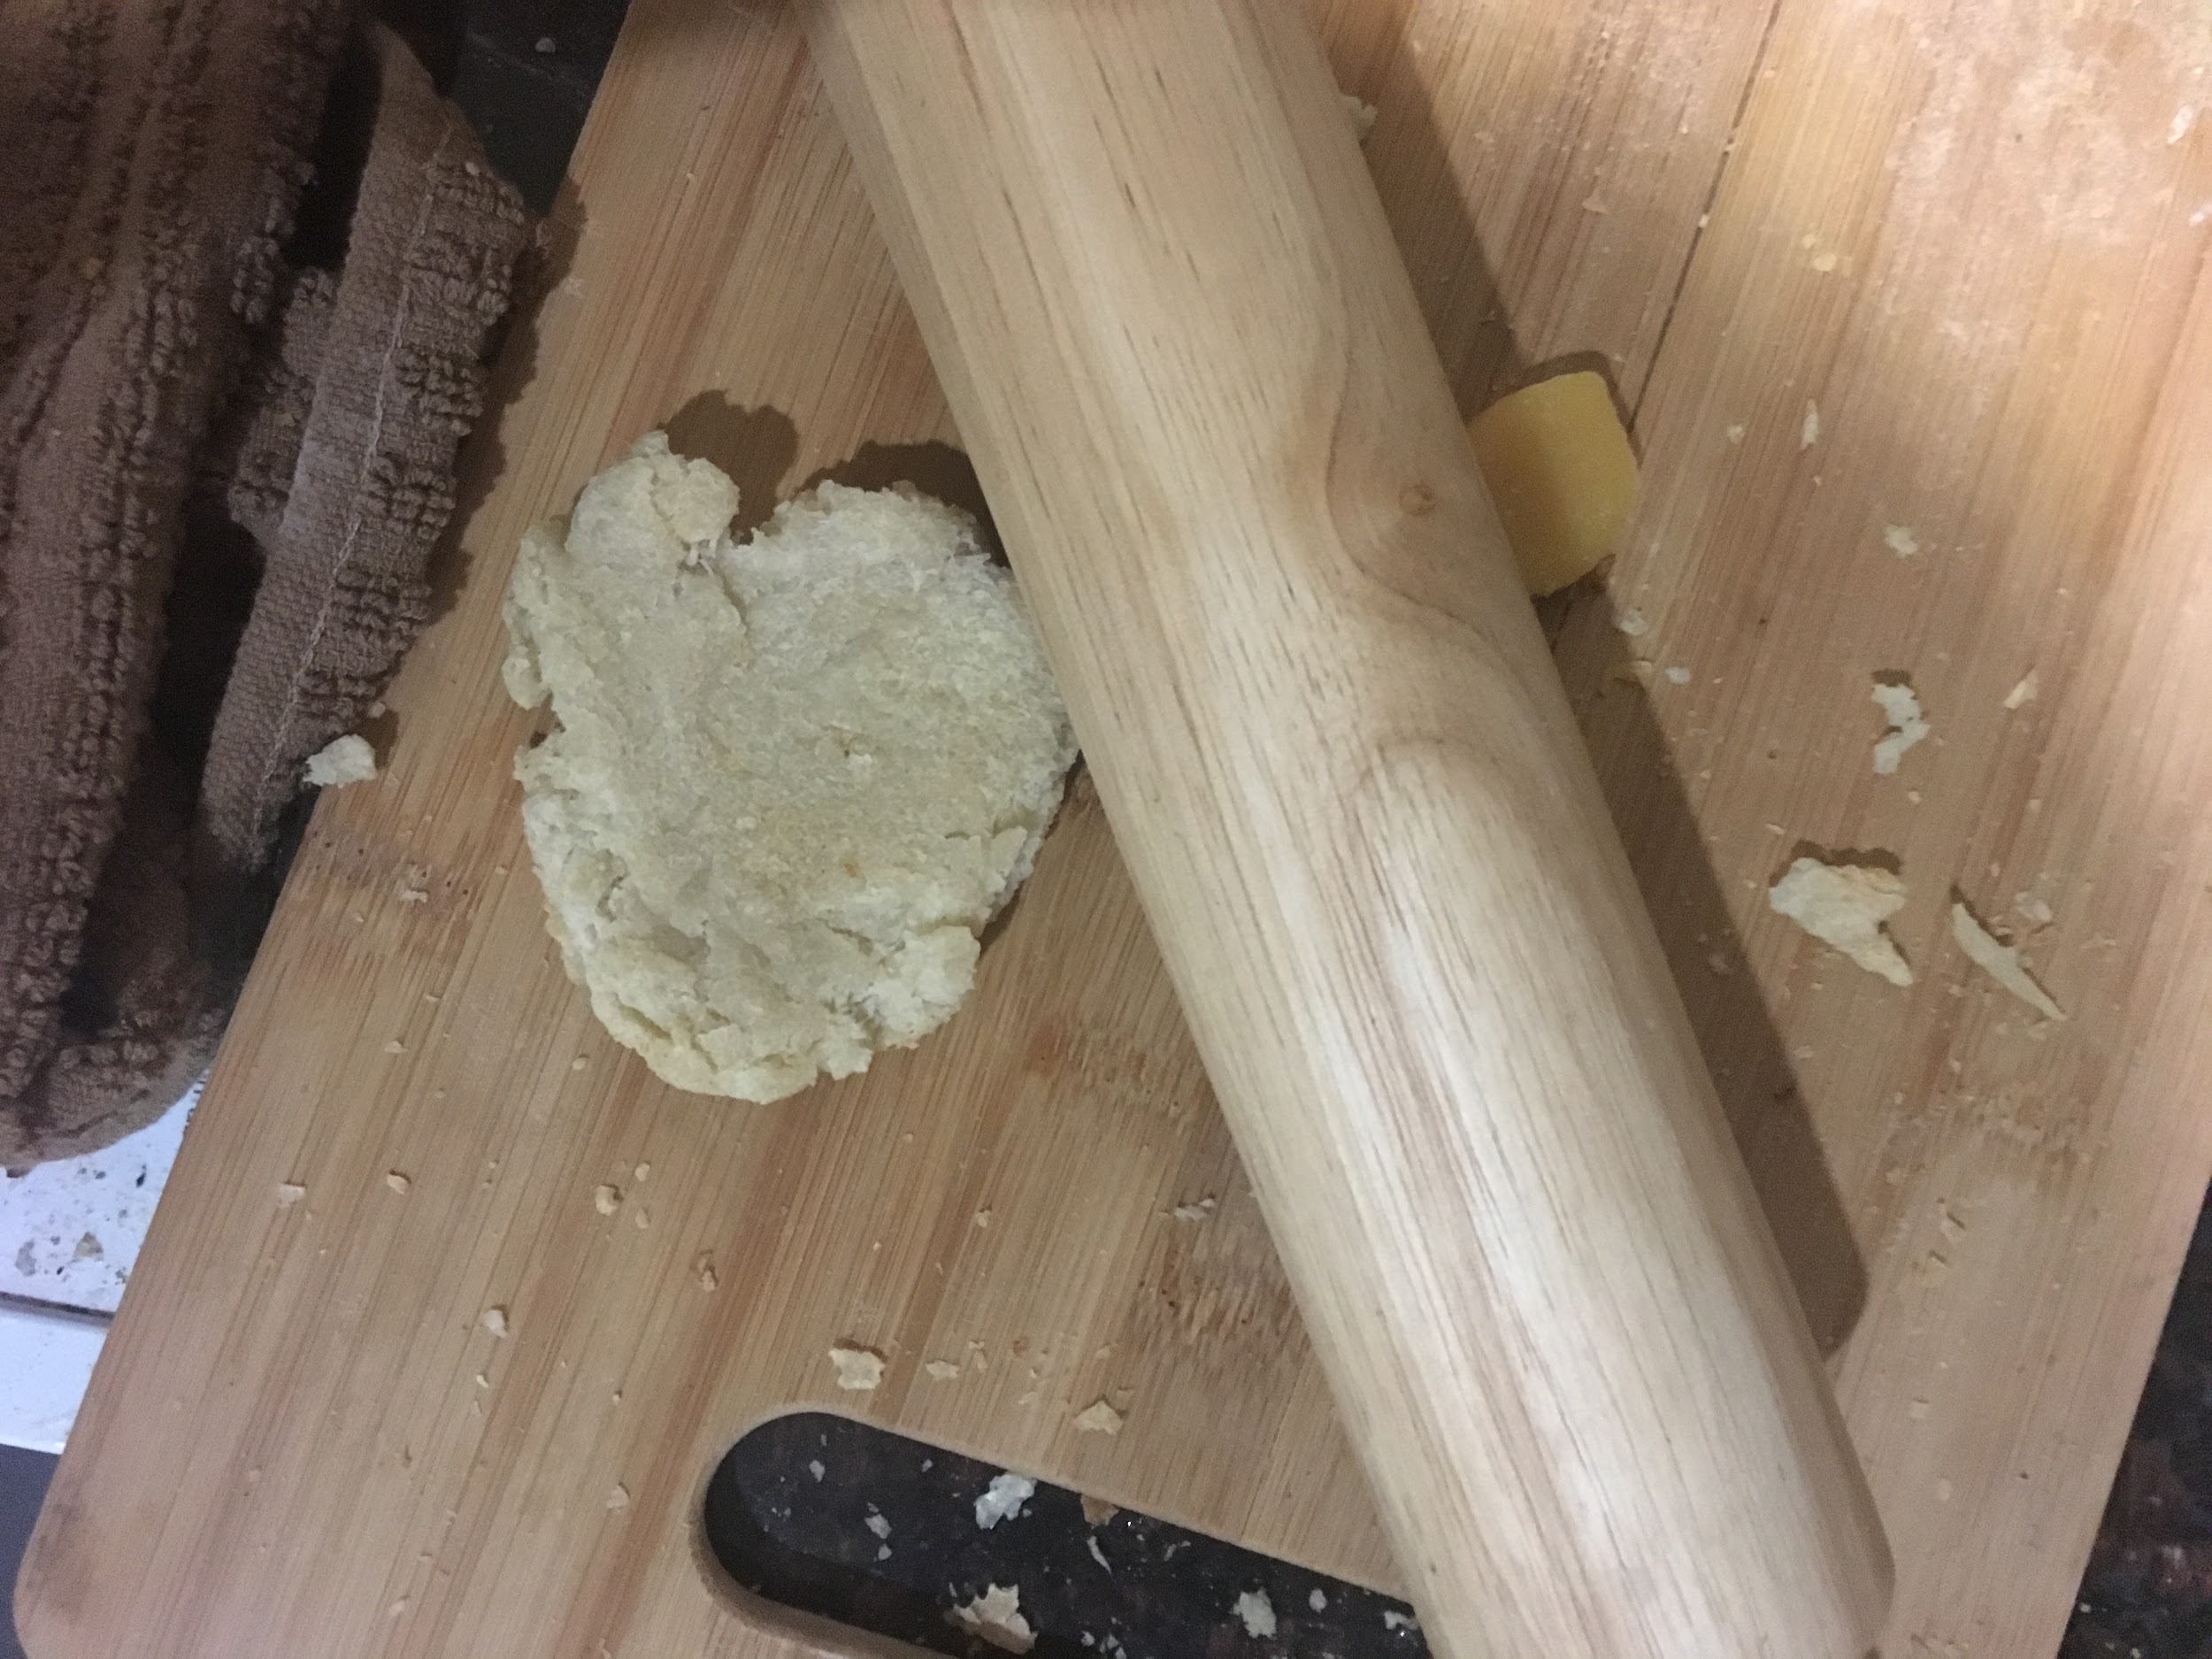 |
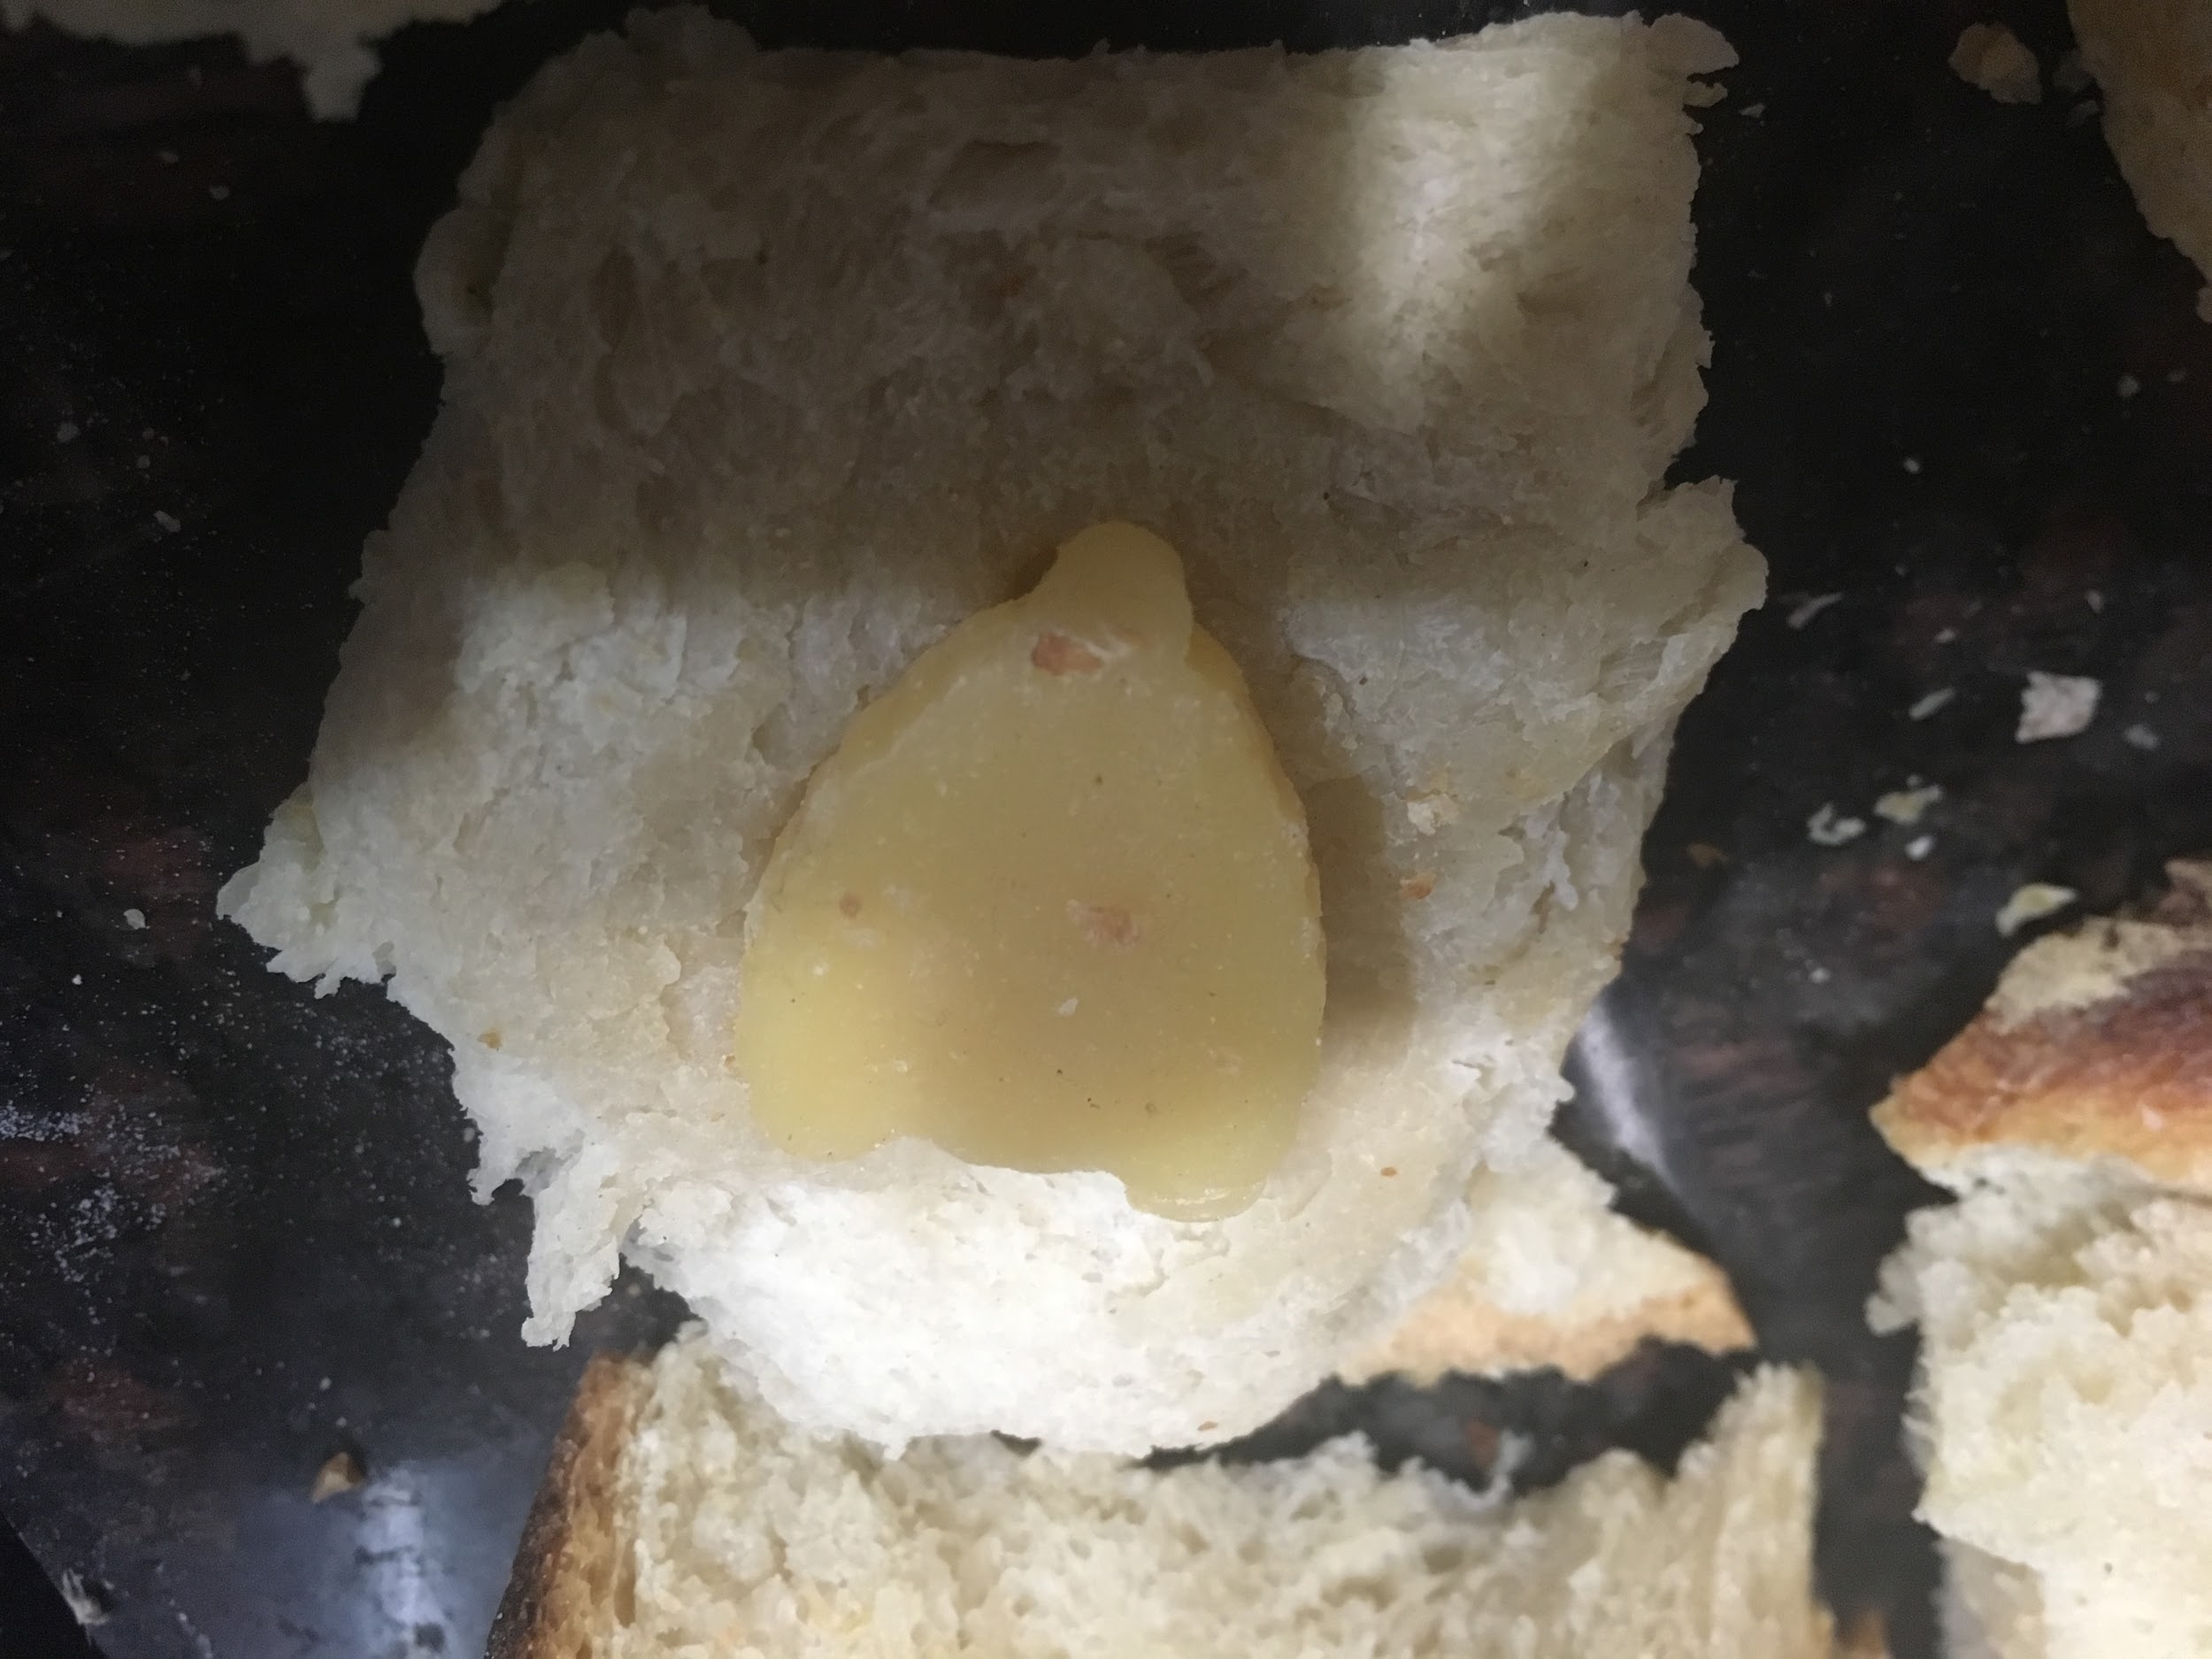
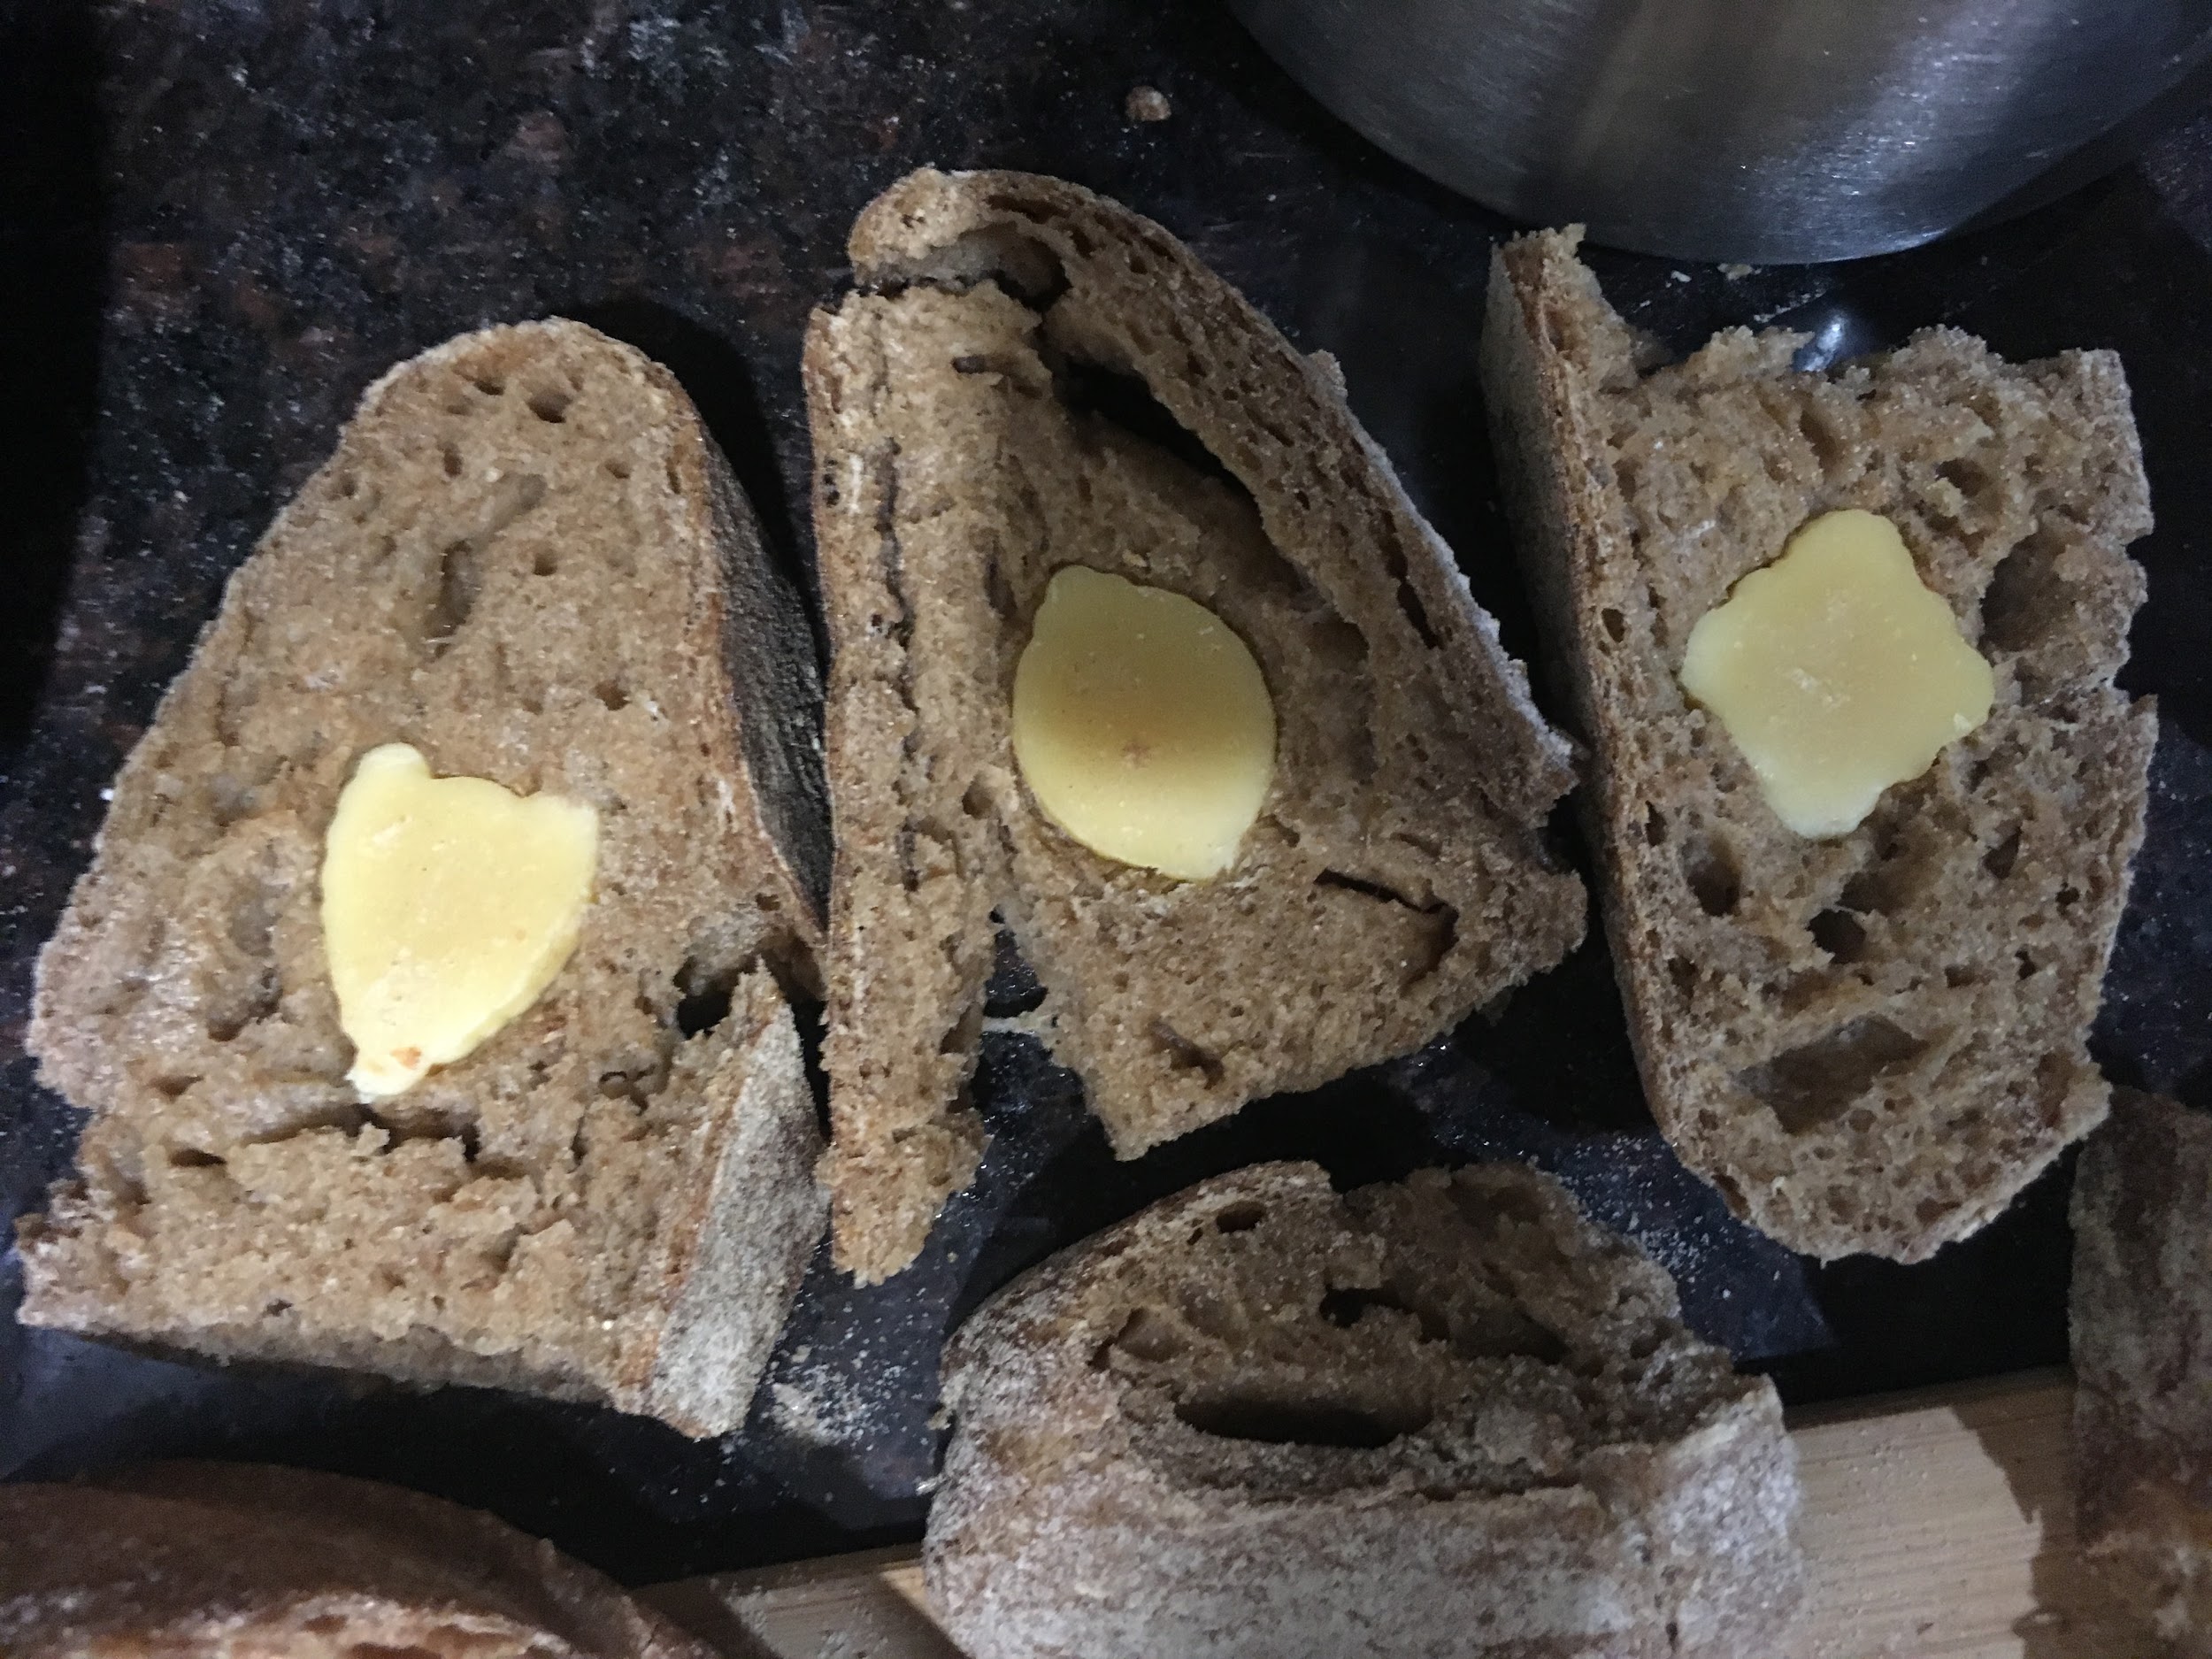
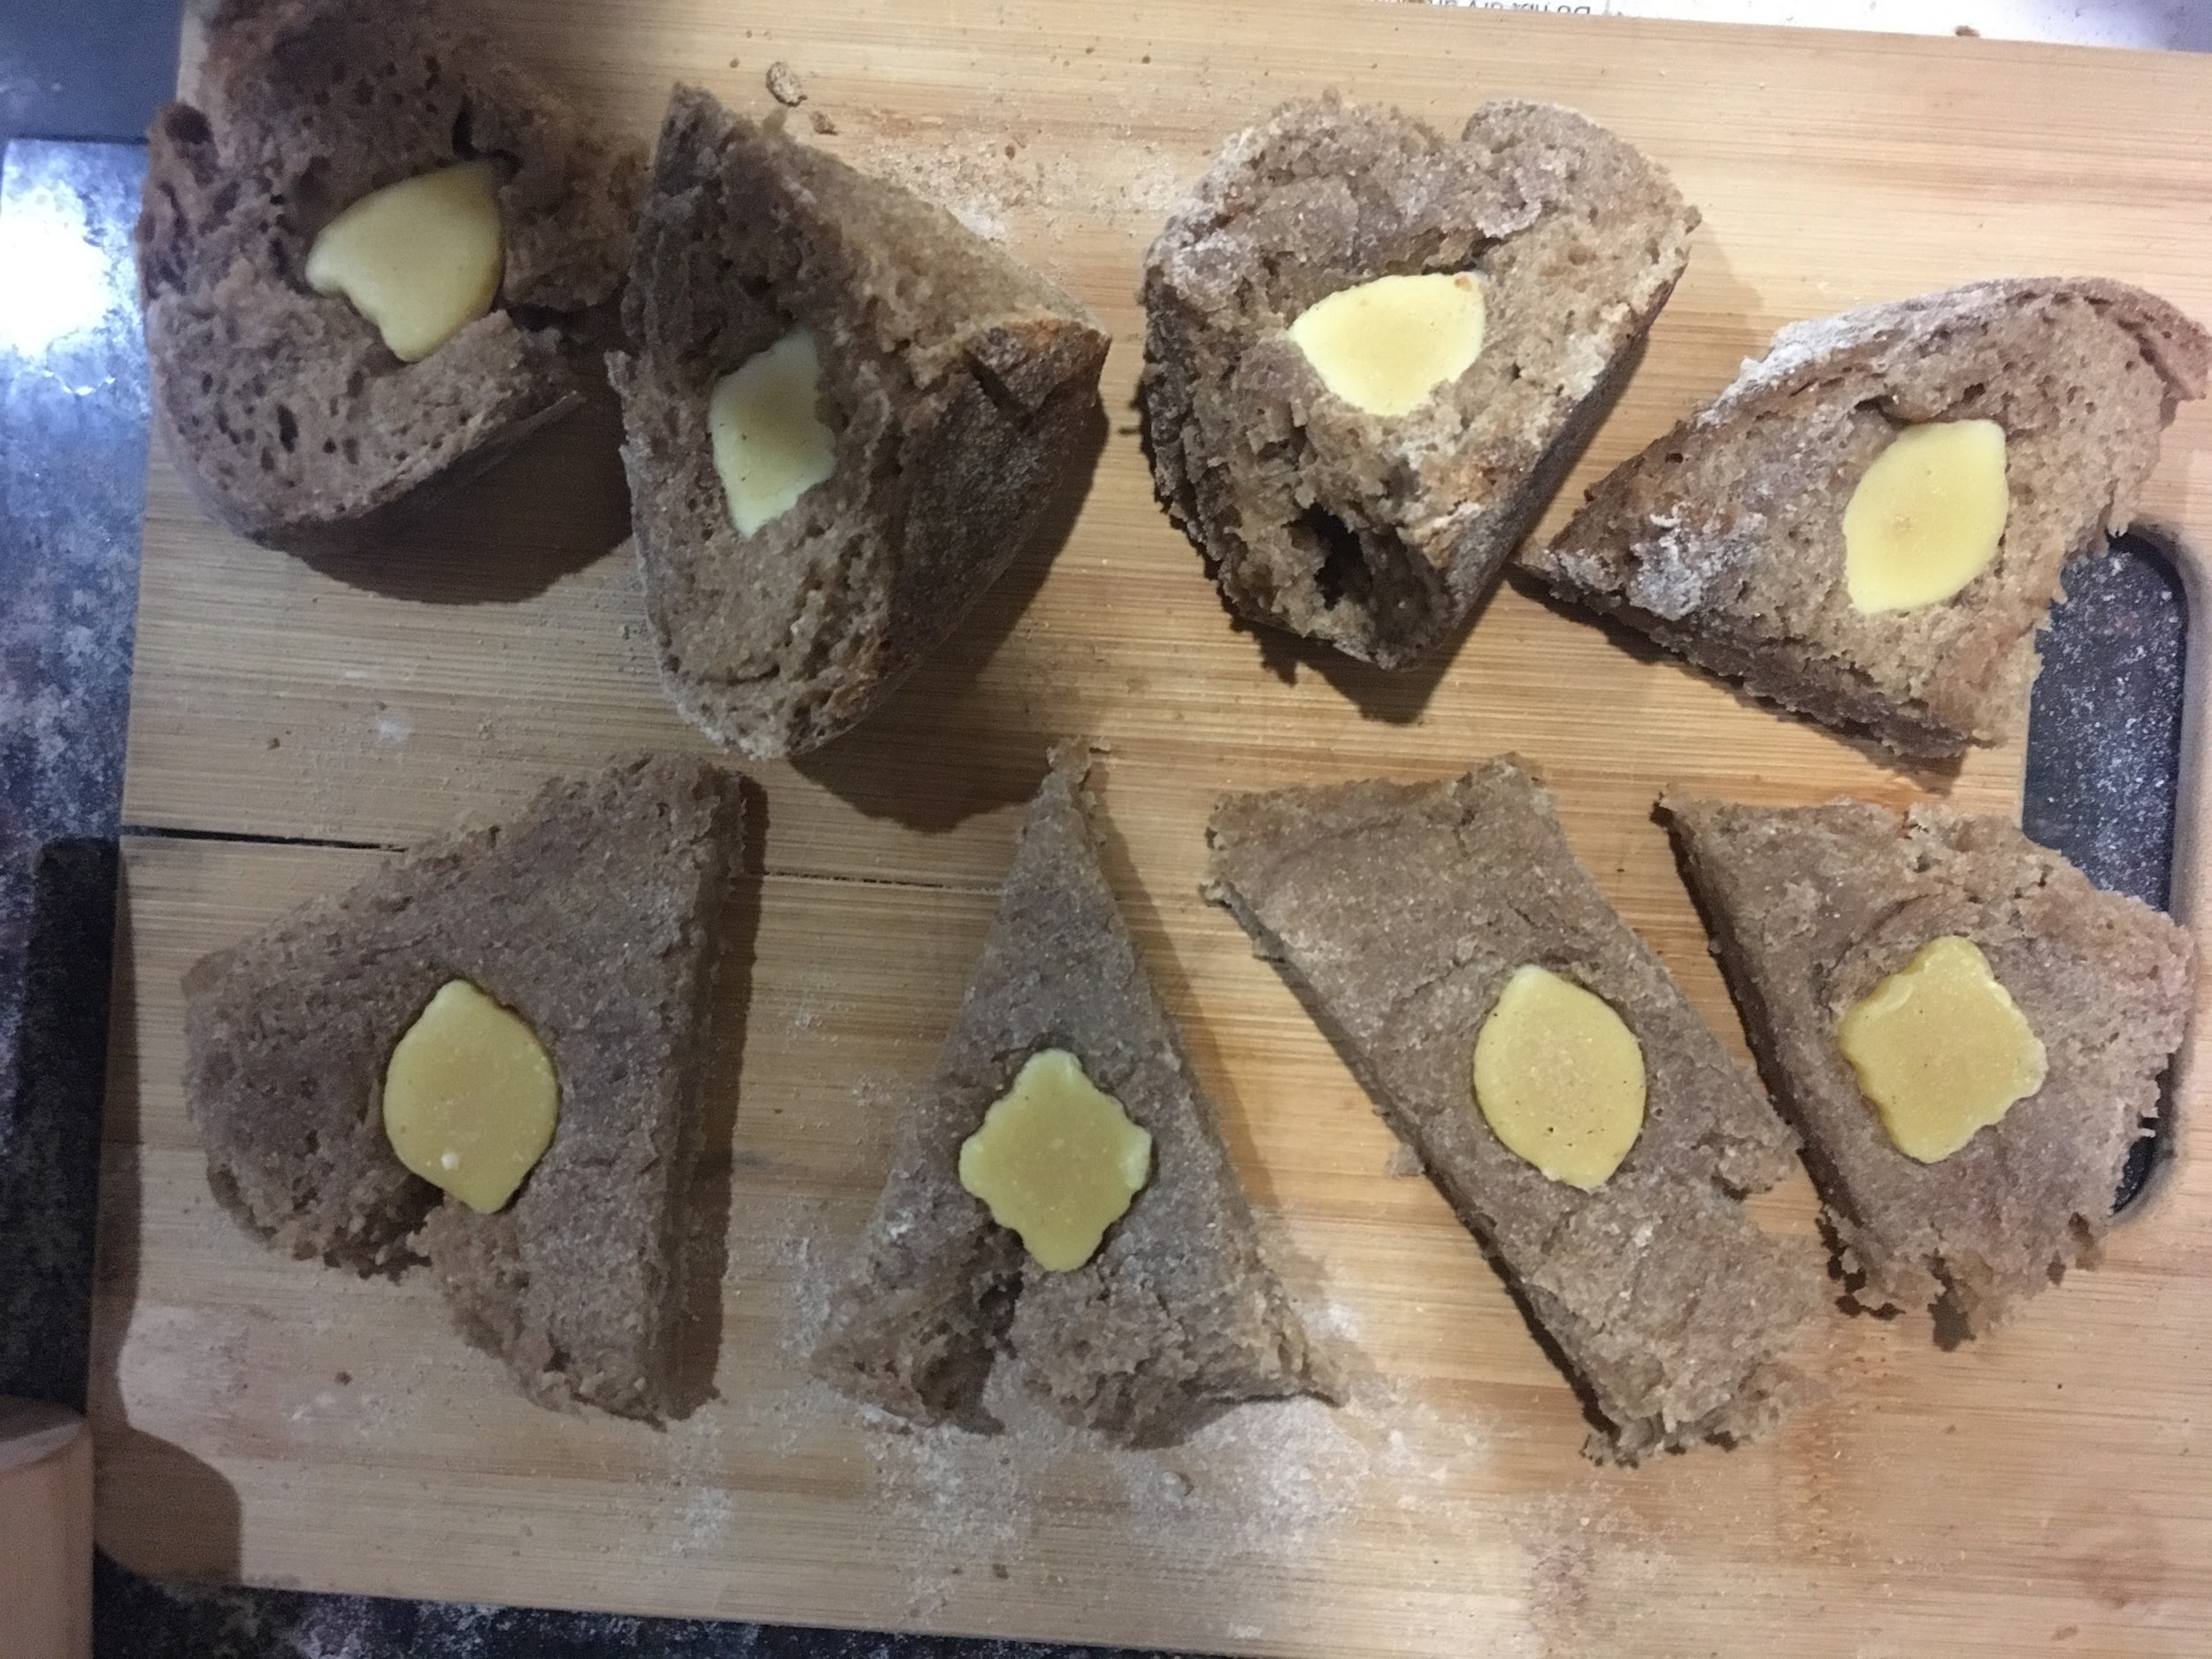
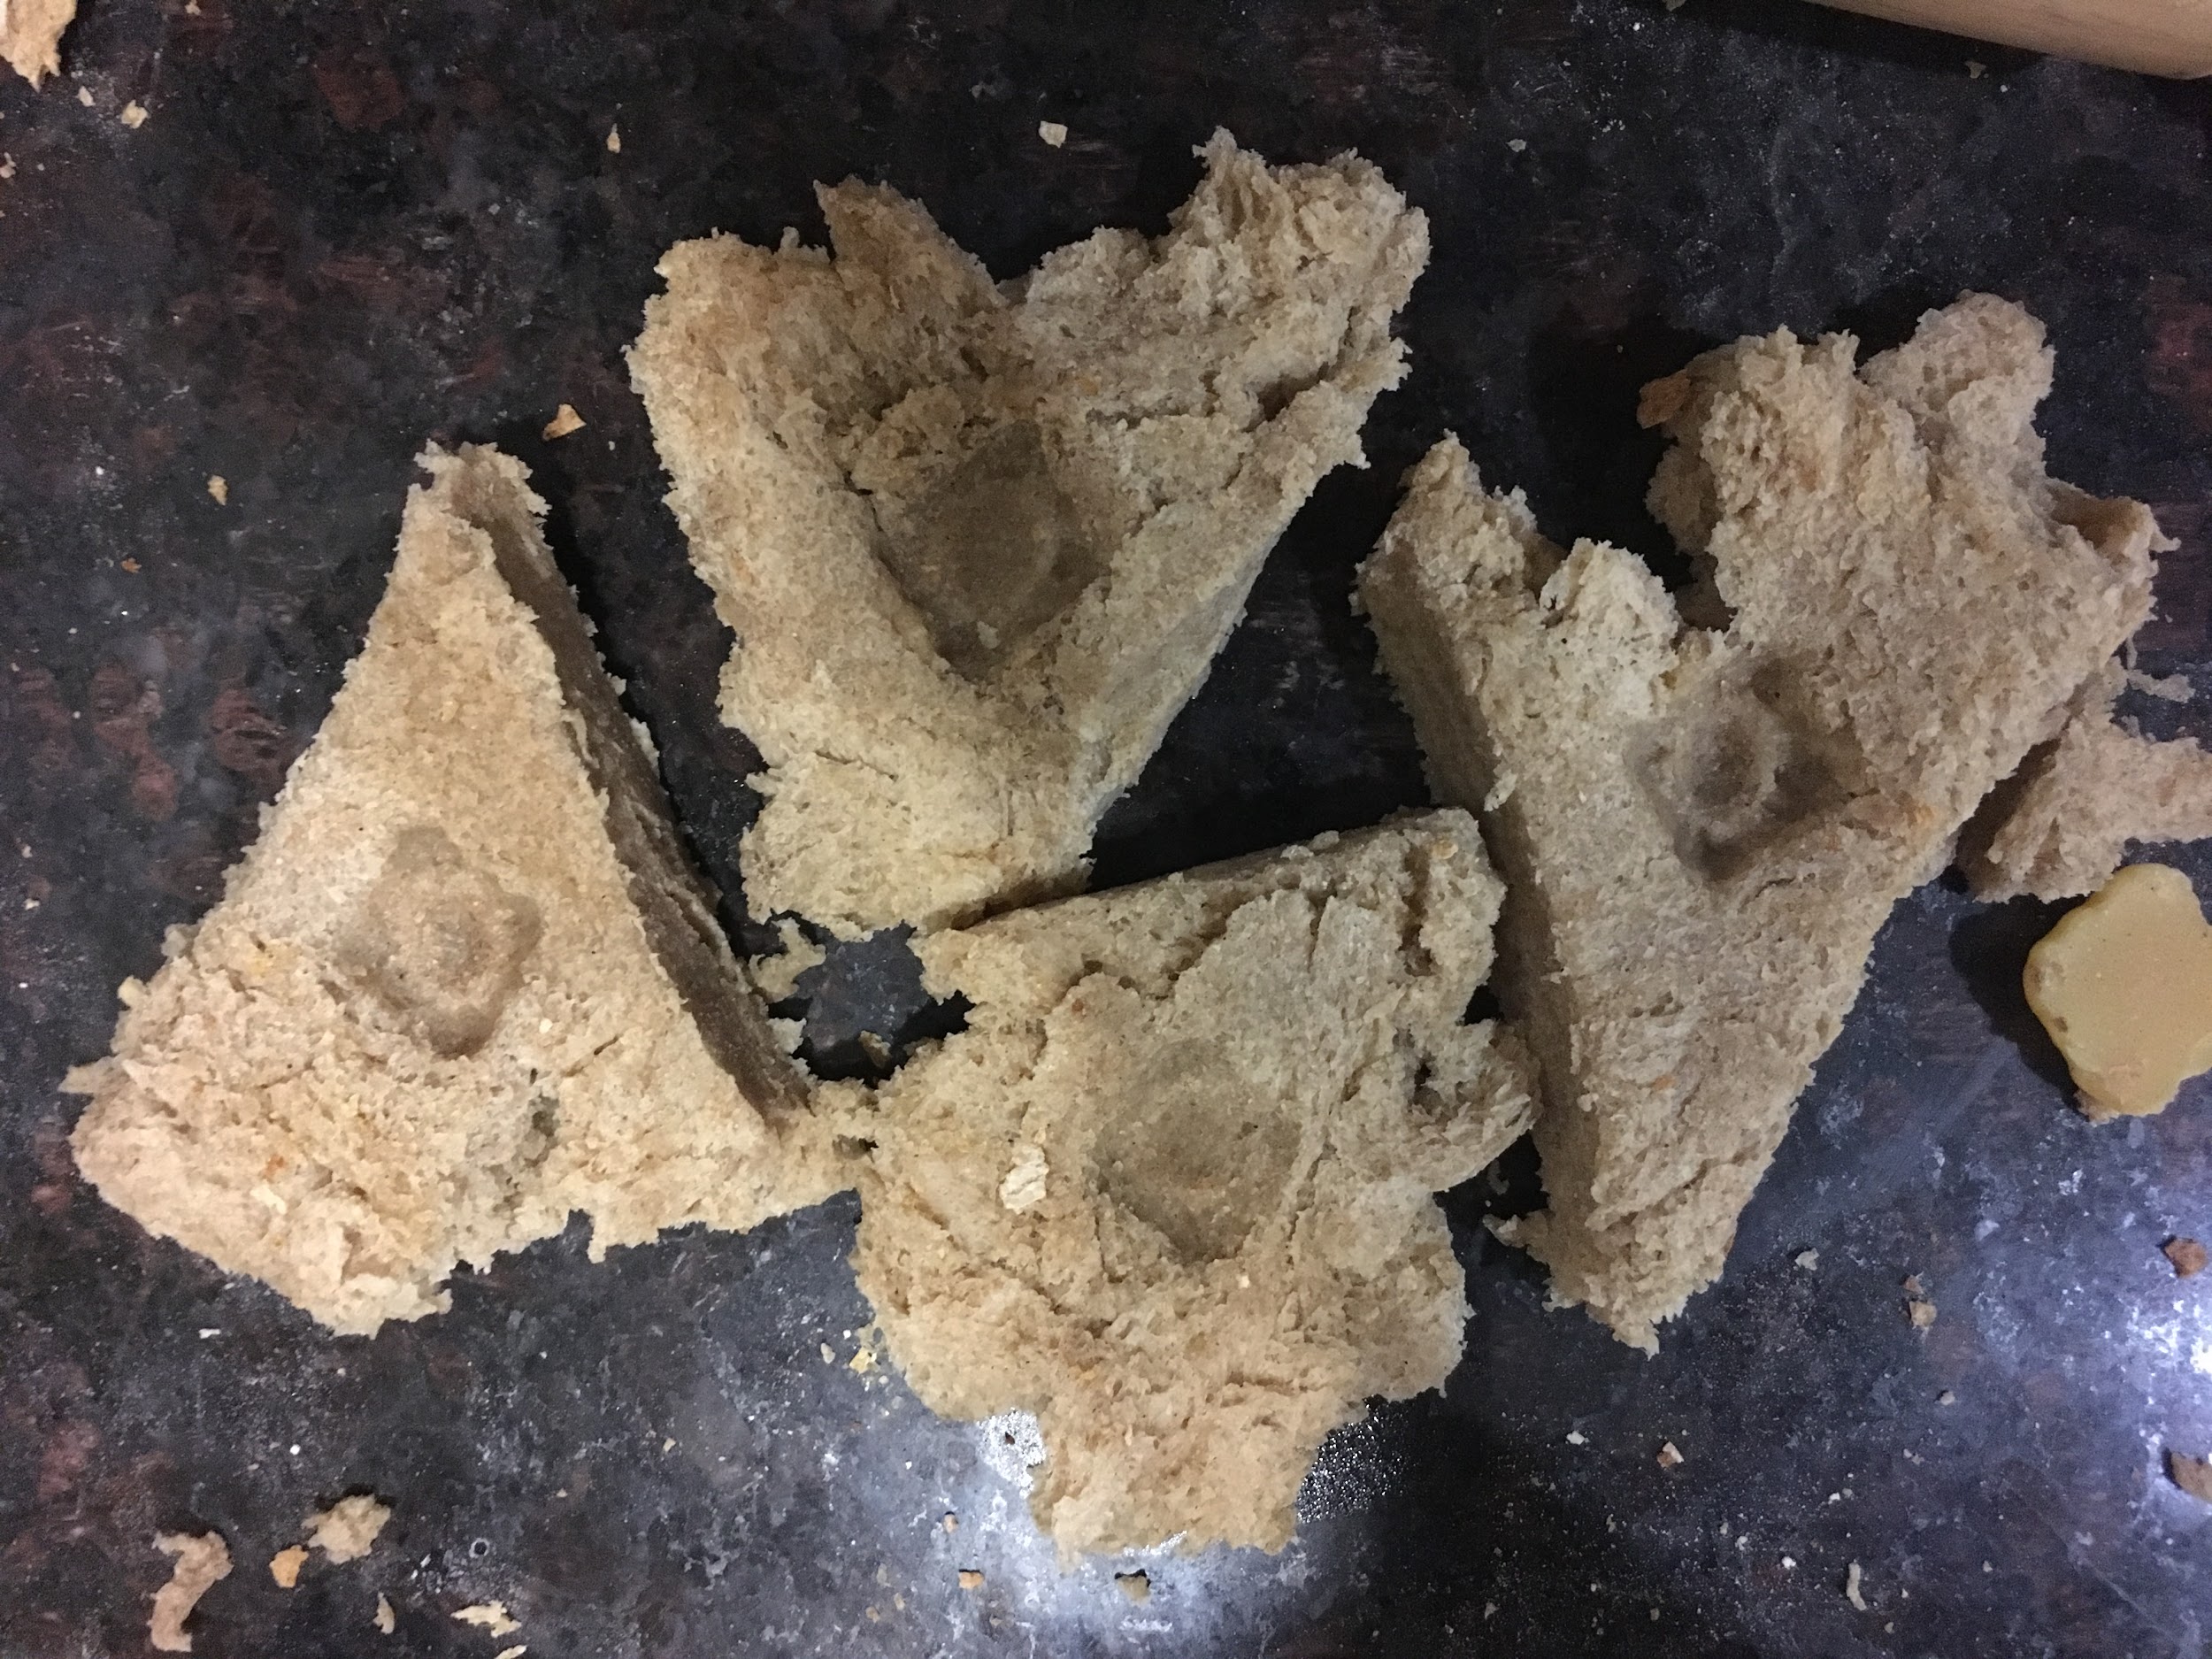
For the remaining half of the bread loaf, I divided it into three slices of approximately 1.0 - 2.0 centimeters in thickness. I then firmly pressed my objects into the slices of bread as well as the kneaded pith, producing three imprints of different designs on each of preparation techniques.
| Image URL: |
|---|
 |
Loaf #1 (100% AP) flour was rather springy and difficult to work with especially while attempting to knead the pith – probably due to high gluten content and the low hydration of loaf which contributes to its elasticity. Maybe needs to bake for a shorter period (not fully baked) OR use a flour with a lower gluten content like rye or buckwheat. When kneading the dough (perhaps due to it being a small loaf), it became hard to work with after awhile and when I tried imprinting a few minutes later the brooches immediately popped back out – sign of shrinkage?
| Image URL: |
|---|
 |
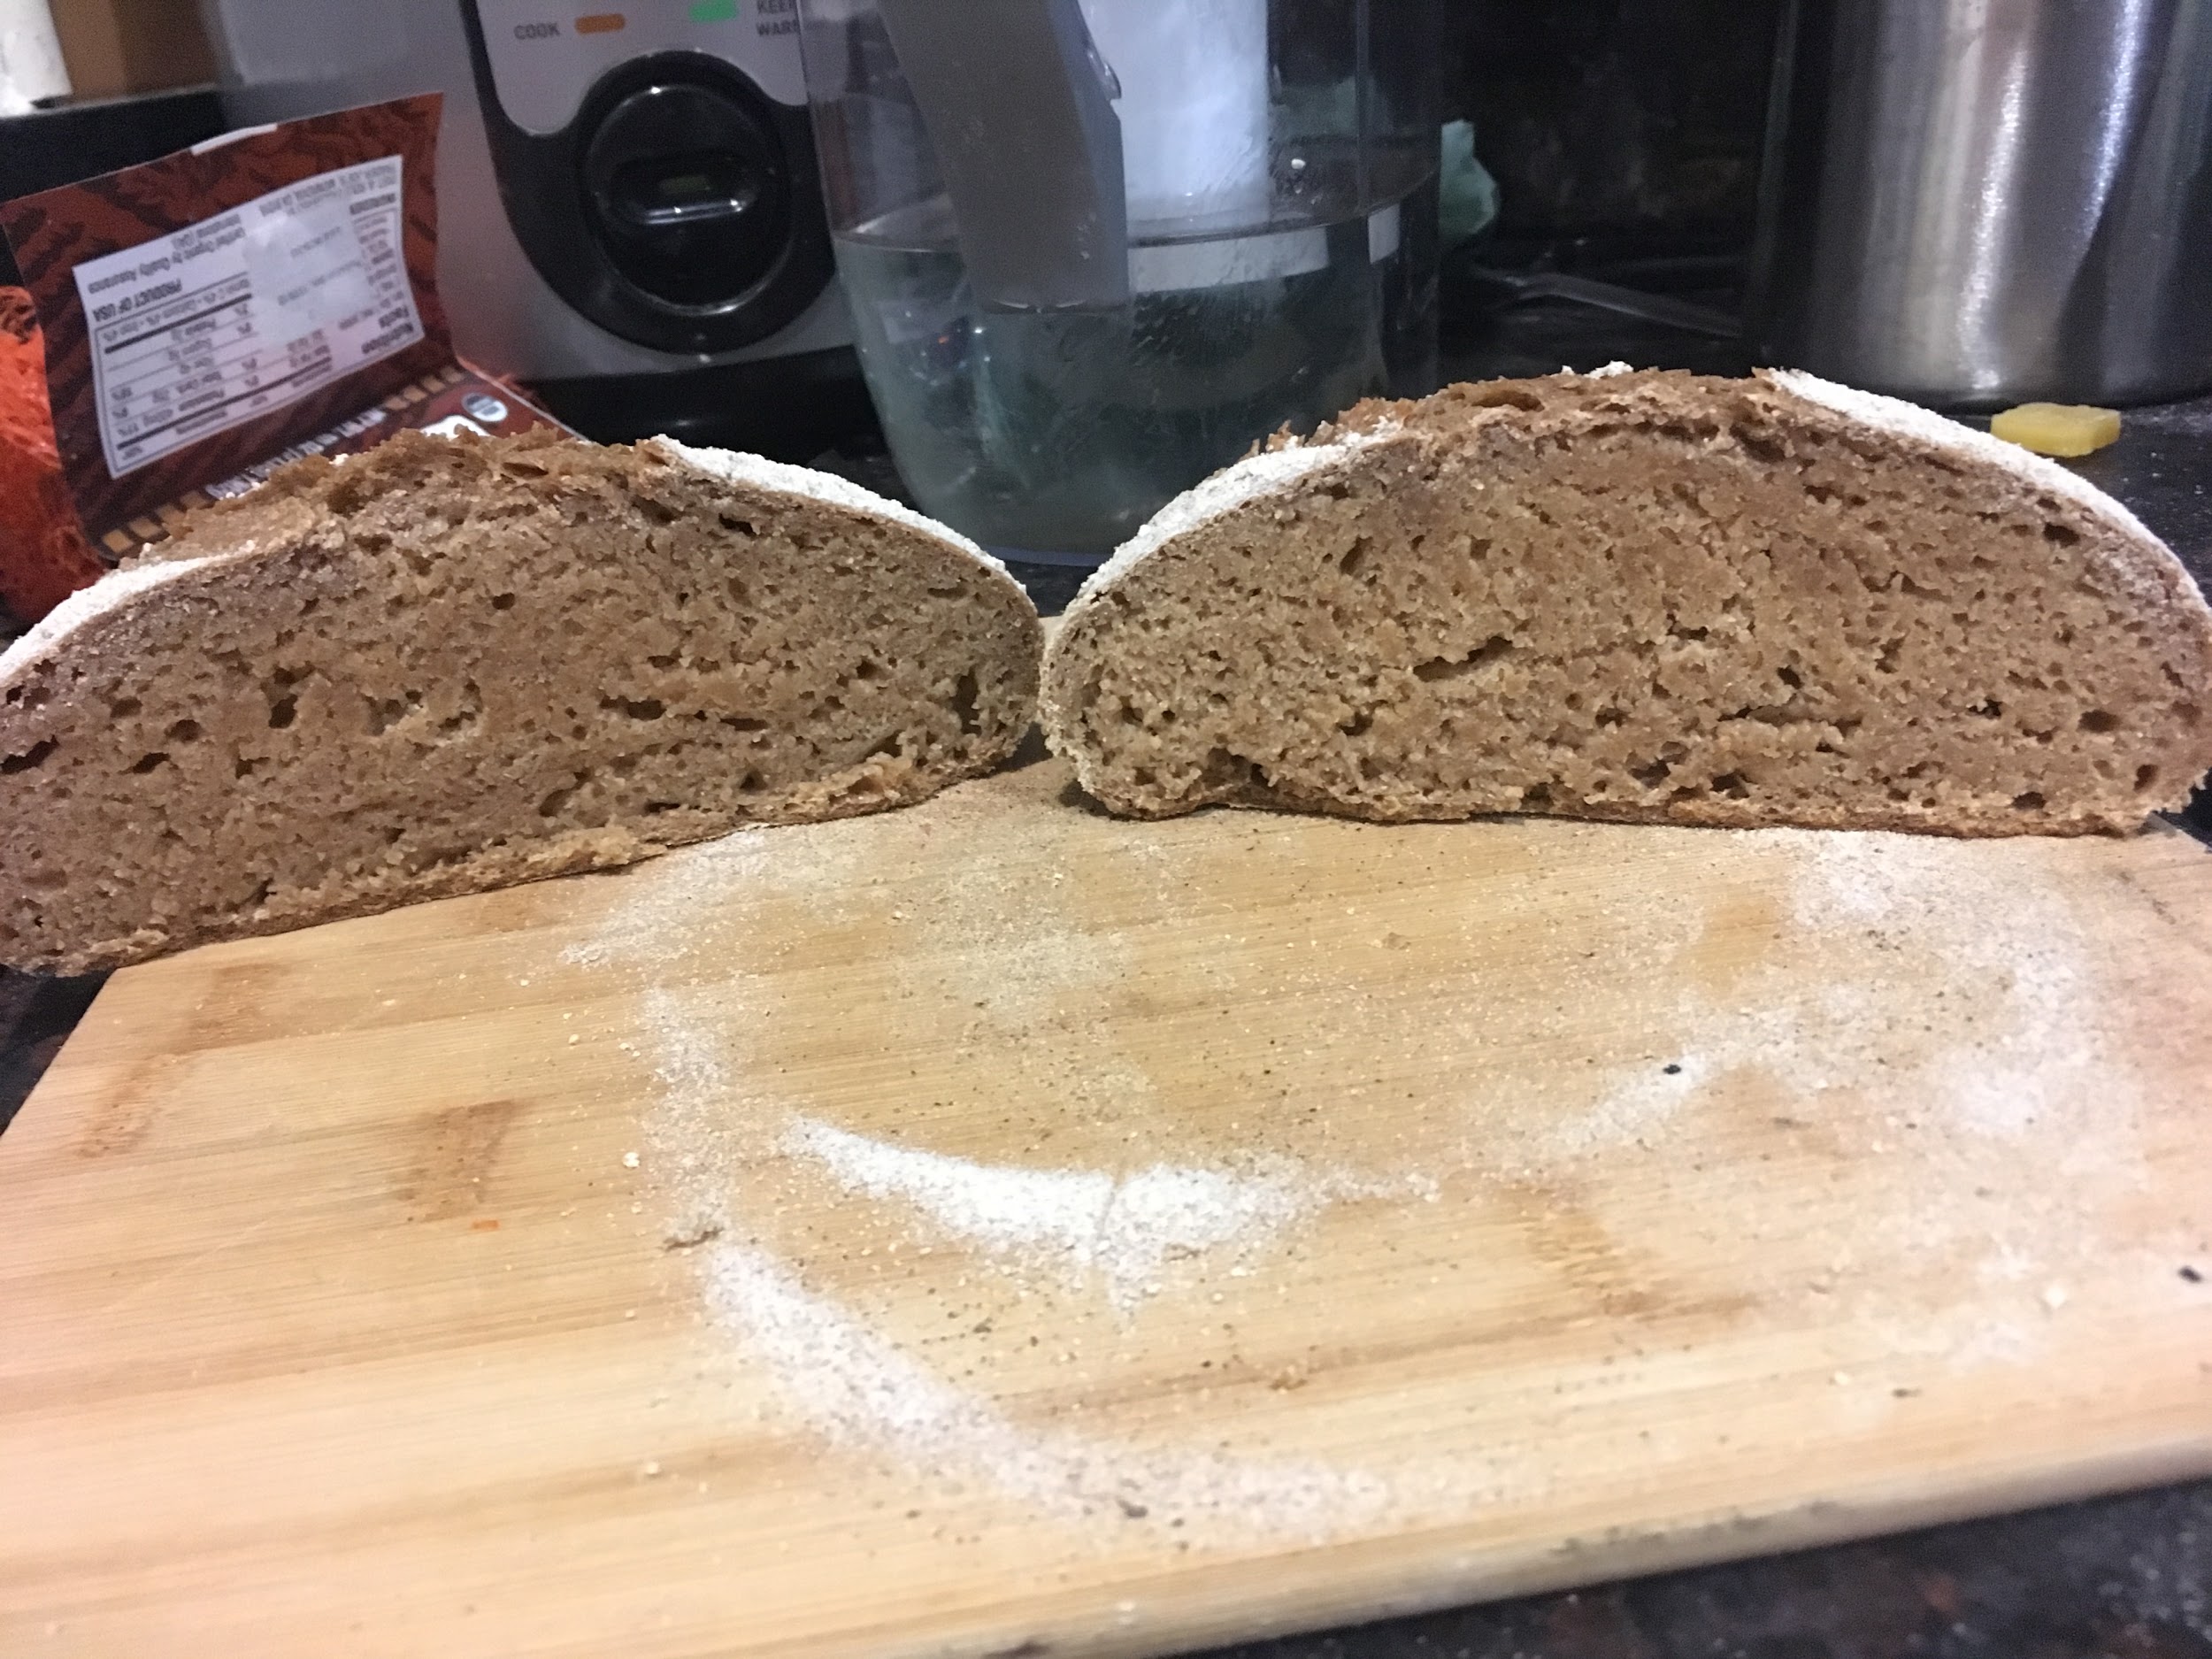
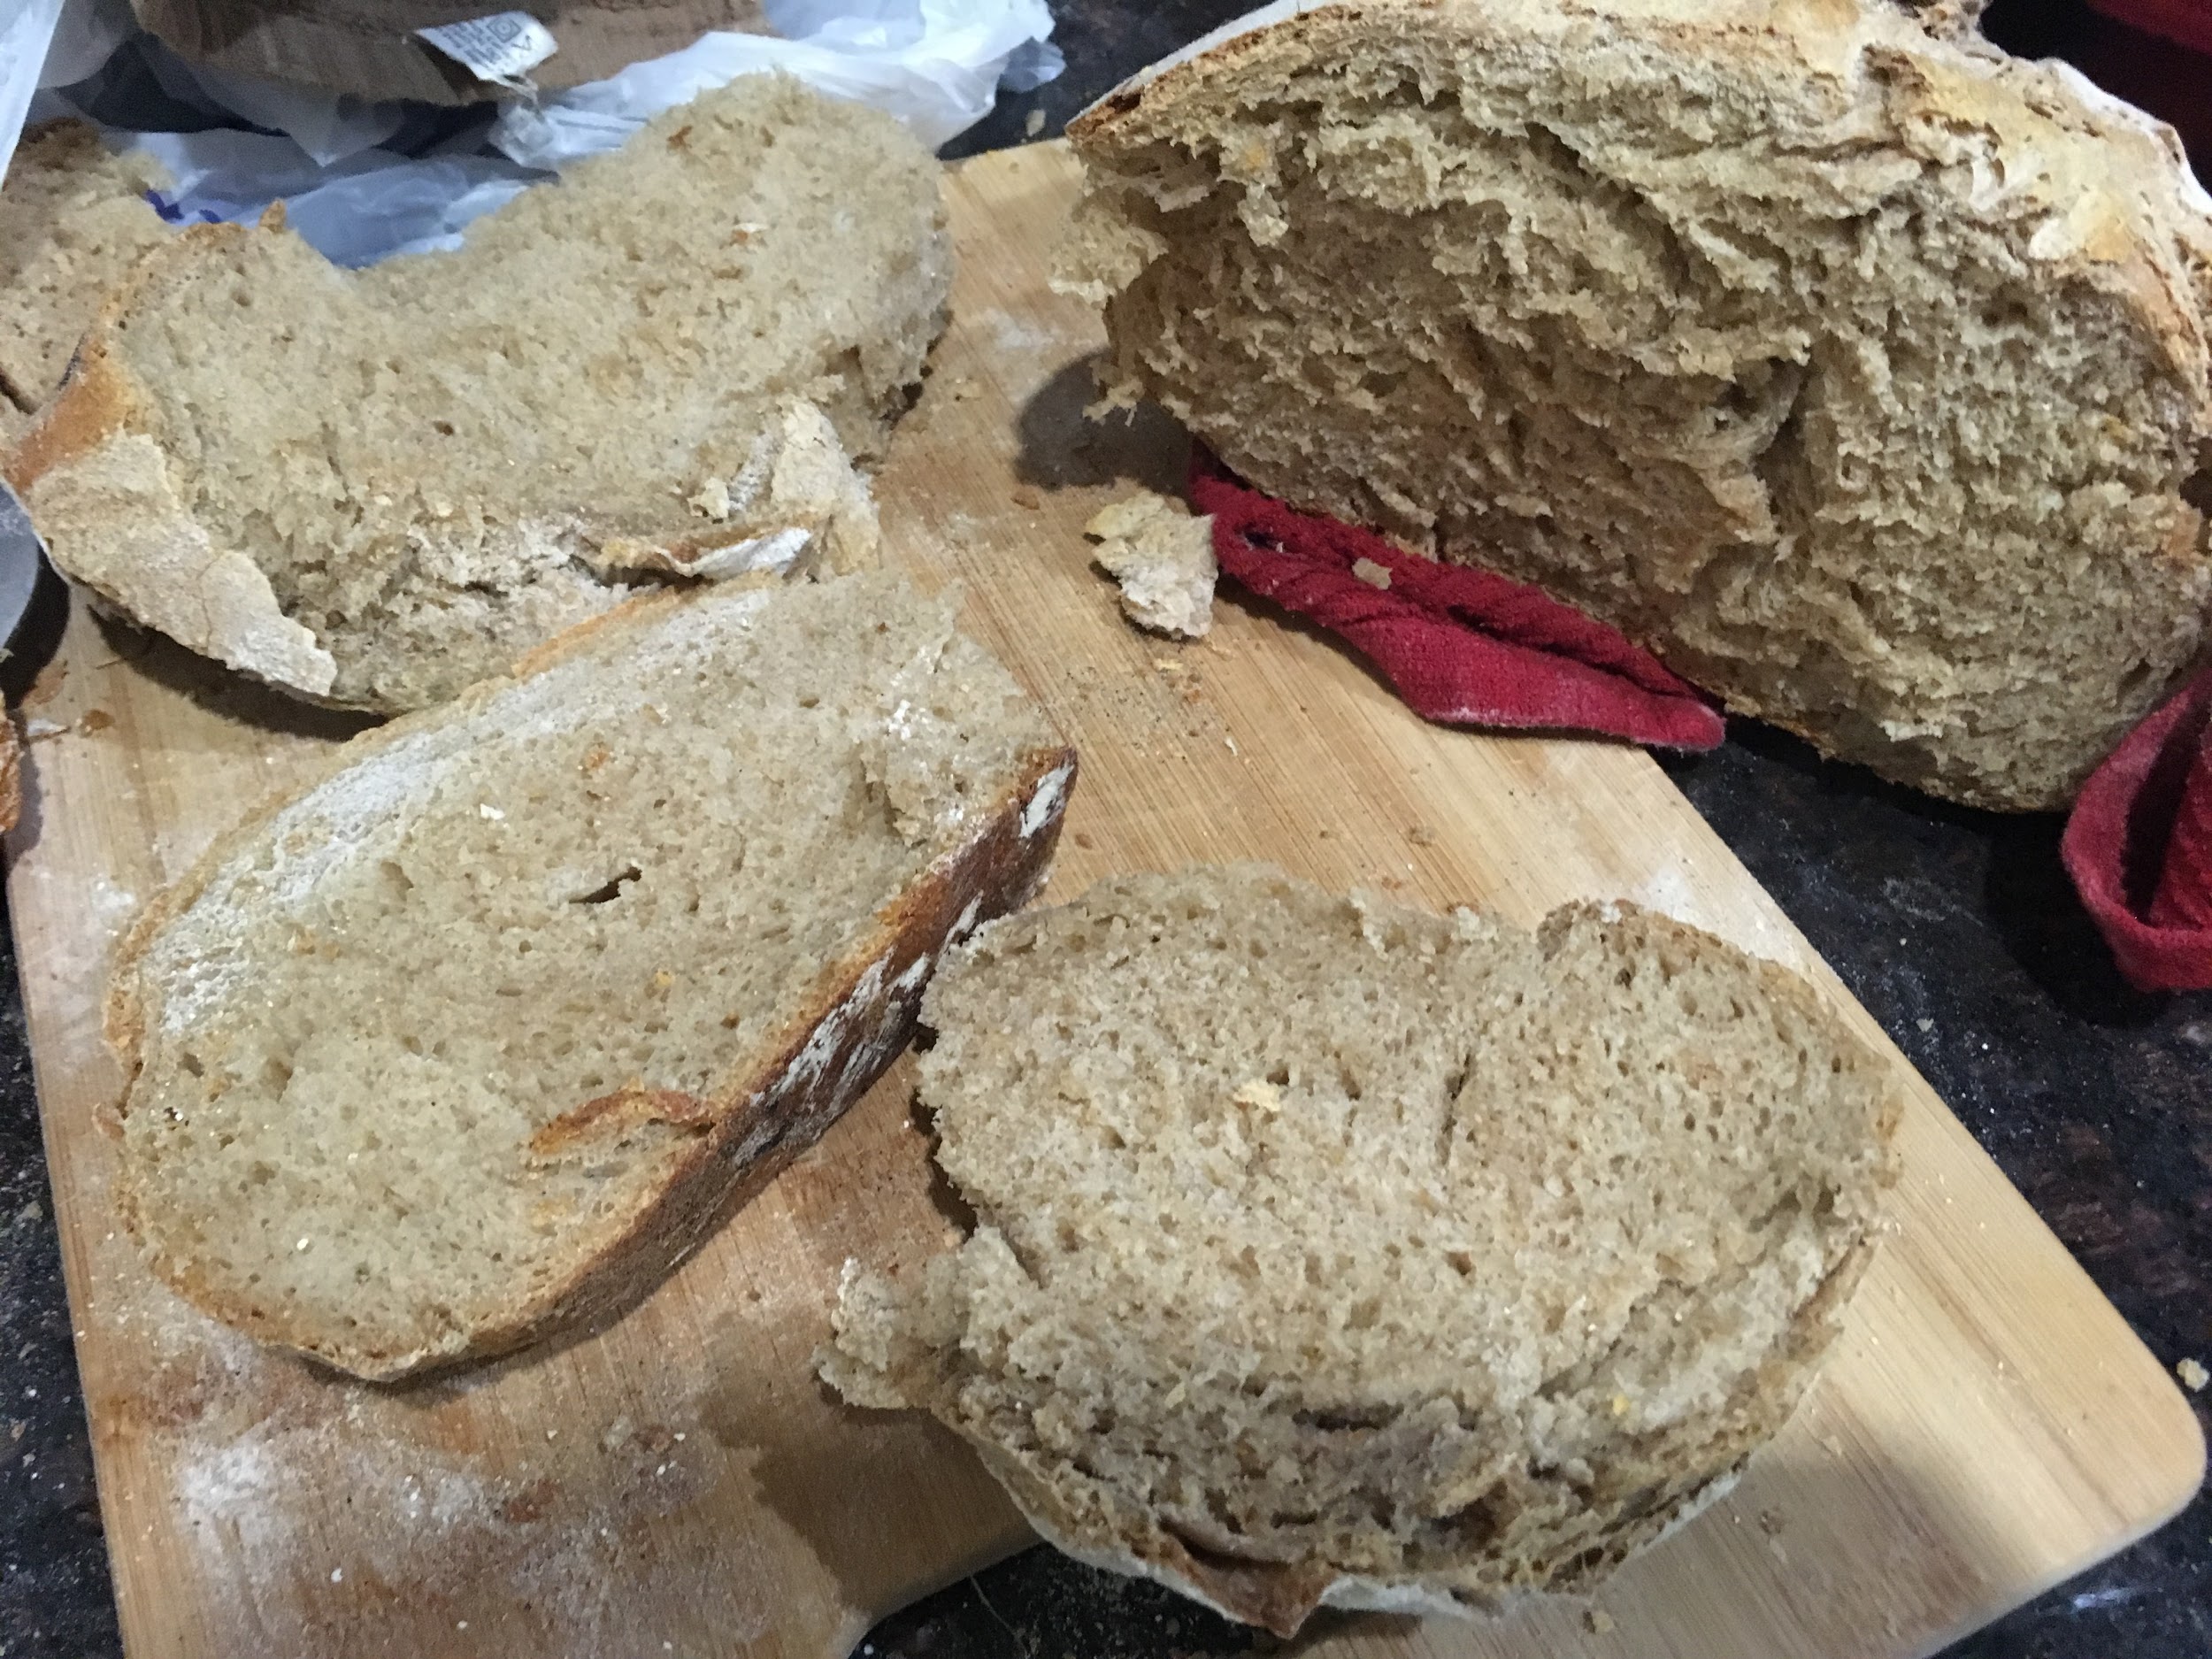
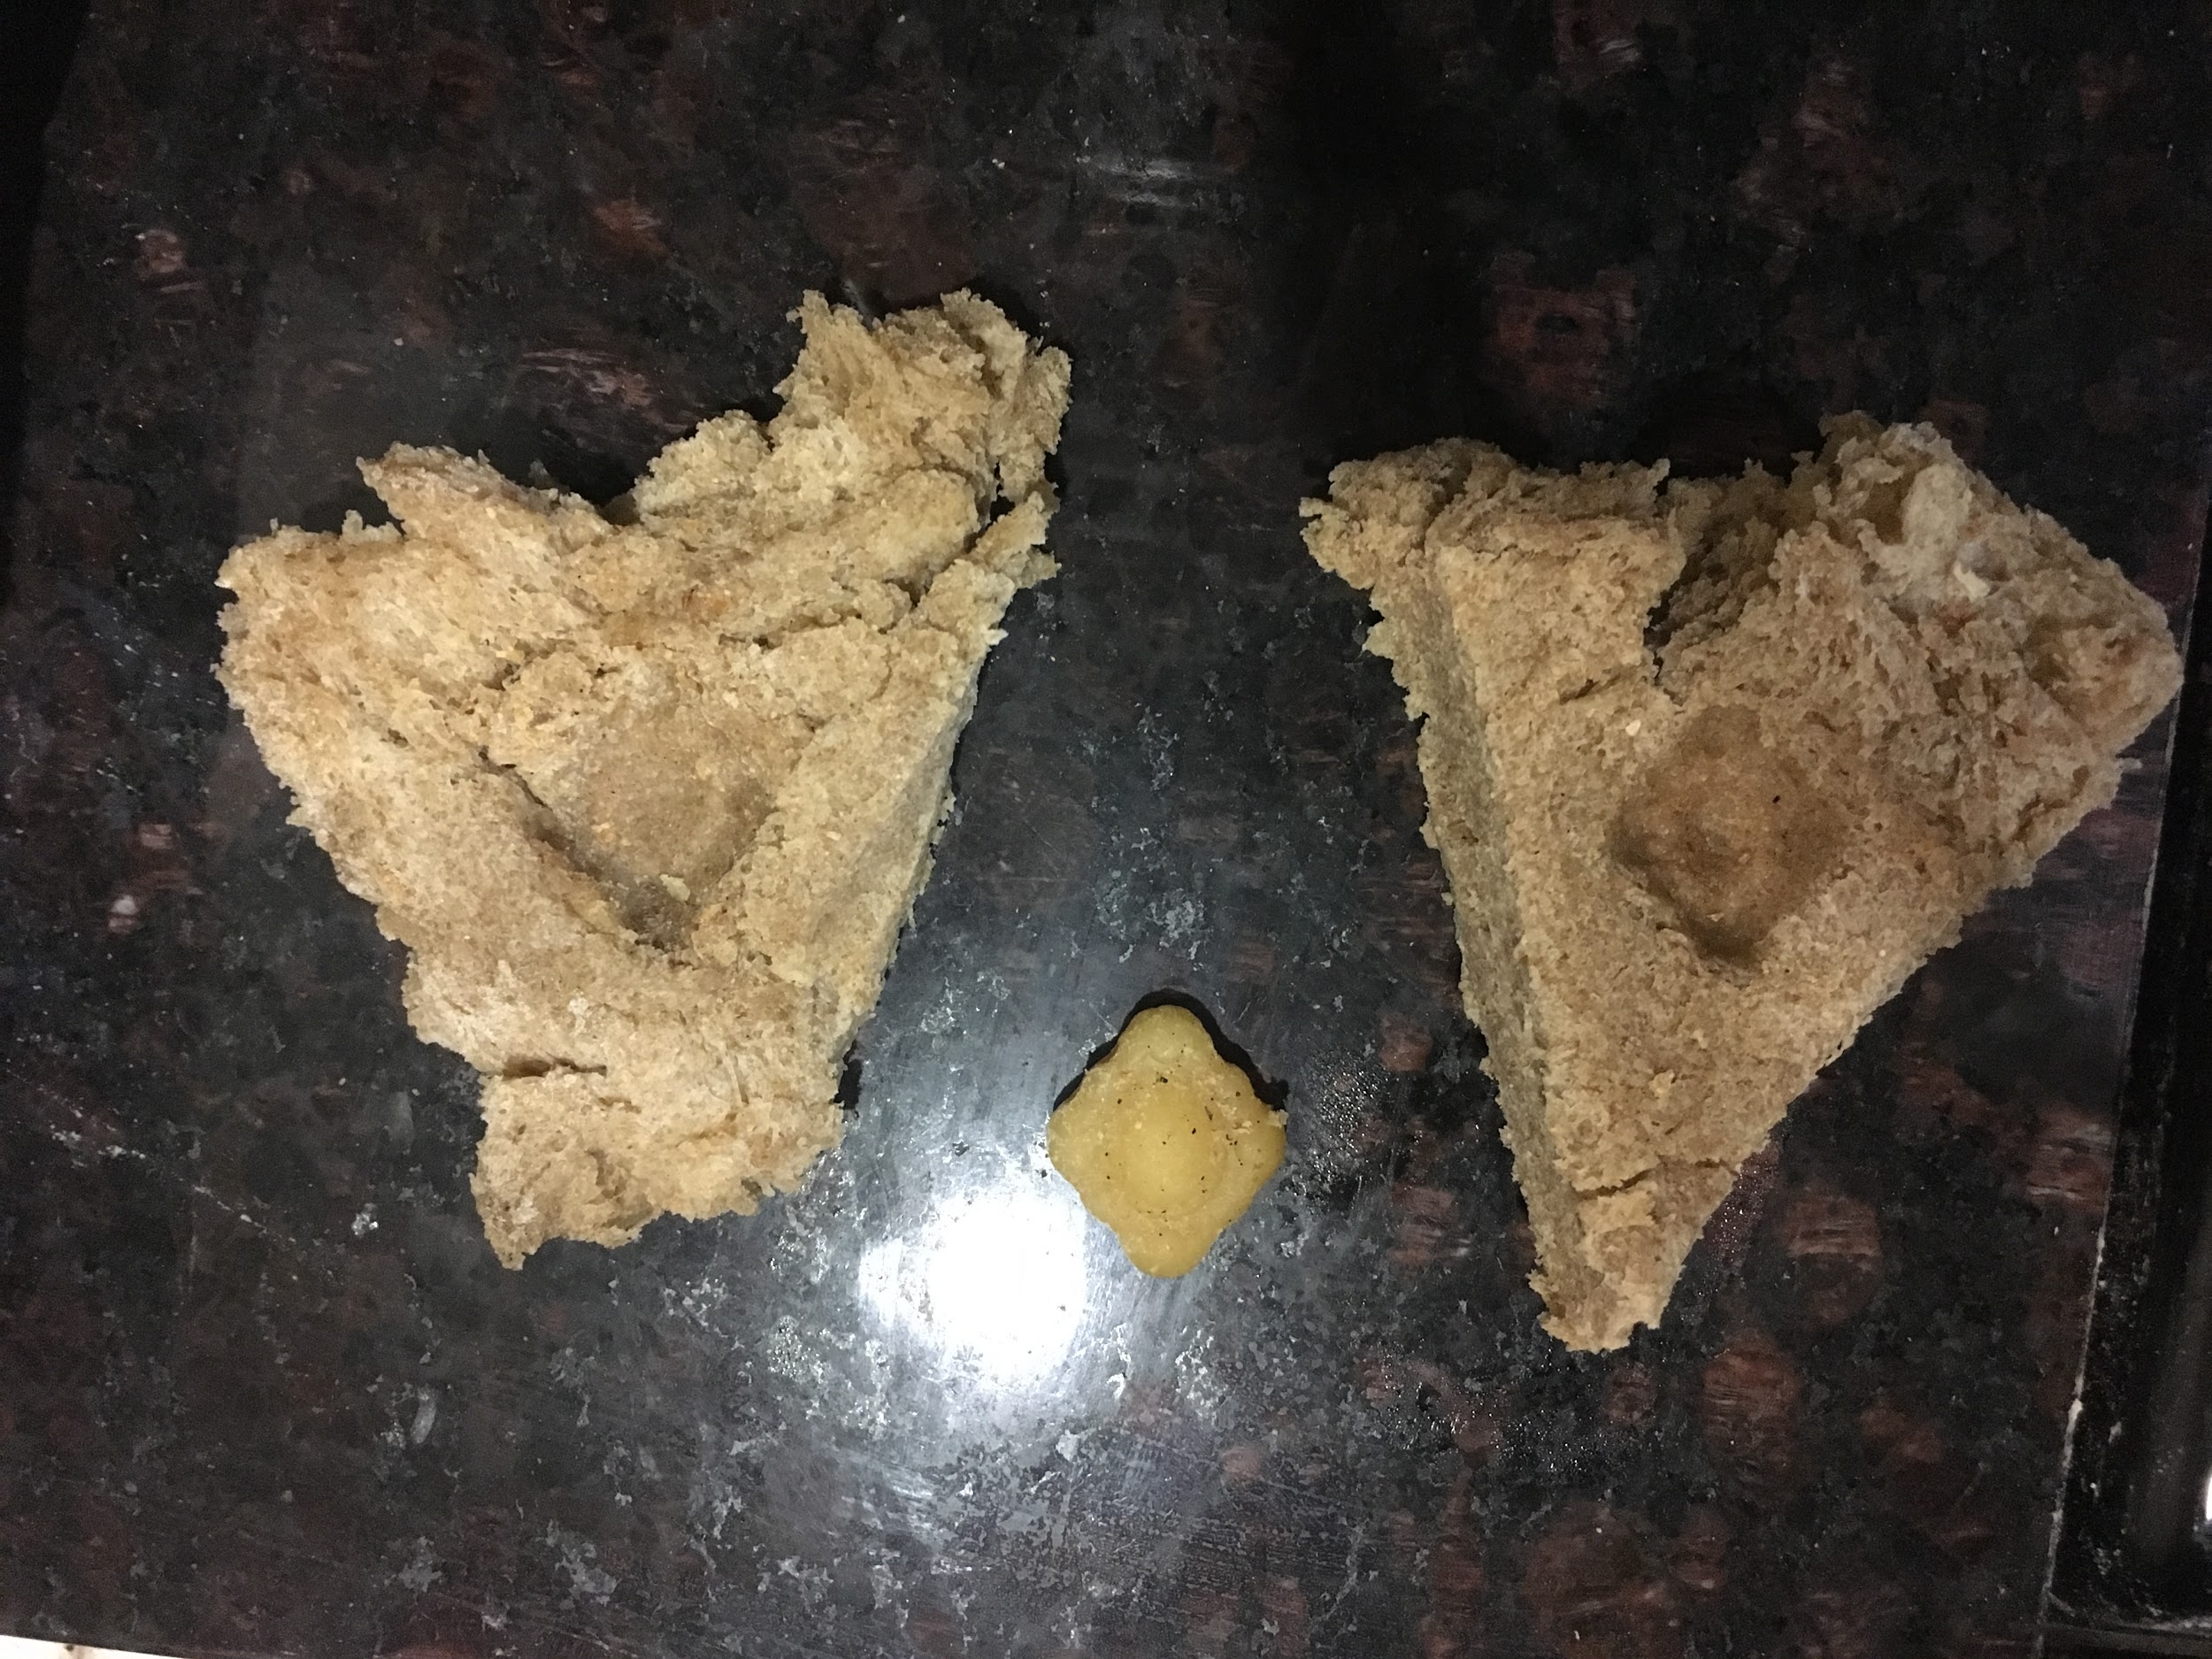
Loaf #2 sagged in the oven and so didn’t get much rise from it. Might either be due to poor shaping or overproofing of loaf. Surprisingly has a more open crumb structure than loaf #1 — I suspect this is due to the wetter + more slack dough — water content important (hydration level) important. Also because of the wetter dough and low gluten content of rye, dough dried less fast and the texture was more paste-like easier to knead and imprint on when bread pith was taken out VS loaf #1 - drier - made the pith method more difficult but the straight imprint on the loaf easier.
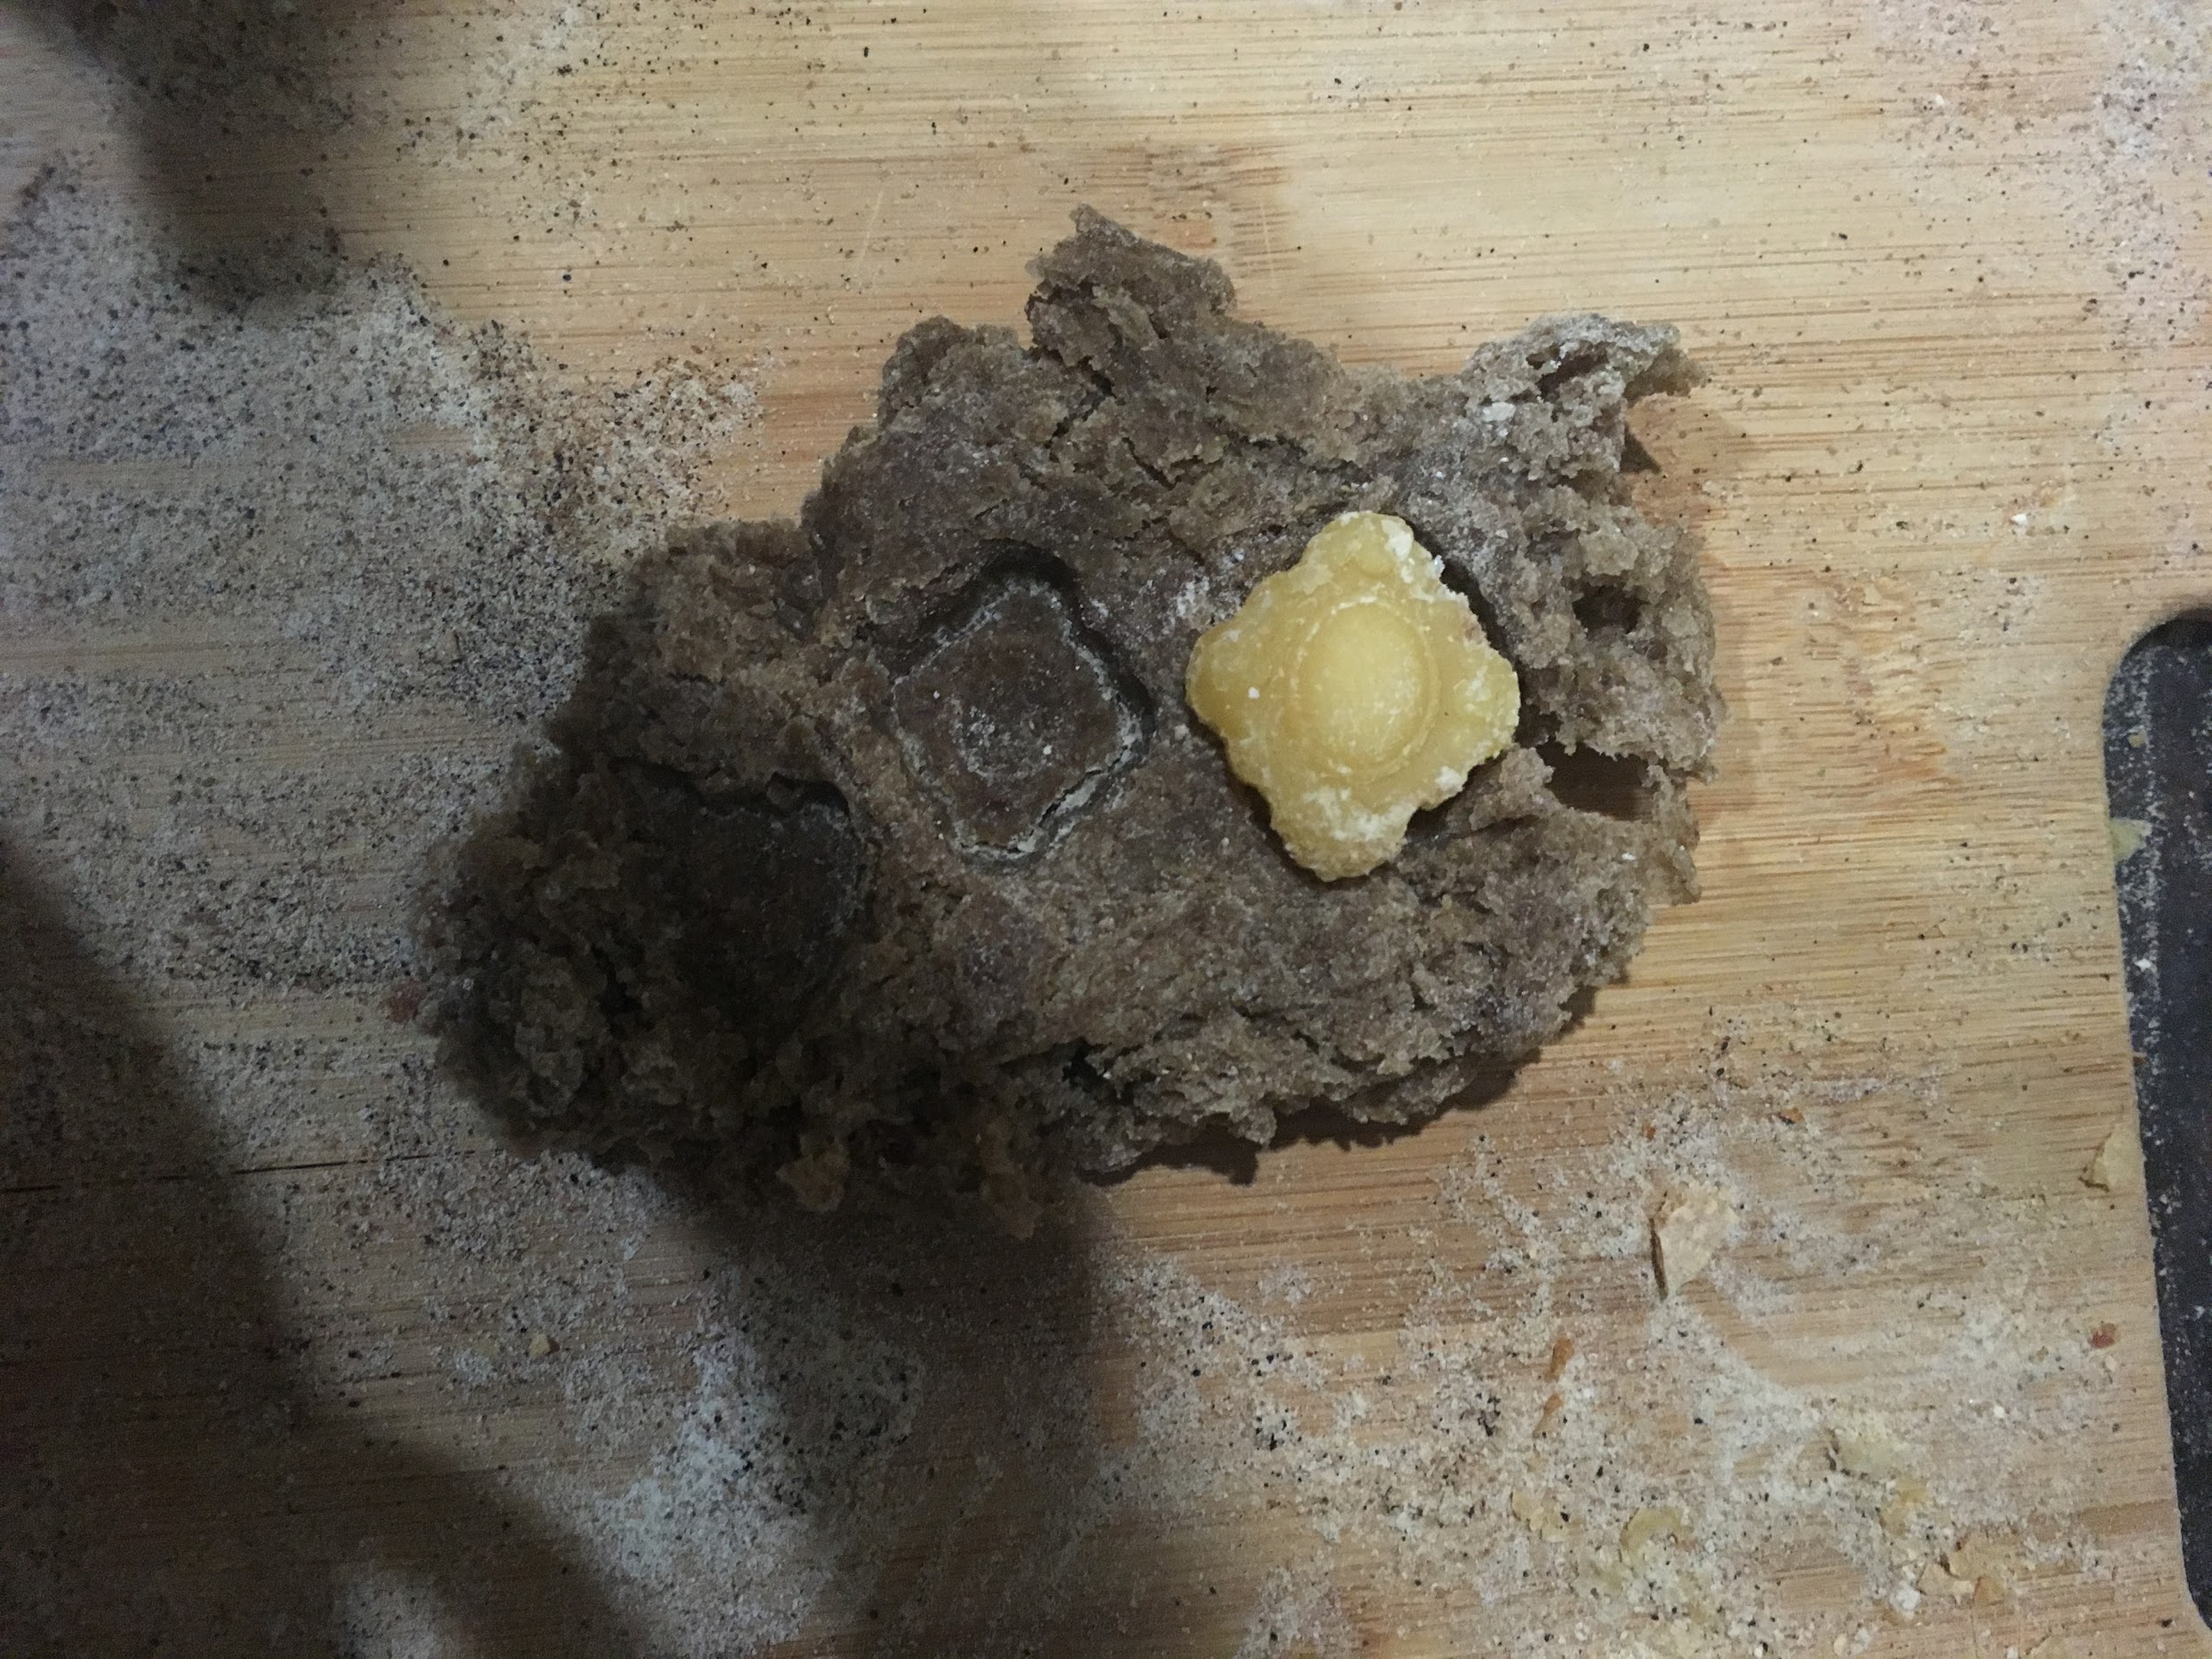
Beeswax brooches aren’t very ideal… can see it change colour as I imprinted into the loaf due to melting (since melting point is at 63C). But also because of that, it adheres to the mold more.
Tried elongating the mold but it just springs back
Need to work fast for the pith method and only one shot at imprinting otherwise it won’t be clear and the shrinkage happens pretty fast especially for Loaf 1.
After molding these loaves, I prepared a batch of dough made with 100% whole wheat flour (loaf #4) using the same method as before, and left it to proof overnight until ready. The dough was much wetter and stiffer and needed a longer kneading in order to pass the windowpane test.
Name: Min Lim
Date and Time:
Location: Personal Apartment Kitchen
Subject: Bread-baking (loaves #4), Bread-molding (loaves #4)
Weather: Cloudy, 4°C
Humidity: 62%
- Made bread with 50% whole wheat and 50% rye (loaf #3) with same method as before — extremely dense even after adding more water + took a while to knead and for window-pane test to pass. Dough also kept breaking apart due to addition of rye flour (which has pentosans, a group of complex sugars, that causes dough to be less elastic). Left it to proof.
- Baked loaf #4 (100% whole wheat) in same conditions as previous. Interestingly loaf #4 had a much more uneven crumb…it might be due to needing to properly and completely deflate the dough, as well as the hydration content of the dough.
| Image URL: |
|---|
 |
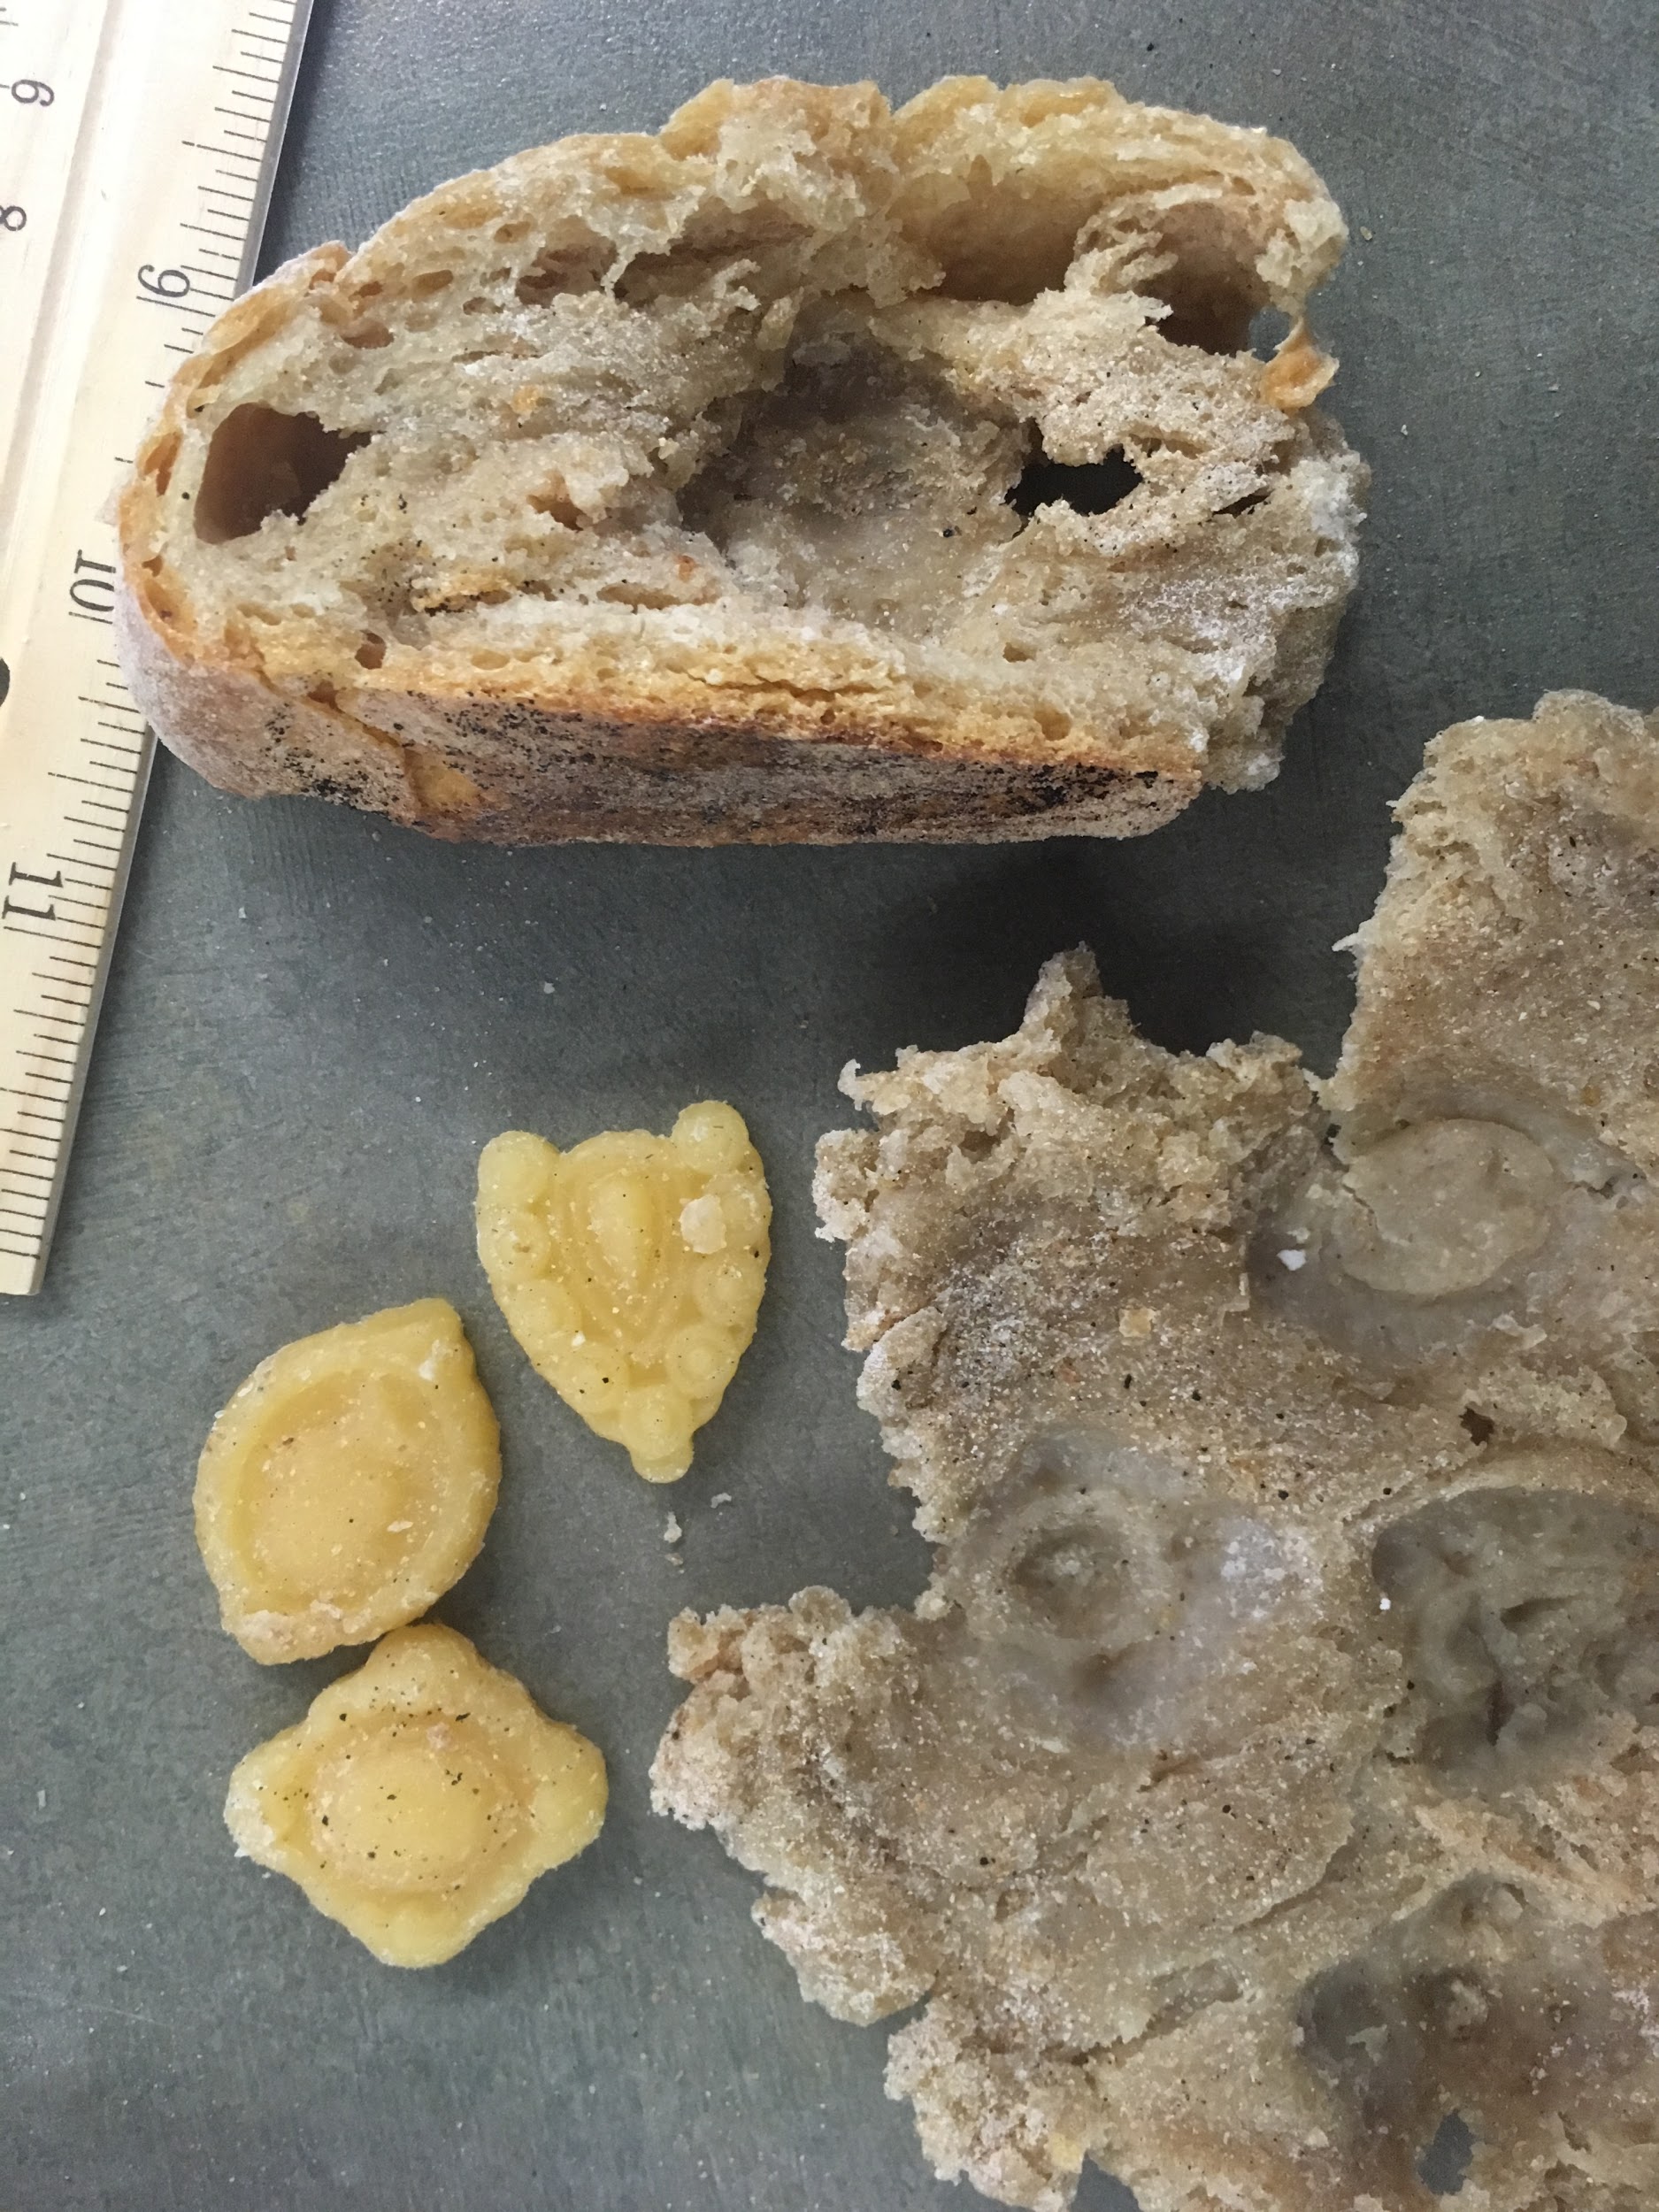
- When sliced open, loaf #4 felt the same amount of moistness as loaf #2 (50% rye, 50% ap). The kneading and forming of the bread molds and imprints came together much easier.
I also unmoulded the objects from loaf #1 and #2 -- the metal ones really had very shallow imprints and some even went green from the copper reaction. Beeswax molds came out much better where the molds managed to capture the detail of the original object — have decided to only use beeswax molds for my annotation
| Image URL: |
|---|
 |
And also for consistency since I have several copies of the same design and can compare how the same design was imprinted on different loaves.
Surprisingly the one where the bread-pith isn’t removed left a much greater impression - i think its because the pith one dried too quickly to really properly stamp on it
Name: Min Lim
Date and Time:
Location: Personal Apartment Kitchen
Subject: Bread-baking (loaves #3), Bread unmoulding (loaf #4), bread making (100% rye, loaf #5)
Weather: Cloudy, 4°C
Humidity: 62%
- Baked loaf #3 — 50% whole wheat and 50% rye — it is so dense!
- Very sad amount of rise compared to the other loaves
| Image URL: |
|---|
 |
- Not very strong gluten structure as well, very tight crumb, but easy to imprint
- Unmoulded objects from loaf #4 - in this case the one with the bread-pith removed left an AMAZINGLY clear impression i am so impressed with some visible shrinkage as well!
| Image URL: |
|---|
 |
- Again beeswax moulds were much better - i think it’s the depth of the imprints on objects
- Went to the supermarket to find barley flour, got oat flour instead bc no barley
- Think it will still work - similar idea of low gluten content and also oat flour was used back then as well
Made loaf #5 (100% rye) - literally impossible to knead as it kept breaking apart and was extremely dense. Gave up kneading after 20 minutes (some gluten formation) and left it overnight to proof once again. Don’t have much hope for this one - I think 100% rye bread requires a very delicate touch (stretch & fold method?) otherwise it’ll usually end up like flatbread/extremely dense. Most breads (even modern ones) use a mix of rye and other flours as well rather than 100% rye. We’ll see tomorrow.
Name: Min Lim
Date and Time:
Location: Personal Apartment Kitchen
Subject: Bread-baking (loaves #5), Bread-molding (loaves #5)
Weather: Cloudy, 4°C
Humidity: 63%
Baked loaf #5 (100% rye) -- extremely dense, minimal rise, very crumbly and gummy inside -- bread molds broke apart when impressions were made as well
as well!
| Image URL: |
|---|
 |
I now have all the loaves I need to make a comparison between how the different flour types affect the bread molding and shrinking process. These are the five loaves I have produced:
Loaf #1 - 100% AP
Loaf #2 - 50% AP, 50% rye
Loaf #3 - 50% Whole Wheat (ww), 50% rye
Loaf #4 - 100% ww
Loaf #5 - 100% rye
General observations from making the bread molds:
When imprinting onto the bread molds, I noticed that the loaf baked using 100% all-purpose (refined wheat) flour wasere drier and more elastic. The object consequently did not remain within the bread mold as it dried out, as the pith retracted on itself when pressed. The impression formed was thus light and shallow. One of its imprints even had to be was consequently discarded given the lack of impression made.
Conversely, the loaf baked with 100% rye flour was sticky and crumbled when sliced — the bread pith often split as the wax brooches were pressed into the mold. This is likely due to the presence of pentosans, a group of complex sugars, in the flour, which break apart easily when mixing. Coupled with the low gluten content of rye flour, the bread tends to be denser with smaller air bubbles as well.
Bread produced using 100% whole wheat, 50% whole wheat and 50% rye flour, as well as 50% all-purpose and 50% rye flour yielded molds that were moist and inelastic enough for the objects to remain within the impression as the loaves dried. The pith did not crack when imprinted as well. There therefore seems to be an ideal level of hydration and gluten for the bread loaves used in bread molding, in which unrefined wheat flour, or a portion of its refined form, provided. This is despite the lack of specification in the Ms. Fr. 640 on the types of bread used in this process.
Name: Min Lim
Date and Time:
Location: Personal Apartment Kitchen
Subject: Unmoulding (loaves #3, #5)
Weather: Cloudy, 4°C
Humidity: 63%
It shrunk so much!! So hard to get it out
Some of the beeswax stuck (too hot?)
Indentation super matters / depth of detail
| Image URL: |
|---|
 |
Bread pith one works beautifully -- the process of extracting and kneading the bread pith produced the clearest imprints of any bread mold. This method compressed the crumb of the loaf, which would have likely allowed for the object to be imprinted without the air bubbles of the bread mold disrupting the details of the design. The type of bread used also had less impact on the outcome, as the kneading process homogenized the density and openness of the bread crumb.
| Image URL: |
|---|
 |
Loaf #5: minimal shrinkage...in fact most of them are so crumbly i don’t even think i can cast into them
Name: Min Lim
Date and Time:
Location: Personal Apartment Kitchen
Subject: bread making (100% ap, loaf #6)
Weather: Cloudy, 6°C
Humidity: 69%
Now that I was done testing how different types of flour affected the bread molds and shrinking process, I wanted to find out more about the drying out process - how did the no. of days between imprinting on the bread and casting sulfur (i.e. no. of days the bread has to dry out) affect the shrinking of the molds. I thus decided to bake 2 more loaves of the same flour mix as the ones previously used -- 100% AP (loaf #6) and 100% WW (loaf #7)
7:00am: repeated same process of bread making as previously, using 100% ap flour. Dough is way more elastic and came together quite easily after kneading for approx. 15-16 mins.
7:30am: Once ready, i placed it in a ziploc container to proof.
Name: Min Lim
Date and Time:
Location: Personal Apartment Kitchen
Subject: bread baking (100% ap, loaf #6), bread making (100% whole wheat, loaf #7)
Weather: Sunny, 4°C
Humidity: 63%
After shaping and proofing it for the second time, baked Loaf #6 in the oven -- much flatter w open crumb. Strange - due to poor shaping/deflating or? Went onto create the bread molds and made imperssions after.
| Image URL: |
|---|
 |
Then went onto prepare loaf #7, using the same bread-making method as before. Took awhile longer to knead (~18 mins). Left it to proof once windowpane test passed.
Name: Min Lim
Date and Time:
Location: Personal Apartment Kitchen
Subject: bread baking (100% whole wheat, loaf #7)
Weather: Cloudy, 4°C
Humidity: 63%
Baked loaf #7 - much better rise but again, crumb was much more open and i can’t seem to figure out why.. Took care to properly deflate the loaf this time as well..
| Image URL: |
|---|
 |
As you can see from the interior - much gummier - made the production of bread molds much neater as well.
| Image URL: |
|---|
 |
Name: Min Lim
Date and Time:
Location: M&K Lab (Chandler 260)
Subject: Casting
Weather: Cloudy, 4°C
Humidity: 63%
Loaf #1 (100% AP)
Day baked: 11/27
Day casted: 12/7
Days between baking and casting: 10
Brought seven loaves into the lab for casting today. Using a wooden 50.0cm ruler, I first measured out the dimensions (width and height) of the wax brooches and medallions used, and of their imprints on all my bread molds. I noted any changes in their sizes, and calculated the average amount of shrinkage for each loaf, as well as the average amount of shrinkage for imprints made on the kneaded bread pith, and on the pith that was left as it was. I also recorded the differences in the days between baking and casting the loaves. In this round of casting, I was testing two different aspects of the bread molding recipe: whether the types of flour used affected the shrinking process, and if the number of days between baking and casting (and thus the number of days for the bread to dry out) influenced the extent of shrinkage as well. I have noted this information pertaining to each loaf, in the tables below:
| Image URL: |
|---|
 |
| Slice # | Object | Method | Original Dimensions (cm) | Impression dimensions (cm) |
Amnt of shrinkage (cm) |
|---|---|---|---|---|---|
| 1 | Diamond | Whole slice | 3.0 x 2.7 | 2.8 x 2.5 | 0.2 x 0.2 |
| 2 | Heart | Whole slice | 2.8 x 2.2 | 2.5 x 2.3 | 0.3 x +0.1 |
| 3 | Female | Whole slice | 3.1 x 2.2 | 3.0 x 2.1 | 0.1 x 0.1 |
| 4 | Heart | Pith | 2.8 x 2.2 | 2.2 x 1.8 | 0.6 x 0.4 |
| 5 | Female | Pith | 3.1 x 2.2 | 2.7 x 2.0 | 0.4 x 0.2 |
Avg = 0.32 x 0.16
Slice = 0.2 x 0.07
Pith = 0.5 x 0.3
Loaf #2 (100% AP)
Day baked: 12/4
Day casted: 12/7
Days between baking and casting: 3
| Slice # | Object | Method | Original Dimensions (cm) | Impression dimensions (cm) |
Amnt of shrinkage (cm) |
|---|---|---|---|---|---|
| 1 | Heart | Whole slice | 2.8 x 2.2 | 2.7 x 2.1 | 0.1 x 0.1 |
| 2 | Female | Whole slice | 3.1 x 2.2 | 3.0 x 2.2 | 0.1 x 0.0 |
| 3 | Heart | Pith | 2.8 x 2.2 | 2.7 x 2.1 | 0.1 x 0.1 |
| 4 | Female | Pith | 3.1 x 2.2 | 3.0 x 2.2 | 0.1 x 0.0 |
| 5 | Diamond | Pith | 3.0 x 2.7 | 2.9 x 2.6 | 0.1 x 0.1 |
Avg = 0.10 x 0.06
Slice = 0.1 x 0.05
Pith = 0.1 x 0.07
Loaf #3 (50% ww, 50% rye)
Day baked: 11/29
Day casted: 12/7
Days between baking and casting: 8
| Slice # | Object | Method | Original Dimensions (cm) | Impression dimensions (cm) |
Amnt of shrinkage (cm) |
|---|---|---|---|---|---|
| 1 | Diamond | Whole Slice | 3.0 x 2.7 | 3.0 x 2.4 | 0.0 x 0.3 |
| 2 | Heart | Whole slice | 2.8 x 2.2 | 2.8 x 2.2 | 0.0 x 0.0 |
| 3 | Diamond | Whole slice | 3.0 x 2.7 | 3.0 x 2.5 | 0.0 x 0.2 |
| 4 | Female | Whole slice | 3.1 x 2.2 | 3.0 x 2.2 | 0.1 x 0.0 |
| 5 | Diamond | Pith | 3.0 x 2.7 | 2.5 x 2.2 | 0.5 x 0.5 |
| 6 | Female | Pith | 3.1 x 2.2 | 2.7 x 2.2 | 0.4 x 0.0 |
| 7 | Heart | Pith | 2.8 x 2.2 | 2.5 x 2.2 | 0.3 x 0.0 |
Avg = 0.19 x 0.14
Slice = 0.03 x 0.125
Pith = 0.4 x 0.17
Loaf #4 (50% ap, 50% rye)
Day baked: 11/27
Day casted: 12/7
Days between baking and casting: 10
| Slice # | Object | Method | Original Dimensions (cm) | Impression dimensions (cm) |
Casted object dimensions (cm) |
|---|---|---|---|---|---|
| 1 | Heart | Whole slice | 2.8 x 2.2 | 2.5 x 2.0 | 0.3 x 0.2 |
| 2 | Diamond | Whole slice | 3.0 x 2.7 | 2.6 x 2.4 | 0.4 x 0.3 |
| 3 | Diamond | Whole slice | 3.0 x 2.7 | 3.0 x 2.2 | 0.0 x 0.5 |
| 4 | Female | Whole slice | 3.1 x 2.2 | 2.6 x 1.9 | 0.5 x 0.3 |
| 5 | Diamond | Pith | 3.0 x 2.7 | 2.8 x 2.3 | 0.2 x 0.4 |
| 6 | Heart | Pith | 2.8 x 2.2 | 2.5 x 1.8 | 0.3 x 0.4 |
| 7 | Female | Pith | 3.1 x 2.2 | 3.0 x 2.2 | 0.1 x 0.0 |
Avg = 0.26 x 0.29
Slice = 0.3 x 0.325
Pith = 0.2 x 0.27
Loaf #5 (100% ww)
Day baked: 11/28
Day casted: 12/7
Days between baking and casting: 9
| Slice # | Object | Method | Original Dimensions (cm) | Impression dimensions (cm) |
Casted object dimensions (cm) |
|---|---|---|---|---|---|
| 1 | Female | Whole slice | 3.1 x 2.2 | 2.9 x 2.2 | 0.2 0.0 |
| 2 | Diamond | Whole slice | 3.0 x 2.7 | 2.7 x 2.4 | 0.3 0.3 |
| 3 | Heart | Whole slice | 2.8 x 2.2 | 2.7 x 2.1 | 0.1 0.1 |
| 4 | Female | Pith | 3.1 x 2.2 | 2.8 x 2.1 | 0.3 0.1 |
| 5 | Heart | Pith | 2.8 x 2.2 | 2.7 x 2.2 | 0.1 0.1 |
| 6 | Medallion #1 | Pith | - | 3.0 x 2.1 | - |
| 7 | Medallion #2 | Pith | - | 3.0 x 3.0 | - |
Avg = 0.2 x 0.12
Slice = 0.2 x 0.13
Pith = 0.2 x 0.10
Loaf #6 (100% ww)
Day baked: 12/5
Day casted: 12/7
Days between baking and casting: 3
| Slice # | Object | Method | Original Dimensions (cm) | Impression dimensions (cm) |
Casted object dimensions (cm) |
|---|---|---|---|---|---|
| 1 | Female | Whole slice | 3.1 x 2.2 | 2.8 x 2.2 | 0.3 x 0.0 |
| 2 | Diamond | Whole slice | 3.0 x 2.7 | 3.0 x 2.7 | 0.0 x 0.0 |
| 3 | Heart | Whole slice | 2.8 x 2.2 | 2.8 x 2.2 | 0.0 x 0.0 |
| 4 | Diamond | Whole slice | 3.0 x 2.7 | 3.0 x 2.7 | 0.0 x 0.0 |
| 5 | Diamond | Pith | 3.0 x 2.7 | 3.0 x 2.7 | 0.0 x 0.0 |
| 6 | Diamond | Pith | 3.0 x 2.7 | 3.0 x 2.7 | 0.0 x 0.0 |
| 7 | Female | Pith | 3.1 x 2.2 | 3.1 x 2.2 | 0.0 x 0.0 |
Avg = 0.04 x 0.0
Slice = 0.1 x 0.0
Pith = 0.0 x 0.0
Loaf #7 (100% rye)
Day baked: 12/5
Day casted: 12/7
Days between baking and casting: 3
| Slice # | Object | Method | Original Dimensions (cm) | Impression dimensions (cm) |
Casted object dimensions (cm) |
|---|---|---|---|---|---|
| 1 | Female | Whole slice | 3.1 x 2.2 | 3.0 x 2.2 | 0.1 x 0.0 |
| 2 | Diamond | Whole slice | 3.0 x 2.7 | 3.0 x 2.7 | 0.0 x 0.0 |
| 3 | Heart | Whole slice | 2.8 x 2.2 | 2.8 x 2.1 | 0.0 x 0.1 |
| 4 | Diamond | Whole slice | 3.0 x 2.7 | 3.0 x 2.7 | 0.0 x 0.0 |
| 5 | Female | Pith | 3.1 x 2.2 | 3.1 x 2.2 | 0.0 x 0.0 |
| 6 | Heart | Pith | 2.8 x 2.2 | 2.8 x 2.2 | 0.0 x 0.0 |
| 7 | Diamond | Pith | 3.0 x 2.7 | 3.0 x 2.7 | 0.0 x 0.0 |
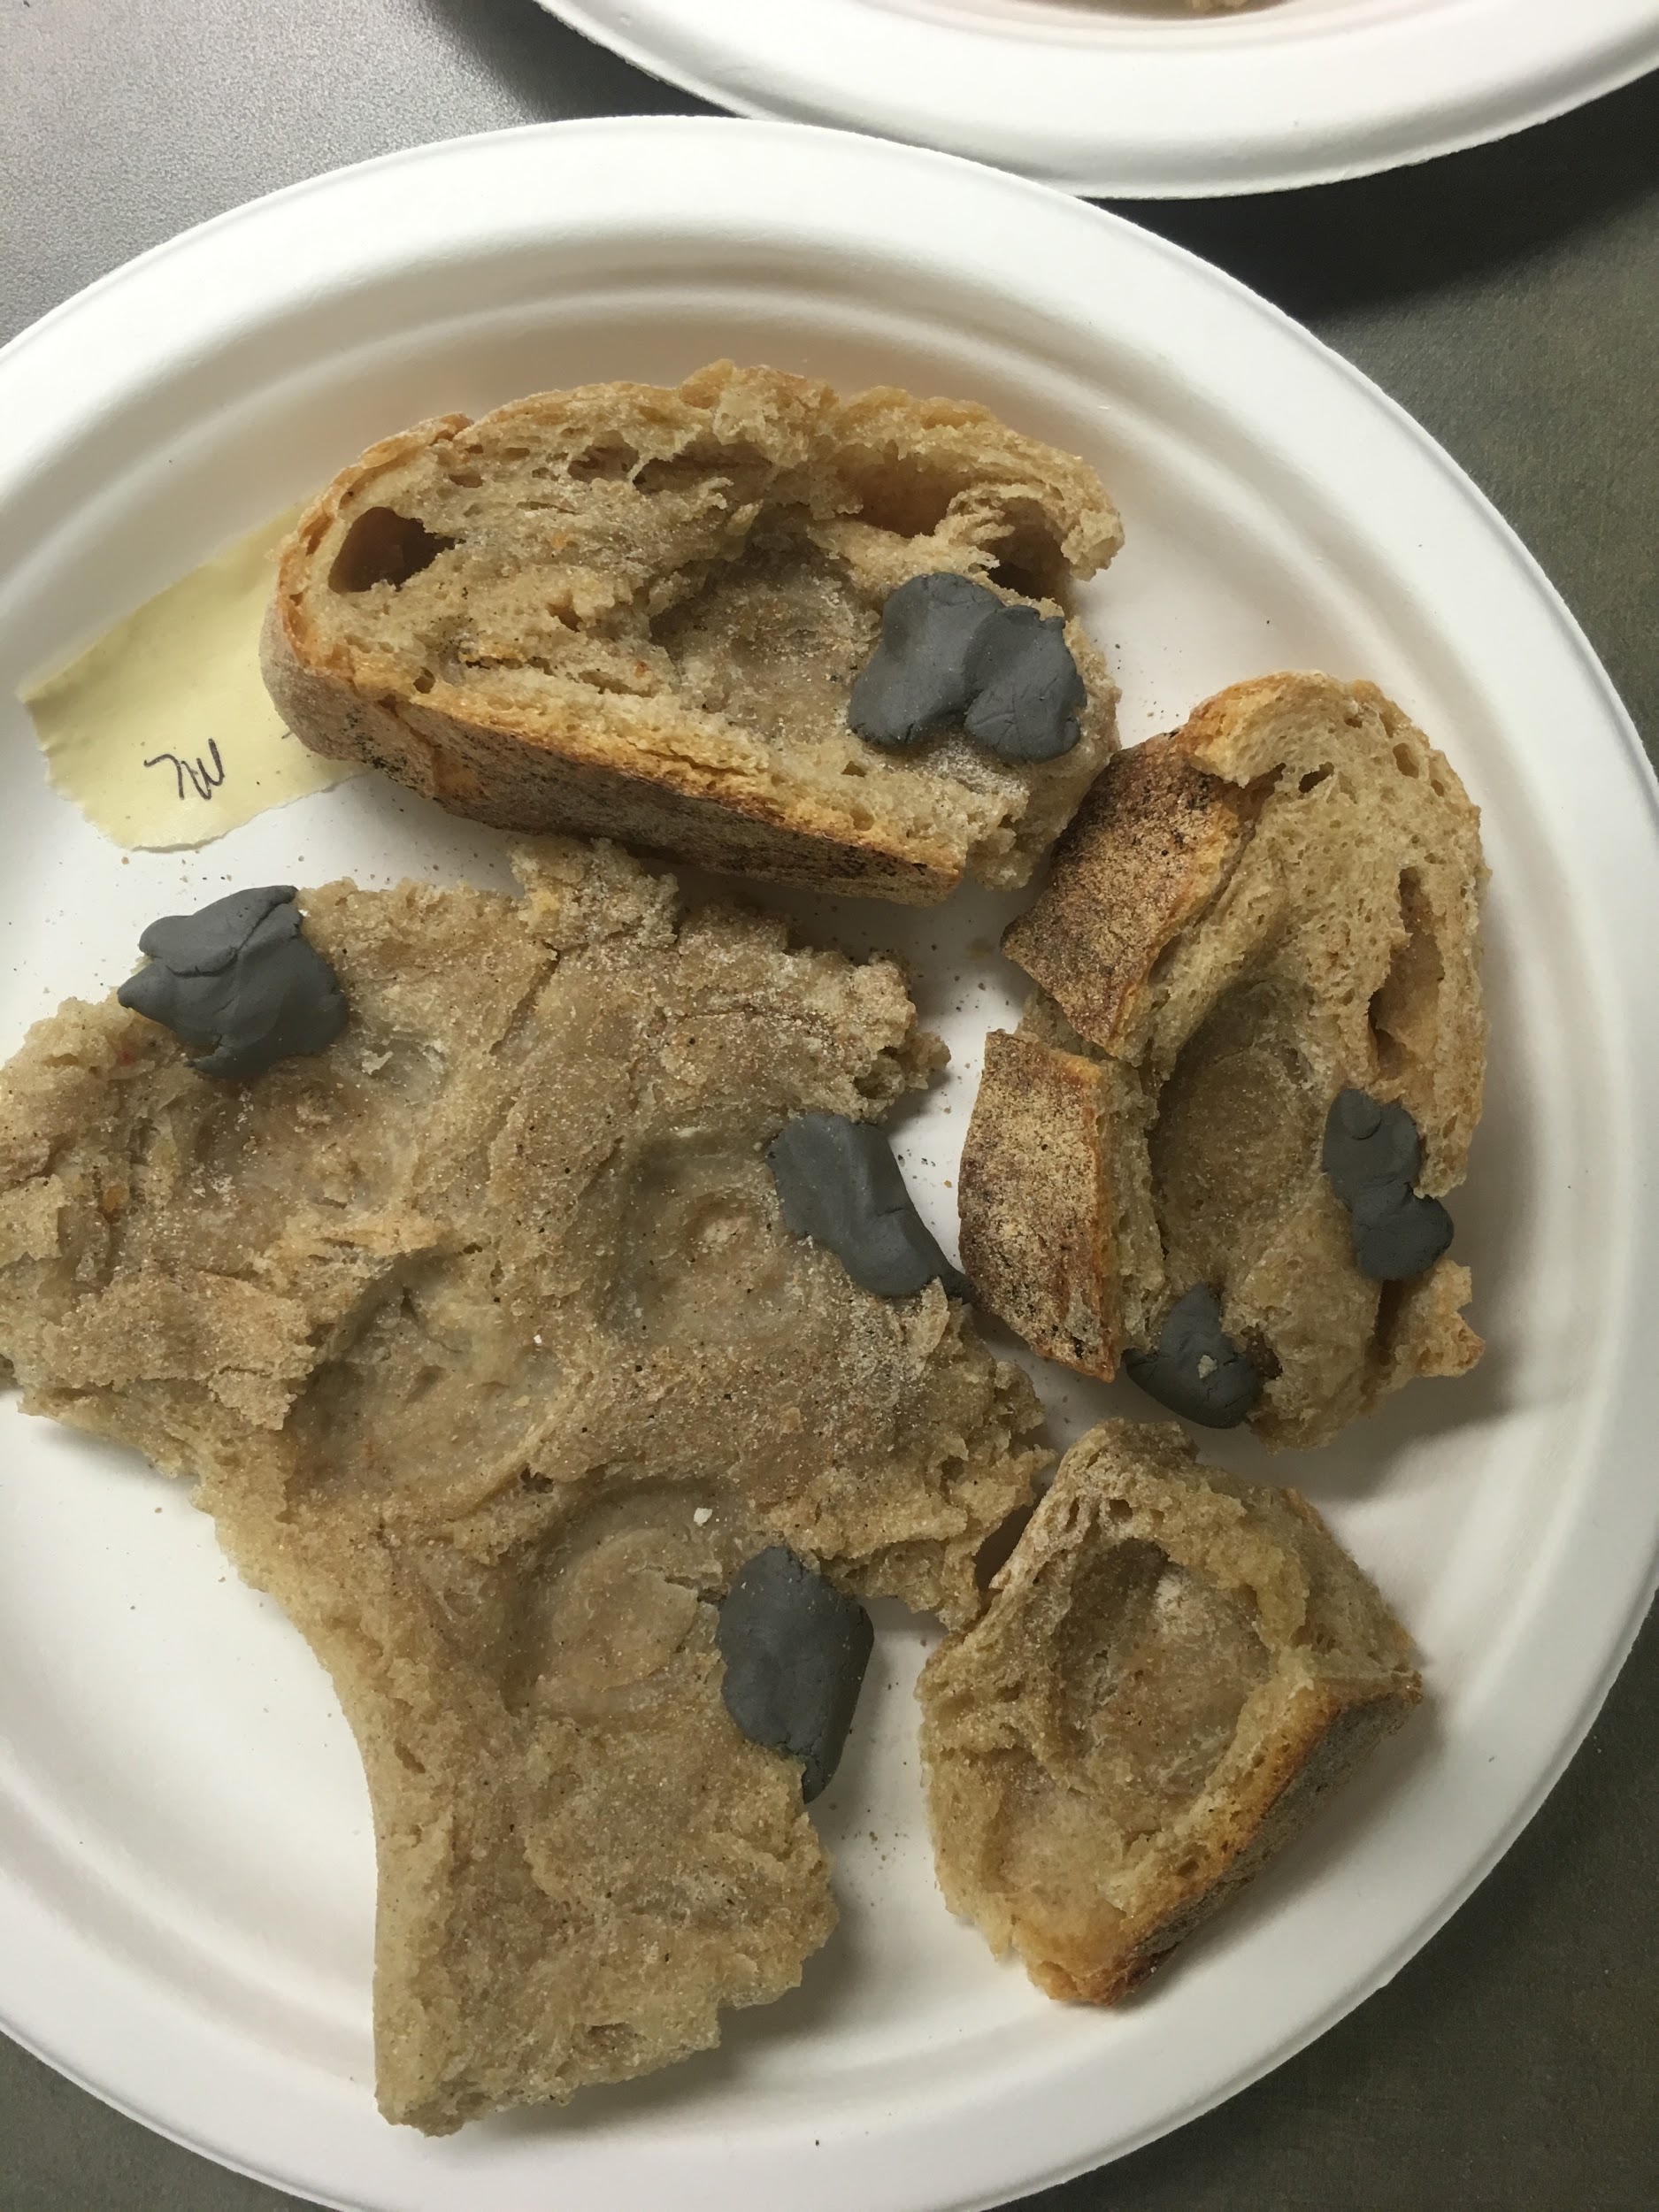
After which, I started preparing my bread molds for casting. Using clay, I began patching up any cracks in the mold which might cause the sulfur to leak through.
| Image URL: |
|---|
 |
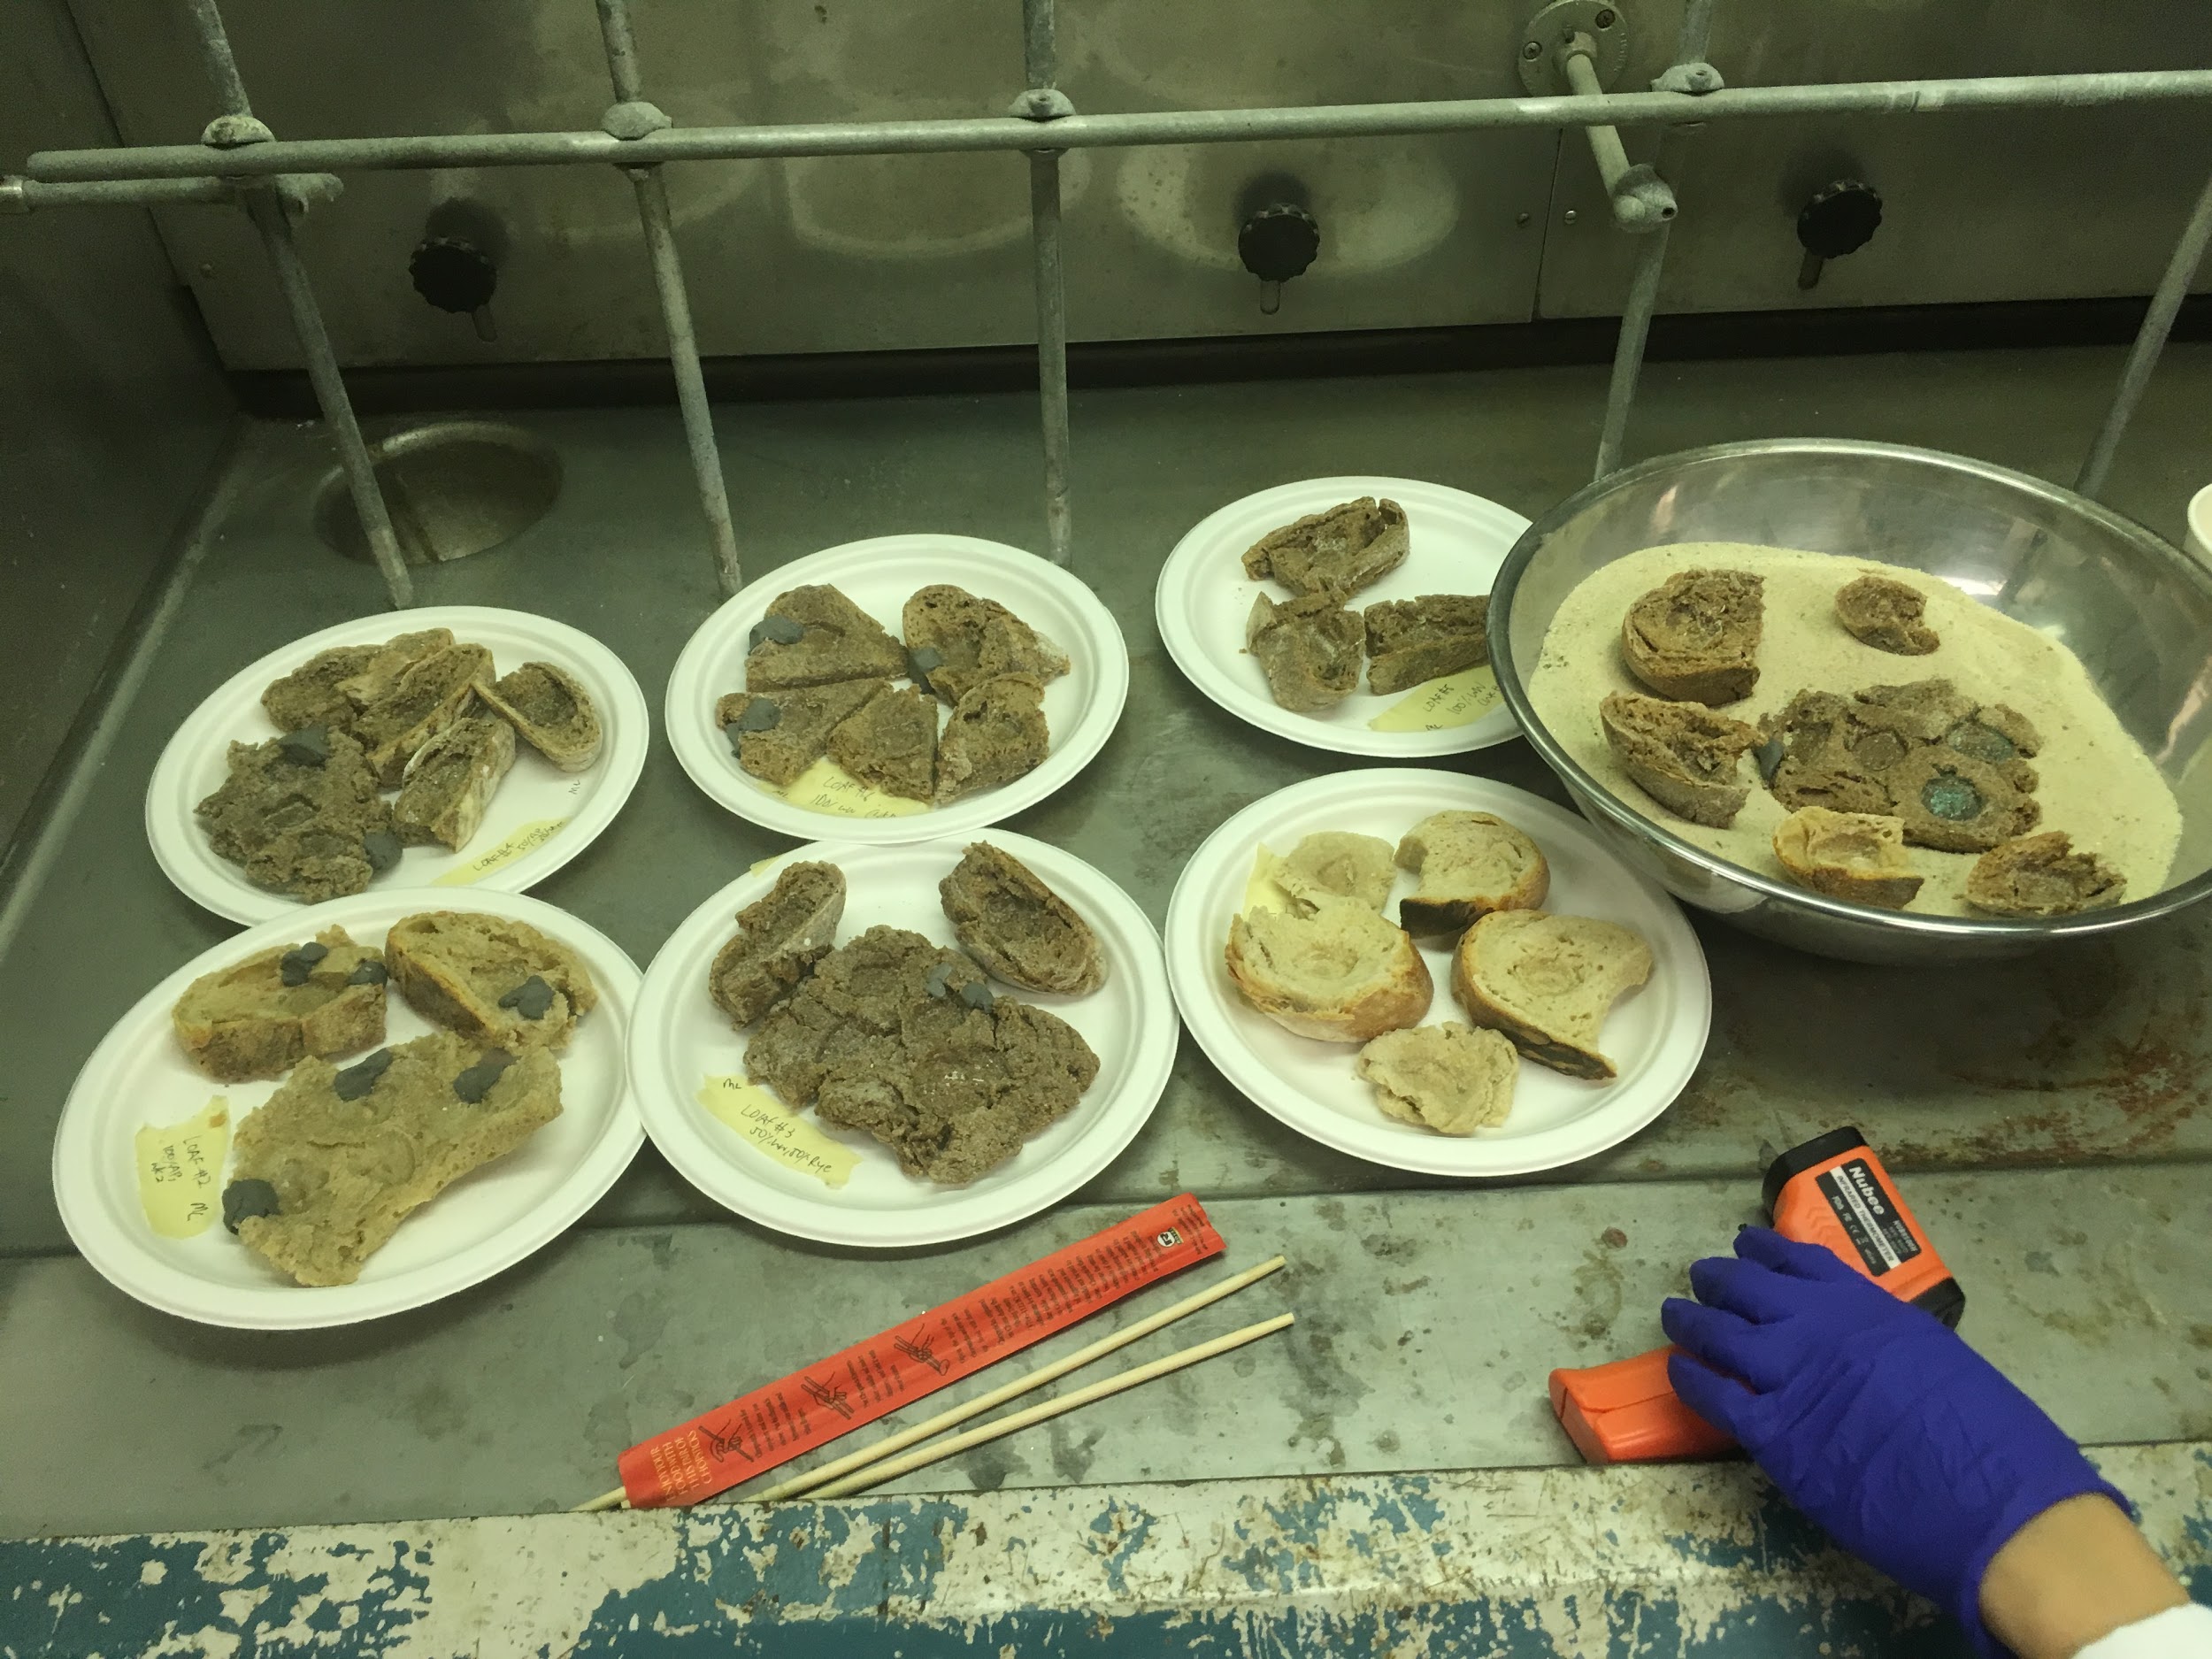
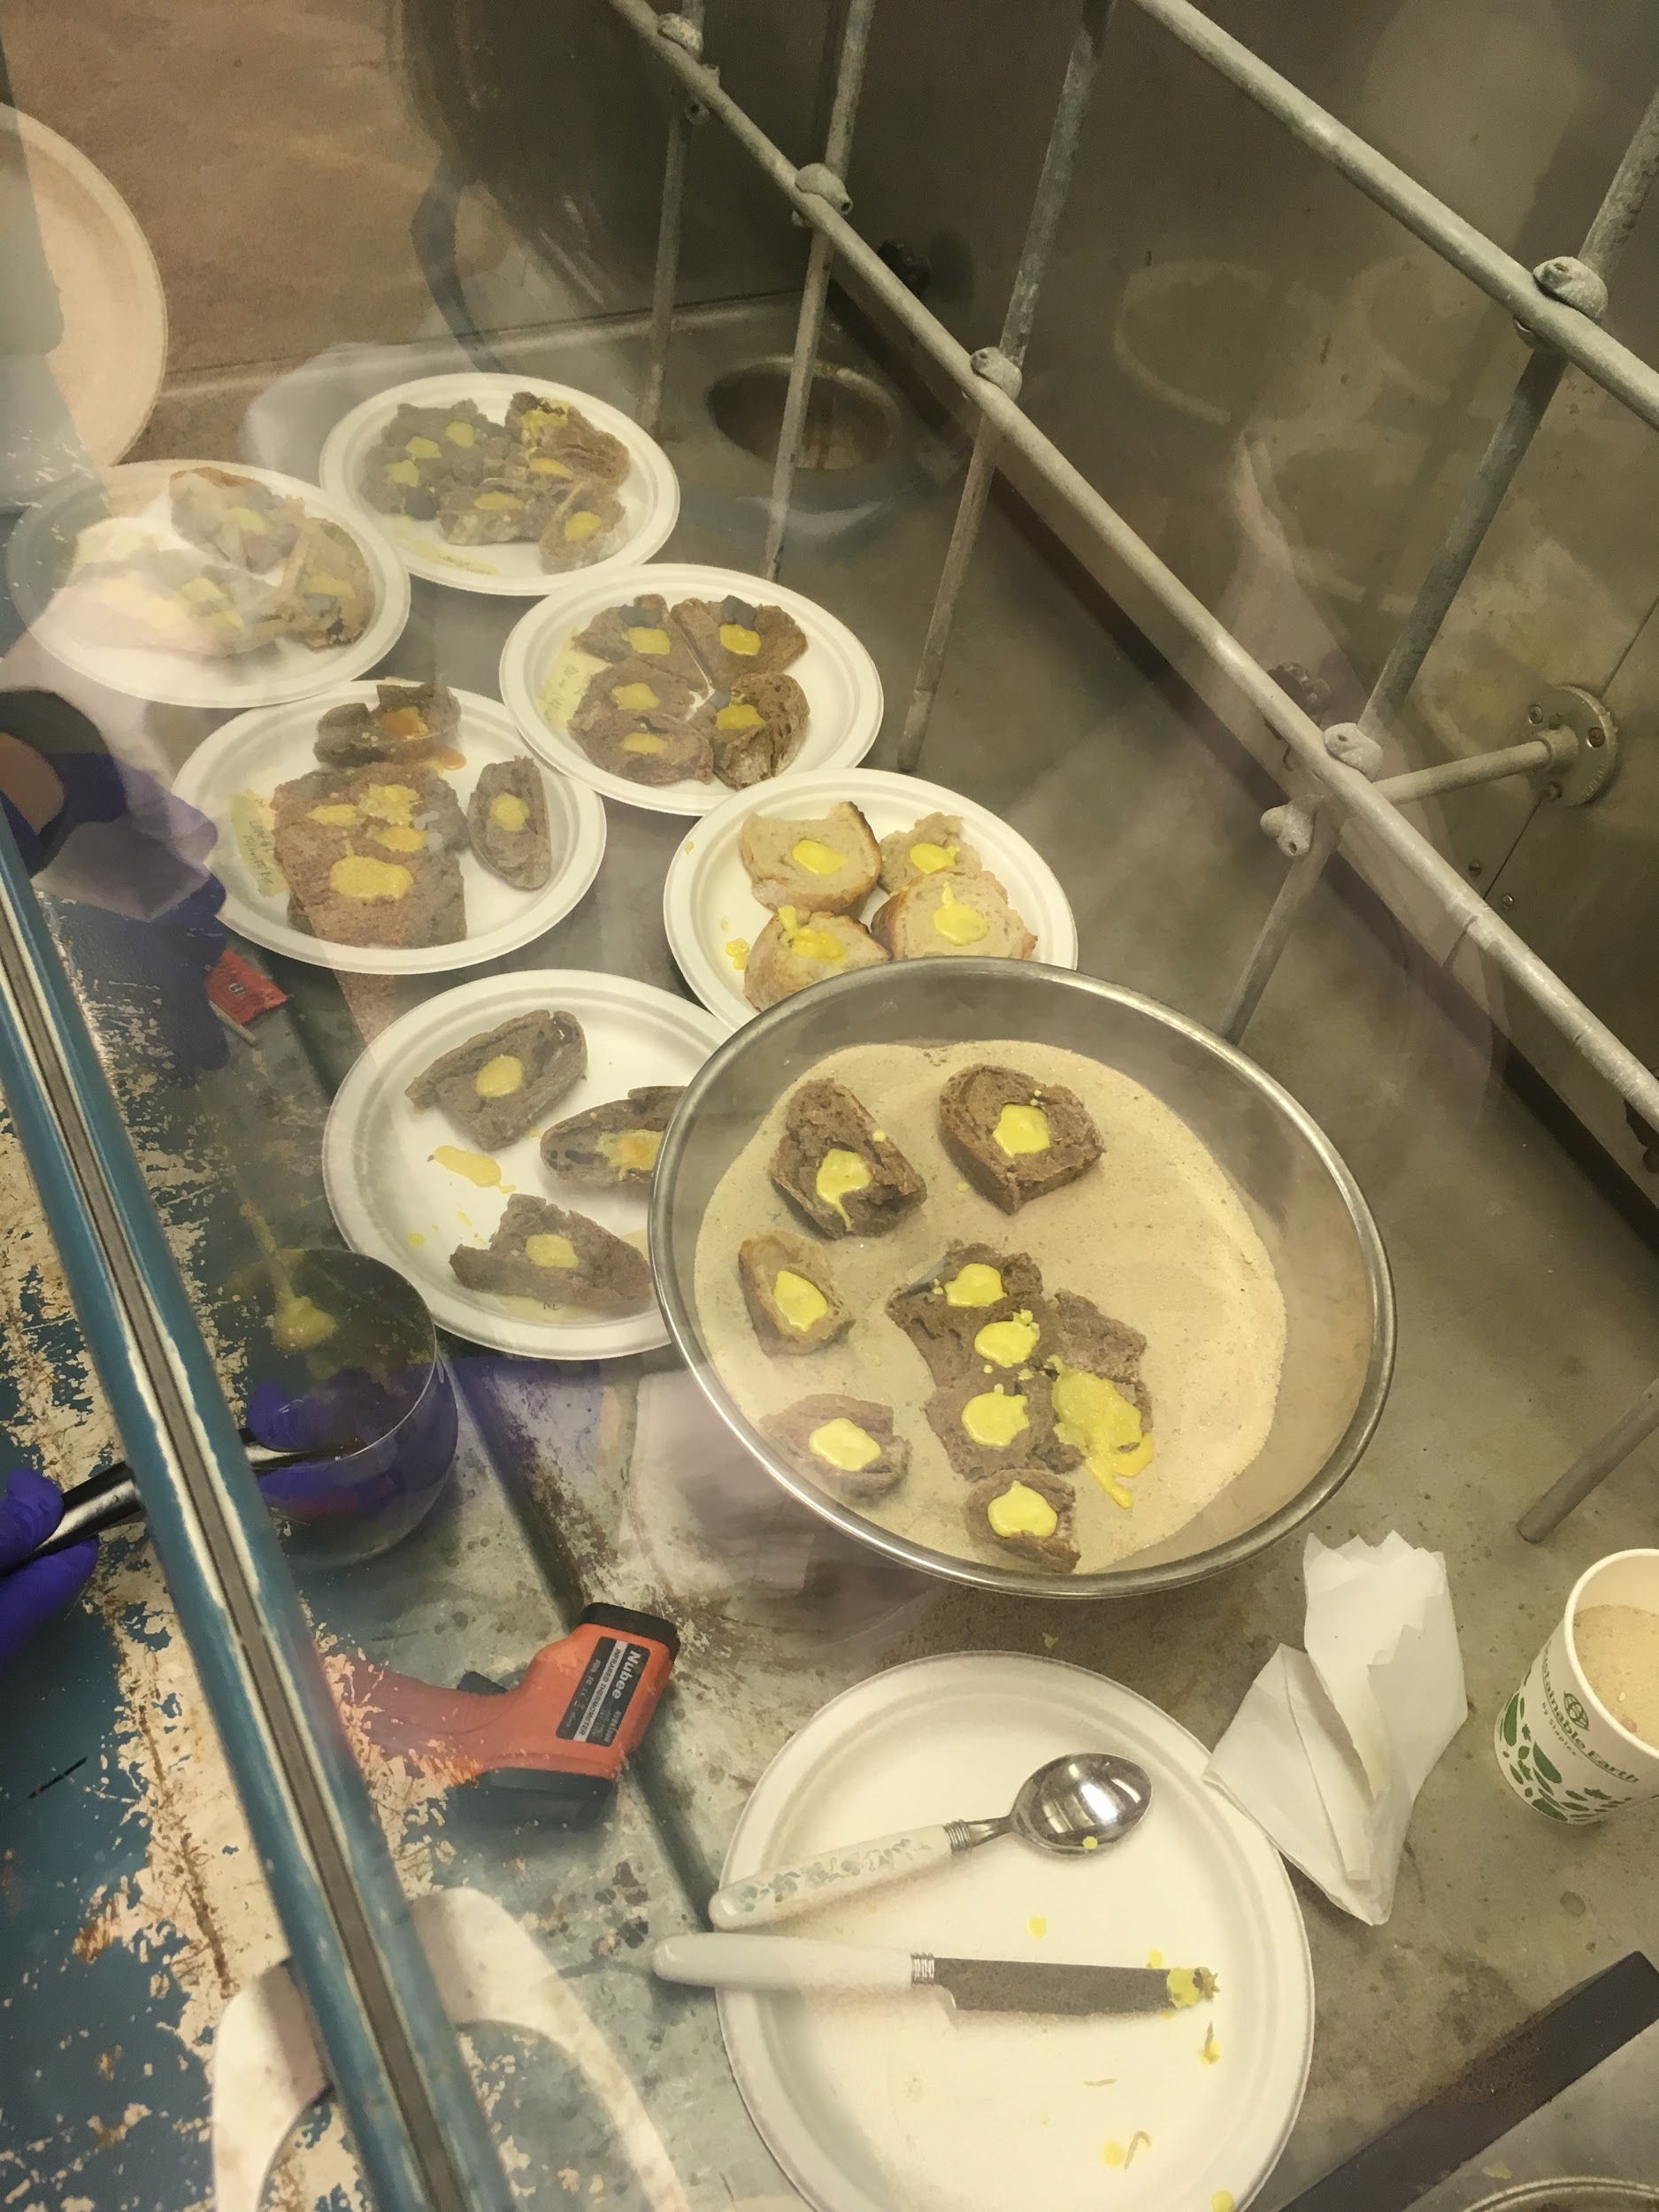
With the help and supervision of Tianna Uchacz, I then began melting the sulfur to cast into the bread molds. I first did a safety check – fire blankets in place, wore safety gear such as lab coat and gloves. I then set up my work station in the fumehood. I first placed bread molds from each loaf onto different disposable paper plates, and labelled them according to the number of days between baking and casting, as well as the flour ratio used. I placed these paper plates in the fumehood as close to me as possible so that I didn’t have to stretch across to pour the melted sulfur into the molds. I also placed the molds that weren’t able to stand upright onto a bowl filled with sand, so that they stabilized. I then placed a portable mini stove with a pot (which already had some solidified sulfur on it from last use) onto the work table, and used a metal spoon to scoop 4 heaping spoonfuls of sulfur powder into the pot. I then stored the spoon and bag of sulfur powder away to clear space. After making sure my workplace was settled and running through the motions of how I was going to cast my objects, I turned the stove onto ‘1’ and began melting the sulfur, stirring with a wooden disposable chopstick to homogenize the heating of the sulfur. In intervals of 2-3 minutes, I also took the temperature of the sulfur powder using a thermometer gun to ensure that the sulfur does not reach flash point.
| Image URL: |
|---|
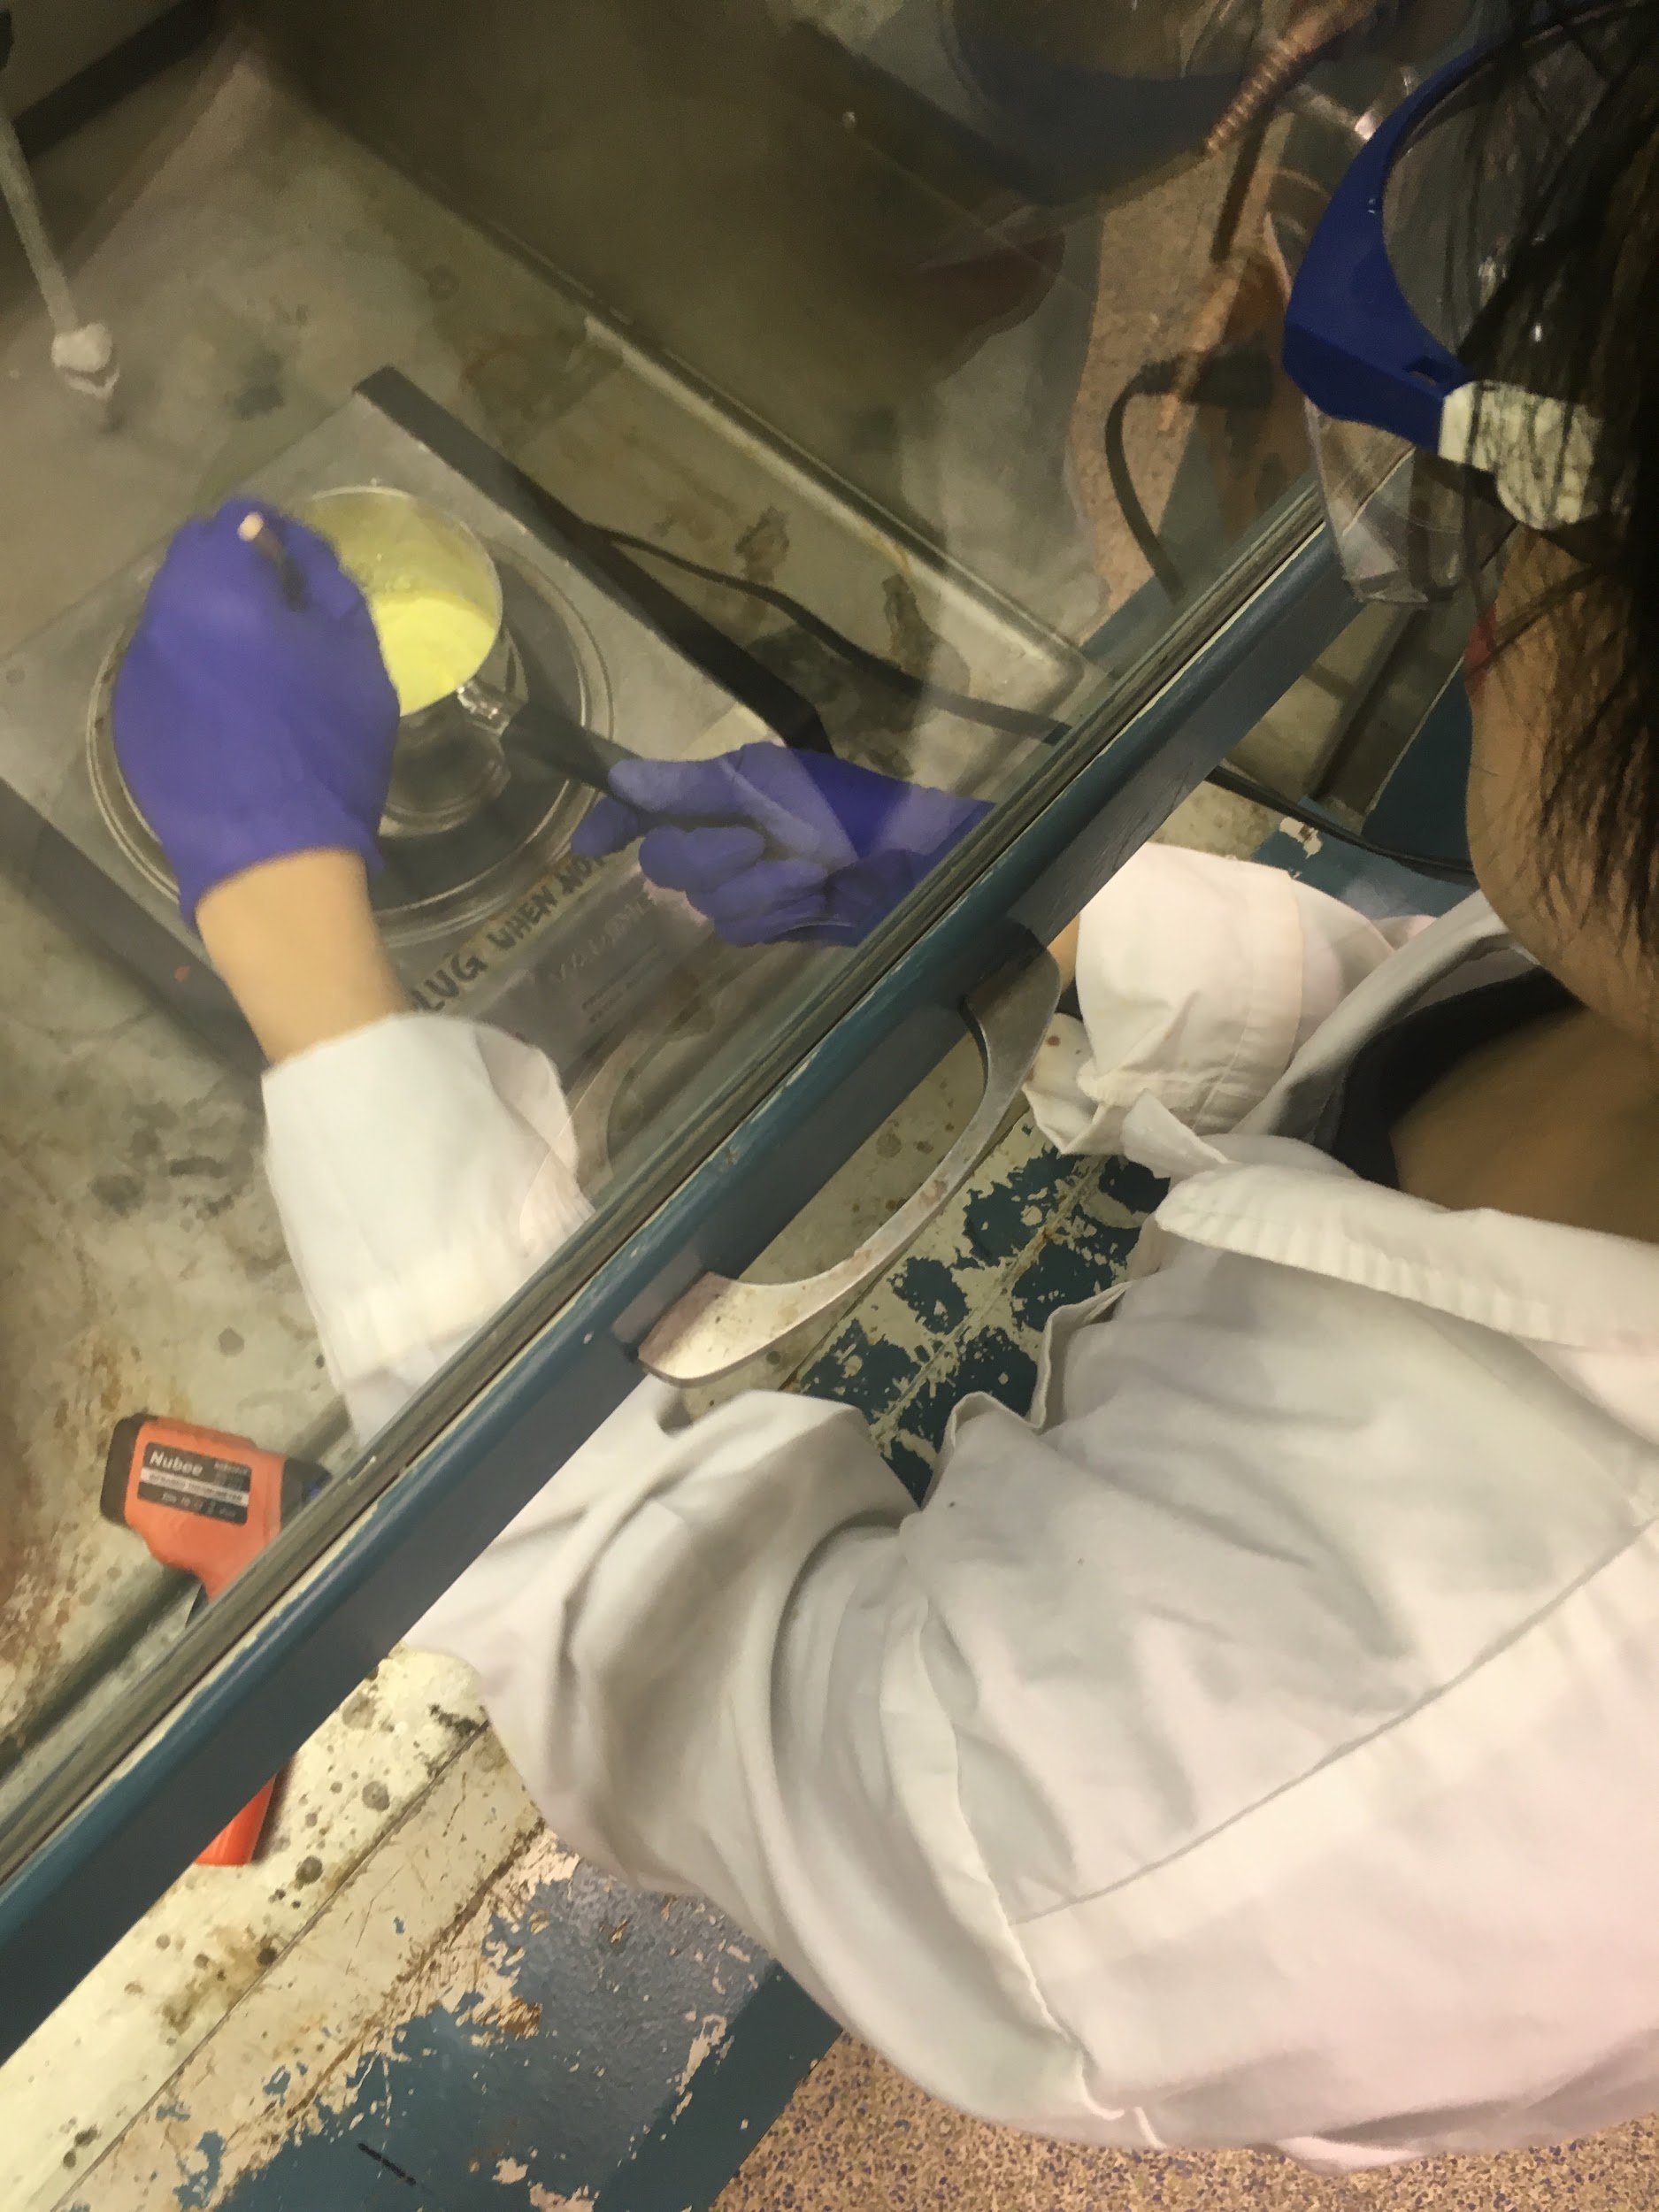 |
Perhaps I was slightly afraid of melting sulfur beyond flash point, but I kept the stove setting to ‘1’, which led to an extremely slow melting process. 20 minutes later, the solid sulfur powder finally grew molten, and melted into a clear, transparent, yellow liquid. I took the sulfur off the heat and began pouring it into my bread molds. 2 loaves after, the sulfur began to solidify once again, which led to quite a bit of solid sulfur collected around the rim of the pot. I put it back on the heat and added 2 more heaping spoonfuls of sulfur into the pot, as I felt that my current amount would not be enough for all my bread molds. Tianna then helpfully scraped down the solid sulfur around the sides of the pot as well to prevent it from dripping onto the stove (and igniting!). Given the speed that the sulfur solidified the first time, I decided to turn up the stove to number 2 setting and leave the pot on the stove for 1-2 minutes after the sulfur reaches liquid form. This was to prevent it from solidifying too quickly. 25 minutes later, the sulfur finally melted. I turned the stove off and poured the melted sulfur into my casts. I realize that the imprints of the metal medallions were shallower than ones imprinted with my wax brooches, and tended to have the sulfur spill out. After filling all my molds with sulfur, I unplugged the hot stove and left it to cool alongside the pot, which I placed beside. I also left the sulfur to solidify in the molds for 15 minutes, before transferring them into a separate fumehood and labelling them.
| Image URL: |
|---|
 |
Name: Min Lim
Date and Time:
Location: Personal Apartment Kitchen
Subject: Making loaves (for drying out - test shrinkage)
Weather: Cloudy, 4°C
Humidity: 63%
Following the results of my first attempt, I was curious to test out what the author-practitioner meant by “bread reheated twice in the oven is better”, as with bread fresh from the oven. I thus decided to bake my bread the day of casting, which means preparing the dough the night before. I decided to make a loaf of 100% all-purpose flour and 100% whole wheat flour to test the differences in flour again, and to get more consistent results (if two loaves of different types shrink — this would provide a greater confirmation of the reheating effect). I followed through with the usual recipe and let the dough ferment overnight.
Made 100% ap loaf and 100% ww loaf for testing shrinkage
Problems with sd starter for the past few days -- not super vigorous so schedule got pushed back
Also wanted to test it freshly baked tmr to “cast it as it is” before it dries
Name: Min Lim
Date and Time:
Location: Personal Apartment Kitchen
Subject: Baking loaves
Weather: Sunny, 3°C
Humidity: 55%
I followed through the baking process with the usual recipe for both loaves. I prepared two designs to use (“Diamond” and “Heart”) for the imprint. When the loaves came out of the oven, I sliced them into half.
| Image URL: |
|---|
 |
| Image URL: |
|---|
 |
Half of which I extracted the bread pith and kneaded it with a rolling pin before slicing it into fours, and half of which I just sliced it into quarters and left it as it is.
| Image URL: |
|---|
 |
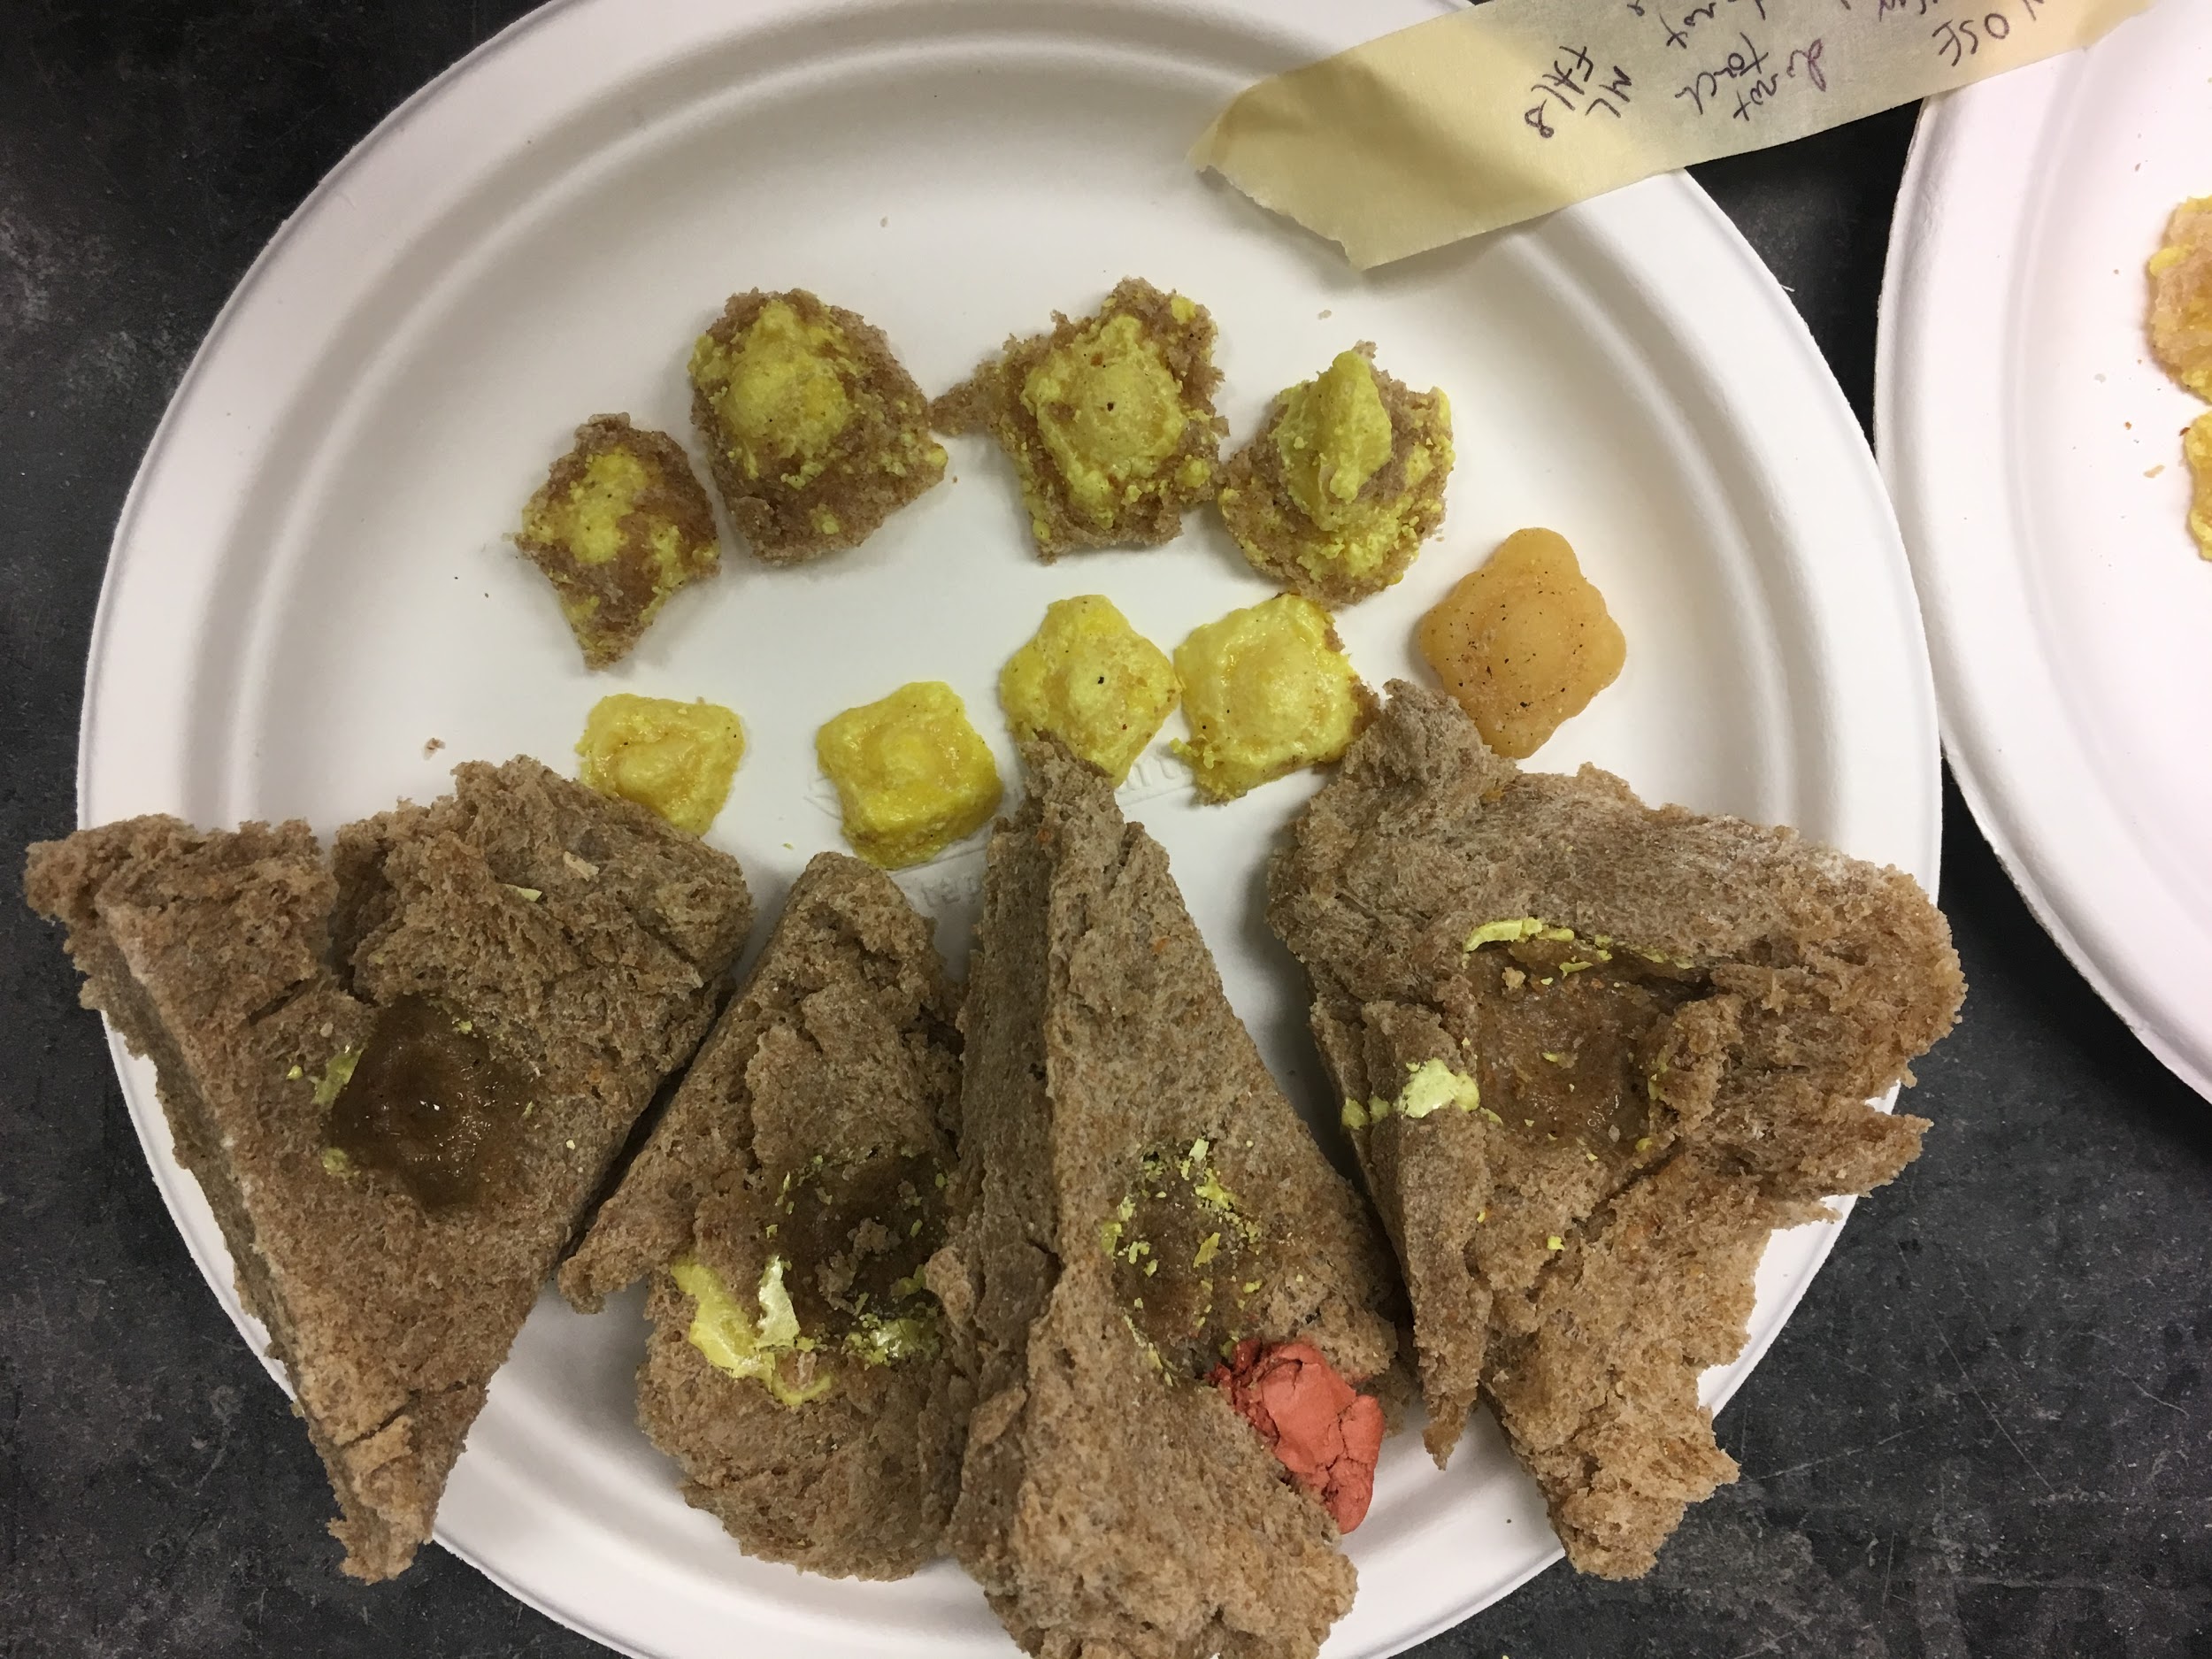
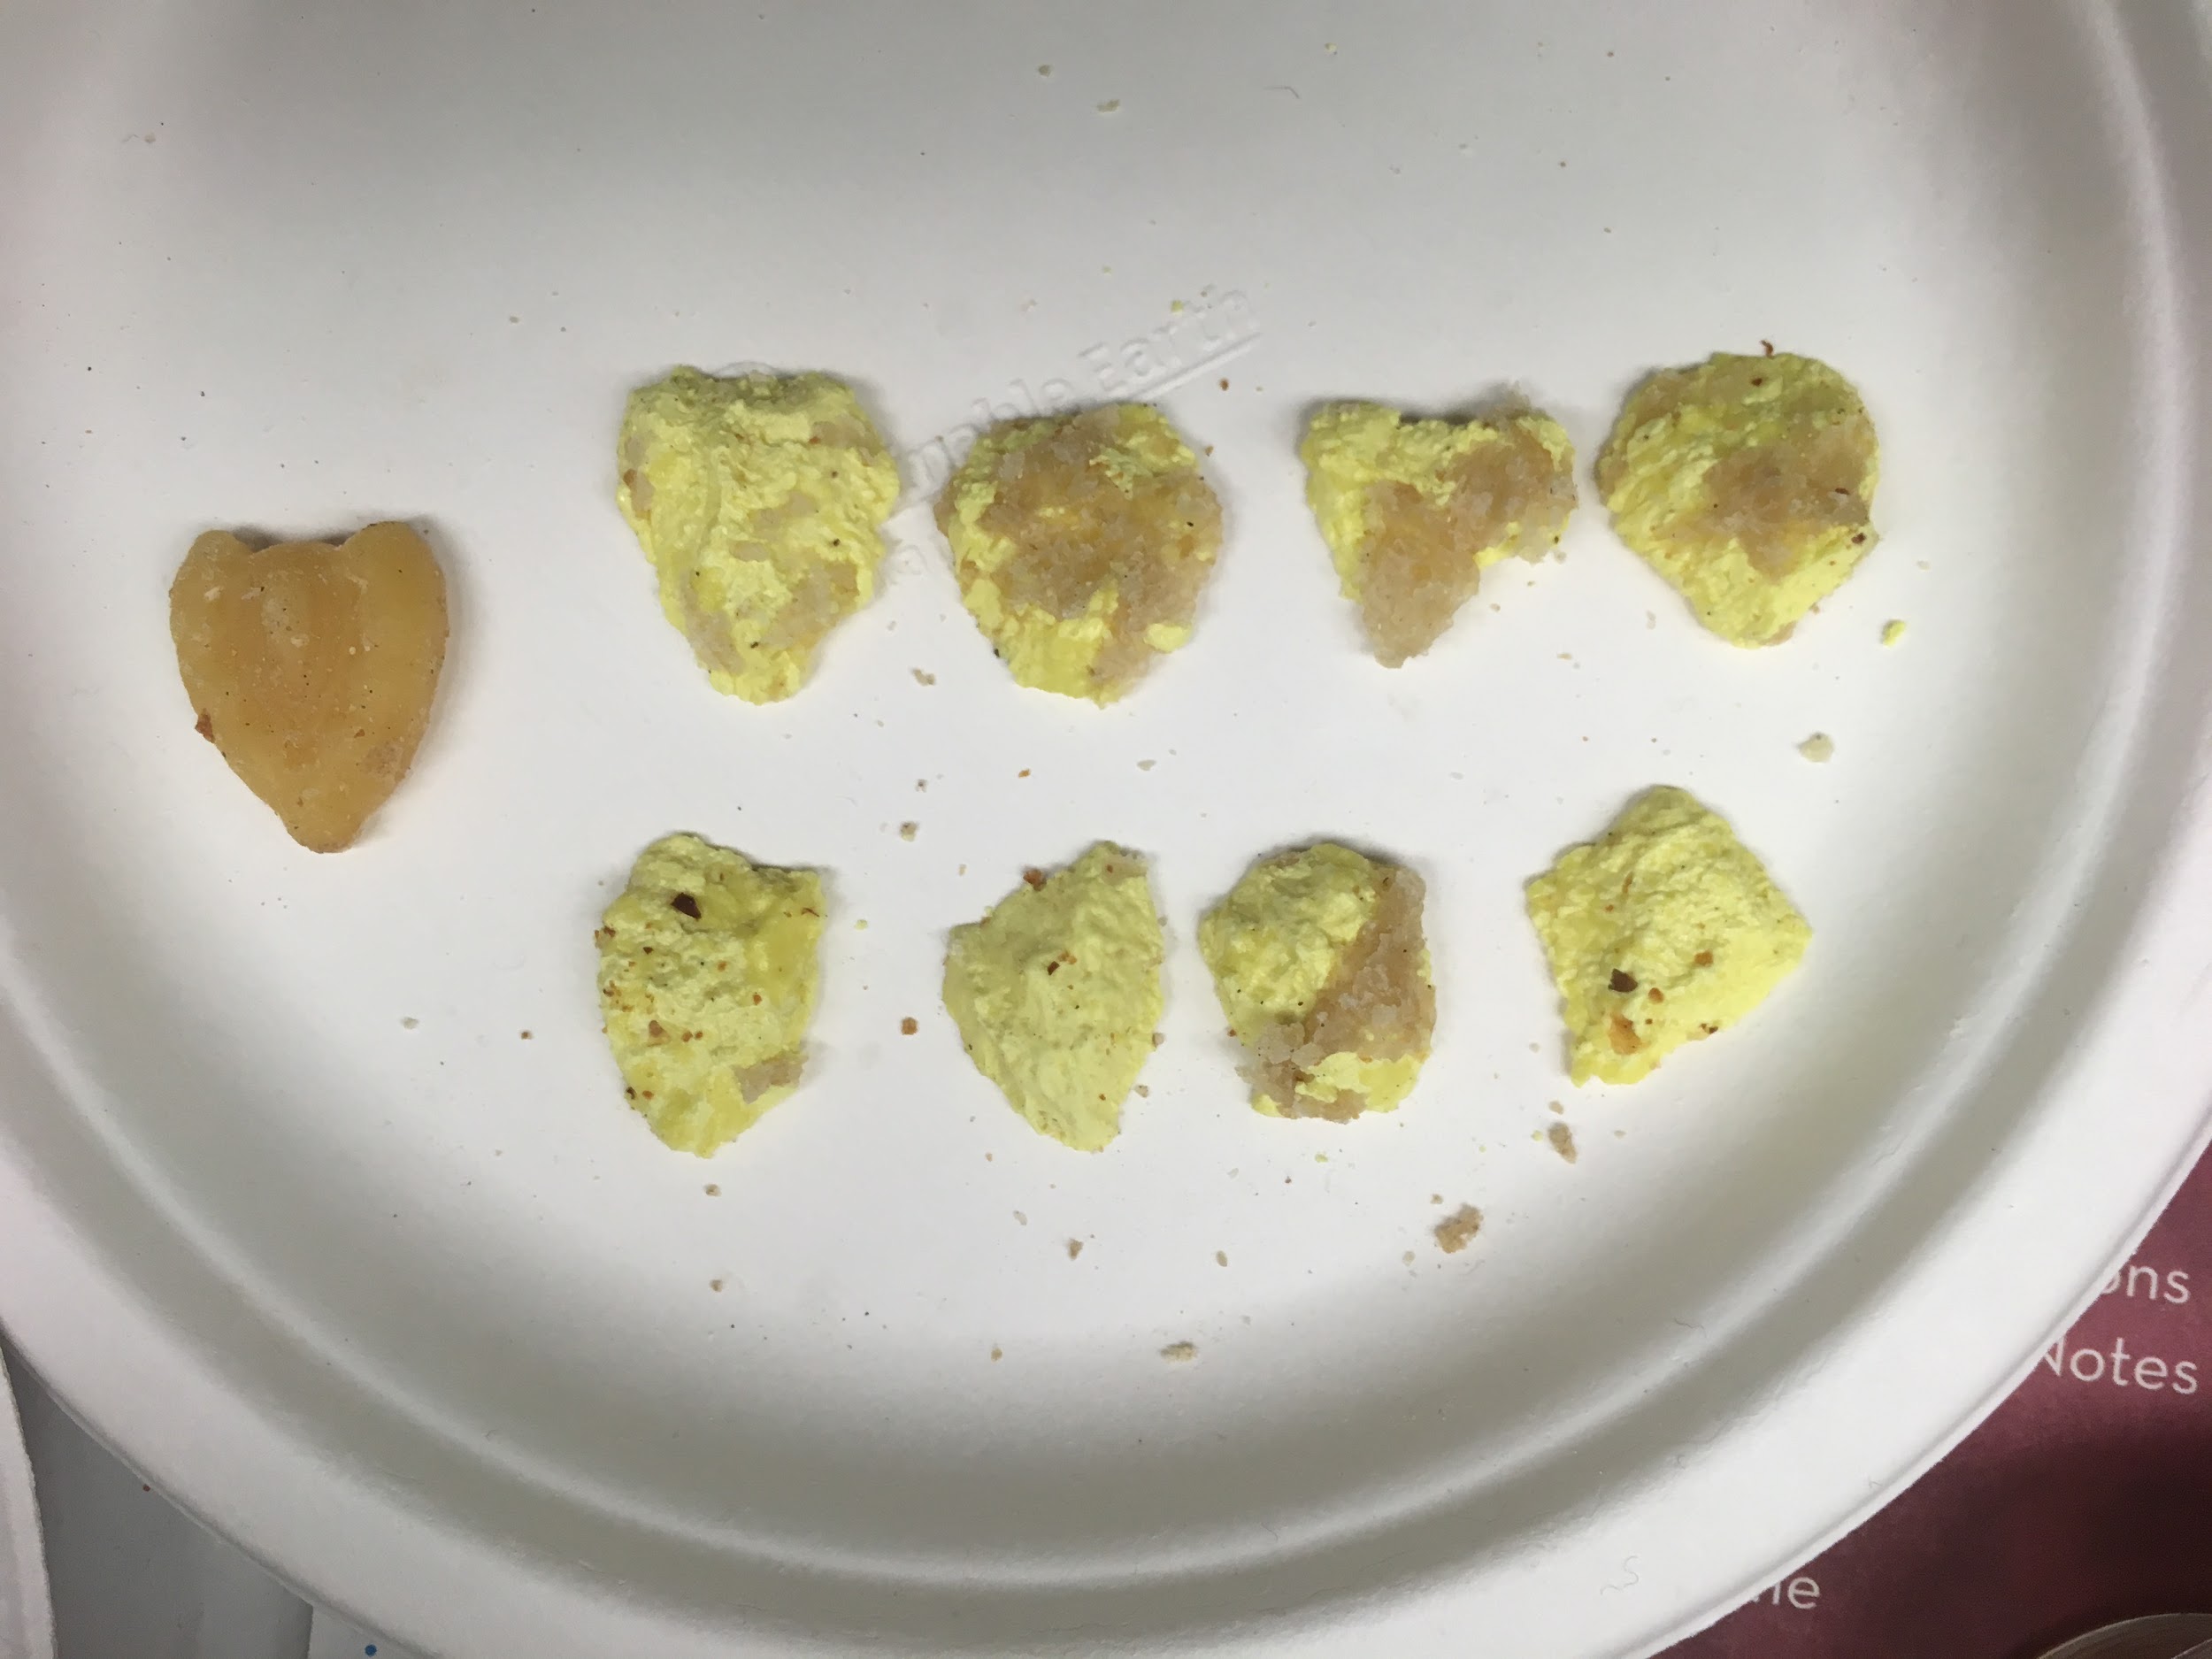
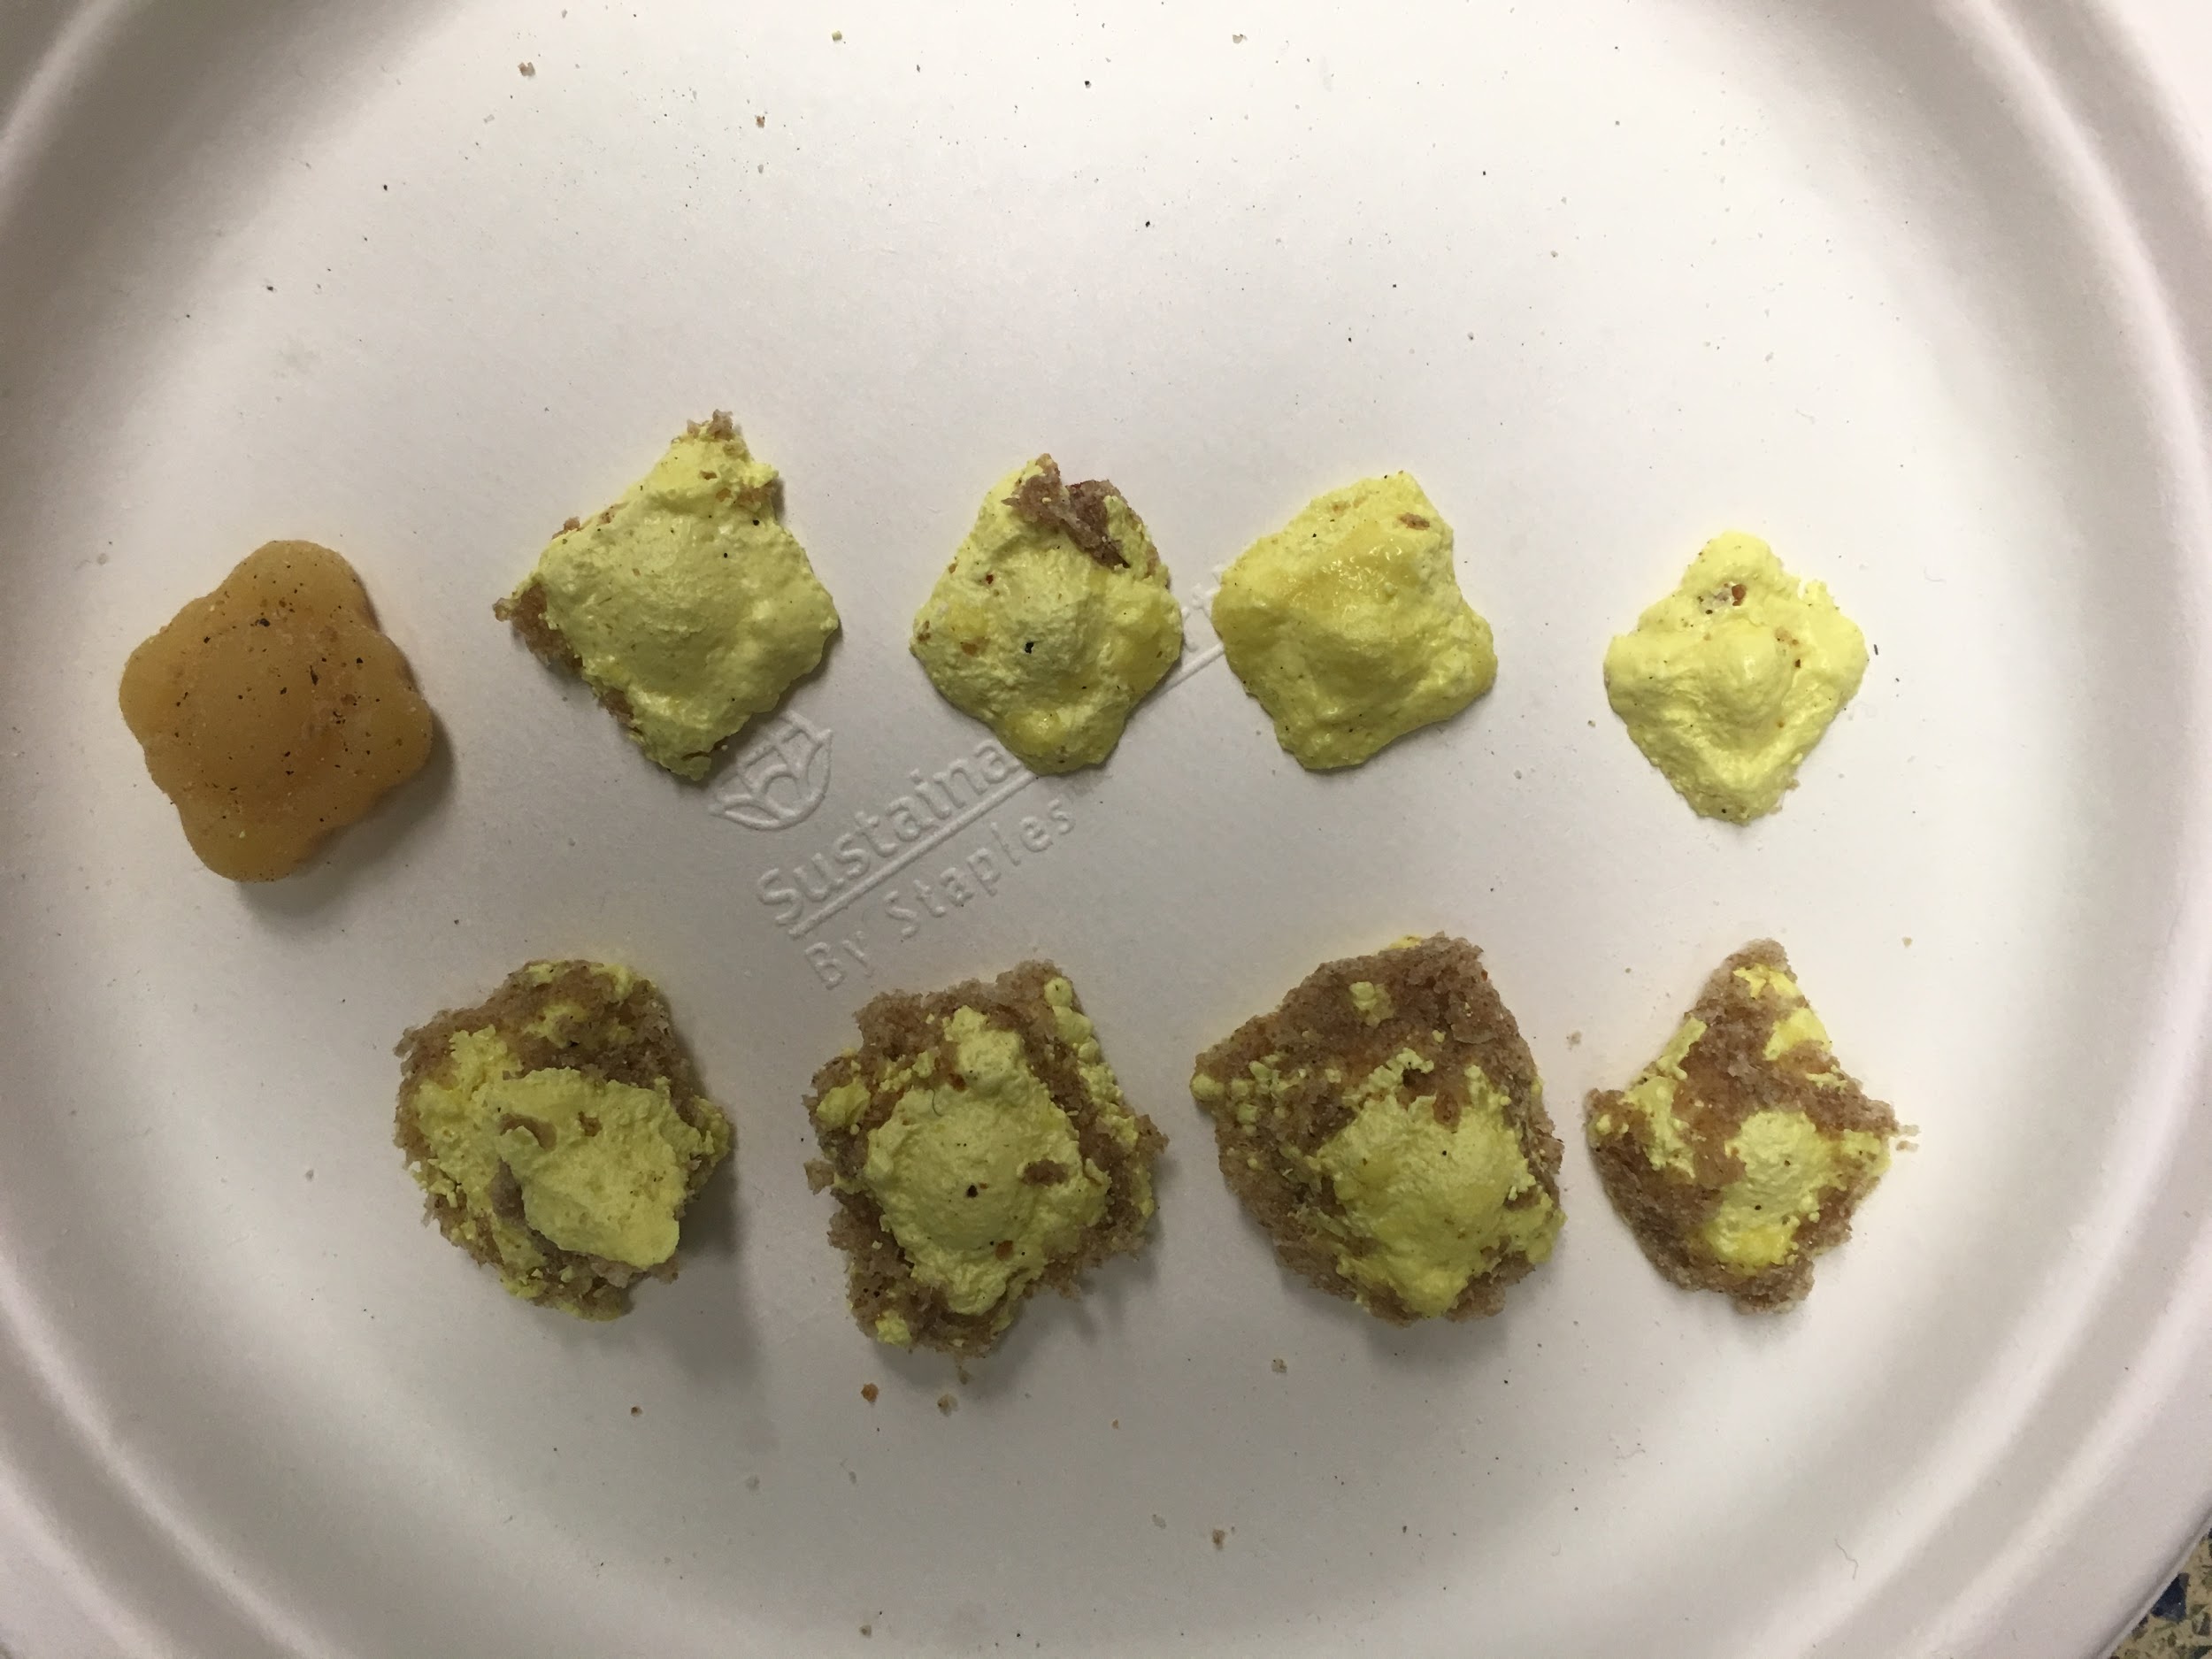
I then immediately pressed the Heart brooch design onto the eight bread molds from the 100% all-purpose flour, and Diamond design for bread molds from the 100% whole wheat flour. The design was impressed easily enough for ones kneaded with the bread pith, but the bread slices (especially with the all-purpose) sprung back easily and did not leave much of an impression, even when pressure was placed onto it. The wax brooches also started melting a little due to the use of beeswax and the heat of the bread. In retrospect, I would have probably casted them in another material that might have been harder to work with, but would not have had such a low melting point.
| Image URL: |
|---|
 |
Once all bread molds had the general shape and impression of the brooches, such that at least the dimensions of the design were captured in the imprints, I then placed them into the oven. I saved one imprint made from the kneaded bread pith and one imprint made from the unkneaded pith of each loaf to act as a control, and placed the rest in the oven. I took one kneaded and one unkneaded bread mold out in intervals of 20-25 minutes. This was an arbitrary number, but generally did so once I could see visible shrinkage, and for the last two slices, I left it in there for as long as I could to see if the shrinking would’ve plateaued at a certain point.
Impressions did visibly shrink! Ones on bread molds made from the all-purpose flour in fact shrunk so much that some of the details were lost and could not be casted/were extremely shallow. Ones with bread molds made from whole wheat flour fared a lot better, and the ones made onto kneaded bread pith produced much clearer impressions.
| Image URL: |
|---|
 |
I then separated these molds and labelled them, before immediately bringing them to the lab to cast.
Name: Min Lim
Date and Time:
Location: M&K Lab (Chandler 260)
Subject: Casting
Weather: Sunny, 3°C
Humidity: 55%
Before casting, I first unmolded my sulfur casts from the previous round of casting. I found that the bread was extremely hard and the casts were impossible to get out even after prying. I tried using a palette knife to pick at the edges, but this chipped away at the sulfur cast instead. I then filled bowls with water and soaked my bread molds in them, hoping that this might loosen the molds up and allow me to extract the cast. I left these bread molds in for 10-15 minutes as I went onto set up my work station in the fumehood for the second round of casting, as I had did the previous time.
Since the sulfur casts were so tricky to extract, I decided to follow Lebrun’s addition to the bread molding recipe, which is to oil the molds. Using 100% linseed oil, I brushed my bread molds until the imprints were fully covered. I then placed them in the fumehood and followed the procedure for melting sulfur. I then poured the melted sulfur into my imprints and left them to dry as I went back to unmolding my first round of casts.
After 30 minutes, bread was now soggy and easier to pry out. Clay has also dissolved and muddied the waters. Even then, some of the sulfur casts were so brittle that they broke upon removing the bread mold, and some sulfur casts still had a substantial amount of bread pith stuck onto it that could not be extracted even after soaking for a further 20 minutes. Sulfur casts made from the medallions were also extremely shallow, and did not capture any detail at all. Given that there were so few casts of the medallions (as I didn’t have multiple copies of the same design, and they had to be within the imprint as it dried), I decided to simply take the results of imprints made with the wax brooches for my annotation.
I initially wanted to measure the dimensions of the casted object on top of the dimensions of the imprint for accuracy, but this was not possible given that bread was stuck to the resultant cast or that the cast was damaged in some ways. Nonetheless, I figured that measuring the dimensions of the imprint would be equivalent to that of the resultant cast (had it succeeded). In this case, the types of bread used and the number of days the molds took to dry did affect the shrinking process, as the average dimensions in all loaves differed (see tables 1-6 in link here, and tables 1-2 in this entry).
After cleaning my work station and setting aside whatever visible/legible sulfur casts there were, I then went onto unmold my sulfur casts from the second round of casting (done today). The sulfur had not yet fully solidified (not opaque yellow, but slightly translucent), but was solid enough to pry out. True to its form, the linseed oil made the extraction process much smoother and easier, especially for casts made with the kneaded bread pith. The ones made in unkneaded bread molds however, still had dough sticking to the sulfur casts. This is likely due to the crumb of the bread – that linseed oil could not reach all the crevices given the uneven surface.
Results: an increase in reheating time did lead to an increase in shrinkage of the cast. The sulfur cast made in the kneaded bread pith -especially for the 100% whole wheat flour – were also much clearer and easier to extract without any bread pith sticking to it. The. Casts also retained quite a bit of details from the original design. The ones made with 100% all-purpose flour saw shrinkage as well, but the sulfur cast also filled the crumb of the bread. Given the shallowness of the initial impression, the casts therefore do not look anything like the original design, and I would be more hesitant to use them as a concrete proof of the shrinking process. Nonetheless, we can see that it is possible, especially with bread made from 100% whole wheat, which is closer to what they would have made during the author-practitioner’s period given the flour available then.
| Image URL: |
|---|
 |
I still don’t know why sulfur of all material was chosen and used, since it’s so brittle, especially since the shrinkage happens with the bread mold, and not with sulfur itself.
Loaf #7 (100% AP)
Day baked: 12/10
Day casted: 12/10
Days between baking and casting: 0
Totally did not capture the details - reheating led to loss in depth of imprint and in some cases became too shallow to cast properly (sulfur v. brittle bc v thin layer, and broke) + shape was totally distorted
| Slice # | Object (Heart); Rebaking time in oven (min) | Method | Original Dimensions (cm) | Casted object dimensions (cm) |
|---|---|---|---|---|
| 1 | 0 | Whole slice | 2.8 x 2.2 | 2.8 x 2.2 |
| 2 | 20 | Whole slice | 2.8 x 2.2 | |
| 3 | 45 | Whole slice | 2.8 x 2.2 | |
| 4 | 1.5 | Whole slice | 2.8 x 2.2 | |
| 5 | 0 | Pith | 2.8 x 2.2 | 2.8 x 2.2 |
| 6 | 20 | Pith | 2.8 x 2.2 | |
| 7 | 45 | Pith | 2.8 x 2.2 | |
| 8 | 1.5 | Pith | 2.8 x 2.2 |
| Image URL: |
|---|
 |
Loaf #8 (100% WW)
Day baked: 12/10
Day casted: 12/10
Days between baking and casting: 0
Graph - decrease in dimensions
(width, height)
Bar chart - avg shrinkage - dimensions of imprint
100% ww - day 9 (total, pith, unkneaded)
100% ww - day 3 (total, pith, unkneaded)
100% ww - day 0 (total, pith, unkneaded)
| Slice # | Object (Diamond); Rebaking time in oven (min) | Method | Original Dimensions (cm) | Casted object dimensions (cm) |
|---|---|---|---|---|
| 1 | 0 | Whole slice | 3.0 x 2.7 | 3.0 x 2.7 |
| 2 | 20 | Whole slice | 3.0 x 2.7 | 2.8 x 2.6 |
| 3 | 45 | Whole slice | 3.0 x 2.7 | 2.6 x 2.5 |
| 4 | 1.2 | Whole slice | 3.0 x 2.7 | 2.6 x 2.4 |
| 5 | 0 | Pith | 3.0 x 2.7 | 3.0 x 2.7 |
| 6 | 20 | Pith | 3.0 x 2.7 | 2.8 x 2.6 |
| 7 | 45 | Pith | 3.0 x 2.7 | 2.6 x 2.4 |
| 8 | 1.2 | Pith | 3.0 x 2.7 | 2.4 x 2.3 |
0.20 x 0.13
0.13 x 0.3
| Image URL: |
|---|
 |
Didnt do the actual measurements yet, but visibly apparent shrinkage!!!
Also unmoulding sulfur from the first batch was extremely hard and the sulfur became quite brittle when i immersed the bread slices in water to loosen the mould - was also more destructive
On the other hand once i oiled it with linseed oil - much easier process + didnt let the bread dry too much before unmoulding them
I am curious if there’s a limit to the shrinkage -- what if i dry the bread out entirely?
Ones with the pith - clearer impression plus crumb structure doesn’t affect the casting
Also much easier to unmold since linseed oil could cover everything