Table of Contents
Dark red text has been formatted as certain heading types. To ensure the table of contents is rendered correctly, make sure any edits to these fields does not change their heading type. |
Name: Min Lim
Date and Time:
Location: Personal Apartment Kitchen
Subject: Bread-making Attempt #1 (Autolysation + Feeding Sourdough)
Weather: Cloudy, 19°C
Humidity: 80%
Aims:
To test behaviour of sourdough starter by making two loaves of bread using an identical recipe — one with the given starter, and one with a personal starter. Recipe used is not a historical reconstruction, but one I’m familiar with to reduce procedural error.
Materials:
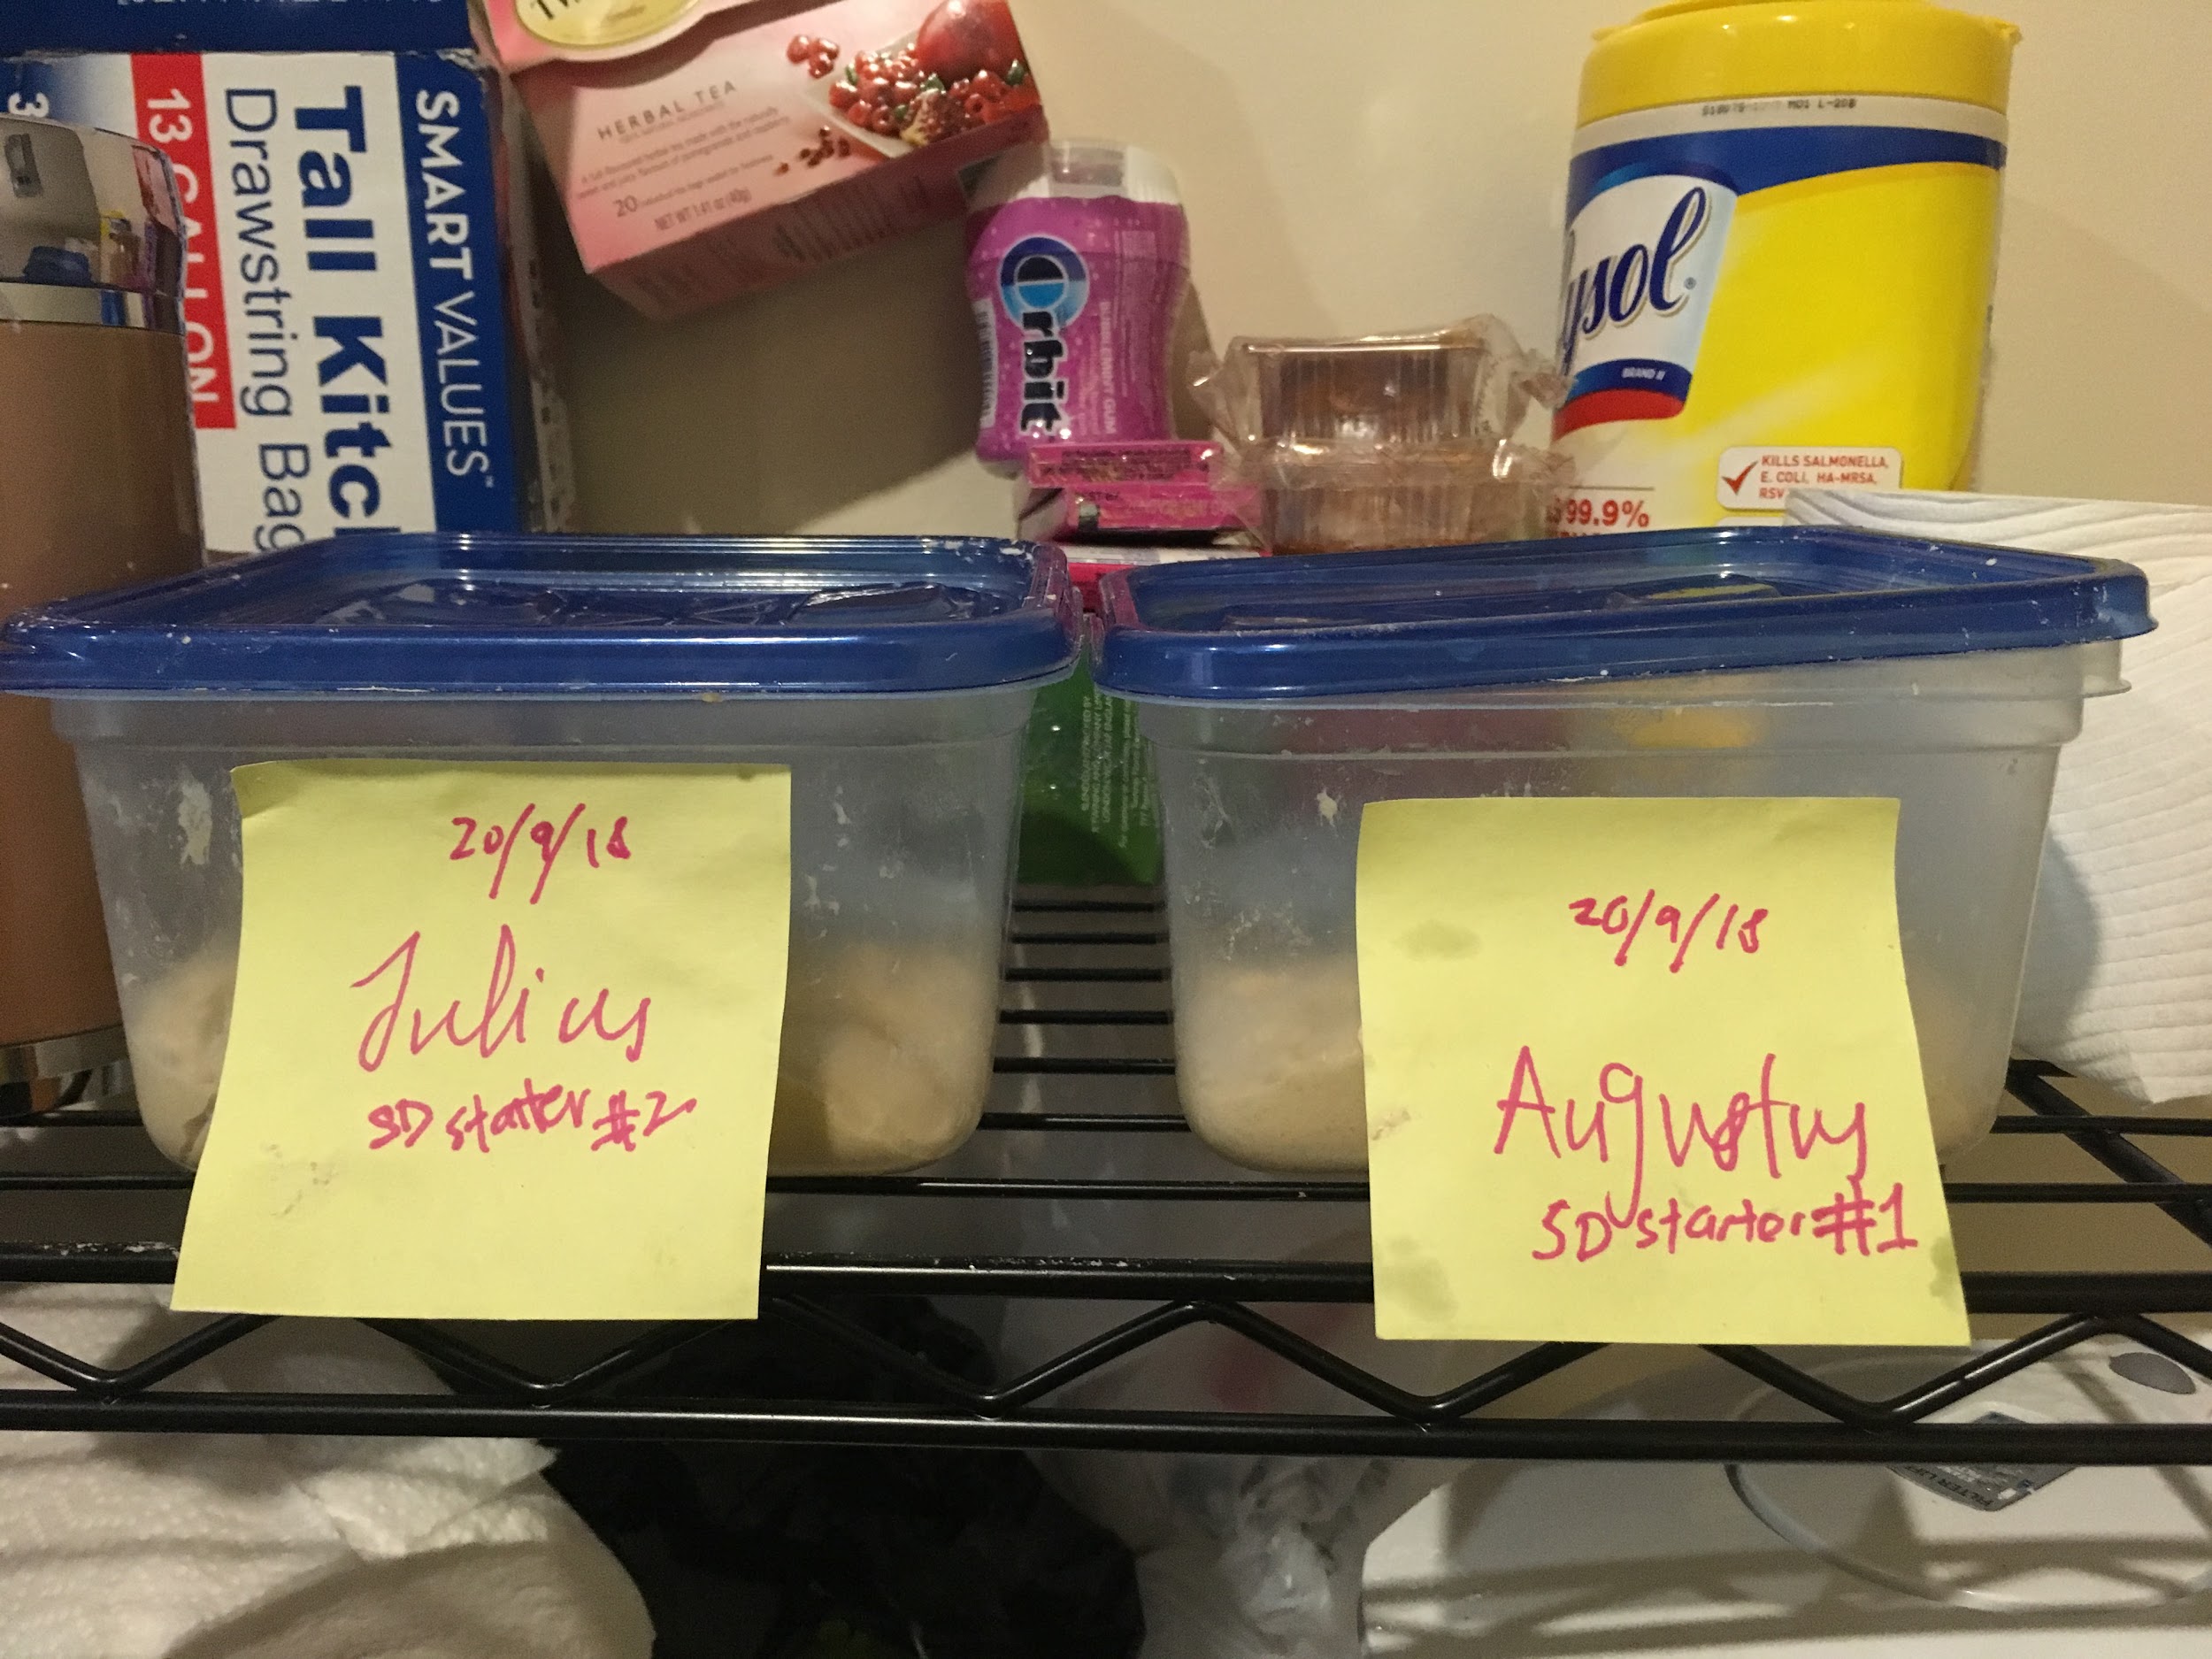
40g Sourdough starter #1 (composition unknown - received in class)
40g Sourdough starter #2 (Initial: King Arthur Flour (KAF) Whole Wheat Flour; fed with KAF All-Purpose Flour)
300g KAF White Whole Wheat Flour
440g KAF All-Purpose (AP) Flour
652g Tap water (lukewarm)
Cling film
Redman electronic measuring scale (to nearest whole number)
Redman stainless steel bowl
Redman silicone heat-resistant spatula
Procedure:
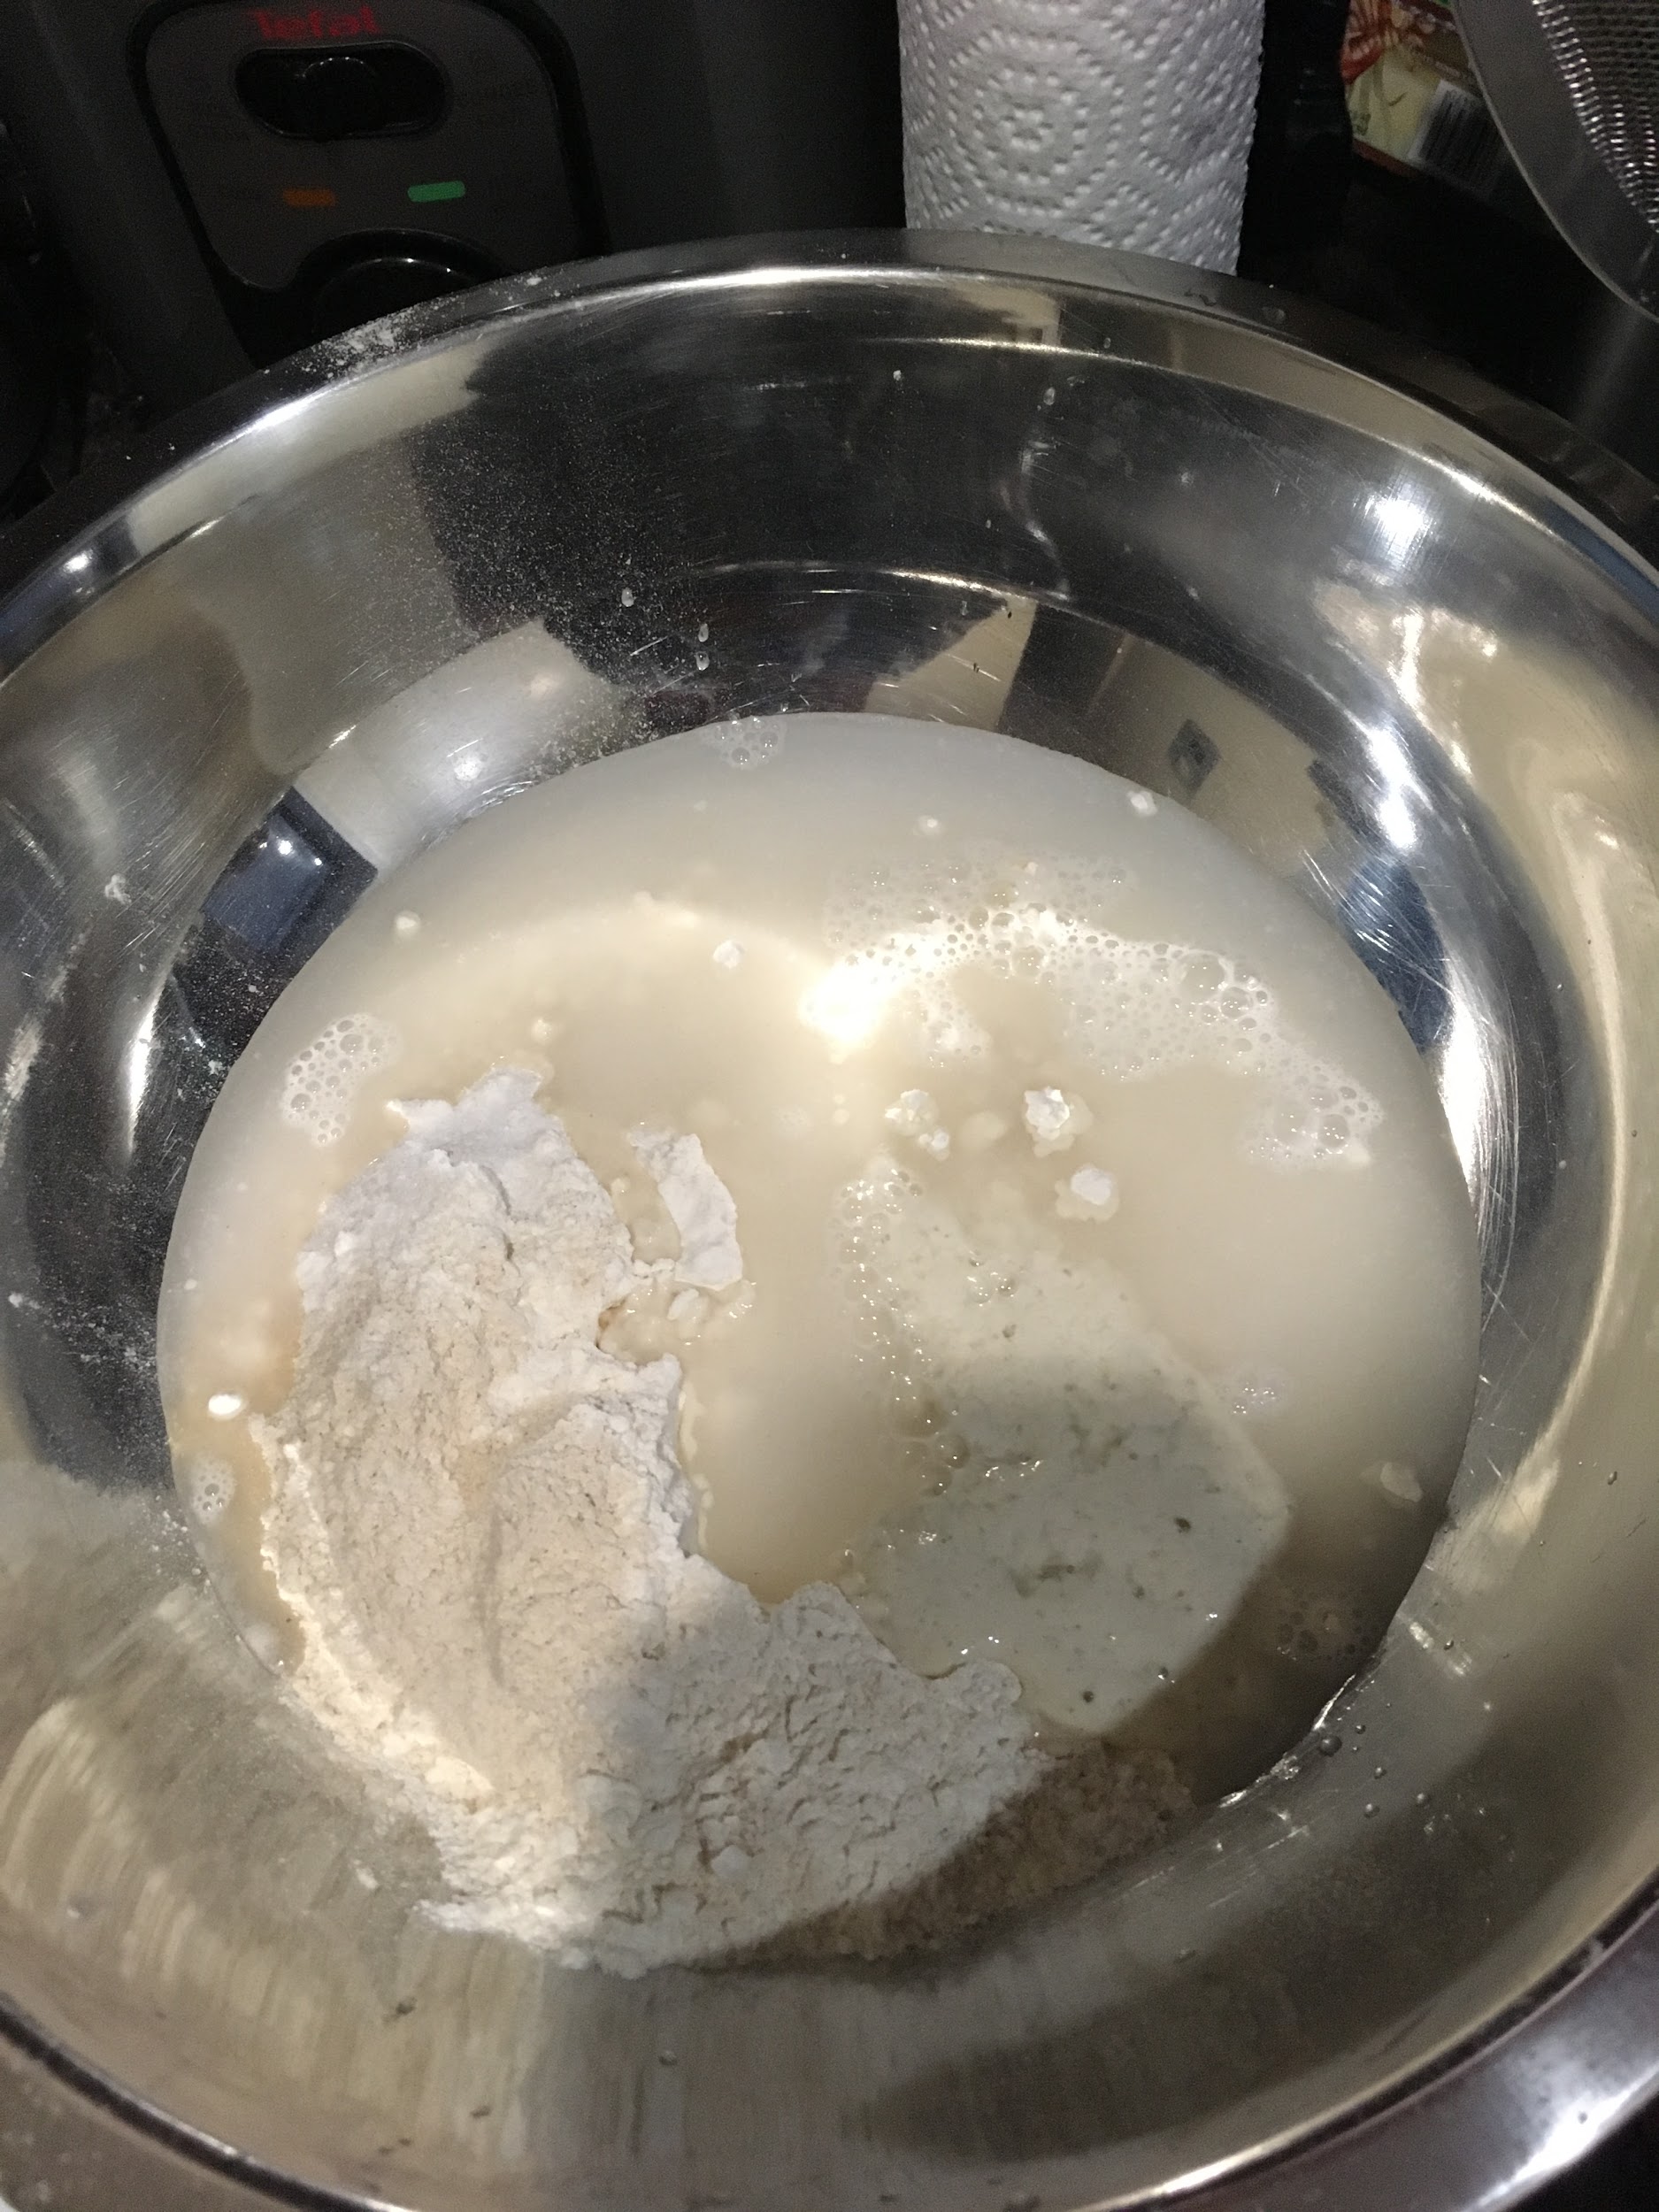
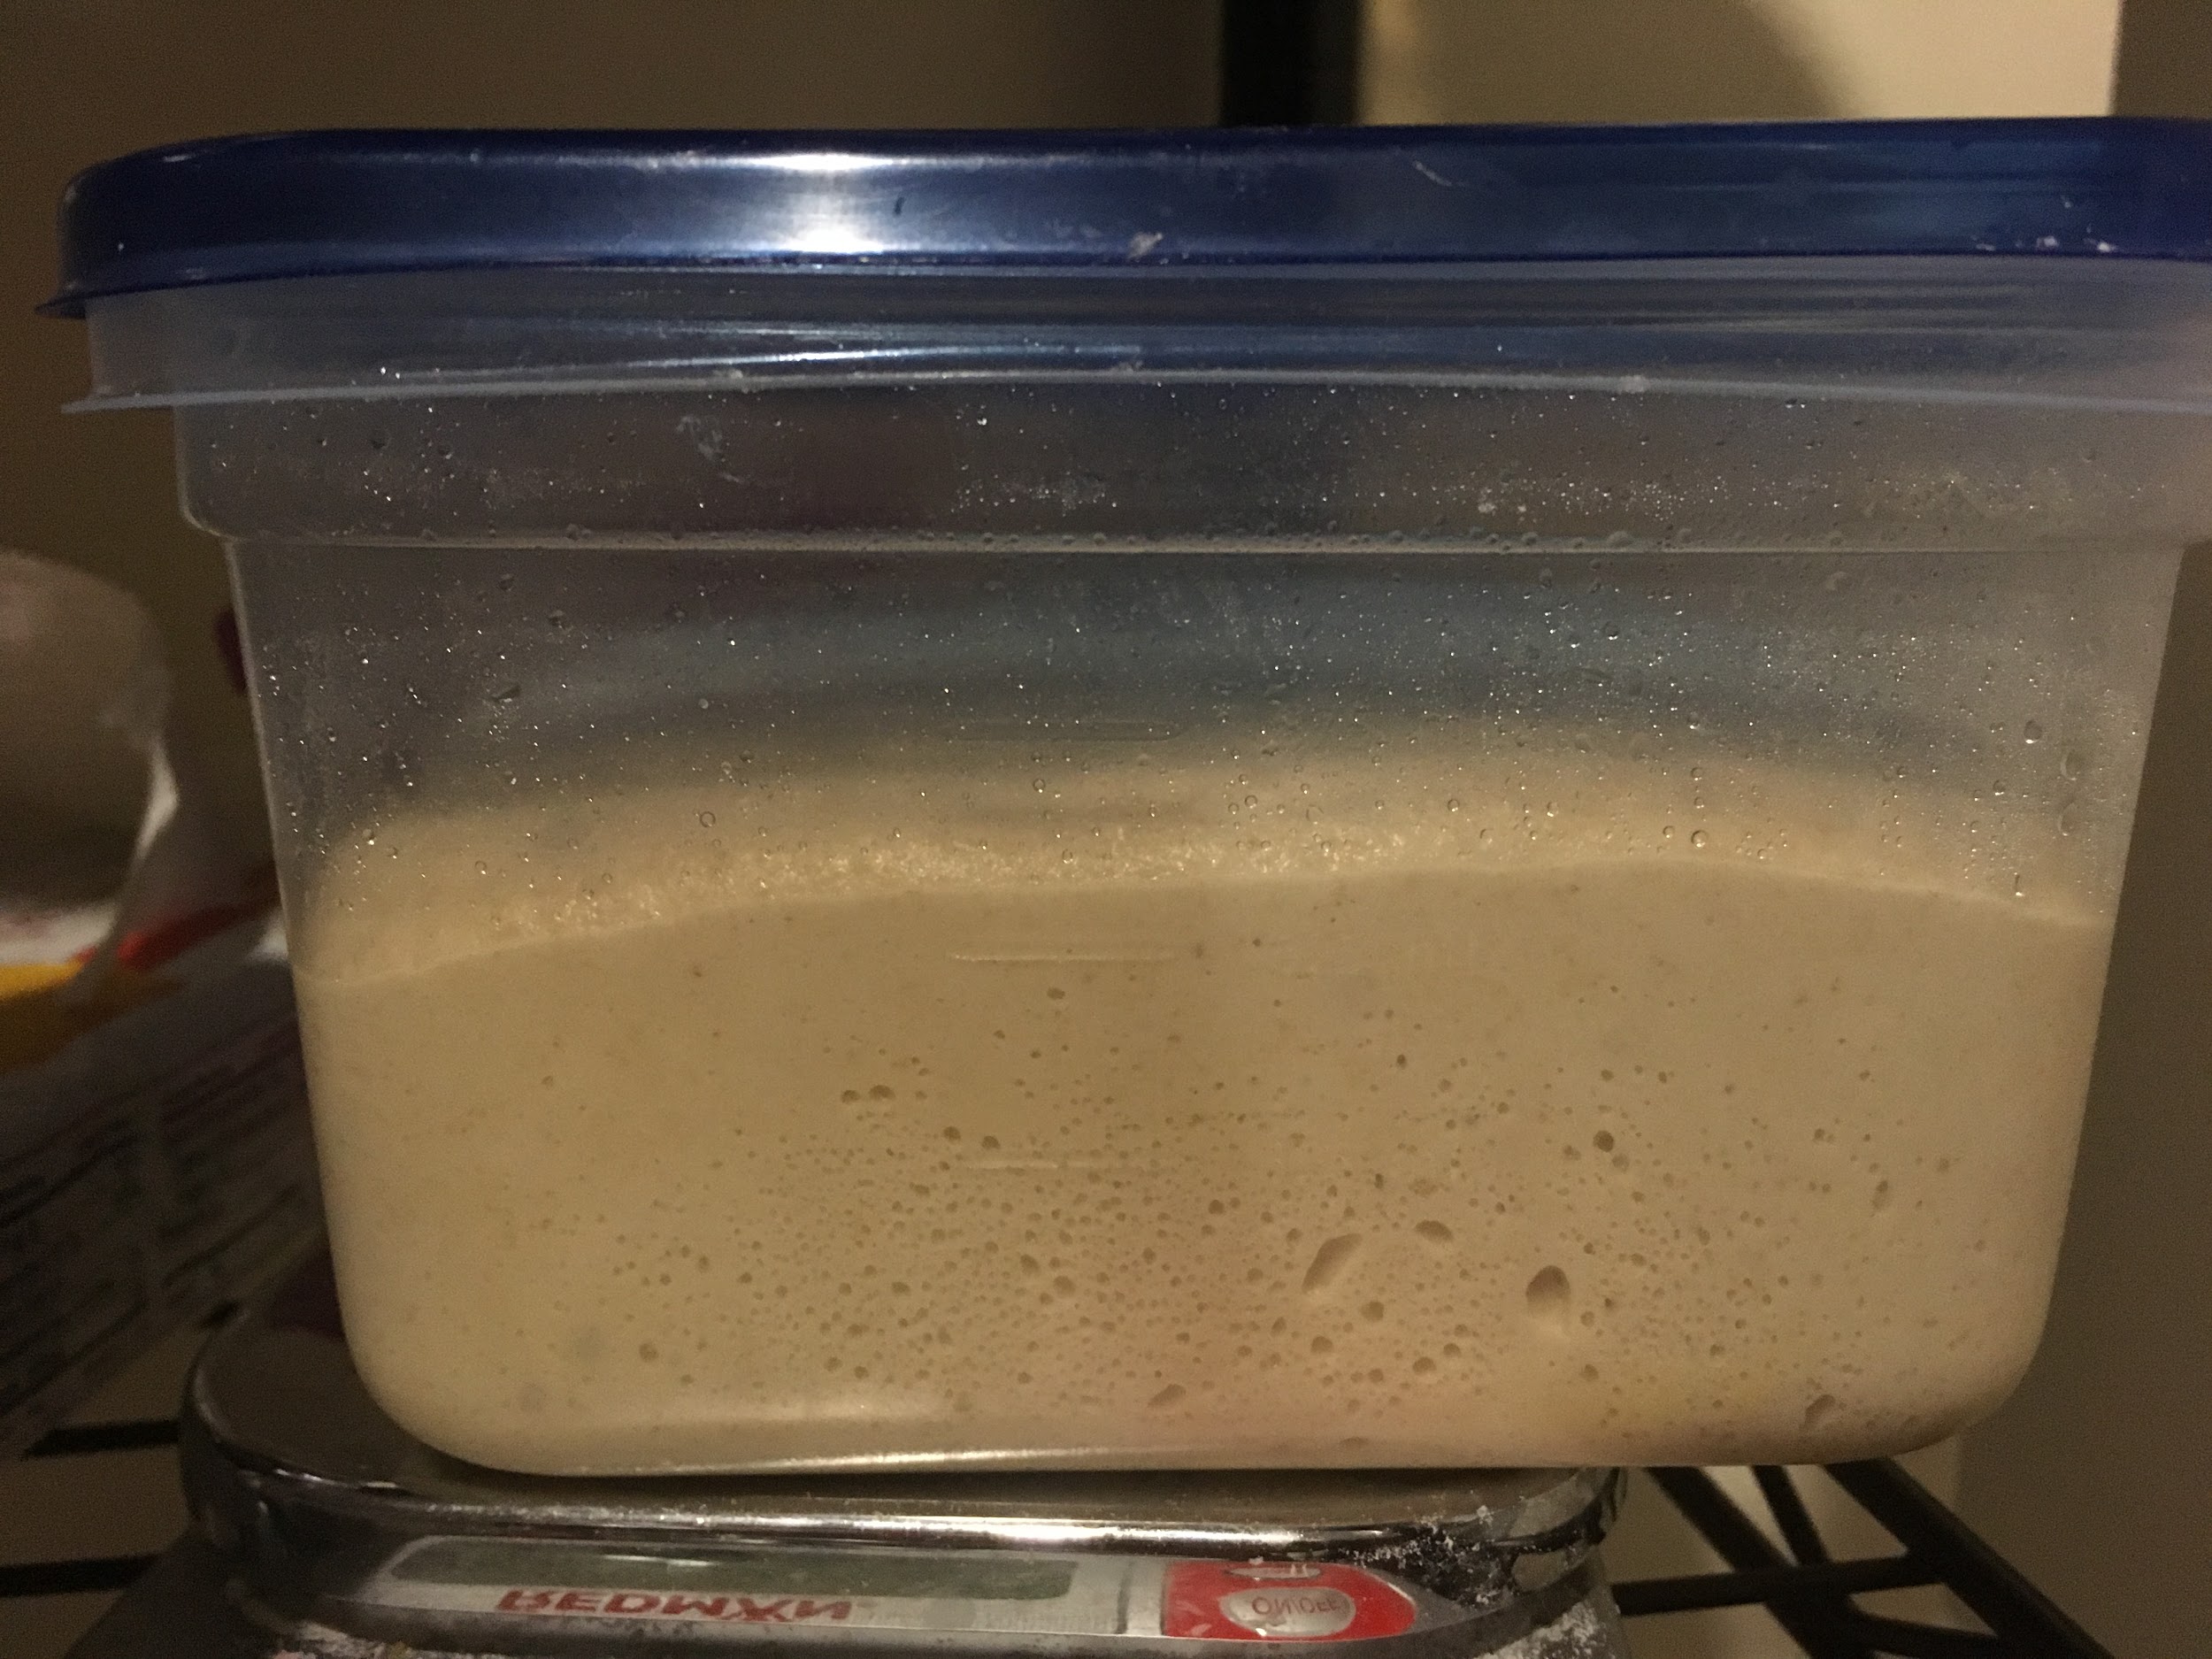
5:55am: 512g of lukewarm tap water is added to a mixture of 50% KAF Whole Wheat Flour (300g) and 50% AP Flour (300g).
| Image URL: |
|---|
|
Mixture is mixed by hand until fully combined. Bowl is loosely covered with cling film.
| Image URL: |
|---|
 |
| Image URL: |
|---|
 |
70g of AP flour and 70g of lukewarm tap water is added to each sourdough starter. Mixture is stirred with spatula until combined. Lids are then screwed on loosely.
| Image URL: |
|---|
 |
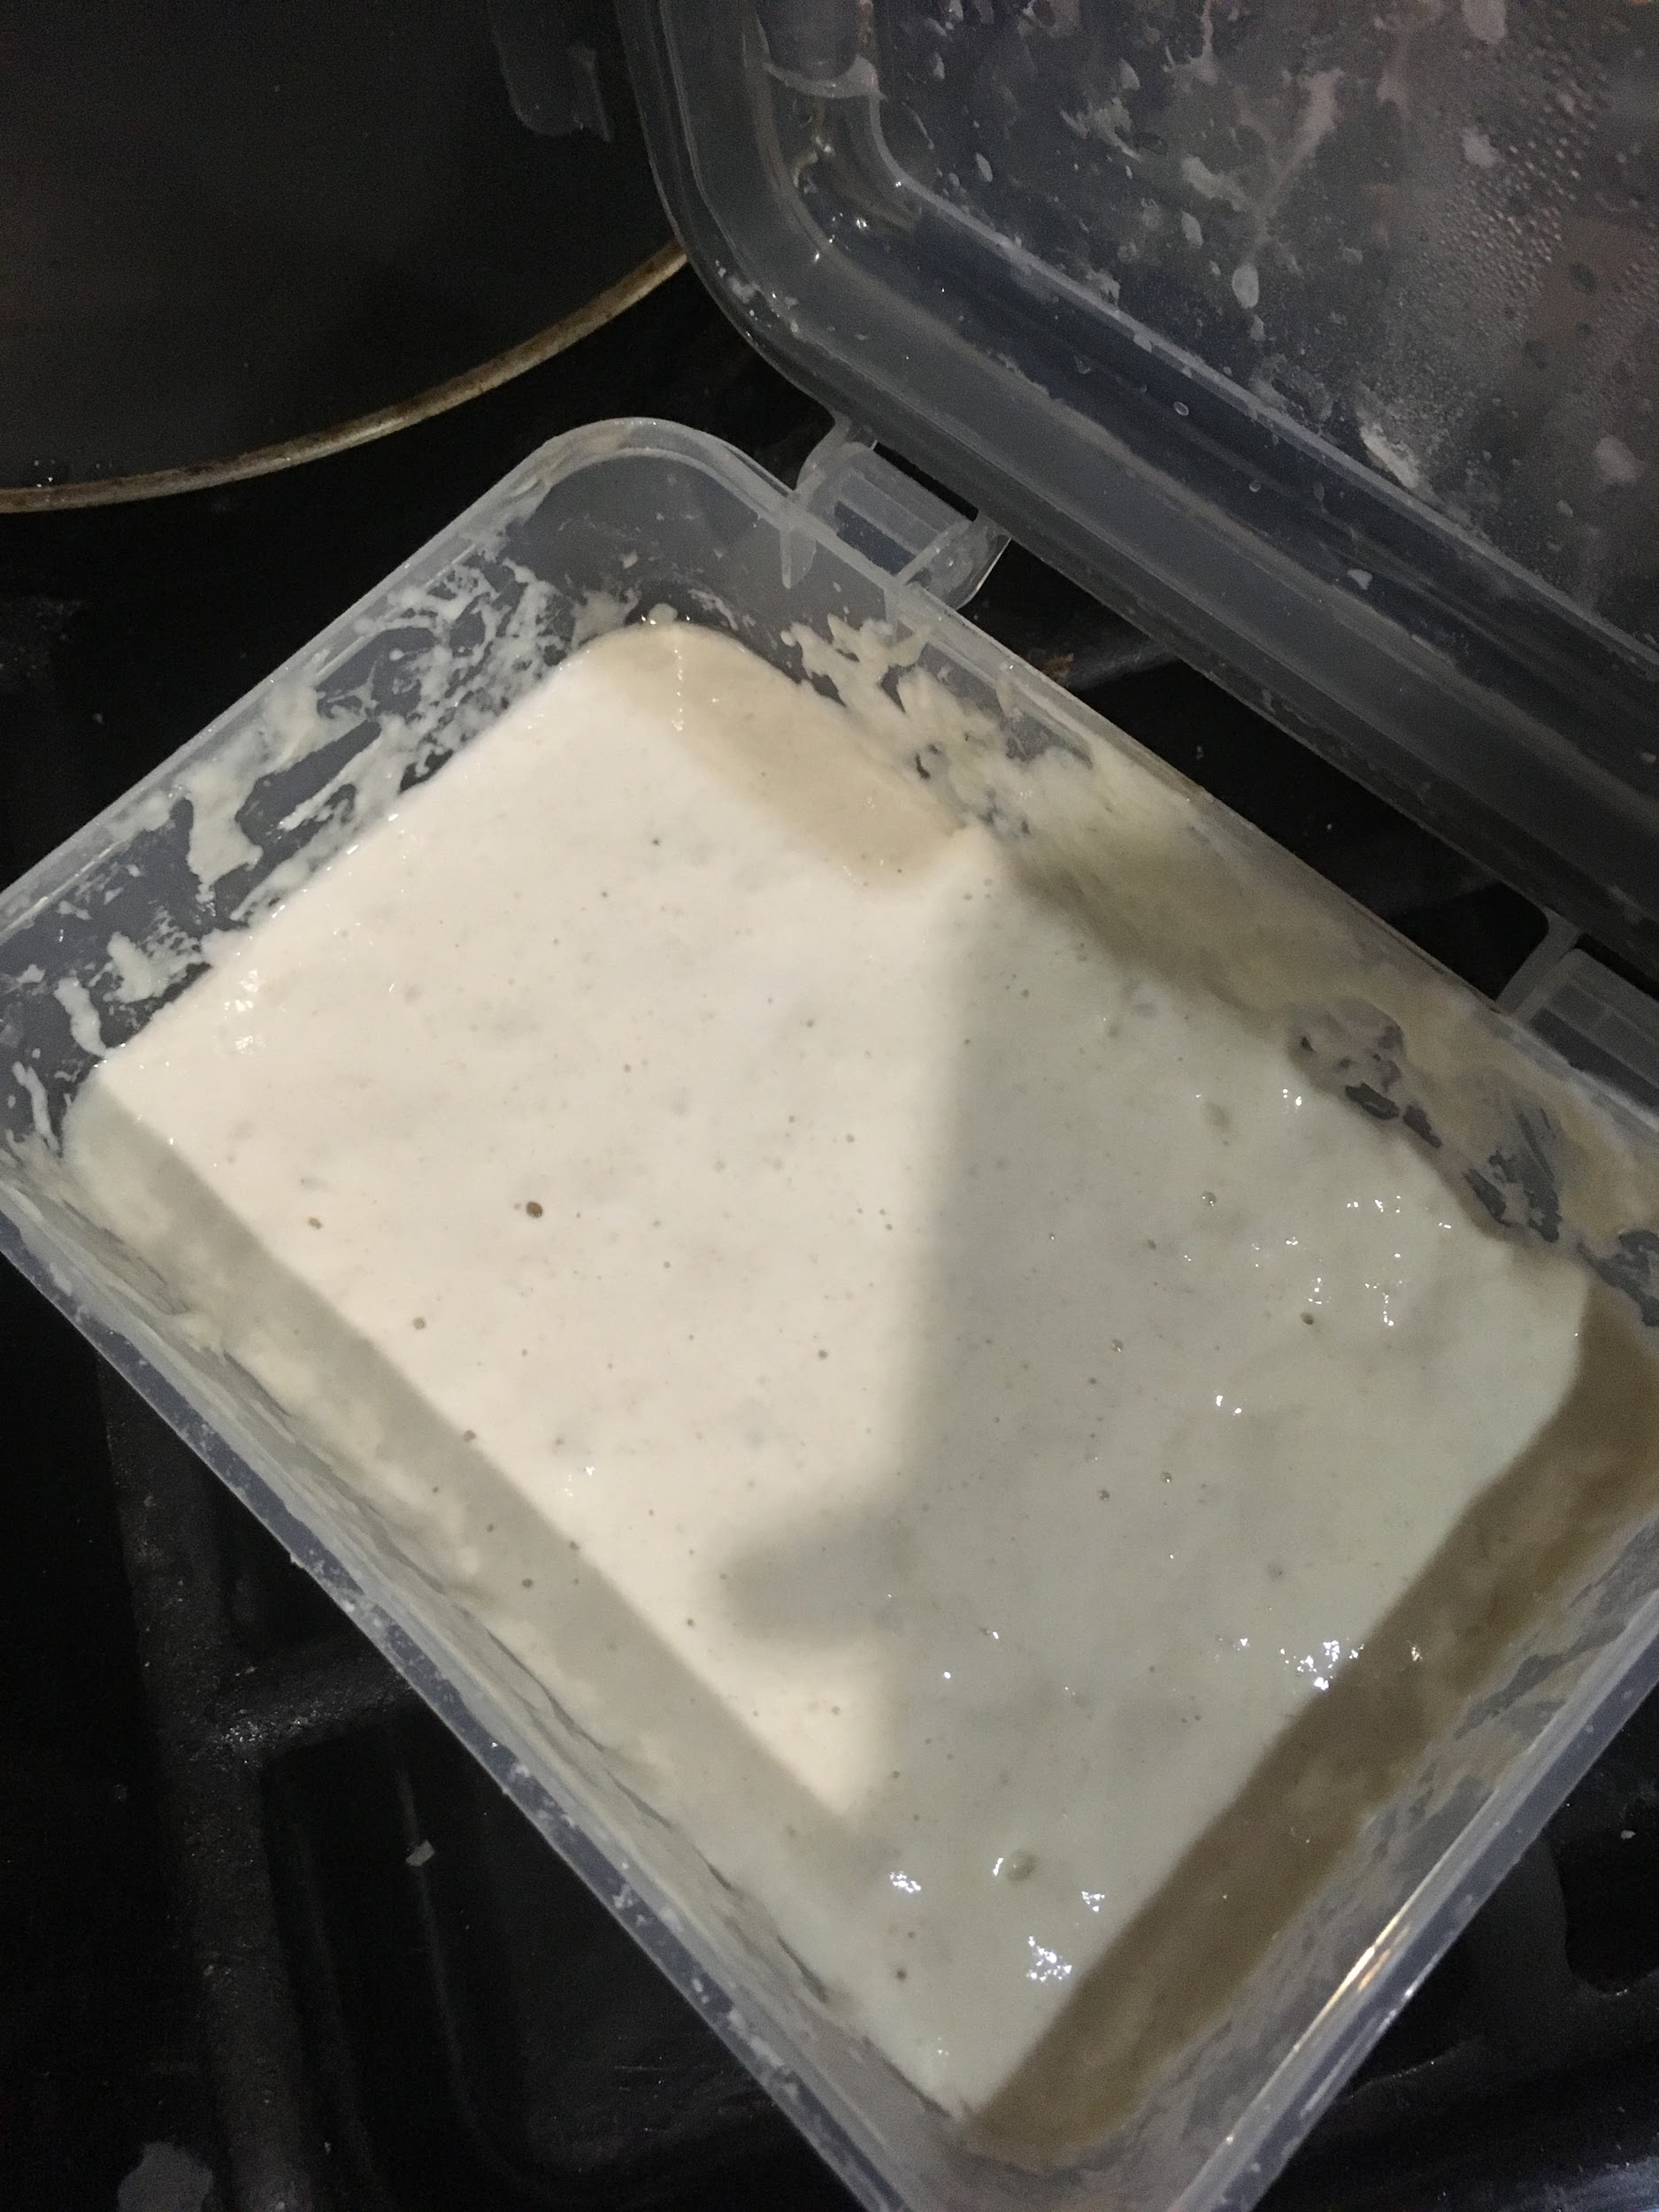
6:30am: Both mixture and starters are left in room temperature for 4 hours for flour to autolyse and for starter to develop.
Notes:
Sourdough starter #1 has a tangier, more pungent smell and a lower viscosity compared to #2 (smells sweeter).
Prior to experiment, starter #1 was transferred into a larger container to allow space for starter growth
Name: Min Lim
Date and Time:
Location: Personal Apartment Kitchen
Subject: Bread-making Attempt #1 (Bulk fermentation)
Weather: Cloudy, 22°C
Humidity: 68%
Materials:
2 plastic 1.25-quart containers with lid, 5.47 inches (H) x 6.19 inches (W) x 6.19 inches (D) (Ziploc, medium square)
1012g flour and water mixture from Bread-making Attempt #1 (Autolysation + Feeding Sourdough)
40g Sourdough starter #1
40g Sourdough starter #2
10g Coarse mediterranean sea salt (ground)
Procedure:
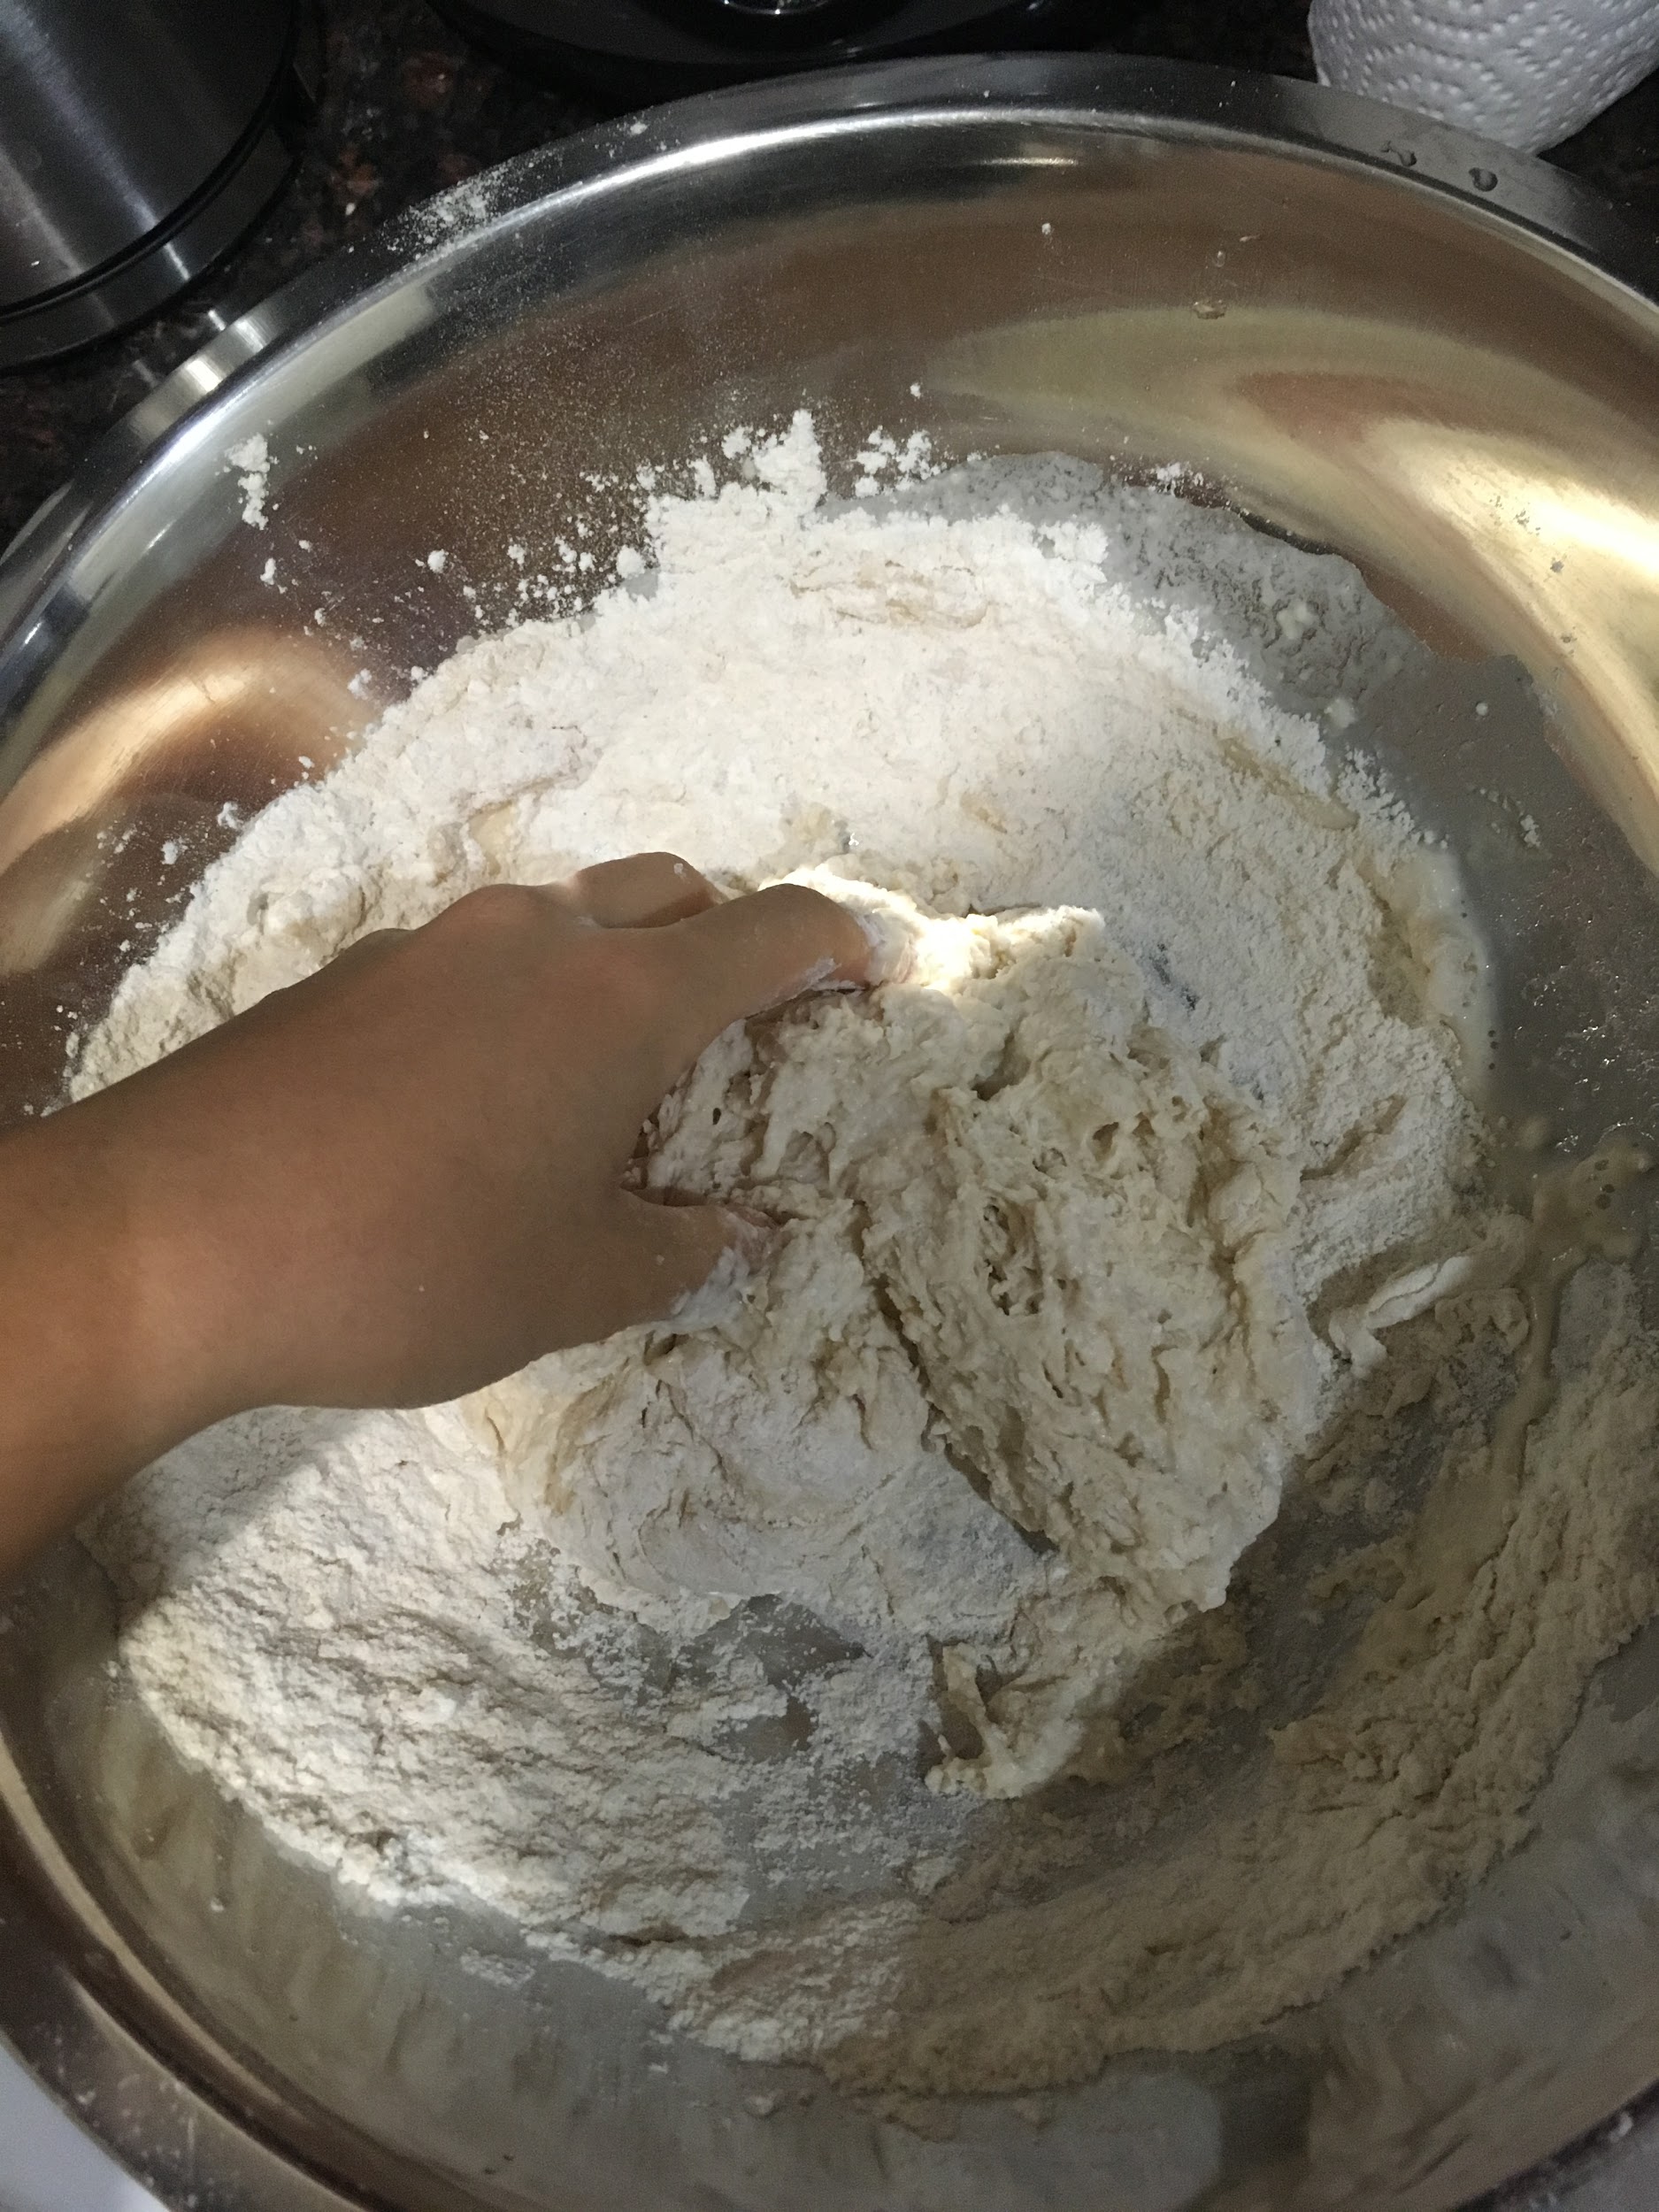
10:30am: Mixture is divided into two and separated into two bowls. 40g of starter #1 is added to one bowl, and 40g of starter #2 is added to the other. Dough is then worked at until starter is fully incorporated.
5g of salt is added into each dough, and worked until fully combined (when fingers can no longer feel any salt granules in the dough - see pictures for technique).
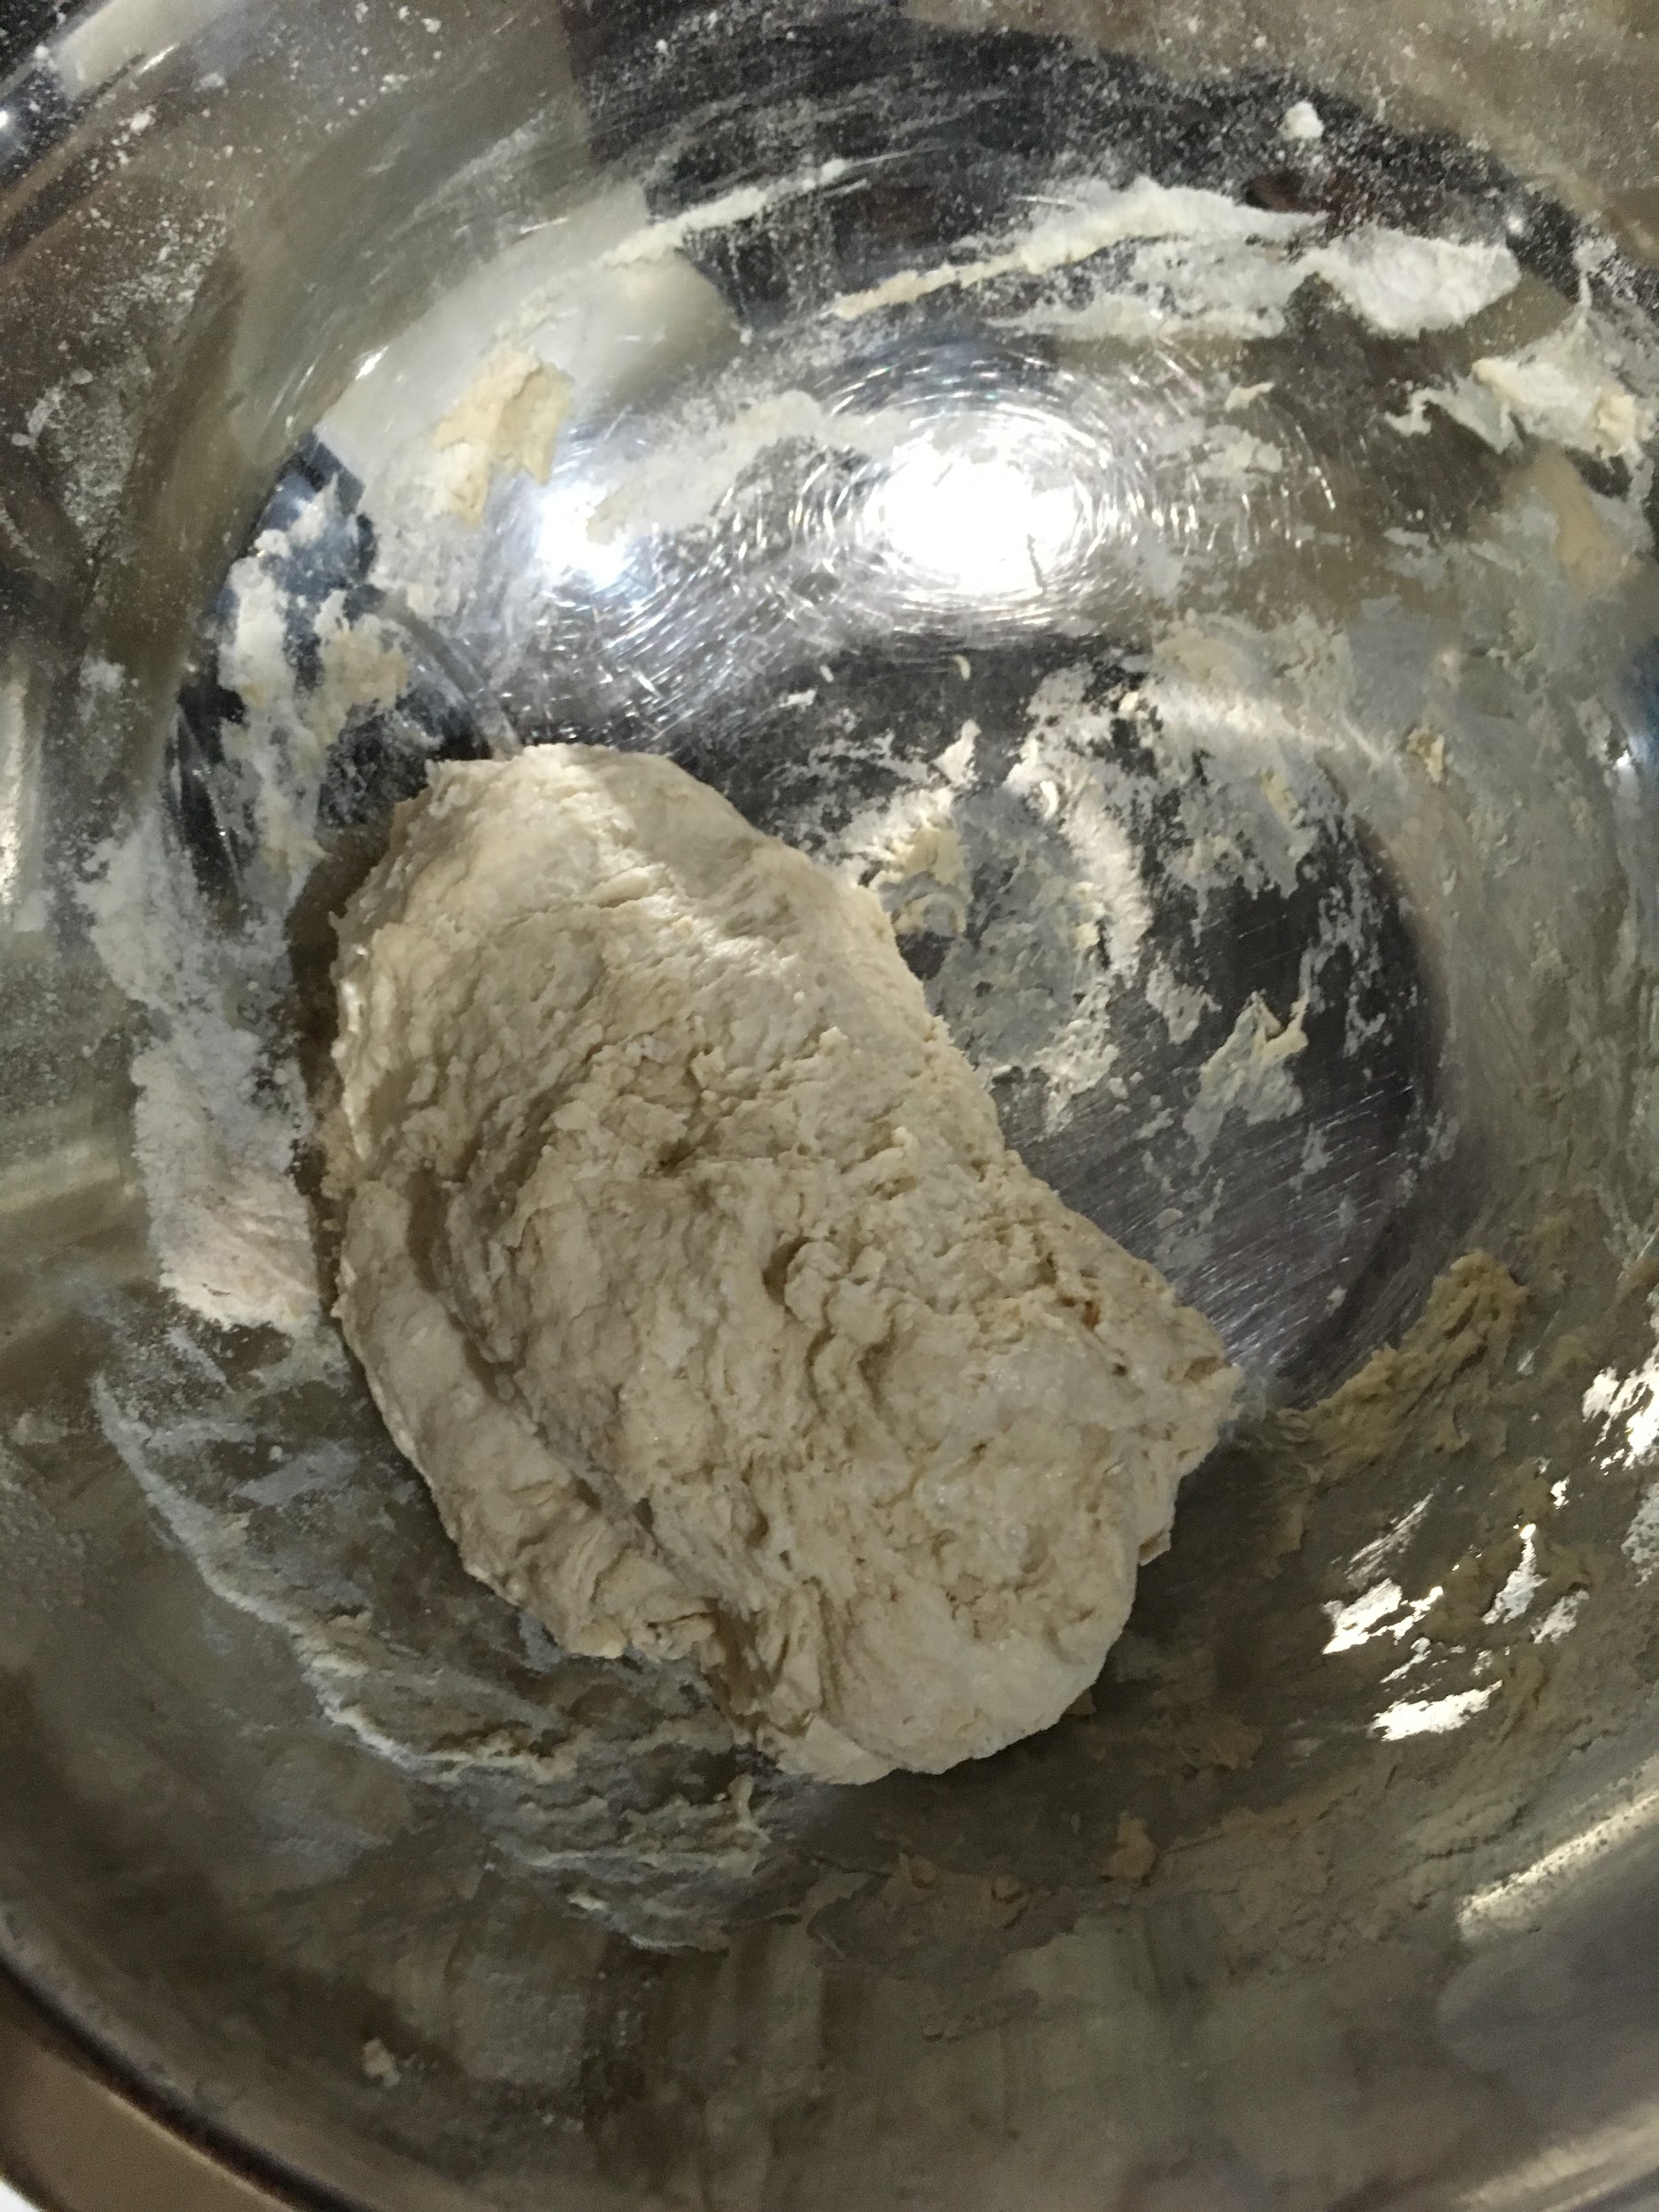
Dough is transferred into separate containers for first proof.
11:00am: Dough is stretched and folded 8 times (see video for technique). This is repeated 4 times in 30-minute intervals.
| Image URL: |
|---|
 |
11:30am: Dough is stretched and folded.
12:00pm: Dough is stretched and folded.
12:30pm: Dough is stretched and folded.
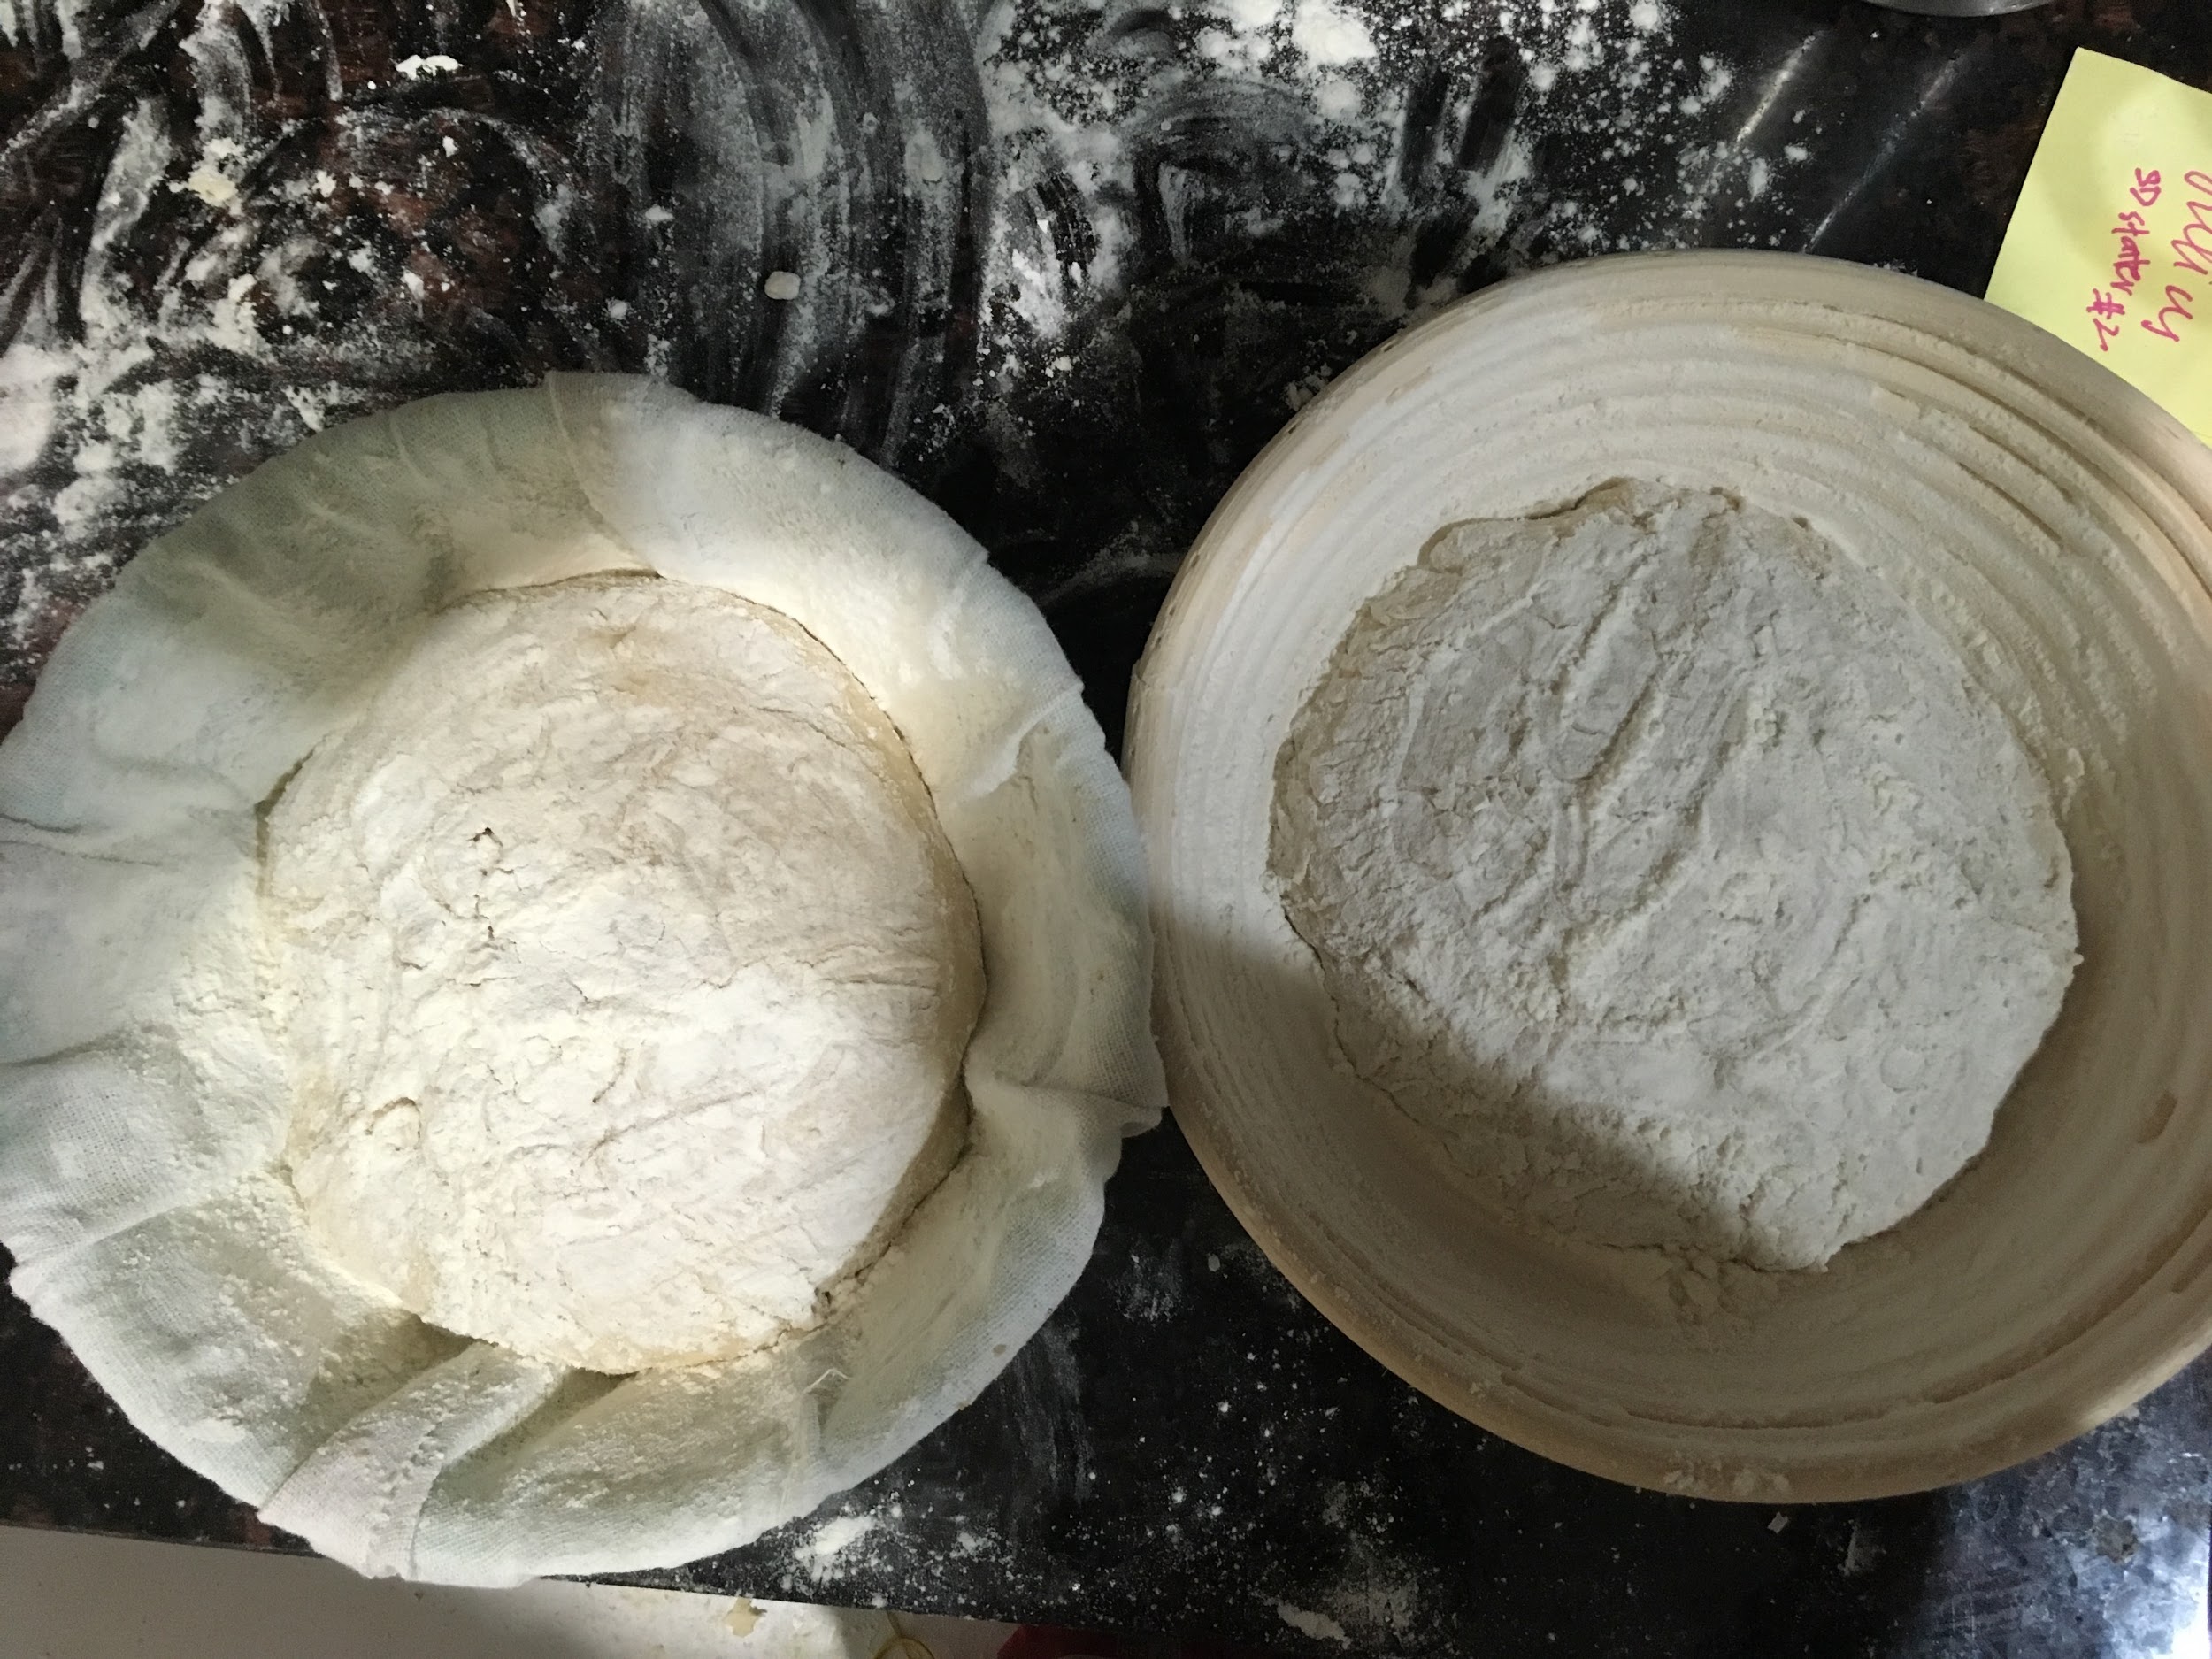
1:00pm: Some bubbles can be seen on surface of both doughs. Final stretch and fold done. Lids are loosely placed on top of containers and dough is left to proof for 10 hours away from direct sunlight or wind.
Notes:
Dough with starter #1 (Dough #1) is more slack, and sticks less to surface of the container compared to dough with starter #2 (Dough #2)
Surface of #1 is smoother than #2
When stretched, dough #1 is less resistant than #2 and retains its shape when folded
Name: Min Lim
Date and Time:
Location: Personal Apartment Kitchen
Subject: Bread-making Attempt #1 (Bench rest, shaping, second proof)
Weather: Cloudy, 22°C
Humidity: 68%
Procedure:
8:30pm: Doughs had already reached the brims of their containers — decided to stop bulk fermentation.
| Image URL: |
|---|
 |
One last stretch and fold was done before doughs were tipped onto dusted surface. Doughs were left to rest for 30 minutes.
| Image URL: |
|---|
 |
9:00pm: Doughs were shaped (see video for technique) then transferred into containers/banneton dusted with flour. Doughs were then covered loosely with a dampened cloth, and left to proof for 2 hours.
| Image URL: |
|---|
 |
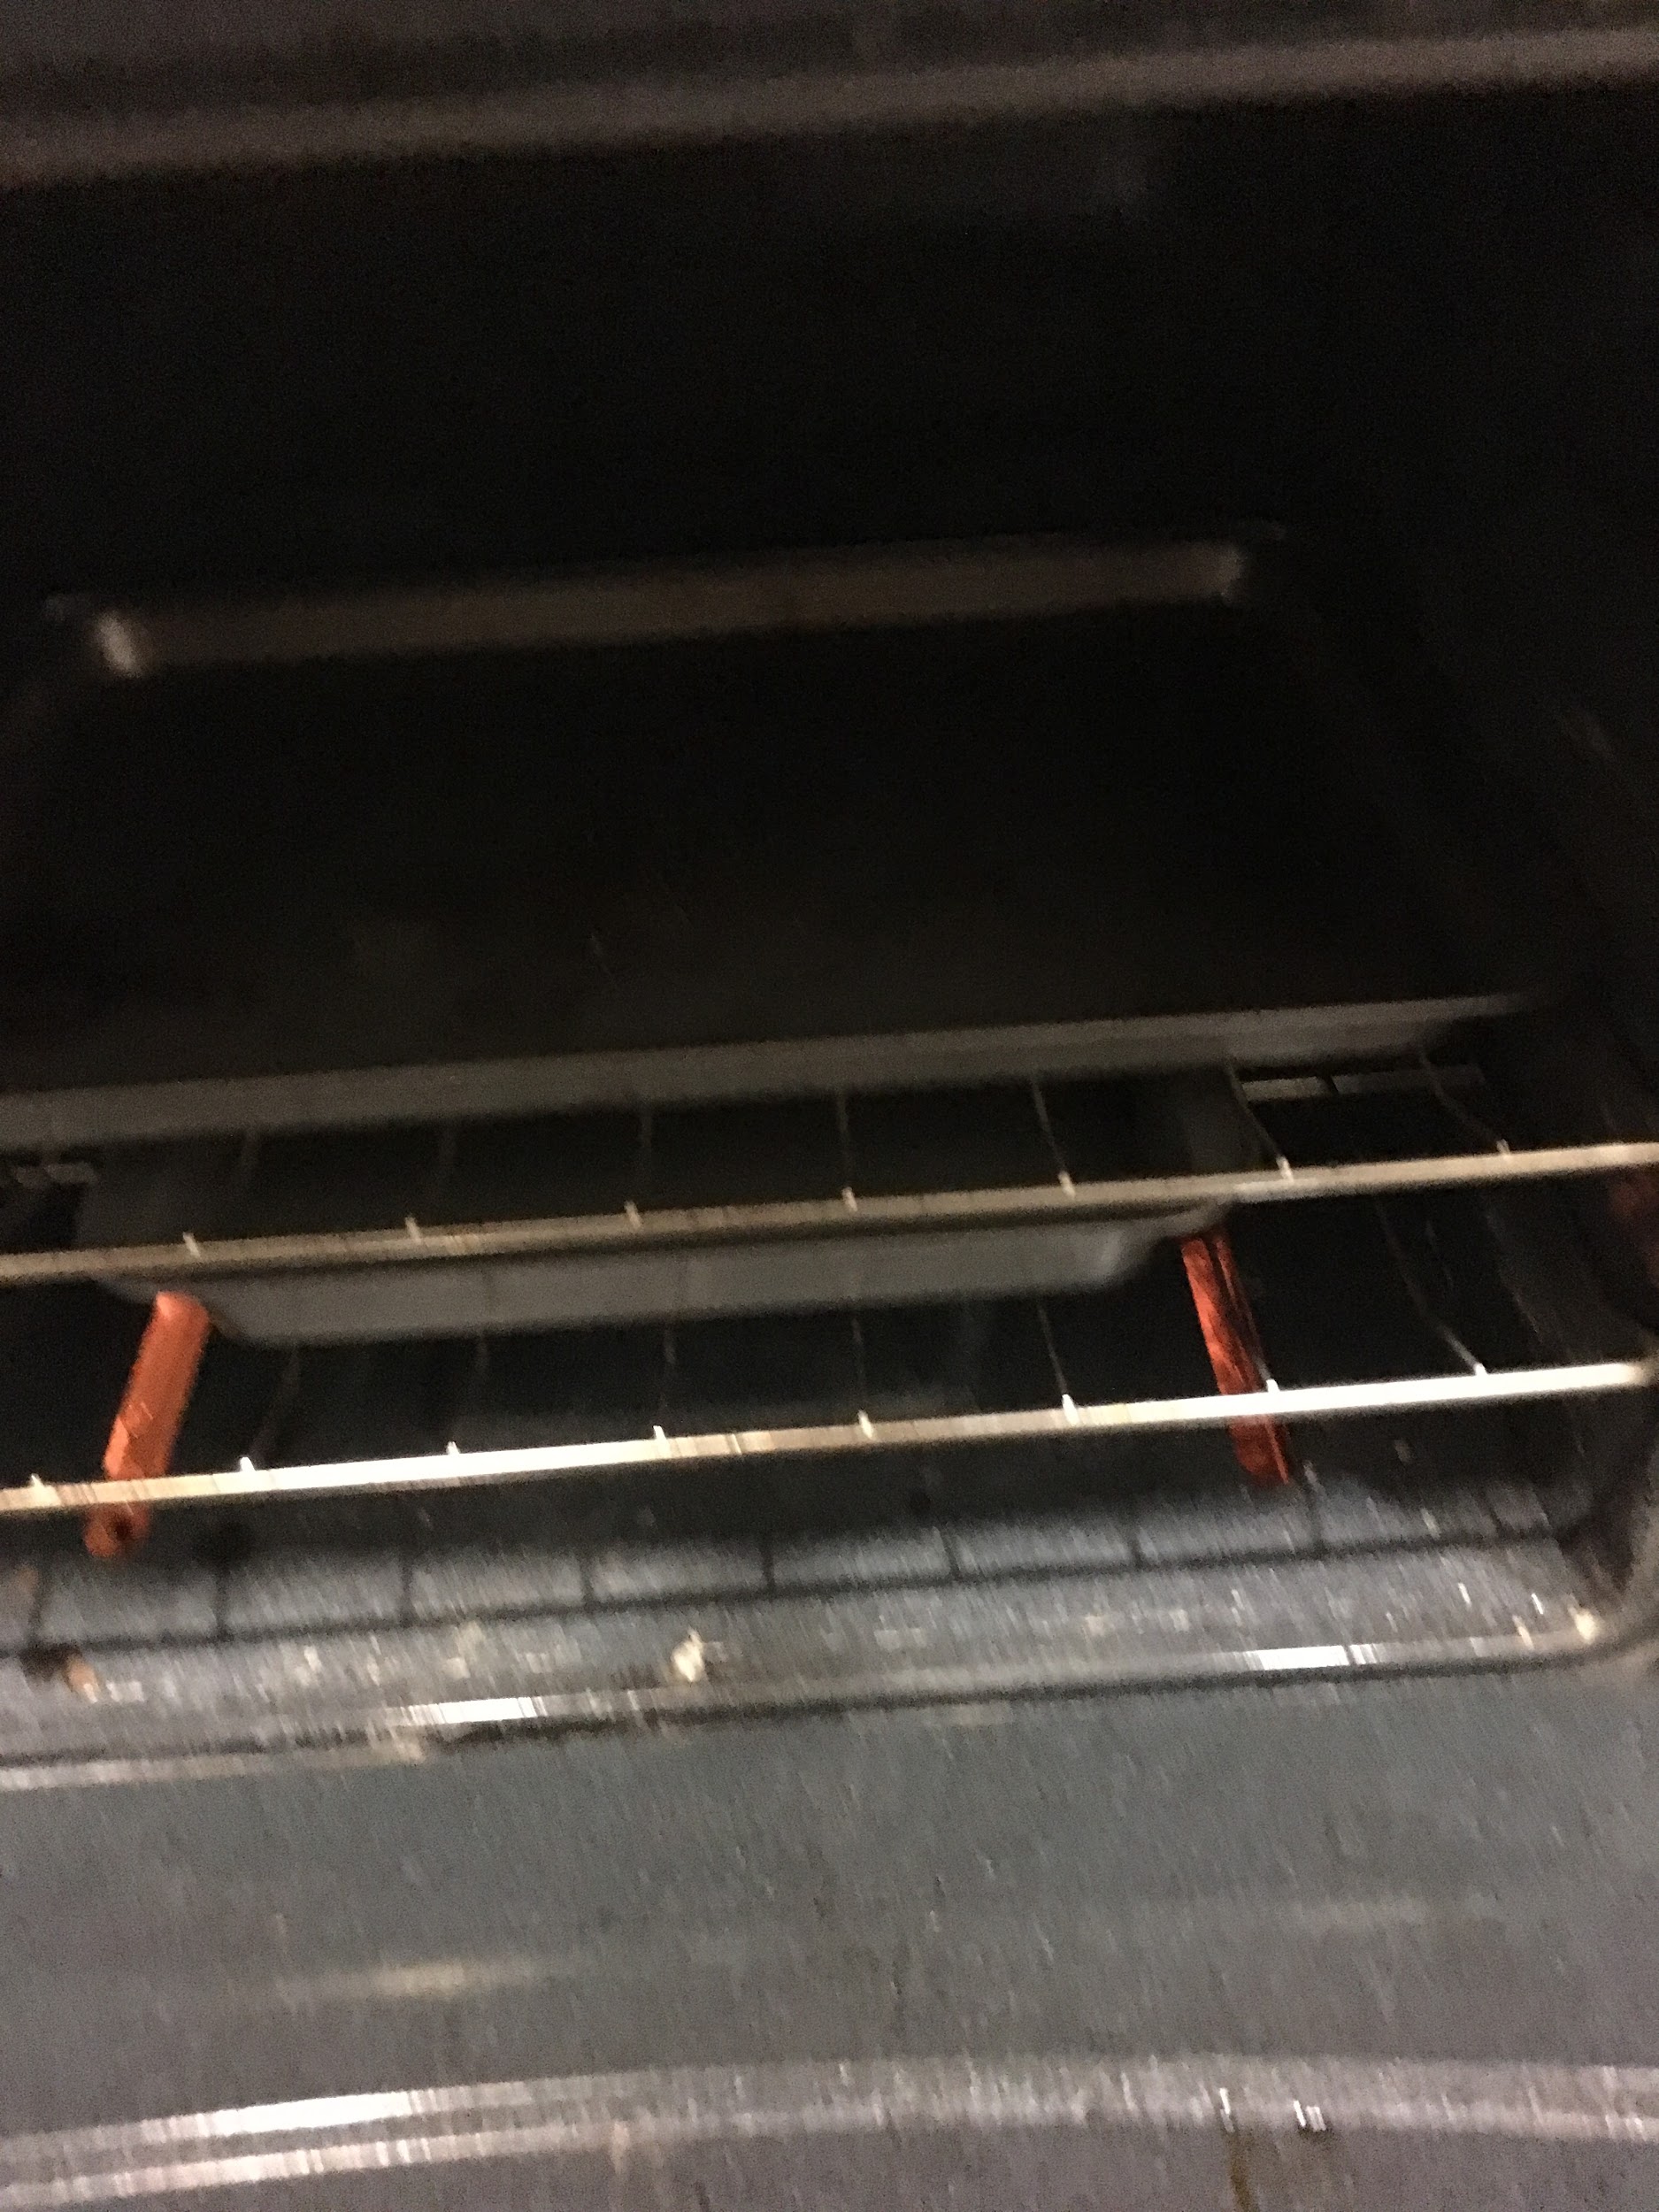
10:00pm: Oven pre-heated to 525F (hottest setting). Two oven racks were placed at the bottomest part of the oven, with a baking tray on top rack and a sheet pan at the bottom. Hot water was then poured into sheet pan (to the brim) to generate steam.
| Image URL: |
|---|
 |
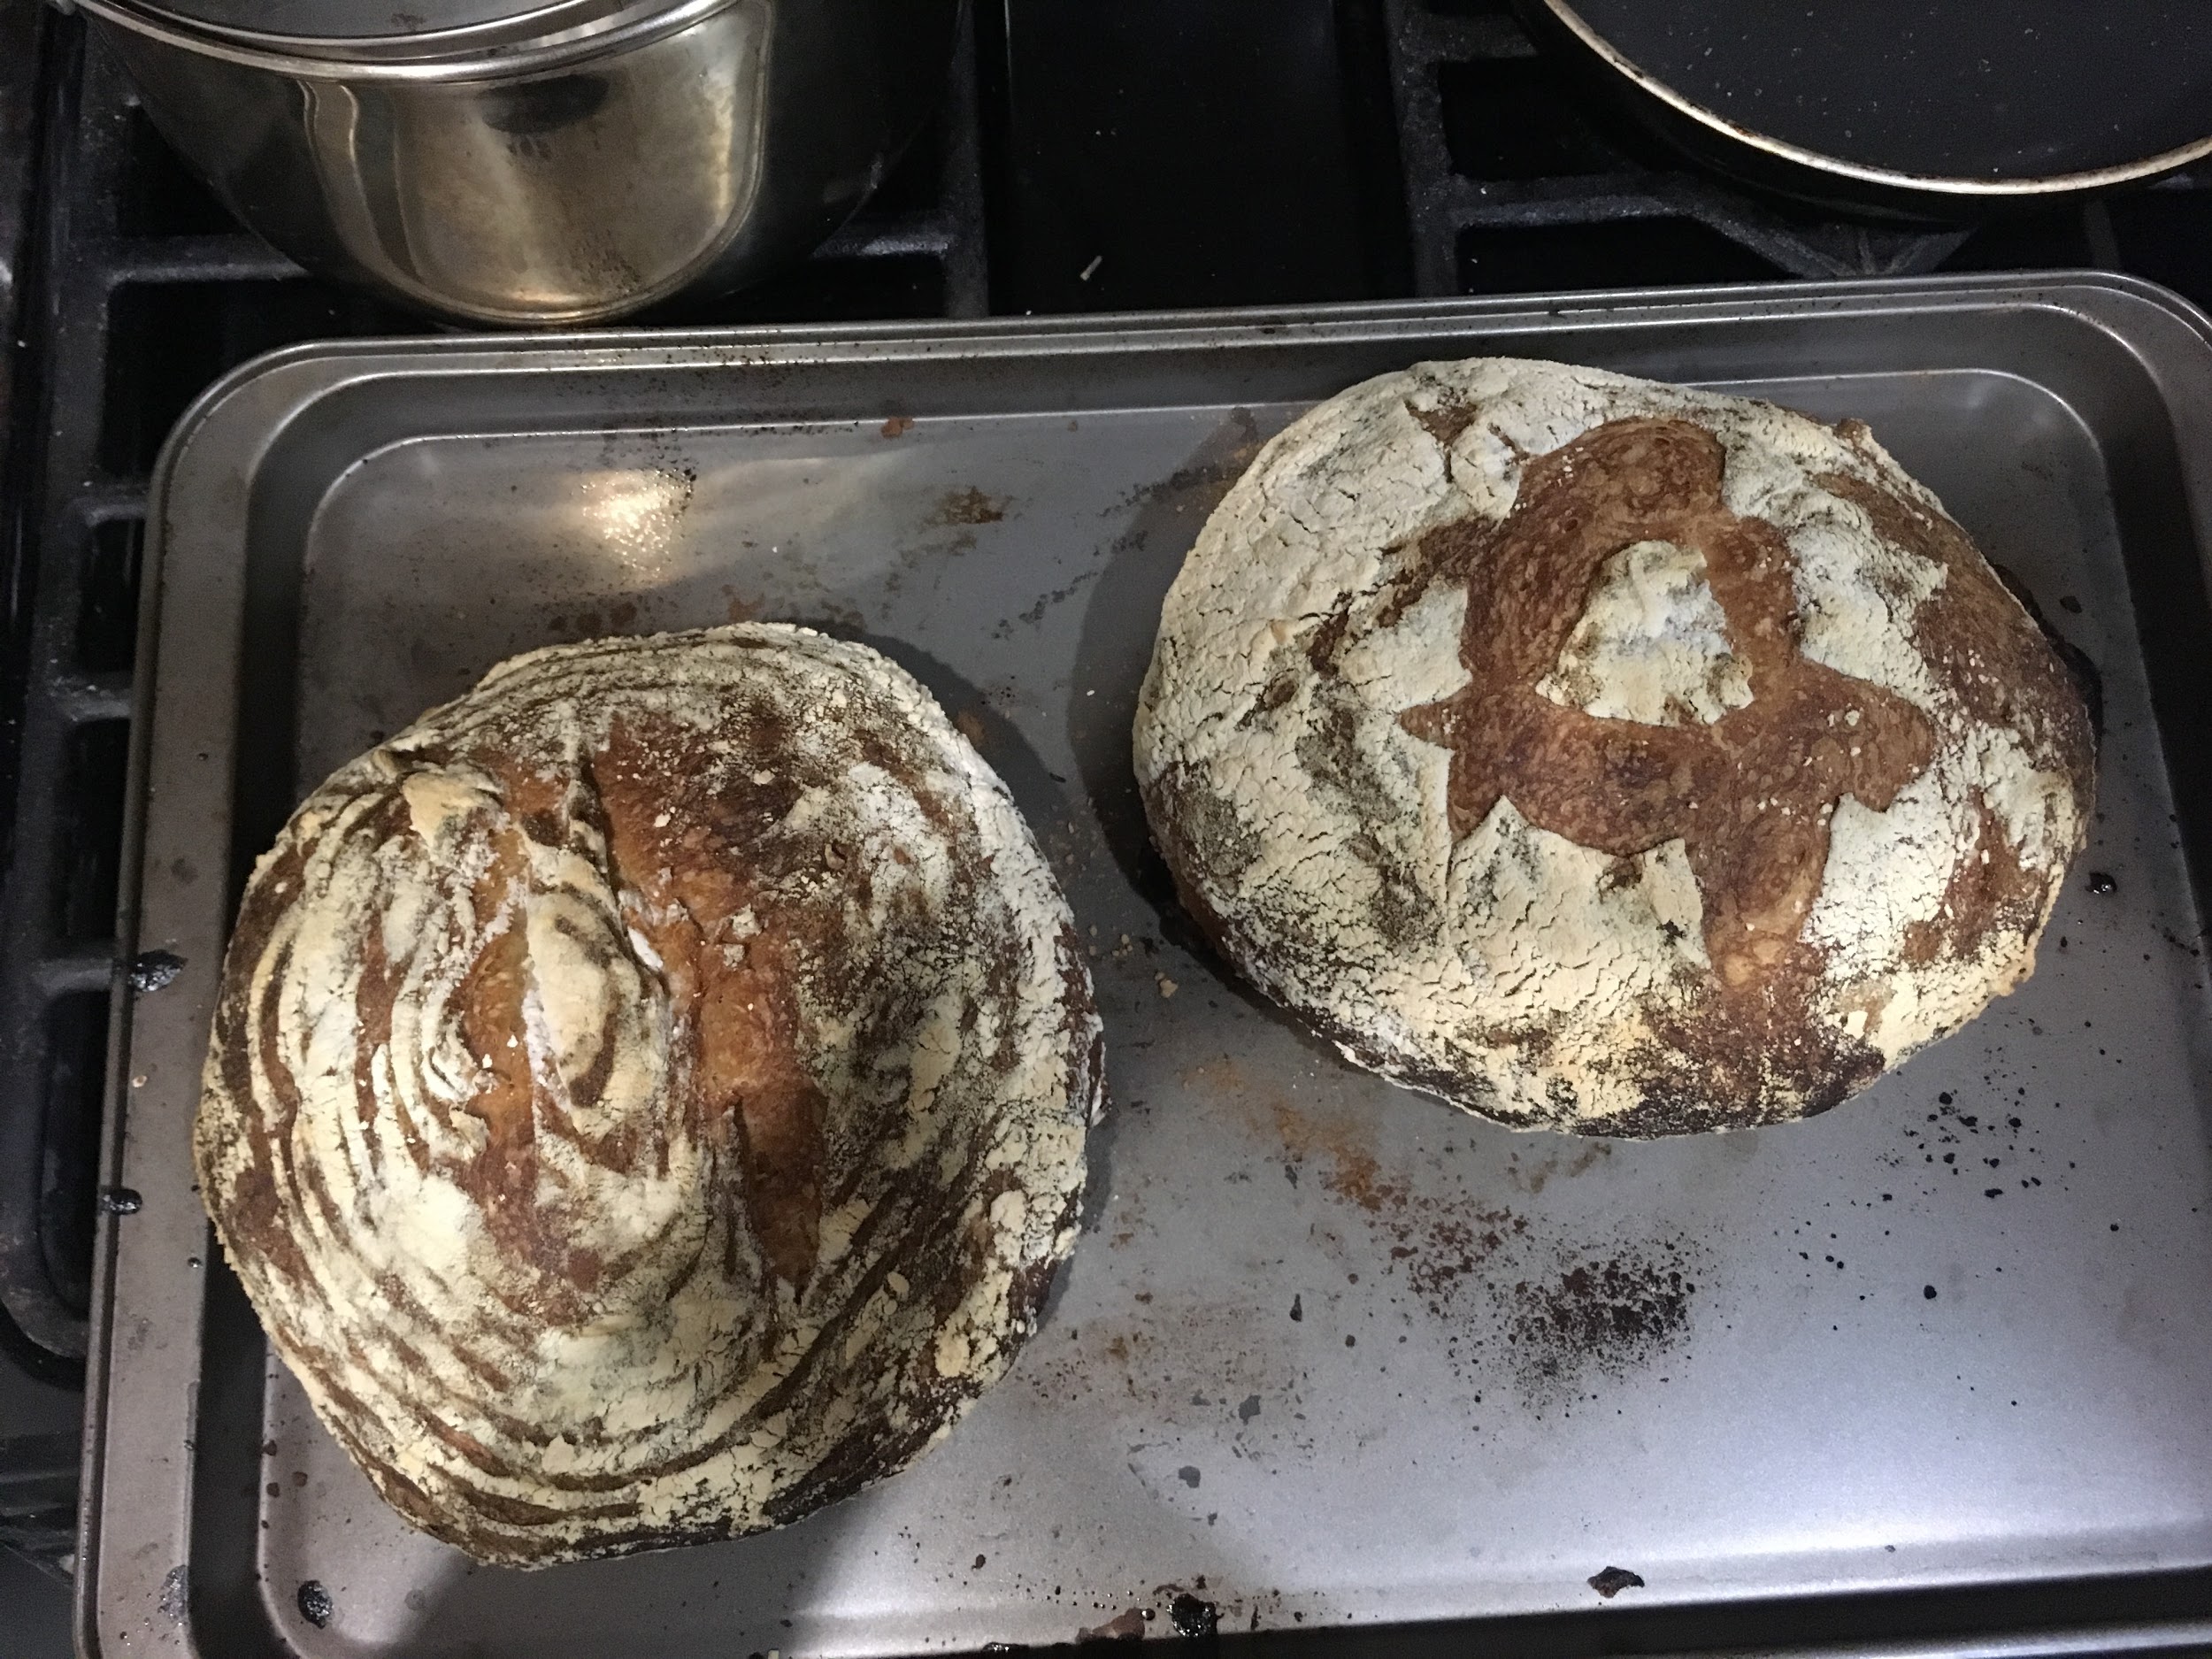
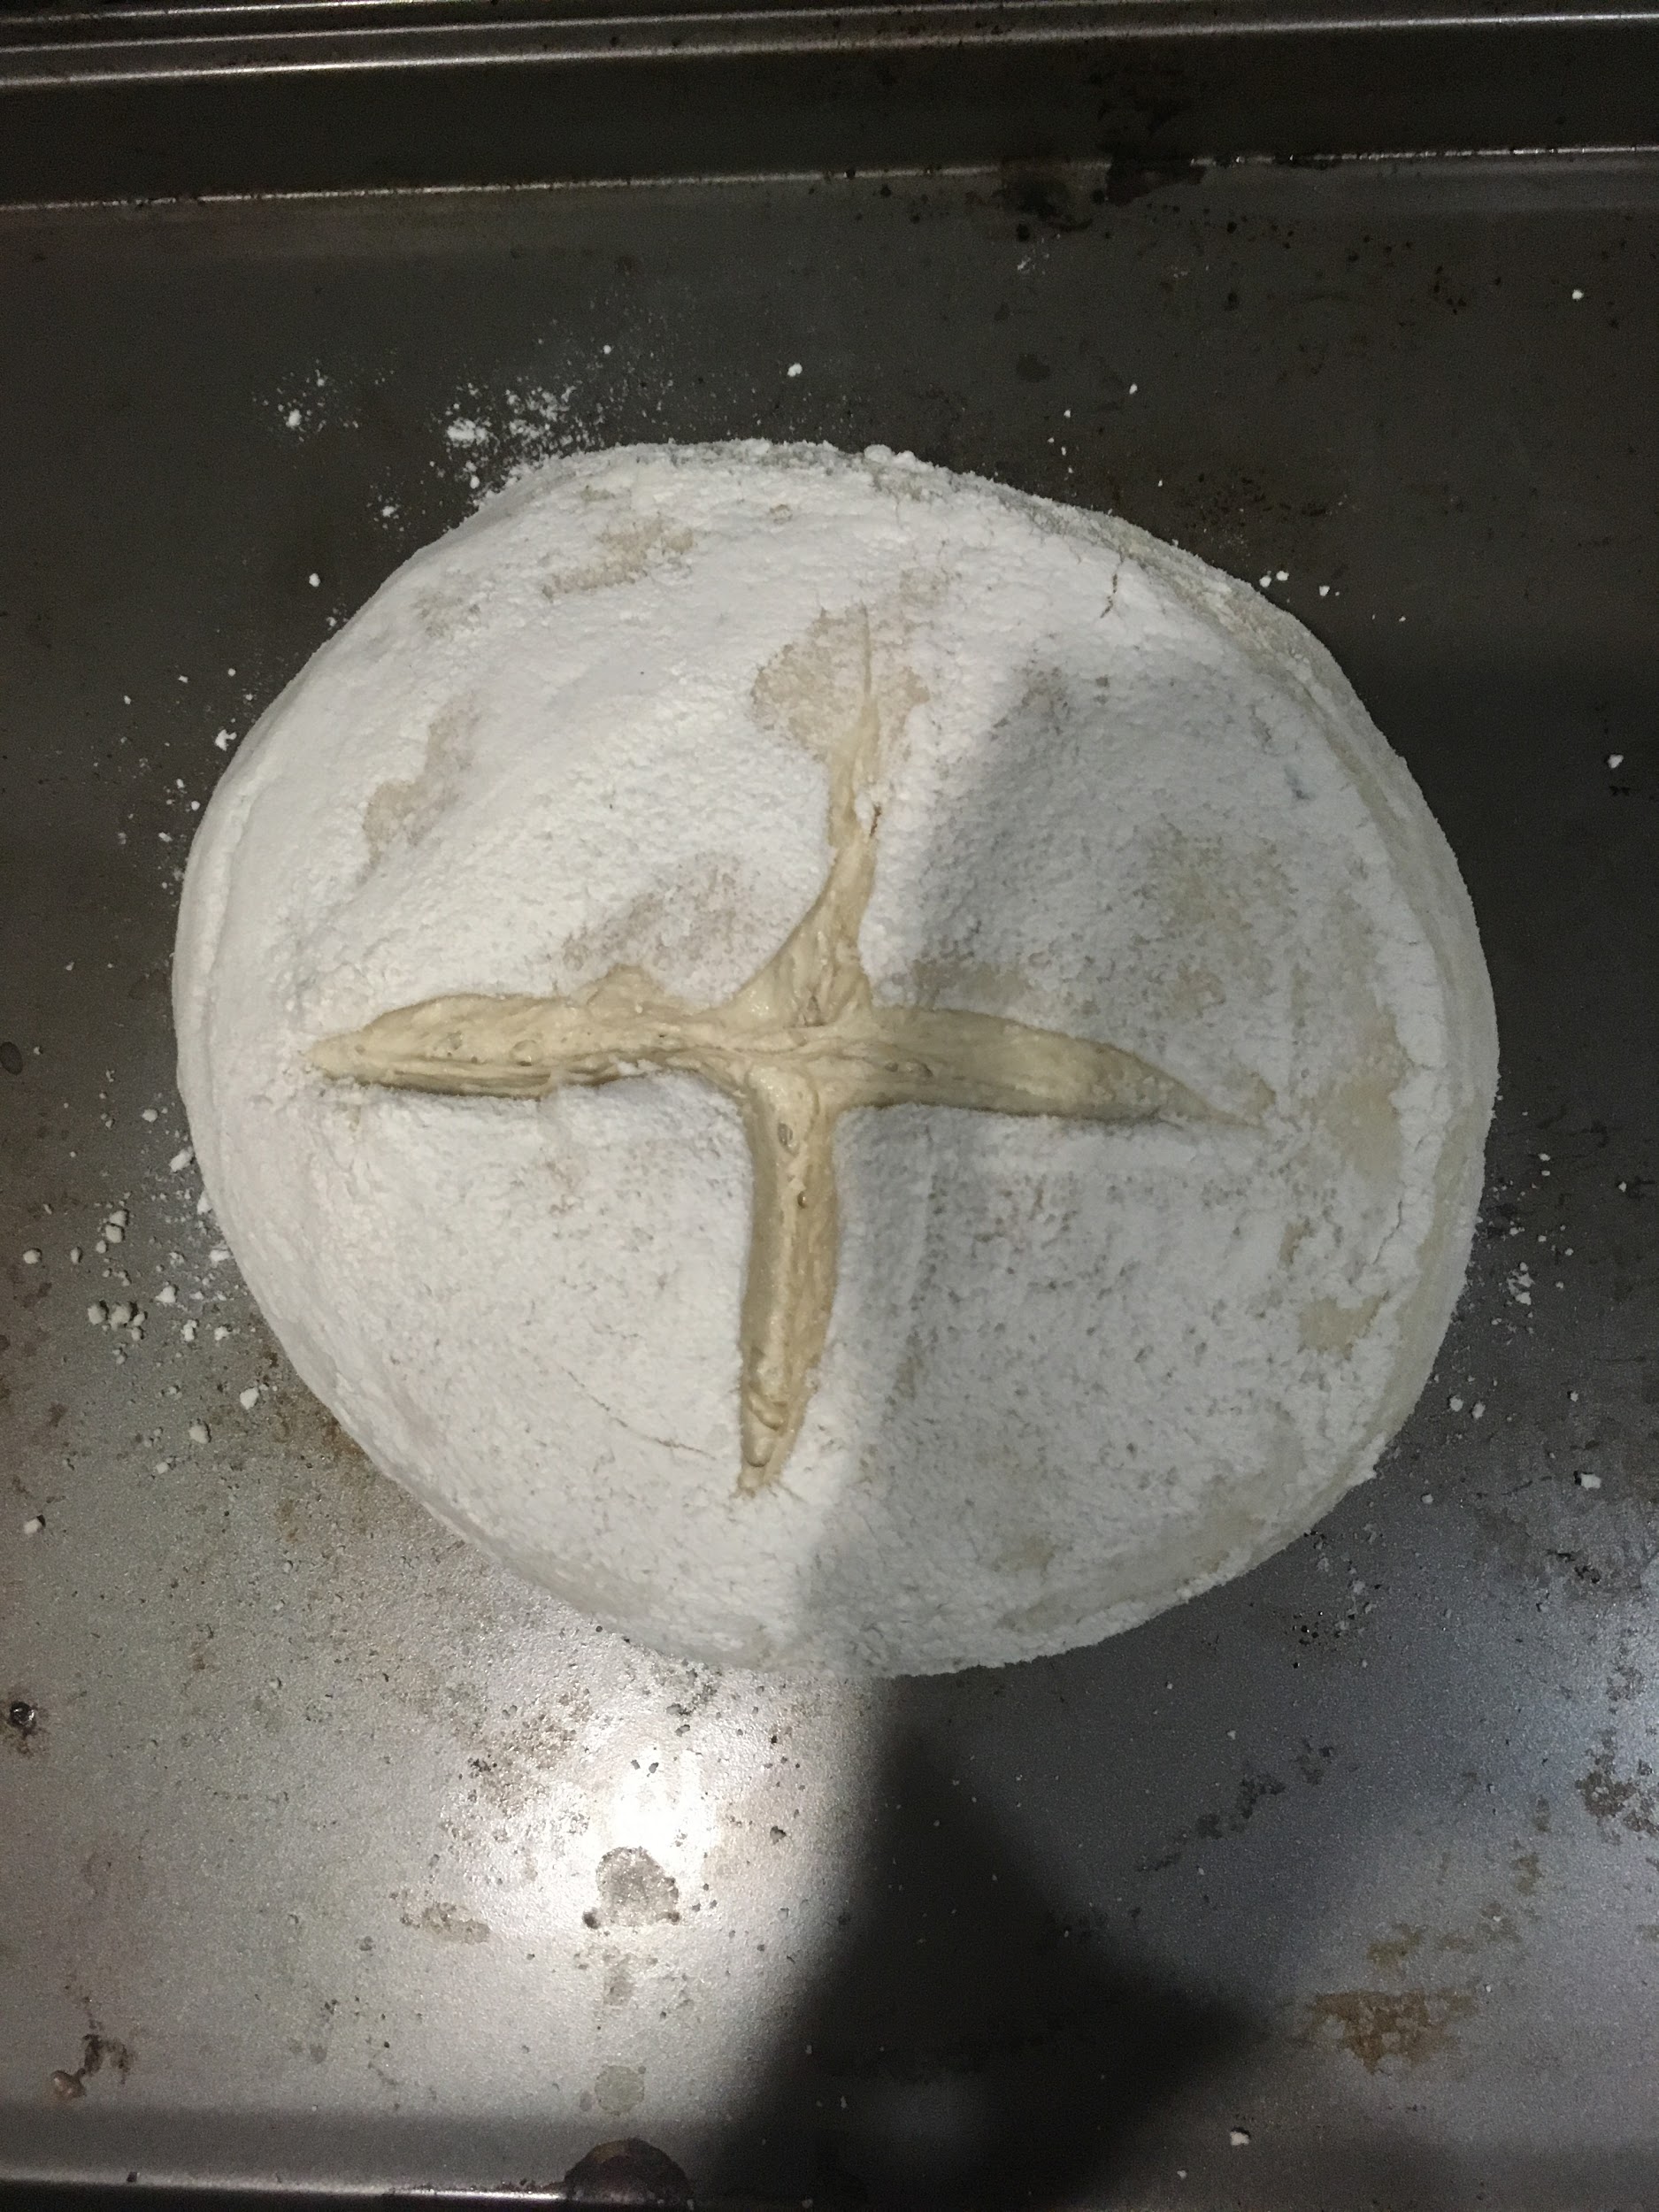
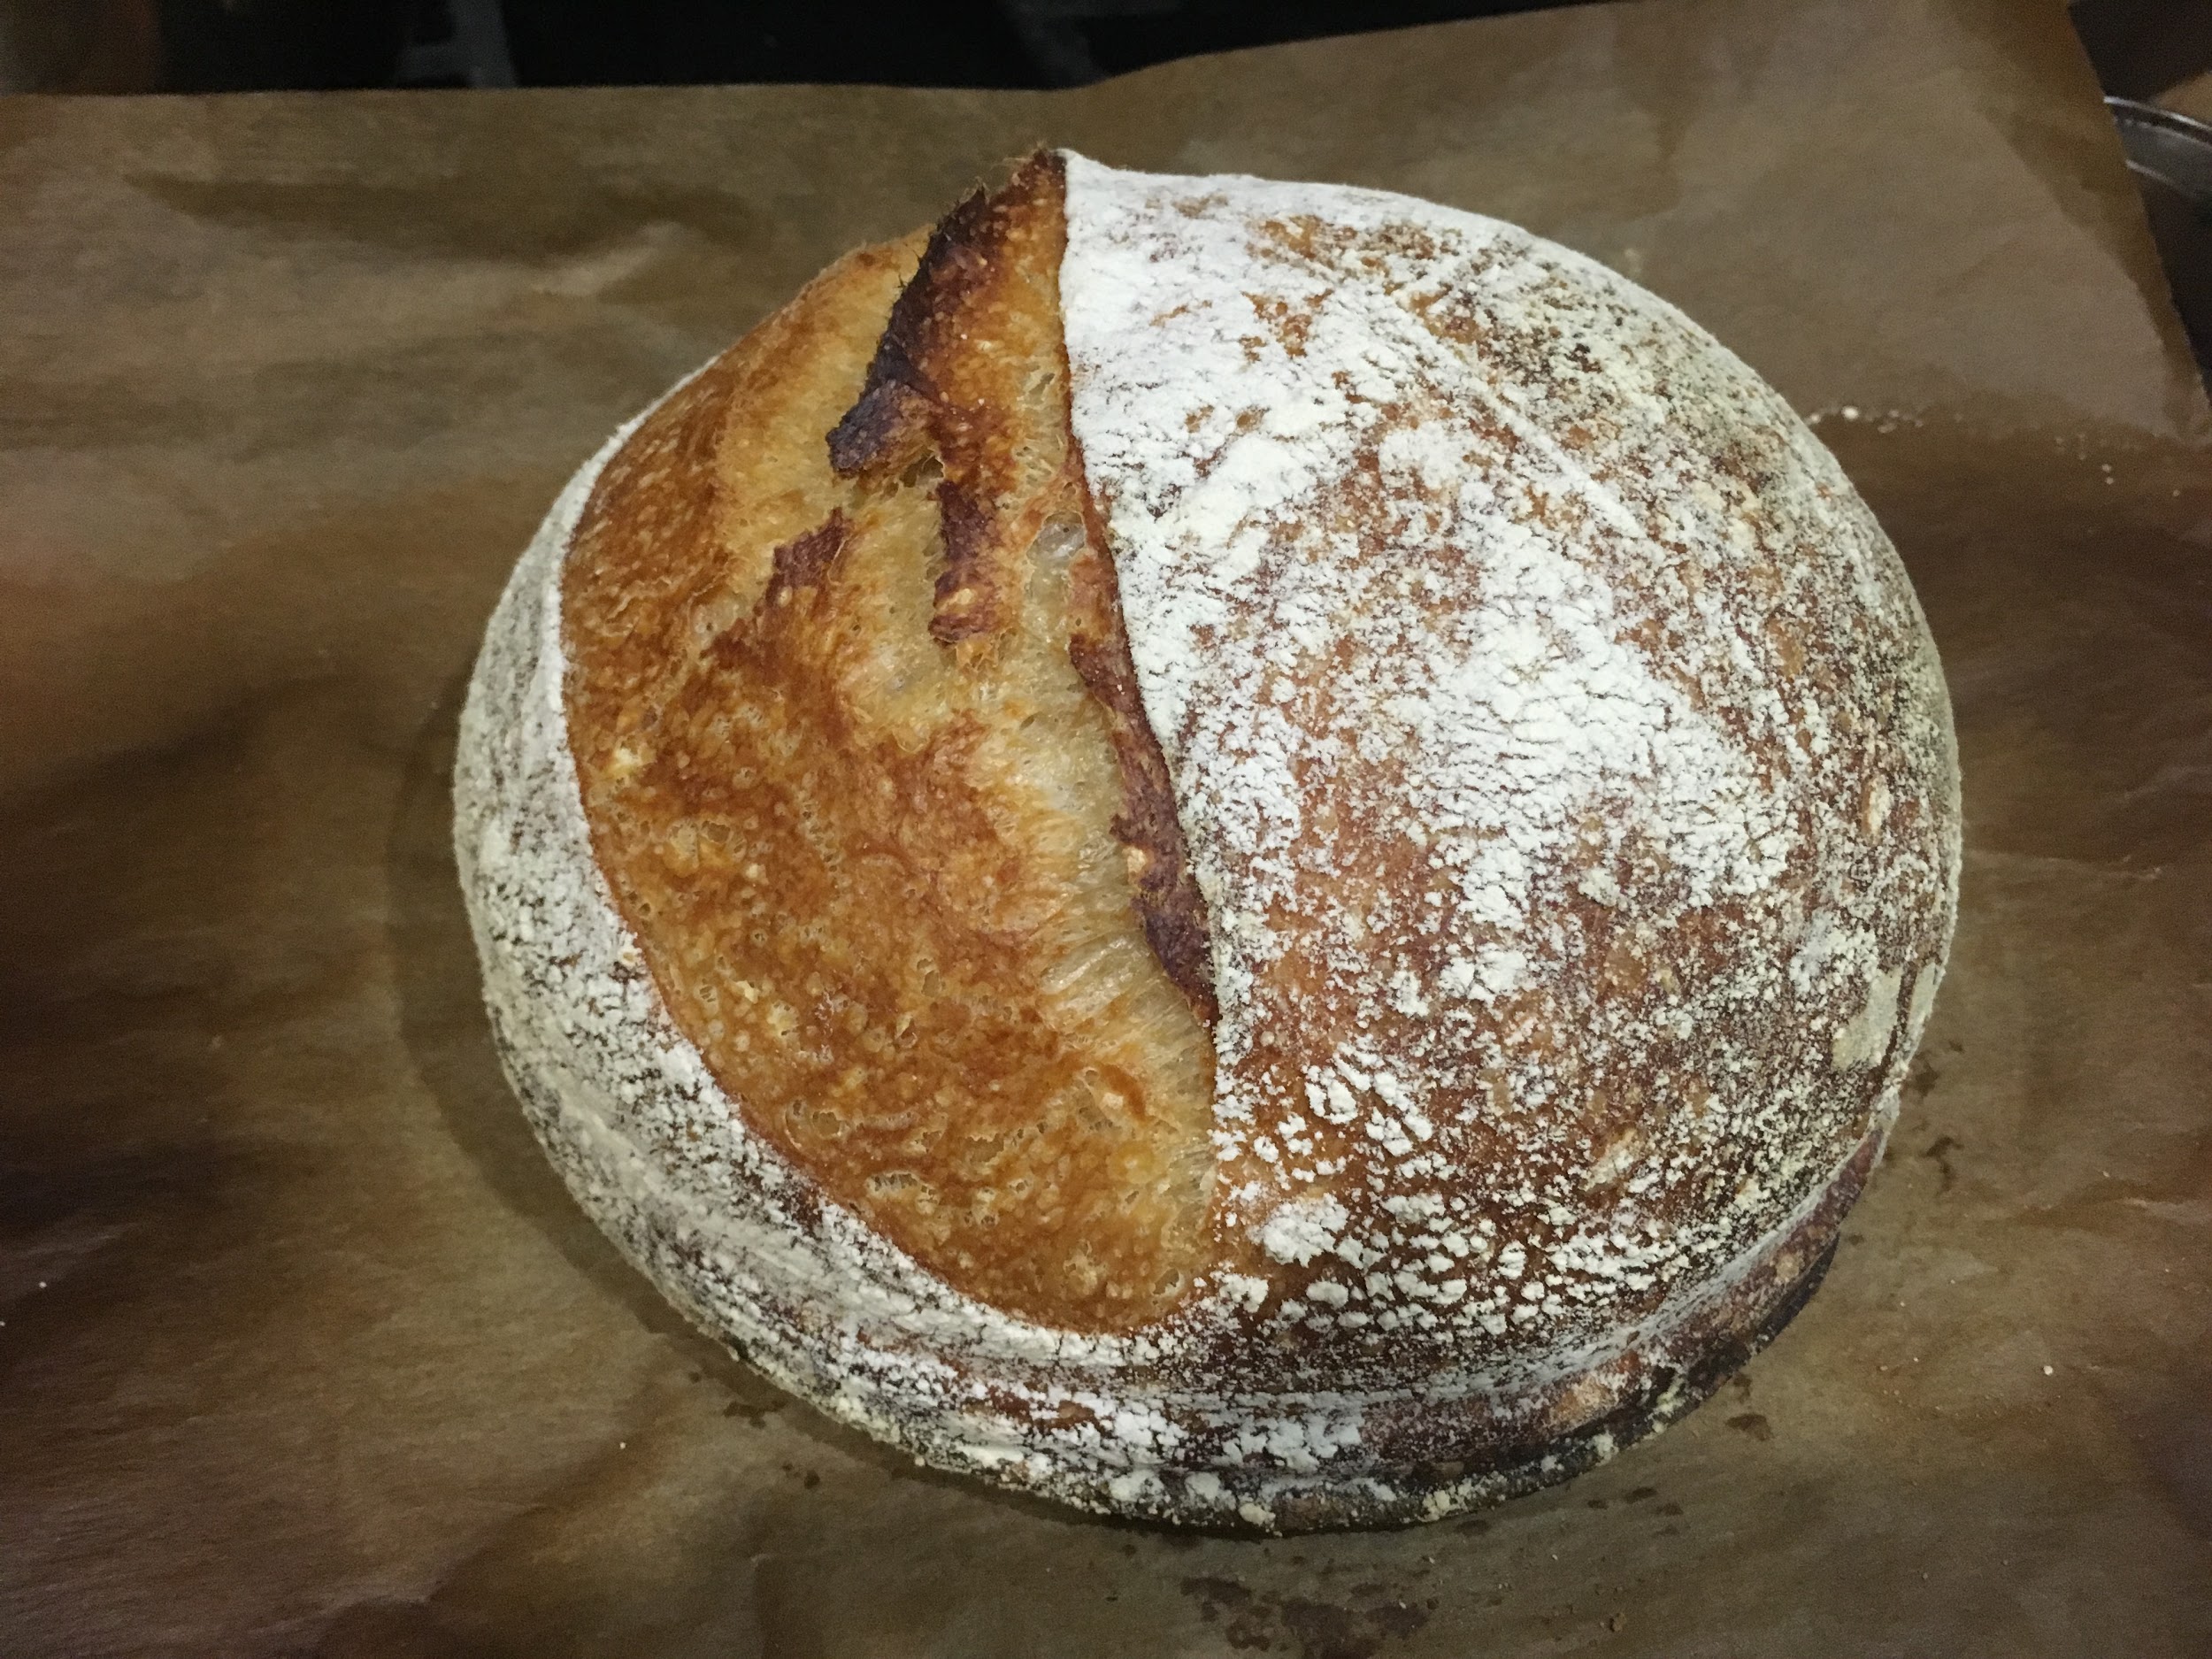
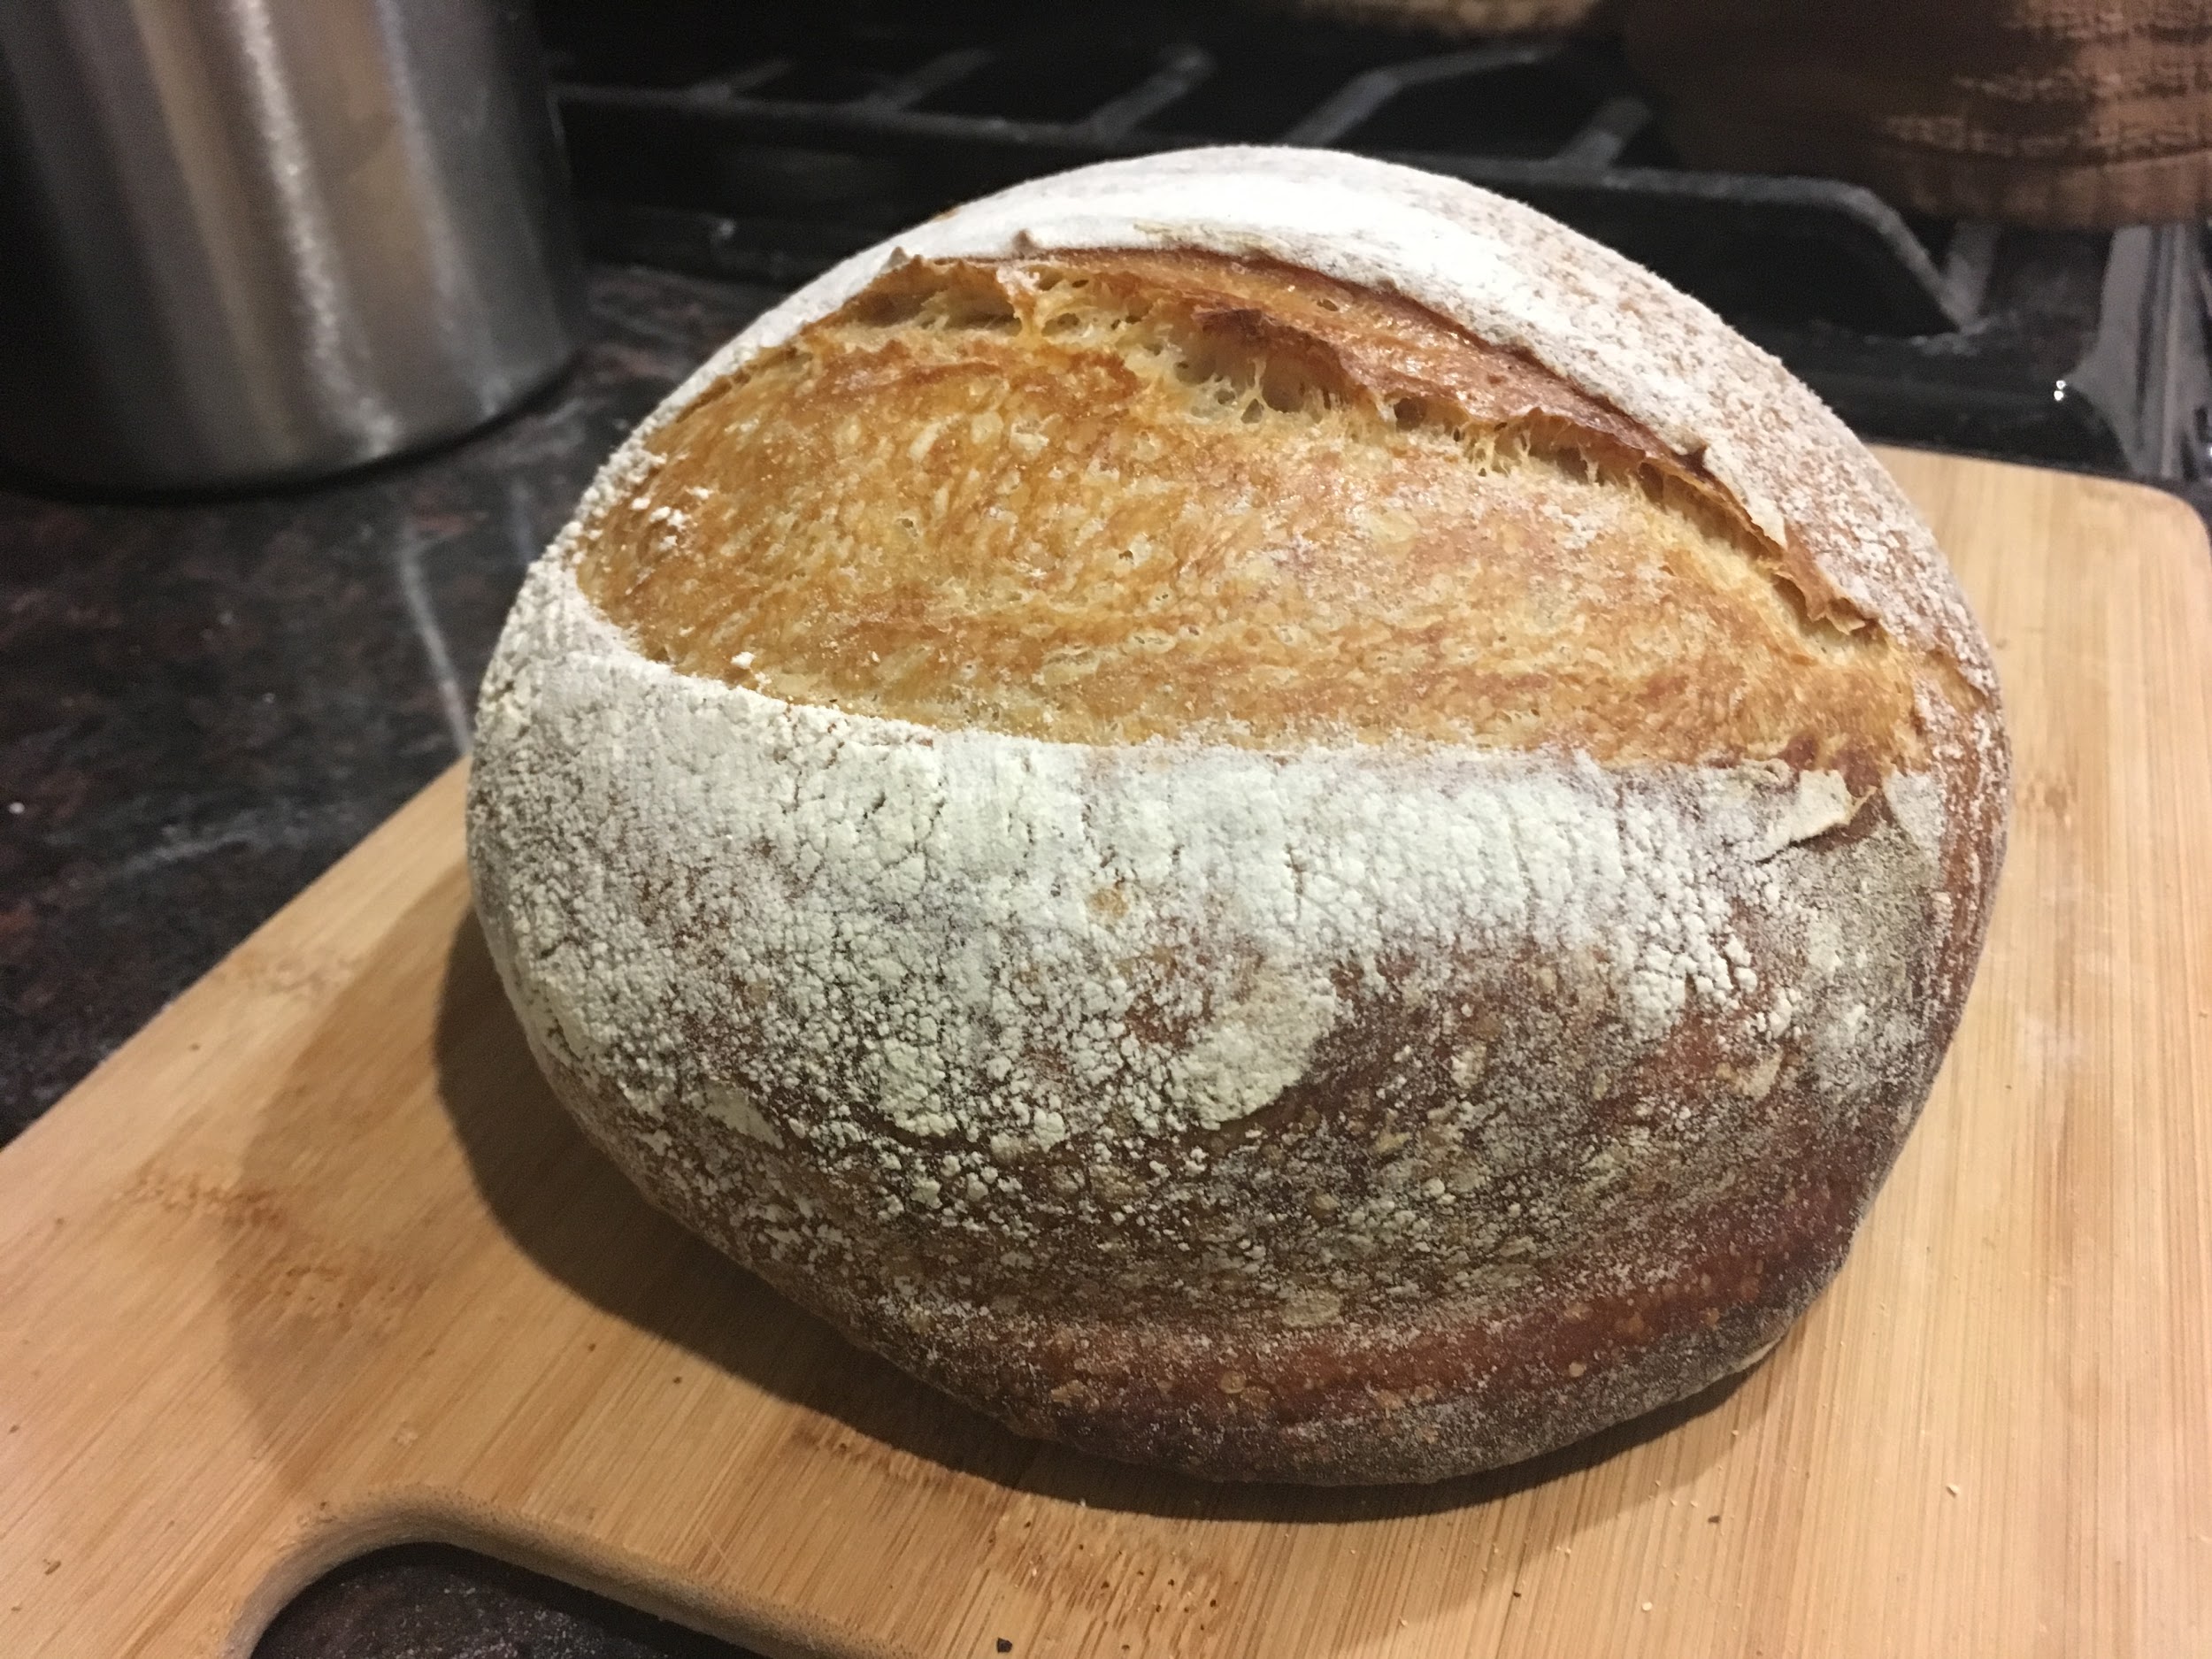
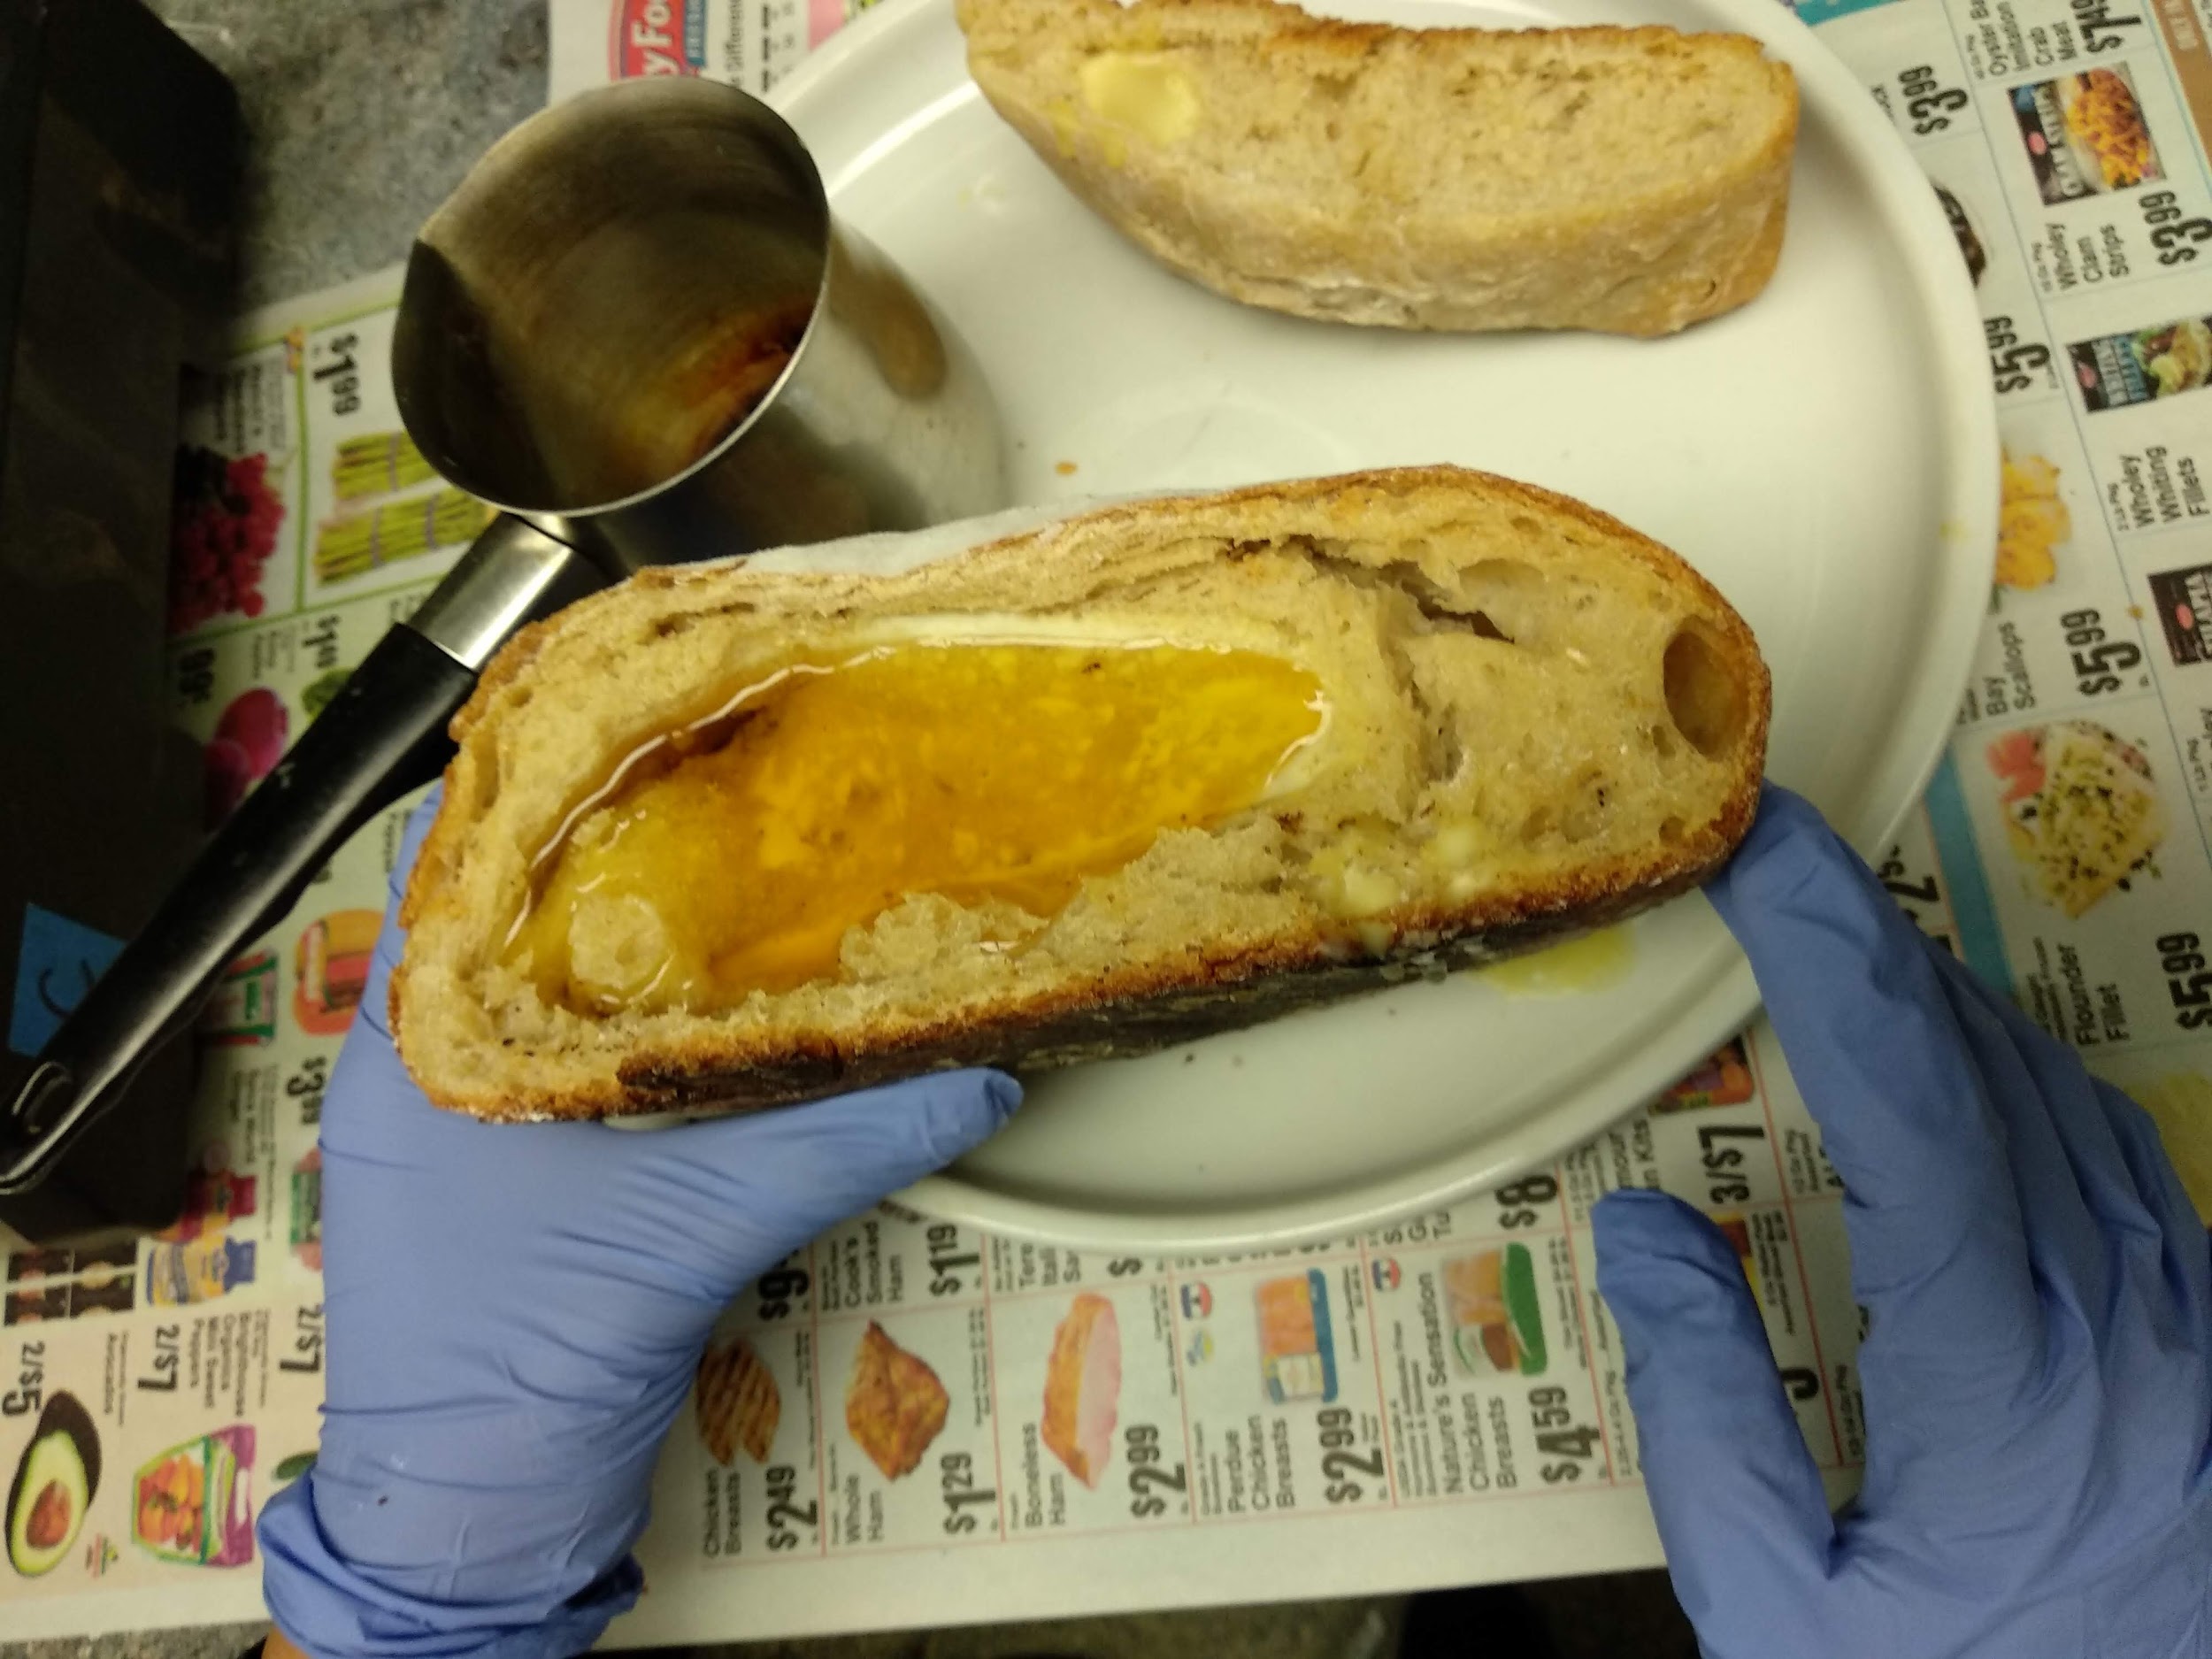
11:00pm: Doughs were tipped out onto the baking tray, with three scores made across Dough #1 and two scores on Dough #2 to differentiate the loaves. Despite dusting both containers with flour, dough #2 still adhered to the container when tipped out, resulting in some spreading. Both doughs were baked in oven for 45 minutes, until deep-brown and hollow when their bottoms are tapped.
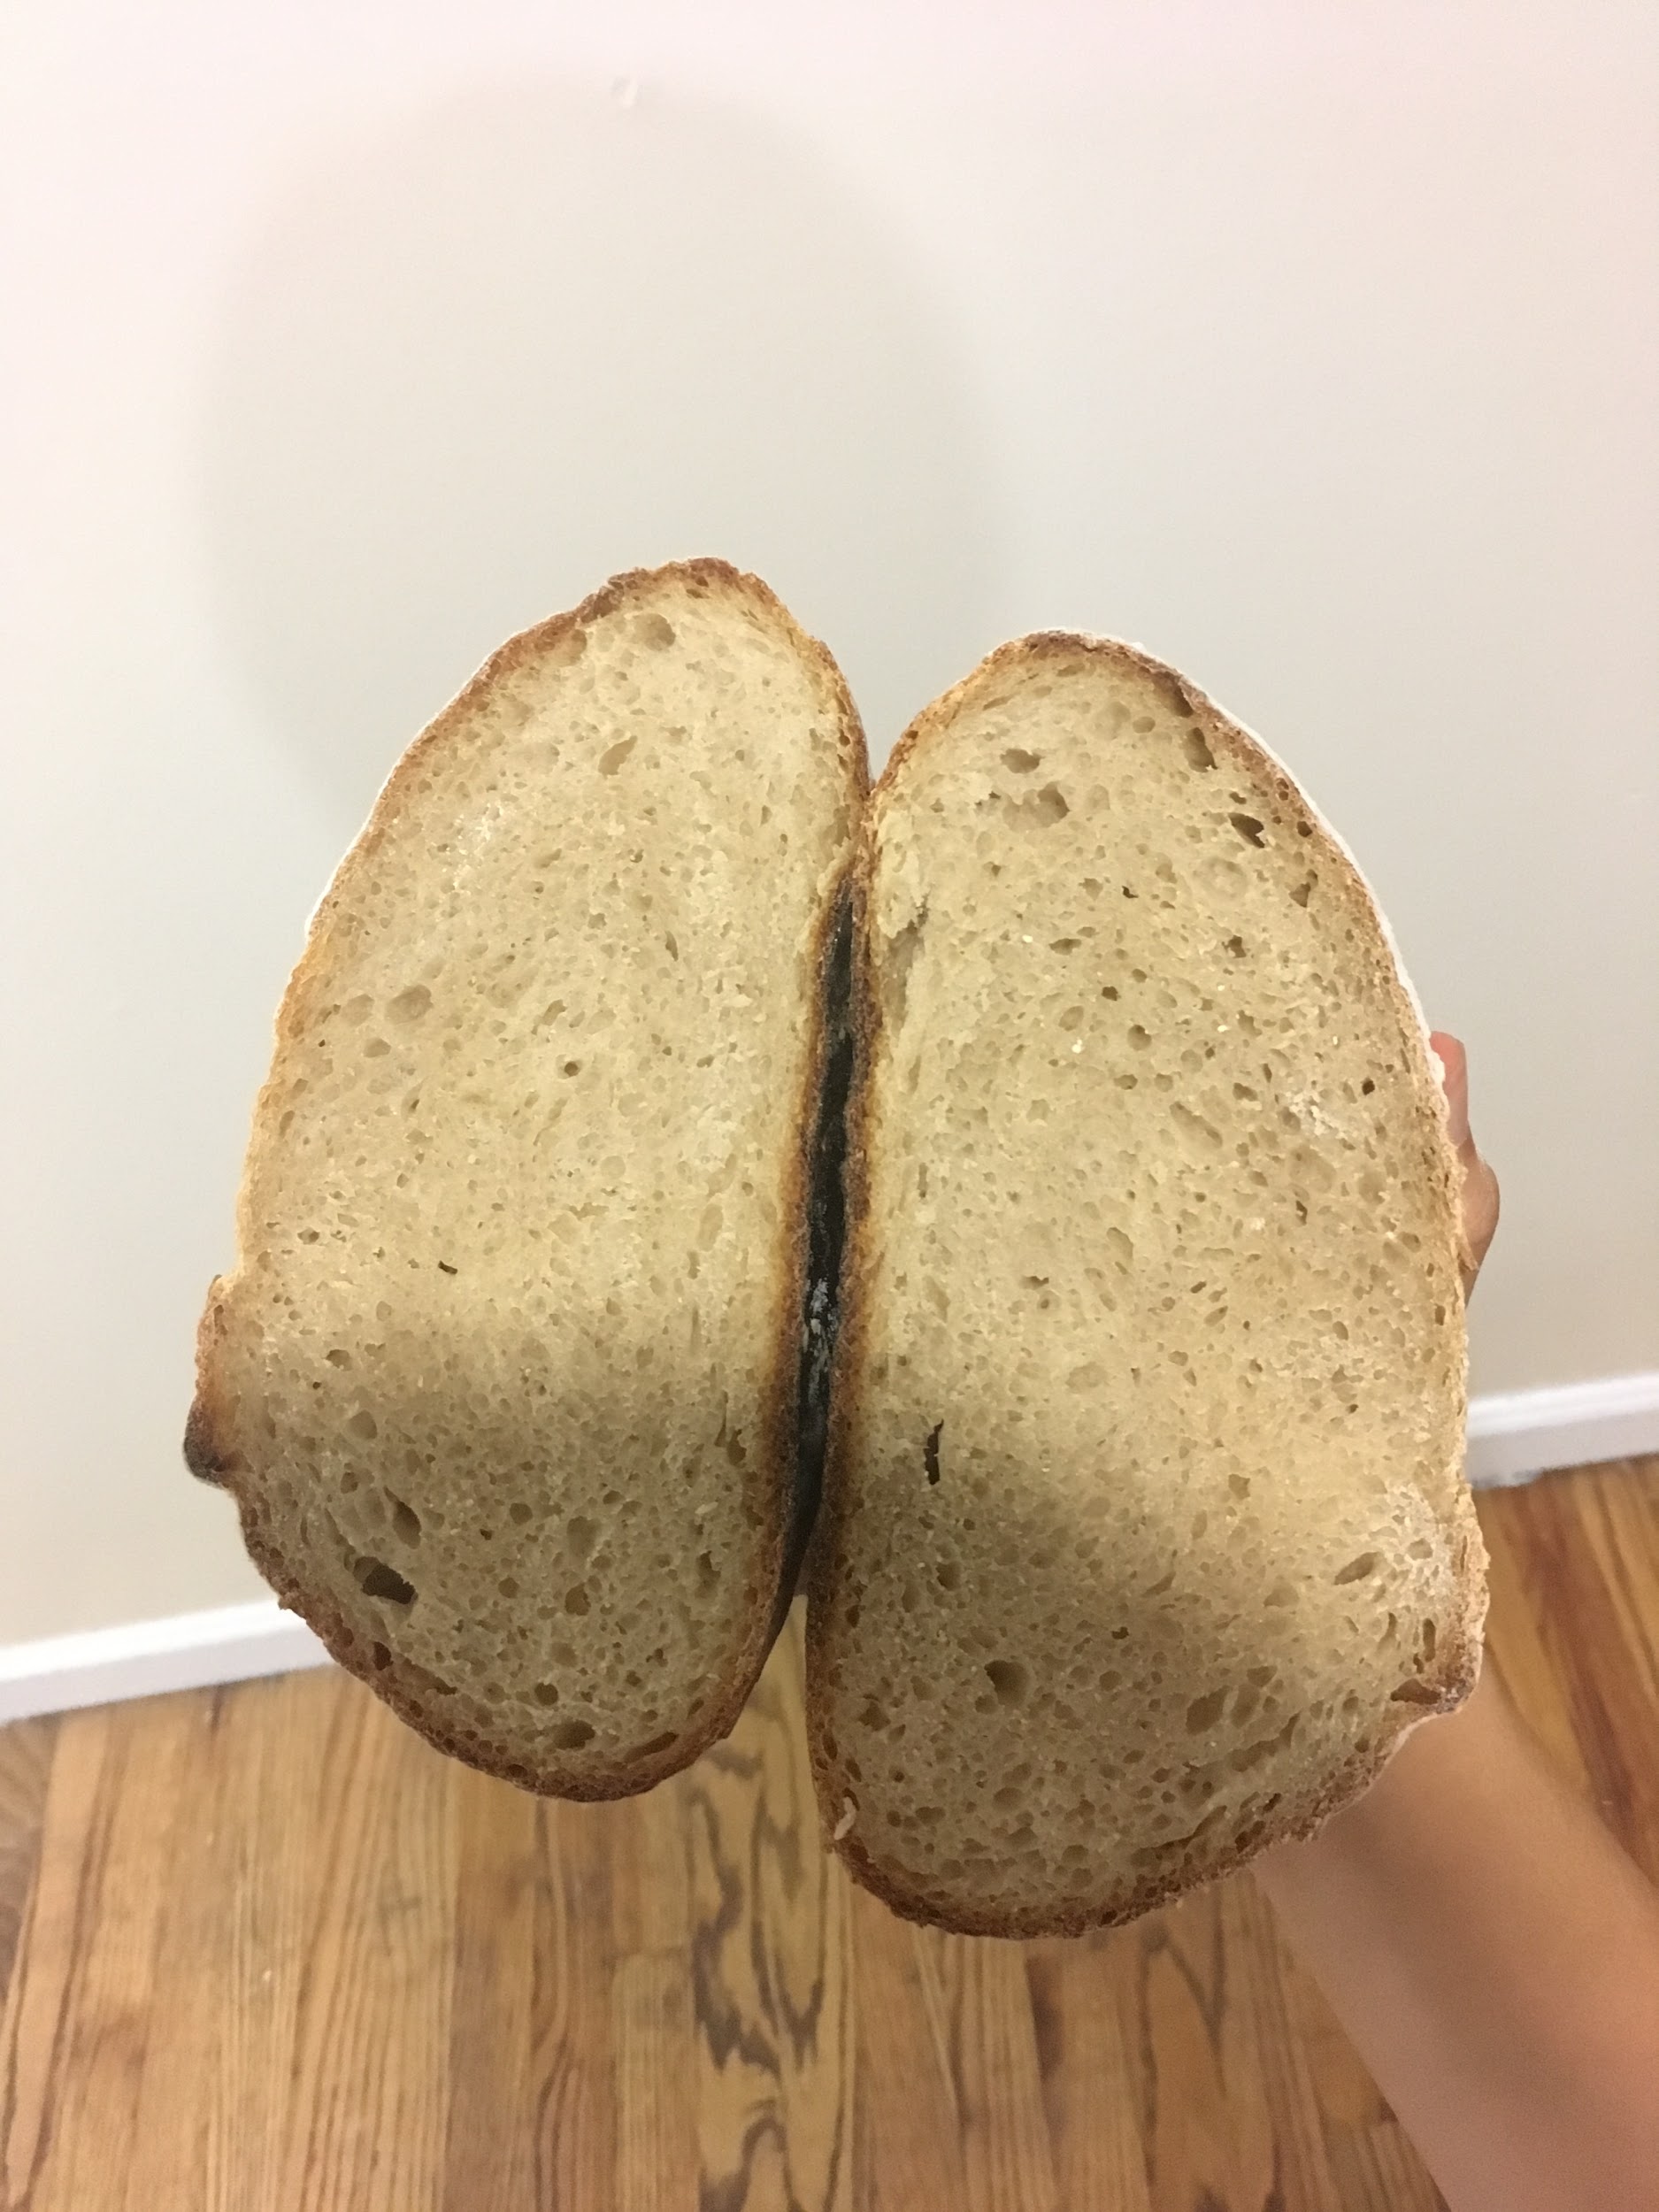
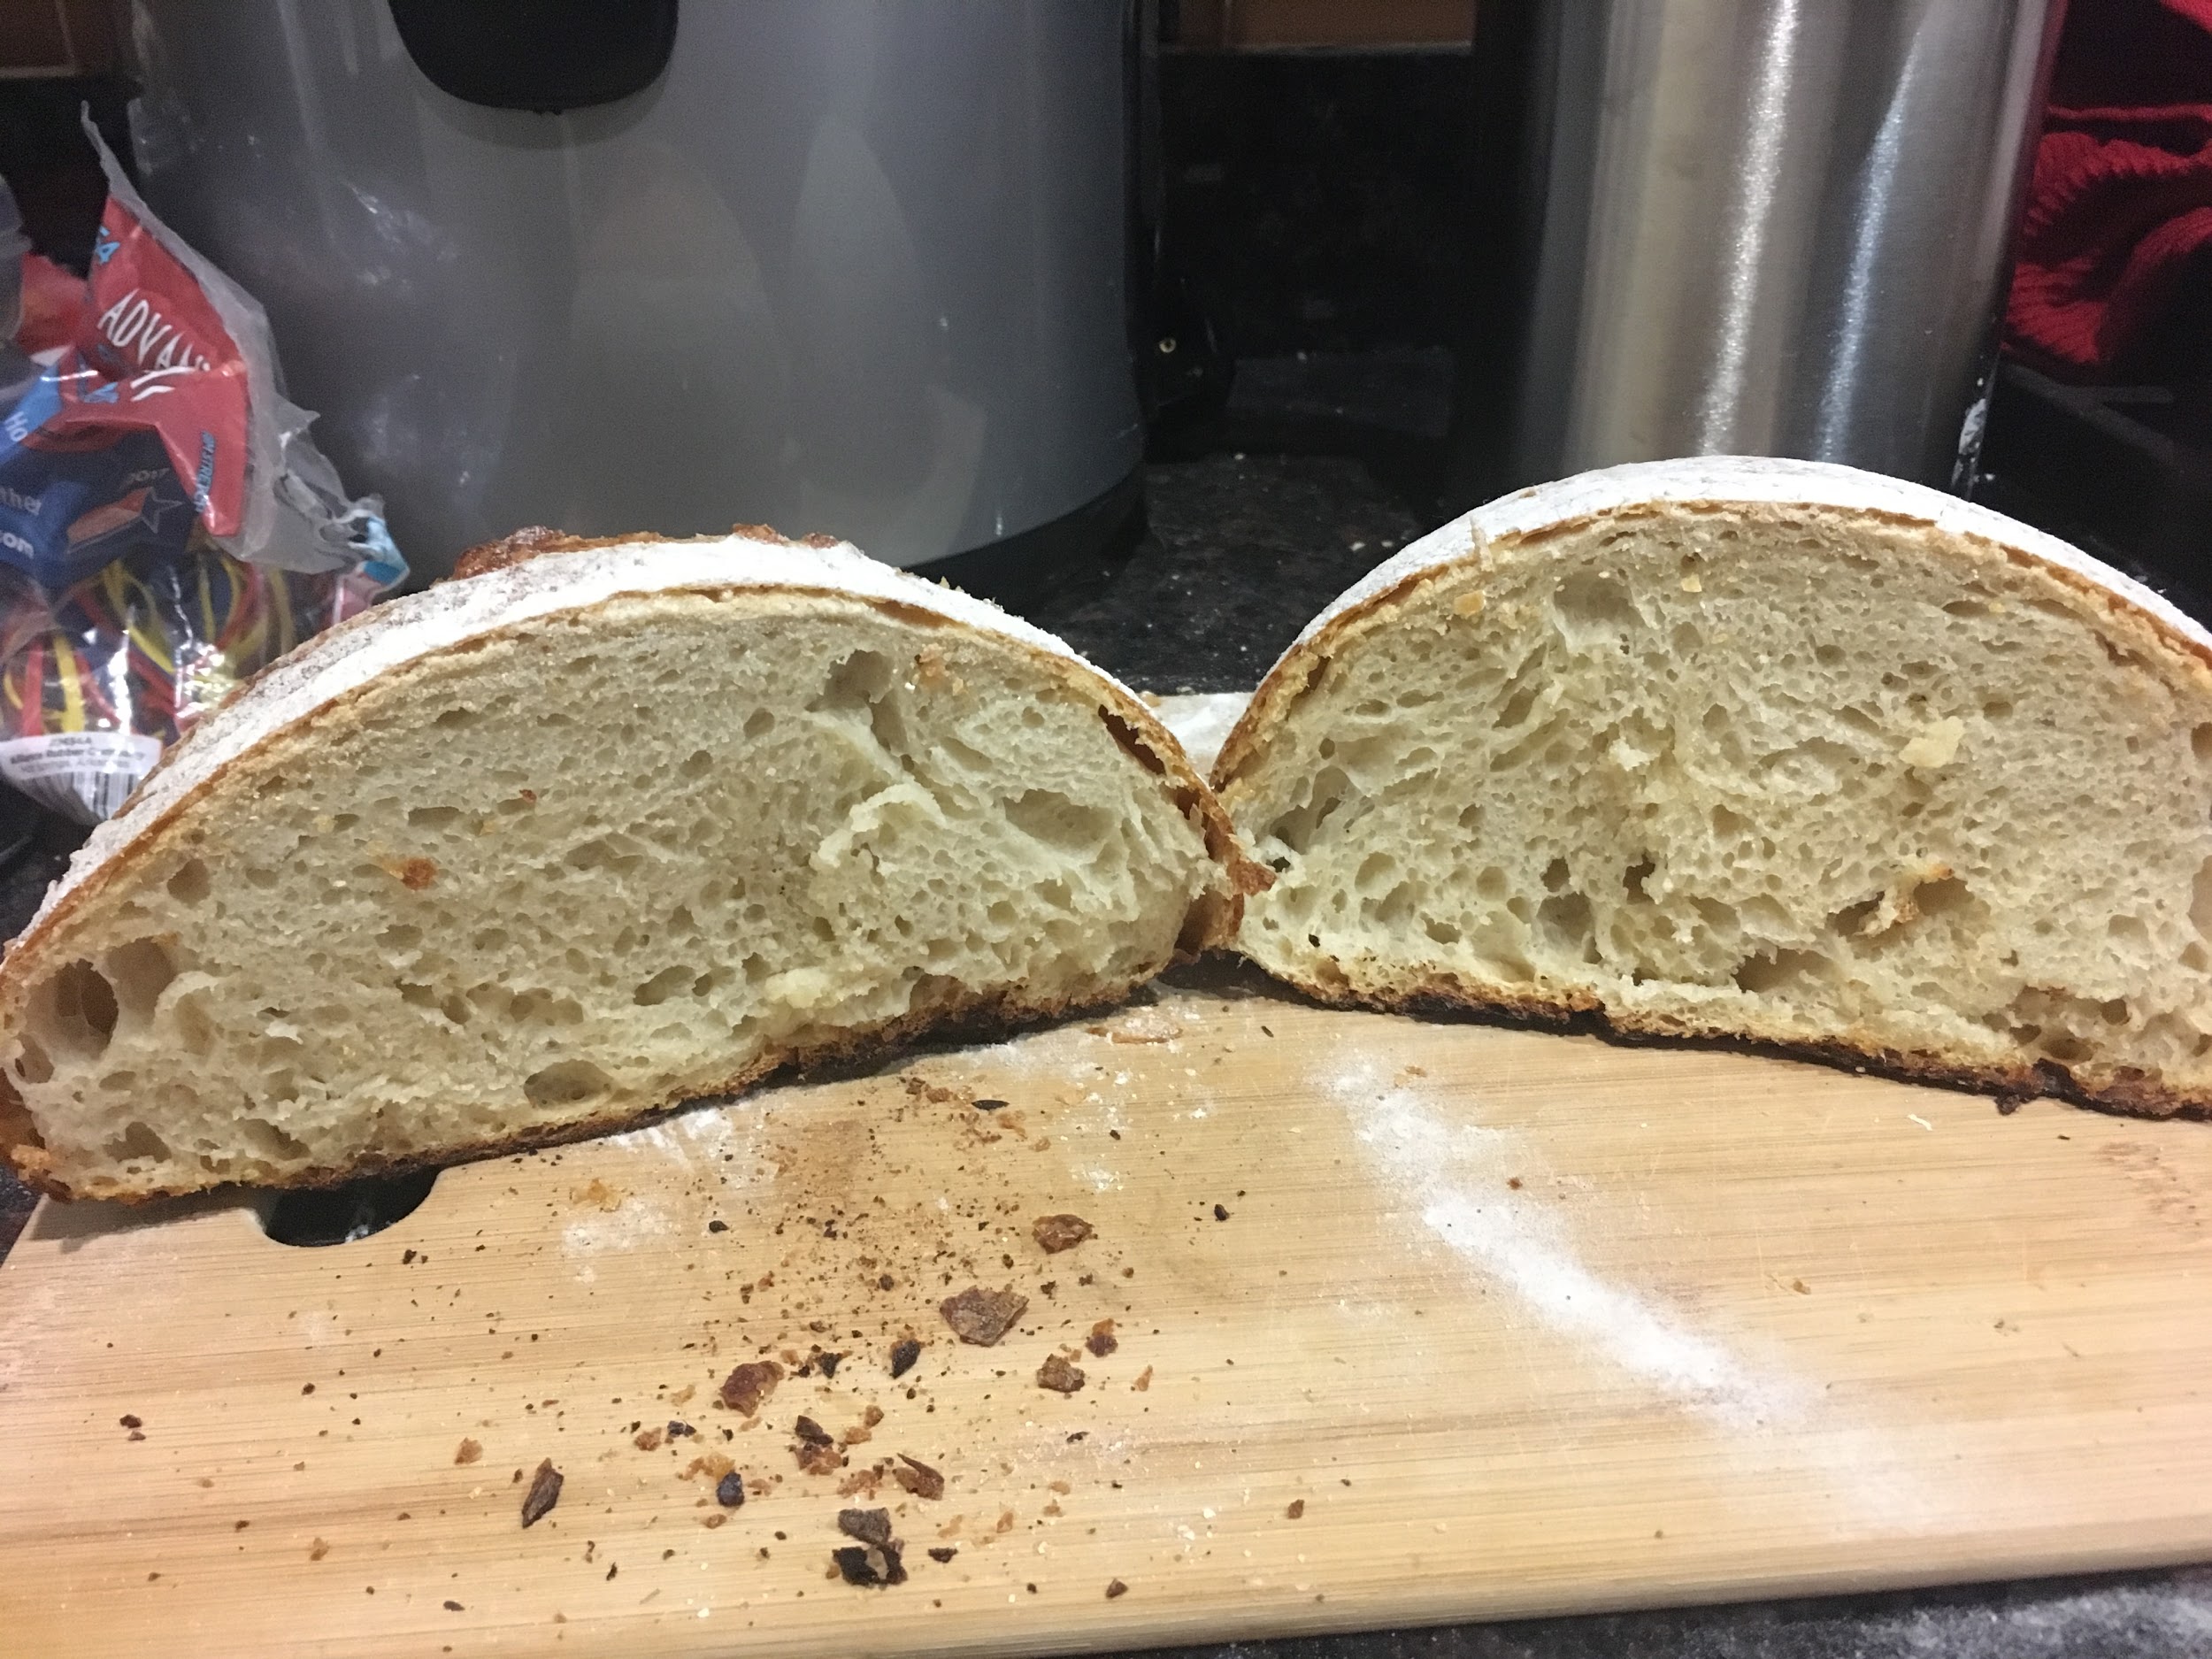
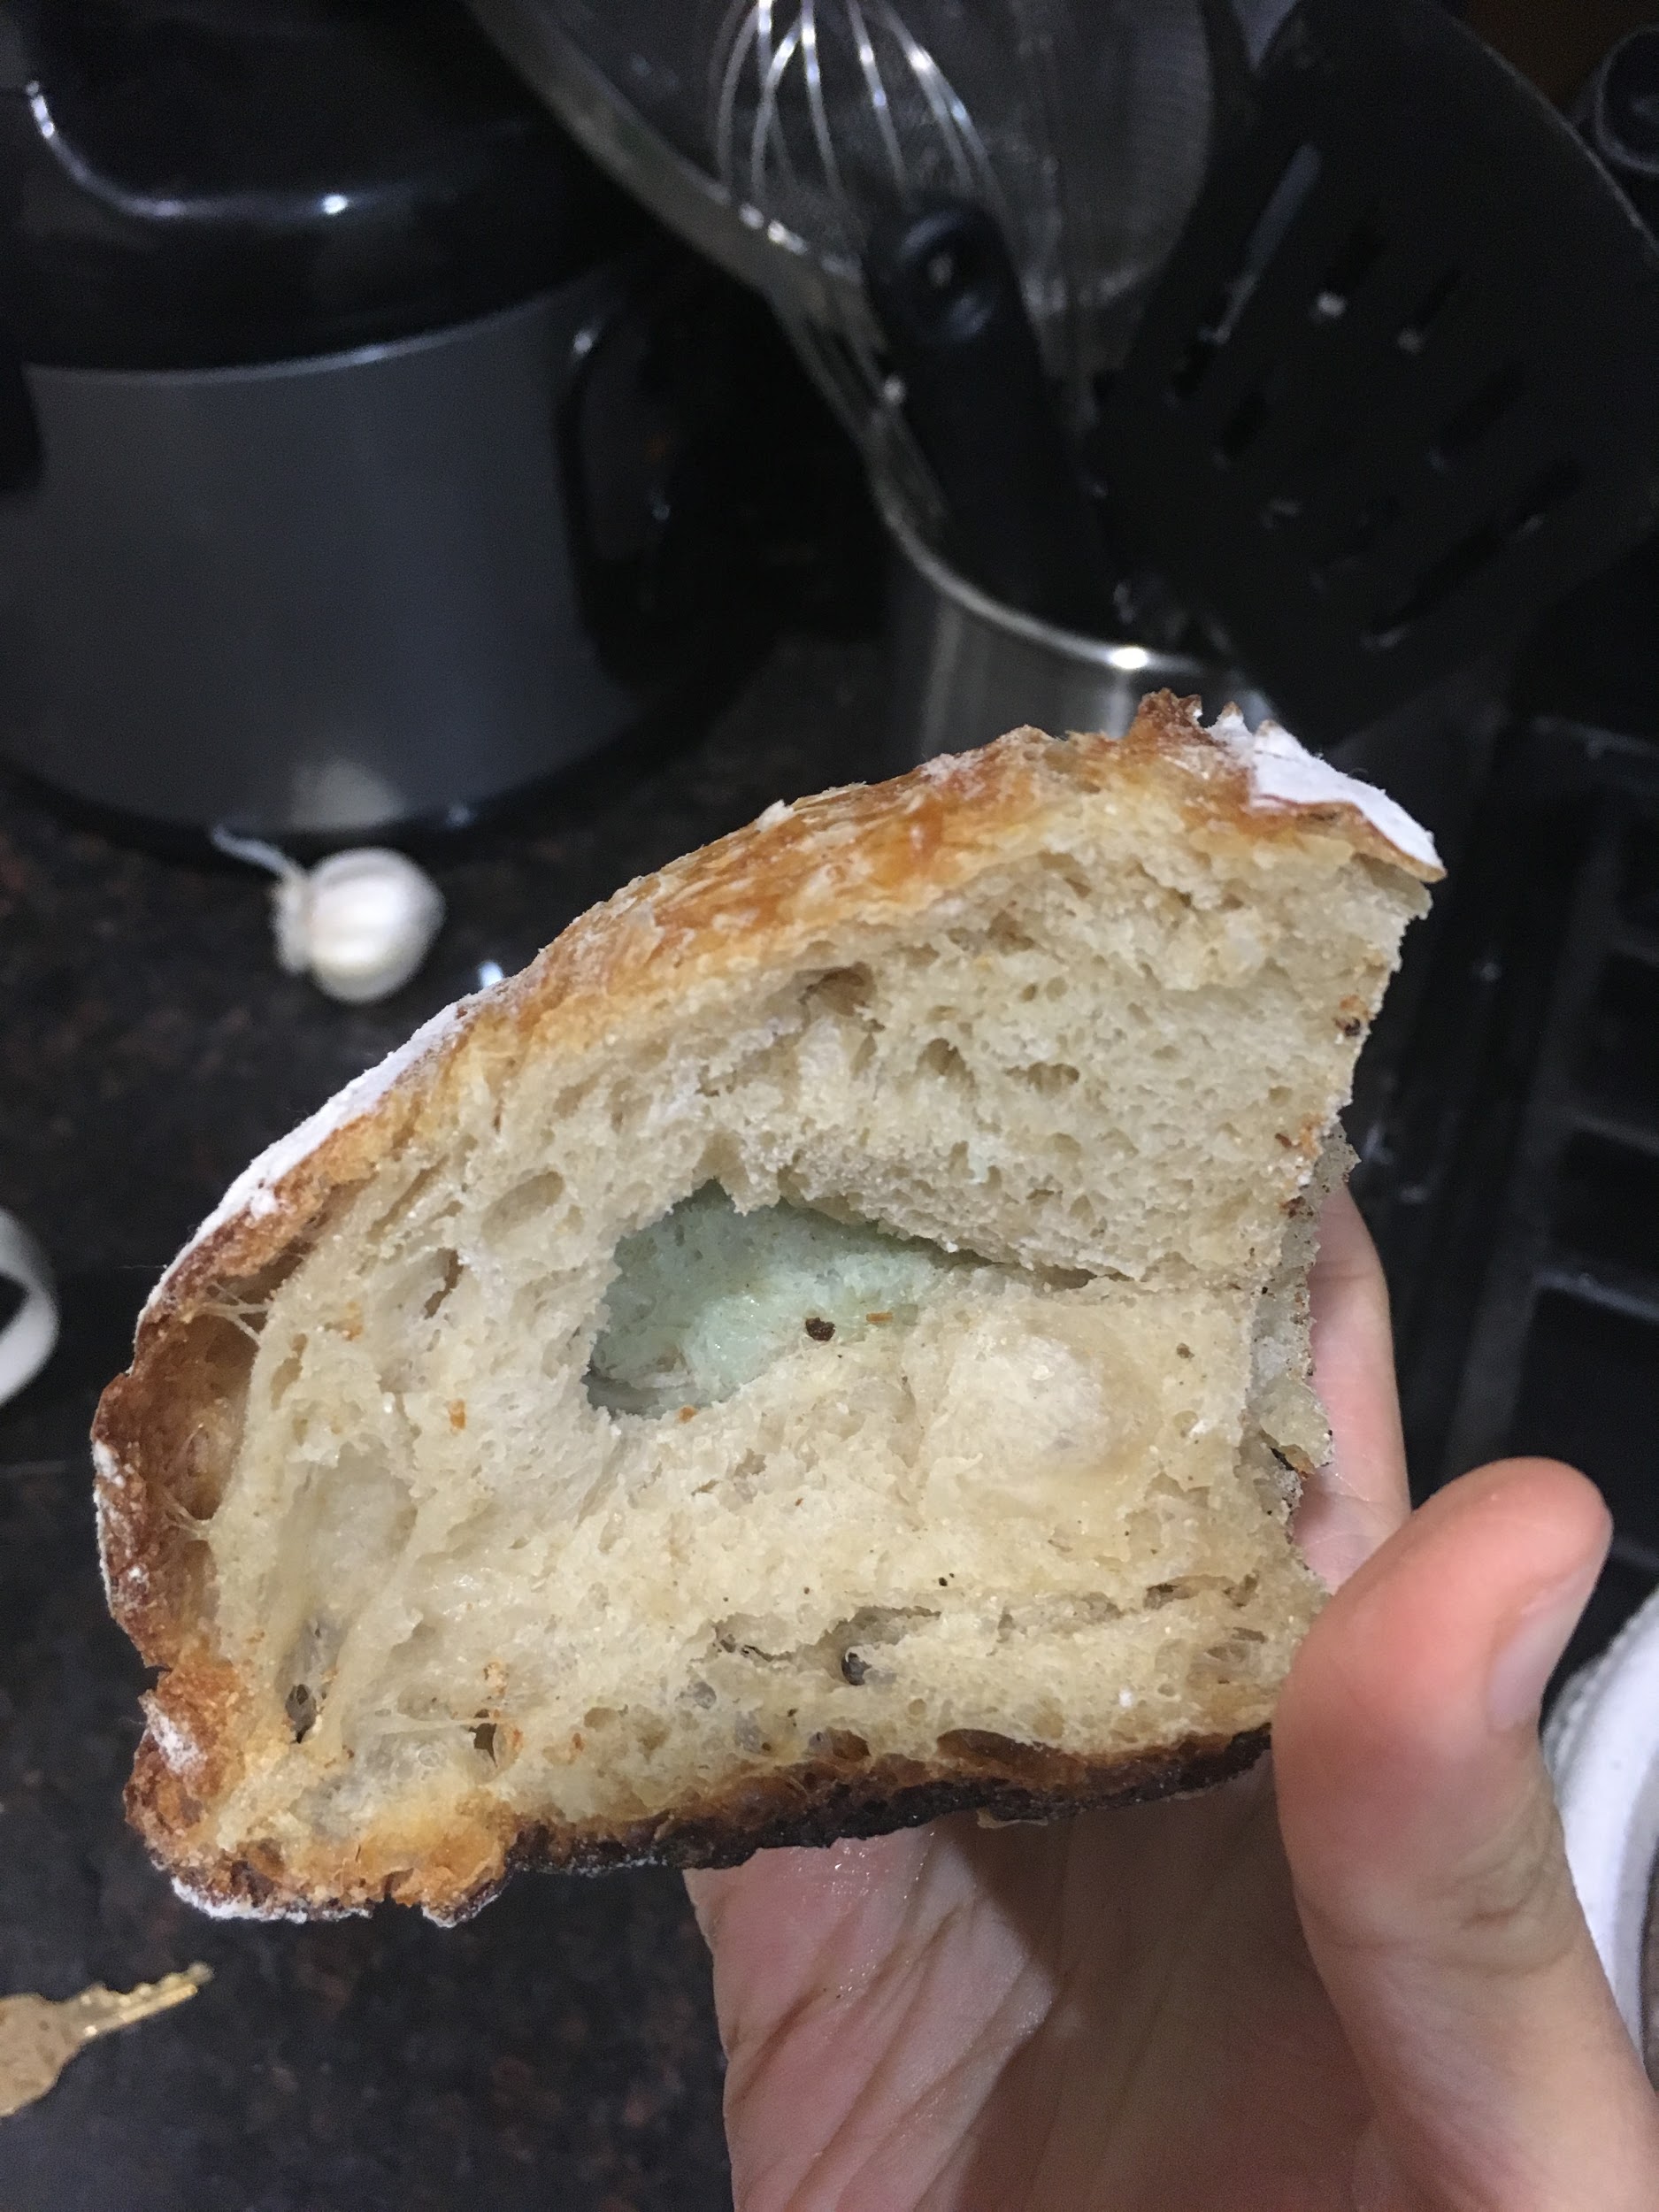
11:45pm: Both loaves taken out of the oven with similar rise and caramelization of crust. Crumb structure of #1 was tighter than #2, but with similar flavour - likely affected by placement of the dough in the oven (#2 placed towards the inside of the oven had a more open crumb).
| Image URL: |
|---|
 |
Notes:
Dough #1 held its shape and was smoother than dough #2, especially in shaping process.
Given that starter #1 ended up with a more slack dough compared to #2, water can be cut back with future bakes involving #1
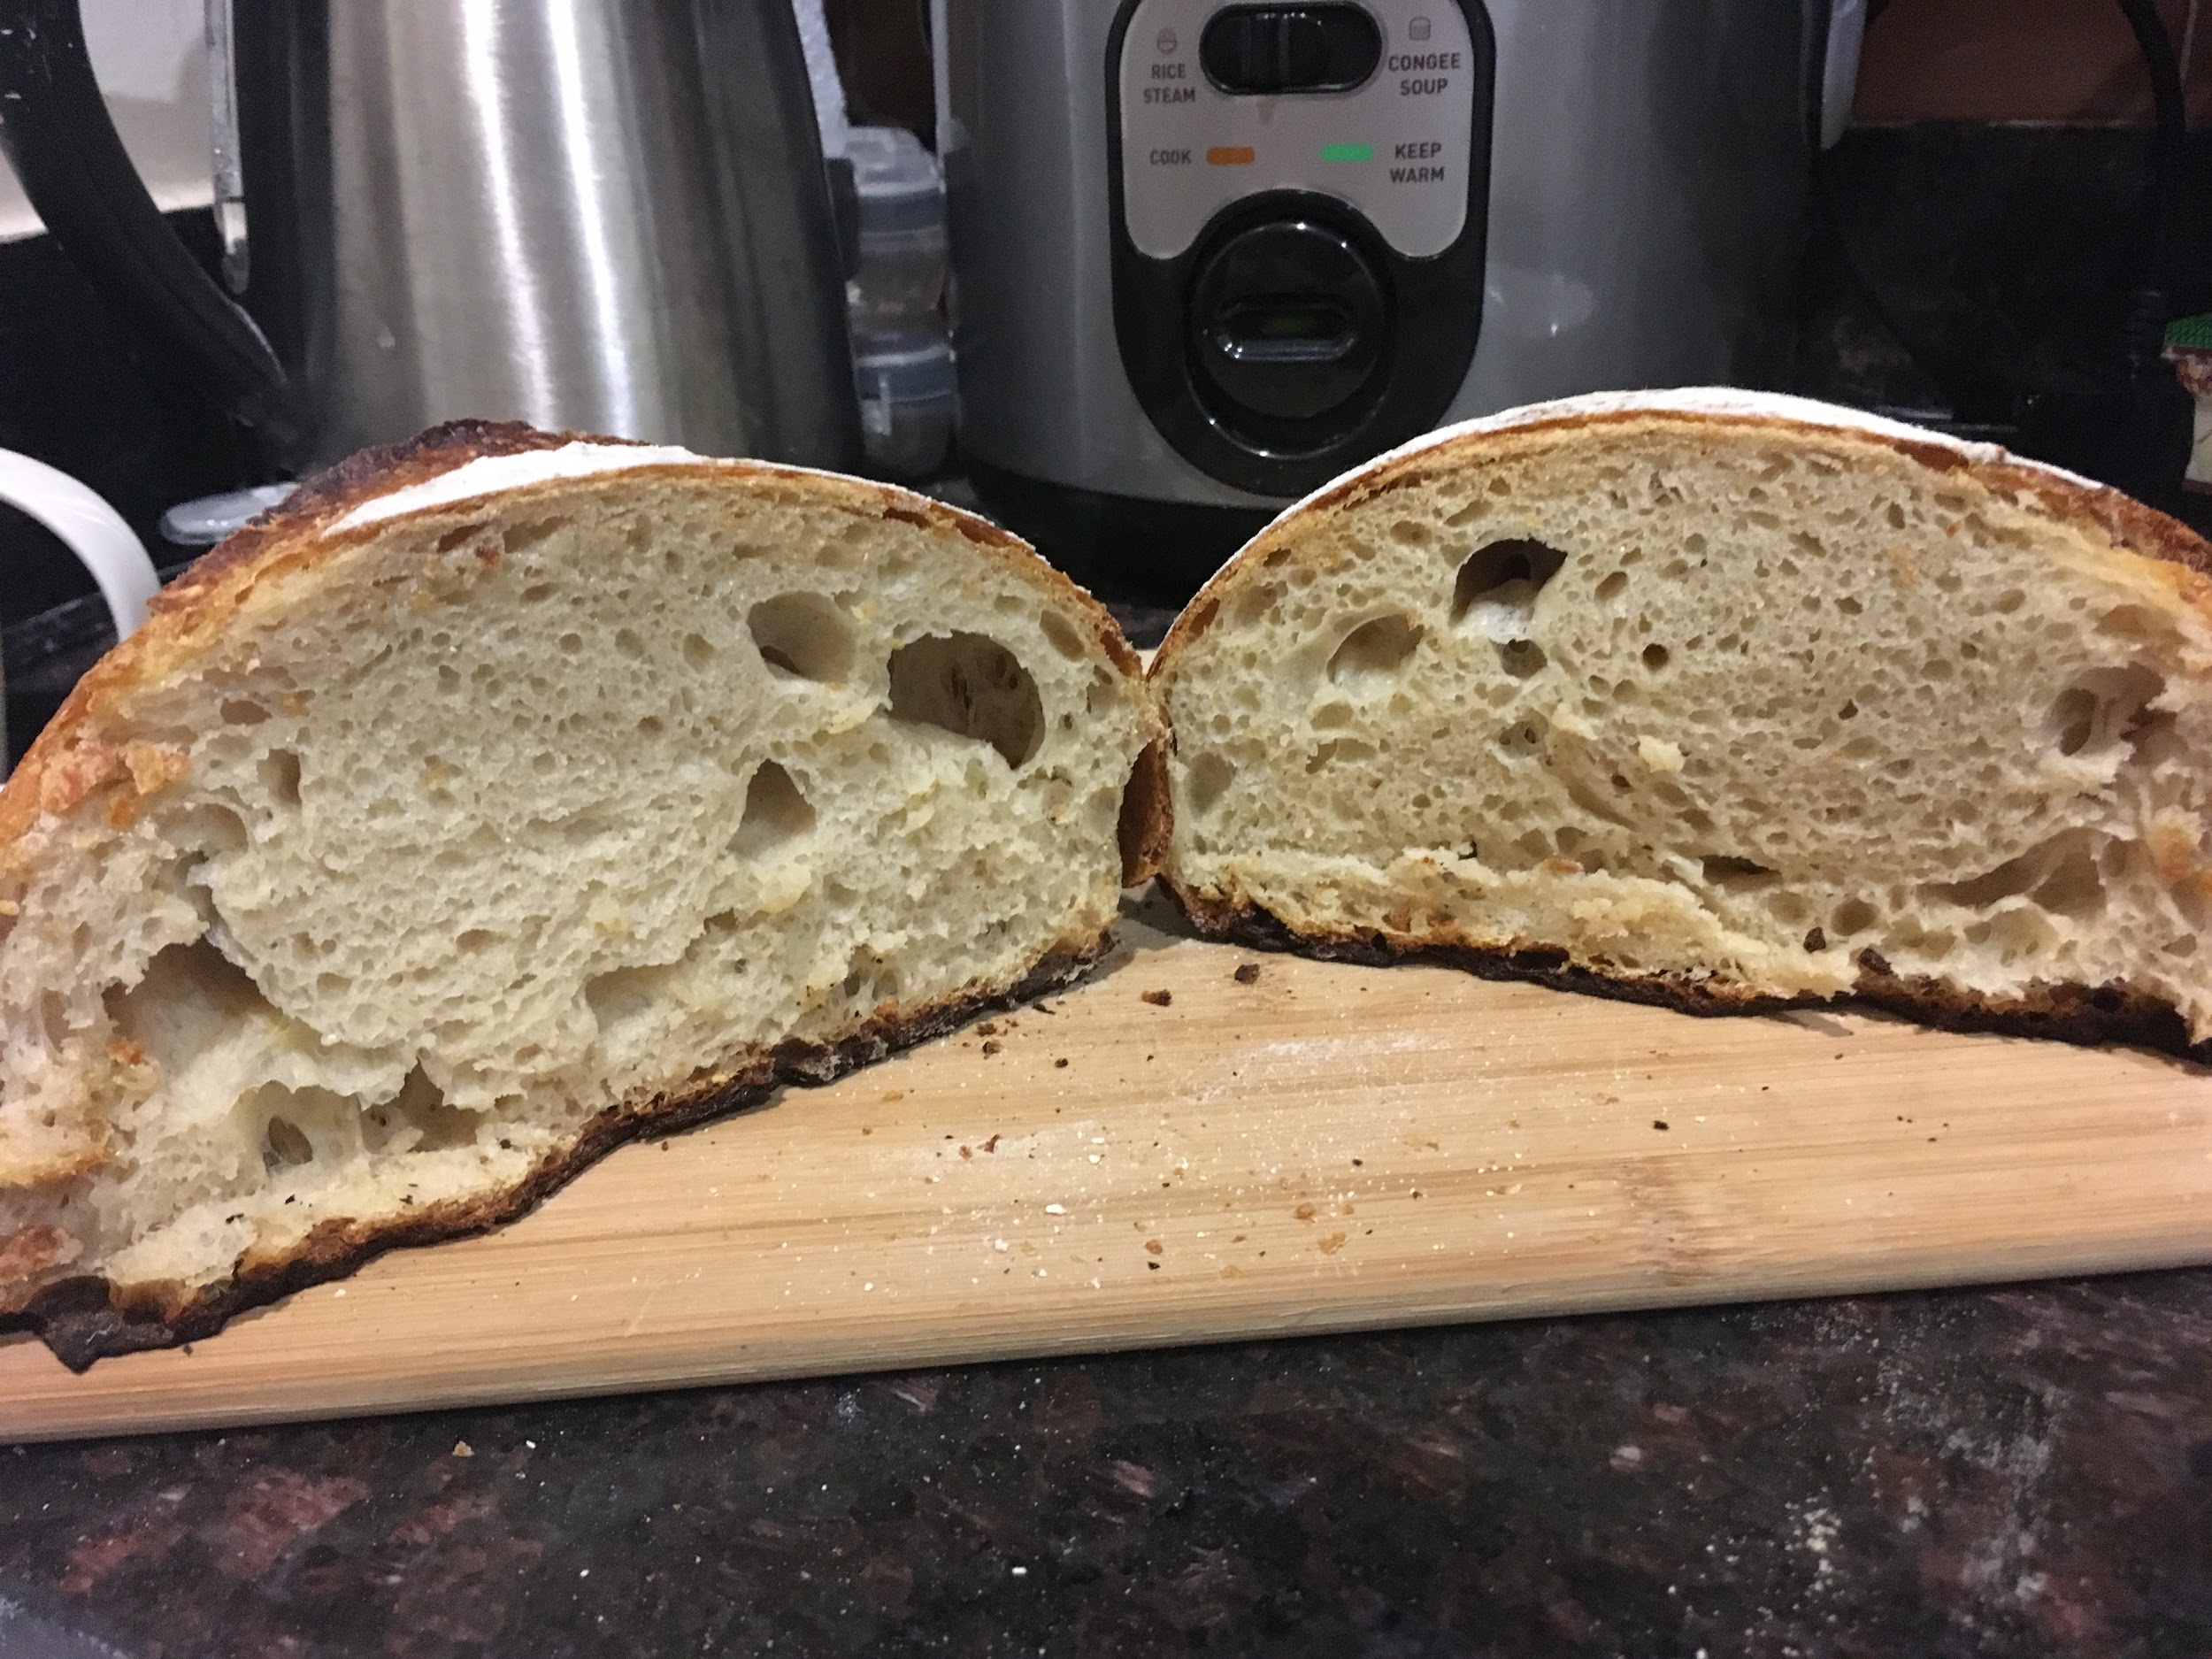
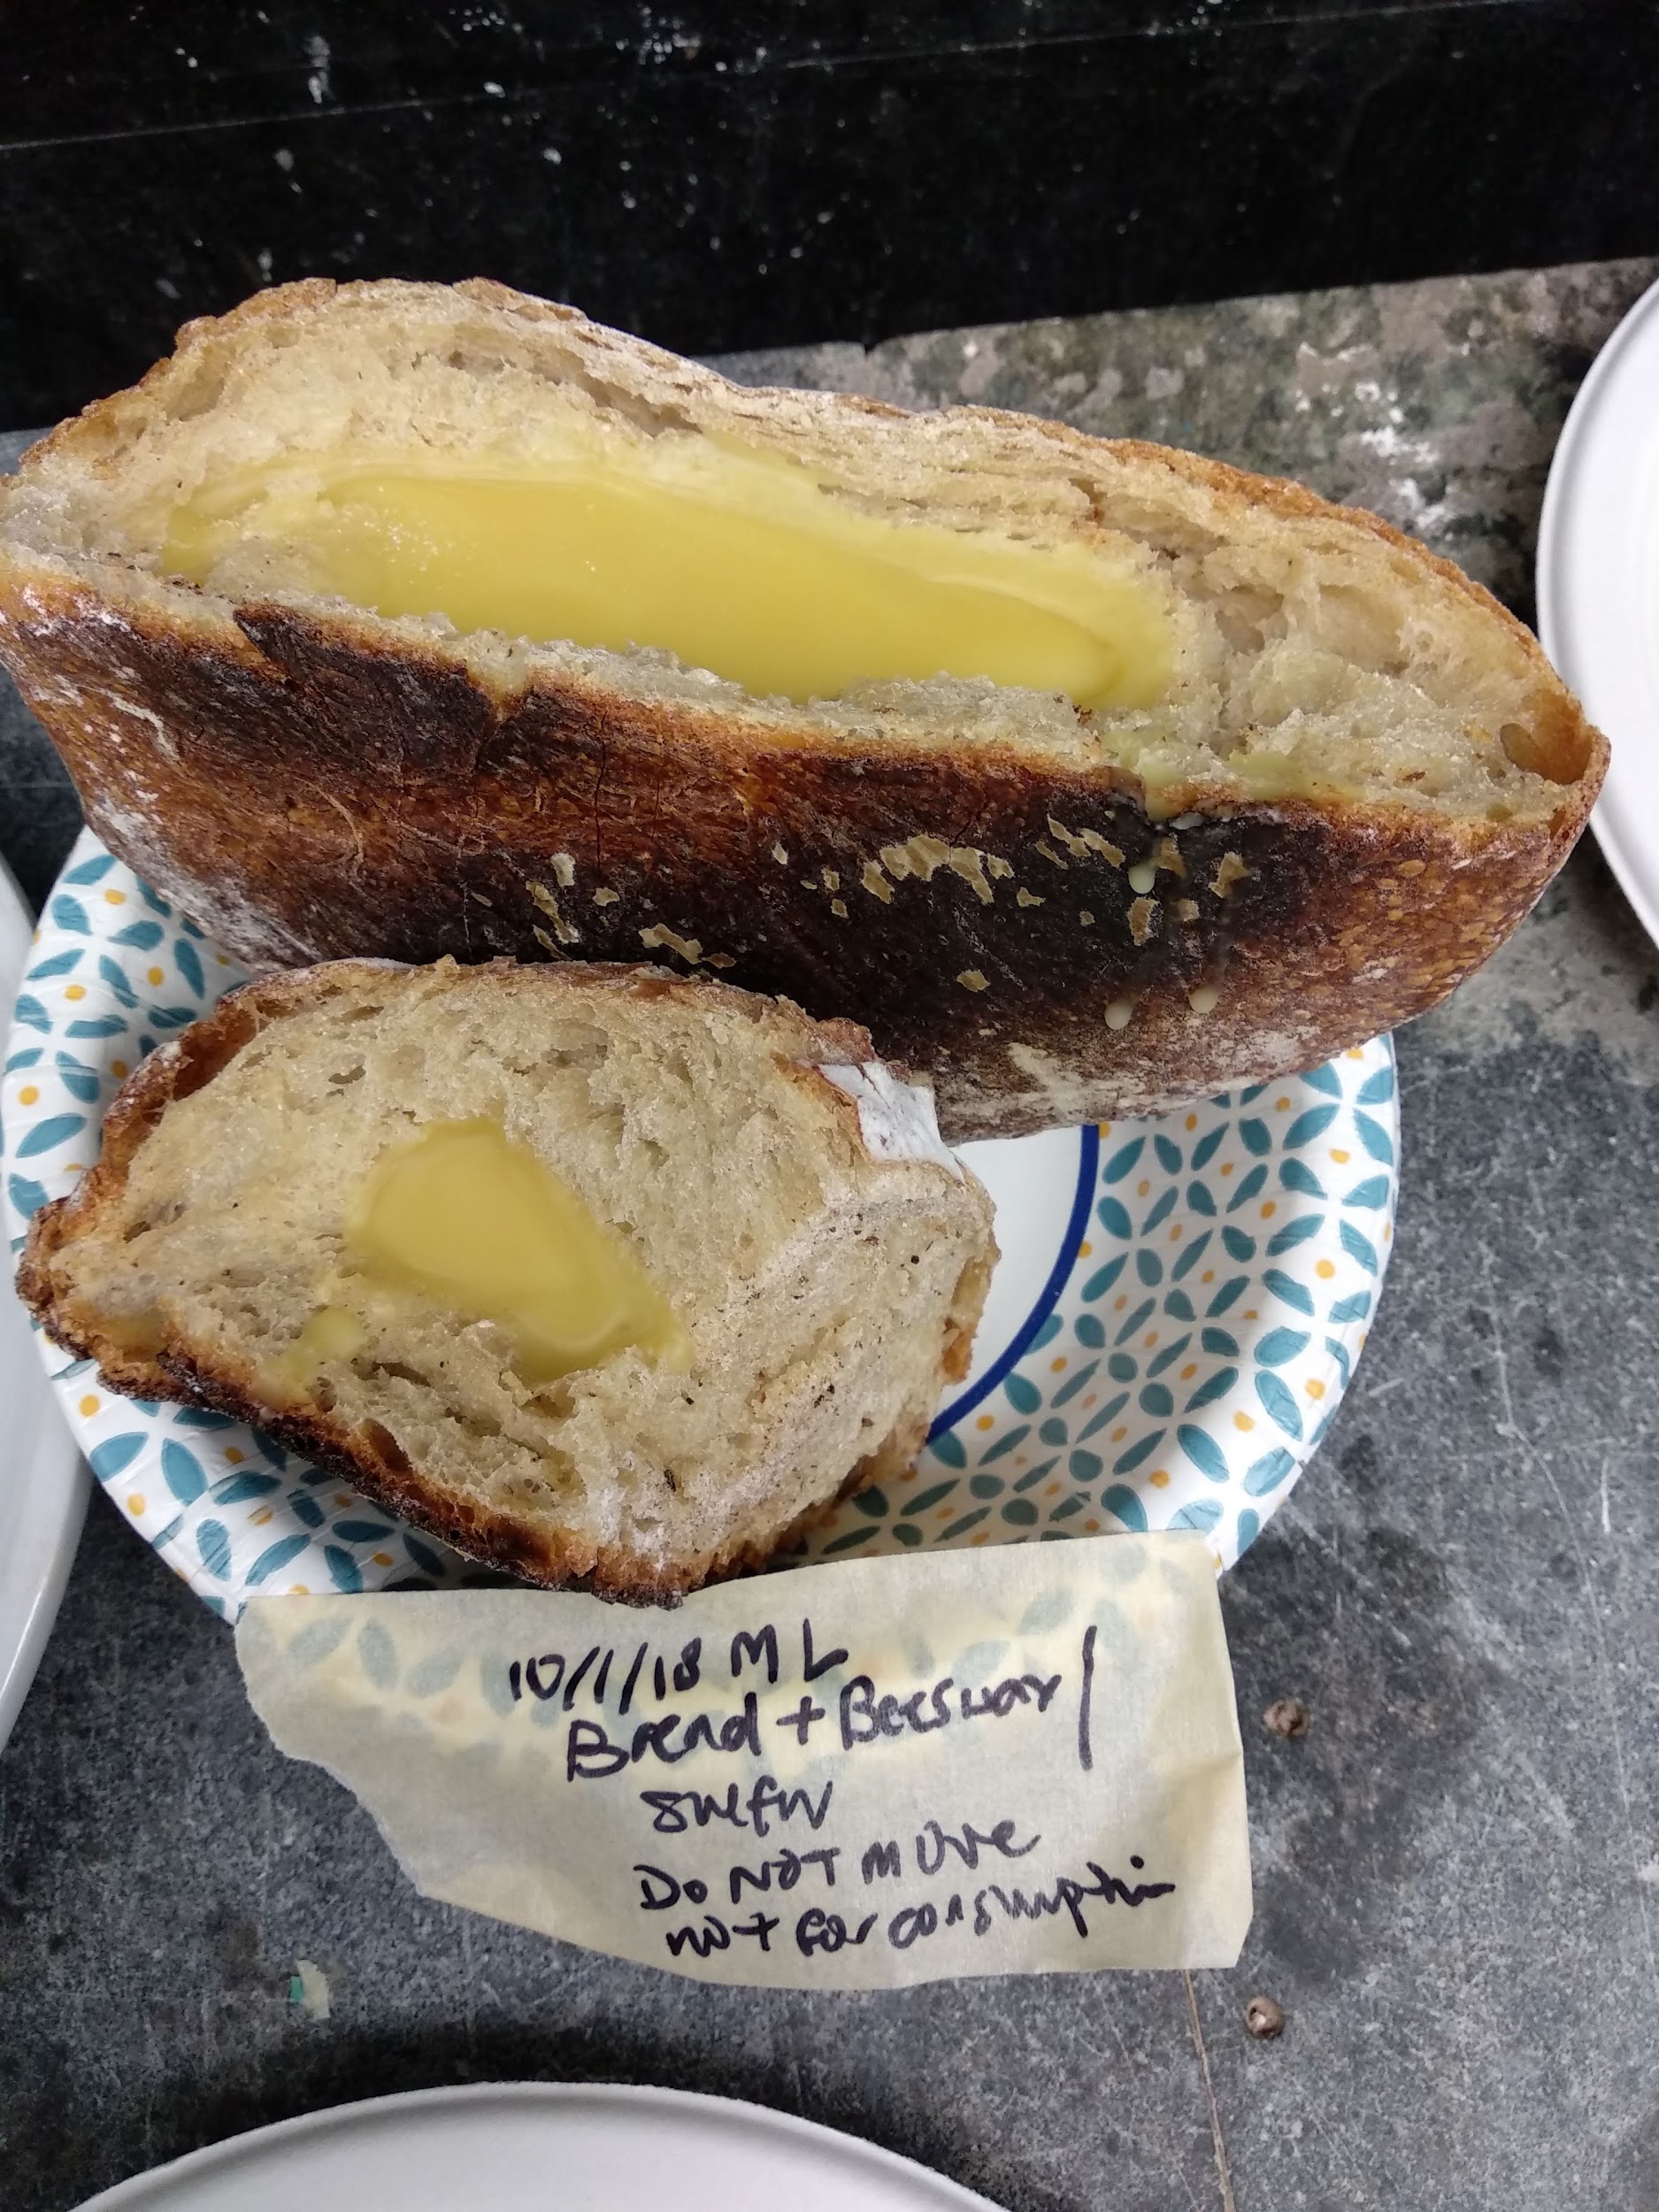
| Image URL: |
|---|
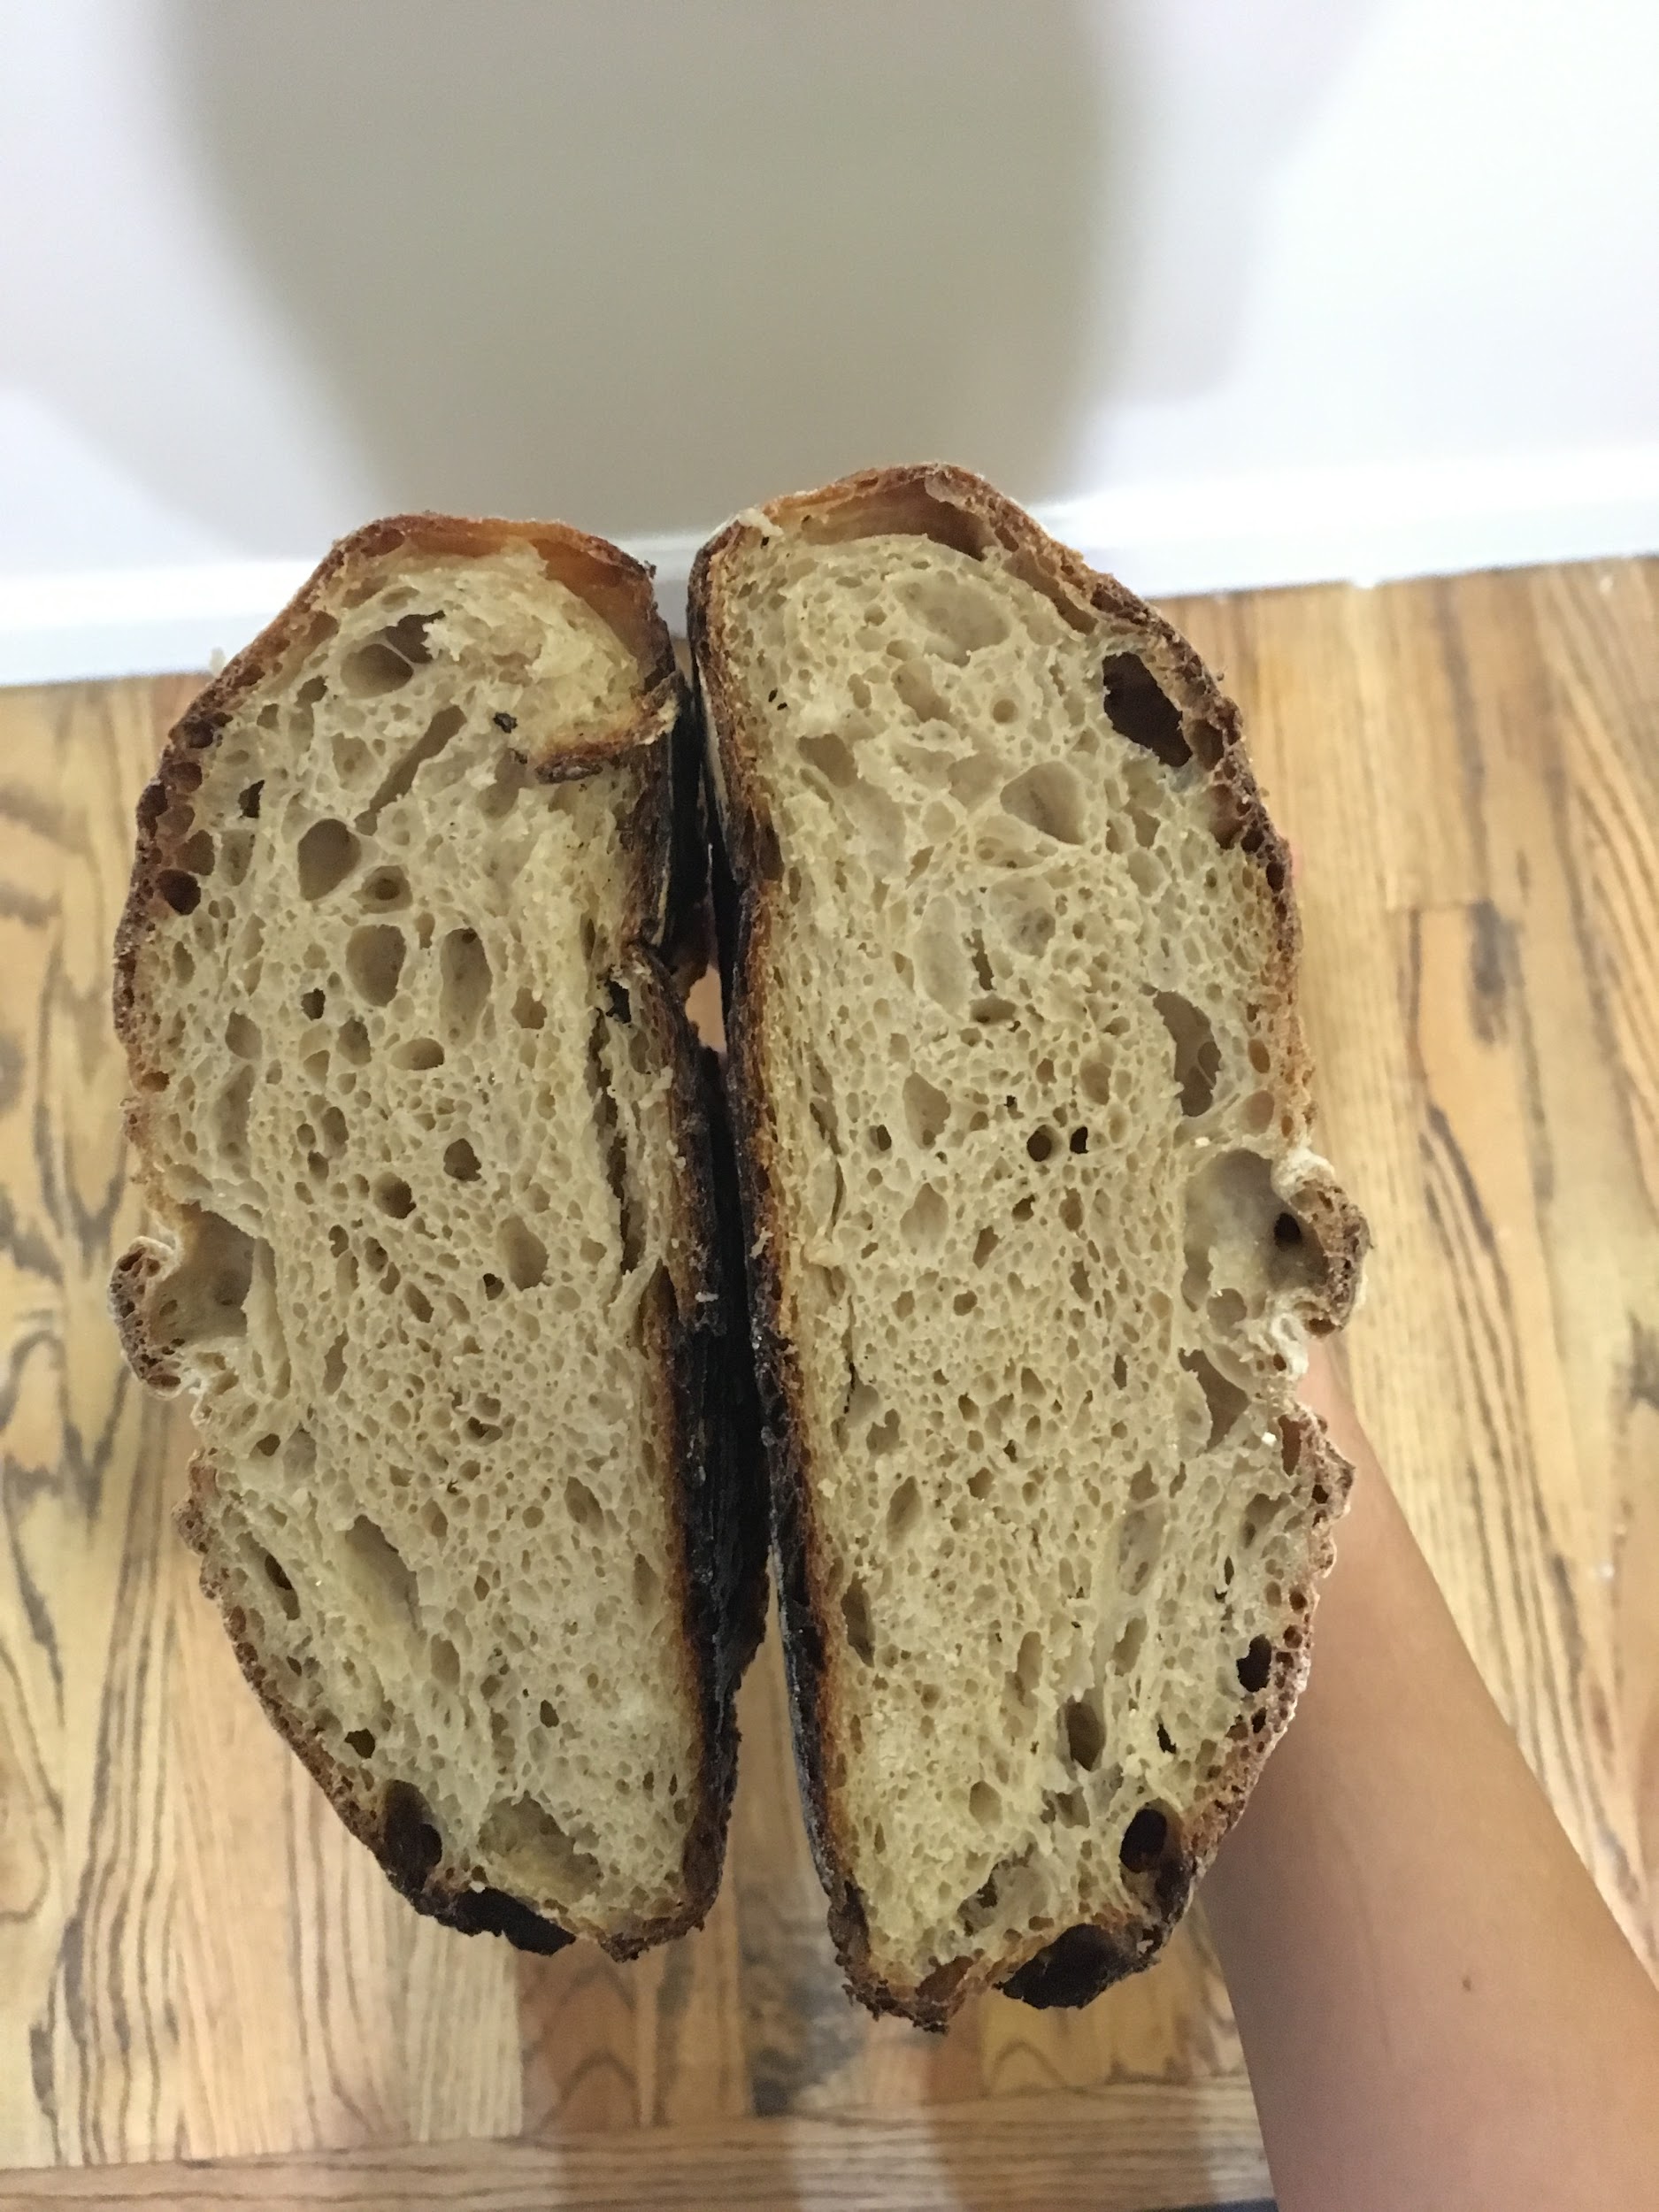 |
Crumb comparison of #1 (left) and #2 (right)
Name: Min Lim
Date and Time:
Location: Personal Apartment Kitchen
Subject: Bread-making Attempt #2
Weather: Rain, 21°C
Humidity: 90%
Aims:
To historically reconstruct a loaf using a 17th century sourdough bread recipe. Recipe taken from Ullman - John Evelyn Bread Recipes Transcription with volumes and ratios referenced from Jas Townsends and Sons.
Materials:
Redman stainless steel bowl
1 plastic 1.25-quart containers with lid, 5.47 inches (H) x 6.19 inches (W) x 6.19 inches (D) (Ziploc, medium square)
350g KAF Unbleached Bread Flour
80g KAF White Whole Wheat Flour
40g Sourdough starter #1
320g warm water
6g Coarse mediterranean sea salt (ground)
Notes:
Because it was cold, rainy, and humid today, I anticipate to reduce the amount of water used in dough, and to increase fermenting and proofing time.
I will also use slightly warmer water (~40°C) to feed my starter and incorporate into dough to kickstart starter growth
Measurements included above are personal estimations of the quantities of each ingredient, as Evelyn does not mention this in his recipe. I based my measurements off Townsends’ video and approximating % hydration of dough
I knew I wanted to make a medium-sized bread, so 300-360g of flour (in total) would be sufficient. I wanted a mix of bread flour and whole wheat, to replicate the presence of bran and quality of flour in the 18th century.
Given that Evelyn calls for the dough to be kneaded, the hydration level (percentage of water) in the dough should not be too high (65-70%), unlike modern sourdough (80-90%). I initially added ¾ cups of water, but found the dough slightly tight when kneading (which would’ve impacted its rise), and added another ¼ cups more until dough was sufficiently slack (but still maintained its structure)
Based off initial experiments (see Bread-making attempt #1), I found that 36-40g of starter was sufficient for getting a good rise in a medium loaf.
Based off these measurements, I then added 5% (~6g) of salt into the dough for flavour.
**A brief note on conversions and percentages:
To calculate % hydration (amount of water in dough)
Divide weight of water by weight of flour (exclude starter, since starter is equal parts flour and water, and salt is relatively neglibible)
Eg. for recipe above: amount of water = 250g, amount of flour = 280g (bread flour) + 80g (whole wheat) = 360g
% Hydration = 250/360 = 69%
To calculate % salt (amount of salt in dough)
Divide salt by weight of flour + water
Usually aiming for 5-8% salt
Procedure:
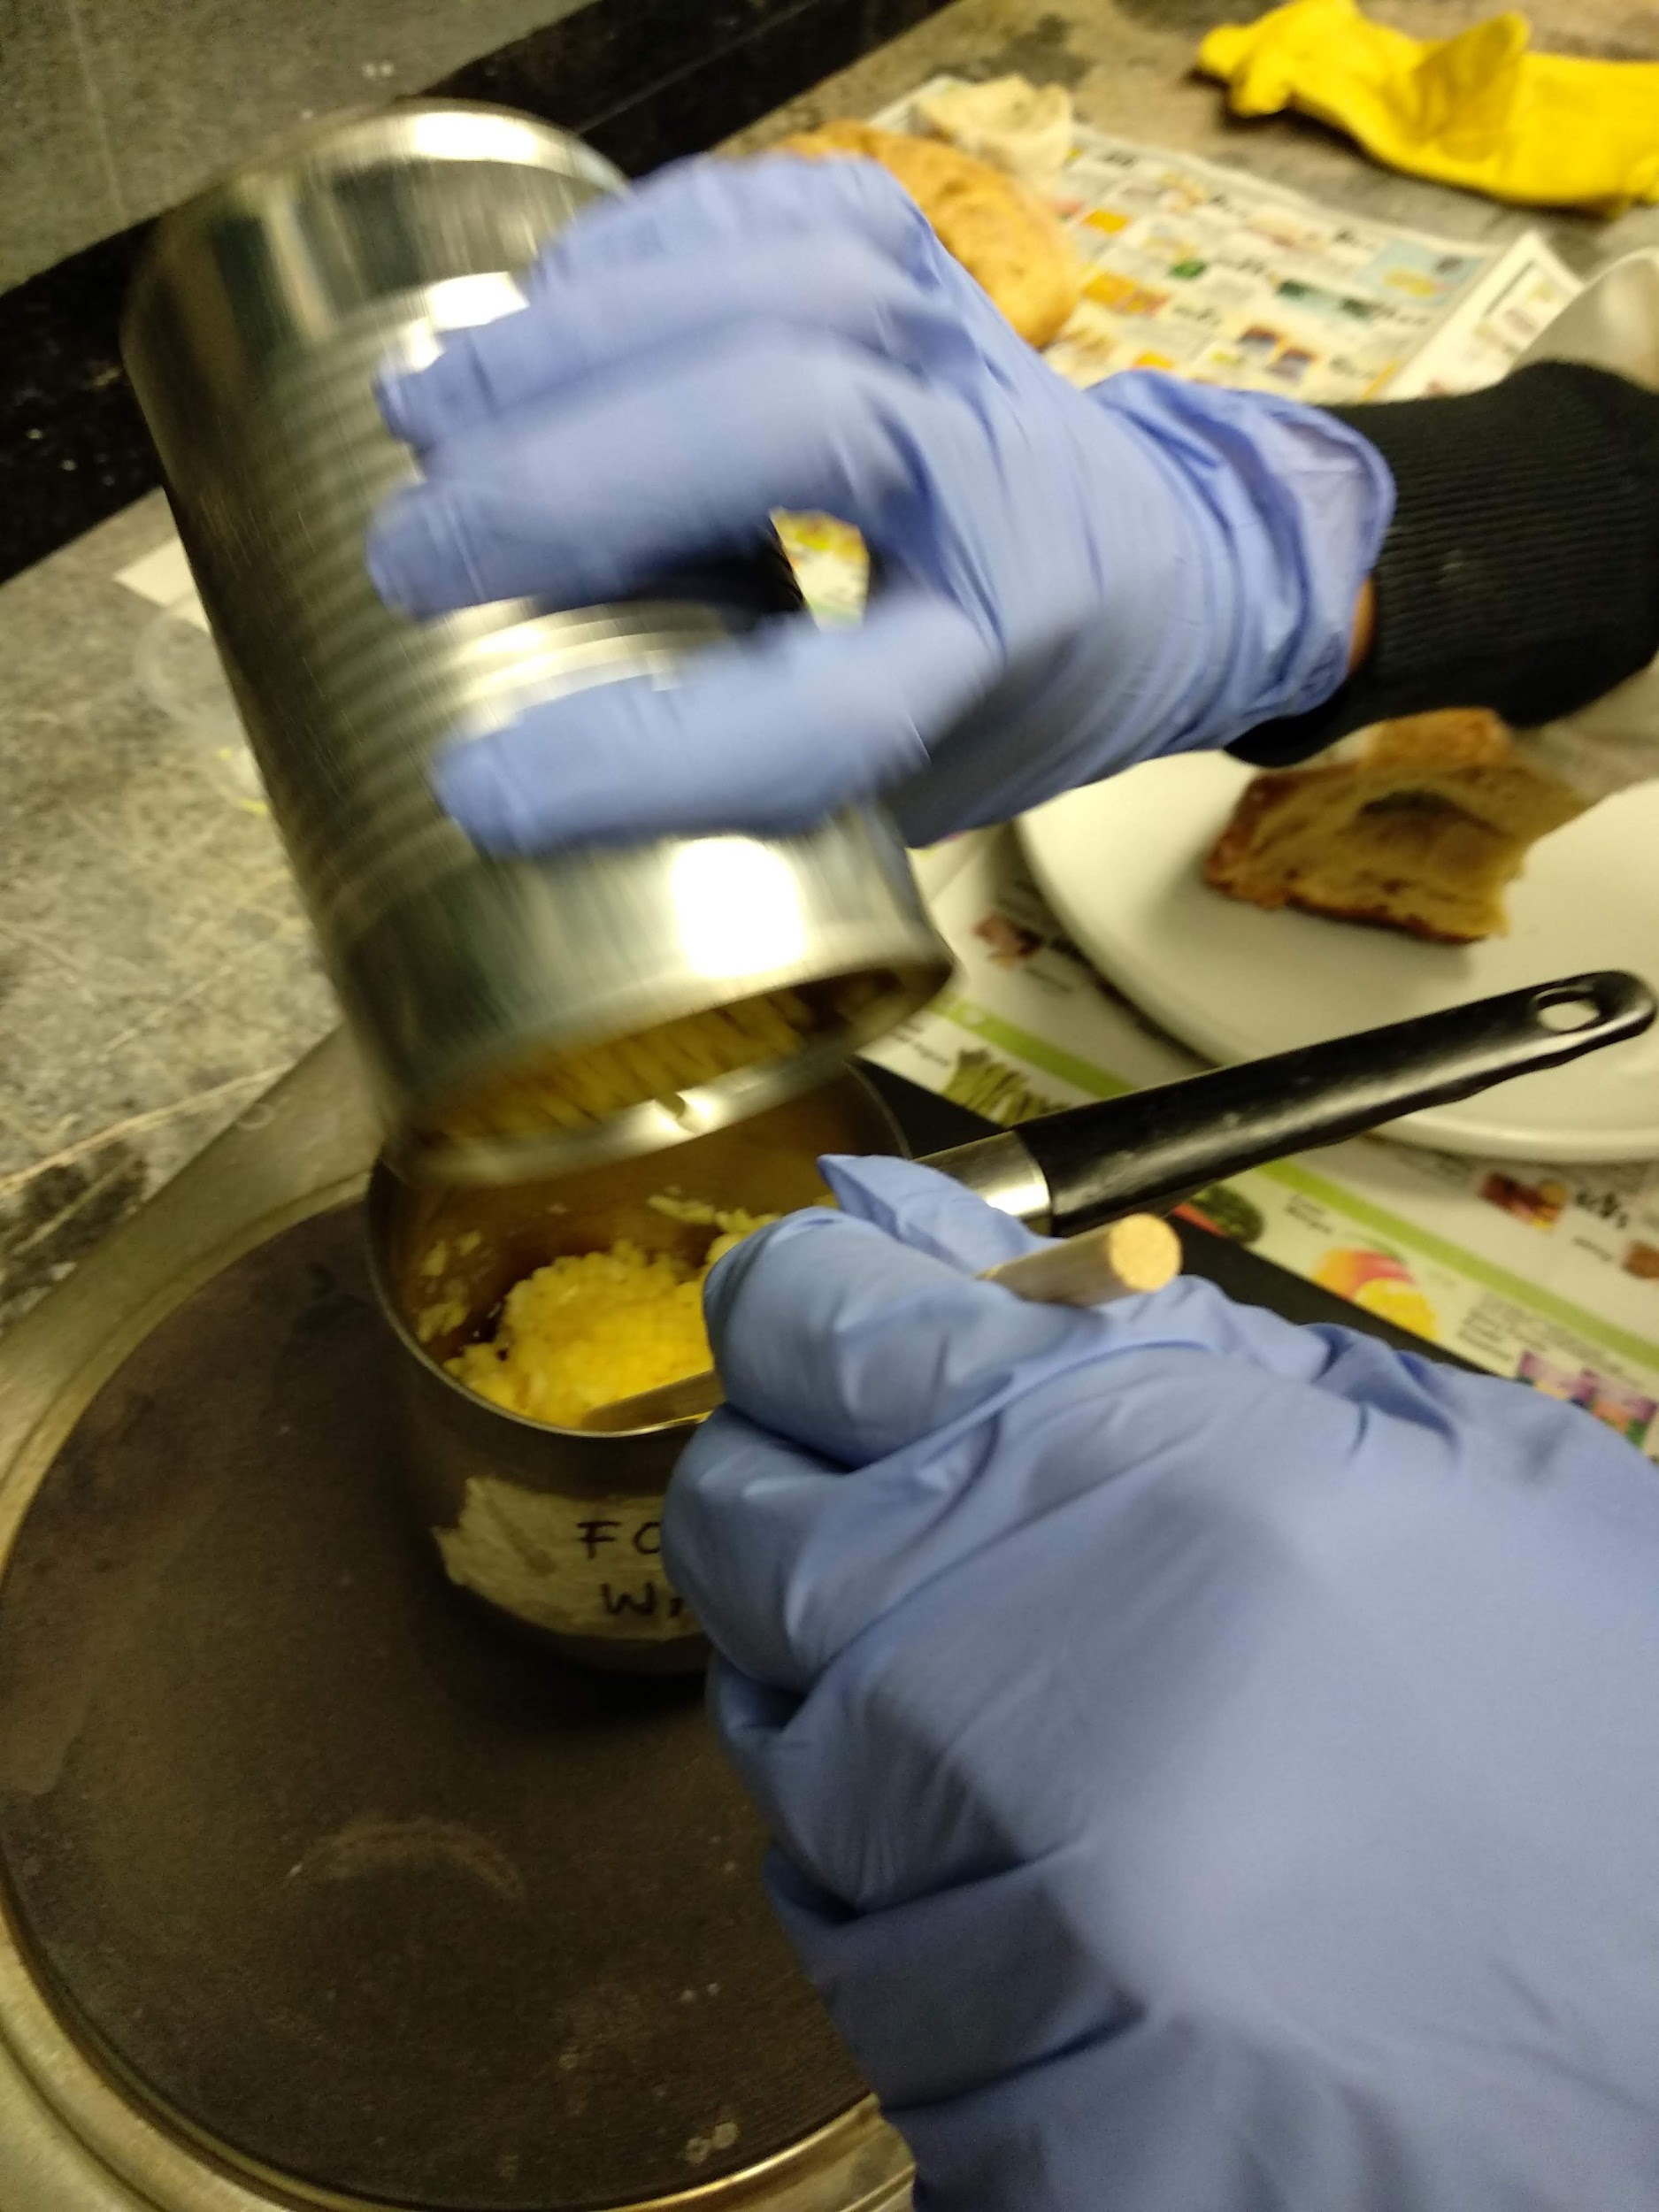
9:30am: Sourdough starter taken out from fridge. 70g of KAF bread flour and 70g of warm water added to the starter and stirred until smooth. Starter left on kitchen counter for 4 hours before use.
1:30pm: Starter had risen nearly twice the height of its original, with many small bubbles on the surface.
| Image URL: |
|---|
 |
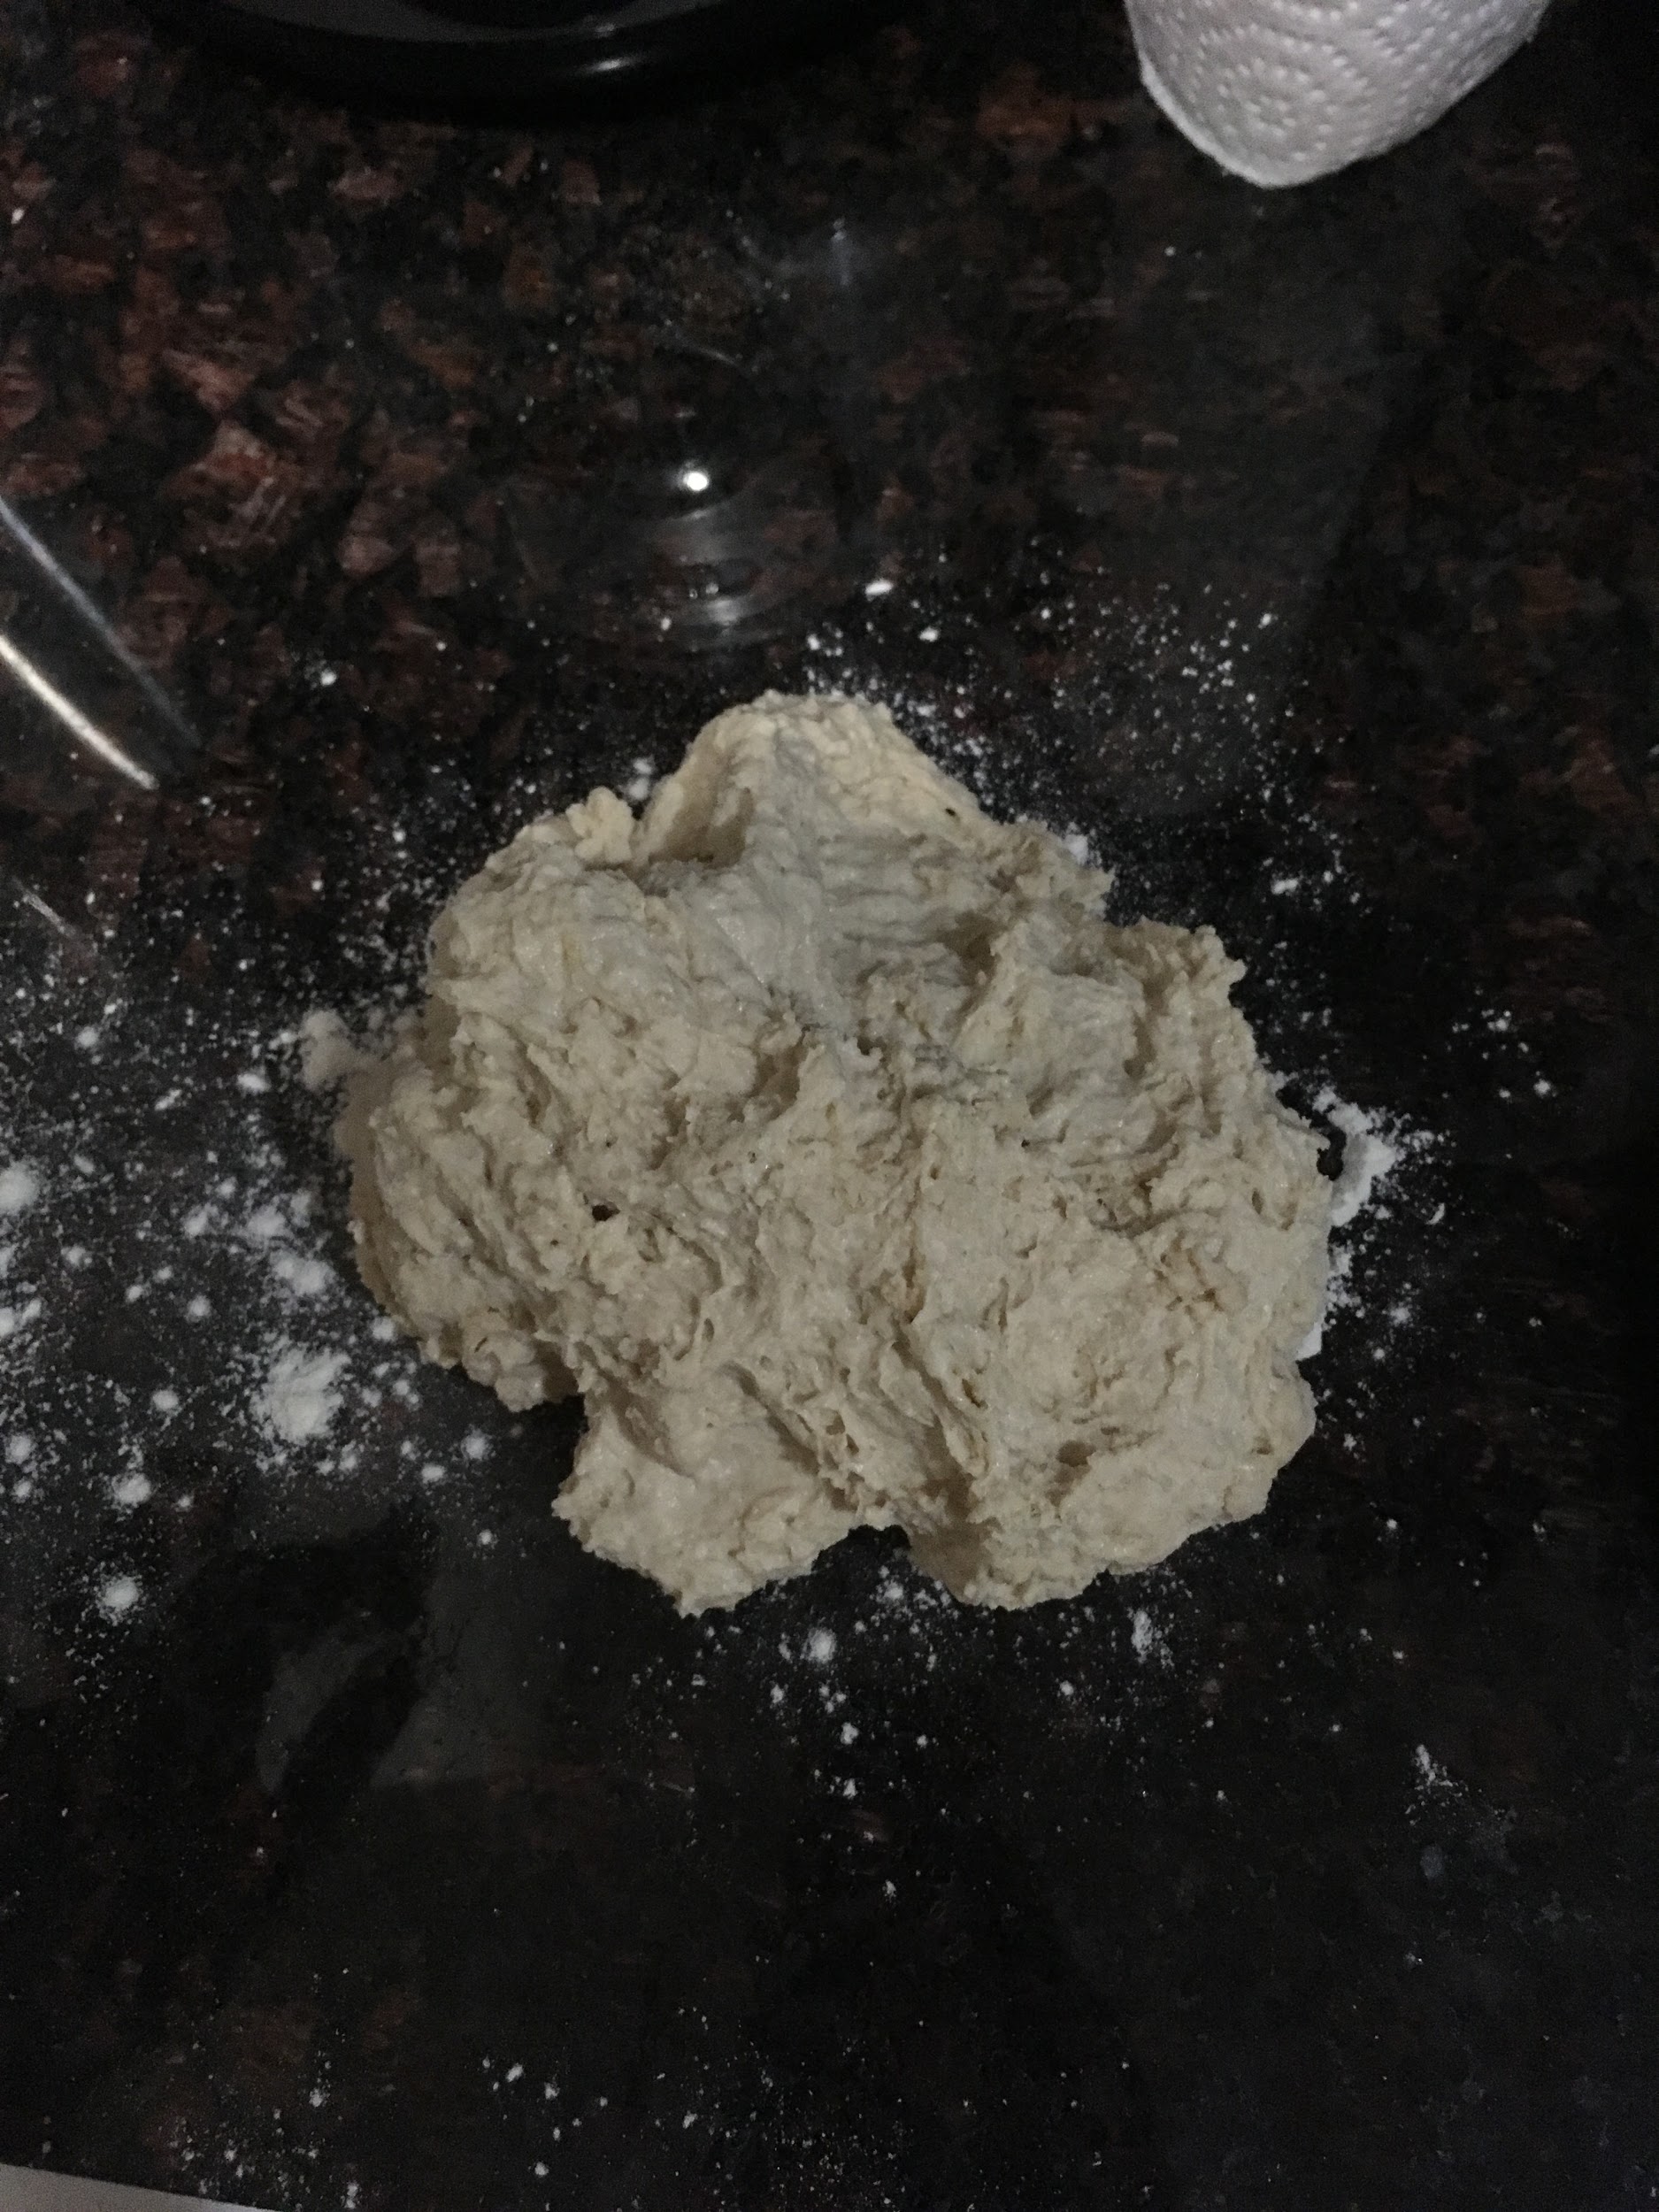
Starter was stirred down, and 40g of it was measured out. Starter was added to a large stainless steel bowl, along with 280g bread flour, 80g white whole wheat flour, 250g warm water and 6g salt, then mixed together by hand until dough came together.
| Image URL: |
|---|
 |
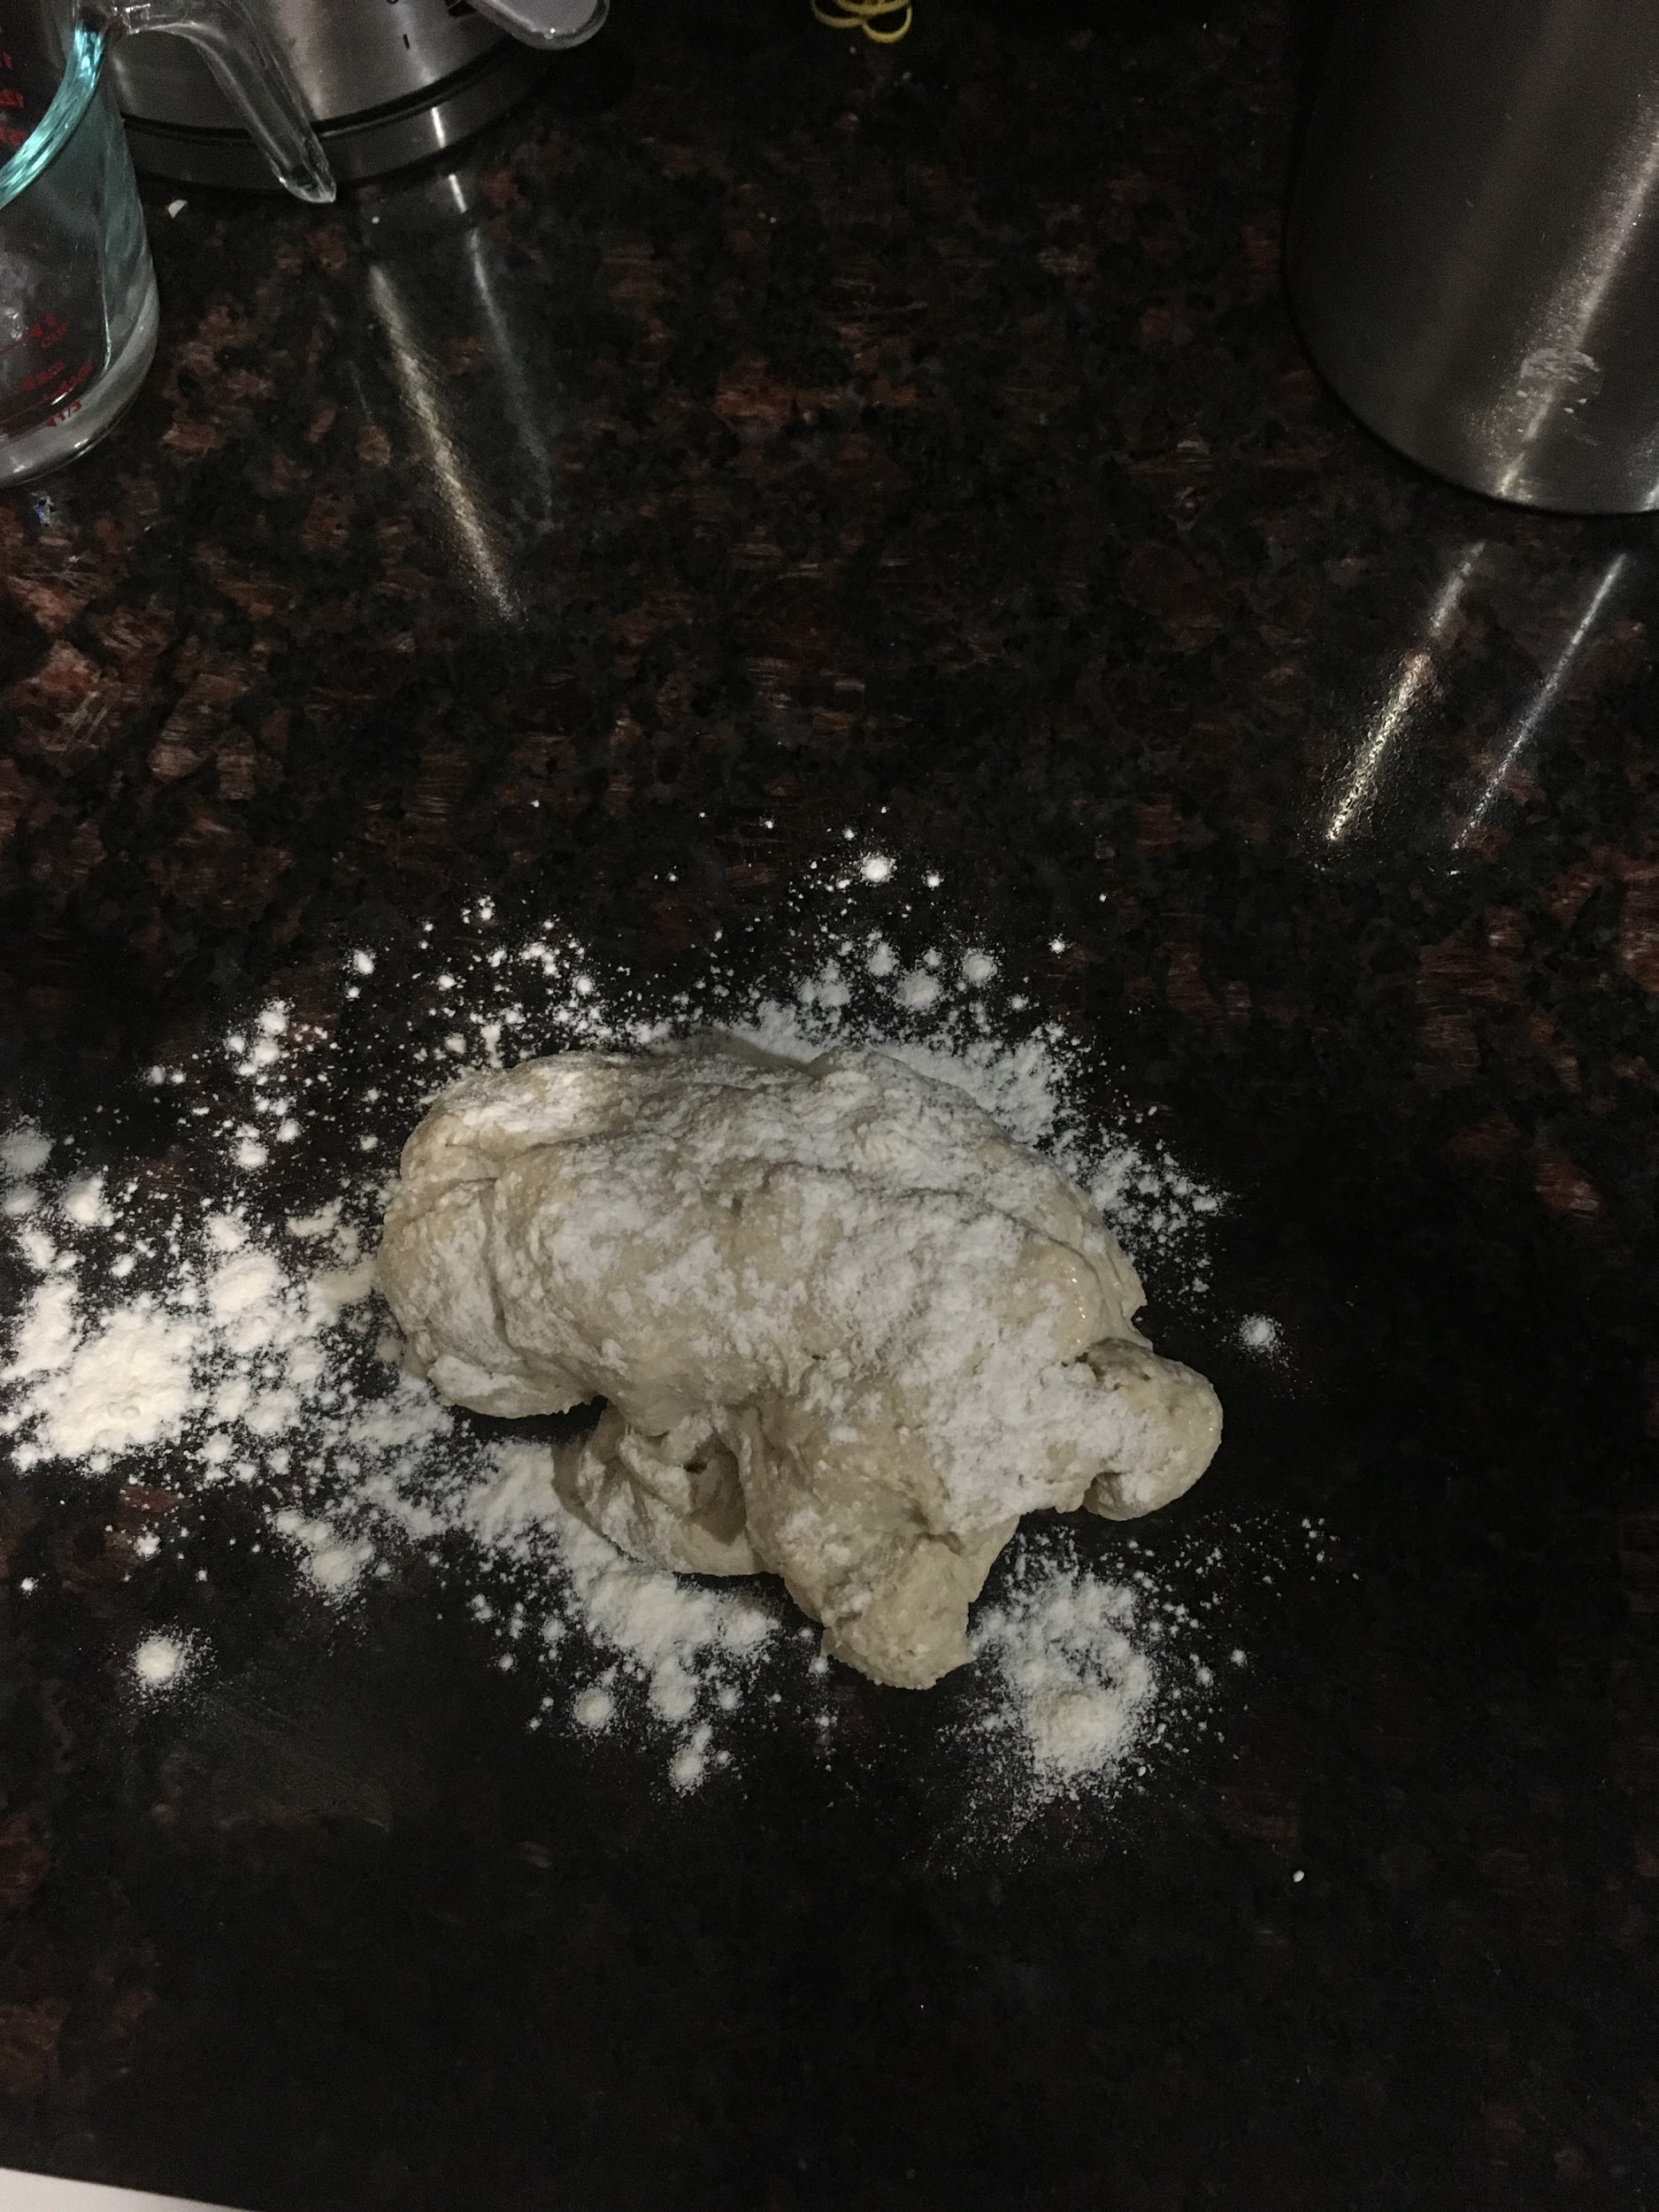
Dough was then tipped out onto kitchen surface, dusted lightly with flour
| Image URL: |
|---|
 |
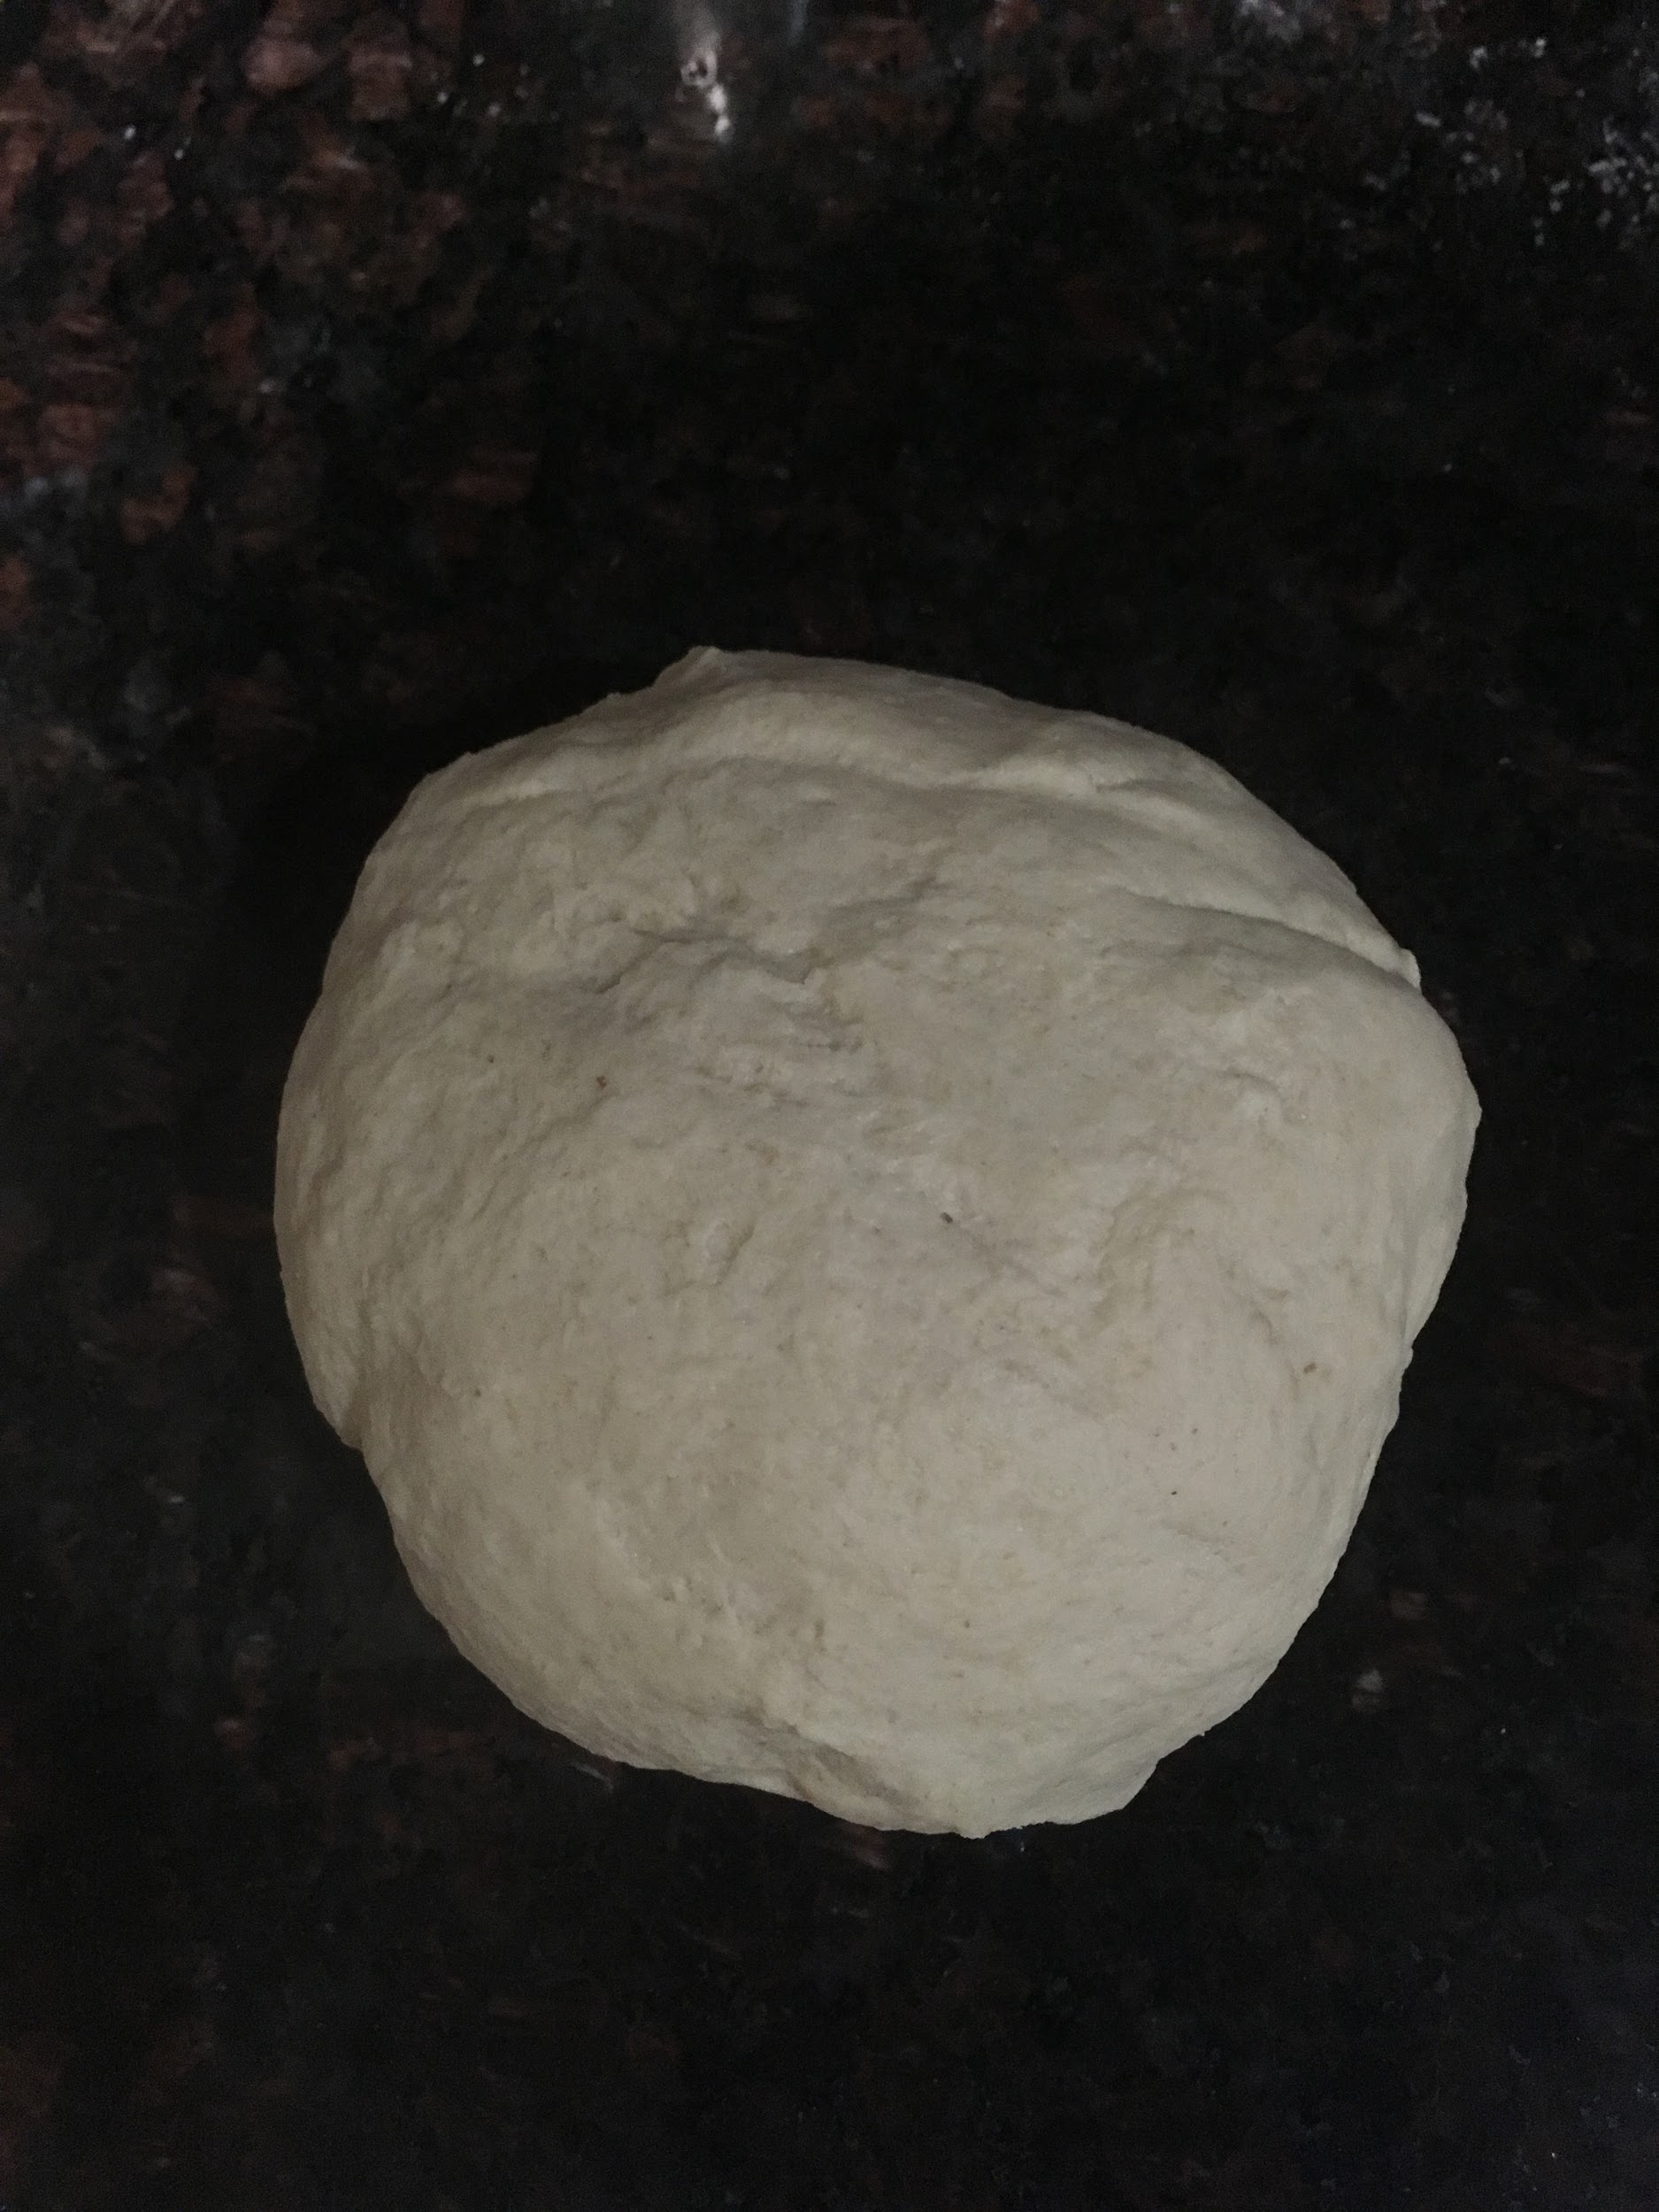
and kneaded until smooth and springy to touch.
| Image URL: |
|---|
 |
Conducted the gluten-pane test to confirm readiness of dough.
| Image URL: |
|---|
 |
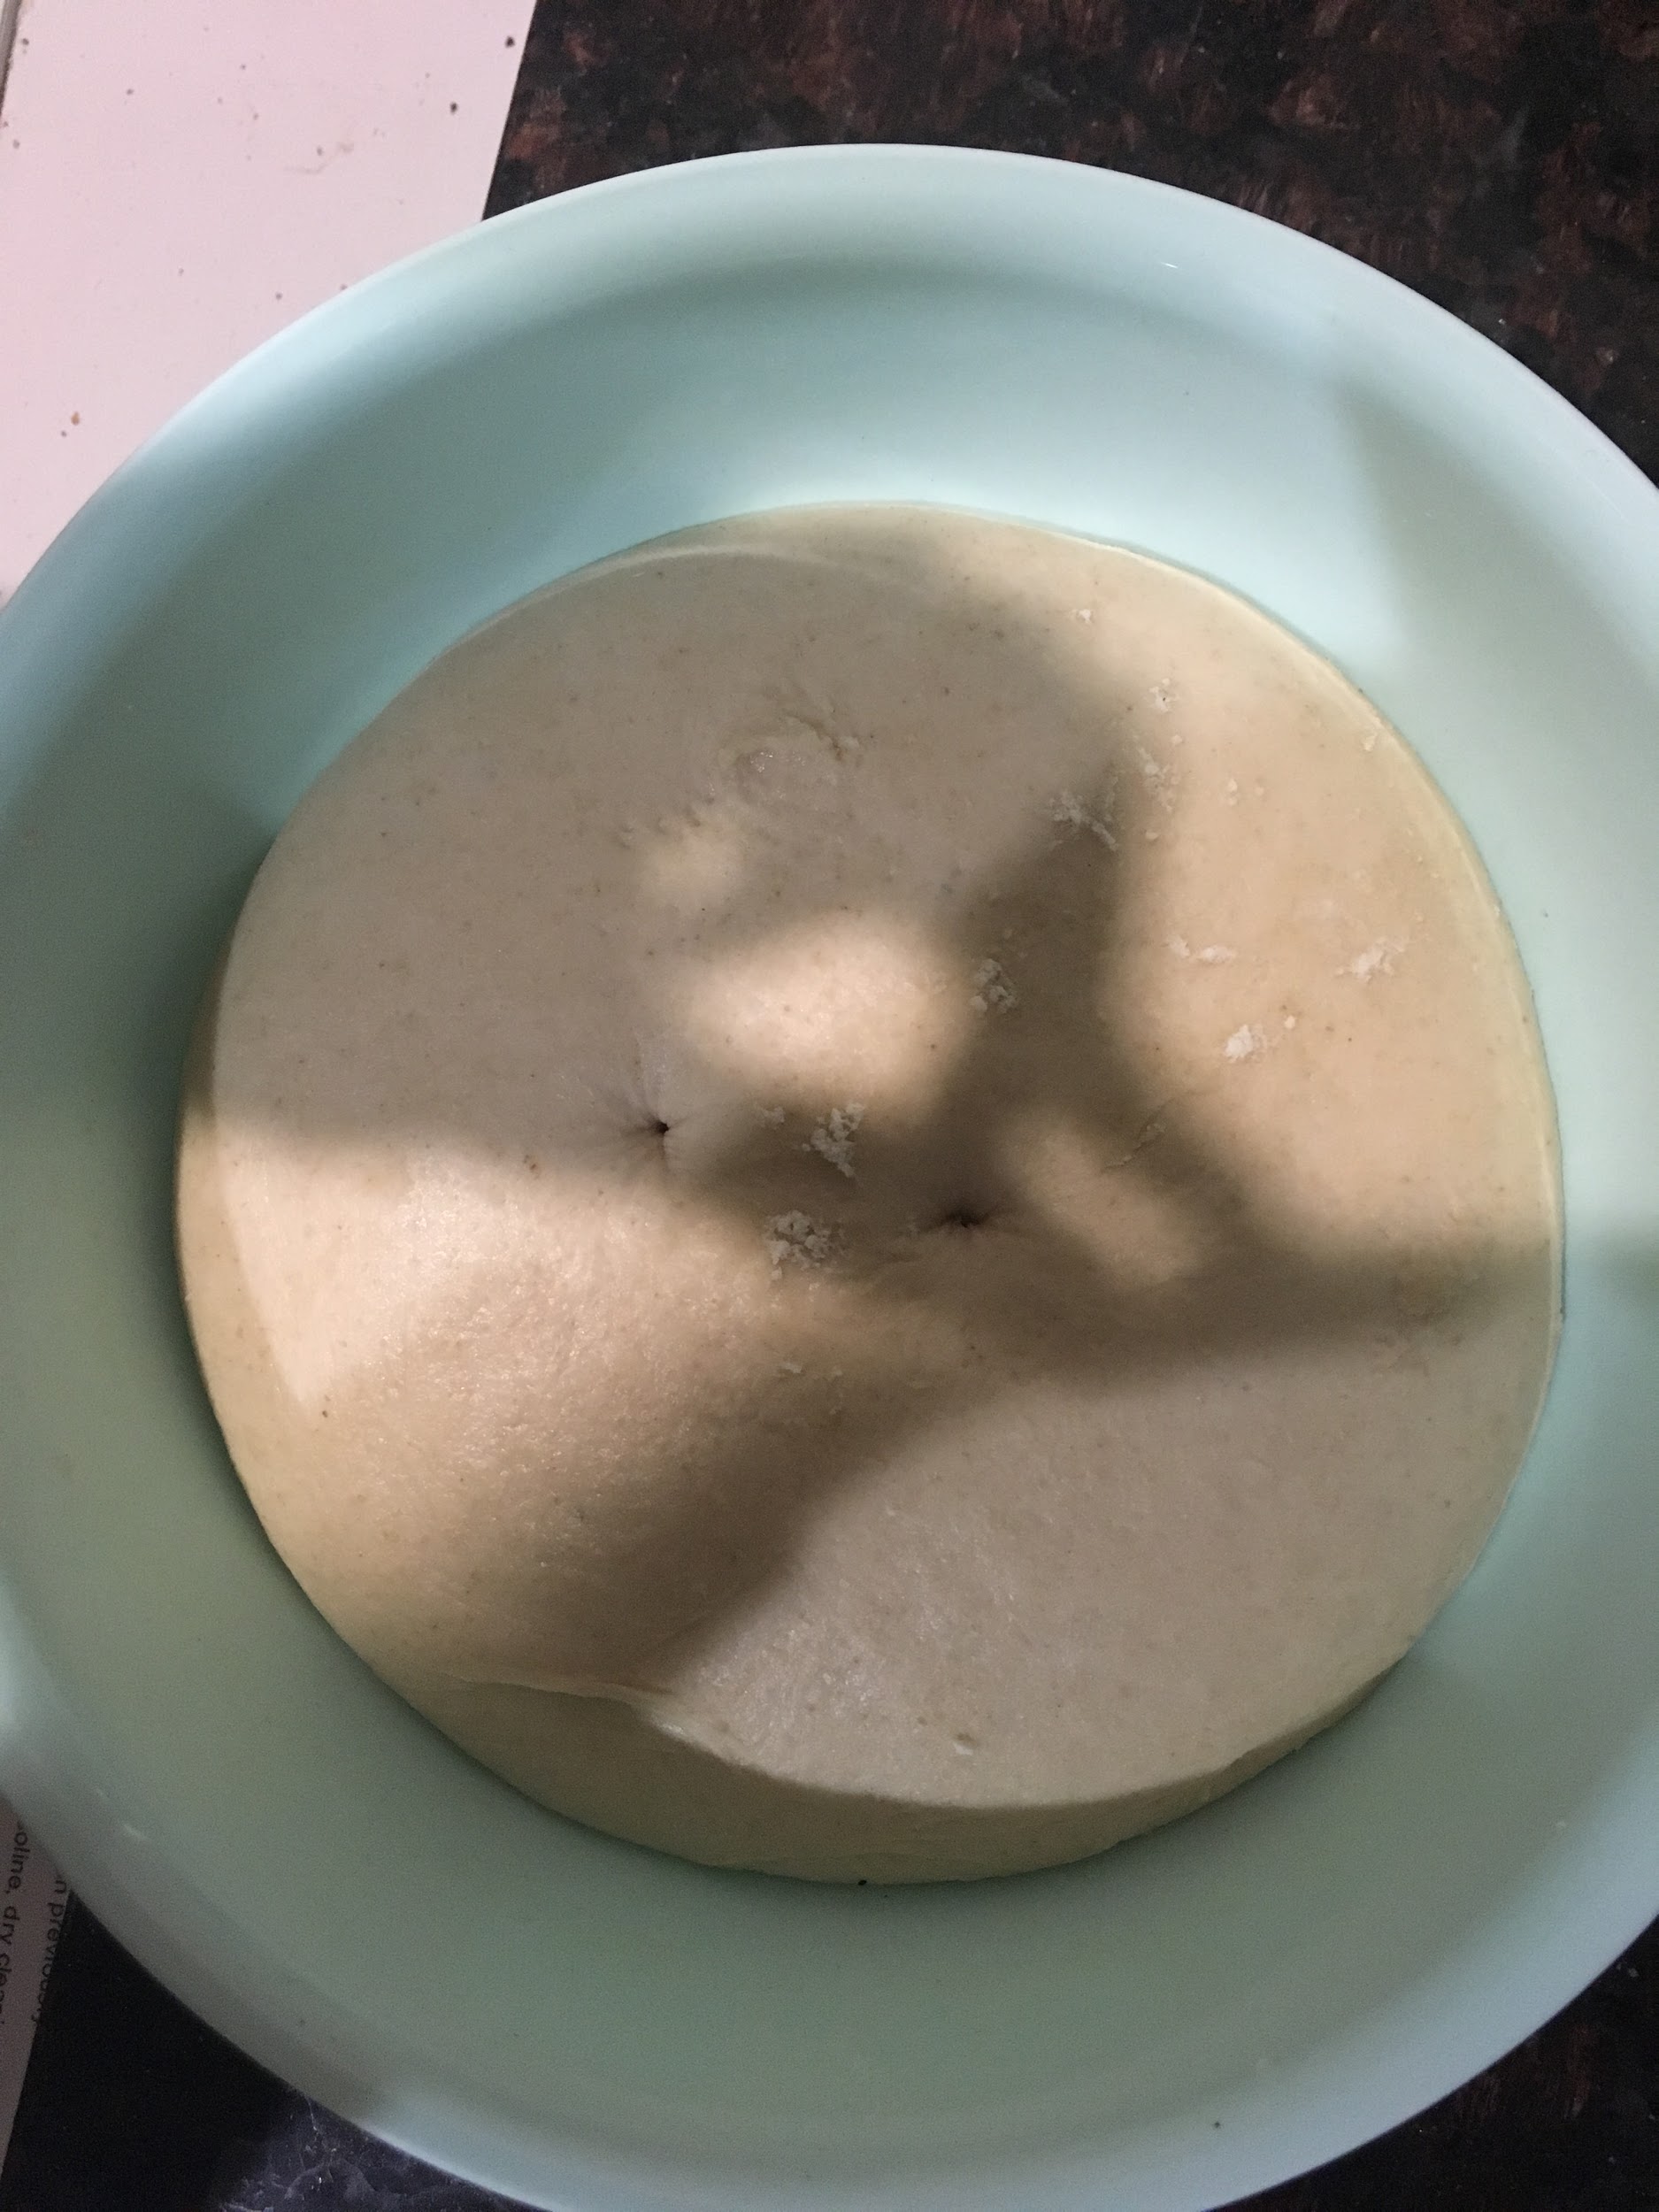
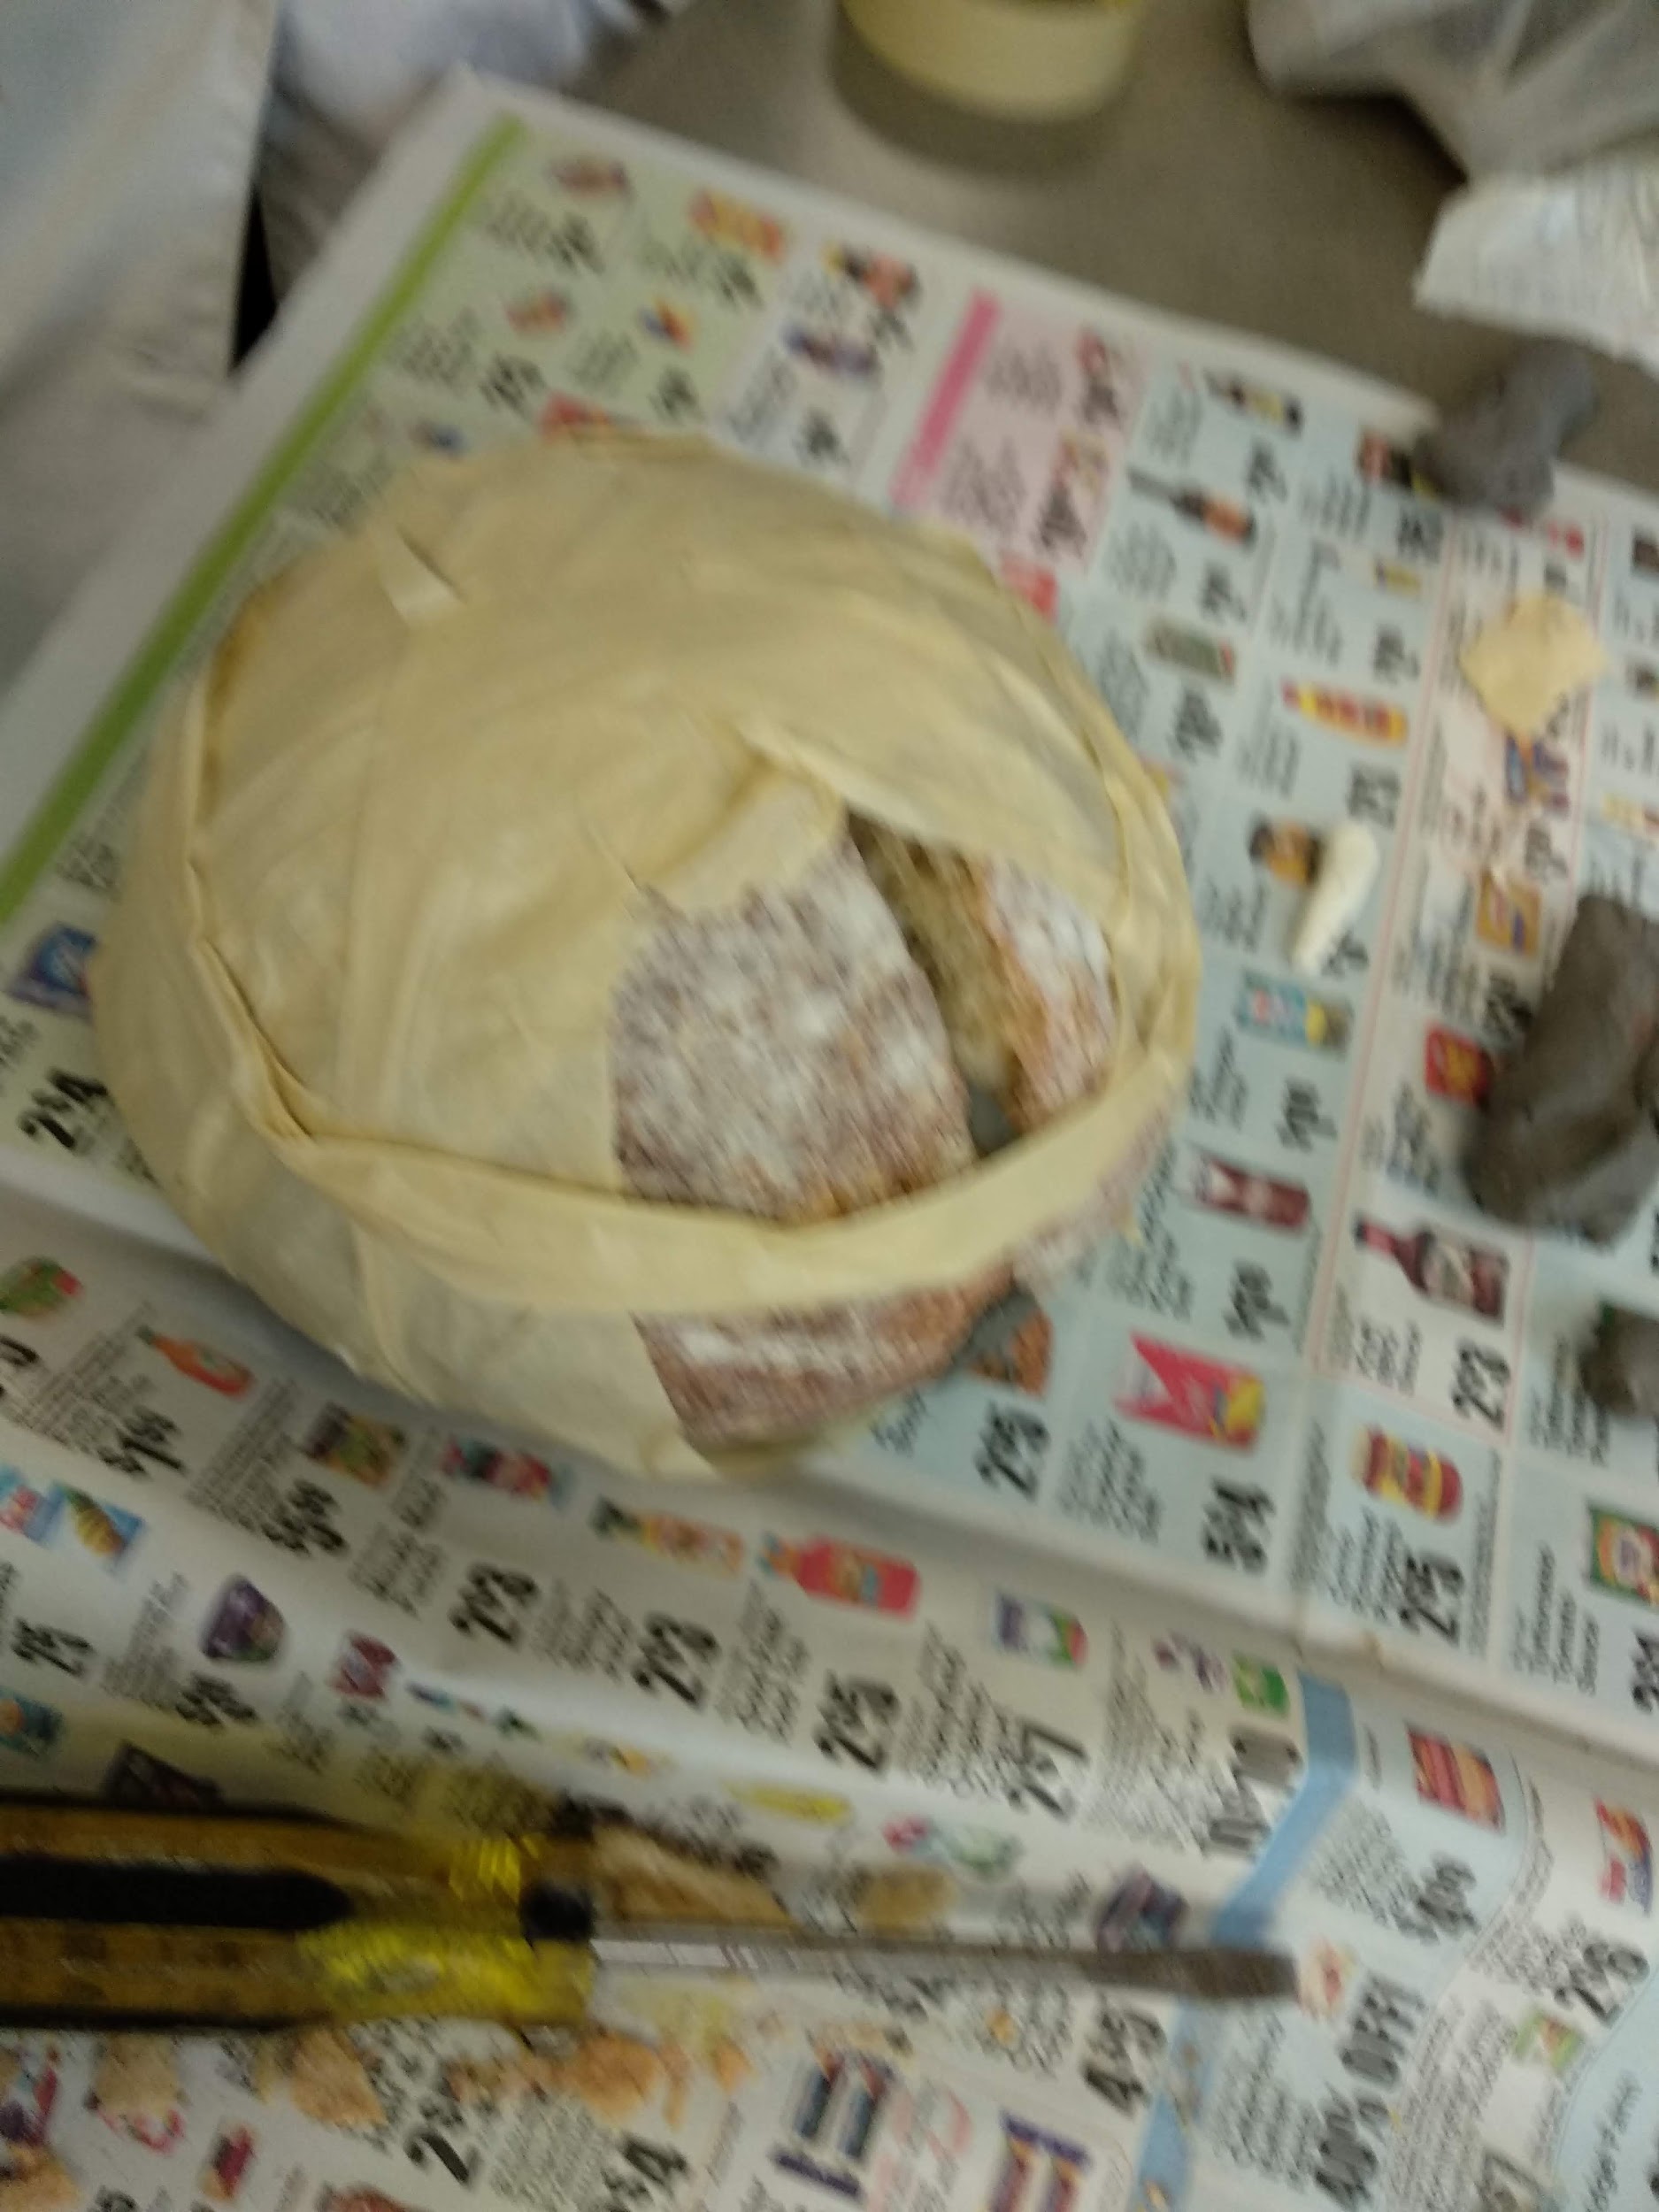
Dough was then transferred into a container, with lid loosely covered on top, and left to ferment until at least doubled in size.
| Image URL: |
|---|
 |
Name: Min Lim
Date and Time:
Location: Personal Apartment Kitchen
Subject: Bread-making Attempt #2
Weather: Cloudy, 22°C
Humidity: 96%
Materials:
KAF Unbleached Bread Flour (for dusting)
1 cup hot water
Sheet pan
Baking tray
9-inch proofing basket
7:00am: Deflated dough and tipped it onto counter dusted with flour. Dough was shaped and transferred to proofing basket to proof for 2 hours.
| Image URL: |
|---|
 |
8:30am: Preheated oven to 525°F with a sheet pan filled with hot water placed on the bottomost rack and baking tray placed directly above.
9:00am: Bread is overturned onto baking tray and scored twice on the surface. Baked for 20 minutes at 525°F and 20 mins at 475°F.
| Image URL: |
|---|
 |
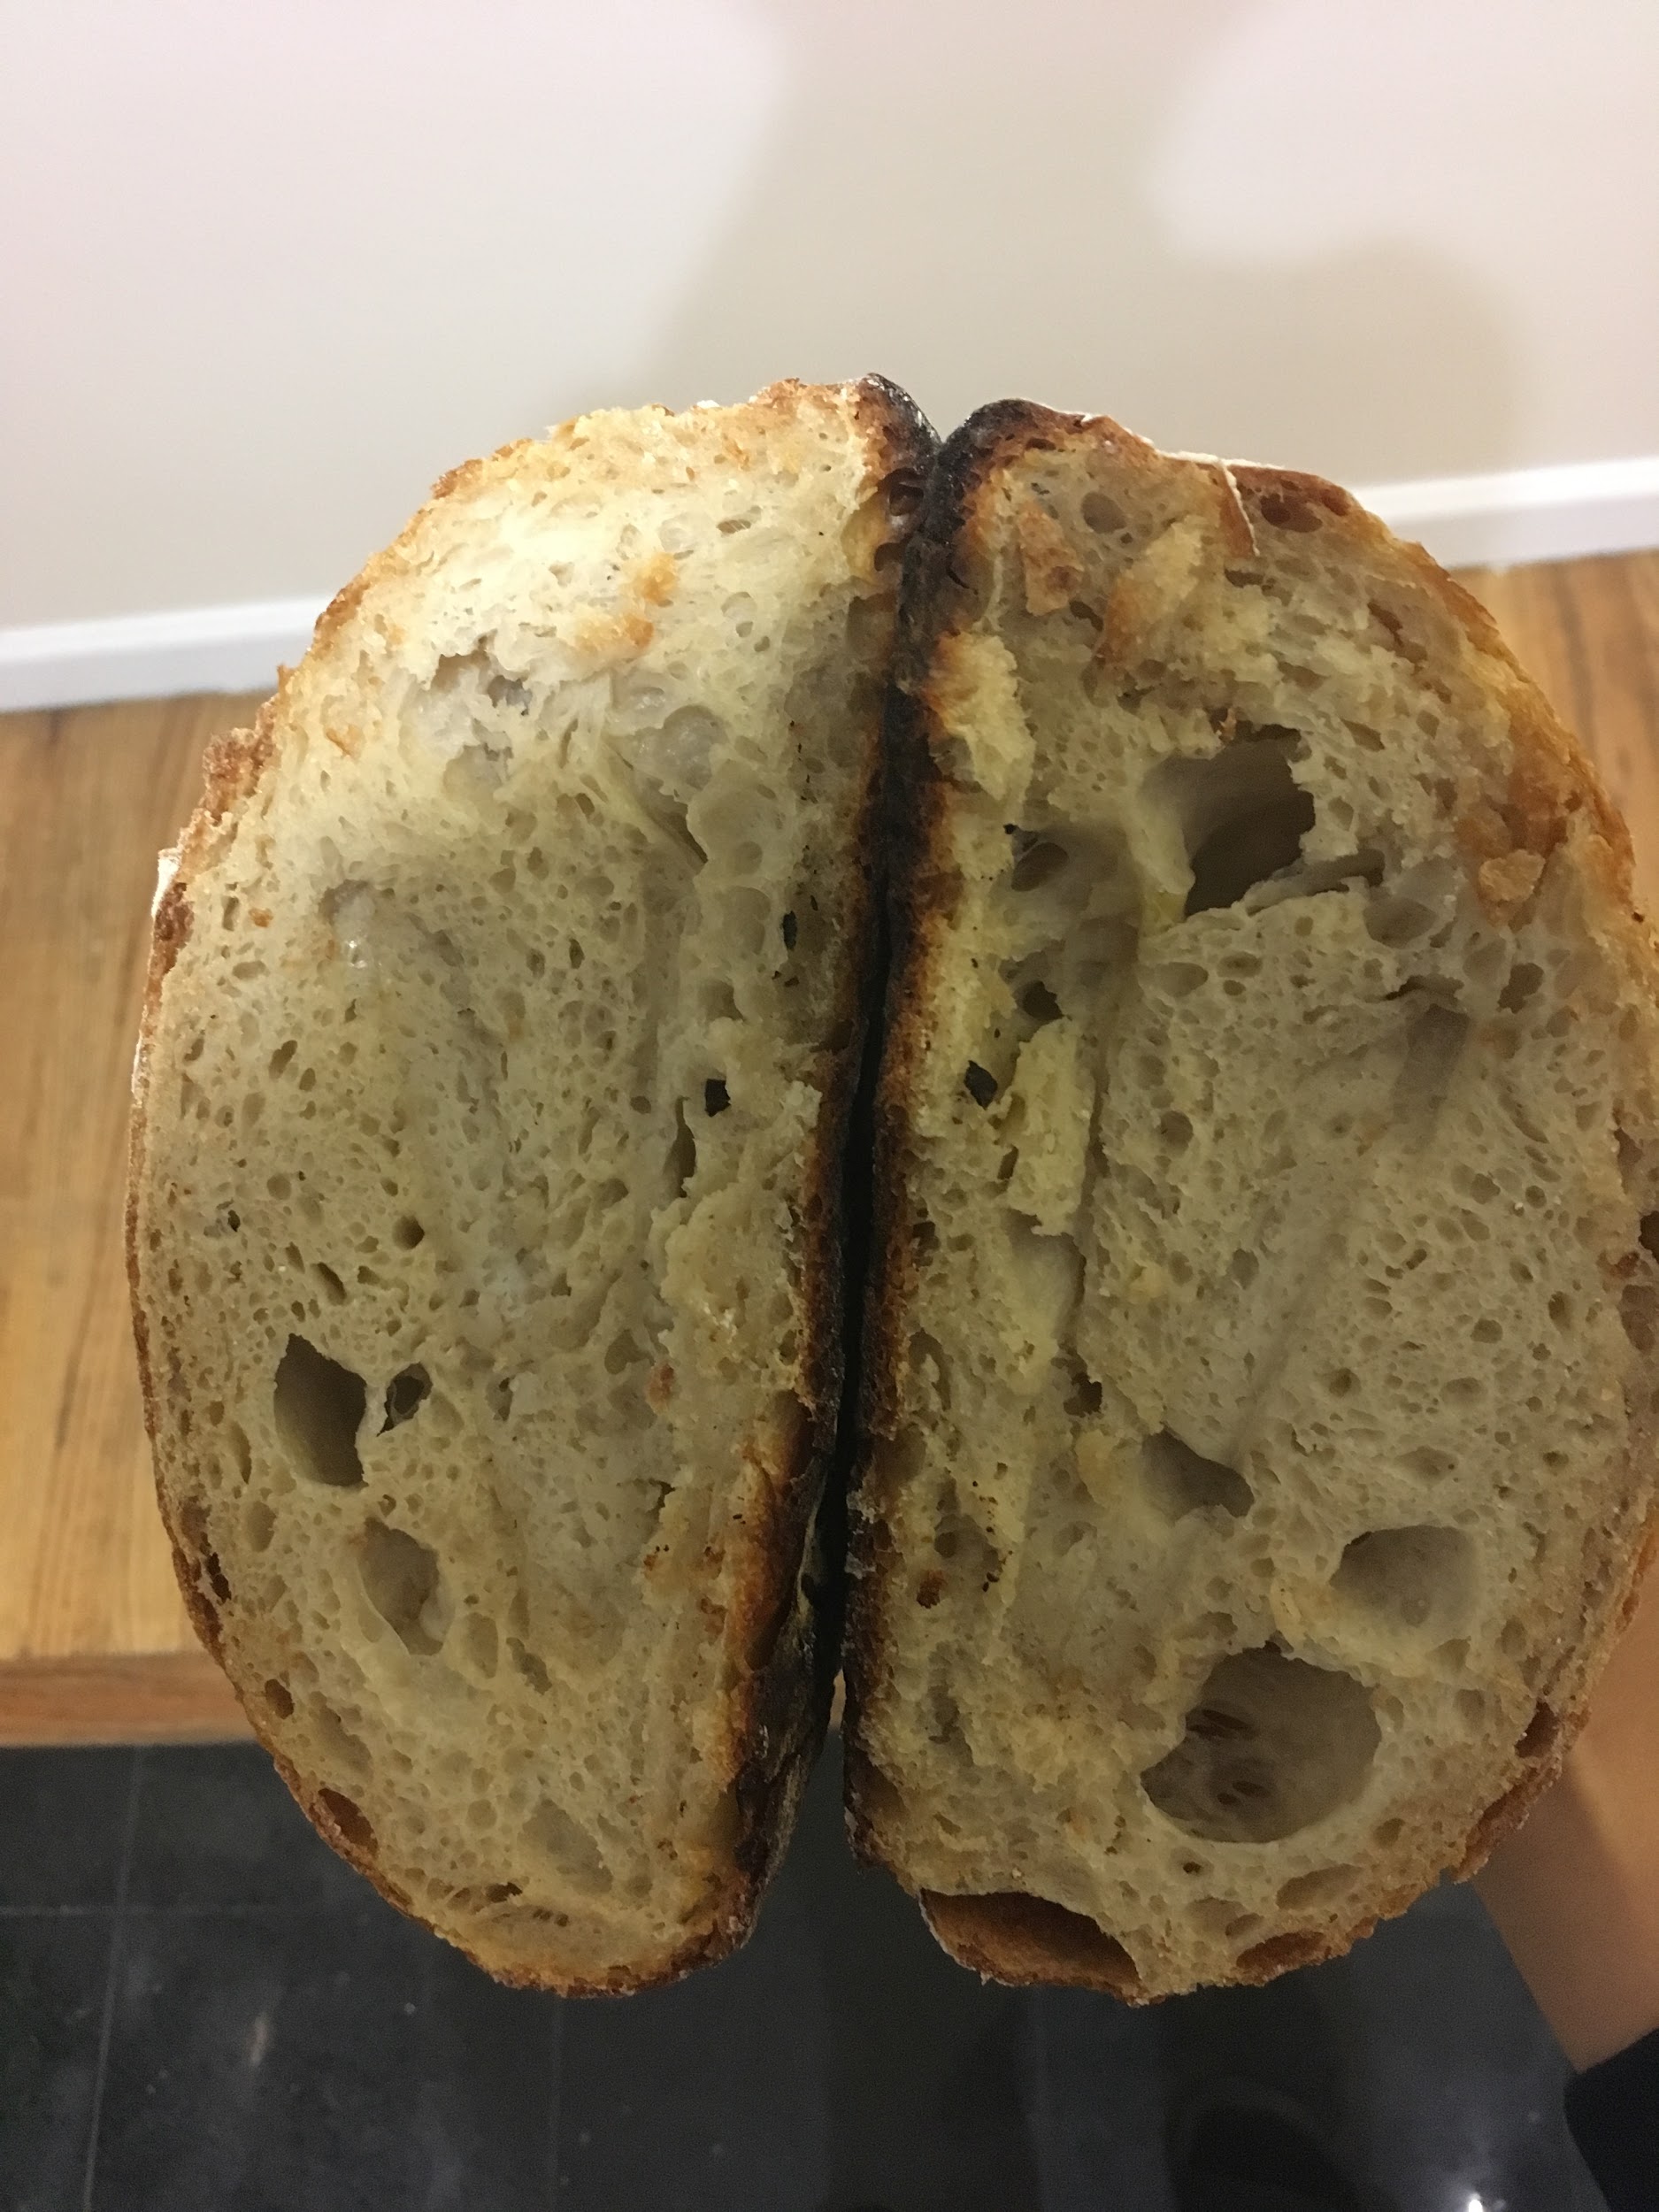
Left to cool completely before sliced.
| Image URL: |
|---|
 |
Notes:
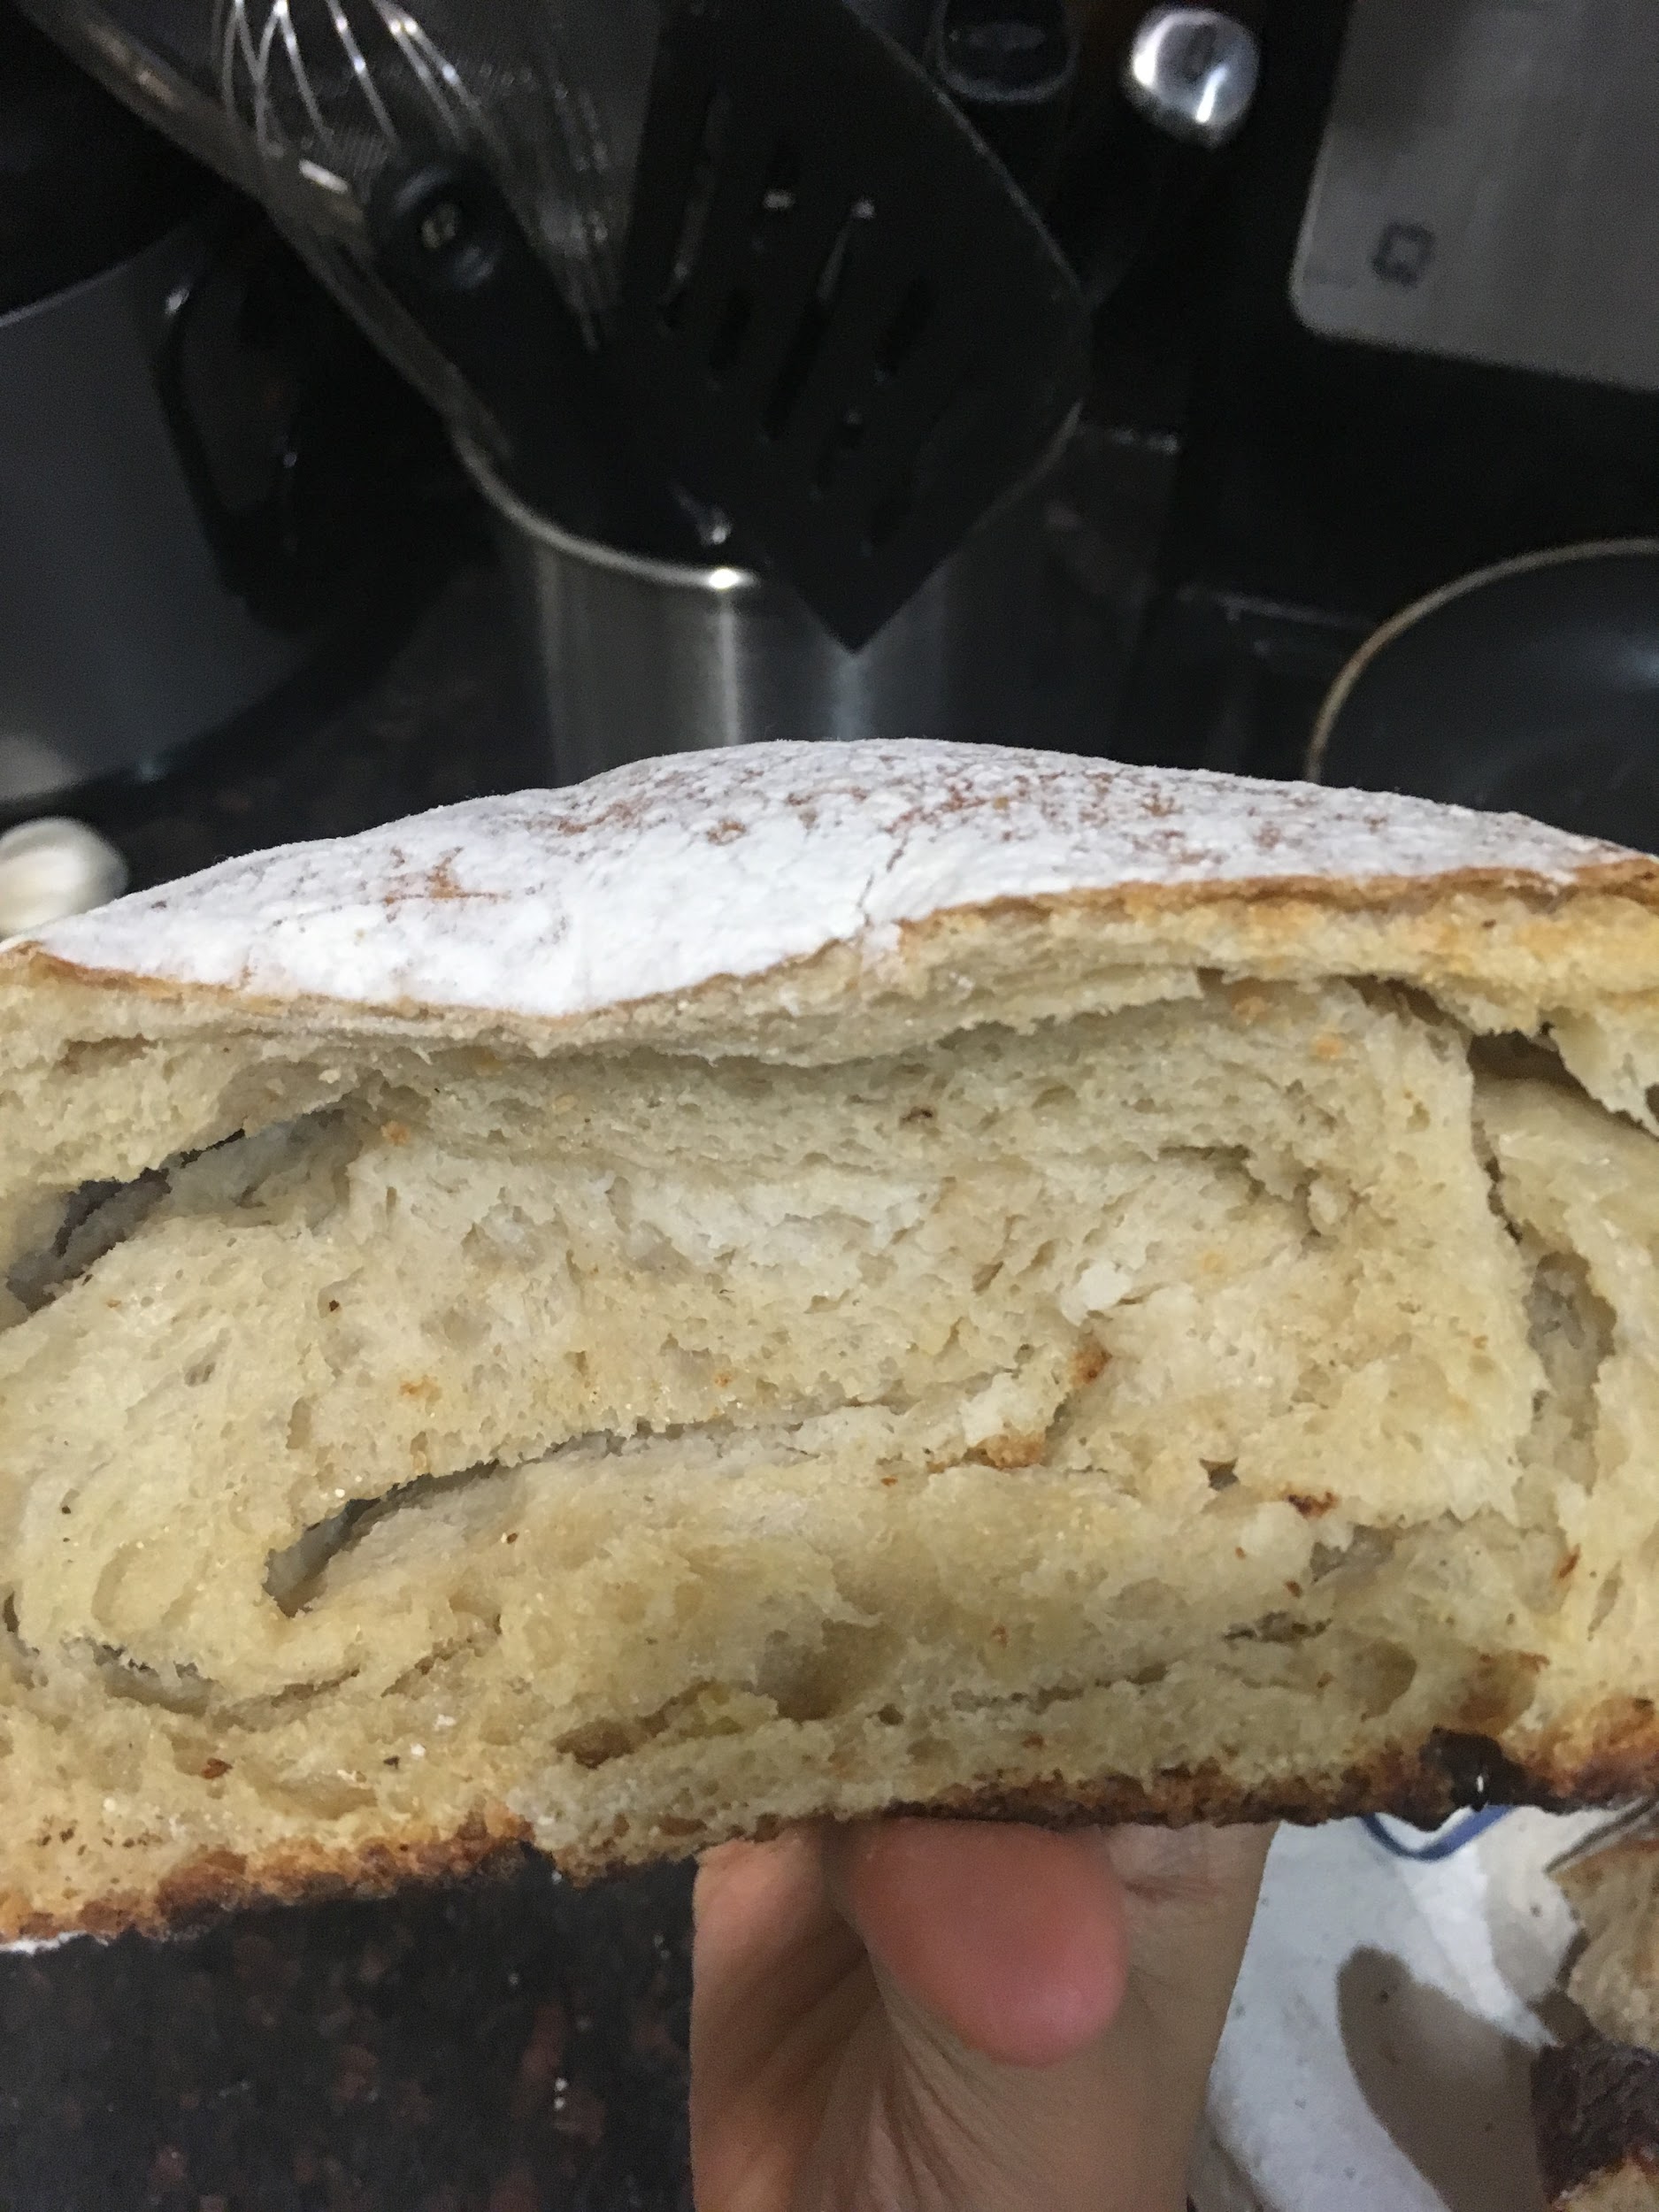
Bread did not rise significantly when baked - crumb slightly more close textured (perhaps due to a lower hydration percentage? Knocking out the air after first proof? Need for longer second proof?)
Future bakes: Increase amount of water used
Evelyn doesn’t explicitly states a second proof, but he does say to take out the dough and place it in the oven after it’s sufficiently heated. Might be useful to time second proof based on amount of time an oven would’ve taken to heat…
| Image URL: |
|---|
 |
Name: Min Lim
Date and Time:
Location: Personal Apartment Kitchen
Subject: Bread-making Attempt #3 + Molding Attempt #1
Weather: Sunny, 18°C
Humidity: 96%
Aims:
To make a bread mold using instructions from BnF Ms Fr 640 (140v) and a historically reconstructed bread from Evelyn’s recipe.
Recipe for bread (John Evelyn, taken from Ullman - John Evelyn Bread Recipes Transcription): Annotations in Red
John Evelyn - 17th century England; recipes for the household
House-hold bread:
Household bread, the more the quantity of wheate, the better: yet it is a good sort of bread for servants, wh. is made of 4 pairs of course-corn & one of Barley, this is a competent proportion for one batch; [1 word illeg] it through the course [1 word illeg].
[Page 2]
Of this take a Bushell about ten o’clock at night, and put Levin into it covering it with some of the same meale.
‘Levin’ = Levain = Raising agent. This resource from Townsends is a useful guide to leaven. Based on research, this could mean barm, yeast, sourdough starter, etc. I will thus be using the given sourdough starter/
Quantity of flour given here is likely variable depending on amount of bread baked. The purpose of this step seems to just be to activate the starter
Take a portion of the flour used to bake the bread and add levain into it.
To temper it in winter, make the water as hot as you can indure it w[i]th the hand; In summer, it is sufficient it be luke-warme; so proportionately in the spring, & autumn.
Given that starter is made of yeast/bacteria - a living organism - its activity is dependent on the temperature of the environment. (Approx 37°C)
Since human body temperature is around 37°C, ‘as hot as you can endure it with the hand’ would mean that the water temperature is slightly hotter but around that range
Colder environment = warmer water to kickstart starter activity, and vice versa
The next morning early, Levin the rest of the meale, tempering & kneading it a very long time, until it be pretty stiff, for though the softer, more light & more bulky it appeare; yet it will be lesser tasting; the light bread goes faster away than that which is wrought [close]:
Add the levain to the rest of the flour (and water?).
Based off this video, the levain is dissolved in water. So I’d imagine mixing the levain in with the flour and combining it with water to make a dough, though not explicitly mentioned
‘Tempering the dough’? Tempering AND kneading ‘until it be pretty stiff’ - This step is likely to develop the gluten structure in the dough, and to work the dough as much as you can until that happens (both tempering - hitting the dough, and kneading it)
Visual markers: It will appear “softer” (not as sticky/shaggy), “more light and more bulky” (not as dense-looking, though more compact)
‘The light bread goes faster away than that which is wrought’ - not sure what this means
The bread well kneaded, you shall [turne] it in the Trough, laing the bottom upmost; then thrust your fist in the middle of the dow to the very bottom of the trough in 2 or 3 places, then cover it well with meale sacks & clean blankets.
Having let it stand there for a while (longer in winter than summer) & [until] you find those holes closed or swelled up; the rising is perfect;
Leave the bread to proof
Visual markers: ‘thrust your fist in the middle of the dow’... ‘until holes closed or swelled up’ - how to tell when the proofing is ready (rather than the conventional way of proofing until doubled in size)
therefore now let somebody be heating of the oven (for it is impossible one person should send both) while you cut the [masse] in pieces; the pieces may be of 16 pound weight each, or some what more; than mould & forme it with loaves, which lay on a cleaned layered cloth, so as a fold of the linen may part and keepe them from inter touching.
A note on ovens:
Bread ovens in 17th century: images can be found here, here, and here
Bread directly placed on surface of oven - heated surface to allow for crust formation and rise
Conventional ovens unable to get as hot as these ovens and surfaces
Best substitute: dutch oven - which was also used during that period for baking - can be heated to a high temperature and baking bread inside a dutch oven traps the heat and steam - allows for a better rise
Modern substitute for dutch ovens: heated baking tray (replicates the heated base), sheet pan filled with boiling water placed underneath (injects steam into the oven, replicating the ‘enclosed’ nature of the dutch oven)
OR: heated baking tray (replicates heated base), and an overturned stainless steel pot (replicates enclosed nature of dutch oven)
Have yet to try this -- will test it out during the experiment!
Preheat oven
Divide big chunks of dough until smaller pieces (this is for making bread in bulk)
16 pound bread - extremely large and heavy (Explains long baking time of 4 hours for Evelyn’s recipe)
‘Cleaned layered cloth’ - allows the dough to breathe via pores of cloth (circulation - not completely sealed like cling wrap) but also prevents dough from touching each other and sticking
Your oven hot (known by raking the end of the a stick against its roofe or hearth, if the sparkles rife plentifully) make it very [cleane], referring only a few coals nearer the mouth; lastly wipe it with a [mop] wett & wrung; then close it up a while to allay the [1 word illeg] heate & dust, wh. will endanger scorching; & when the fiery colour is a little abatted,
‘Cleaned layered cloth’ - allows the dough to breathe via pores of cloth (circulation - not completely sealed like cling wrap) but also prevents dough from touching each other and sticking
let in your loaves as fast & quick as possible; ranging the biggest towards the upper end, round about and filling the middle spare last of all.
‘As fast & quick as possible’ - the hotter the initial contact, the larger the rise
He the heater [of] the Oven must be careful that he burne his wood in every part while kindling it sometimes at one side, sometimes at the other & continually scrapping away the ashes with his [1 word illeg].
The bread put in, stop the mouth well w[it]h the plate doore, & the edges of it with well clothes so keepe in the heate: Four houres time is sufficient for large bread; but you may draw a loafe to see if it be enough; w[i]th your knuckles; if it found & be hard; draw the rest; if not, let them stand a while longer; experience is soone learned; but if you leave the bread too long; it will make it red within, & of ill [relish].
Audio marker: How to tell is bread is baked
Sound: rap the surface of bread with your knuckles. If hard, test other areas. If not, it has not been baked
Modern-day bread making: to test if bread is baked, usually the bottom of the bread is rapped with one’s knuckle. If it sounds hollow, it is baked. The step above likely corresponds with this.
Your batch drawne, place it on that side it is most baked that it may give & [1 word illeg] againe as it cooles; for instance if the upper side be too much (which happens when the ashes were not taken away so often as they should have been during the oven roasting) then range of loaves with the bottom reversed; but if you find them equally well soaked, leave it against the wall on the side which is most baked.
Purpose: to make sure that all the sides of the bread is baked
[Page 3]
Let the bread be cold before you lock it up; & then set it side-ways that the [1 word illeg] may equally flow about it.
Cool the bread
In Summer time your binns set in the cellar, would preserve your bread from mouldiness, better than elsewhere.
Those loaves which are least baked and worst made should be first eaten; for the most baked [1 word illeg] with standing.
It is a profitable oeconomy to have even a batch of stale bread, when you goe to make new.
Recipe for bread mold in the manuscript:
Molding and shrinking a large figure
Mold it with bread pith, having come from the oven, or as the above, & in drying out it will shrink & consequently the medal that you will cast. You can, by this means, by elongating and widening the imprinted bread pith, vary the figure with one image make many various ones. Bread coming from the oven is better. And the one that is reheated twice retracts more. You can cast sulphur without leaving the imprint of the bread to dry, if you want to mold as big as it is. But if you want to let it shrink, make it dry, either more or less.
Key Points:
Mold must be done straight from the oven while bread is hot.
The hotter and more moist the bread, the better it is to imprint.
Reheating the bread (after or before the imprint?) shrinks the imprint.
Drying the bread out shrinks the imprint.
Imprint on bread can be adjusted to make several variations of the same mold.
Questions:
Does the crumb structure/how big the holes are affect the details of the mold?
“Bread coming from the oven is better” -- would molding work if bread is cooled?
How detailed of a replication can the bread mold capture?
To what extent does the imprint shrink/can be adjusted?
Does it matter how large the loaf of bread is?
Protocol:
Bread baking
Feed sourdough starter with equal parts flour and water until active bubbling (overnight)
The next day, measure out 40g sourdough starter and set it aside.
Measure out 280g bread flour, 80g whole wheat flour, 250g water (temperature dependent on surroundings - see annotations above) and 5g salt into a bowl. Add sourdough starter. Mix until a loose, shaggy dough forms.
Tip contents onto counter and gather the dough into a ball. Knead for 10-15 minutes until surface is smooth and springy to touch.
Transfer dough to container to proof. Poke 2-3 holes through the dough. Once the holes have closed up, the proofing is complete.
After proofing is complete, pre-heat oven to hottest setting (in my case, 525F) with oven racks placed at the bottomest part of the oven. Place a baking tray on the top rack and a sheet pan on the bottom. Fill sheet pan with boiling hot water. Close the oven.
Tip dough out of container, and shape it into a ball. Transfer dough to proofing basket/container (in a similar shape to the eventual bread loaf) and leave it to proof until oven is sufficiently heated (1-2 hours)
Take baking tray out of oven and transfer dough onto baking tray. Score the dough and leave it to bake for 20 mins at 525F before lowering the temperature to 475F, baking for another 20 mins (approx). Bread is done when surface is browned and insides sound hollow when crust is rapped with knuckle.
Making mold
While bread is baking, prepare item that you desire to mold
Immediately when bread comes out of the oven, slice the bread in half.
Press item into one half of the bread, then join the other half together and press firmly. Secure with string/tape until bread is completely cooled.
Remove item from loaf.
For imprint to shrink:
After removing item from loaf, leave it for a few days to dry OR reheat bread in the oven again after it is completely cool to further dry out the bread
Procedure:
11:00pm (night before): Sourdough starter taken out of refrigerator. 70g bread flour and 70g warm water added to starter, then stirred till completely mixed. Starter left to stand at room temperature on kitchen rack, with lid loosely screwed.
7:00am: Sourdough starter has doubled in volume. Starter was stirred down with silicone spatula, and 40g of it was portioned out and set aside. In a mixing bowl, I measured out 280g of bread flour, 80g whole wheat flour, 250g water and 6g salt. I added the 40g of starter into the bowl, and stirred (with my fingers) until a loose dough formed.
| Image URL: |
|---|
 |
Dough was then emptied onto kitchen counter and kneaded until smooth and springy to touch. Since dough constantly stuck to my fingers, I added 1-2tsp of flour as I was kneading to achieve the consistency I wanted.
| Image URL: |
|---|
 |
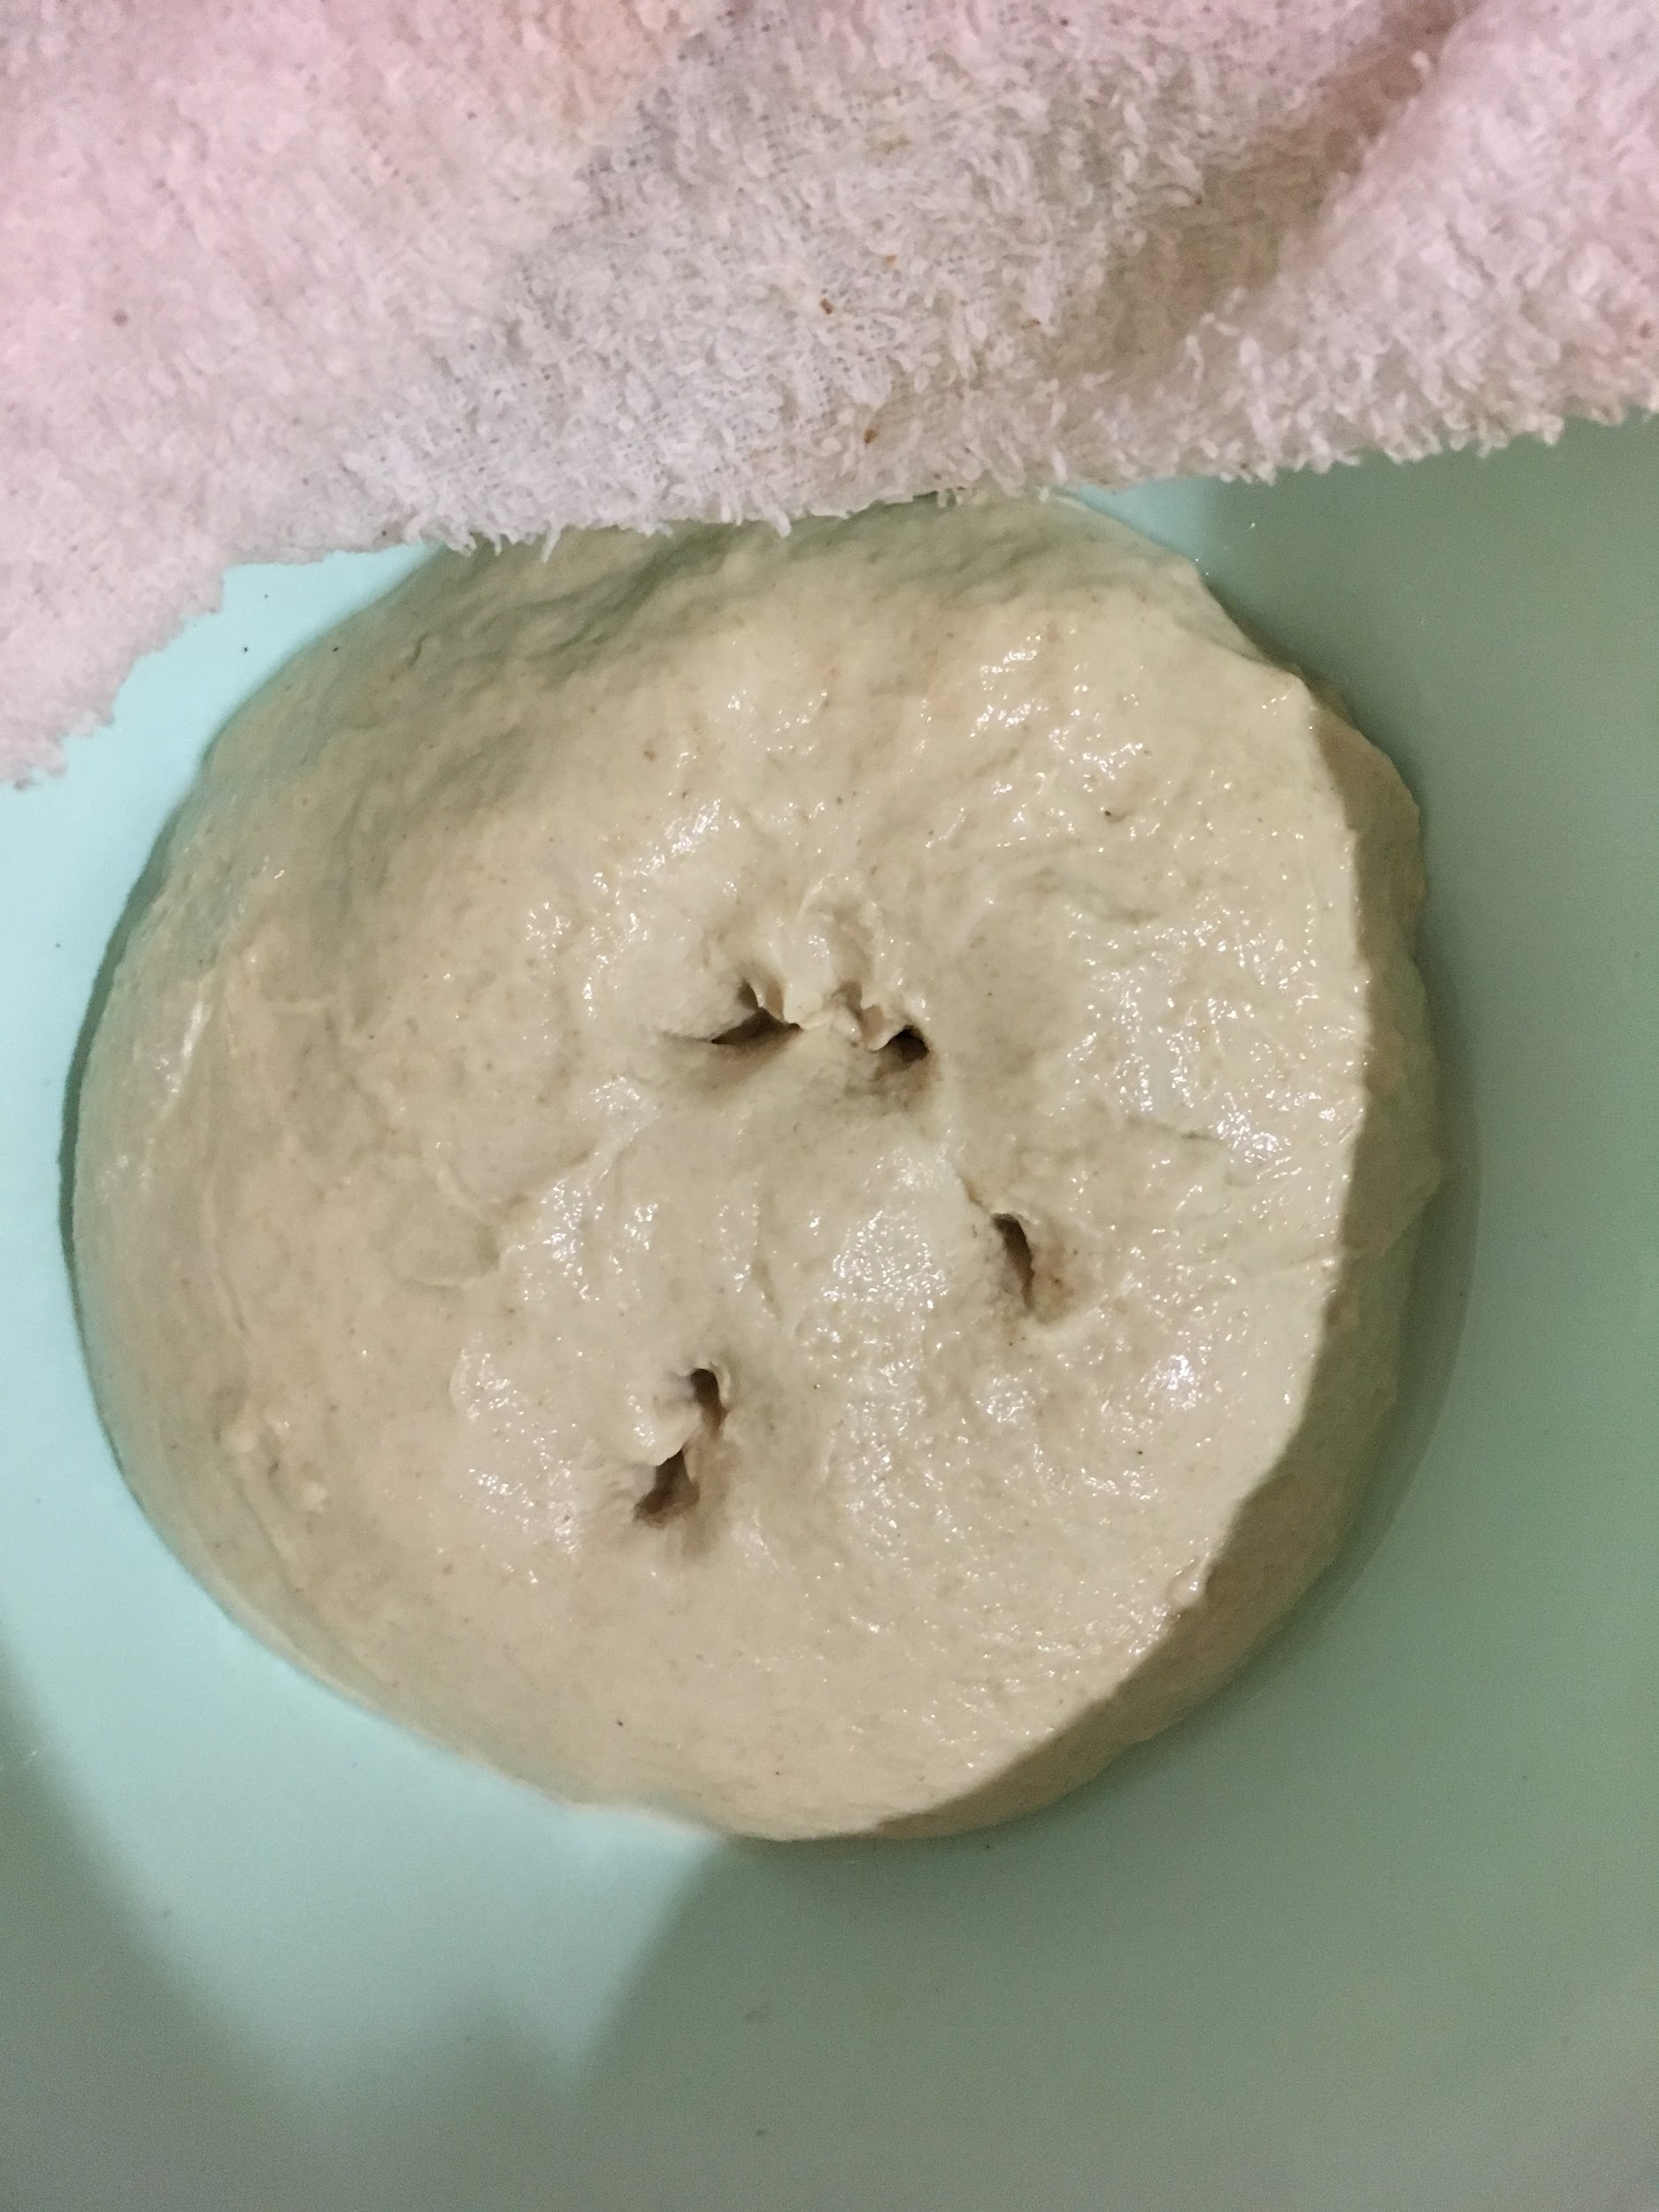
Dough was then placed in a container. Using my index and middle finger, I poked 4-5 holes through to the bottom of the dough. I then covered the container with a damp cloth and left it to proof until have had closed up.
| Image URL: |
|---|
 |
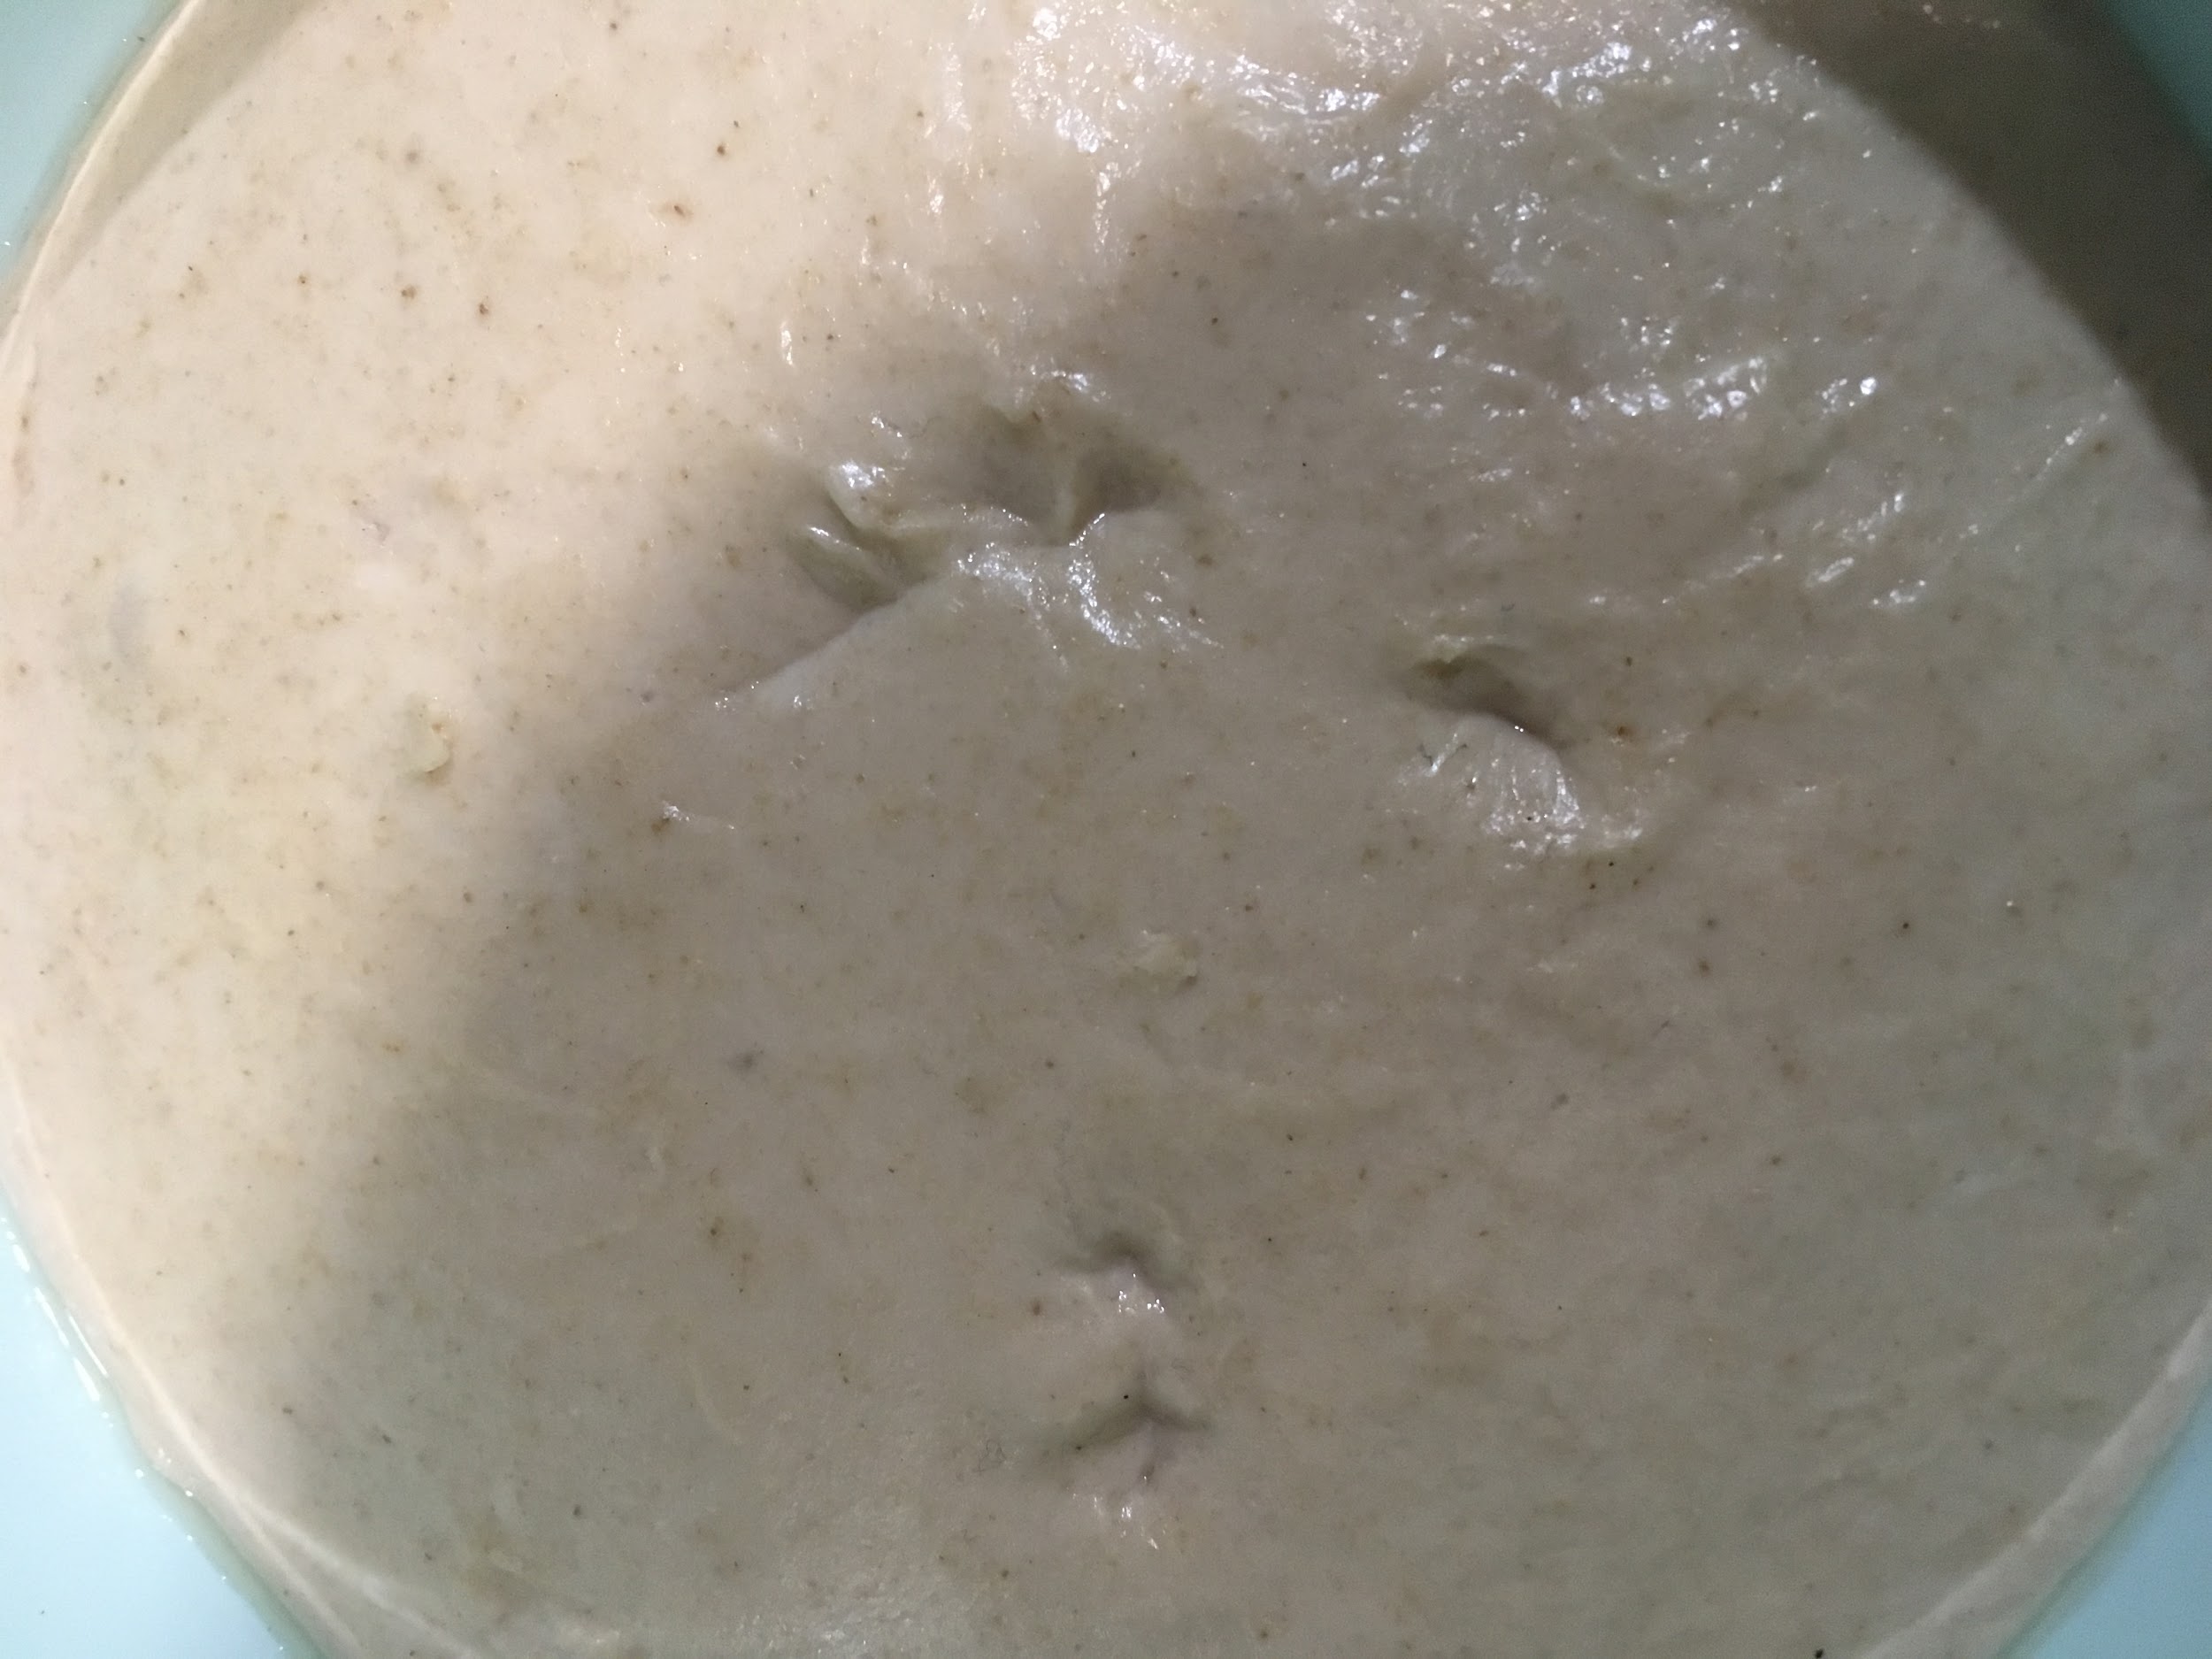
9:00pm: Holes sufficiently closed up.
| Image URL: |
|---|
 |
Dough was gently tipped onto kitchen counter, dusted lightly with flour. I then shaped the dough and placed it into the container (on top of a cloth linen to prevent sticking) and left it for its second rise.
| Image URL: |
|---|
 |
Preheated the oven to 525F, placing a baking tray and a stainless steel pot inside.
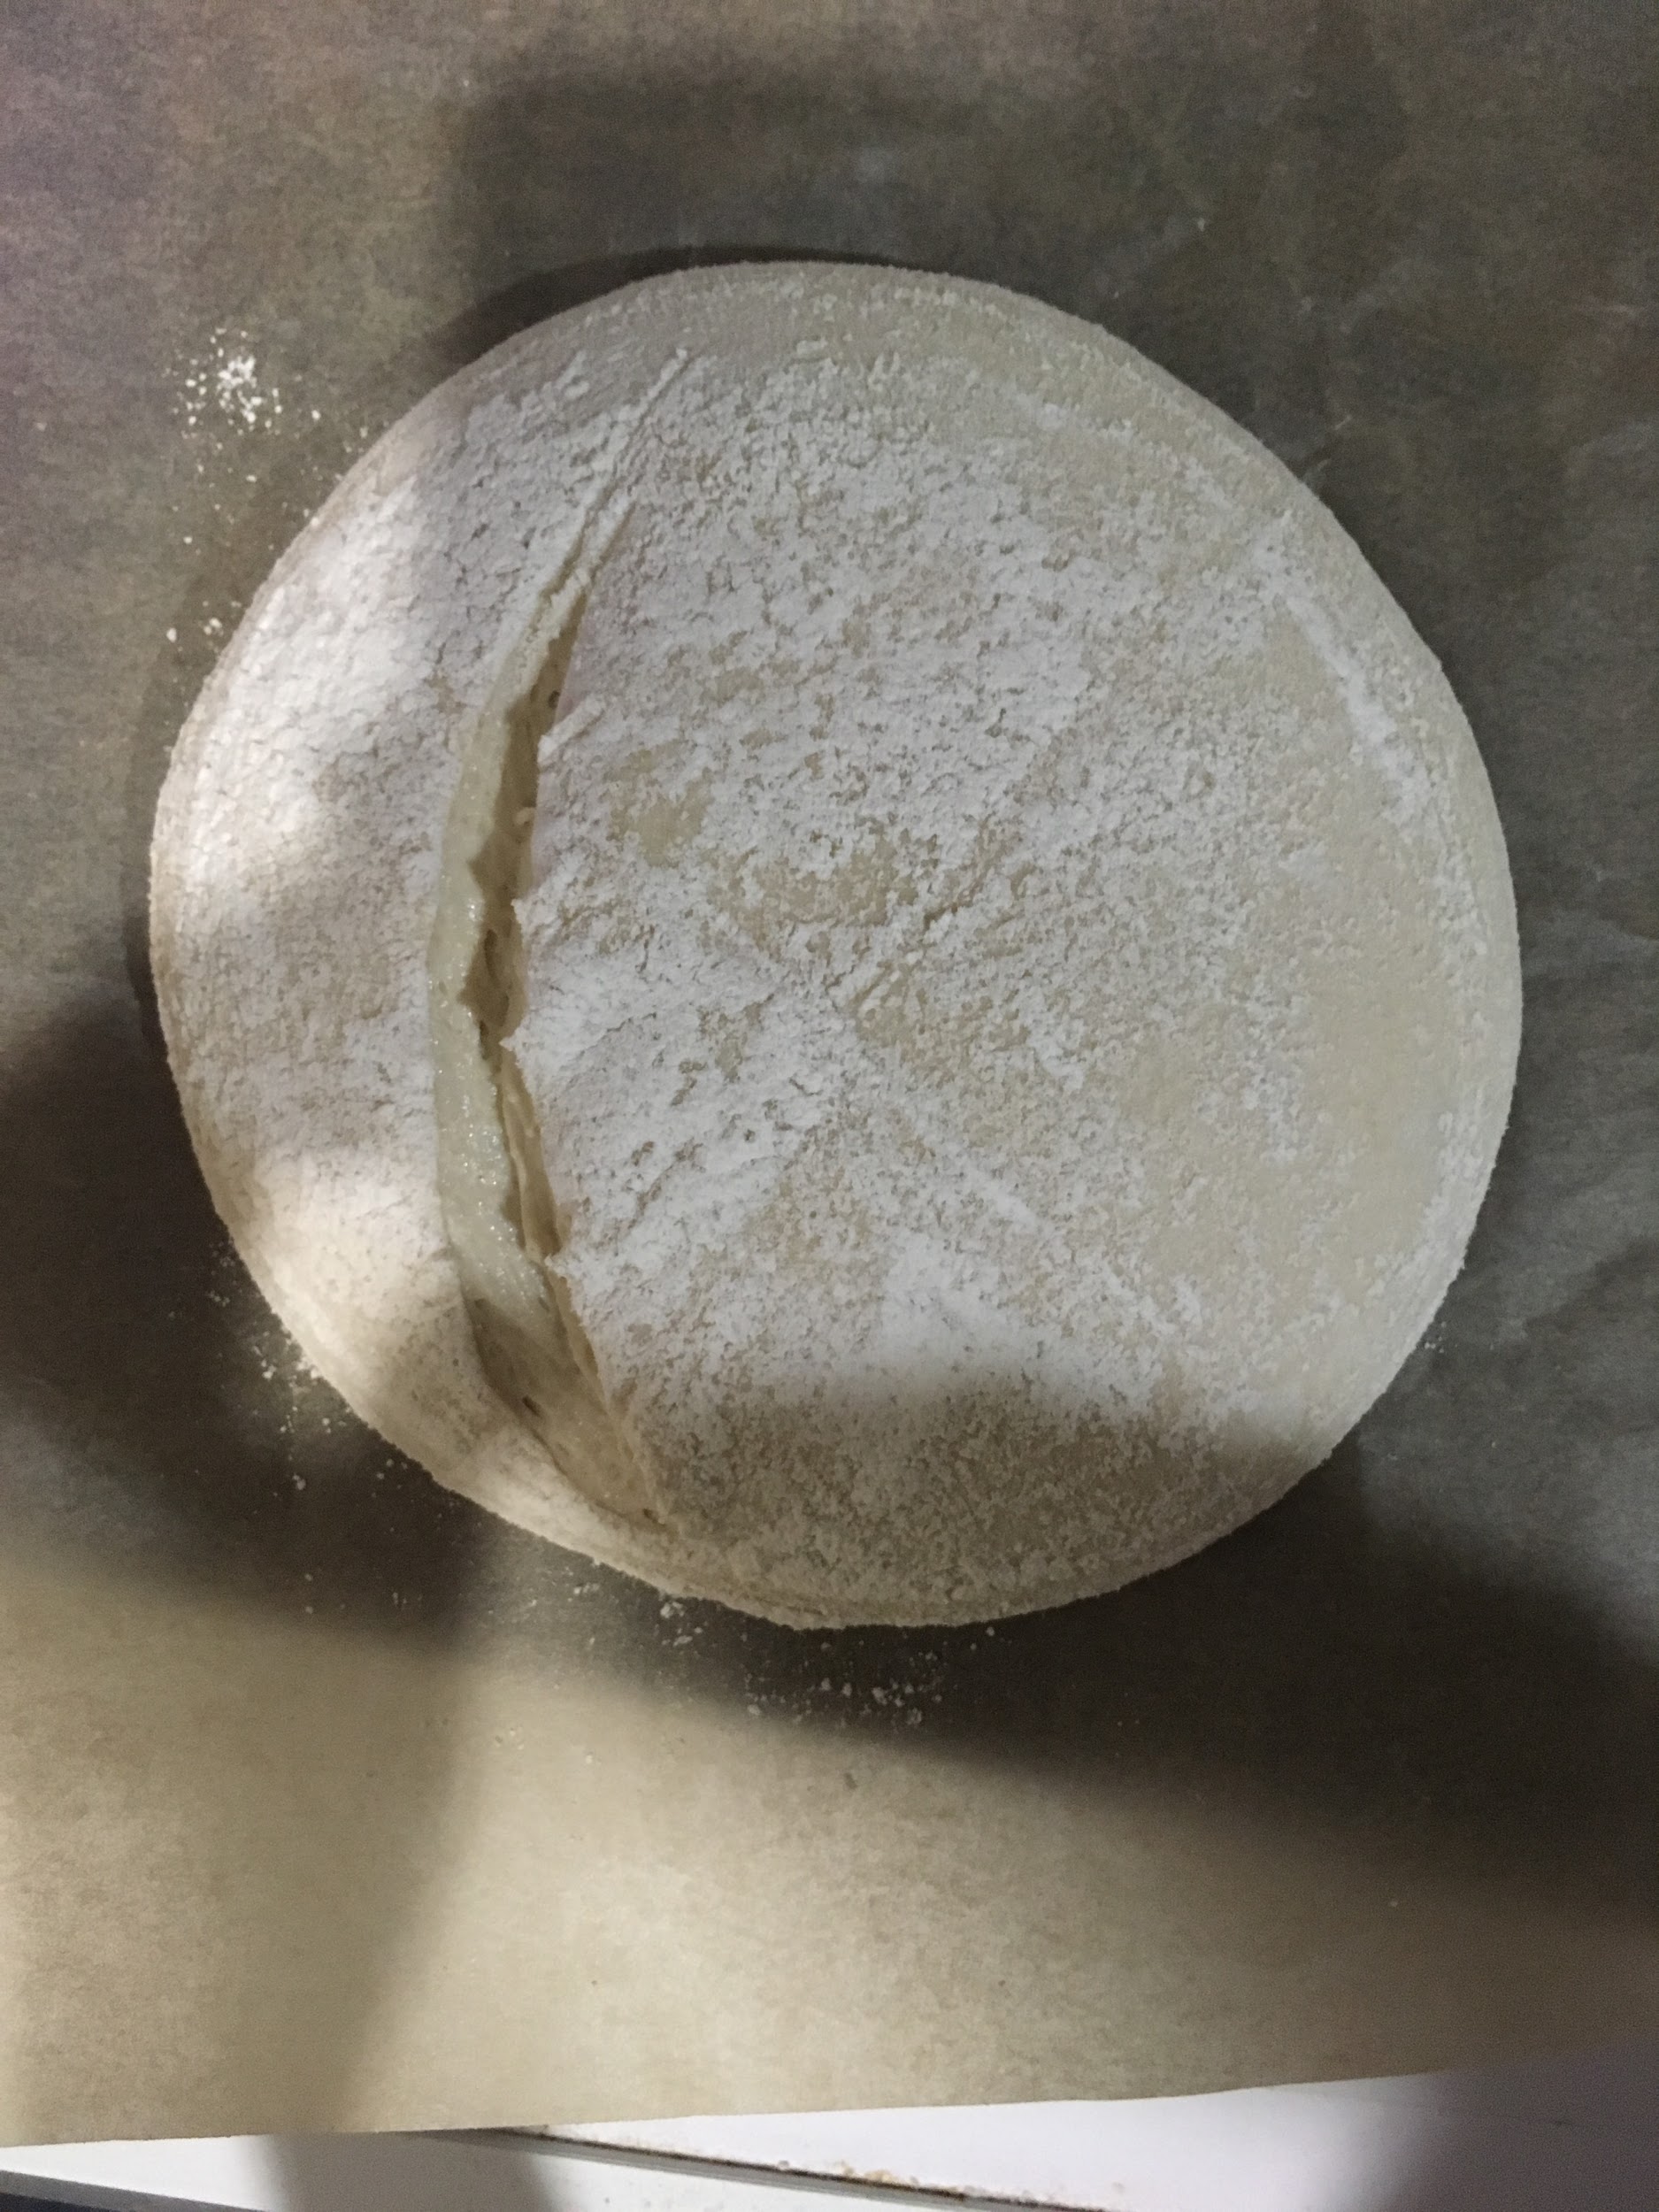
10:00pm: Dough was gently tipped onto a sheet of parchment paper. Excess flour was brushed off and dough was scored.
| Image URL: |
|---|
 |
It was then transferred onto the baking tray, then covered with an overturned stainless steel pot (to replicate a dutch oven). Baked for 20 mins at 525F, and another 25 mins at 475F.
10:30pm: Object to mold (stapler) prepared -- placed on kitchen counter.
10:45pm: Bread was taken out of the oven after sufficiently browned, and insides sounded hollow.
| Image URL: |
|---|
 |
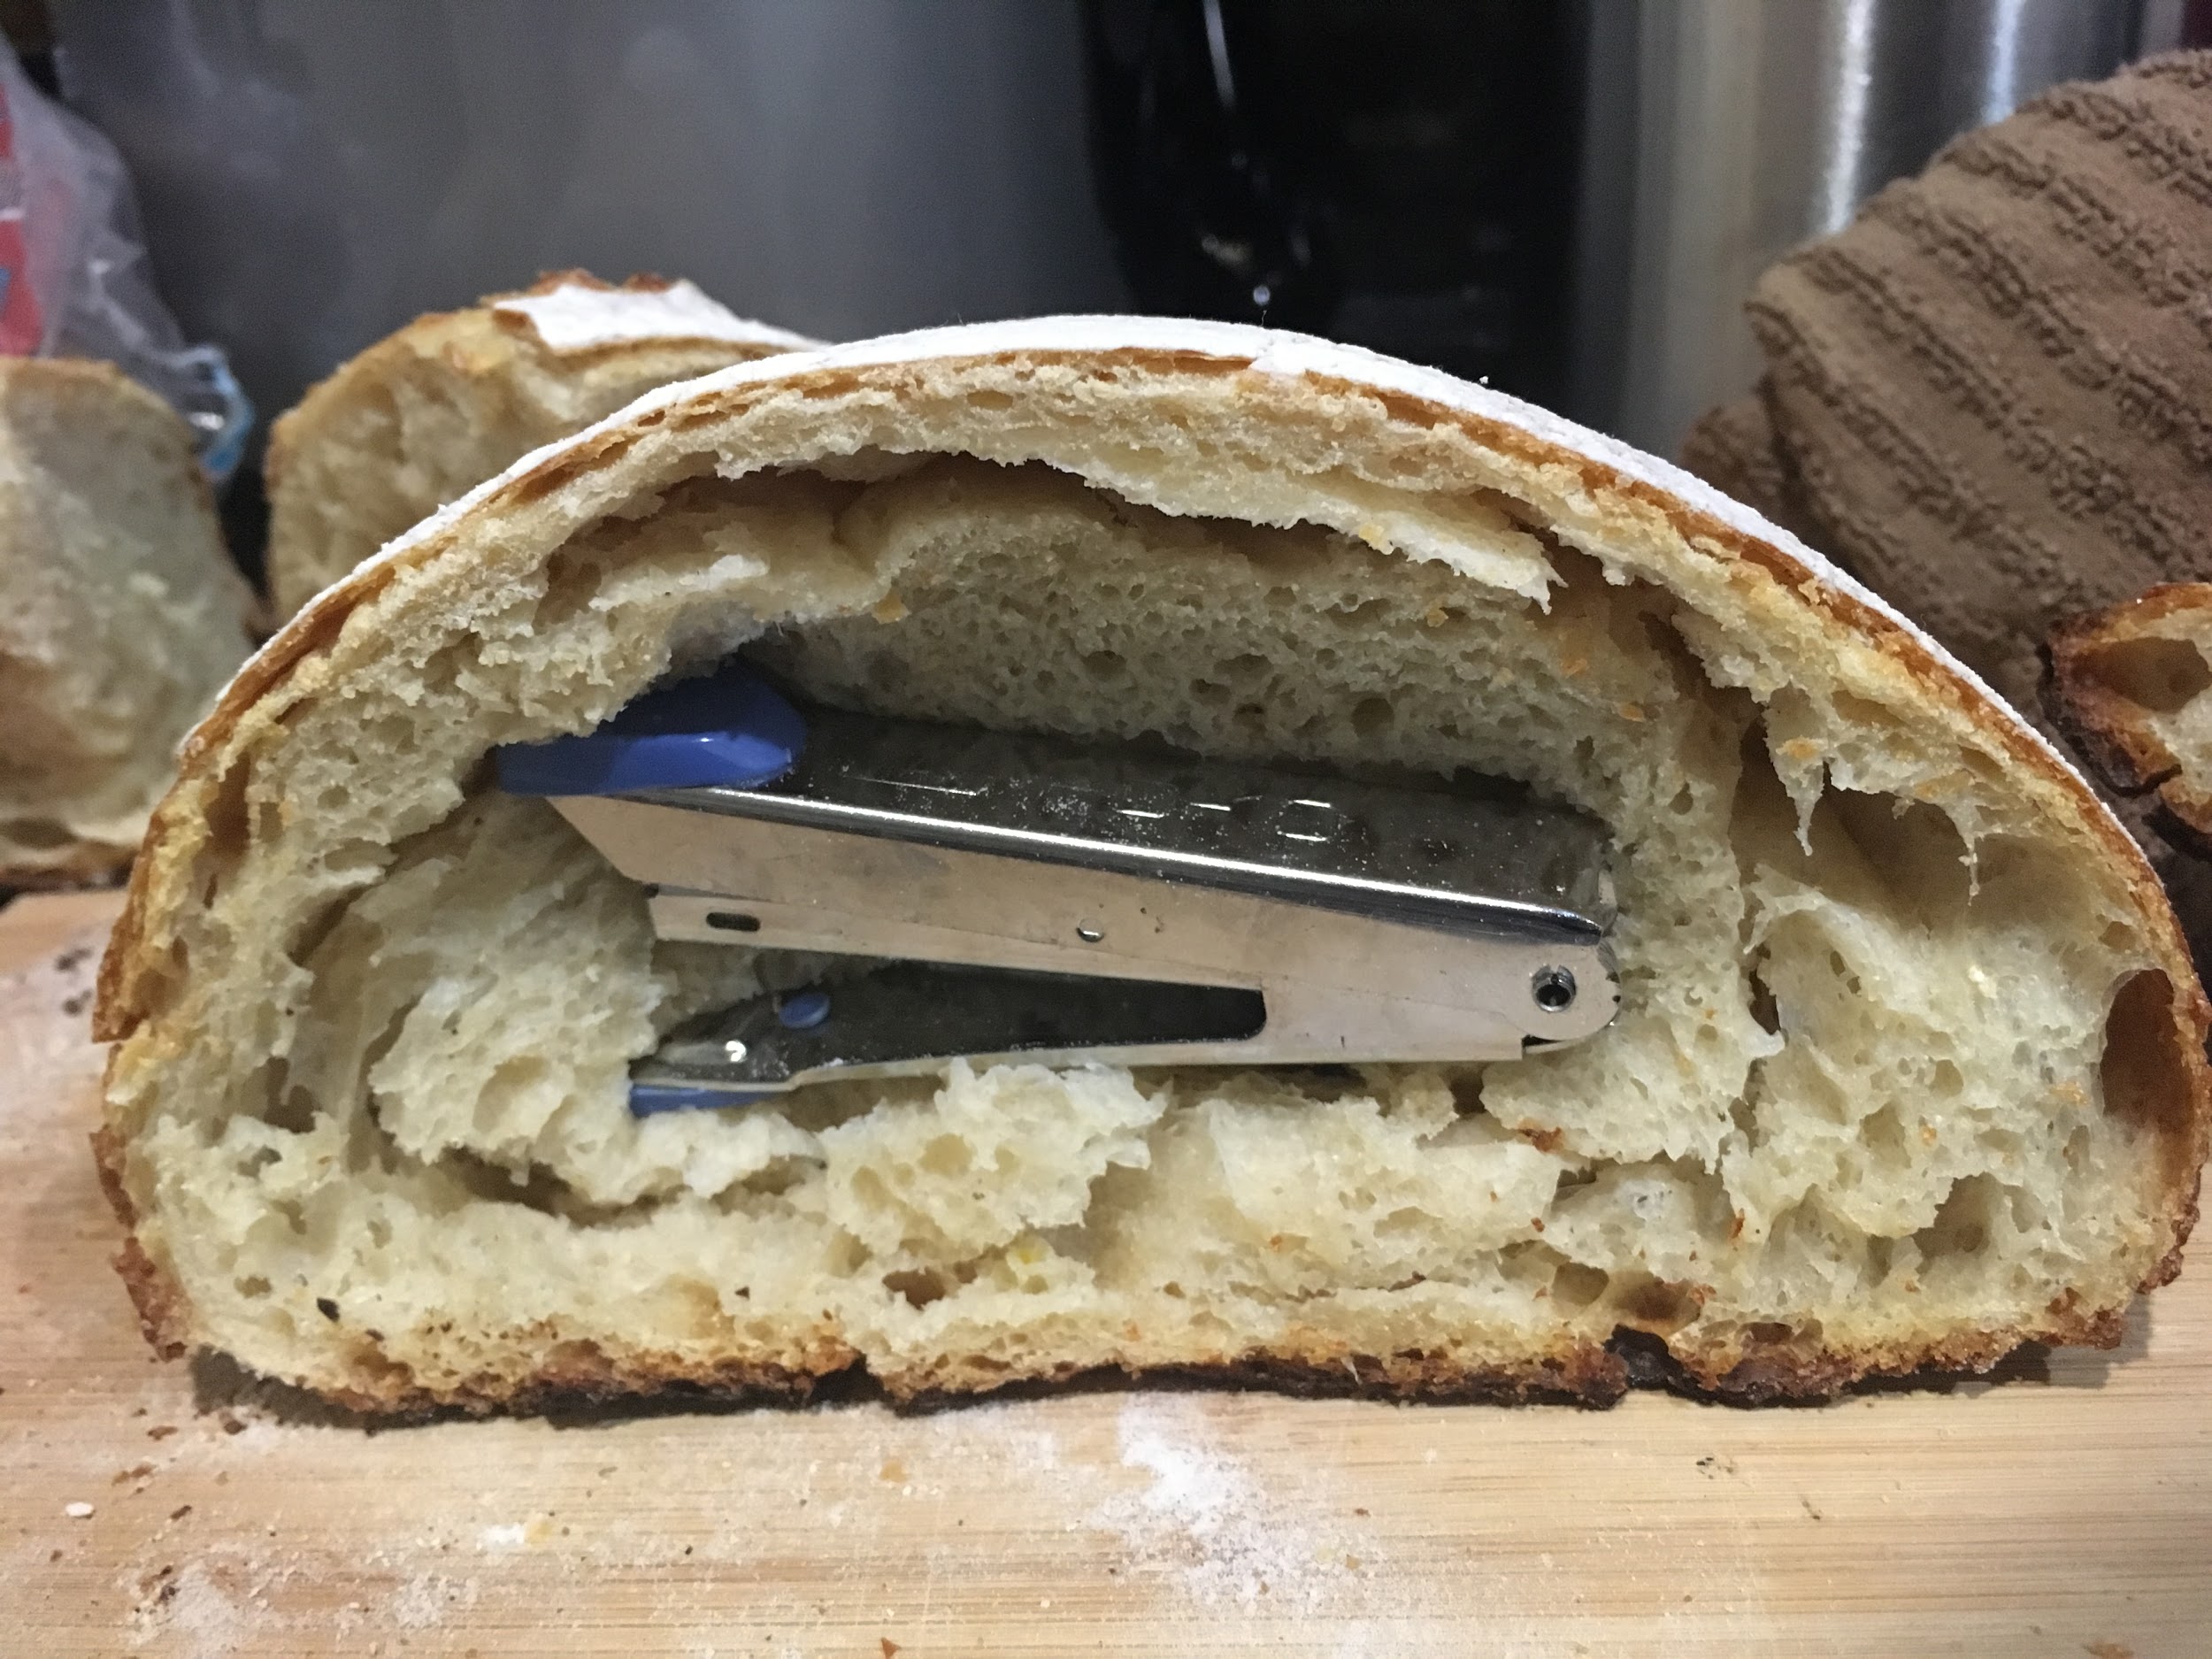
I transferred the bread to a chopping board, and sliced it in half with a bread knife.
| Image URL: |
|---|
 |
I then pushed the stapler into a half of the bread, and pressed it tightly with the other half. I secured the two halves together with two rubber bands, and placed it aside until cooled completely.
| Image URL: |
|---|
 |
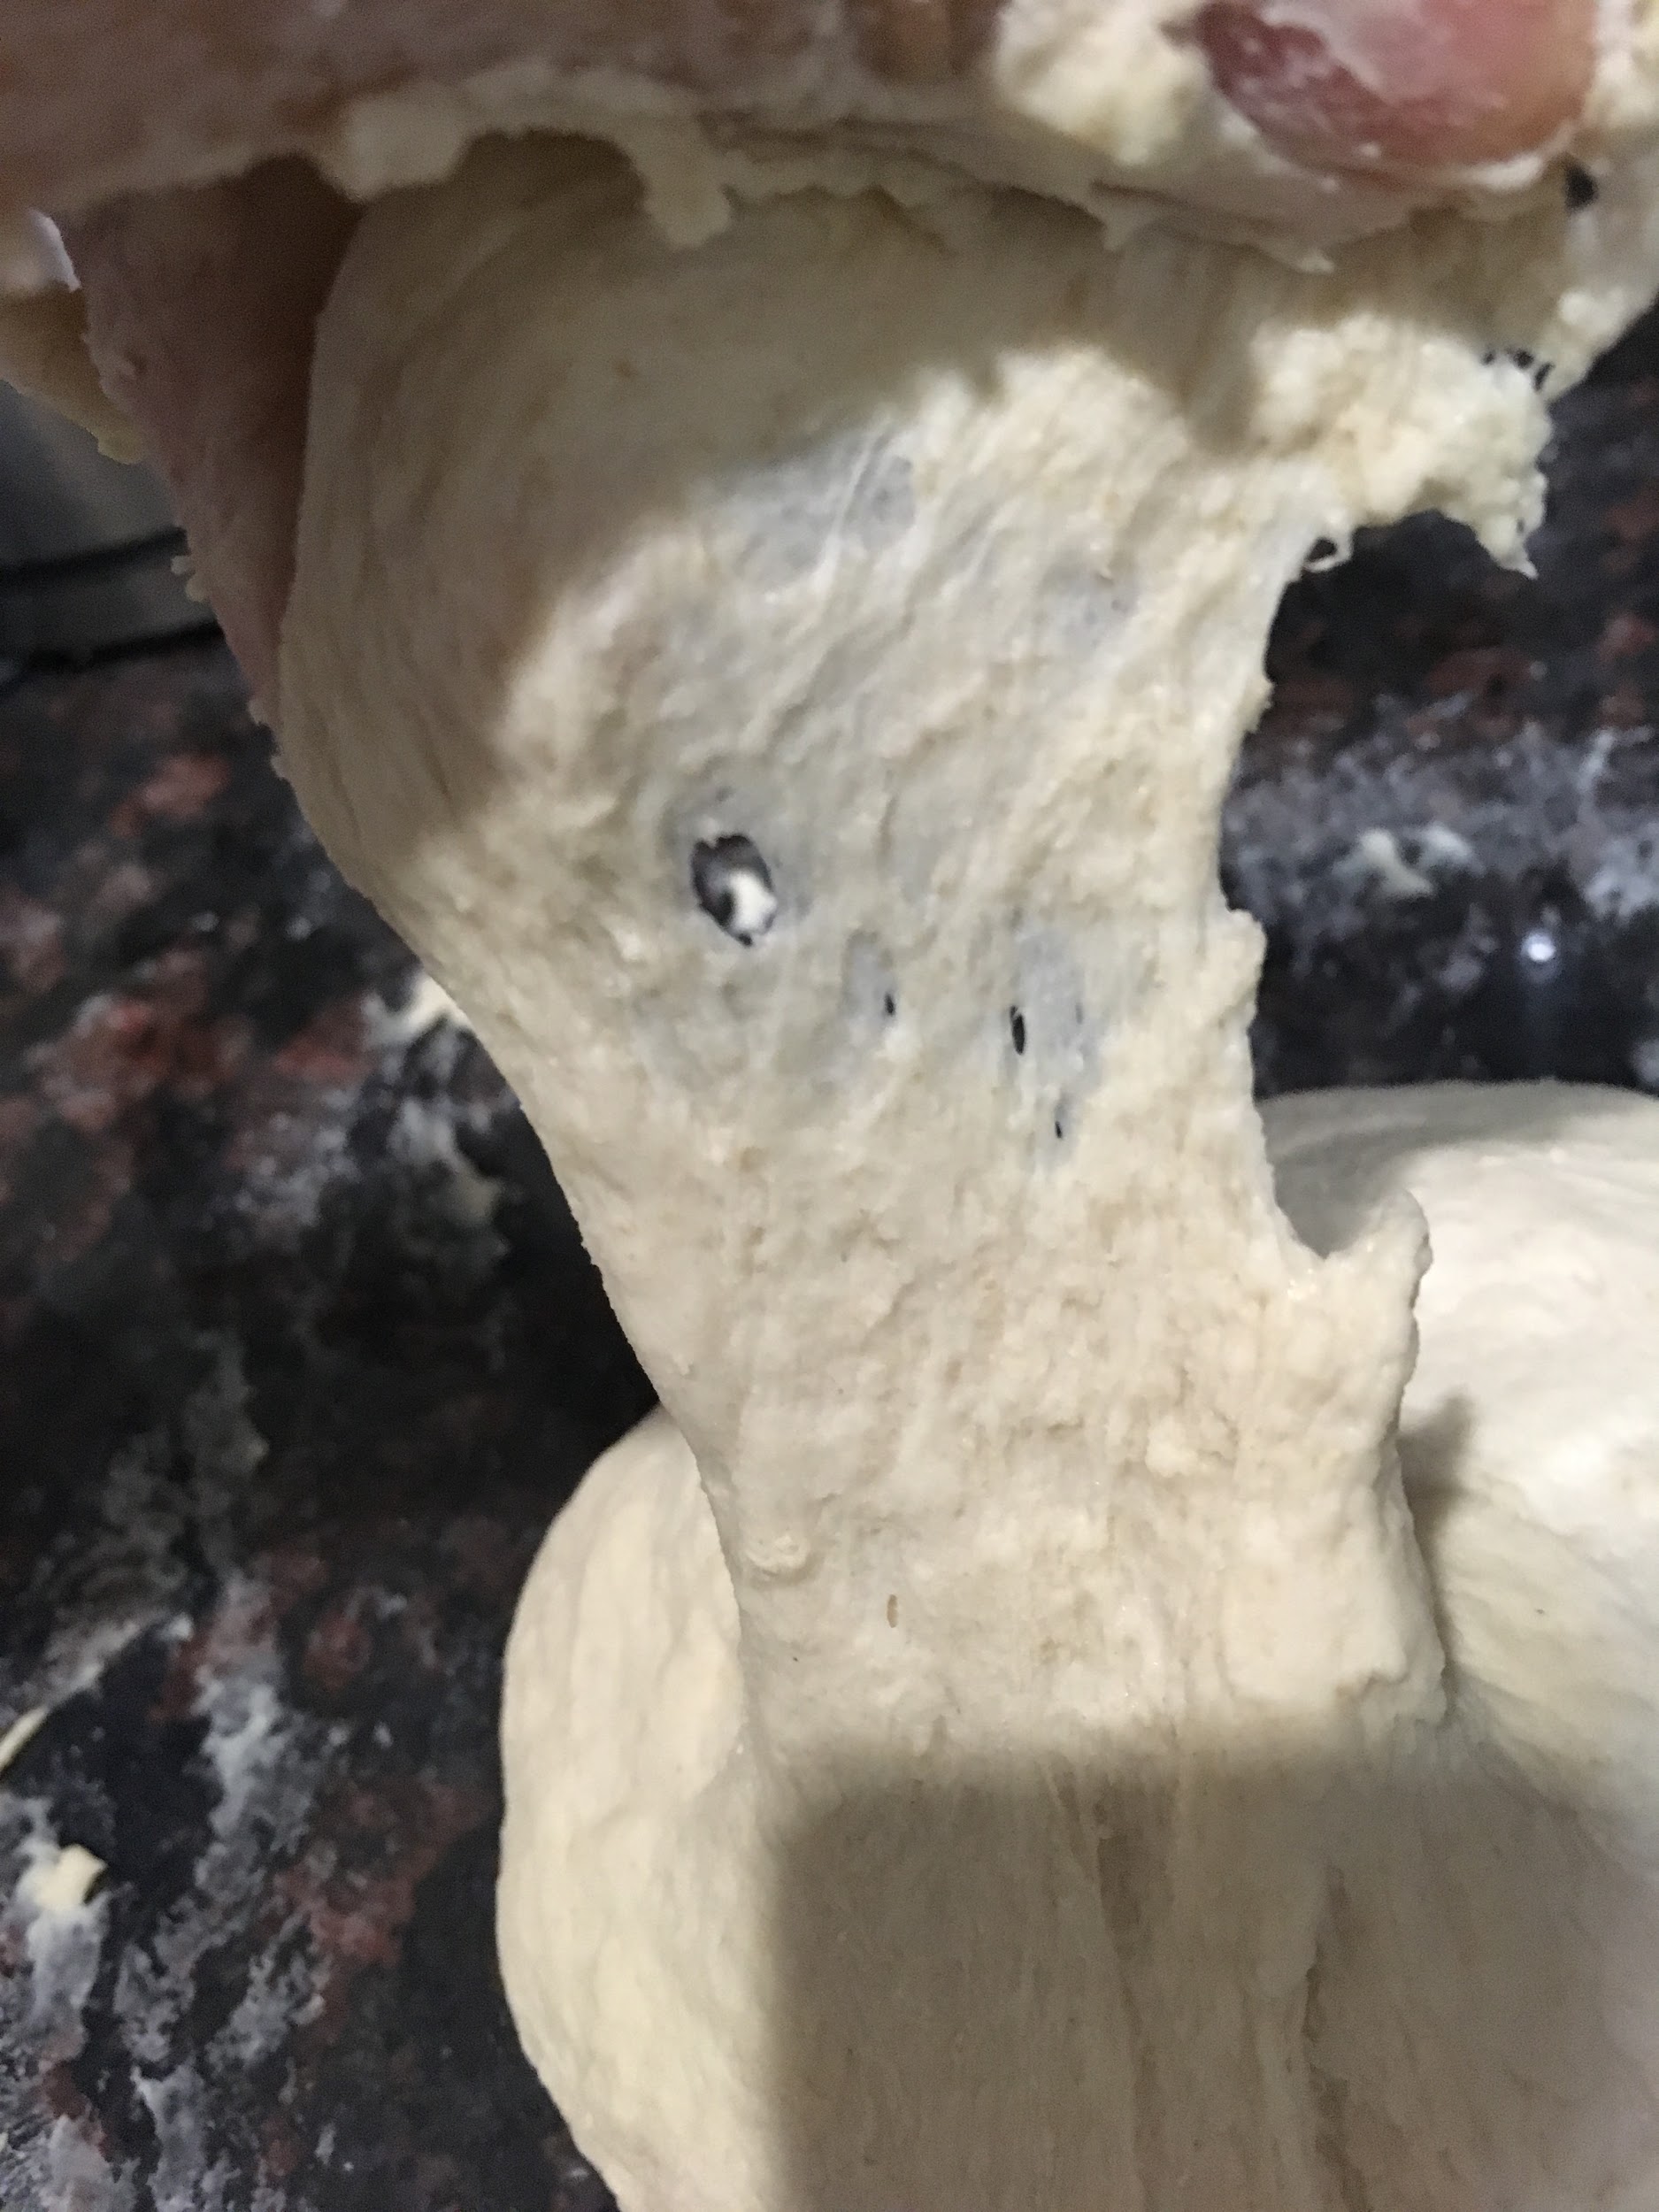
7:00am (the next day): Rubber bands were removed and stapler was taken out of mould. Stapler did not seem to make much of an indent into the bread, although the surface details were captured well. Some interference with mould from the open crumb structure of the loaf. Perhaps not pressed in hard enough? Or perhaps the stapler was too thick? Will make another batch to test with the stapler and another object.
| Image URL: |
|---|
 |
Name: Min Lim
Date and Time:
Location: Personal Apartment Kitchen
Subject: Bread-making Attempt #4 + Molding Attempt #2
Weather: Sunny, 16°C
Humidity: 70%
Aims:
To make a bread mold using instructions from BnF Ms Fr 640 (140v) and a historically reconstructed bread from Evelyn’s recipe. Application of the object to the bread adjusted from previous attempt (testing out a one-sided mold).
Protocol (adjusted):
Bread baking
Same as previous attempt.
Making mold
While bread is baking, prepare item that you desire to mold
Immediately when bread comes out of the oven, slice the bread in half.
Press item into one half of the bread and push it down until item is completely encased in the dough. Secure with string/tape until bread is completely cooled.
Remove item from loaf.
Procedure:
11:00pm (night before): Sourdough starter taken out of refrigerator. 70g bread flour and 70g warm water added to starter, then stirred till completely mixed. Starter left to stand at room temperature on kitchen rack, with lid loosely screwed.
7:00am: Sourdough starter has doubled in volume. Starter was stirred down with silicone spatula, and 40g of it was portioned out and set aside. In a mixing bowl, I measured out 280g of bread flour, 80g whole wheat flour, 250g water and 6g salt. I added the 40g of starter into the bowl, and stirred (with my fingers) until a loose dough formed. Dough was then emptied onto kitchen counter and kneaded until smooth and springy to touch. Since dough constantly stuck to my fingers, I added 1-2tsp of flour as I was kneading to achieve the consistency I wanted. Dough was then placed in a container. This dough was slightly wetter than the previous dough. I dusted my fingers with flour and poked 2 holes through to the bottom of the dough. I then covered the container with a damp cloth and left it to proof until holes have closed up.
| Image URL: |
|---|
 |
9:00pm: Holes sufficiently closed up. I gently tipped the dough onto a lightly dusted kitchen counter, and shaped it. Placed in proofing basket to proof. Preheated oven to 525F with baking tray and stainless steel pot.
10:00pm: Dough gently tipped onto baking sheet and scored, before placed in baking tray in the oven. Overturned steel pot placed on top of the dough until compeletely covered. Baked at 525F for 15 minutes.
| Image URL: |
|---|
 |
And 475F at 30 minutes until surface is browned and insides are hollow.
| Image URL: |
|---|
 |
10:45pm: Prepared 3 different objects to test out bread mold - stapler, nail, and key. Removed bread from oven and transferred it onto chopping board.
Sliced bread into half,
| Image URL: |
|---|
 |
and pressed stapler firmly on one half of the loaf.
| Image URL: |
|---|
 |
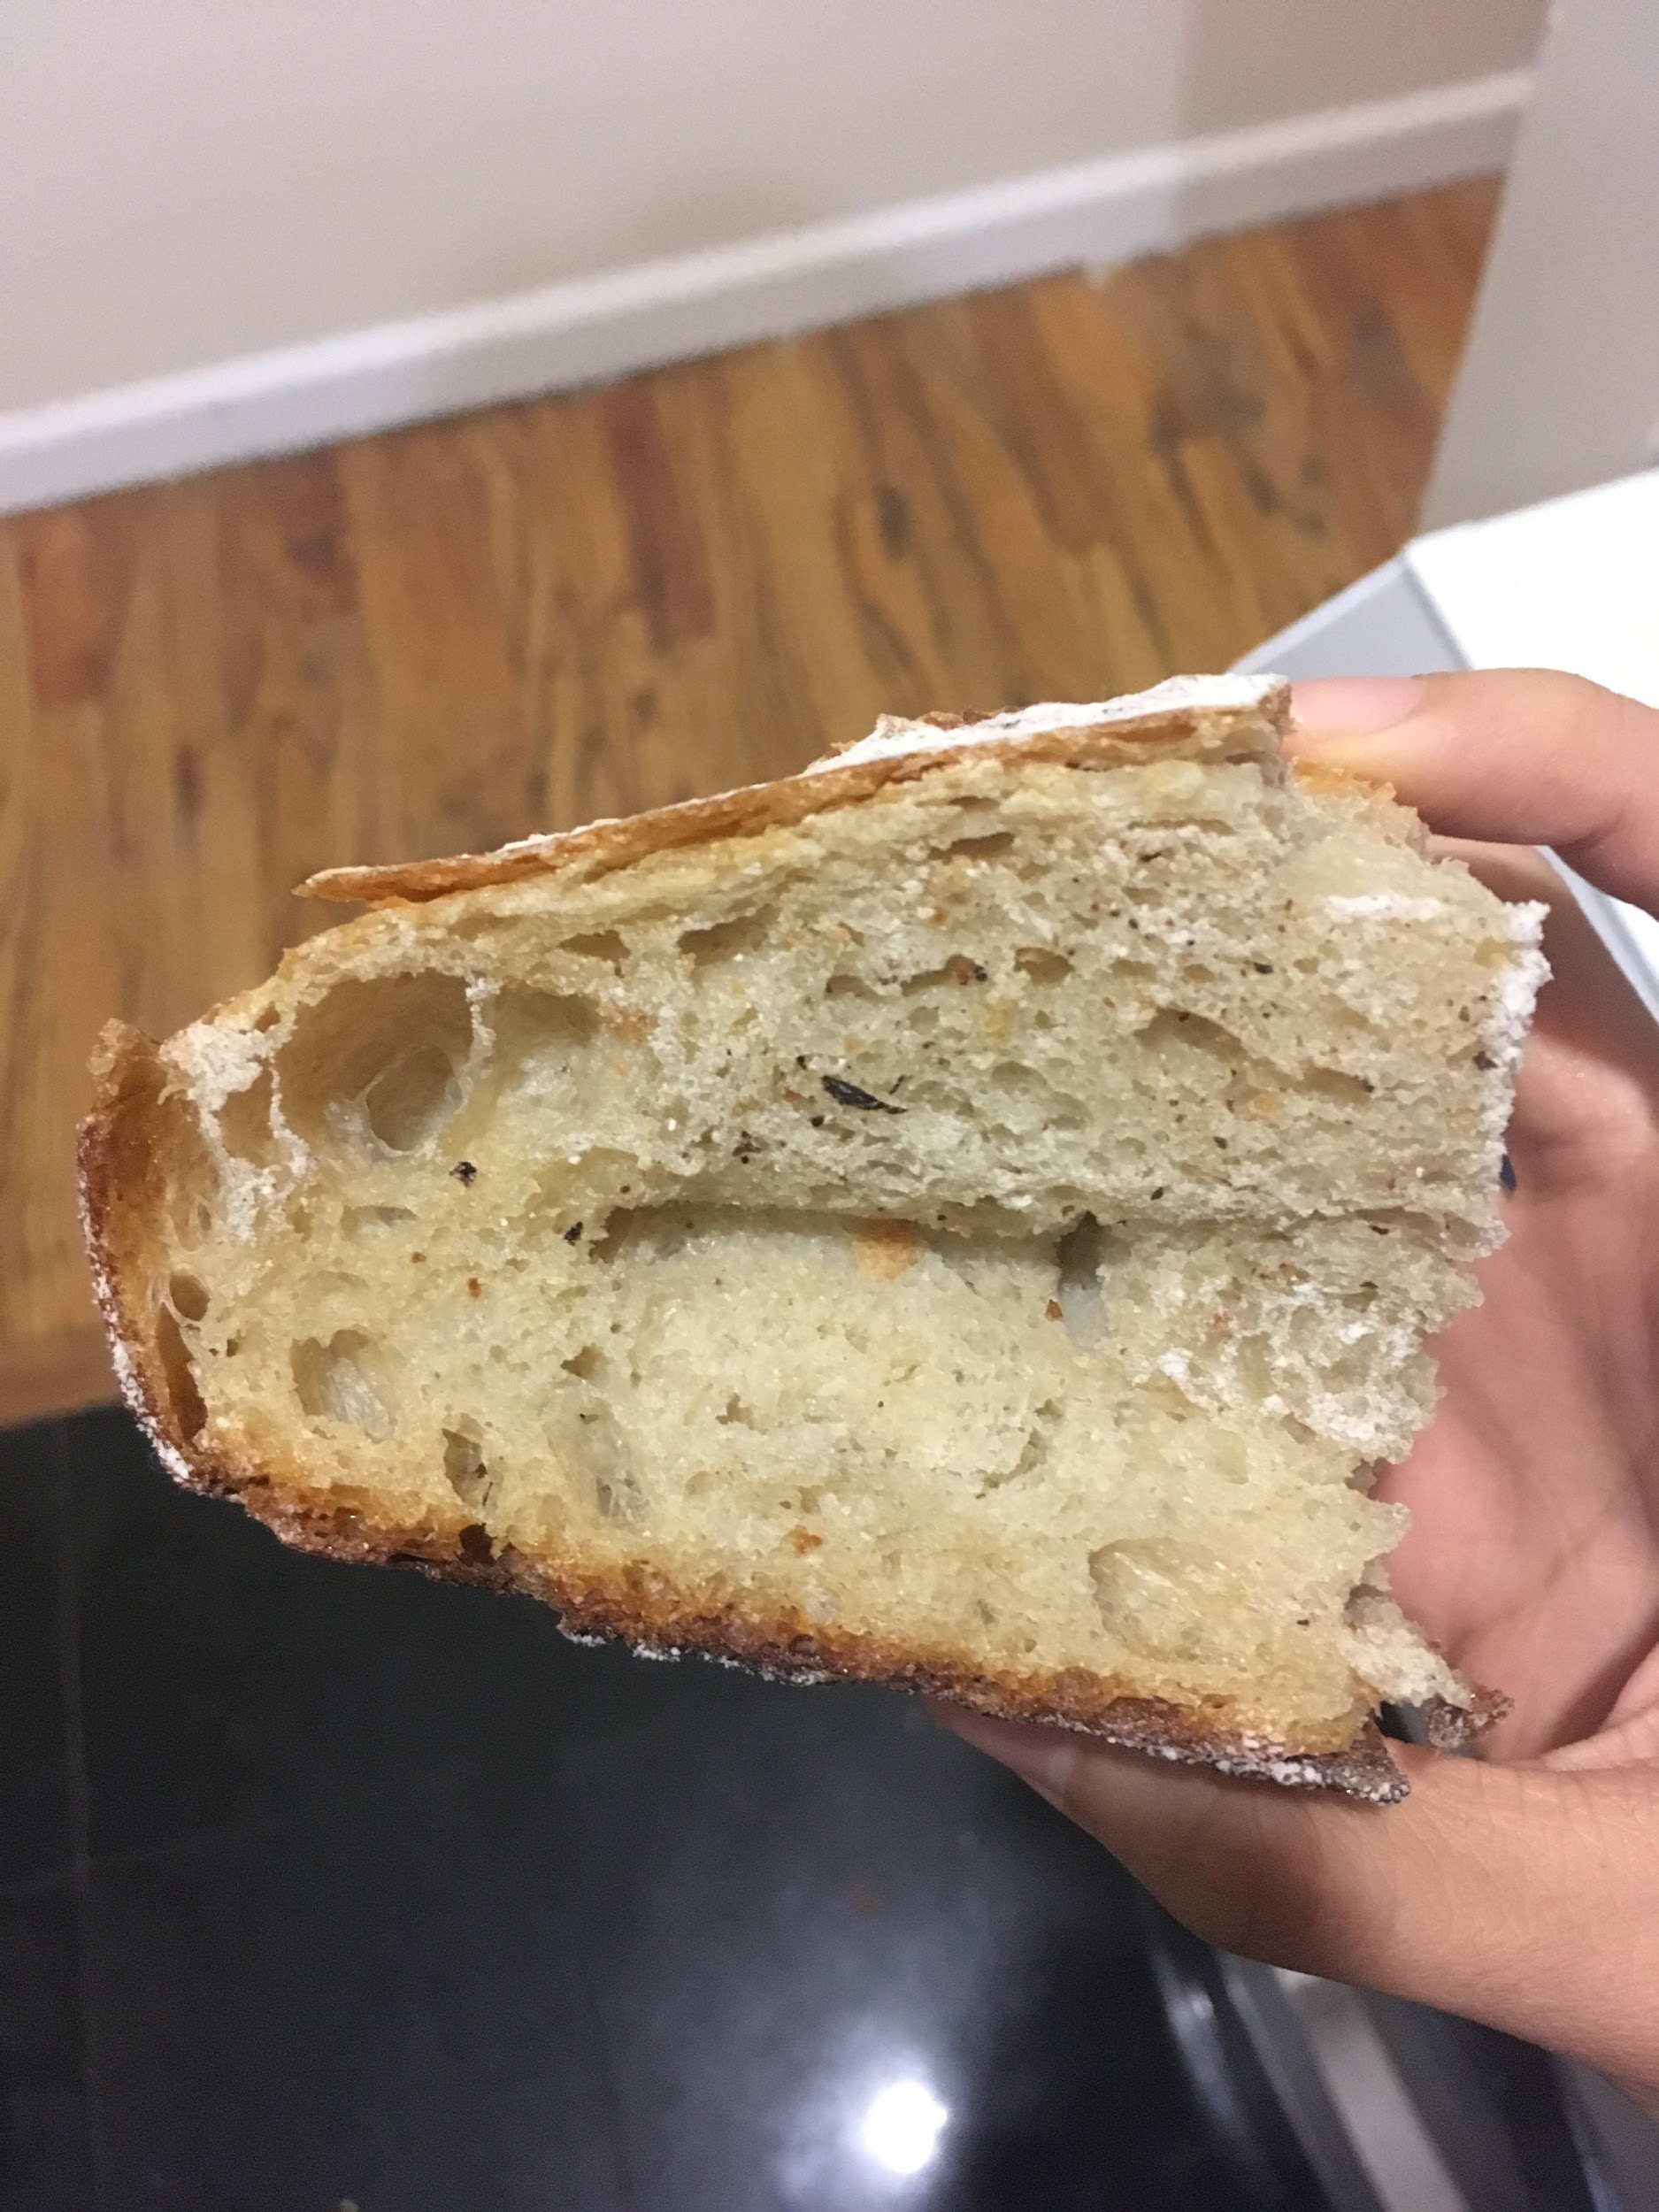
For the other half, I sliced the bread into quarters, and pressed the nail and key firmly into each quartered loaf. They were much easier to push through the insides of the bread, while the stapler caused the loaf of bread to tear away from the crust, instead of cohering to its shape.
| Image URL: |
|---|
 |
I secured two rubber bands onto the loaf with the stapler, and left all three pieces aside to cool.
Notes and Thoughts:
Am pretty doubtful that my bread molds are going to work…The loaf with the stapler doesn’t seem to be adhering to the shape of the stapler at all. Meanwhile, the loaves with the nail and key might capture the shape, but its depth may not be accurate… Wonder if you can tell how much strength to put when pressing the object into the mold...Will see tomorrow.
I was doubtful of Evelyn’s “press holes in dough” technique for the first proof, but it worked out very well and was an excellent visual indicator of when the proof was done! Flavour did sufficiently develop during the timeframe.
Name: Min Lim
Date and Time:
Location: Personal Apartment Kitchen
Subject: Bread-making Attempt #4 + Molding Attempt #2 (Unmolding of objects)
Weather: Cloudy, 19°C
Humidity: 84%
Procedure:
Bread has sufficiently cooled and its insides have seemingly shrunk - adhering to the perimeter of the object. Objects were removed from their loaves to leave an indentation. These will be my molds.
Observations:
| Image URL: |
|---|
 |
| Image URL: |
|---|
 |
| Image URL: |
|---|
 |
| Object | Colour (of mold) | Shape (of mold) | Depth (of mold) |
|---|---|---|---|
| Stapler | Mold is of the same colour as the inside of the bread. Developed a sheen on the surface where stapler was embedded. | Mold managed to adhere to some parts of the stapler. The thinner portions were better embedded in the mold, and thus more detailed. | Some parts of the stapler were successfully embedded into the loaf, while others only managed to make a slight indentation and rested on the surface of the bread instead. Uneven depths. |
| Key | Mold is tinted with a faint shade of green (similar hue to verdigris). Developed a sheen on the surface where key was embedded. | Mold managed to adhere to the shape of the key well. However, the thinner grooves of the key have been enveloped by the loaf -- unable to see the full mold without some prying. | Key was fully embedded into the loaf. Mold seems to be of a greater depth than that of the key. |
| Nail | Mold is of the same colour as the inside of the bread. Developed a sheen on the surface where nail was embedded. | Mold managed to adhere to shape of nail well. Unable to observe if grooves of nail have been captured as well. | Nail was fully embedded into the loaf, and mold is of a similar depth/volume to the nail. |
Notes and Thoughts:
There seems to be a limit to the size and shape of the object that can be molded. Smaller objects (such as the key and nail) were much easily embedded in the loaf, while larger objects faced more difficulty.
Will have to test out later in the lab if the details (eg. grooves of the nail) can be captured by the bread mold.
I believe that the crumb structure of the loaf does affect the outcome of the mold. An open crumb would mean more air pockets and thinner gluten strands. For instance, for the stapler, this meant that when force was applied to push the stapler into the mold, the gluten strands from other parts of the bread gave way. It was thus difficult for the stapler to fully adhere to the loaf.
In this case, instead of preserving the air pockets from the first proof, might be wiser to knock all the air out to produce a tighter crumb.
This could also be due to the ratios of the surface area of the object to the bread loaf itself. Smaller objects = smaller surface area = larger ratio. Thus when force is applied, a greater pressure was exerted and object could be easily embedded into the loaf. You can see this with the stapler as well, where thinner areas (with smaller surface areas) embedded well into the loaf compared to its thicker portions.
In such instances, maybe the one-sided mold would not be as effective as pressing two loaves together onto the object, as the depth of the mold can be halved on each side of the loaf to achieve a same effect
The shrinkage of the loaf after it has cooled was interesting, and gave context and insight as to what the manuscript meant by “if you want to let it shrink, make it dry, either more or less.”
The change of colour of the mold with the key was interesting as well. I wonder if this will affect the eventual colour of the wax/sulphur cast onto the mold.
There was definitely more to the application of the object to the loaf than I expected, and will have to expand on the details in my revised protocol.
Protocol (Revised -- Most Updated):
Bread baking
Feed sourdough starter with equal parts flour and water until active bubbling (overnight)
The next day, measure out 40g sourdough starter and set it aside.
Measure out 280g bread flour, 80g whole wheat flour, 250g water (temperature dependent on surroundings - see annotations above) and 5g salt into a bowl. Add sourdough starter. Mix until a loose, shaggy dough forms.
Tip contents onto counter and gather the dough into a ball. Knead for 10-15 minutes until surface is smooth and springy to touch.
Transfer dough to container to proof. Poke 2-3 holes through the dough, till your fingers reach the bottom of the container. Cover dough with a damp cloth, or loosely with the lid of the container.
Once the holes have closed up, proofing is complete. Pre-heat oven to hottest setting (in my case, 525F) with an oven rack placed at the bottomest part of the oven. Place a dutch oven on the rack and leave it to heat. Alternatively, place a baking tray on the rack along with a stainless steel pot - this will function as your dutch oven. Close the oven.
Tip dough out of container, and shape it into a ball. Transfer dough to proofing basket/container (in a similar shape to the eventual bread loaf) and leave it to proof until oven is sufficiently heated (1-2 hours)
Take the pot out of oven and transfer dough onto baking tray. Score the dough and enclose it with the pot. Close the oven and leave it to bake for 15 mins at 525F before lowering the temperature to 475F, baking for another 30 mins (approx), or until surface is browned and insides sound hollow when bottom of loaf is rapped with a knuckle.
Making mold - two-sided method
While bread is baking, prepare item that you desire to mold
Immediately when bread comes out of the oven, slice the bread in half, making sure that the insides of the loaf join together firmly. The bread will be very hot coming out of the oven, so be sure to use cloths or oven mitts when handling and slicing the bread. When sliced, the insides of the bread will be steaming and moist.
Press item into one half of the bread, making sure that the object is firmly embedded in the dough, at least halfway through. Join the other half together and press firmly. Secure with string/tape until bread is completely cooled (overnight, or 4-5 hours).
Once cooled, remove item from loaf.
For greater adherence and a more fitting mold, leave item in the loaf for a few days until bread is completely dried.
Making mold - one-sided method
Follow steps 9-10.
Press item into one half of the bread, making sure that the object is completely embedded in the dough and does not come out when dough is turned upside down or when shaken. Leave the bread to cool (with item).
Follow steps 12-13.
Name: Min Lim, Sahar Bostock, Nicolle Bertozzi
Date and Time:
Location: Making and Knowing Lab (260 Chandler)
Subject: Casting Bread Molds
Aims:
To fill my three molds with beeswax or sulphur to produce replica of object and determine success of creating the bread molds
Materials:
Bread mold #1 (Stapler)
Bread mold #2 (Nail)
Bread mold #3 (Key)
Bread mold #4 (Stapler, 2-piece mold)
Linseed oil (M&K Lab)
Sulphur (M&K Lab)
Beeswax (M&K Lab)
Paintbrush (M&K Lab)
Heavy-duty masking tape (M&K Lab)
Scissors (M&K Lab)
Initial Thoughts:
I had some options of how to cast my mold. With a choice of:
Brushing surface of the mold with linseed oil
Not brushing surface of the mold with linseed oil
And
Filling interior of the mold with sulphur
Filling interior of the mold with beeswax
This means that there were 4 different ways to cast my bread molds. Since linseed oil was to prevent the sulphur/wax from adhering to the bread, I decided to brush bread molds #1 and #2 with the oil, as they had more detailed grooves which would’ve increased the chances of the mold sticking.
I decided to fill #1 and #3 with beeswax. Especially with 1, since the impressions were quite irregular (some very shallow), potential leakages would be less dangerous with beeswax than sulphur. I chose to fill #2 with sulphur since the nail left the most impression on the bread, and the mold was small enough to be easily handled.
For bread mold #4, I was initially not planning to use it, given the shallowness of its impression and the huge gaps when the two pieces of bread were pressed together. I thus did not brush it with linseed oil, but decided to fill it with beeswax as it was the less dangerous choice.
This would allow me to test out as many permutations of bread mold casting as I could.
In sum:
Bread mold #1 (Stapler): Linseed oil, Beeswax
Bread mold #2 (Nail): Linseed oil, Sulphur
Bread mold #3 (Key): Beeswax
Bread mold #4 (Stapler, 2-piece): Beeswax
Procedure:
1:15pm: I brushed molds #1 and #2 with linseed oil, making sure to coat the molds thoroughly, brushing over the grooves and small details multiple times. Especially for the stapler mold, I notice the linseed oil soaking into some of the larger air pockets in the crumb.
| Image URL: |
|---|
 |
1:25pm: Molds #1 and #3 were prepared for beeswax casting.
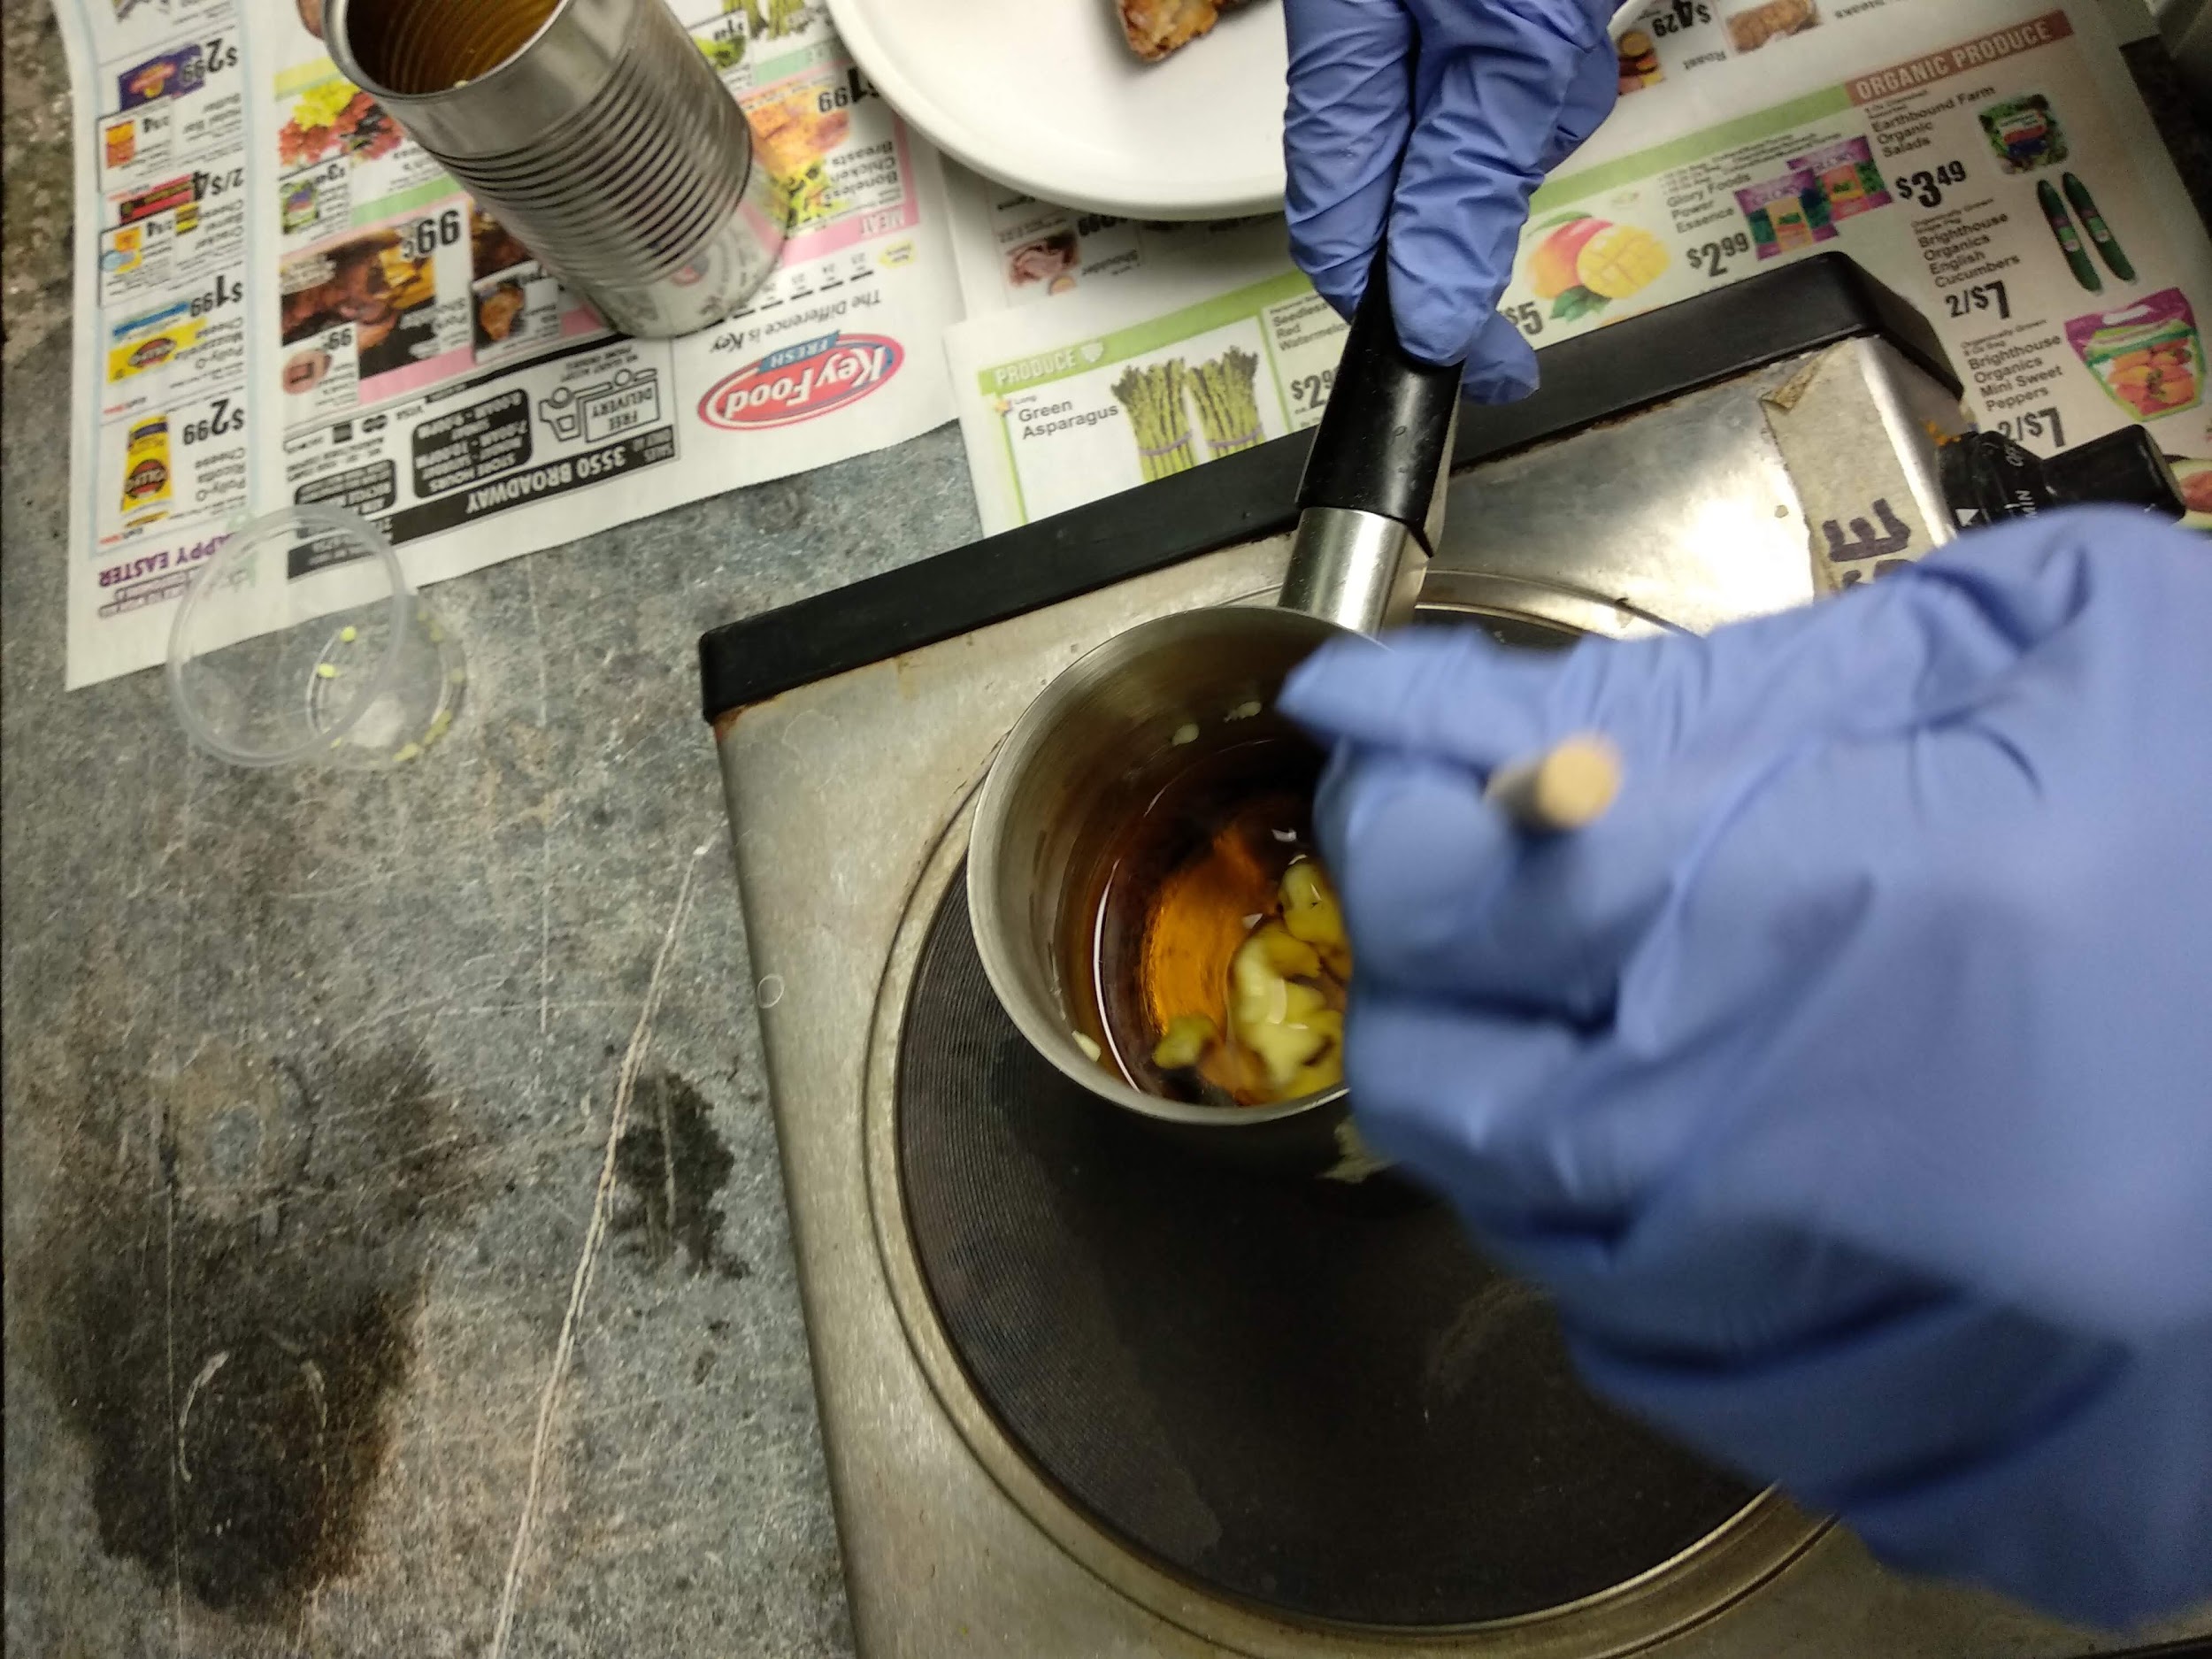
1:27pm: Sahar and I began melting beeswax pellets in a small pot on top of a hot plate, stirring constantly with a chopstick.
| Image URL: |
|---|
 |
It was difficult to judge the amount of beeswax needed, especially for larger molds, since we were unsure how much of the wax would flow into the air pockets instead. We used ~a quarter of the can provided. This was melted under medium heat.
| Image URL: |
|---|
 |
1:31pm: More beeswax pellets were added to the pot to be melted, as we felt that the present amount was insufficient to fill all our molds.
| Image URL: |
|---|
 |
1:34pm: Pellets was completely melted and turned a viscous, transparent, liquid-like consistency.
| Image URL: |
|---|
 |
1:36pm: Poured wax into mold #3
| Image URL: |
|---|
 |
1:39pm: Poured wax into mold #1
| Image URL: |
|---|
 |
1:45pm: Placed molds #1 and #3 on a paper plate, labelled, and left them to the side to completely dry out.
| Image URL: |
|---|
 |
1:48pm: Prepared bread mold #4 for casting. With the help of the M&K team, I first molded clay to plug the gaps in my bread mold and prevent leakages. I then secured the bread mold together with heavy-duty masking tape, making sure to bind it as tightly as possible to seal the gaps. I left a hole at the top of the bread to allow the beeswax to be poured in. This would’ve also allowed the bread to sit on its base to dry out, thus allowing more stability (vs. pouring beeswax from the side). This took up a lot of tape and time.
| Image URL: |
|---|
 |
2:03pm: I began melting beeswax pellets for mold #4. As this was a big mold, I used ¼ of the pellets in the can (all the remaining pellets). As time was running short, I melted the pellets under high heat, making sure to stir constantly to prevent burning.
| Image URL: |
|---|
 |
2:08pm: Pellets was completely melted and turned a viscous liquid-like consistency.
| Image URL: |
|---|
 |
2:10pm: Poured wax into mold #4. Placed mold #4 on a paper plate, labelled, and left it to the side to completely dry out.
| Image URL: |
|---|
 |
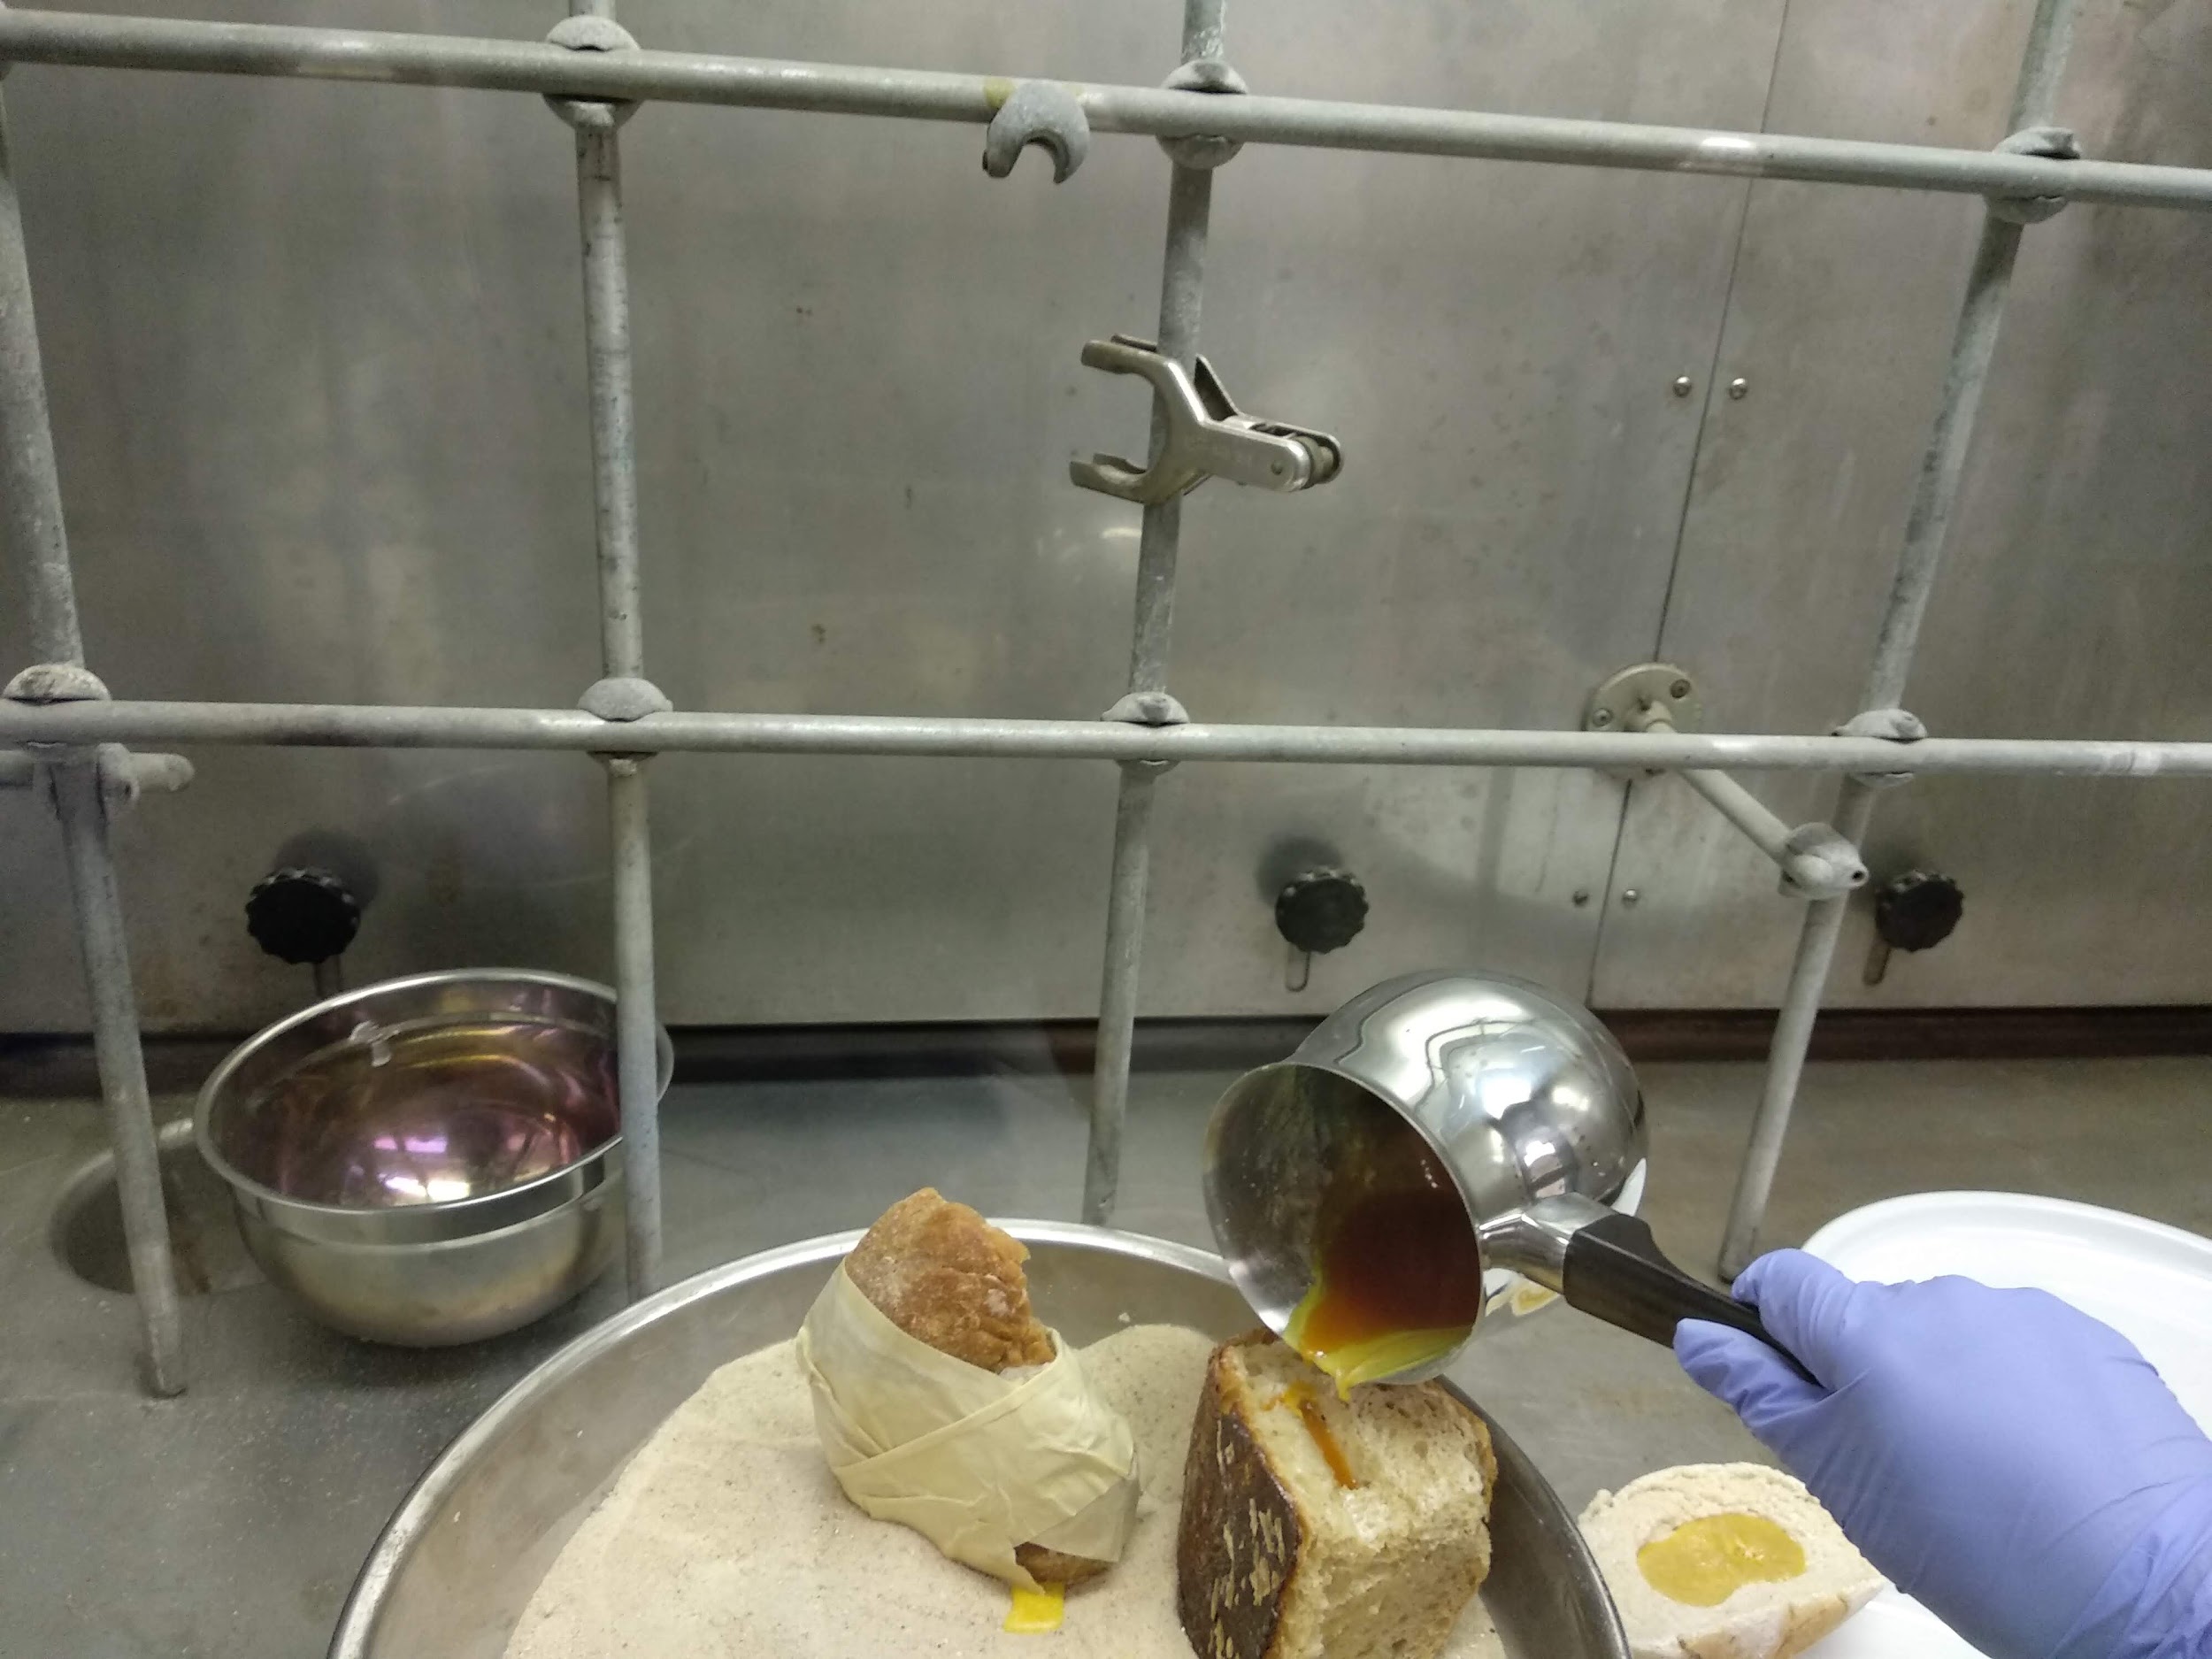
2:12pm: Prepared mold #2 for casting in sulphur.
2:14pm: Poured sulphur into mold #2. Placed it in a bed of sand (for stability) in the fumigation tank to allow it to solidify slightly before transferring it onto a paper plate.
| Image URL: |
|---|
 |
| Image URL: |
|---|
 |
2:30pm: Transferred mold #2 on a paper plate with molds #1 and #3, labelled, and left it to the side to completely dry out.
| Image URL: |
|---|
 |
Observations:
The deeper the impression, the easier it was to fill the molds (so that fillings would not spill out)
The orientation in which to fill the molds also mattered to ensure that bread could stand upright to dry out without needing fixtures to secure it in place
The crumb structure did affect how the molds were filled — ones with a more open crumb tended to have beeswax/sulphur spill into the air pockets as well
2 piece mold was much more difficult to prepare than a 1 piece mold. I wonder how people in the past would’ve secured the bread pieces together if it were not for tape…
Some of my classmates also gouged out the fillings of their bread before shaping it into a mold. That produced a tighter crumb and made a better impression. Must check through recipes and see if this process would’ve been intuitive.
It was difficult to judge the volume of beeswax/sulphur needed for the molds, and this probably had to come with experience
Name: Min Lim
Date and Time:
Location: Making and Knowing Lab (260 Chandler)
Subject: Unmolding
Aims:
To unmold casted objects from the bread molds
Materials:
Bread mold #1 (Stapler)
Bread mold #2 (Nail)
Bread mold #3 (Key)
Bread mold #4 (Stapler, 2-piece mold)
Scissors (M&K Lab)
Procedure:
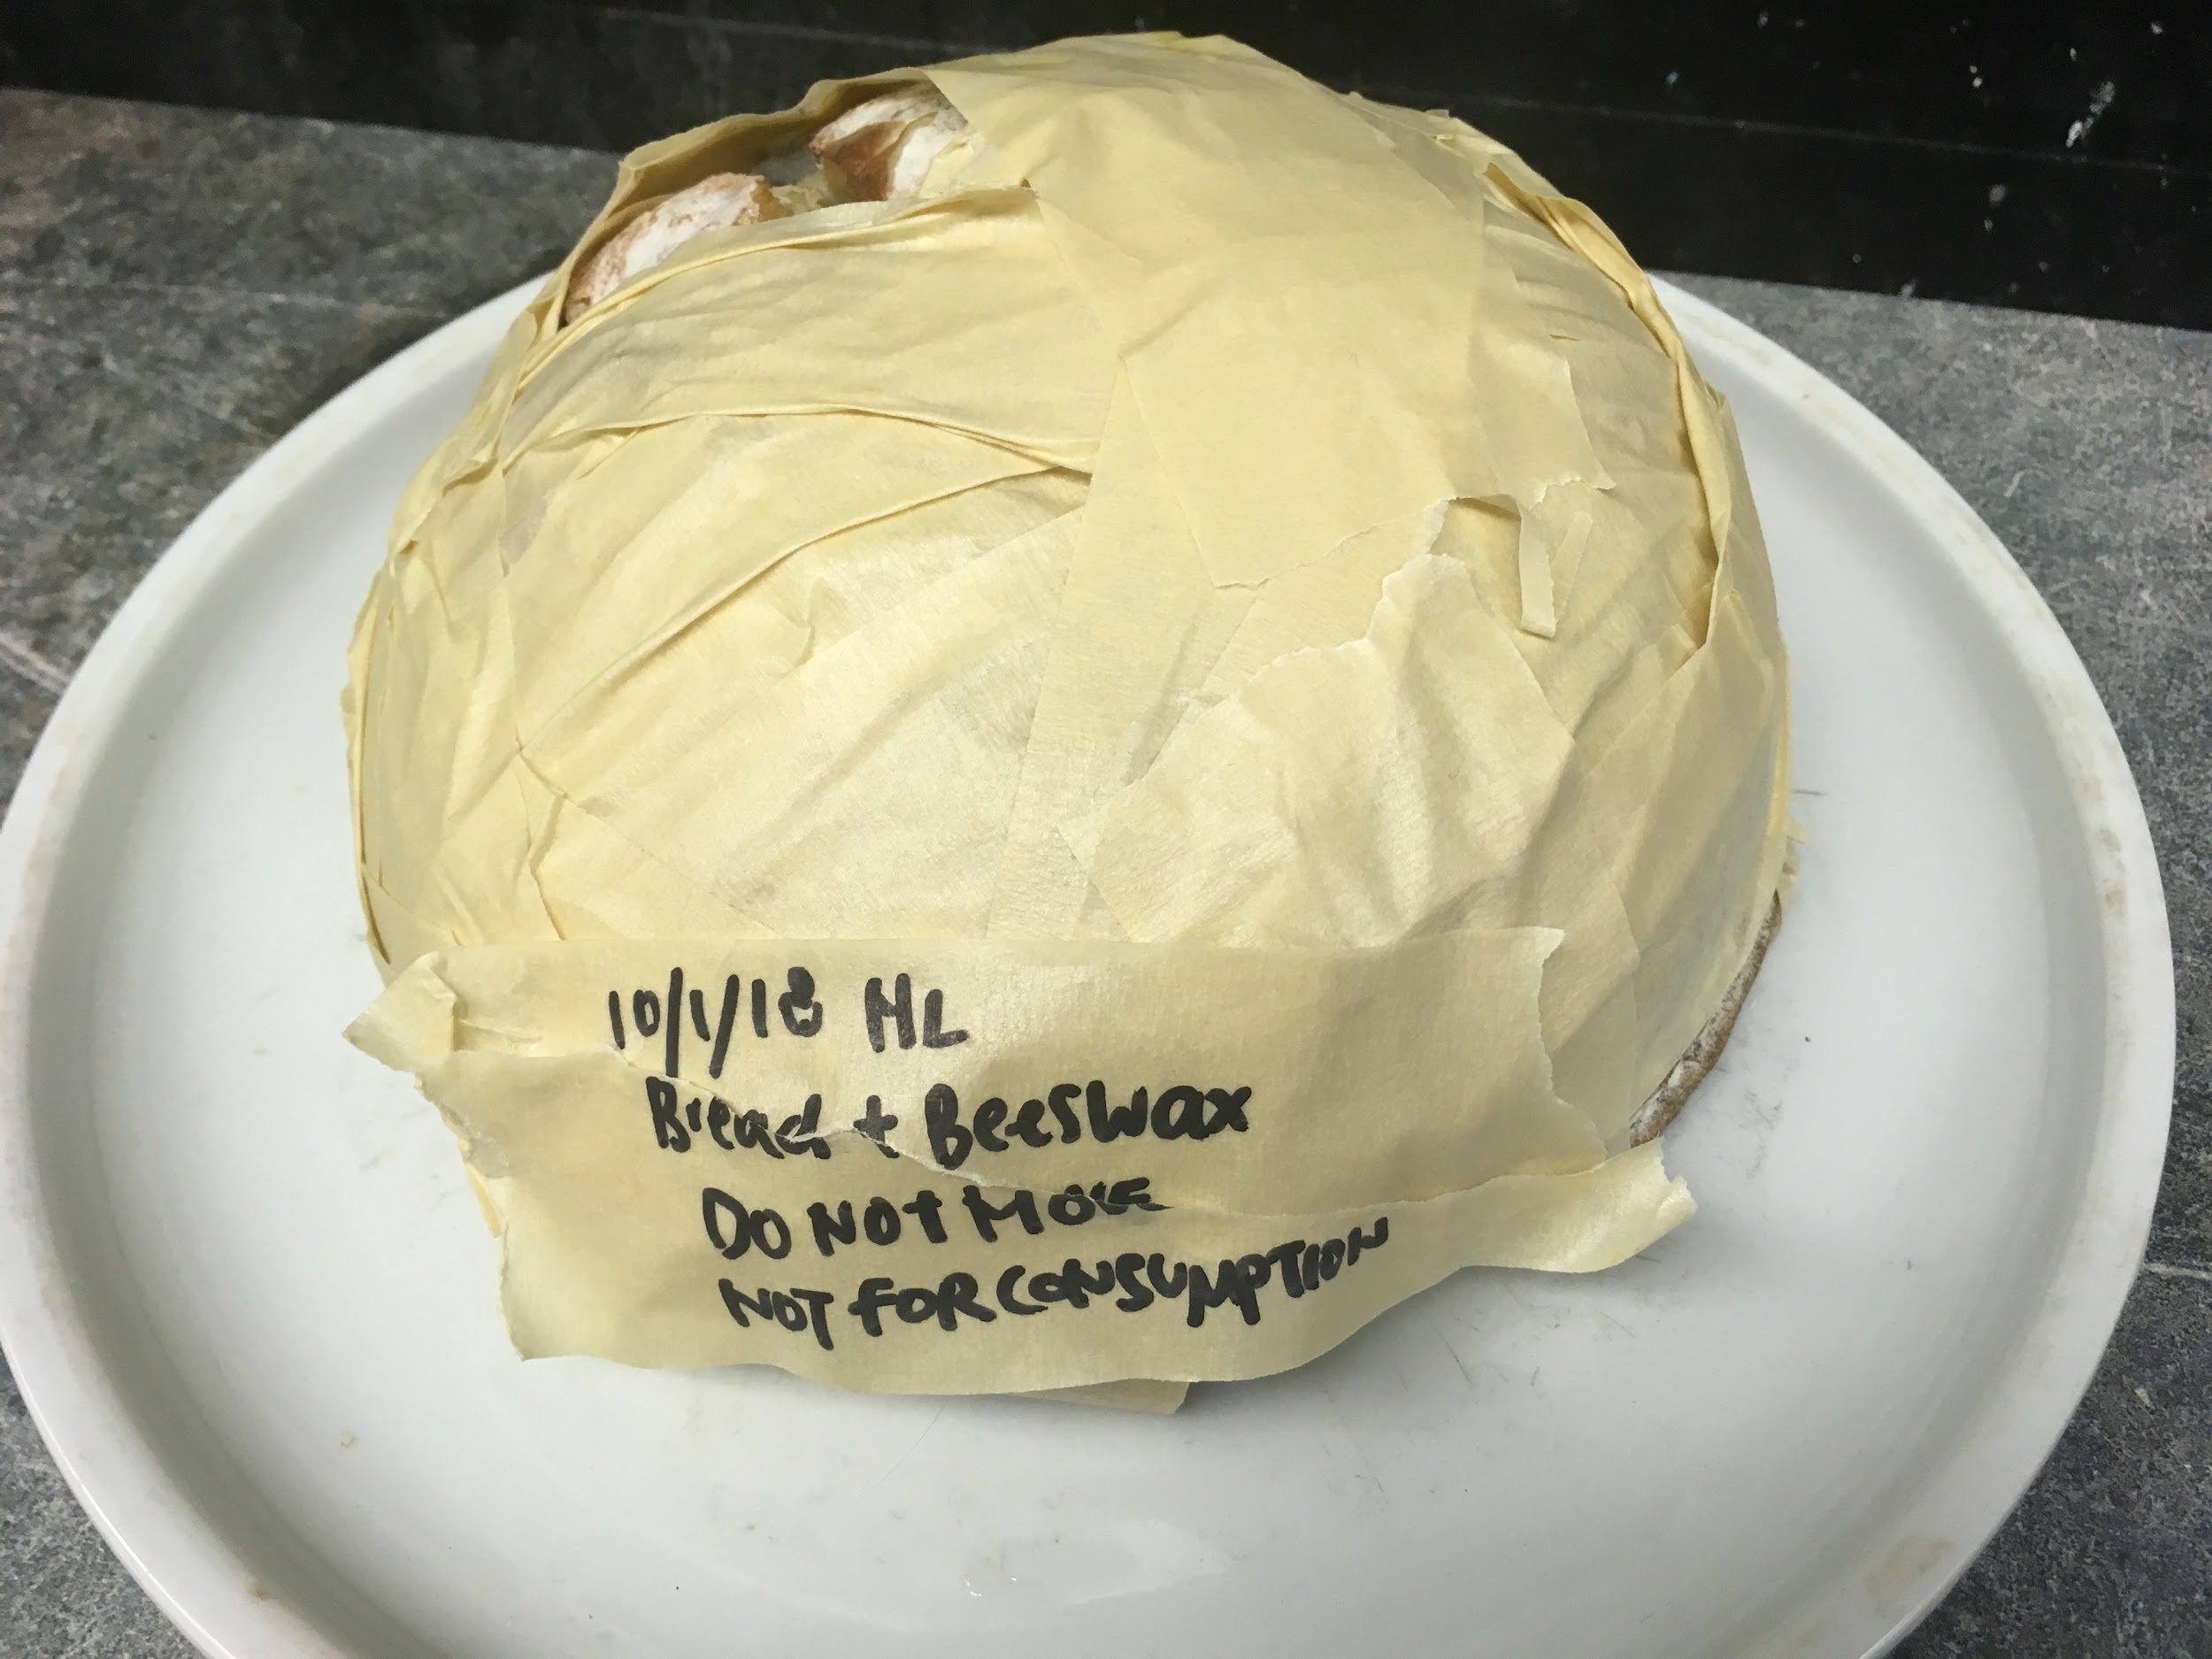
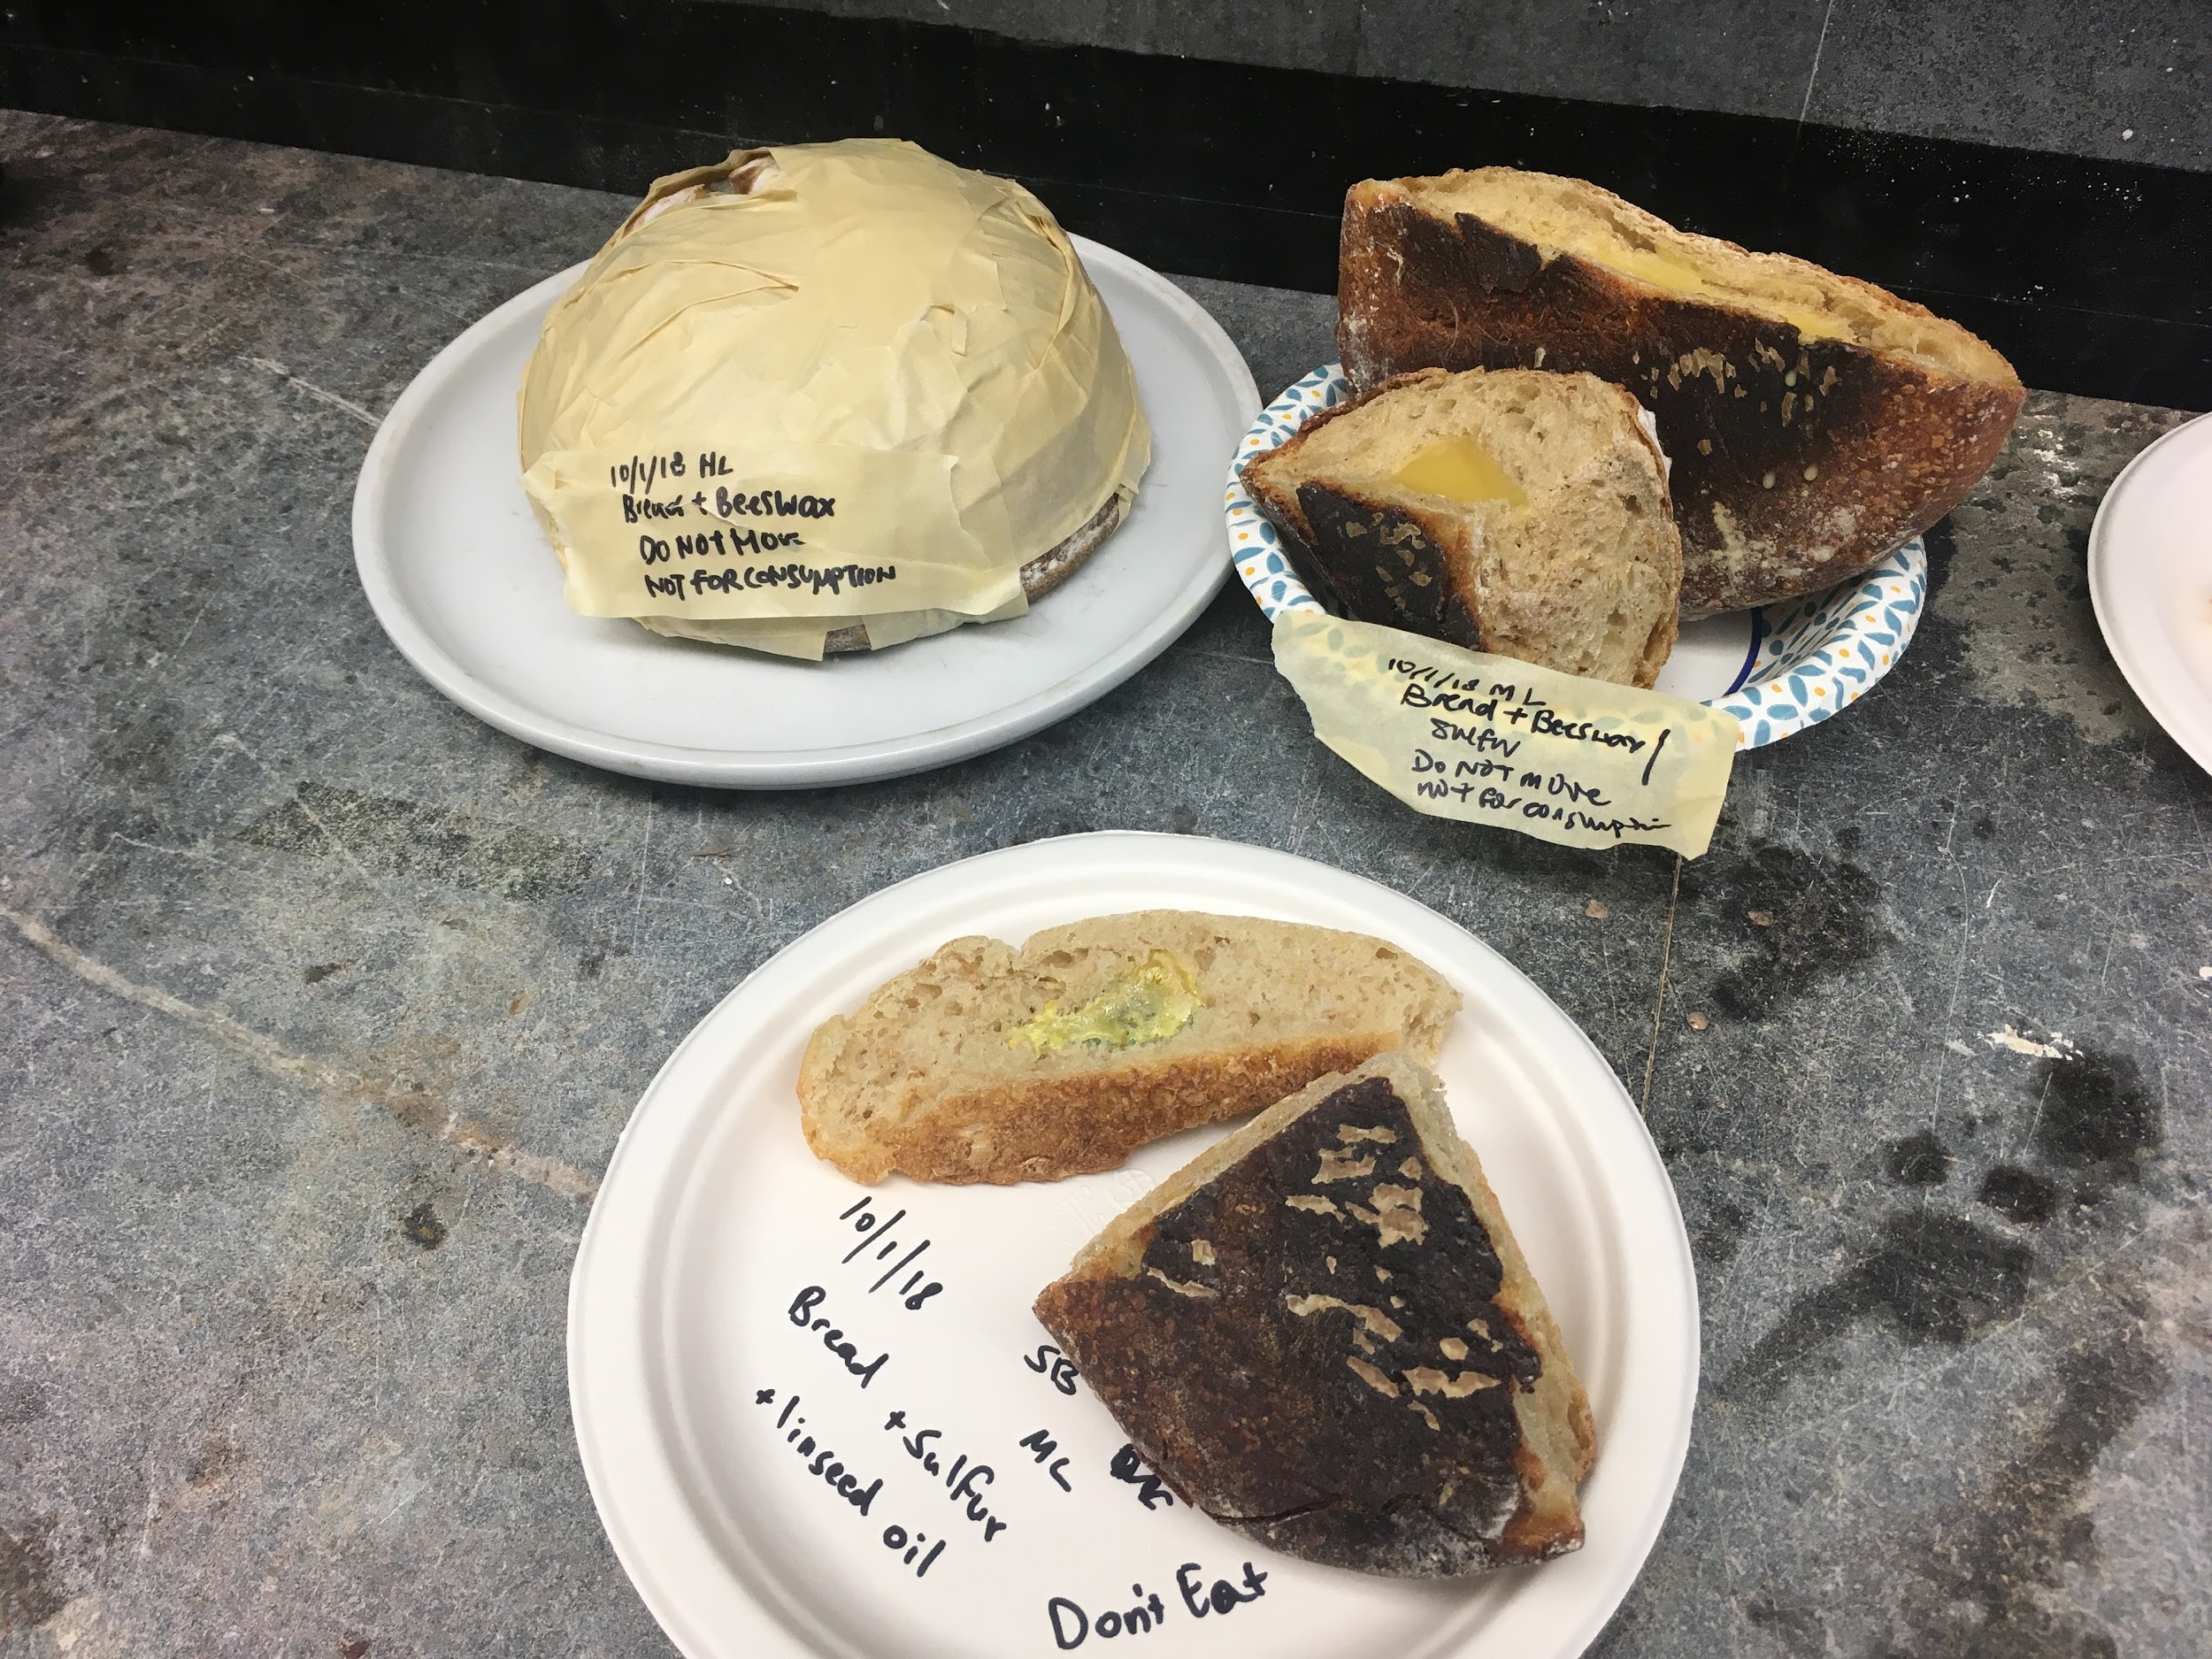
2:10pm: Retrieved bread molds from resting place. All of them were dry, hard, and stiff. Some beeswax leakage observed in #4 at the bottom of the plate.
| Image URL: |
|---|
 |
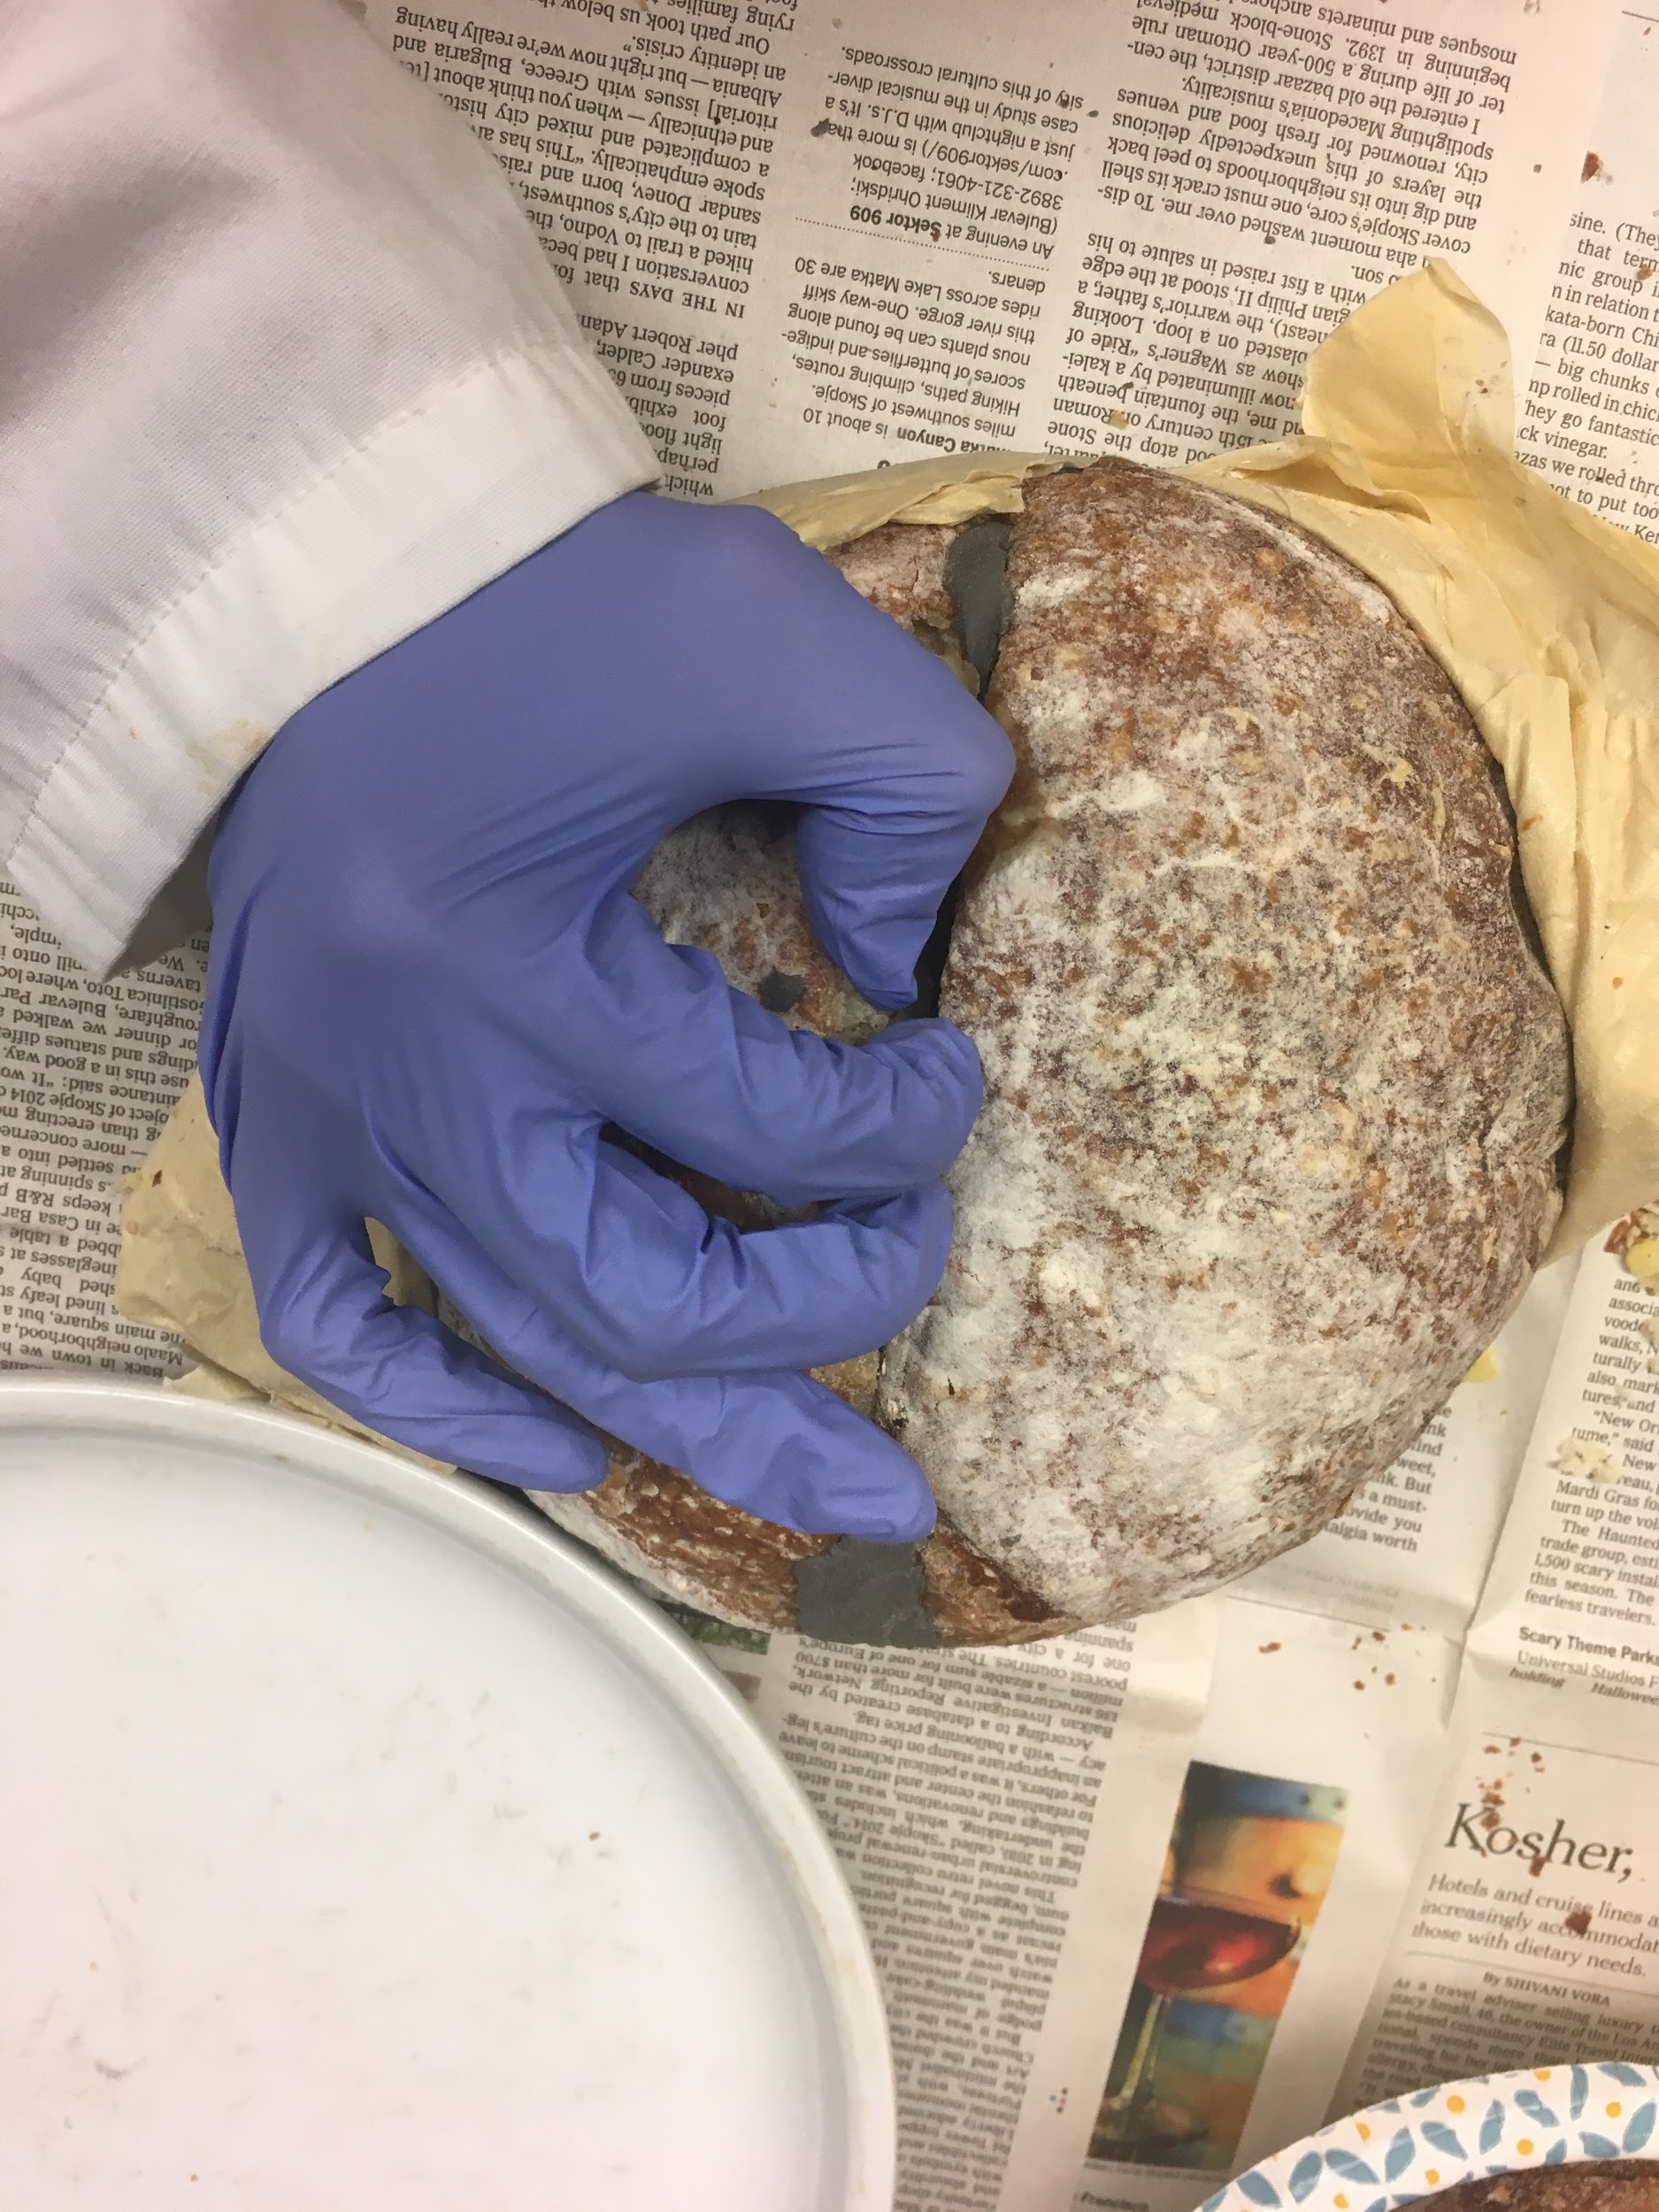
2:15pm: Starting with #1, I tried prying the mold out from the bread. Even with the linseed oil, much of the bread still clung onto the mold. This was a destructive process as most of the bread had to be pried away bit by bit, given its hardness, and I did not manage to preserve the original mold.
Did the author-practitioner intend for bread molds to be reusable? Or were they one-off?
| Image URL: |
|---|
 |
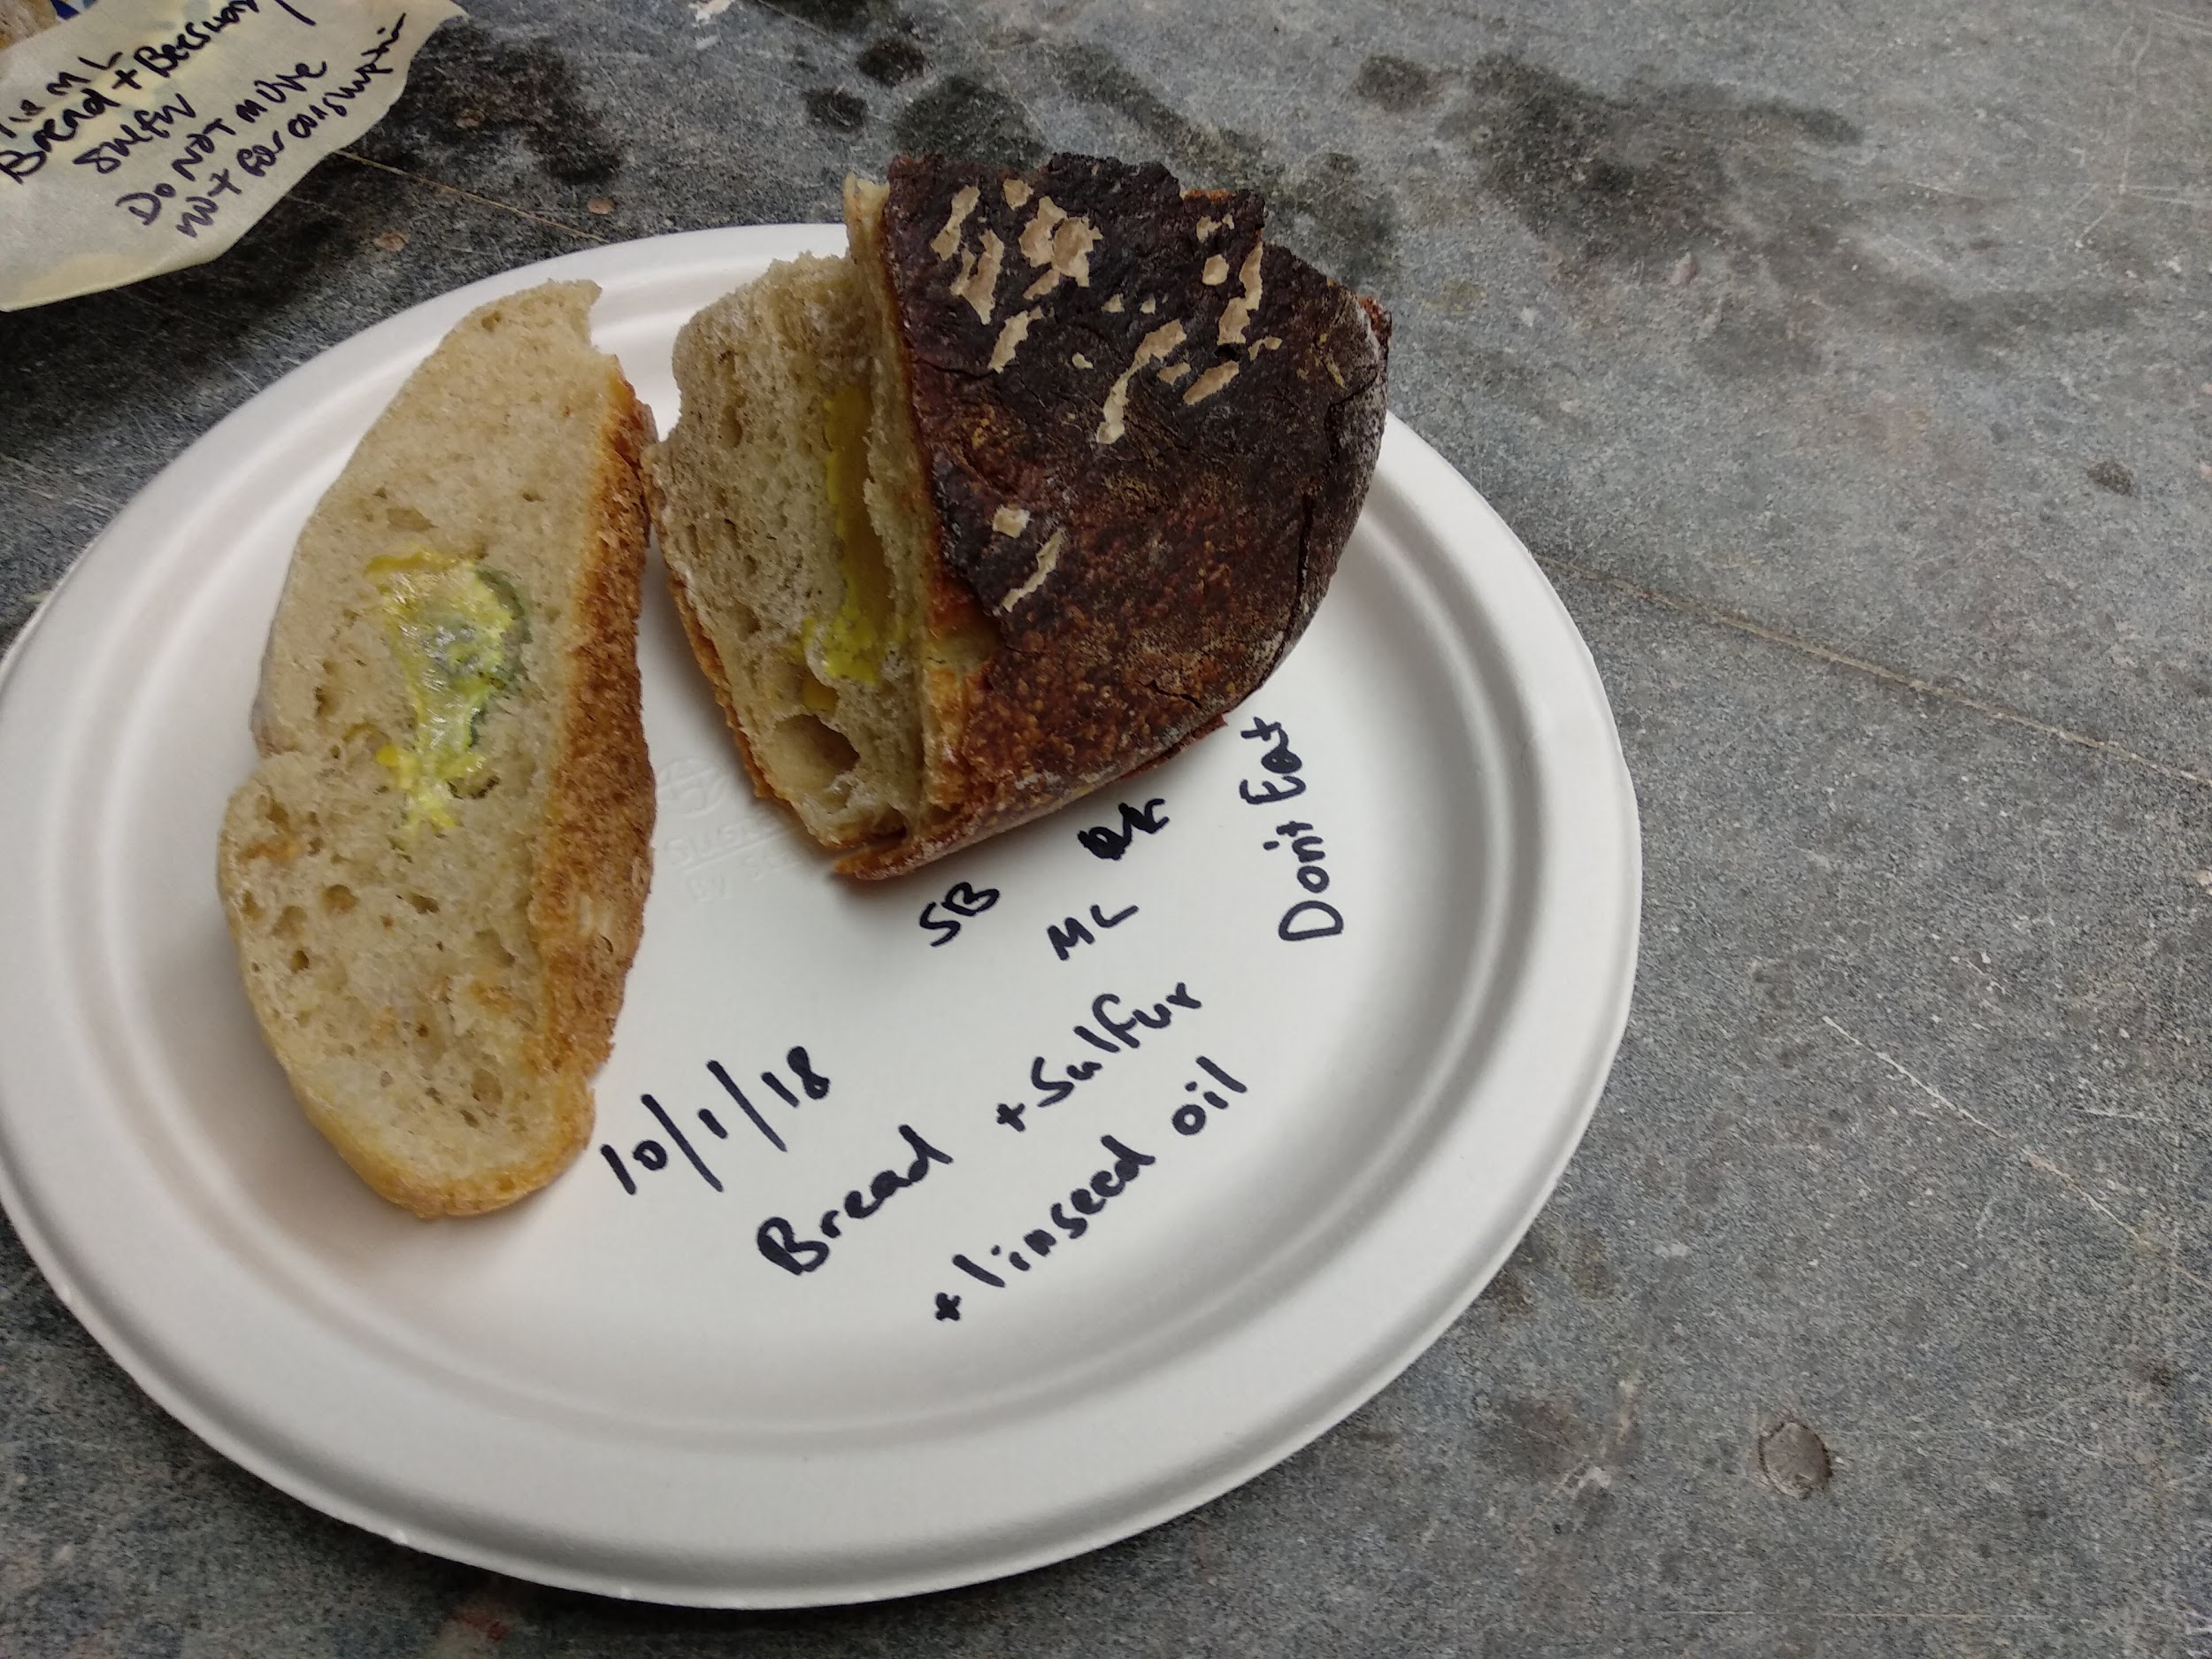
Quite a lot of beeswax filled the air pockets of the bread, the mold was not very successful in replicating the original shape of the stapler.
| Image URL: |
|---|
 |
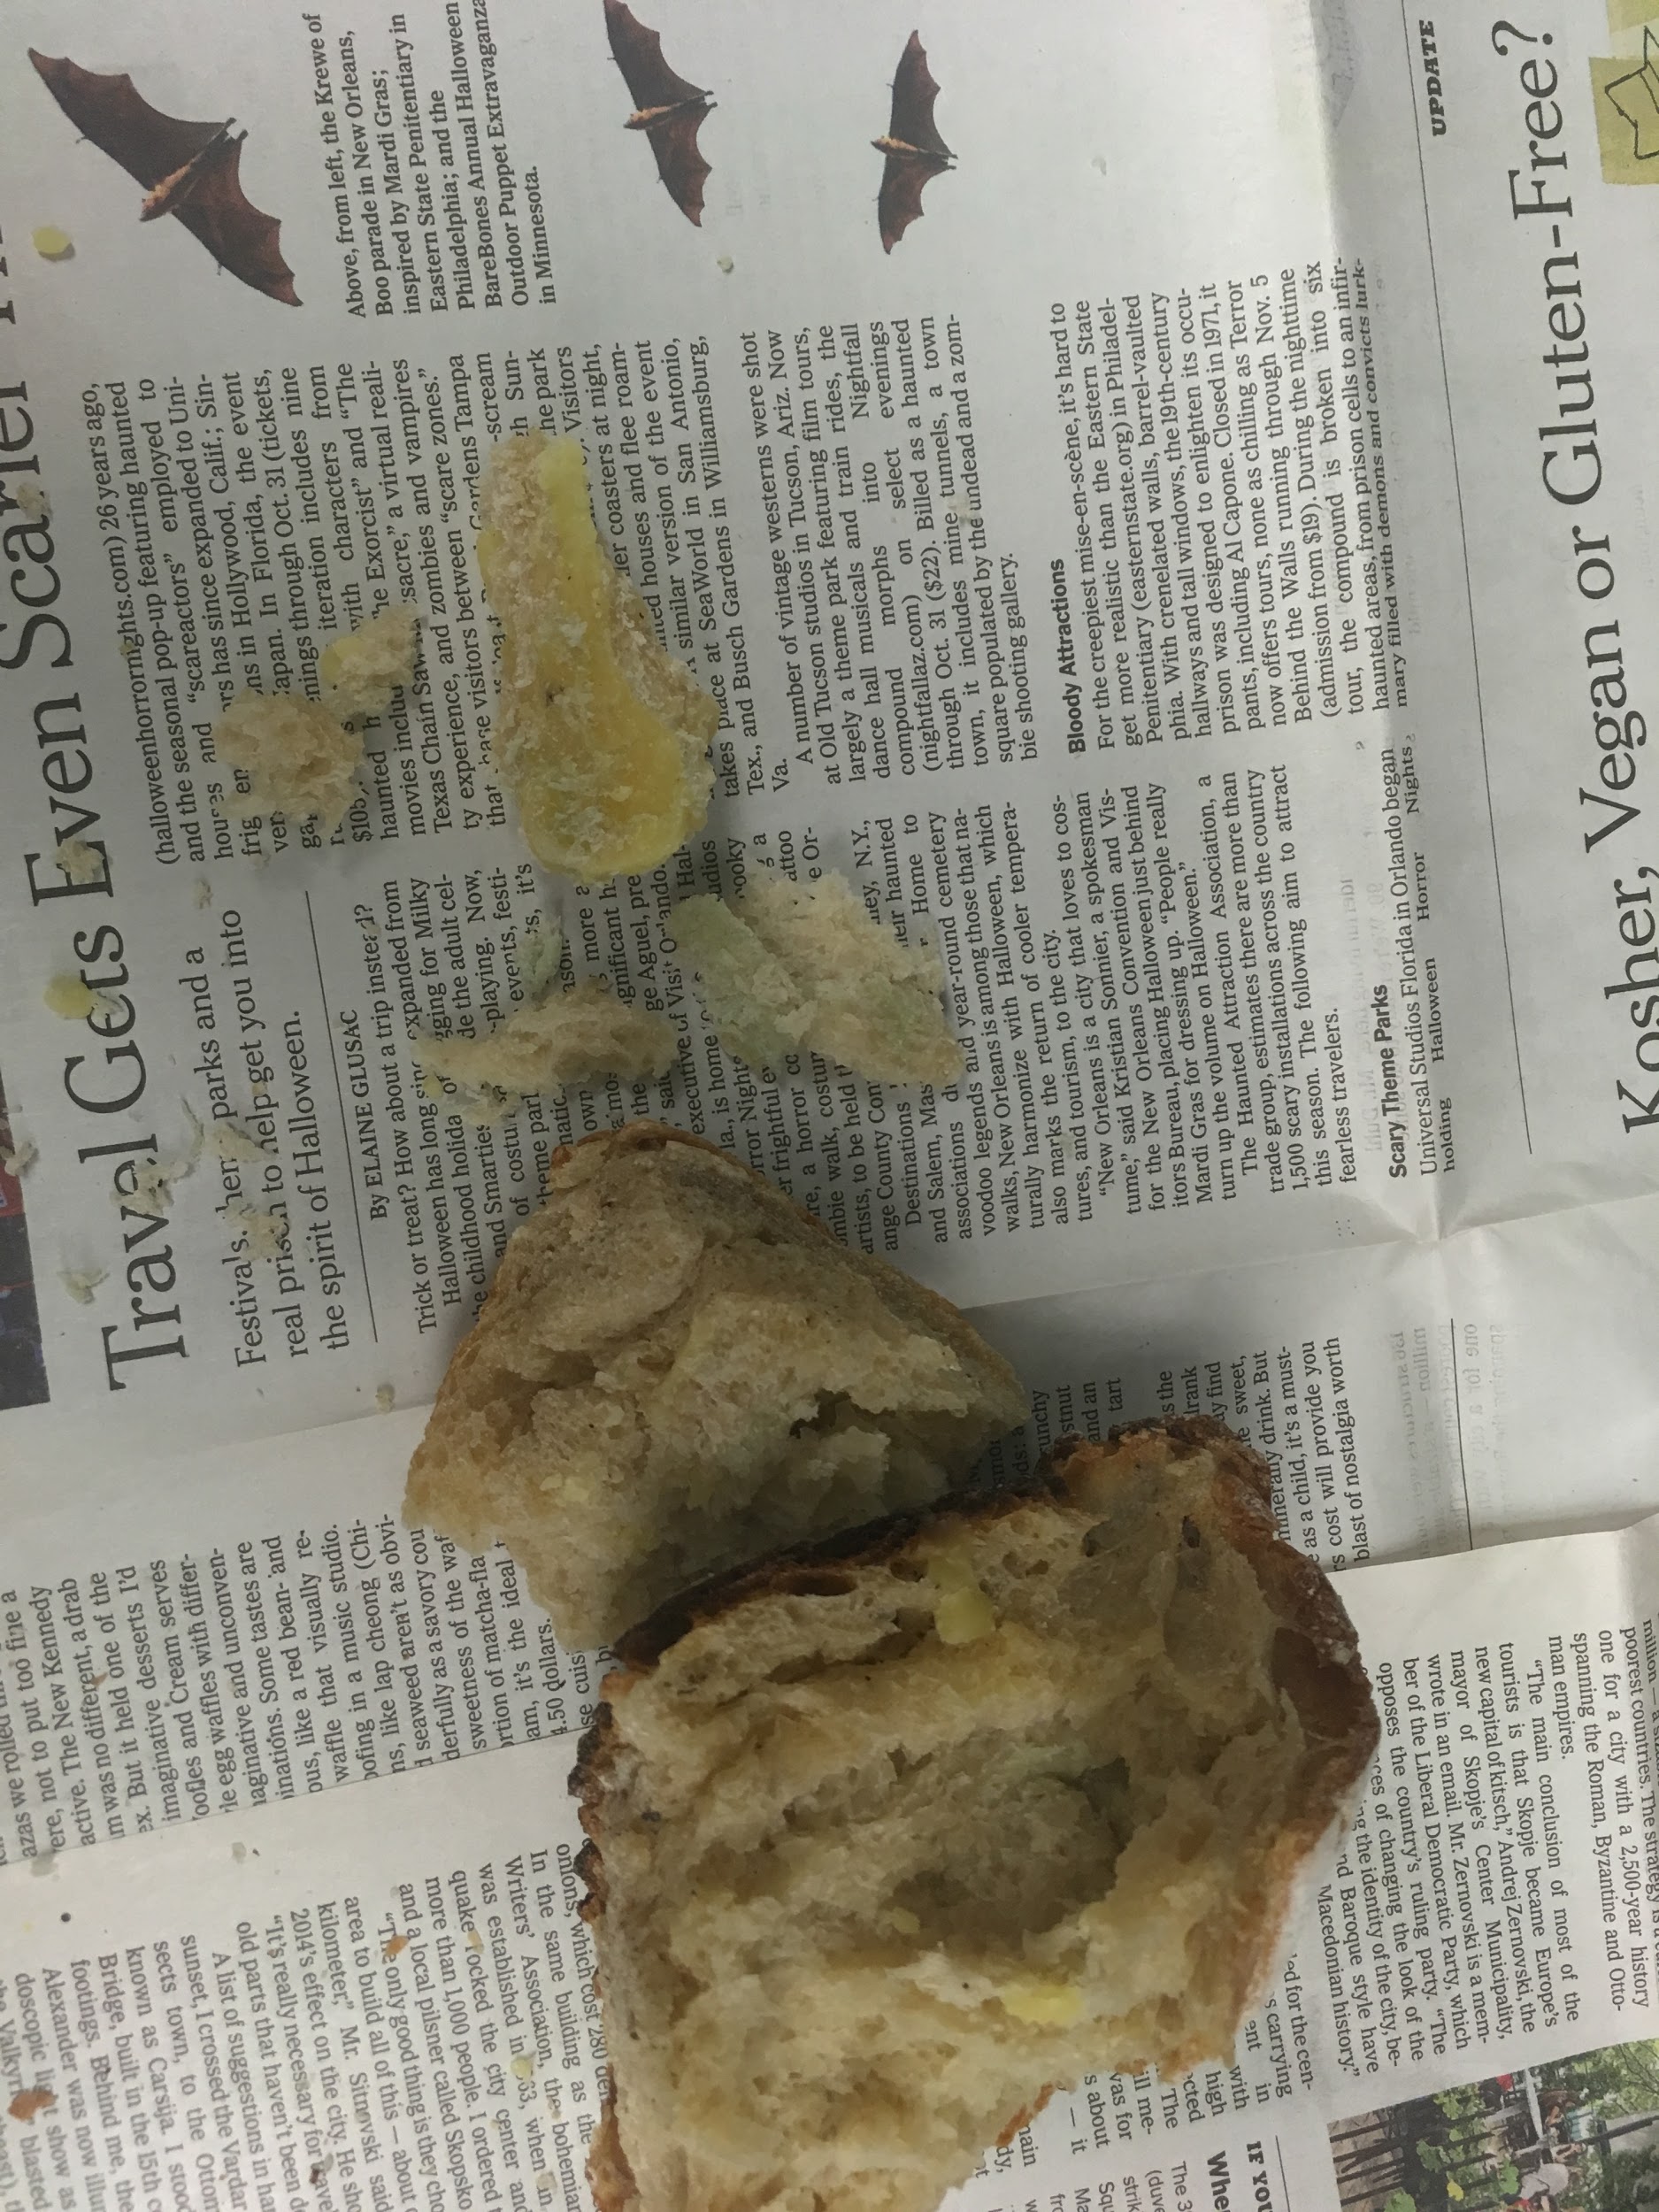
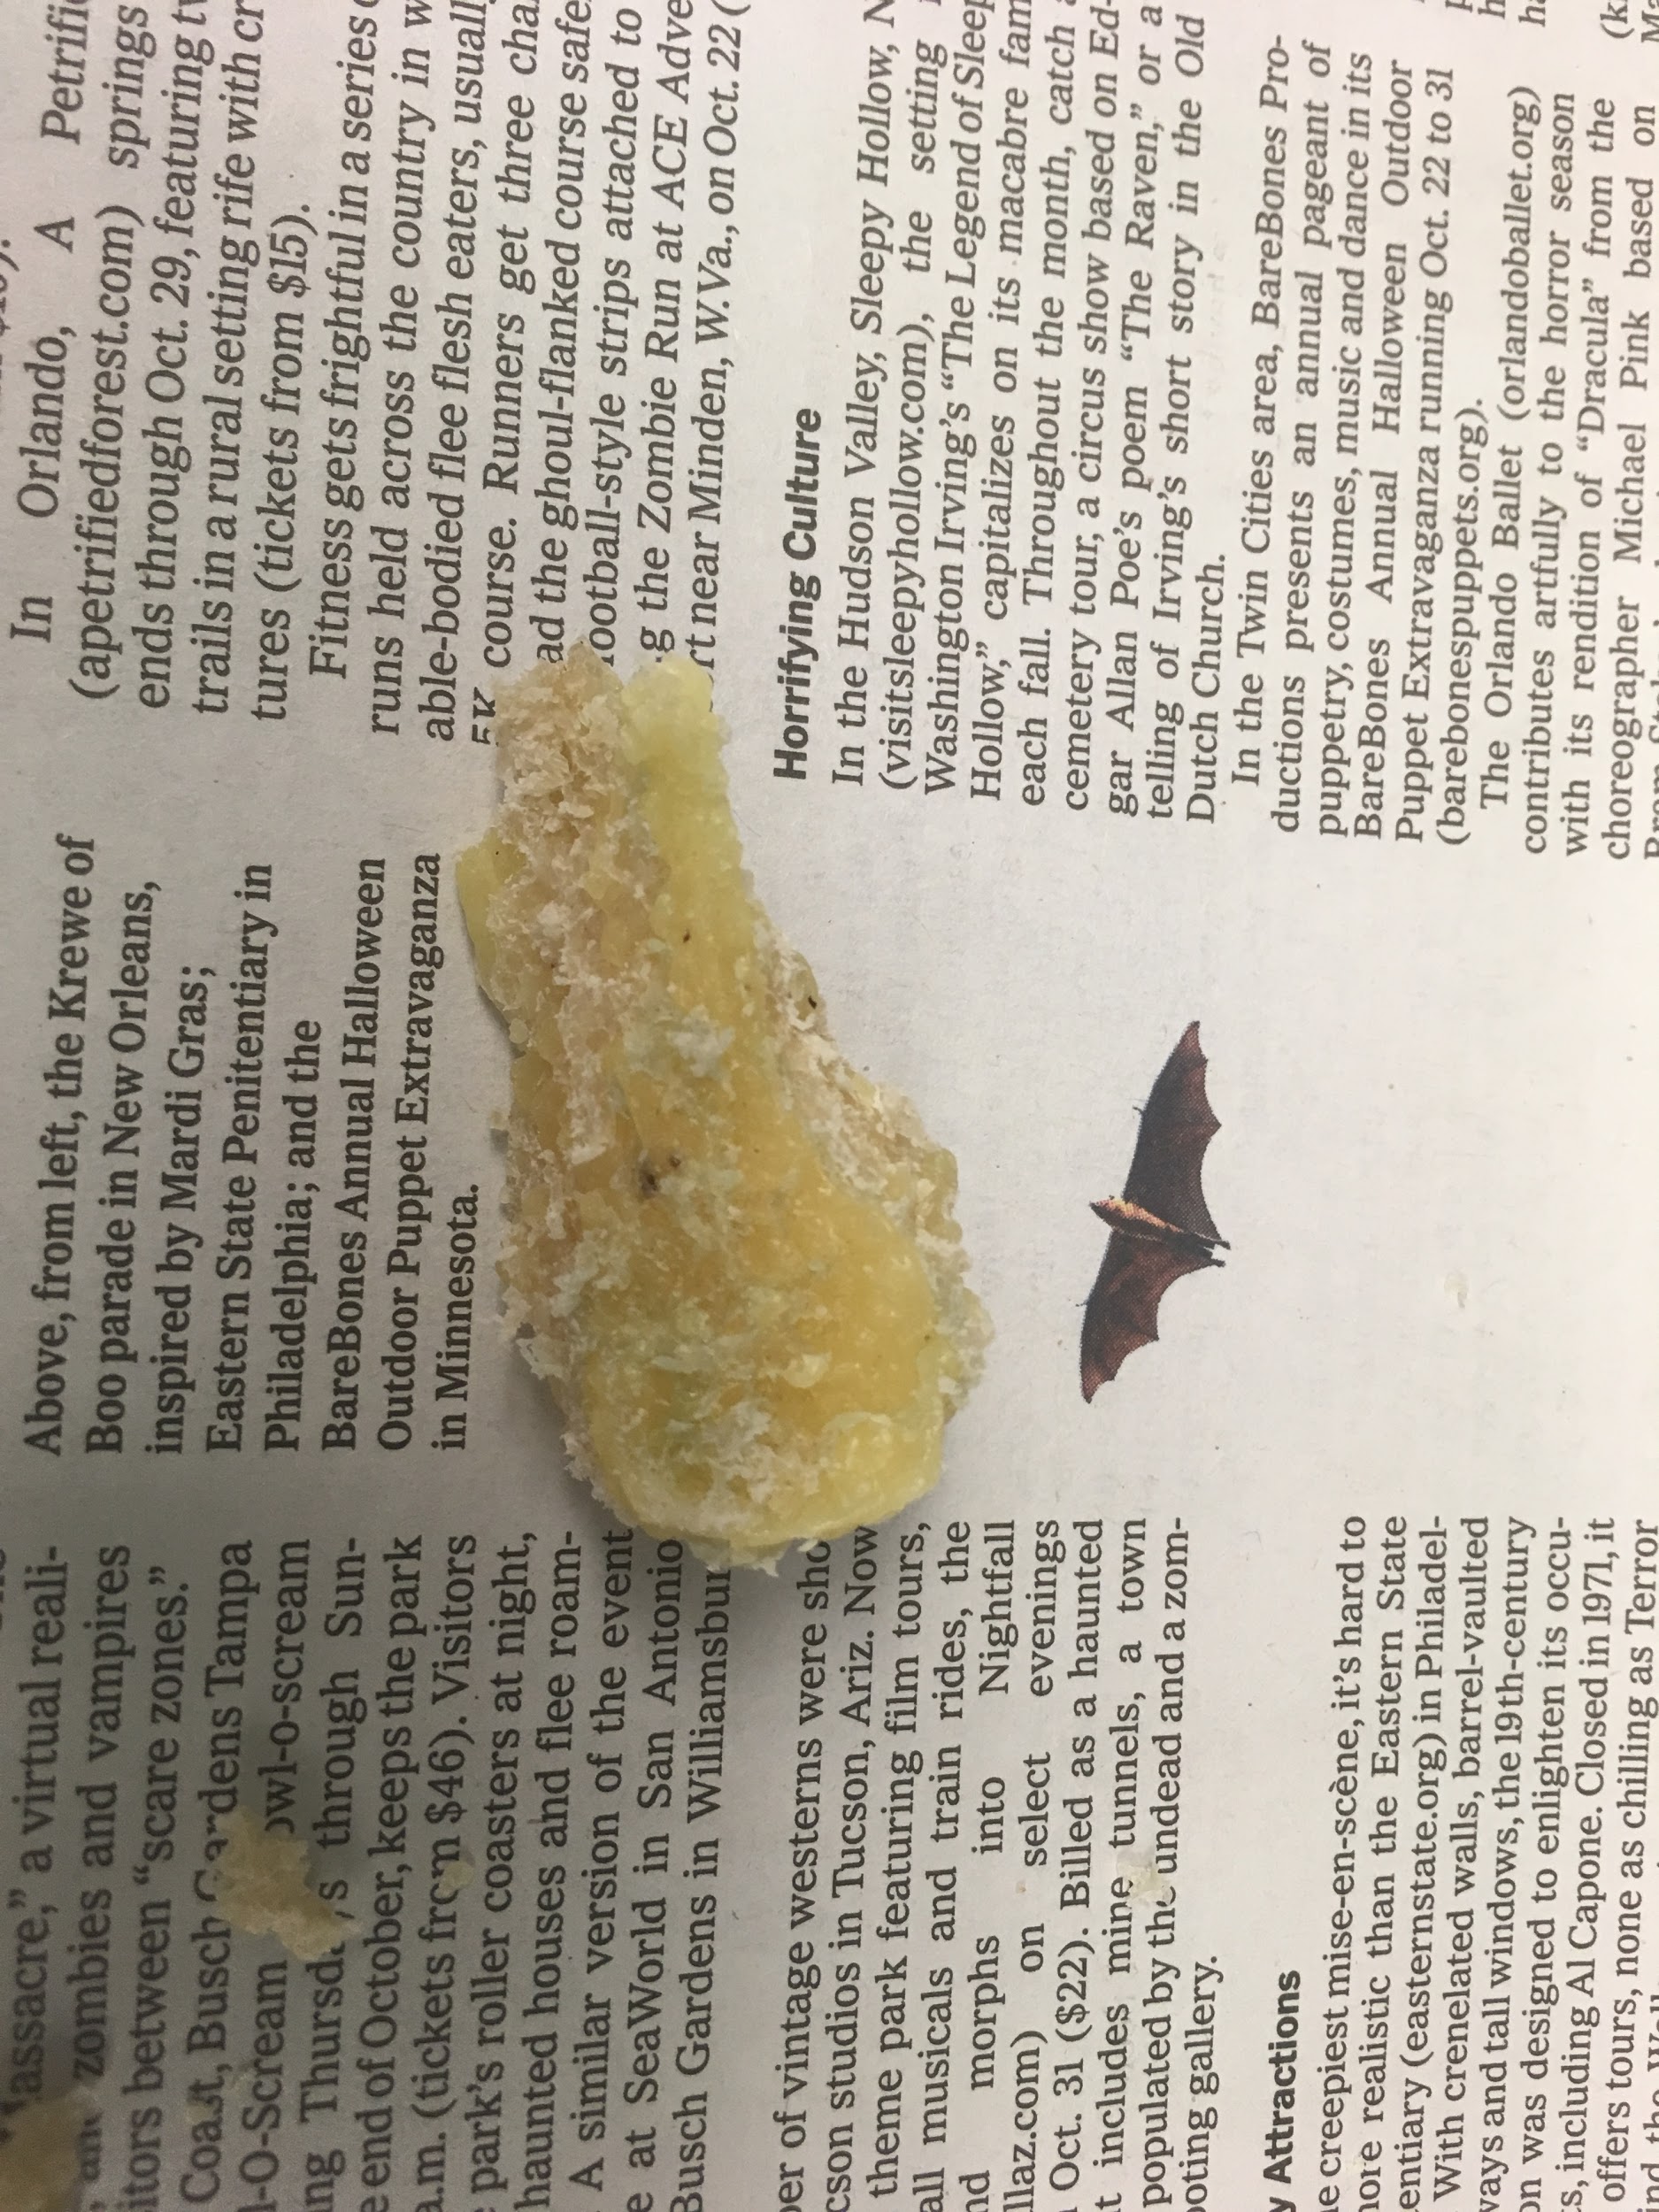
#2 and #3 came off easily, likely due to the size. I was surprised to see the details of the nail grooves captured in #2, though some of the sulphur filled the air pockets in #2 as well, despite a tighter crumb, leaving only a vague impression of the original object.
| Image URL: |
|---|
 |
The same went for #3, though more bread was stuck to the beeswax, likely due to the lack of linseed oil application.
| Image URL: |
|---|
 |
I had to use a scissors and quite a lot of effort to pry open #4. Despite filling it with quite a bit of beeswax, most of it flowed into the sides/air pockets, and the stapler impression was only half filled.
| Image URL: |
|---|
 |
2:30pm: For molds #1 and #3, where bread was stuck to the beeswax, I rinsed them under water before using my fingernails to scrape as much of the dough off as I could.
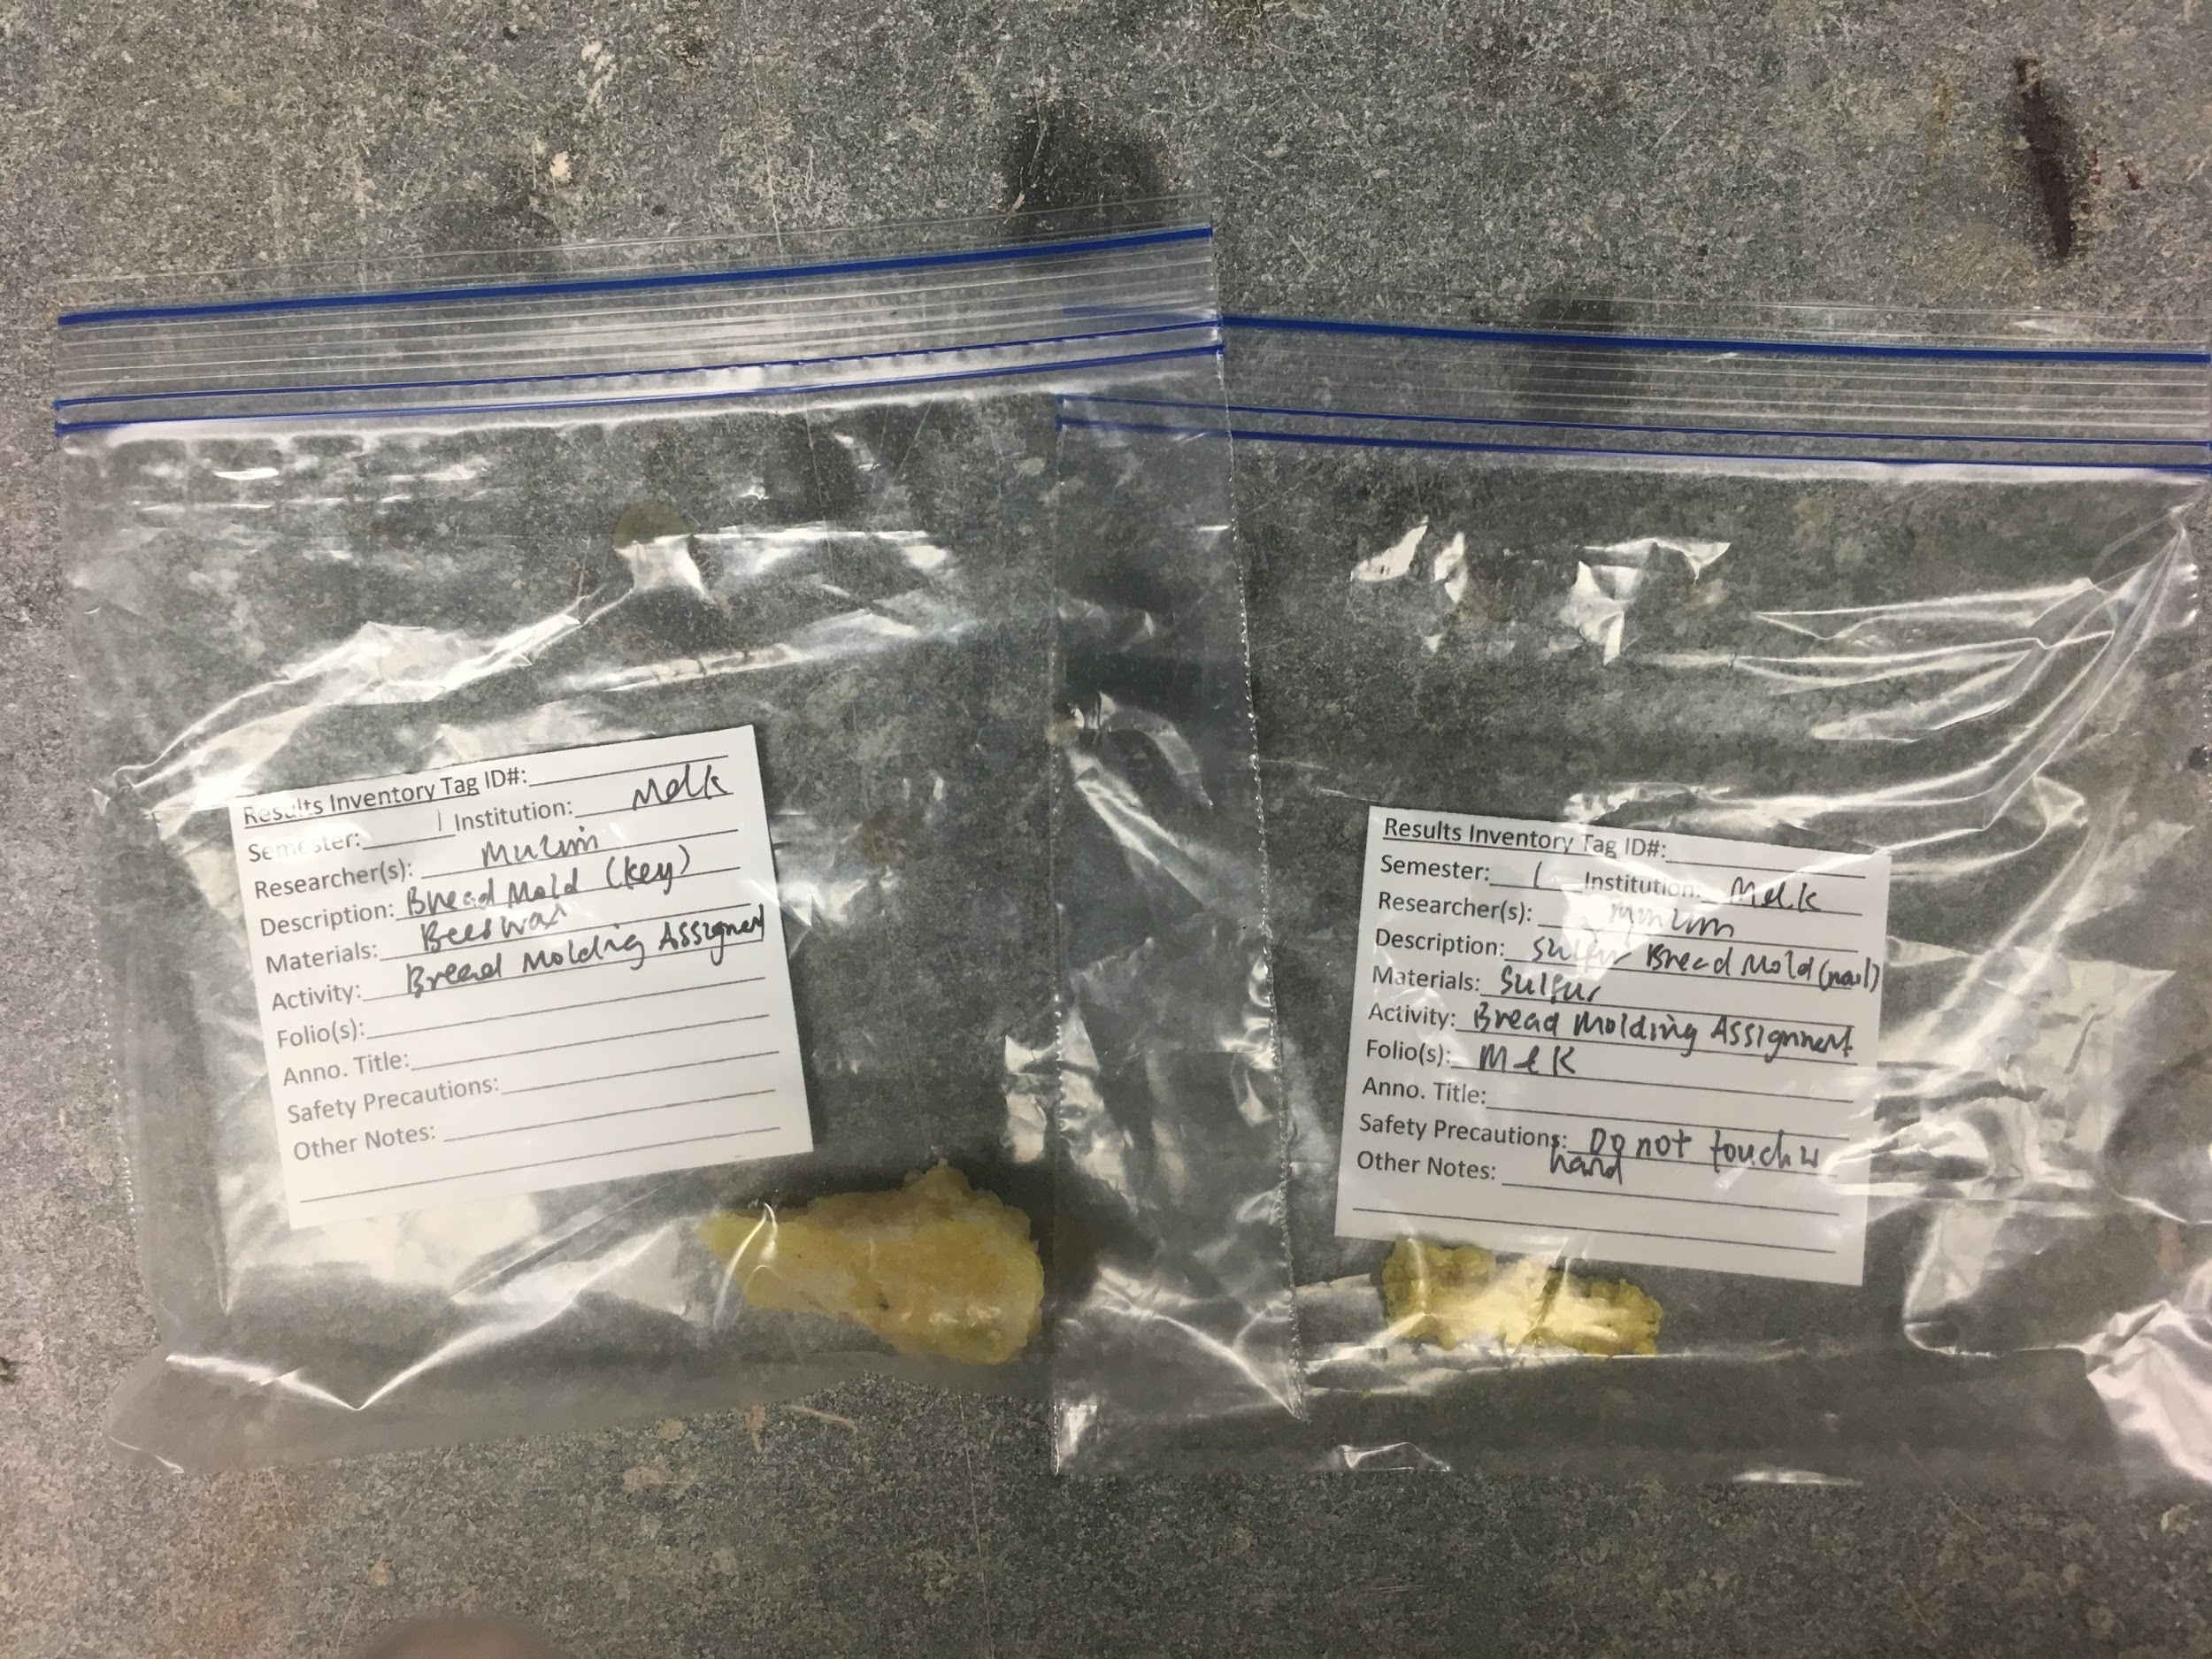
As #2 and #3 did leave a vague impression, I decided to store them in ziploc bags, label them, and keep them. I threw away #1, #4, and the remnants of the bread.
| Image URL: |
|---|
 |
Observations:
I am still skeptical about baking bread for the purpose of bread molding vs. bread for consumption. In next iterations, I will use a flour with a higher gluten content and less water to produce a tighter crumb.
Crumb structure did affect how the molds turned out. Surface area of object to bread (as mentioned above) also mattered as well.
I was surprised at how much details the bread mold could capture (especially for the nail). Would like to experiment with coins/other objects to determine exact level of detail.