See also much more reflective and detailed examples from M&K students:
- Min Lim, Fall 2018, Breadmolding Annotation
- Olivia Branscum, Fall 2018, Breadmolding Skillbuilding
Table of Contents
Bread Making Field Notes
Name: Naomi Rosenkranz & Megan Lennon (Naomi’s roommate)
Date and Time:
2021.05.15, 10:00am
Location: Our apartment (Amsterdam and 140th St, NYC)
Subject: Background and preparation
As part of the Summer 2021 course, GU4962: Hands on History, we will be preparing molds from freshly-baked bread in order to cast wax or sulfur objects. The goal is to study the process described on fol. 140v in BnF Ms. Fr. 640, For casting in sulfur. The full assignment and interpretation is found in Assignment Sheet: Bread Molding.
From the assignment sheet:
Review the full entries in the Edition: fol. 140v in BnF Ms. Fr. 640 |
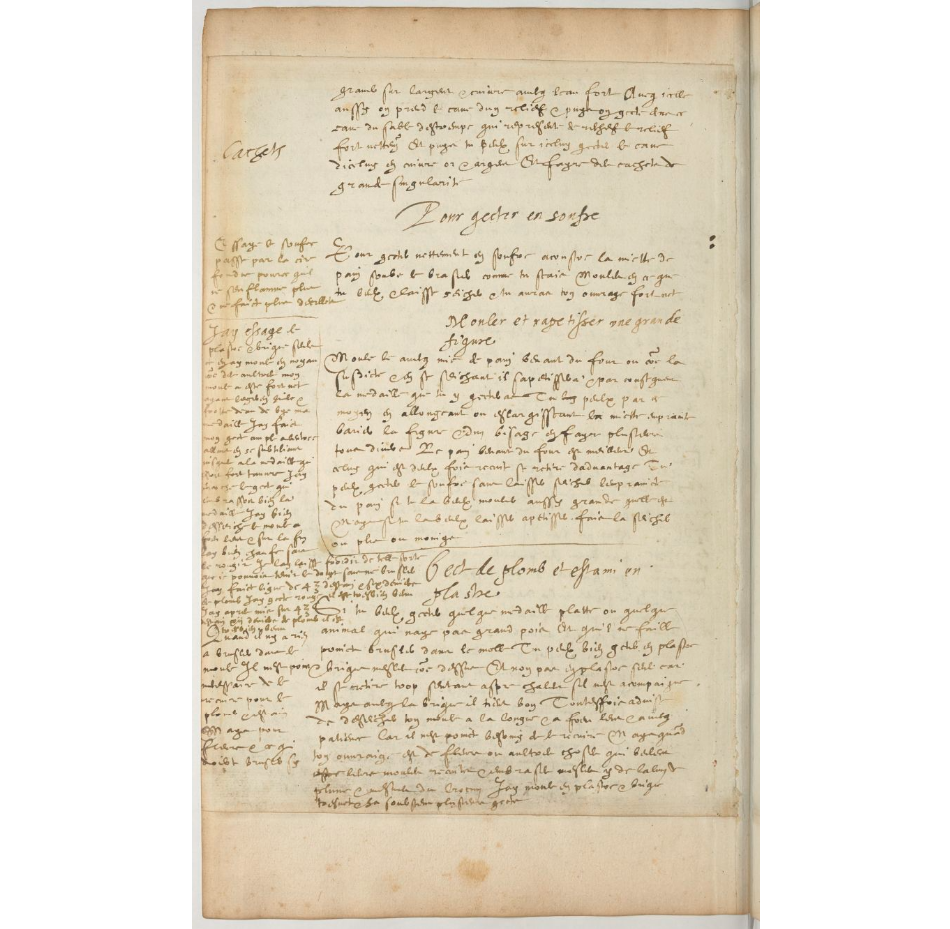
| For casting in sulfur To cast neatly in sulfur, arrange the bread pith under the brazier, as you know. Mold in it what you want & let dry, & you will have very neat work.
Molding and shrinking a large figure Mold it with bread pith coming from the oven, or as the aforesaid, & in drying out, it will shrink & consequently the medal that you will cast in it. You it can, by this means, by elongating and widening the imprinted bread pith, vary the figure & with one image make many various ones. Bread coming from the oven is better. And the one that is reheated twice retracts more. You can cast sulfur without leaving the imprint of the bread to dry, if you want to mold as big as it is. But if you want to let it shrink, make it dry, either more or less. |
You are tasked with baking bread, loaves of which will become molds into which you will cast wax or sulfur.
Name: Naomi Rosenkranz & Megan Lennon (Naomi’s roommate)
Date and Time:
2021.05.15, 10:15am
Location: Our apartment (Amsterdam and 140th St, NYC)
Subject: Preparing bread
Flickr album with all Breadmaking photos: https://www.flickr.com/photos/128418753@N06/albums/72157719214724092
Last week, we looked for a bread recipe with minimal effort to prepare for dinner. When we prepared it then, it had a really fine crumb (i.e., even texture without big bubbles) and so it seemed like a good candidate for molding.
The recipe we decided to use for breadmolding is adapted from https://gatherforbread.com/easy-perfect-yeast-bread/. The original is copied below with our changes noted at each step as “ADAPTATION.”
ORIGINAL RECIPE (GATHER FOR BREAD) Easy Perfect Yeast Bread The easiest yeast bread I've ever made. So good that I make it several times each month. Makes 2 loaves, so you can share or freeze one for later. Cook Time 40 mins Total Time 40 mins Course: Bread | Cuisine: American | Servings: 2 loaves | Author: Melanie - Gather for Bread
INGREDIENTS - 1 tablespoon active dry yeast
- 1 tablespoon sugar
- 1 tablespoon salt
- 2 cups warm water not over 110°F
- 5 1/2 to 6 cups All-Purpose Flour
- cornmeal or flour for dusting
- boiling water
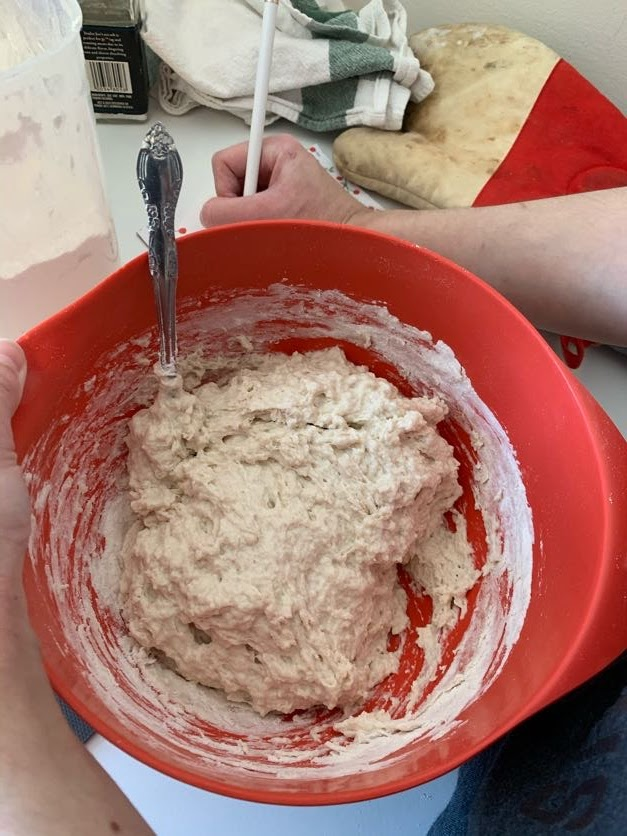
INSTRUCTIONS - In a large bowl mix together the yeast, sugar, salt and water. Let this stand until the yeast is dissolved. Gradually add the flour, one cup at a time to the liquid and mix thoroughly until the dough pulls away from the sides of the bowl. Turn the dough out onto a floured surface to knead. (This may be a little messy, but don't give up!)
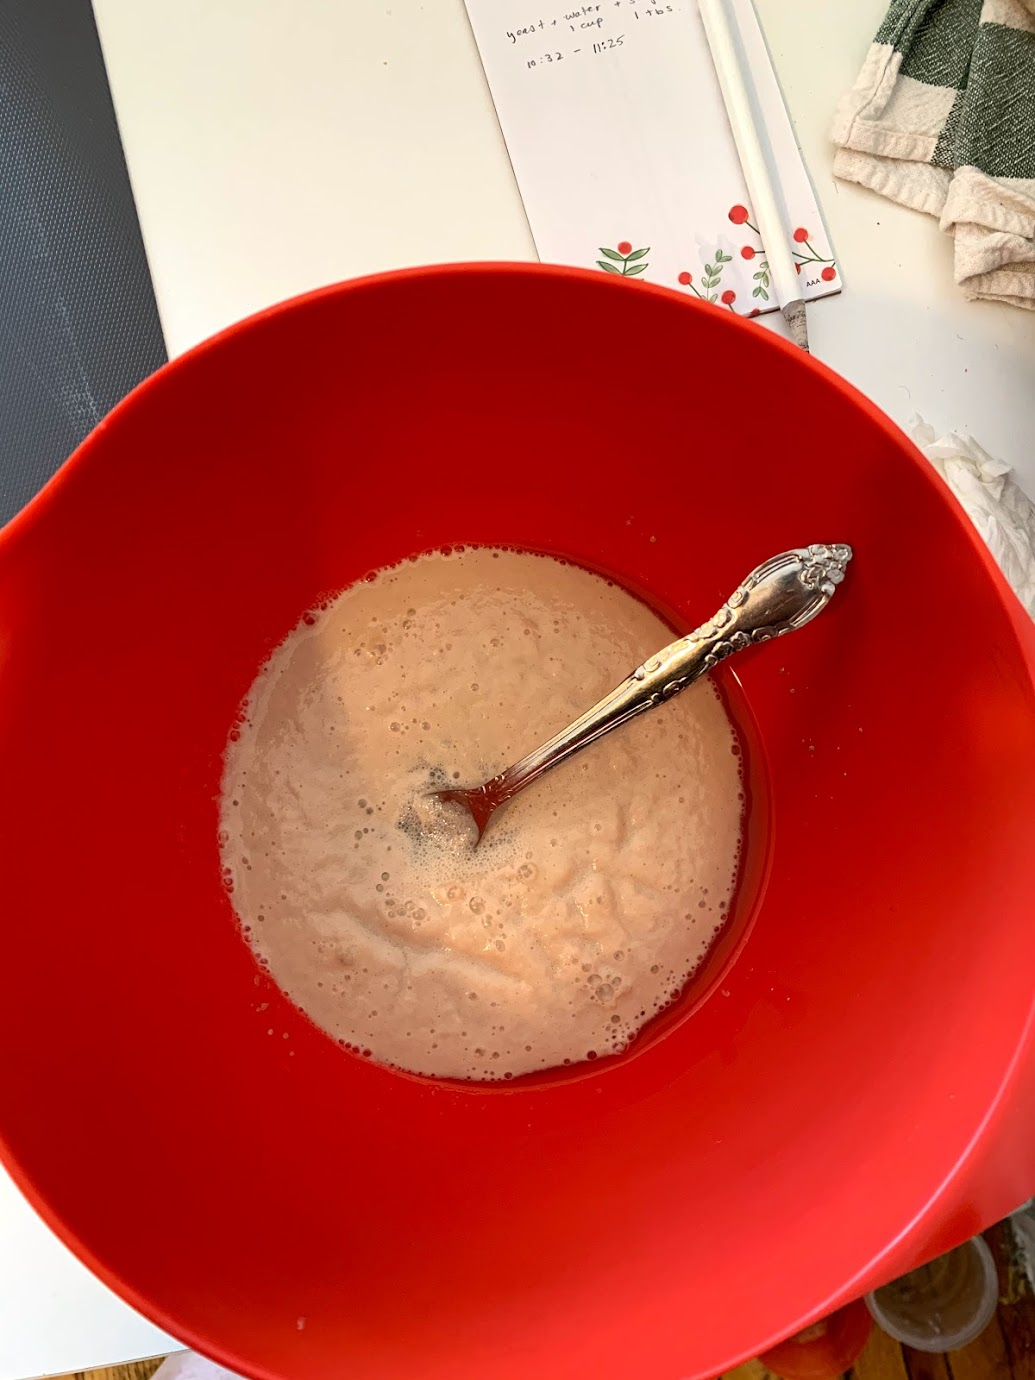
- ADAPTATION: Mix the yeast, sugar, and only 1 cup of the warm water in a large bowl. Let stand until the yeast is frothy (~15 minutes minimum) - this is based on our previous bread-baking experience and other recipes.
- Once frothy, add the second cup of warm water and the salt. Then add flour as described.
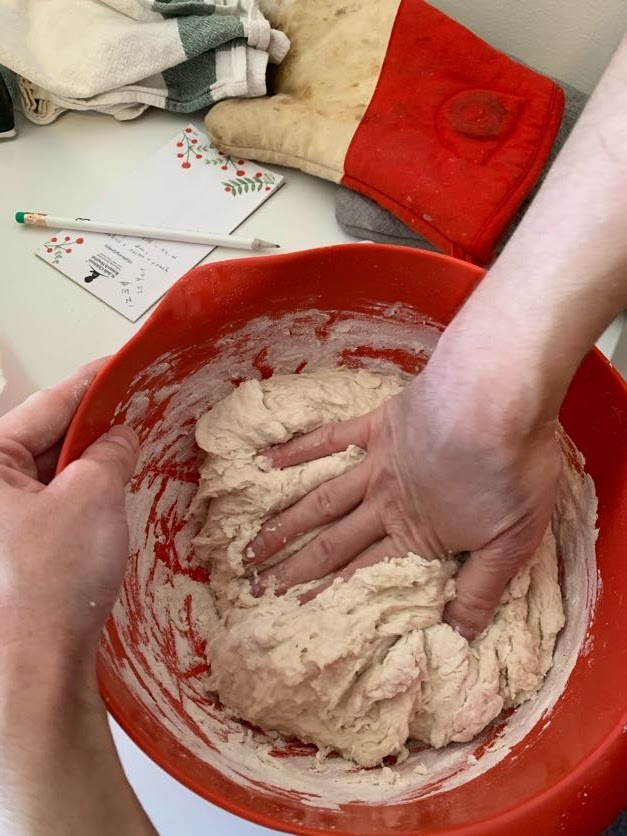
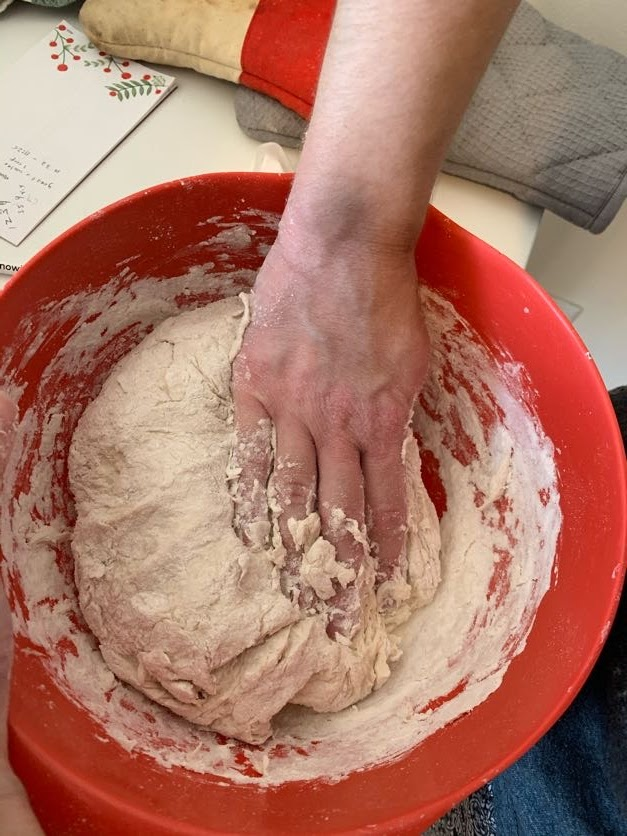
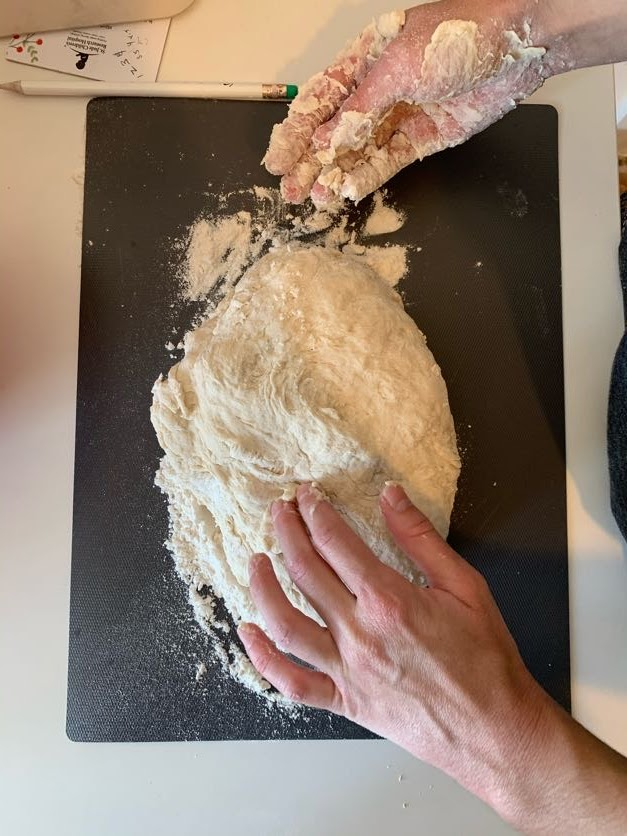
- Knead It: Fold the far edge of the dough back over on itself towards you. Press into the dough with the heels of your hands and push away. After each push, rotate the dough 90°. Repeat this process in a rhythmic, rocking motion for 5 minutes, sprinkling only enough flour on your kneading surface to prevent sticking. Let the dough rest while you scrape out and grease the mixing bowl with a few drops of olive oil (preferred) or non stick baking spray. Knead the dough again for 2 to 3 minutes.
- Let It Rise: Return the dough to the bowl and turn it over once to grease the top. Cover with a damp towel and keep warm until the dough doubles in bulk, about 1 to 2 hours.
- Shape it: Punch down the dough with your fist and briefly knead out any air bubbles. Cut the dough in half and shape into two Italian- or French-style loaves. Place the loaves on a cookie sheet generously sprinkled with cornmeal. Let the loaves rest for 5 minutes.
Bake it: - Lightly slash the tops of the loaves 3 or more times diagonally and brush them with cold water.
- ADAPTATION: Did not brush the tops of the loafs with cold water.
- Place an aluminum roasting pan on the bottom of the oven. Fill 1" deep with boiling water. Slide loaves onto baking stone* in a cold oven. I use this one. Bake at 400°F for 35 to 45 minutes, until the loaves are golden brown and sounds hollow when tapped.
|
Ingredients:
- Enriched and Bleached, modern white flour - the cheapest available
- Obtained from Food Universe (538 W 138th St, New York, NY 10031)
- White, refined sugar (cheapest available)
- Obtained from Target
- Obtained from Food Universe (538 W 138th St, New York, NY 10031)
- Obtained from Food Universe (538 W 138th St, New York, NY 10031)
- Tap water from NYC (Hamilton Heights)
Notes:
- We made one batch of dough earlier this morning that we did not document. The batch we are recording here is the second of the day.
- 10:30am: we mixed the yeast, sugar, and 1 cup water to let stand - intending to leave it for ~15min.
- 10:35am-11:25am: We inadvertently let the yeast+sugar+water stand ~50min because something else came up that we had to attend to. It was VERY frothy.
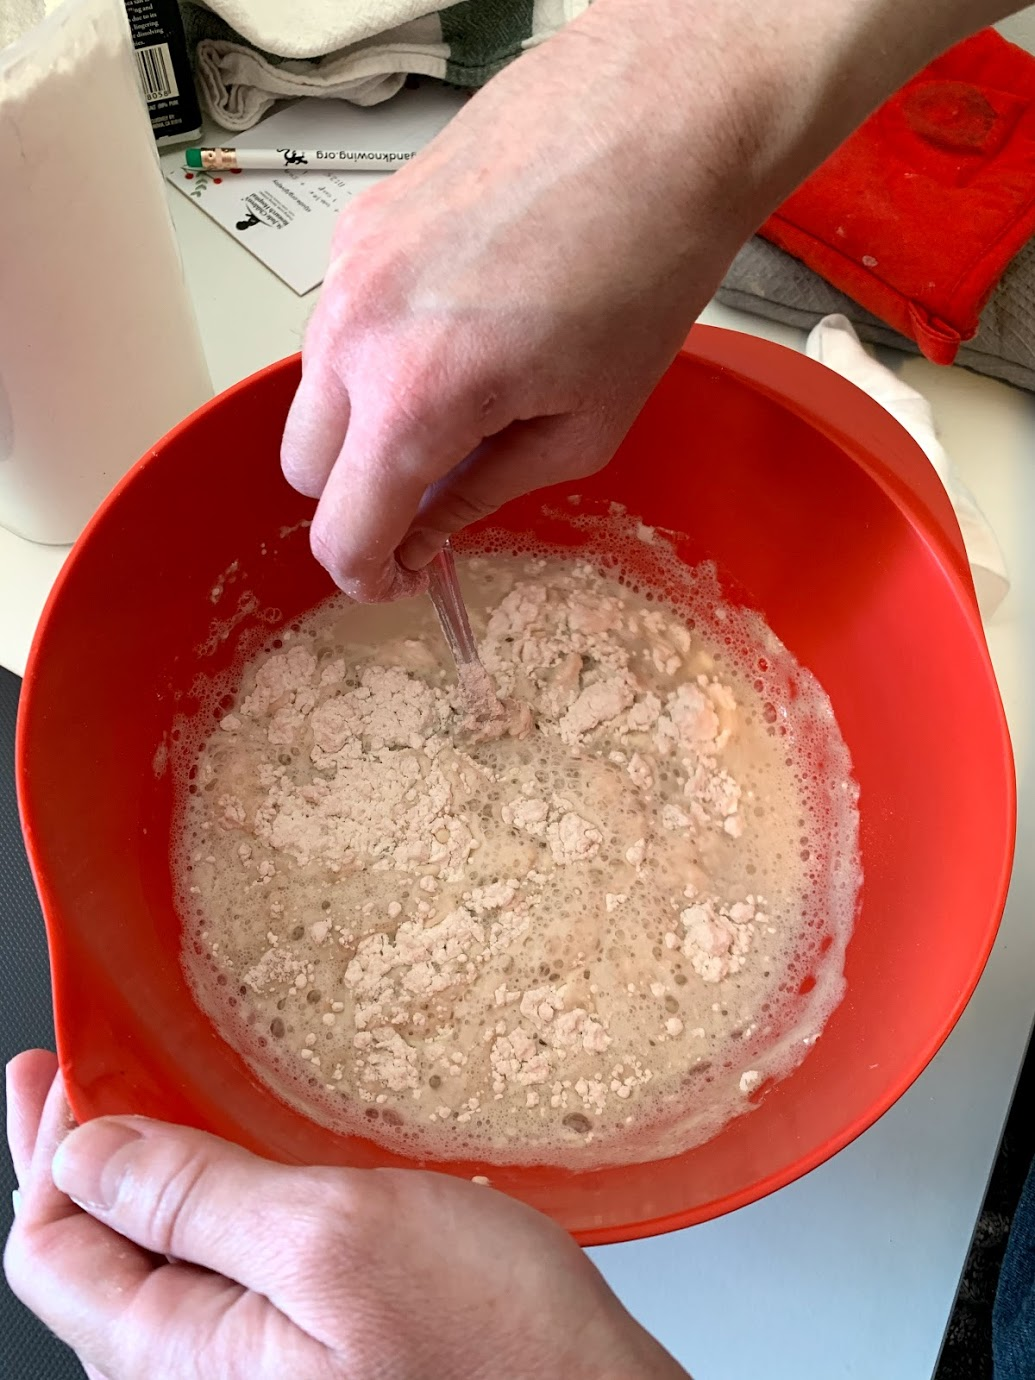
- 11:25am: add the second cup of water and salt. Then the flour, one cup at a time
- 1 cup flour - mix with a fork
- 2 cups - still with a fork
- 3 cups - still with a fork. The dough is starting to pull away from the sides of the bowl, so adding only ½ cup at a time now
- 3.5 cups - still with a fork
- 4 cups - still with a fork
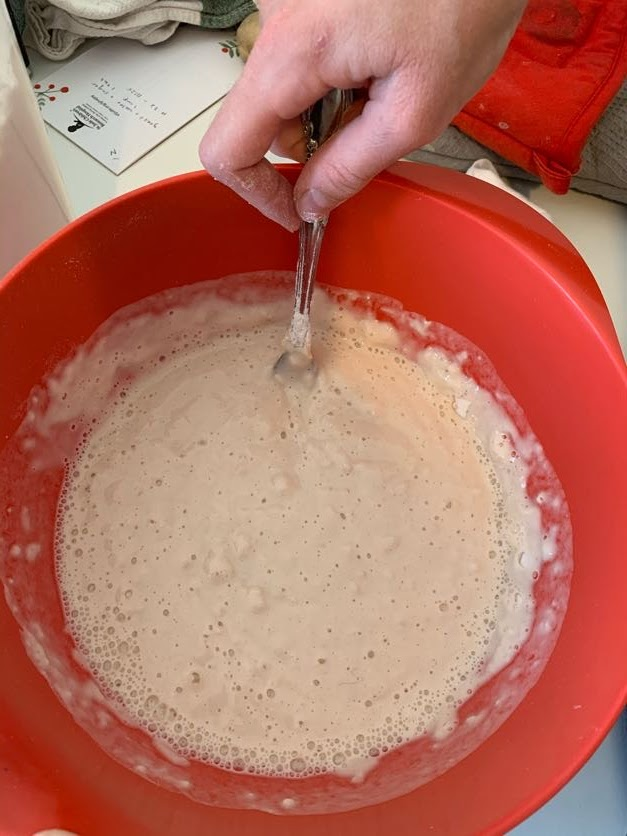
- 4.5 cups - change to mix by hand as the dough becomes more elastic
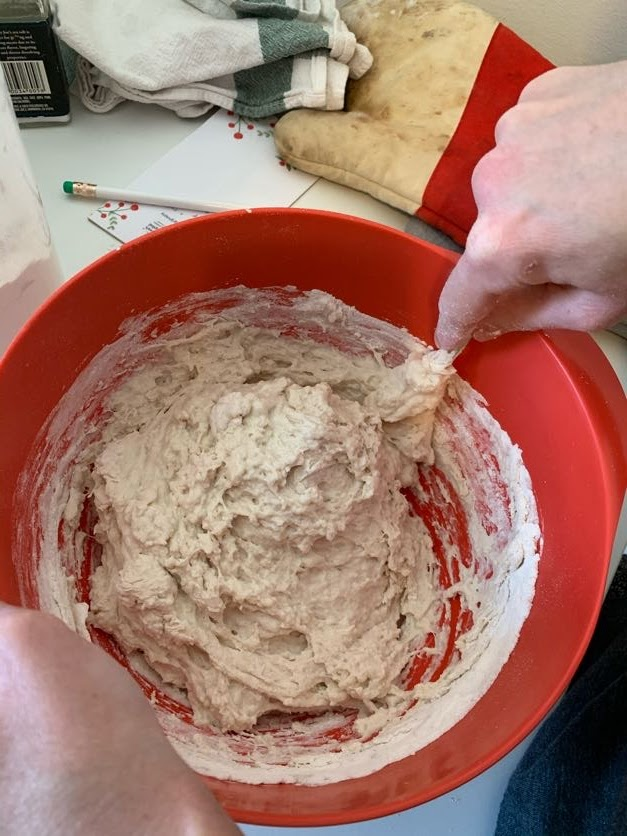
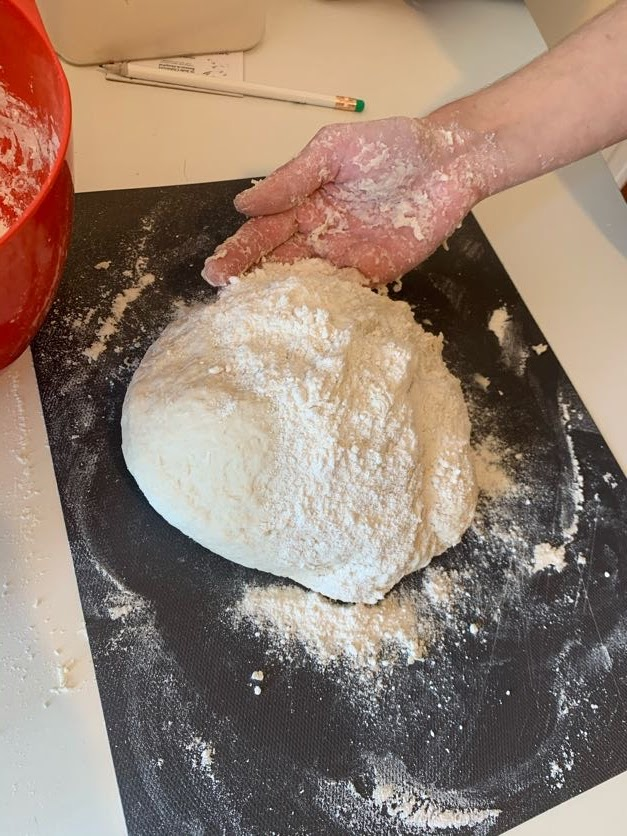
- 11:30am: turn out the dough to knead by hand on a floured cutting board
- 11:30am-11:45am: knead the dough on the cutting board, adding flour as needed to get a non-sticky consistency. Drawing upon previous experience baking bread and wedging clay.
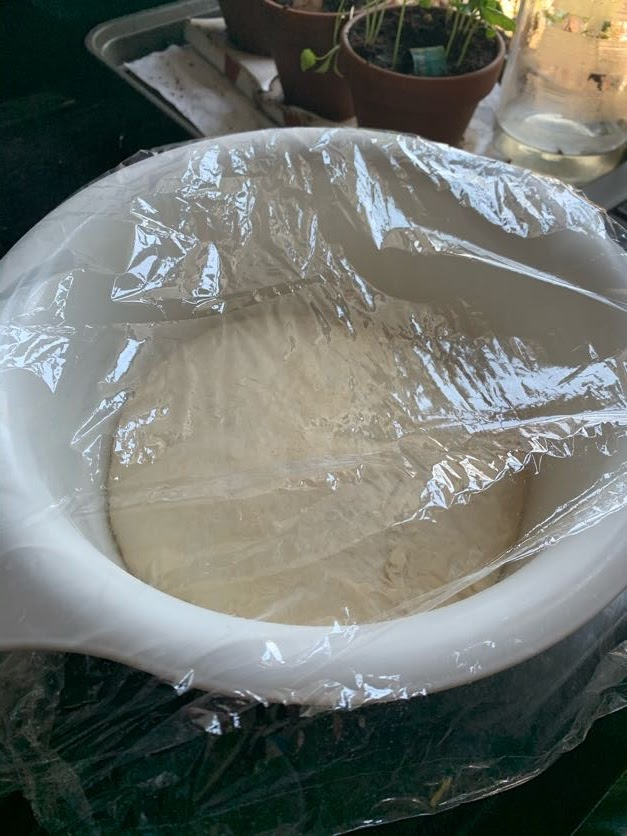
- 11:45am-2:20pm: form the dough into a ball and leave to rise in an oiled bowl covered loosely with plastic wrap. Leave on top of oven near window in the kitchen (it is 75 °F outside and a little sunny) until double in size.
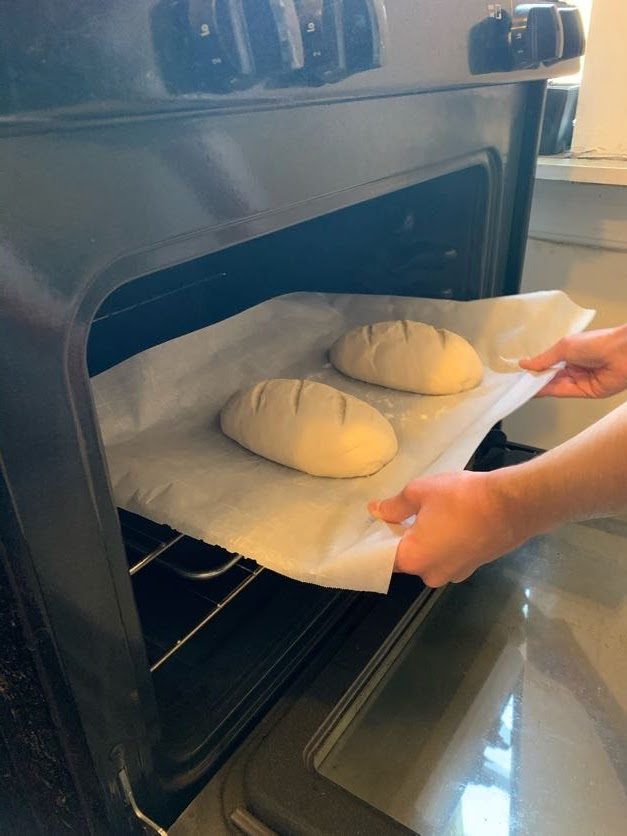
- 2:25pm: punch down the dough, cut in two, and form into two loaves. Place on parchment paper lightly sprinkled with parchment paper. In the bottom rack of the oven, fill a sheet pan with boiling water (as described in the recipe above), then place the sheet pan with bread loaves on the rack above and close the oven. Set oven to 400 °F.
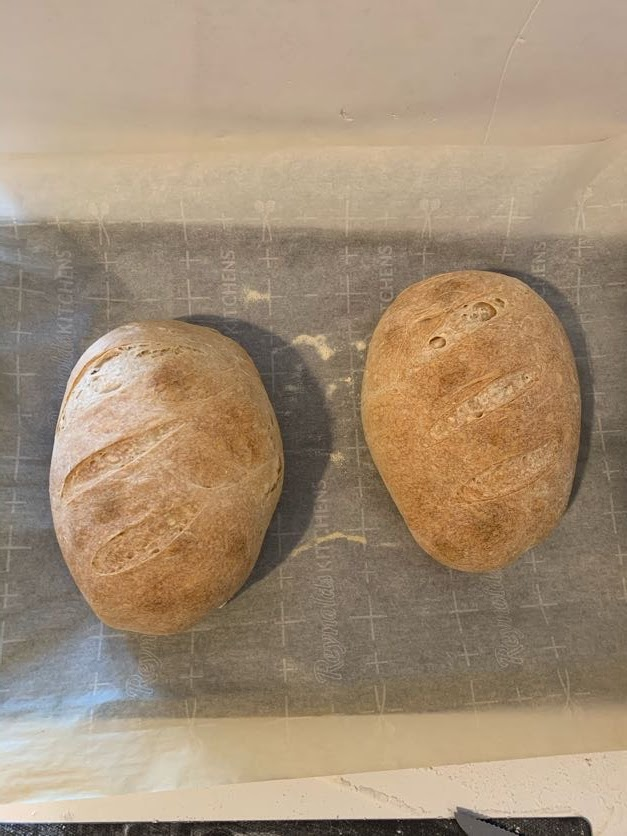
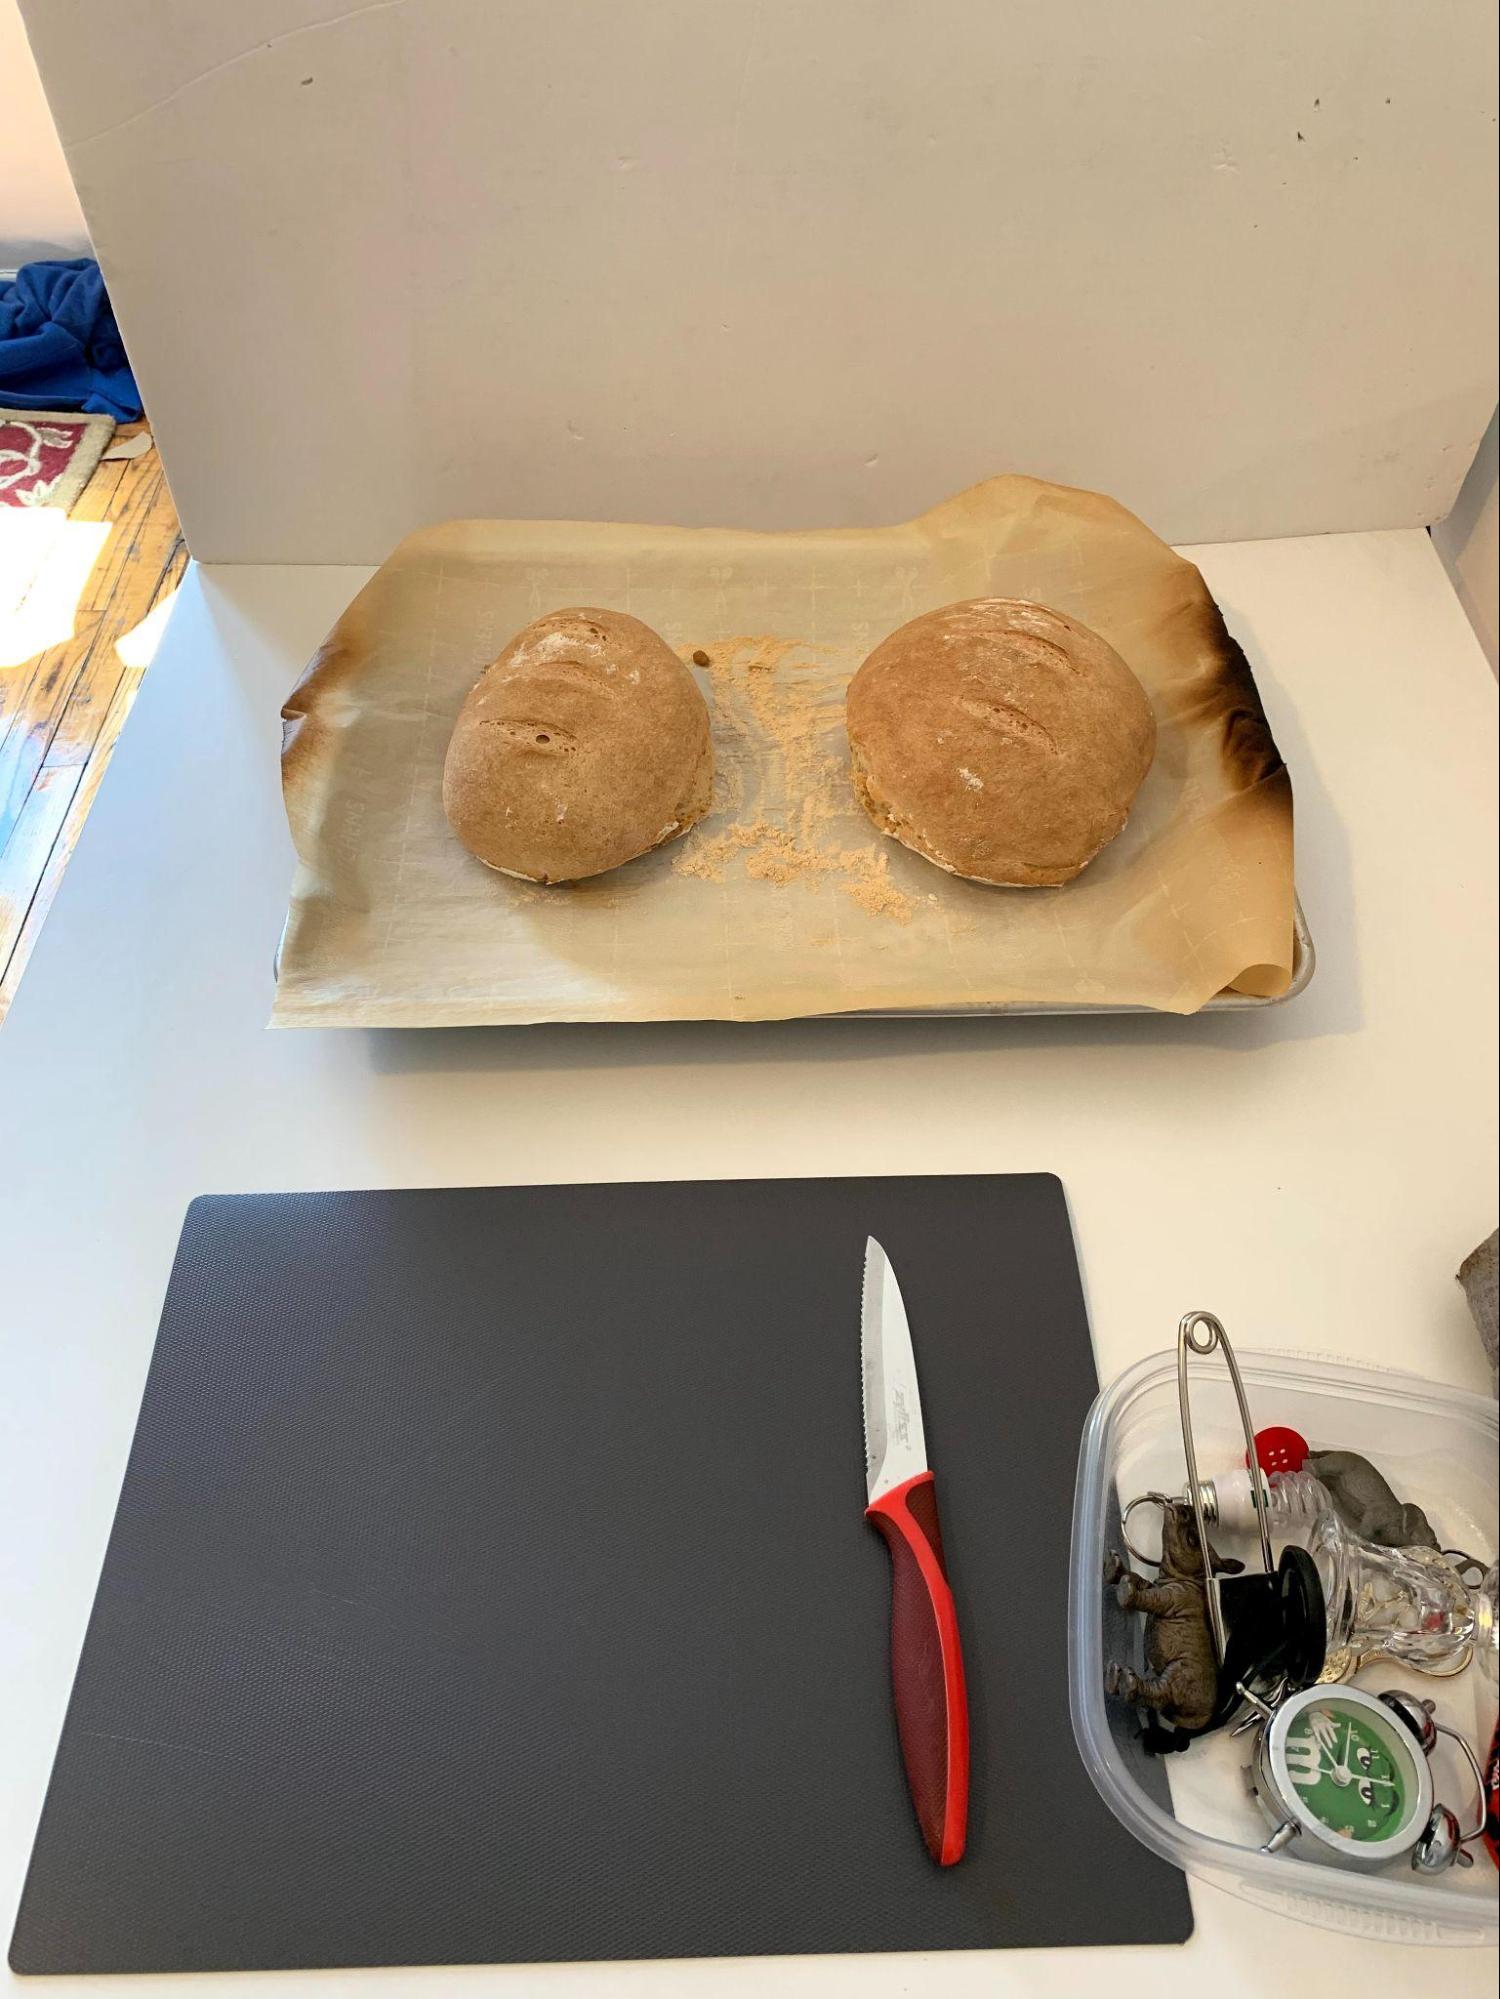
- 2:25pm-3:15pm: Bake bread until brown and sounds hollow when tapped on bottom.
- 3:15pm: take loaves out and prepare to make molds.
Bread Molding Field Notes
Name: Naomi Rosenkranz & Megan Lennon (Naomi’s roommate)
Date and Time:
2021.05.15, 3:15pm
Location: Our apartment (Amsterdam and 140th St, NYC)
Subject: Preparing molds
Flickr album with all Bread Molding photos: https://www.flickr.com/photos/128418753@N06/albums/72157719204099129
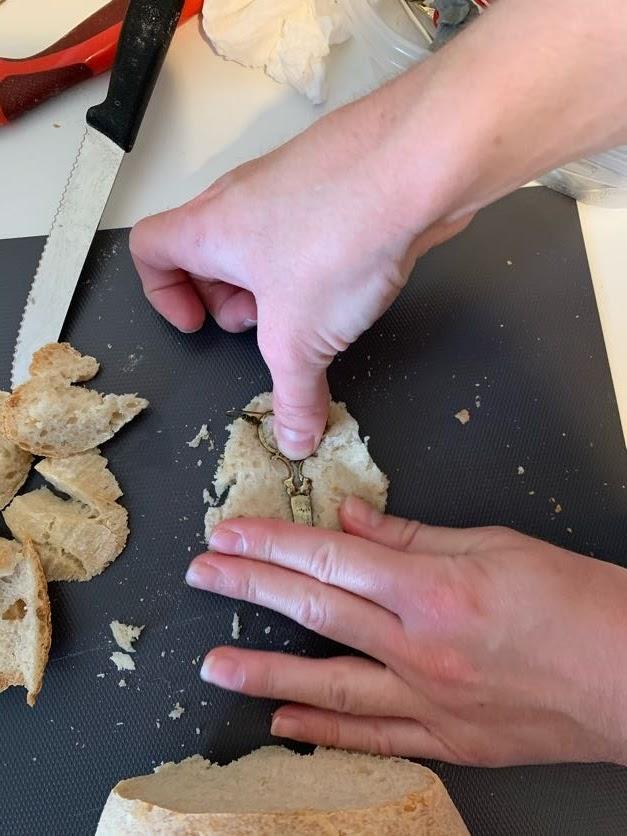
Items for molding
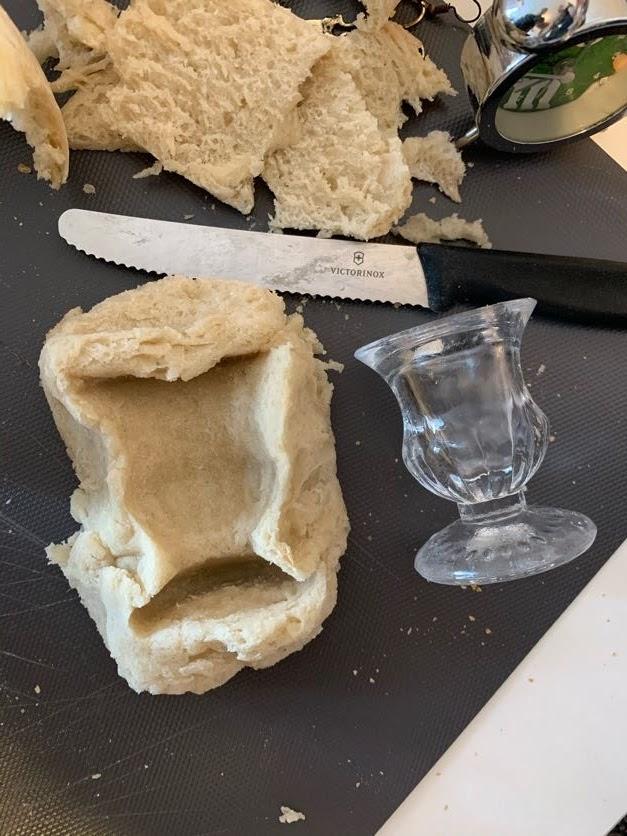
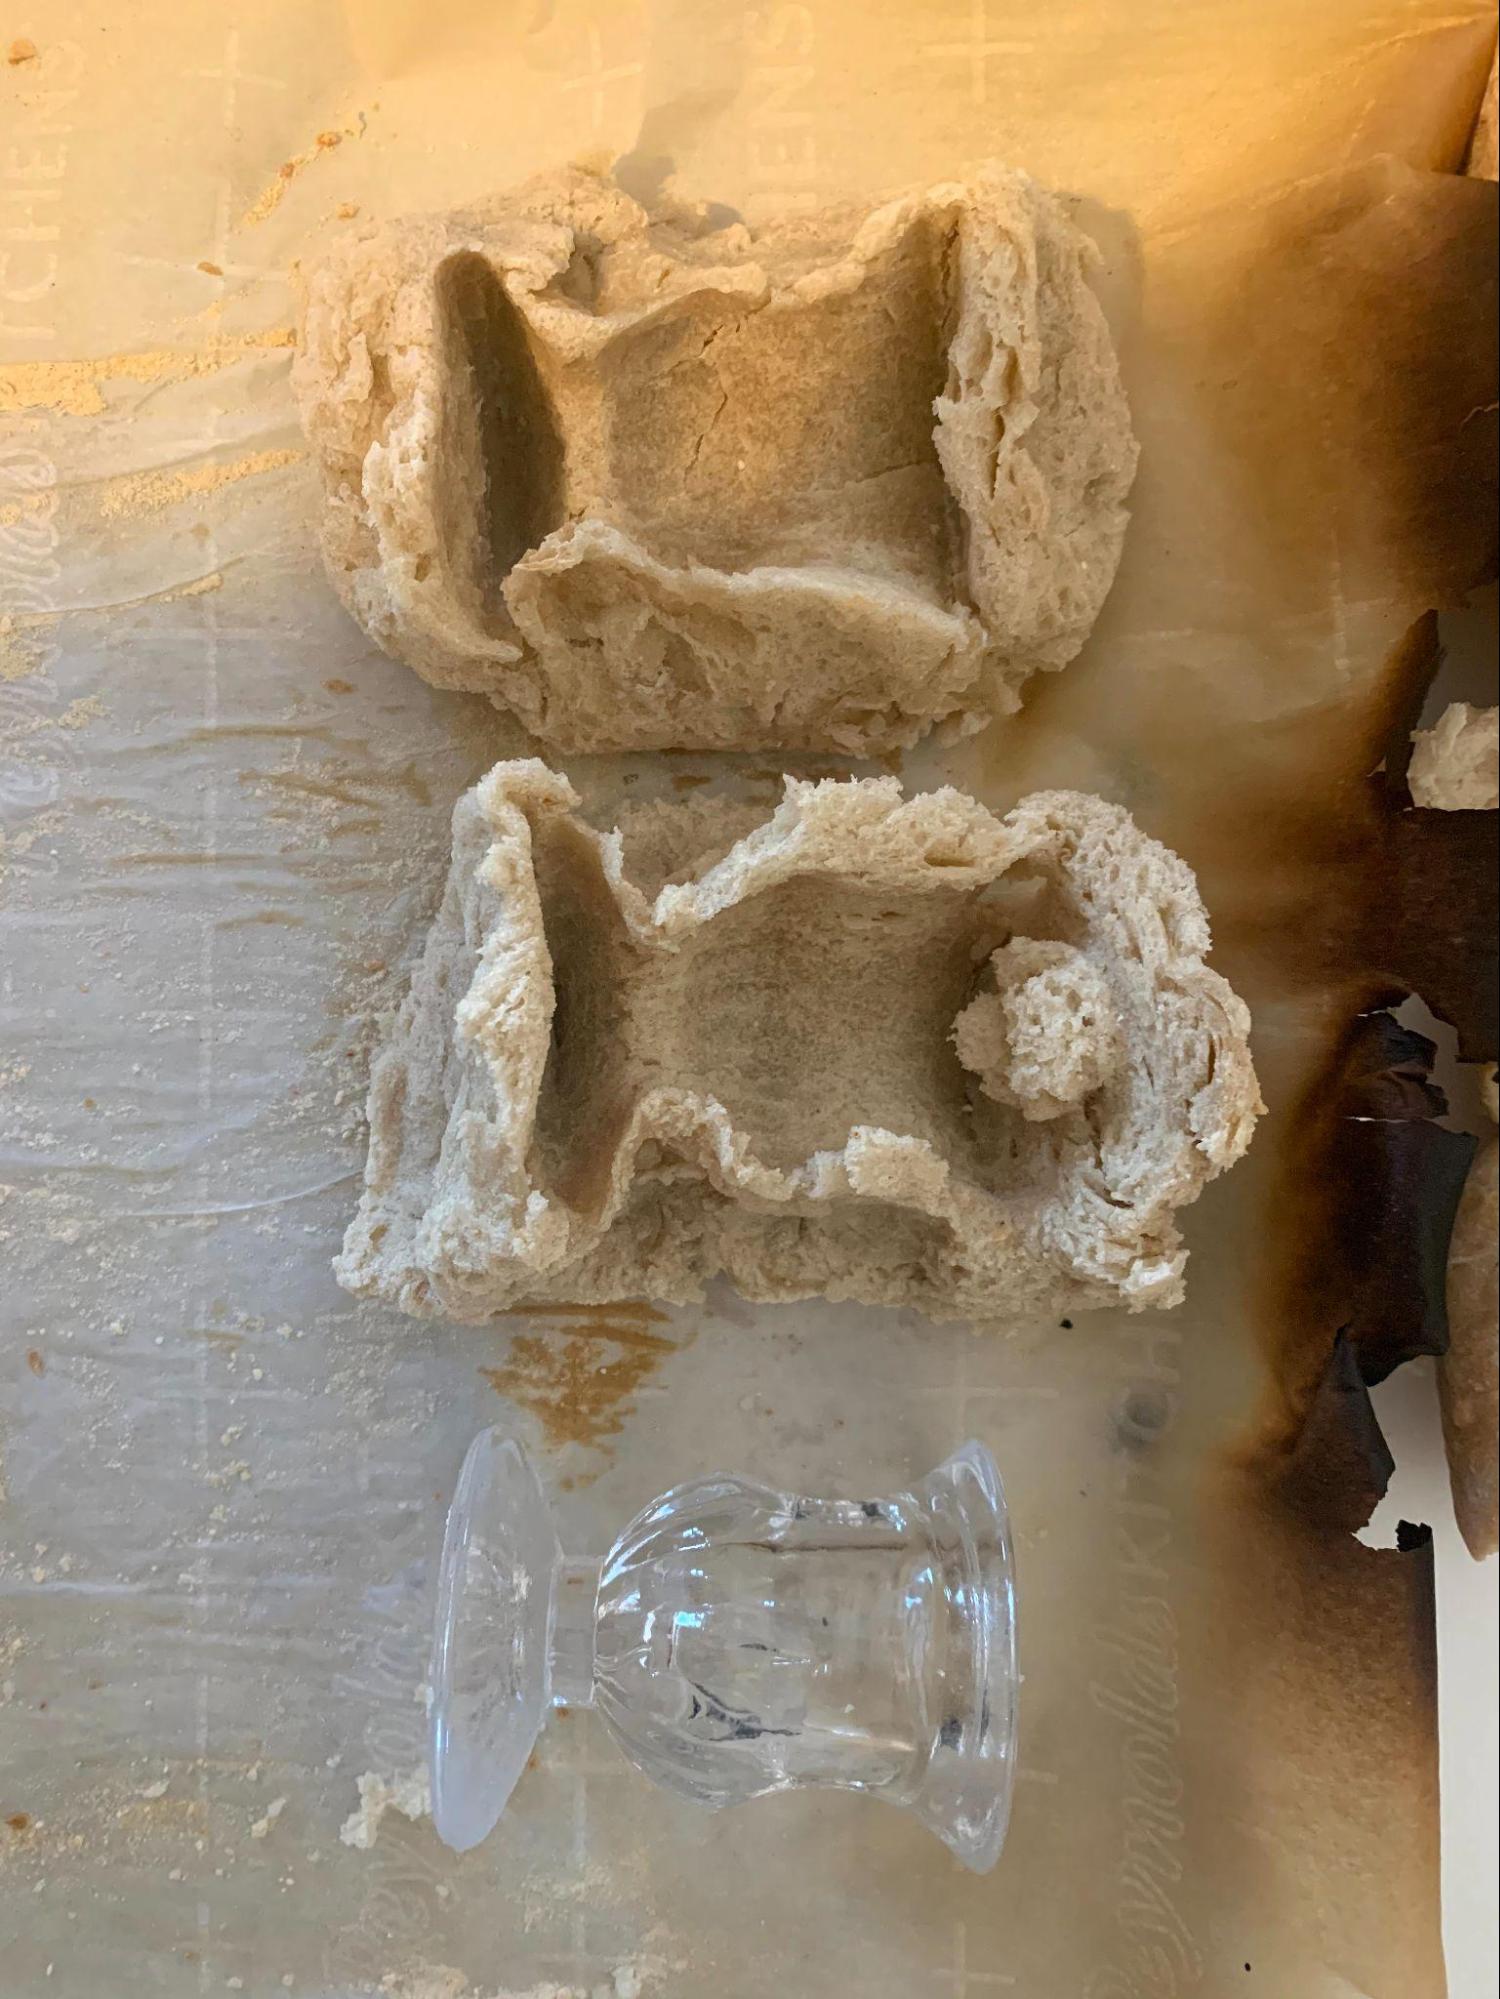
- The improvised glass muller (a glass candlestick, Letine (amazon))
- Giant metal safety pin (~12.5cm in length)
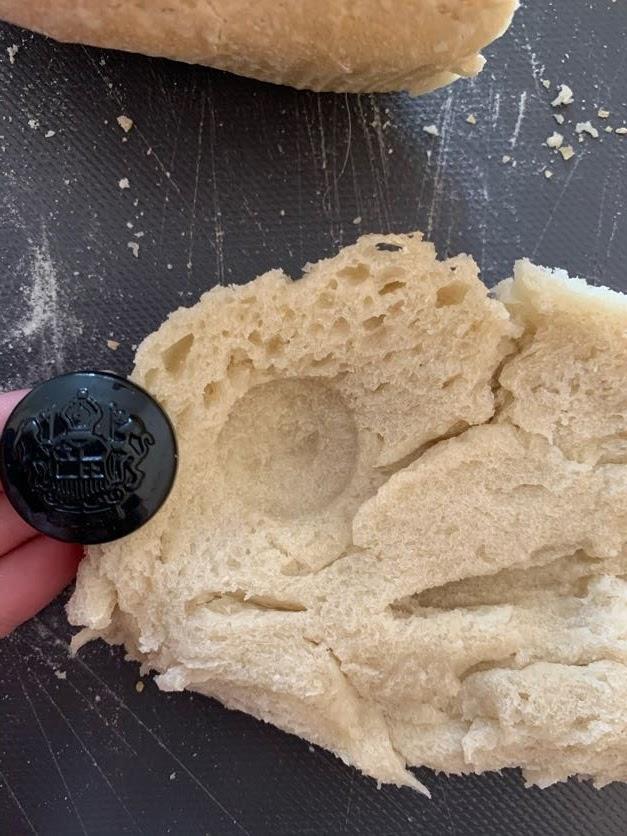
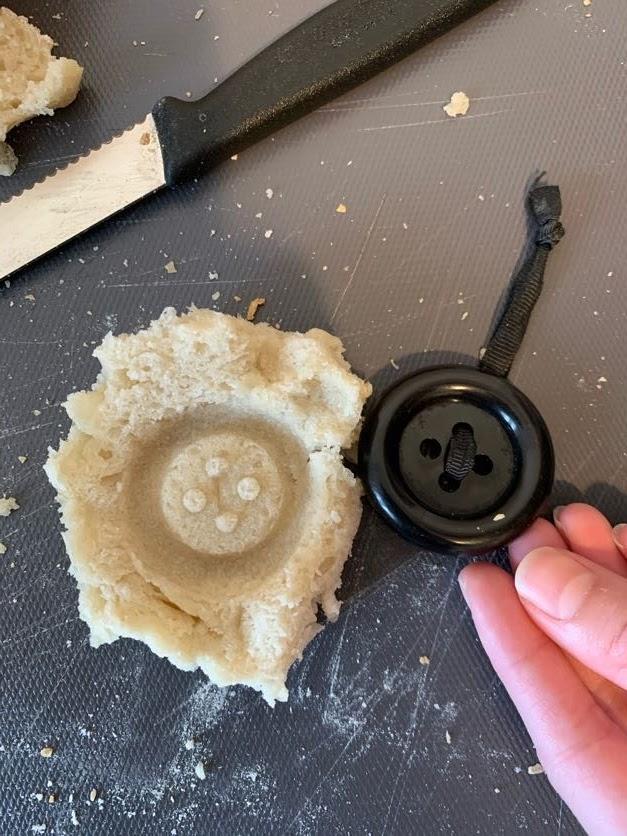
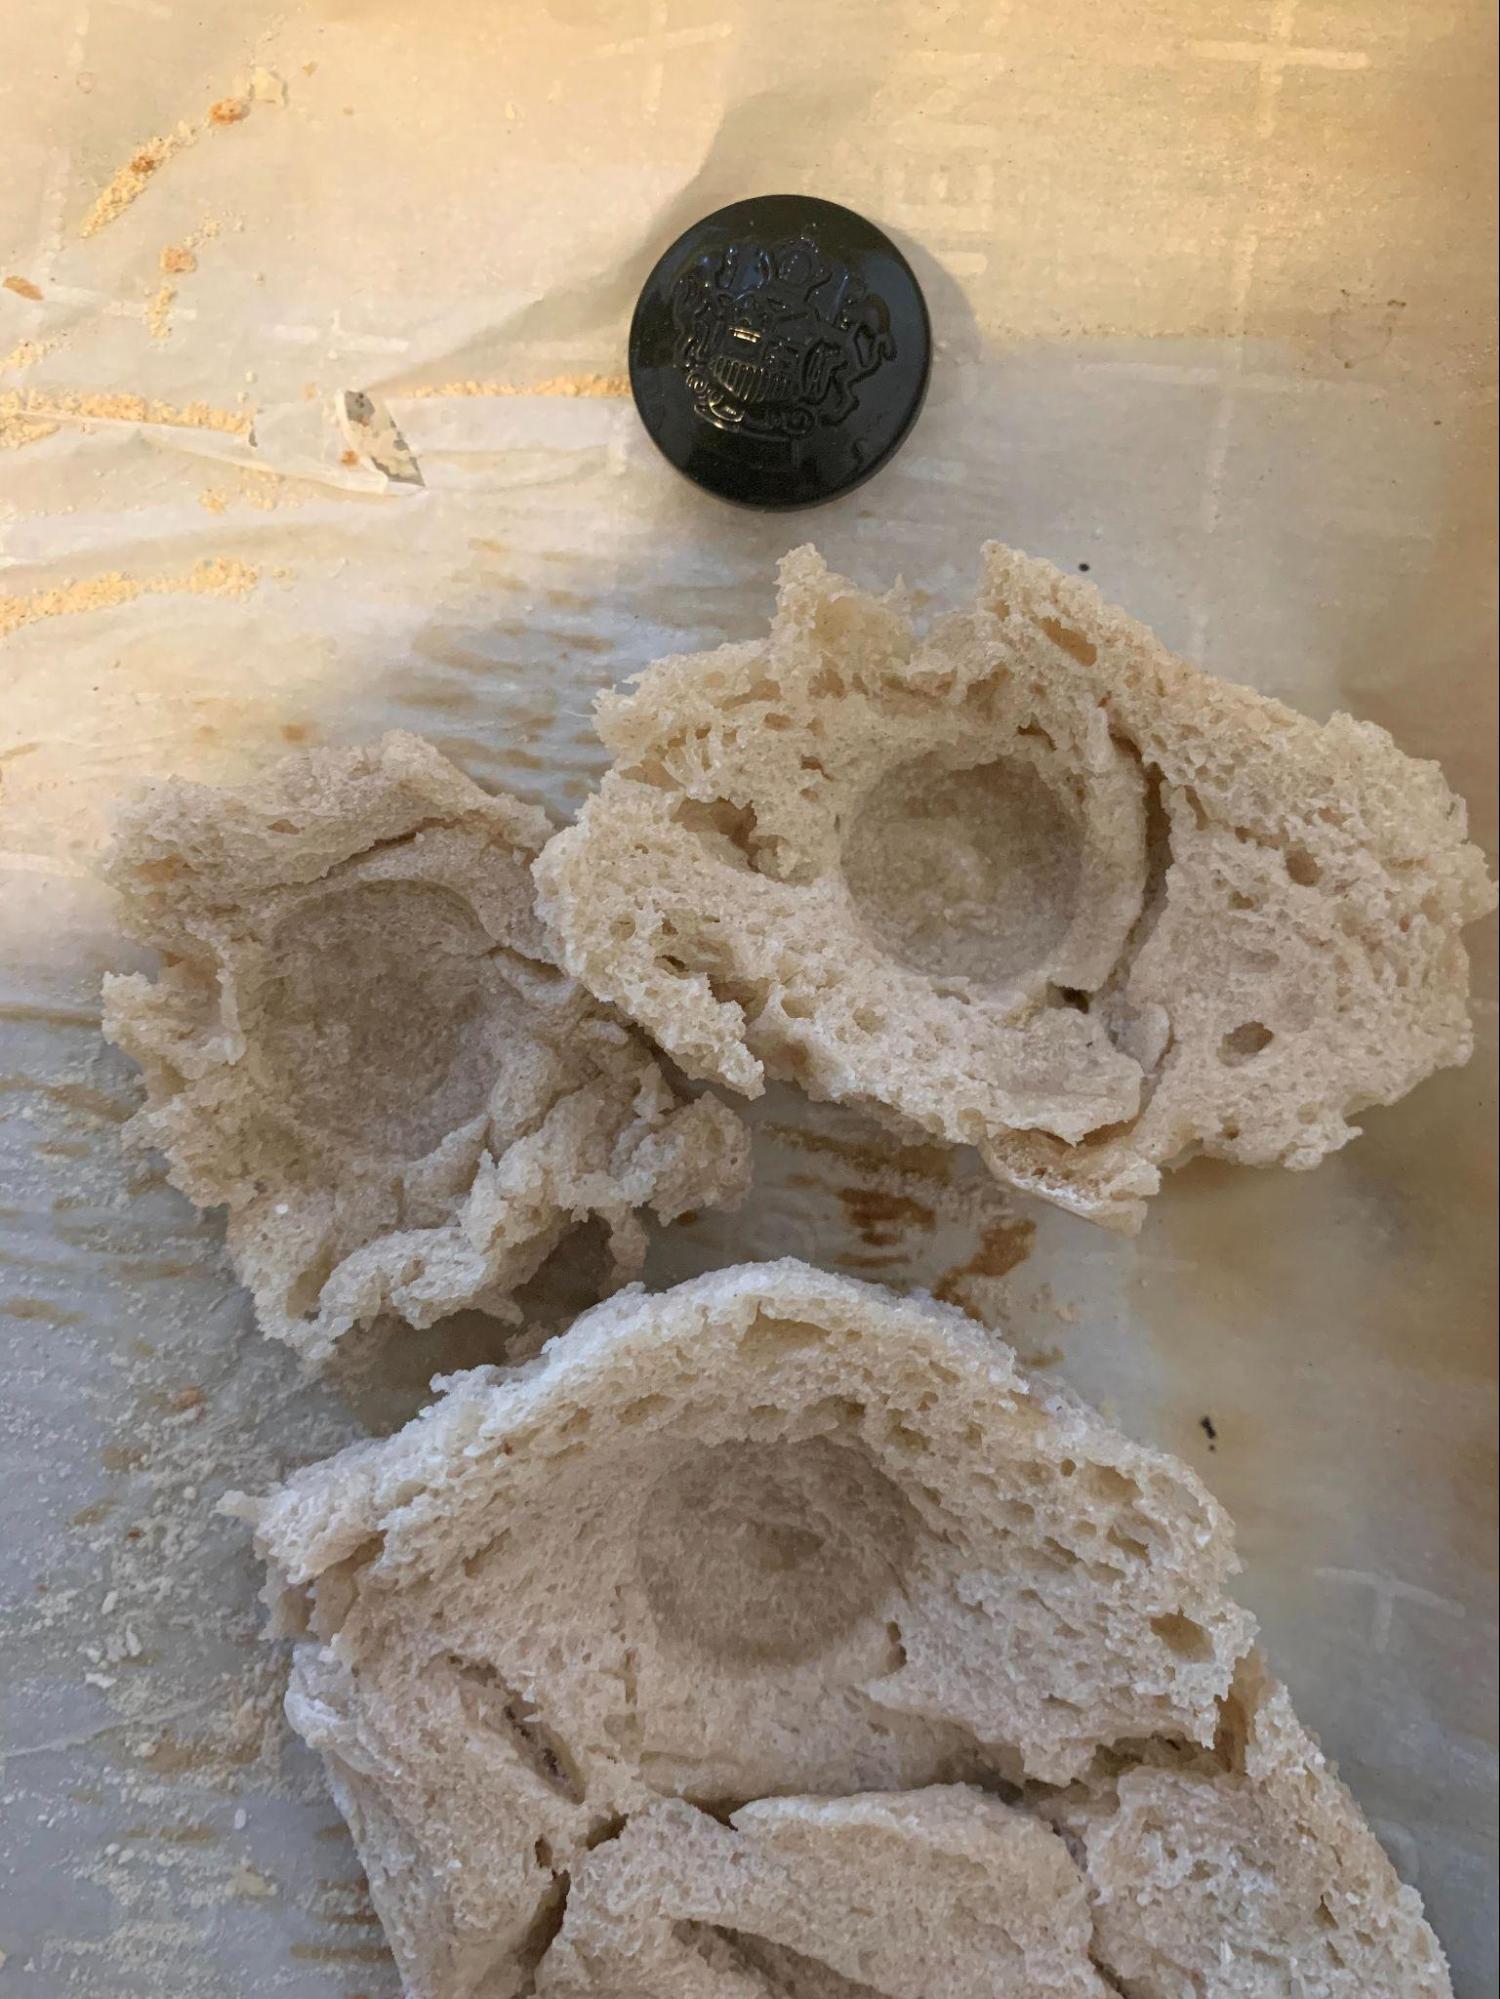
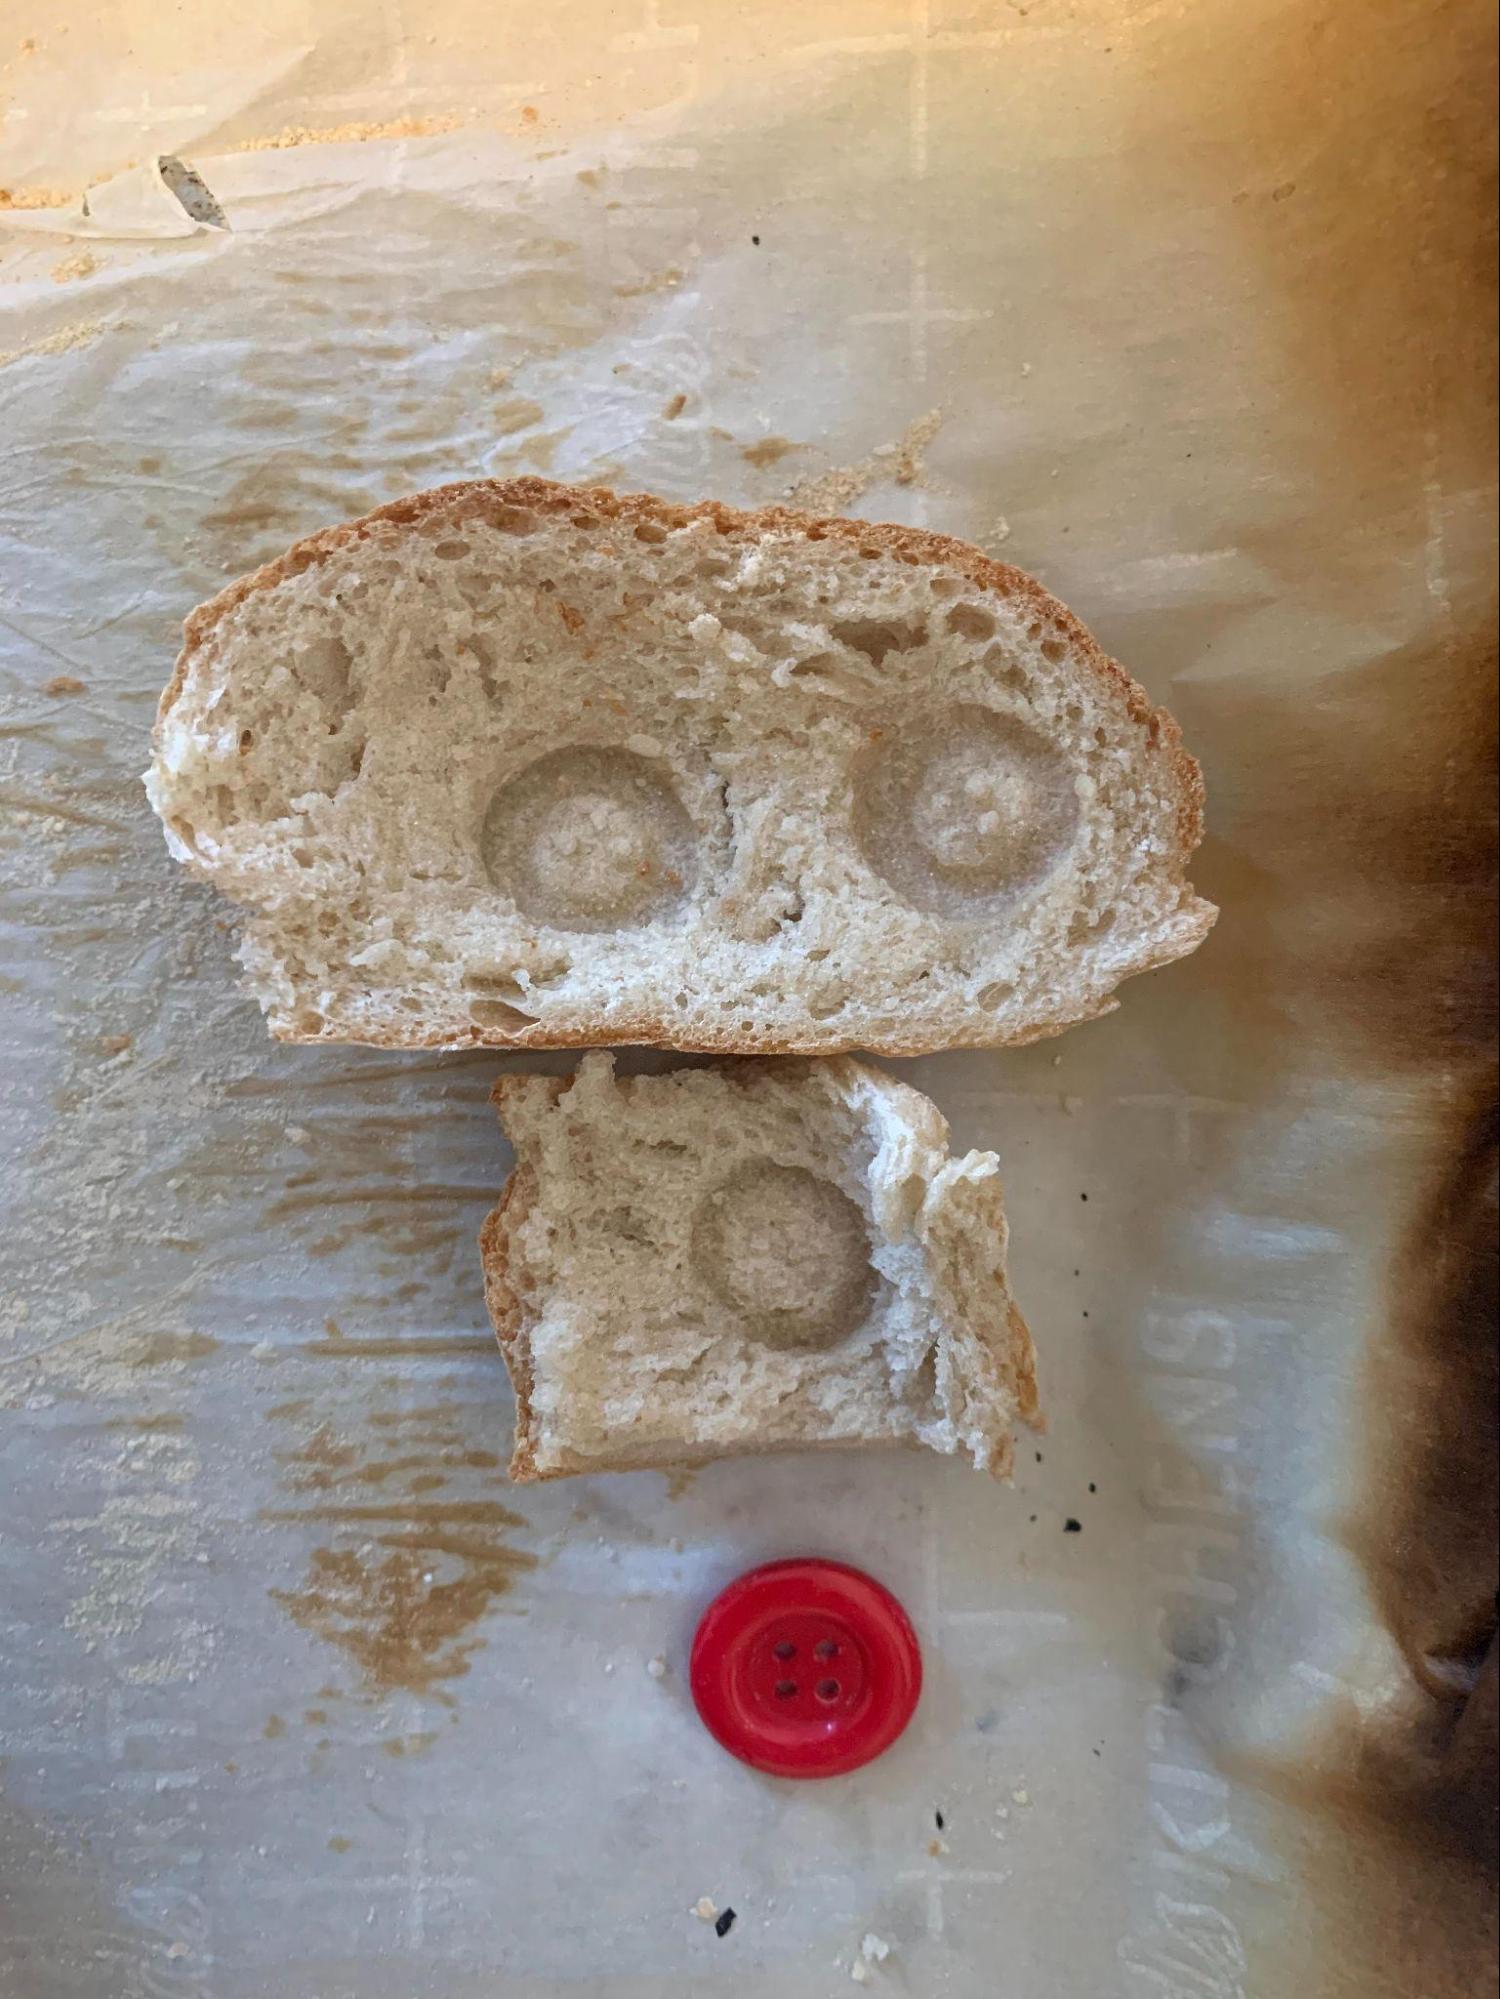
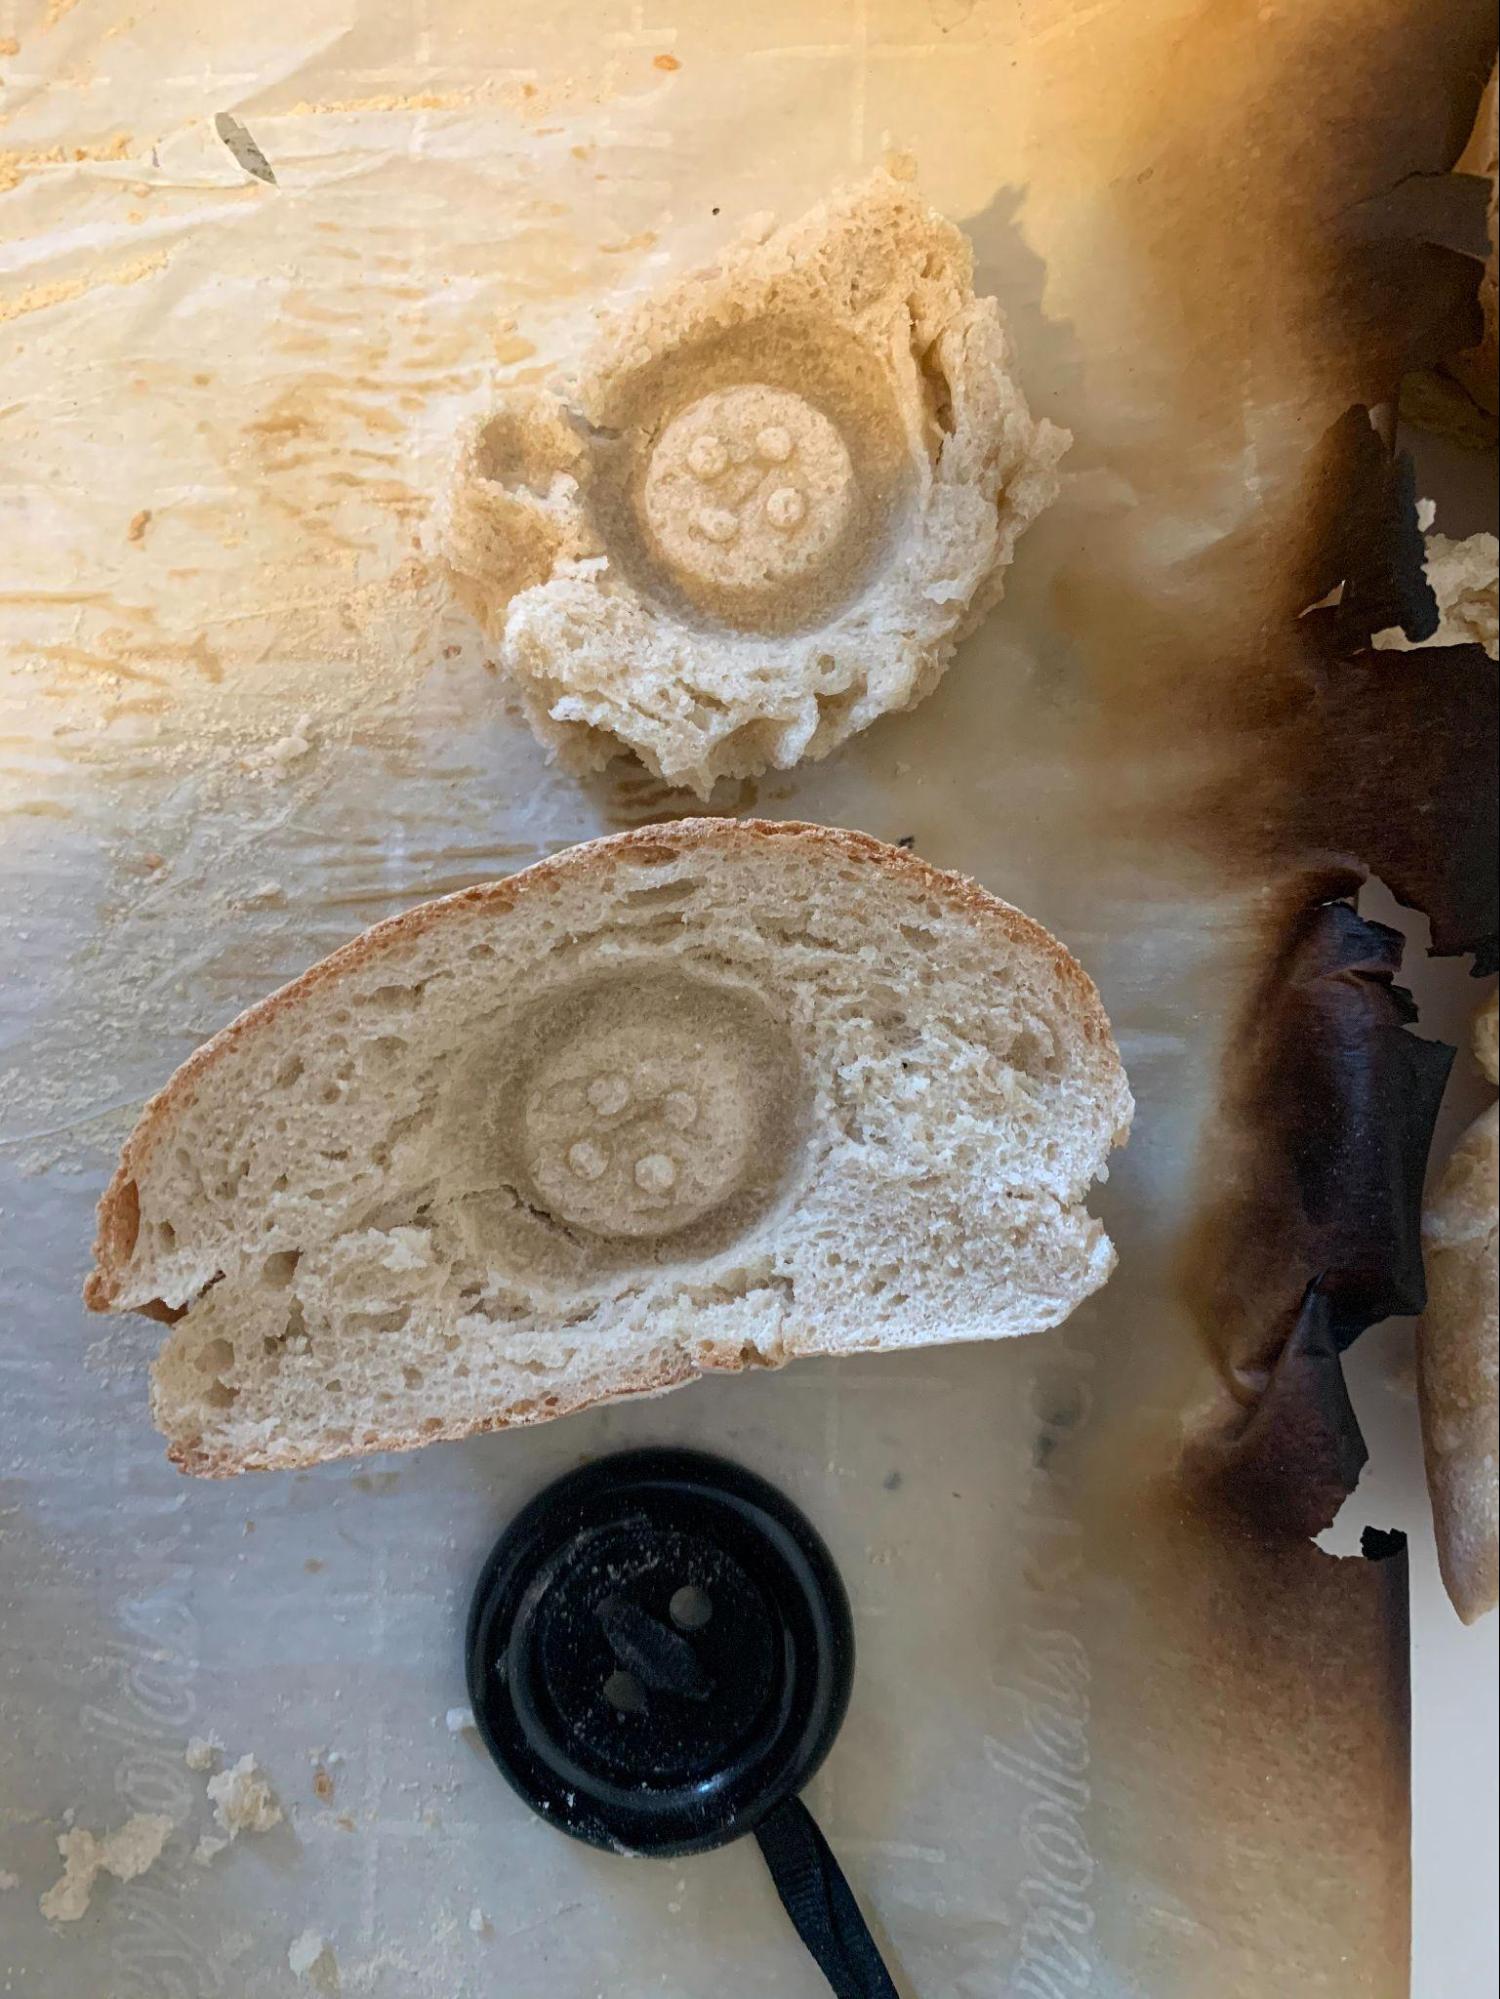
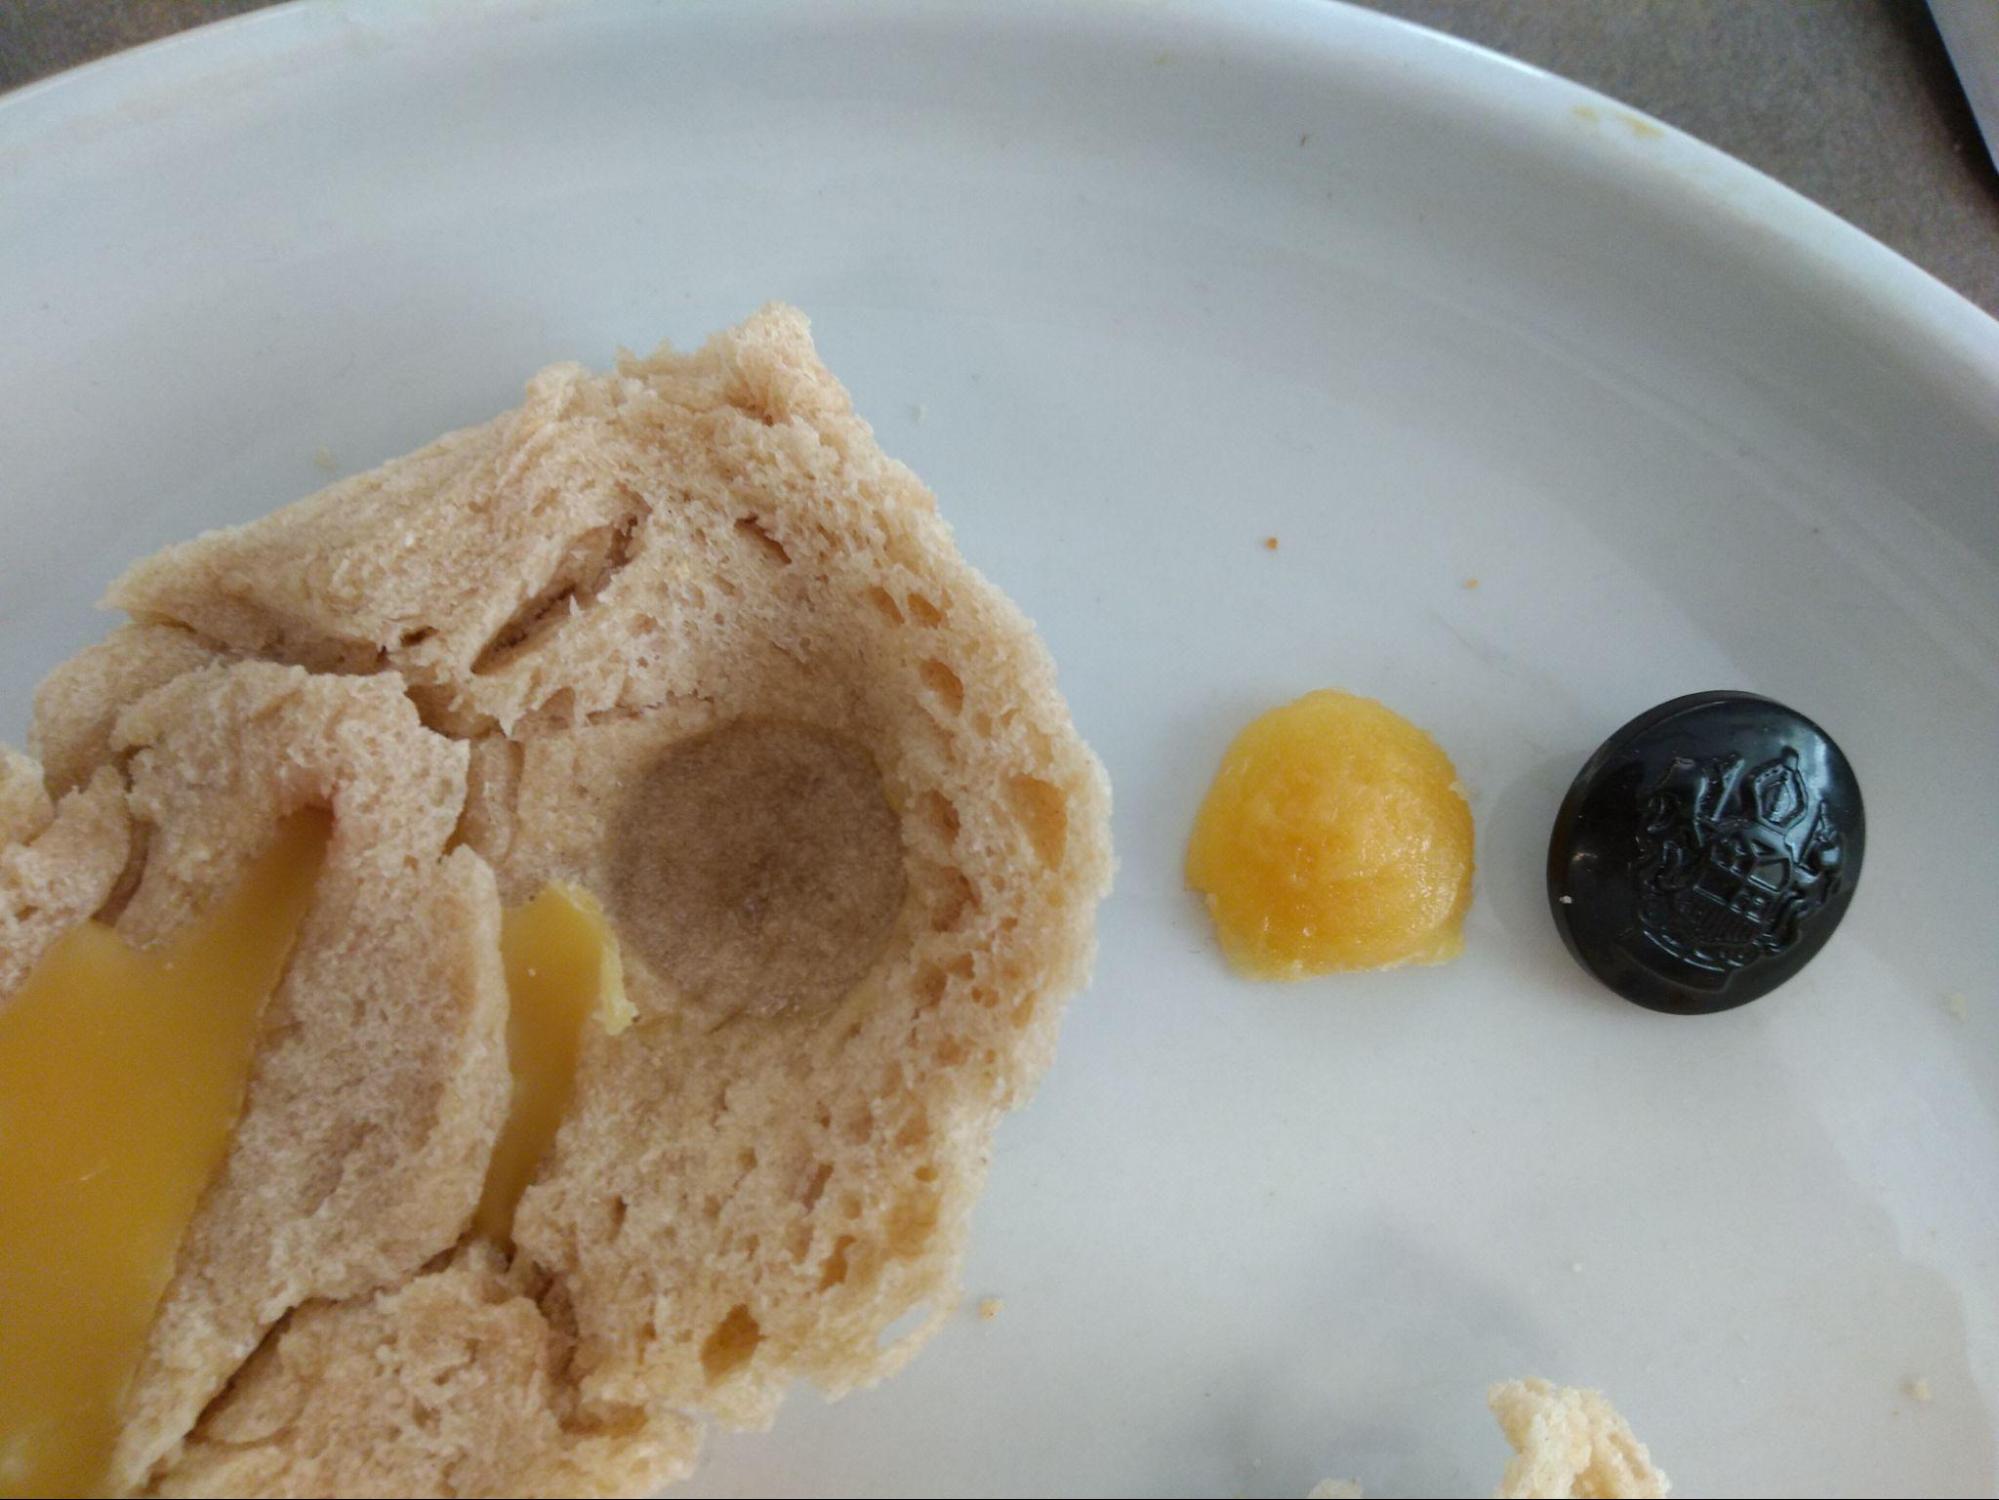
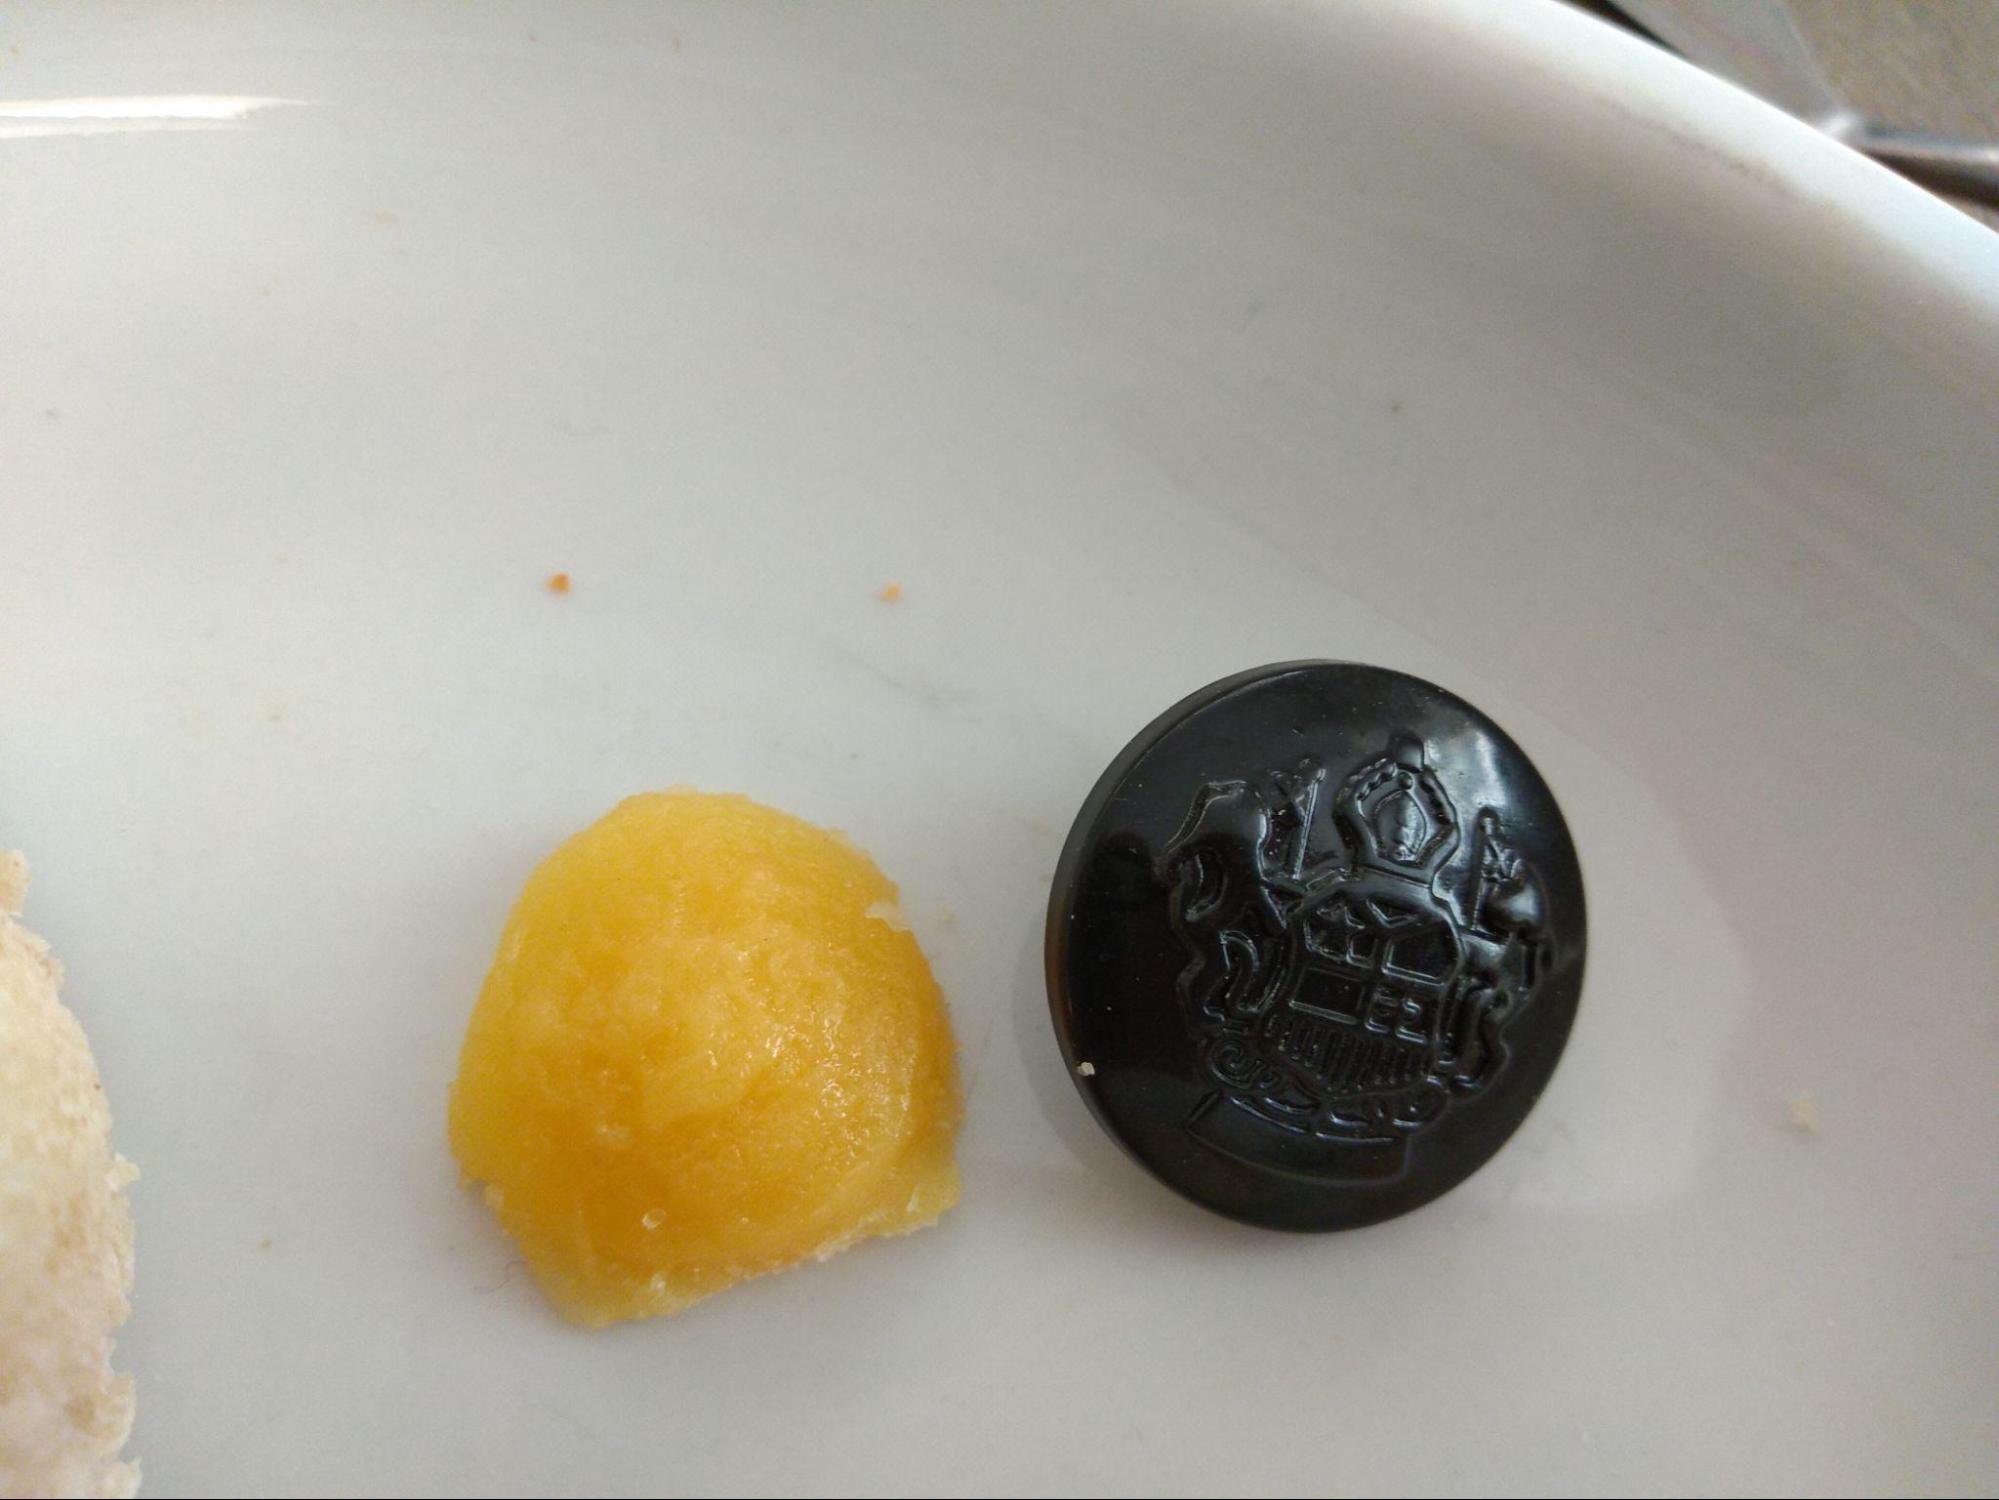
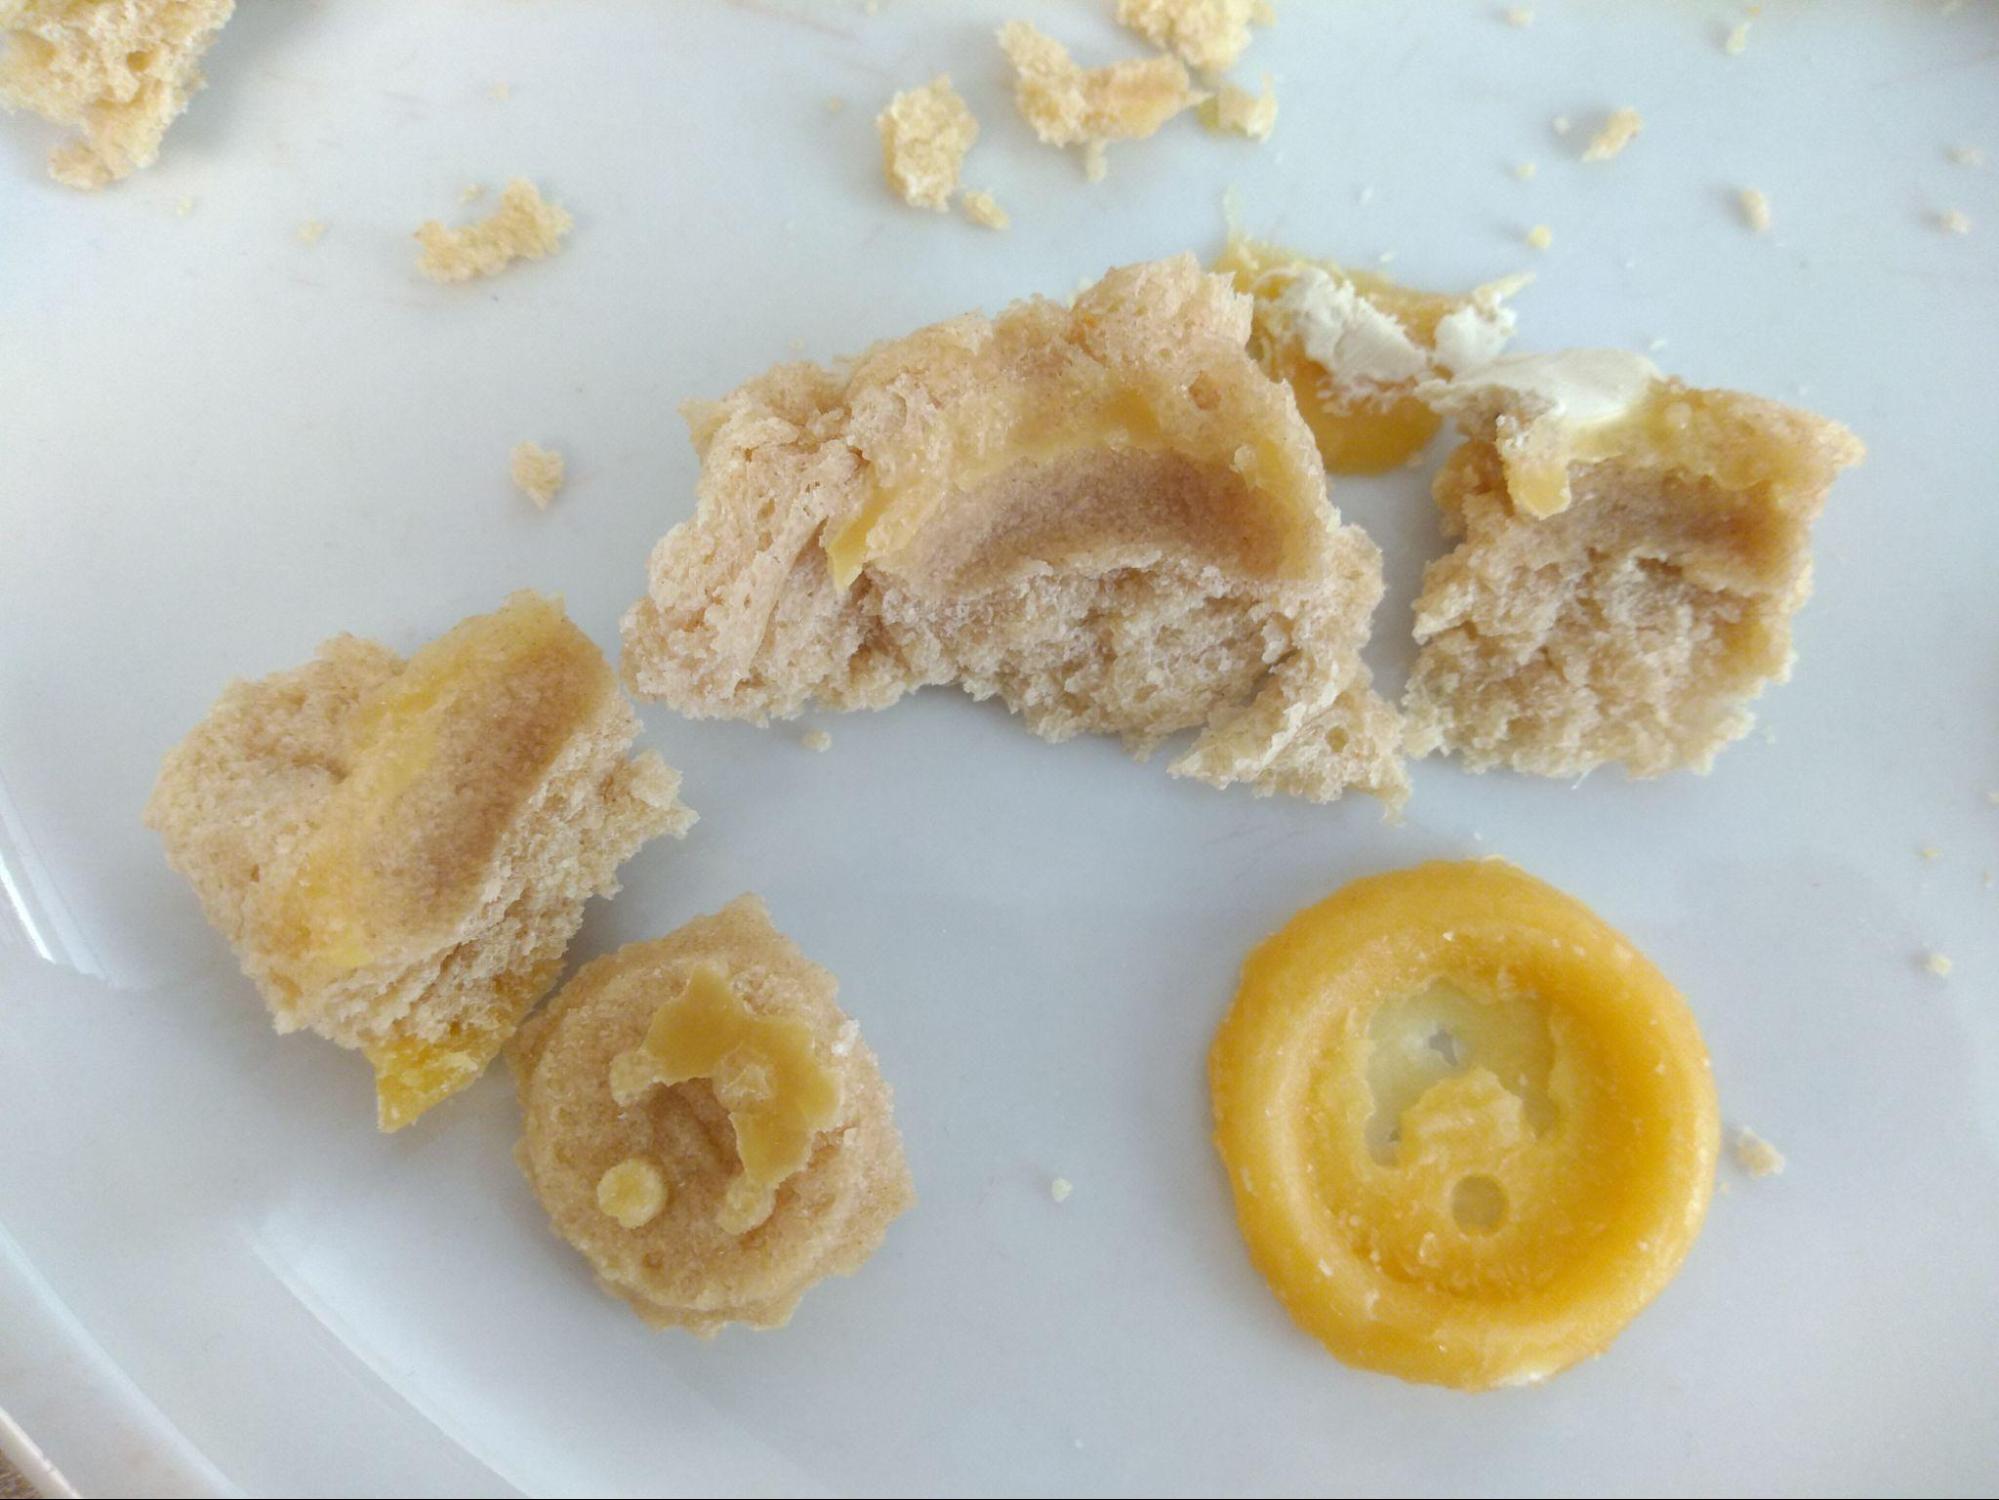
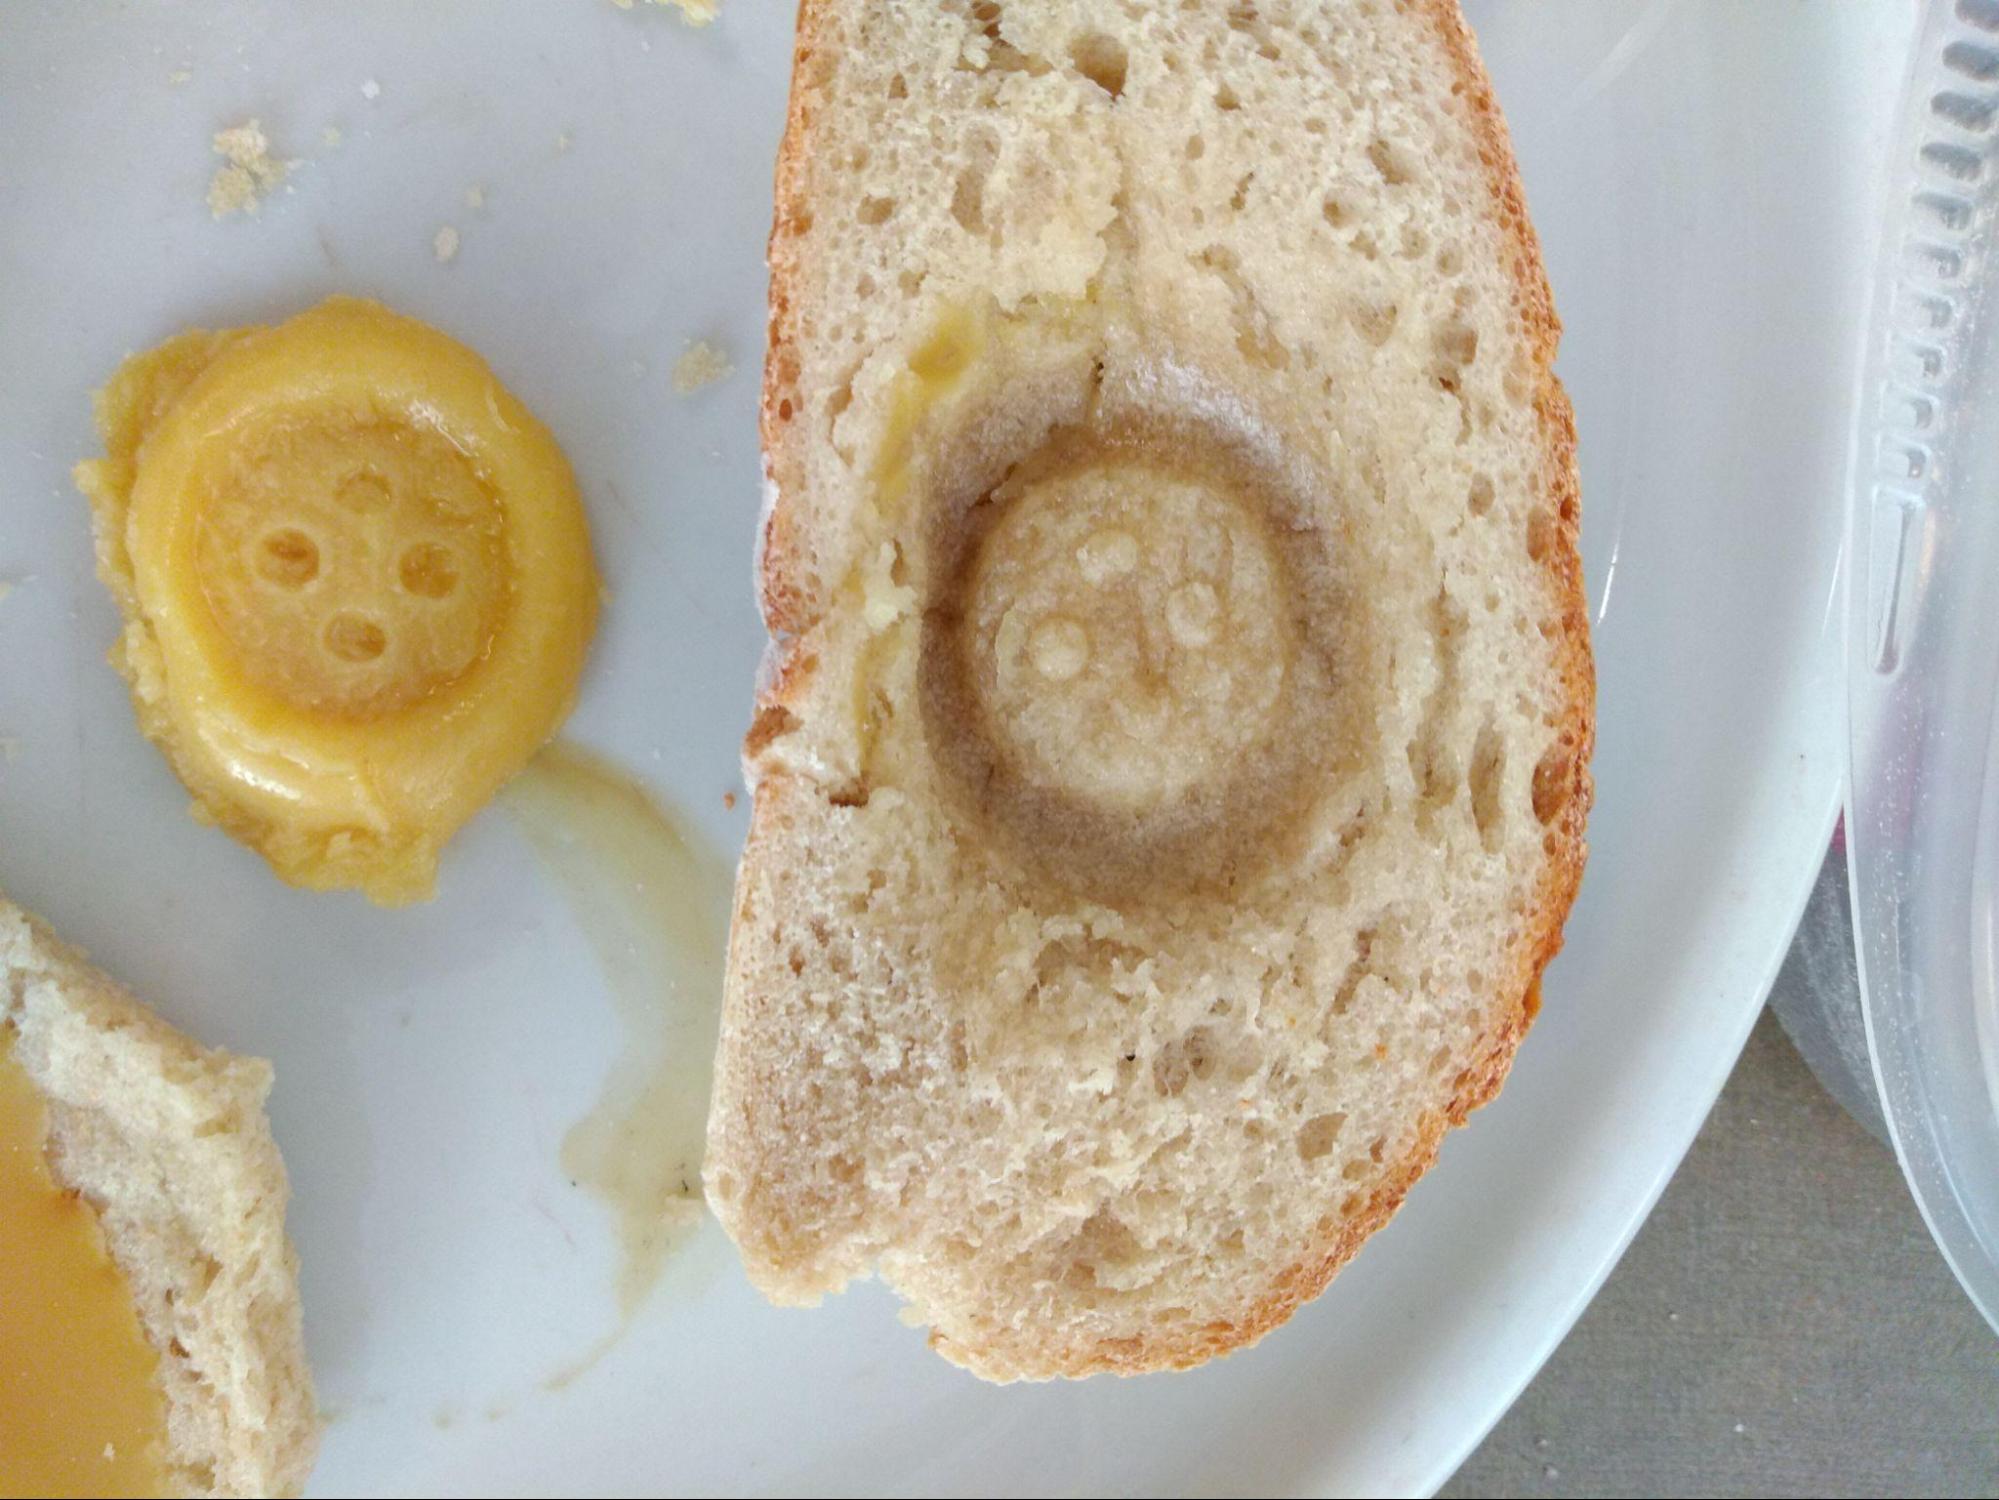
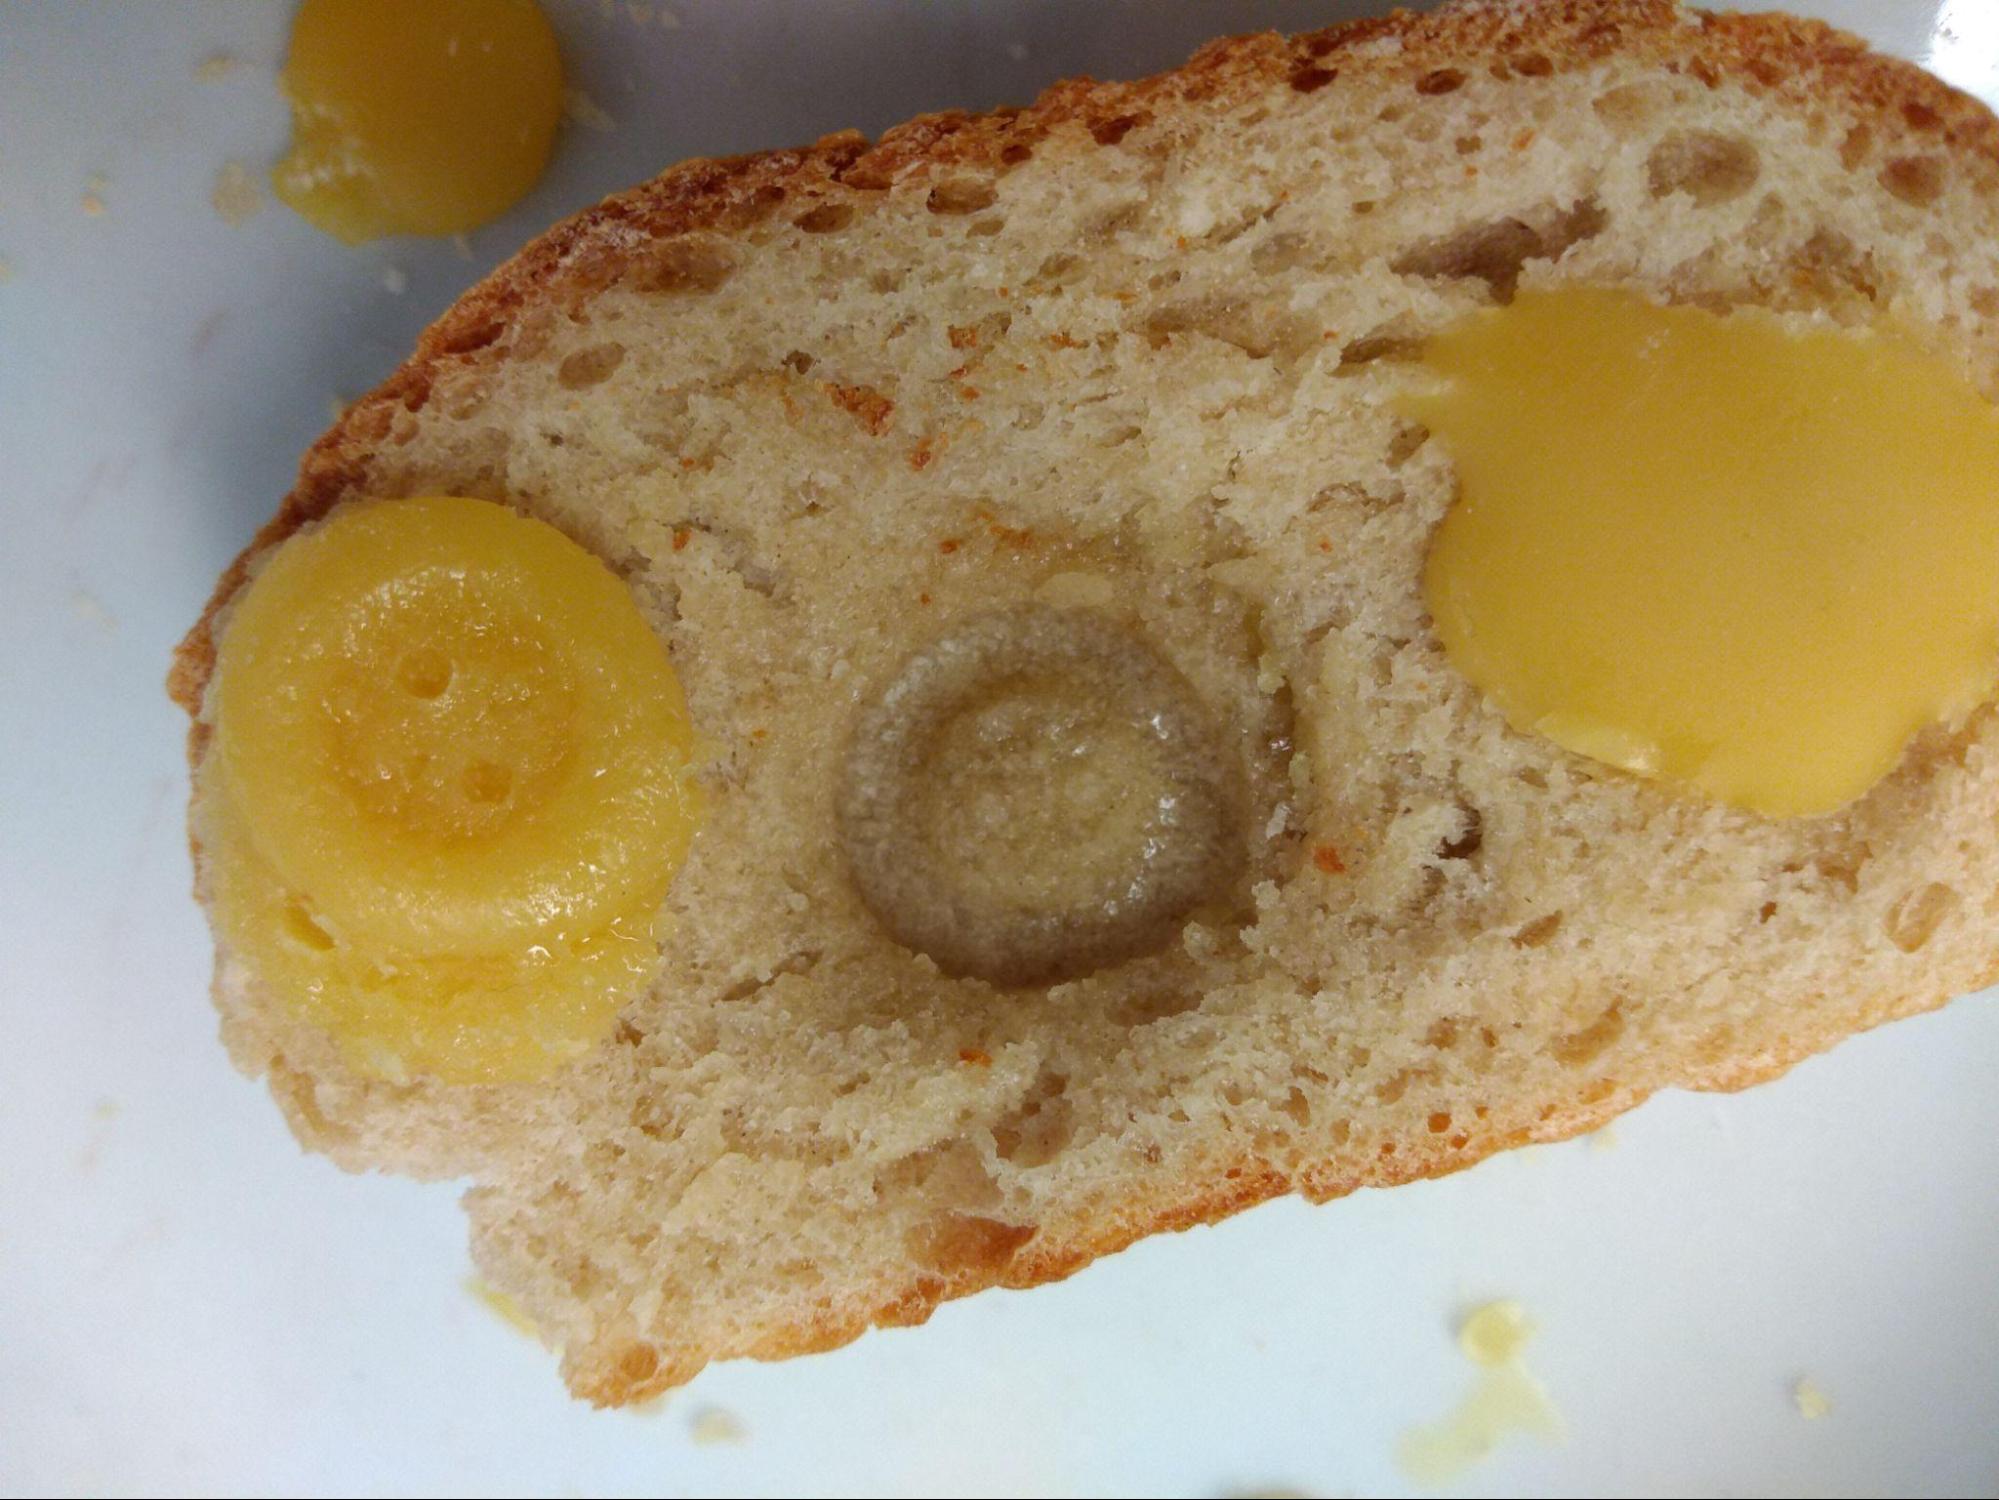
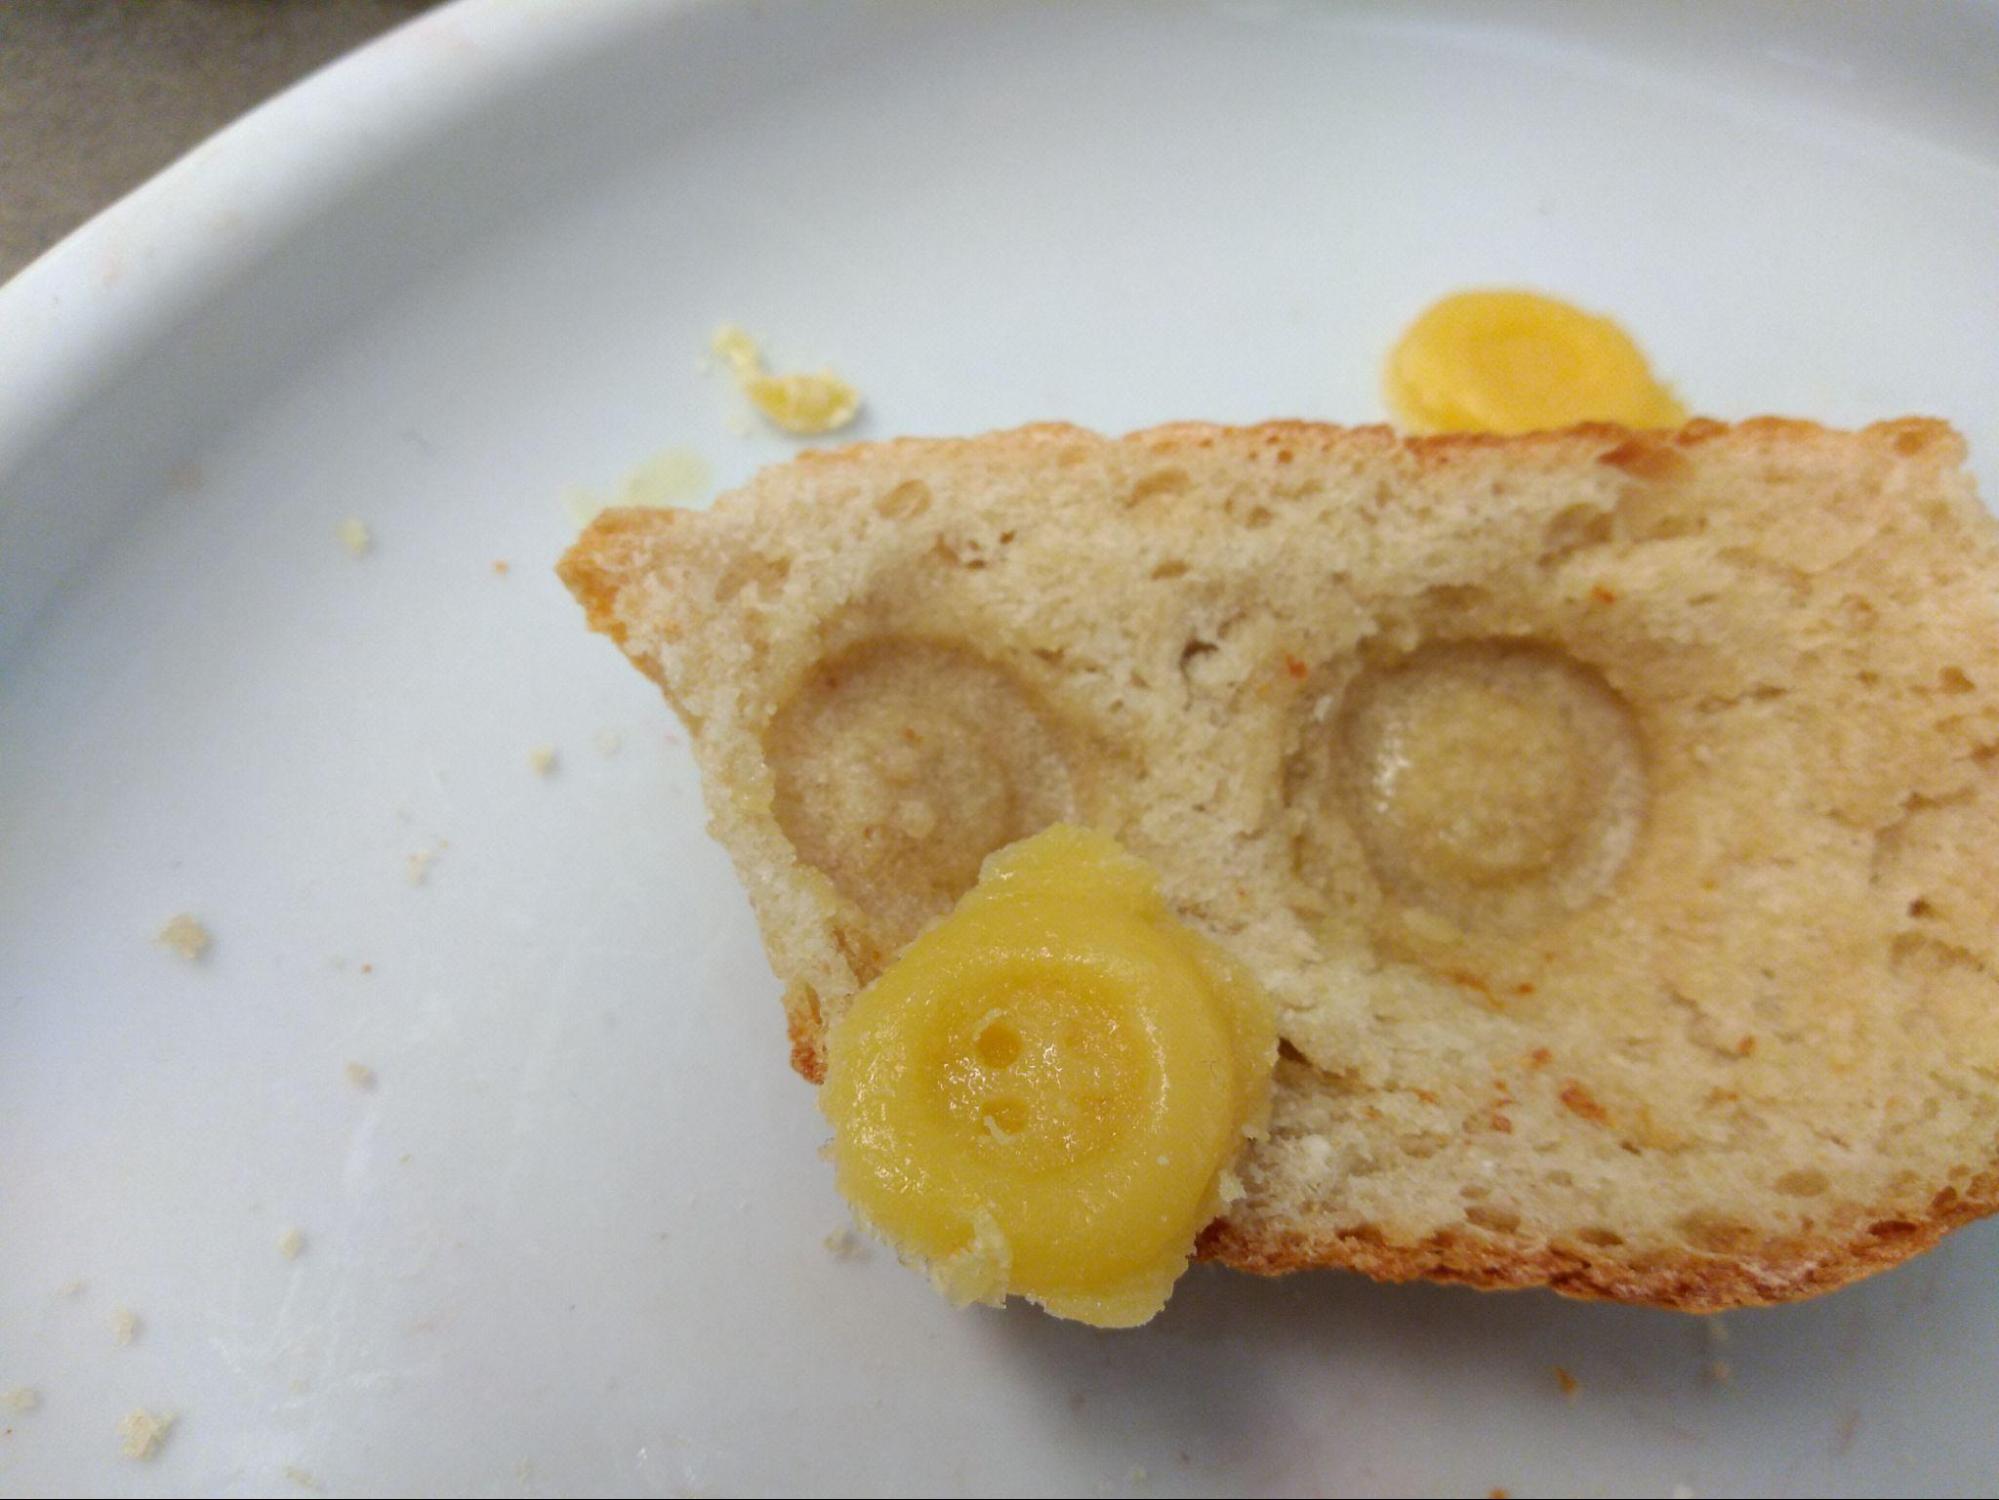
- Three buttons
- Extra large, black with four holes and an attached ribbon (~4.25cm diameter)
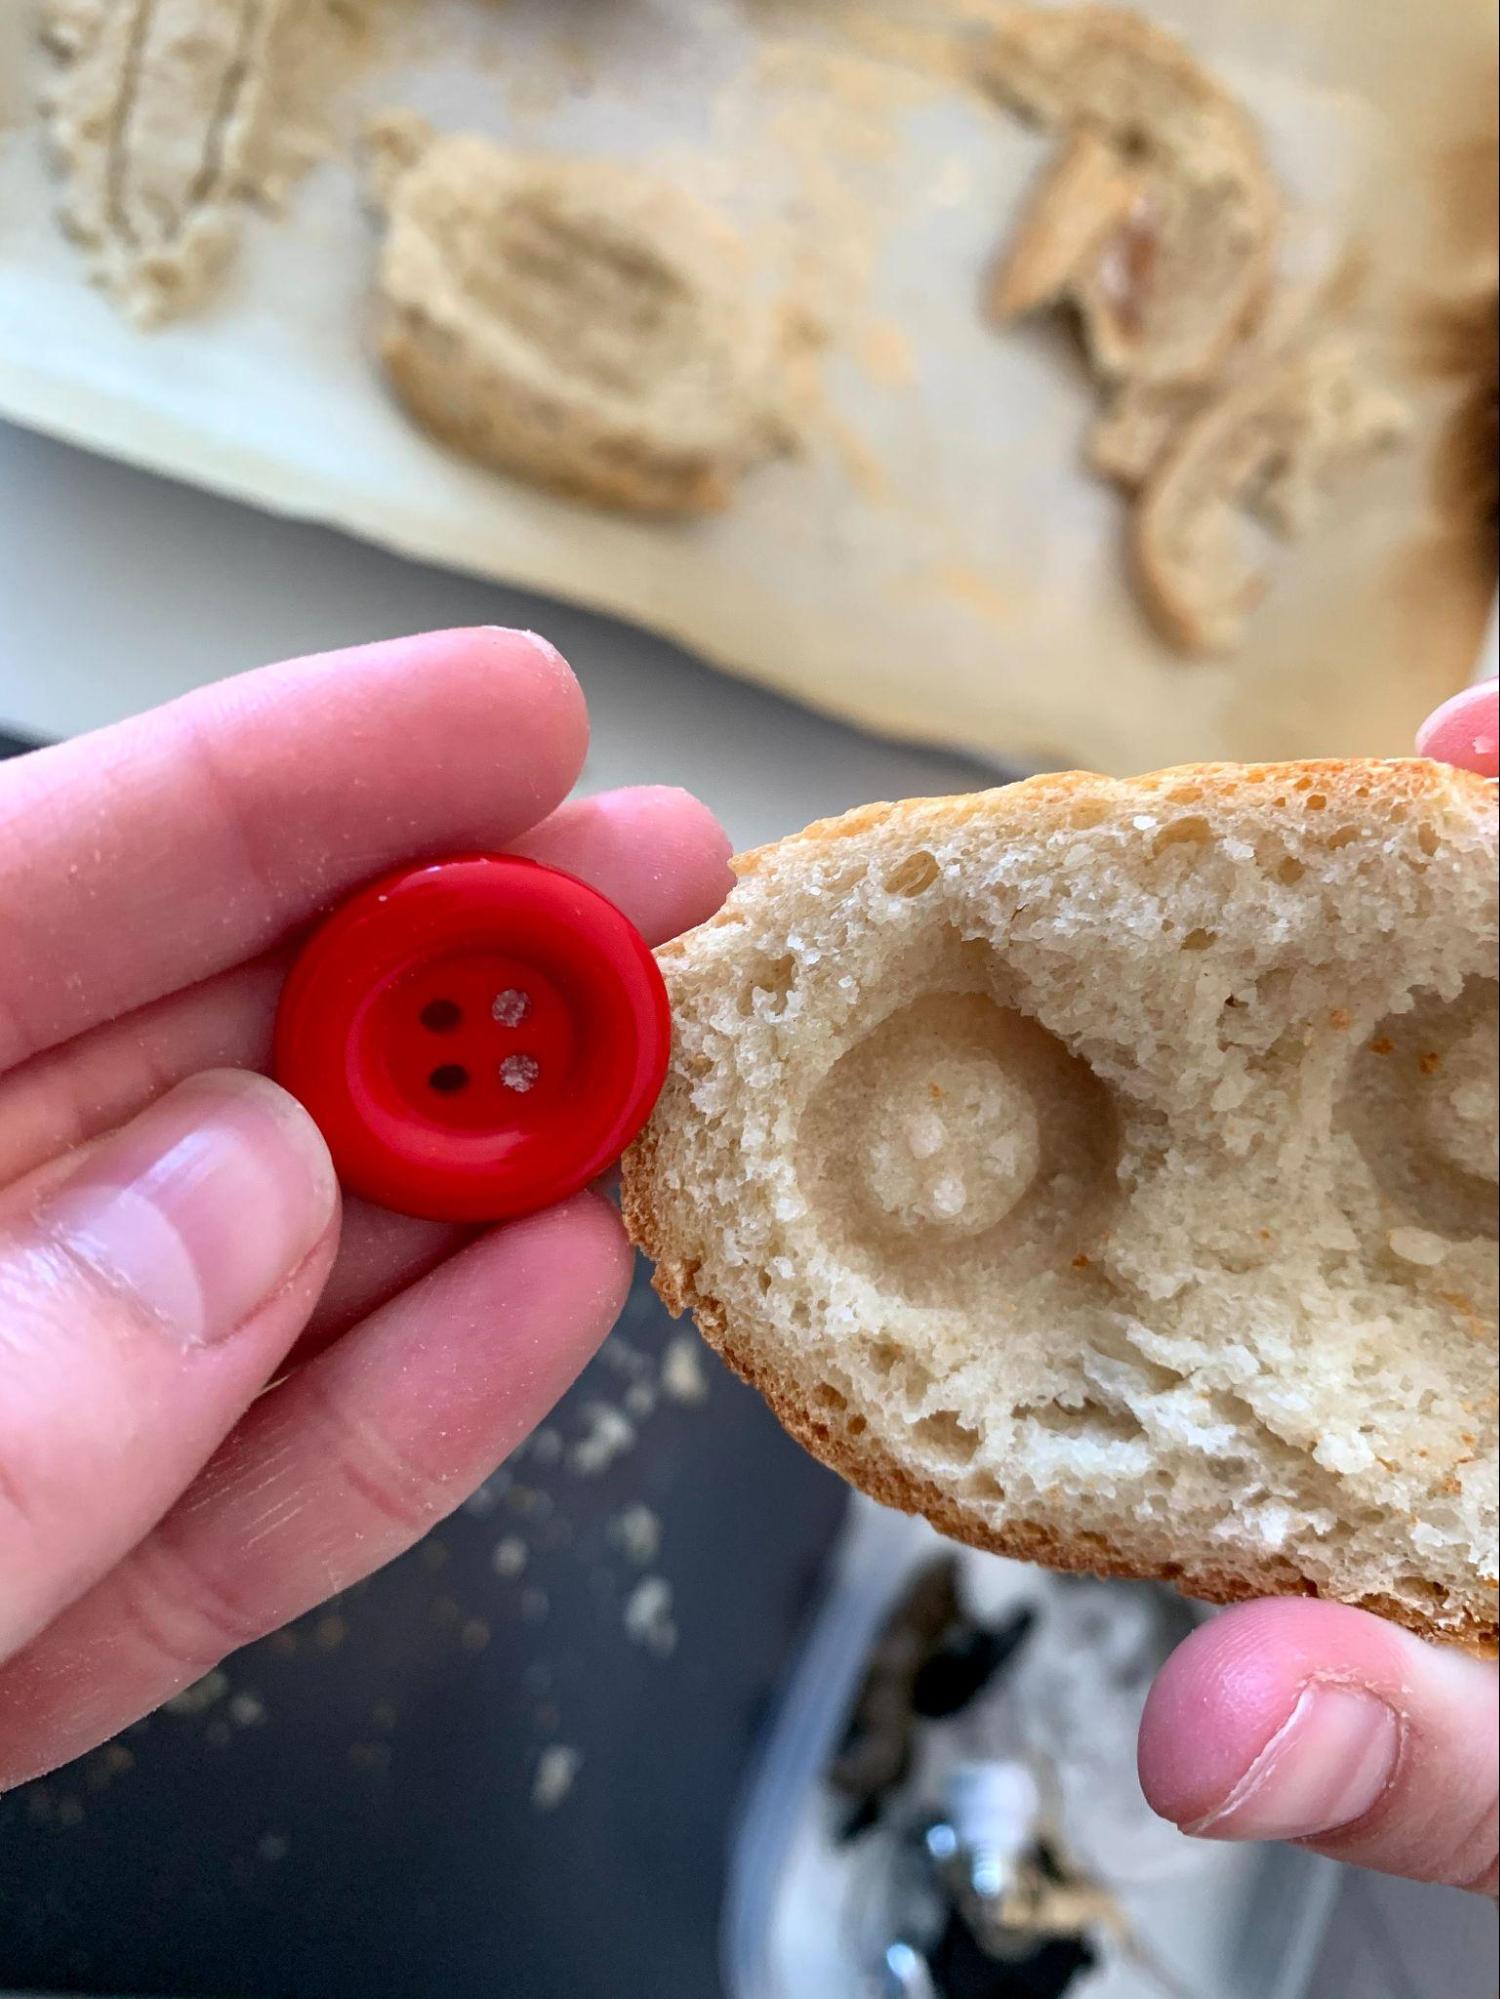
- Large, red with four holes (~2.25cm diameter)
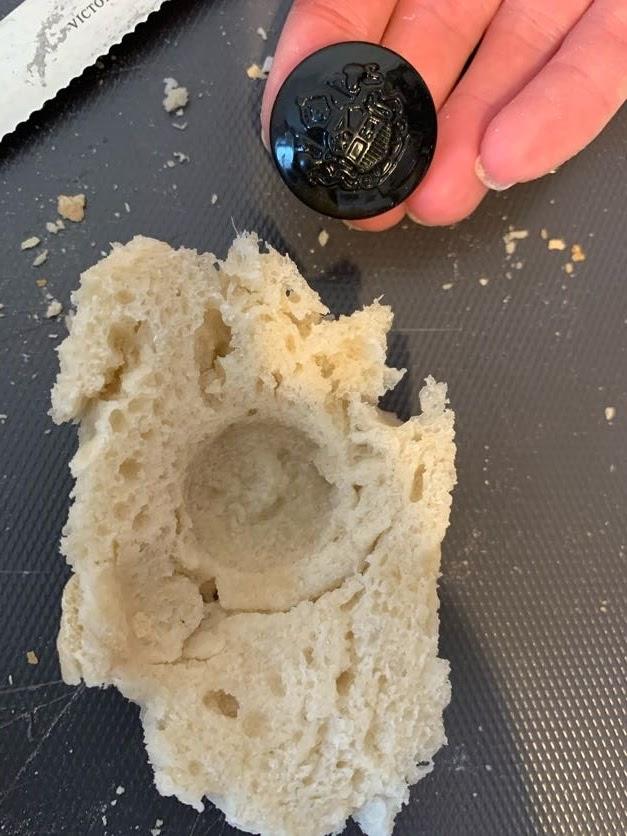
- Large, black with coat of arms design (~2.5cm diameter)
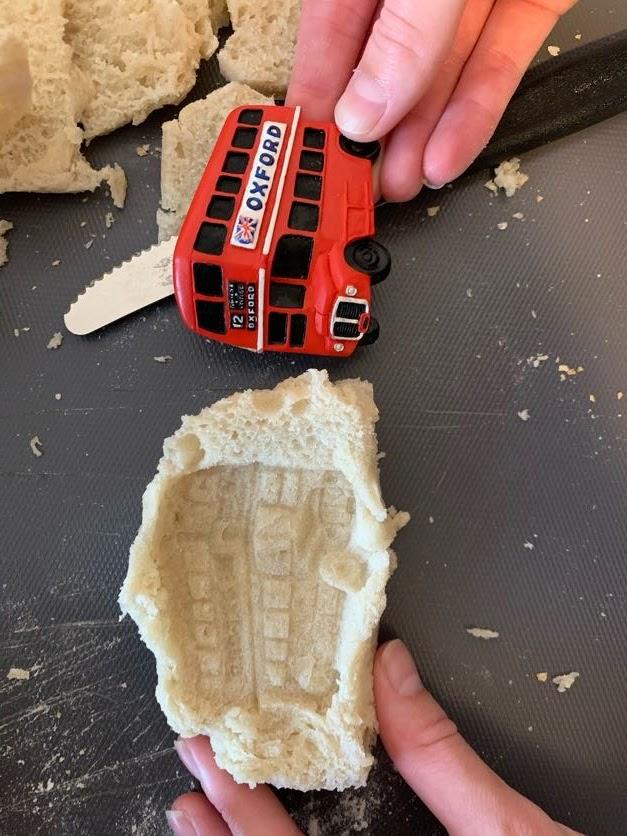
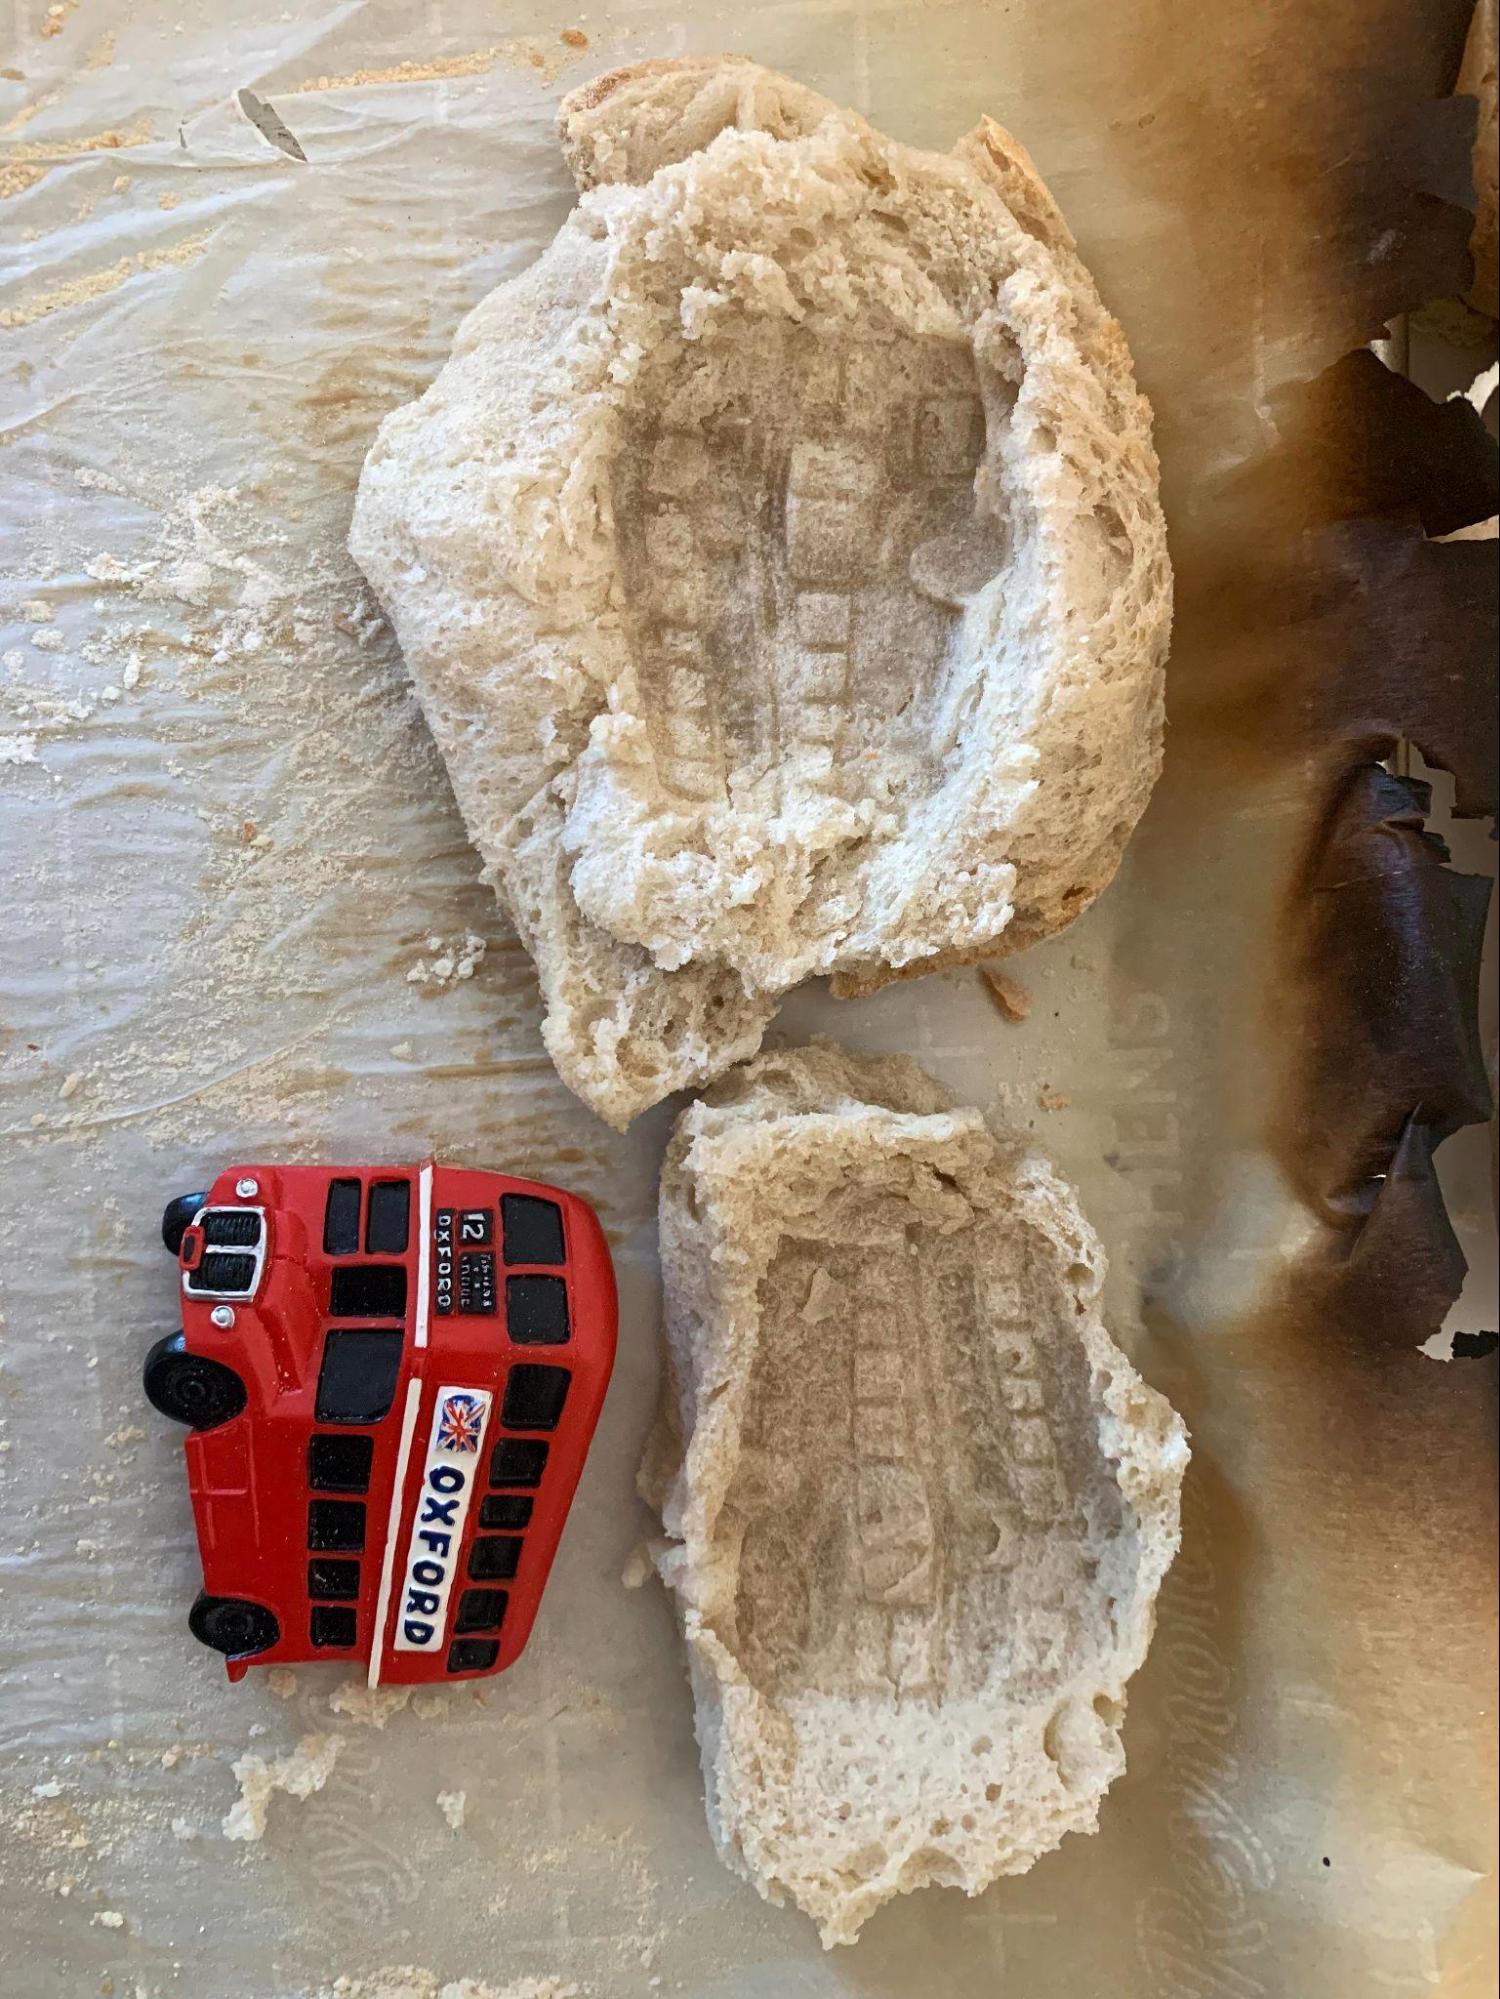
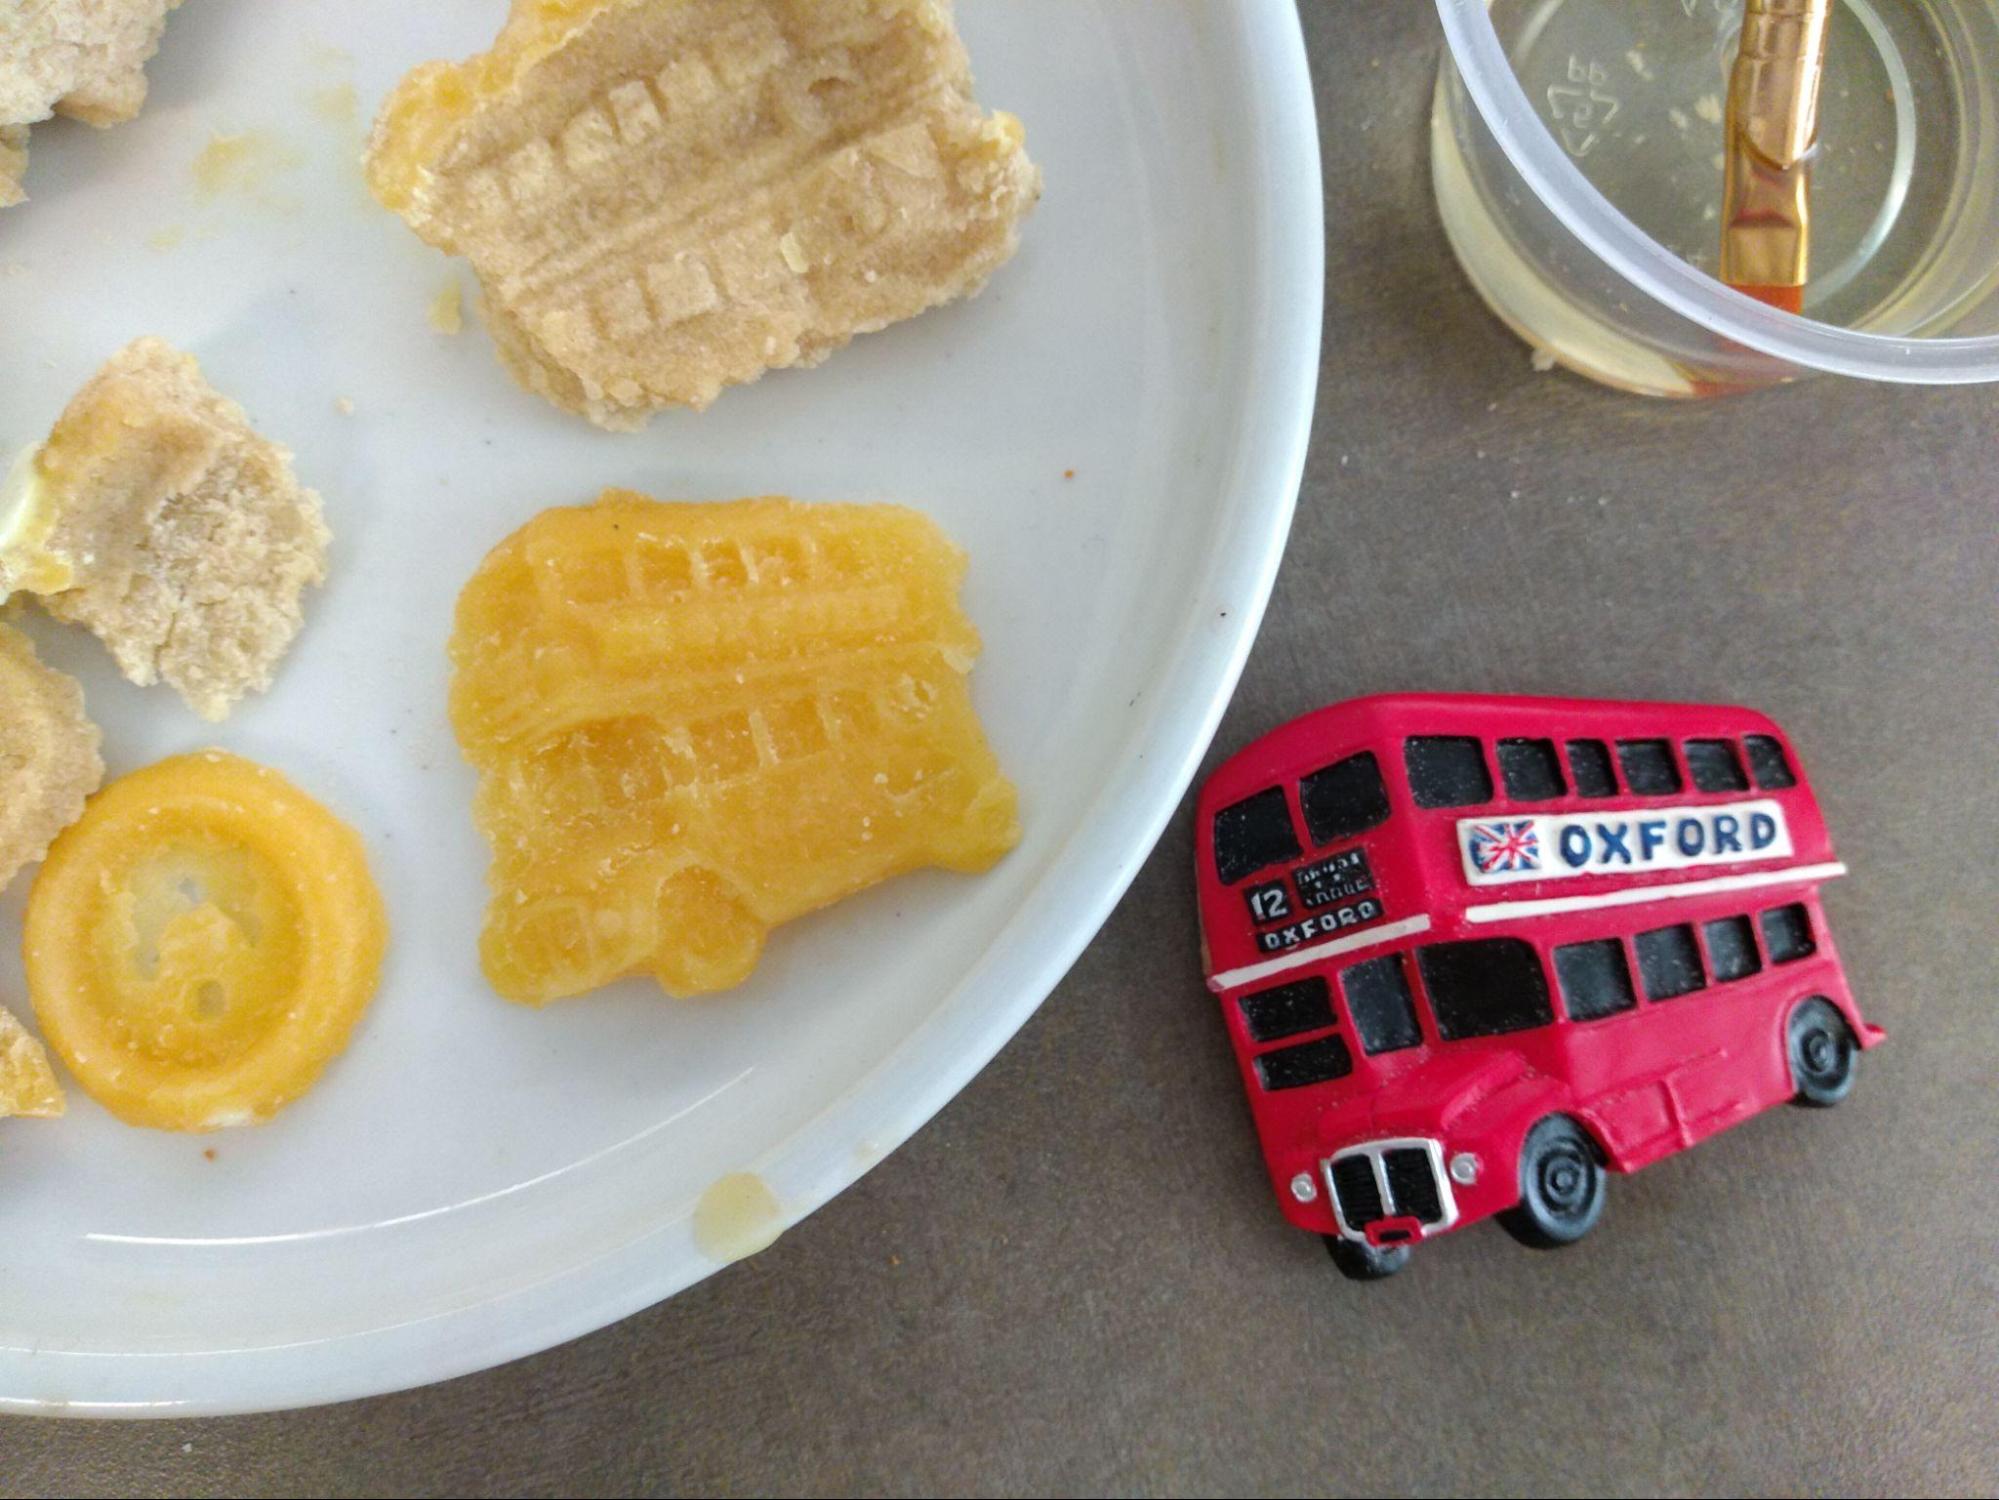
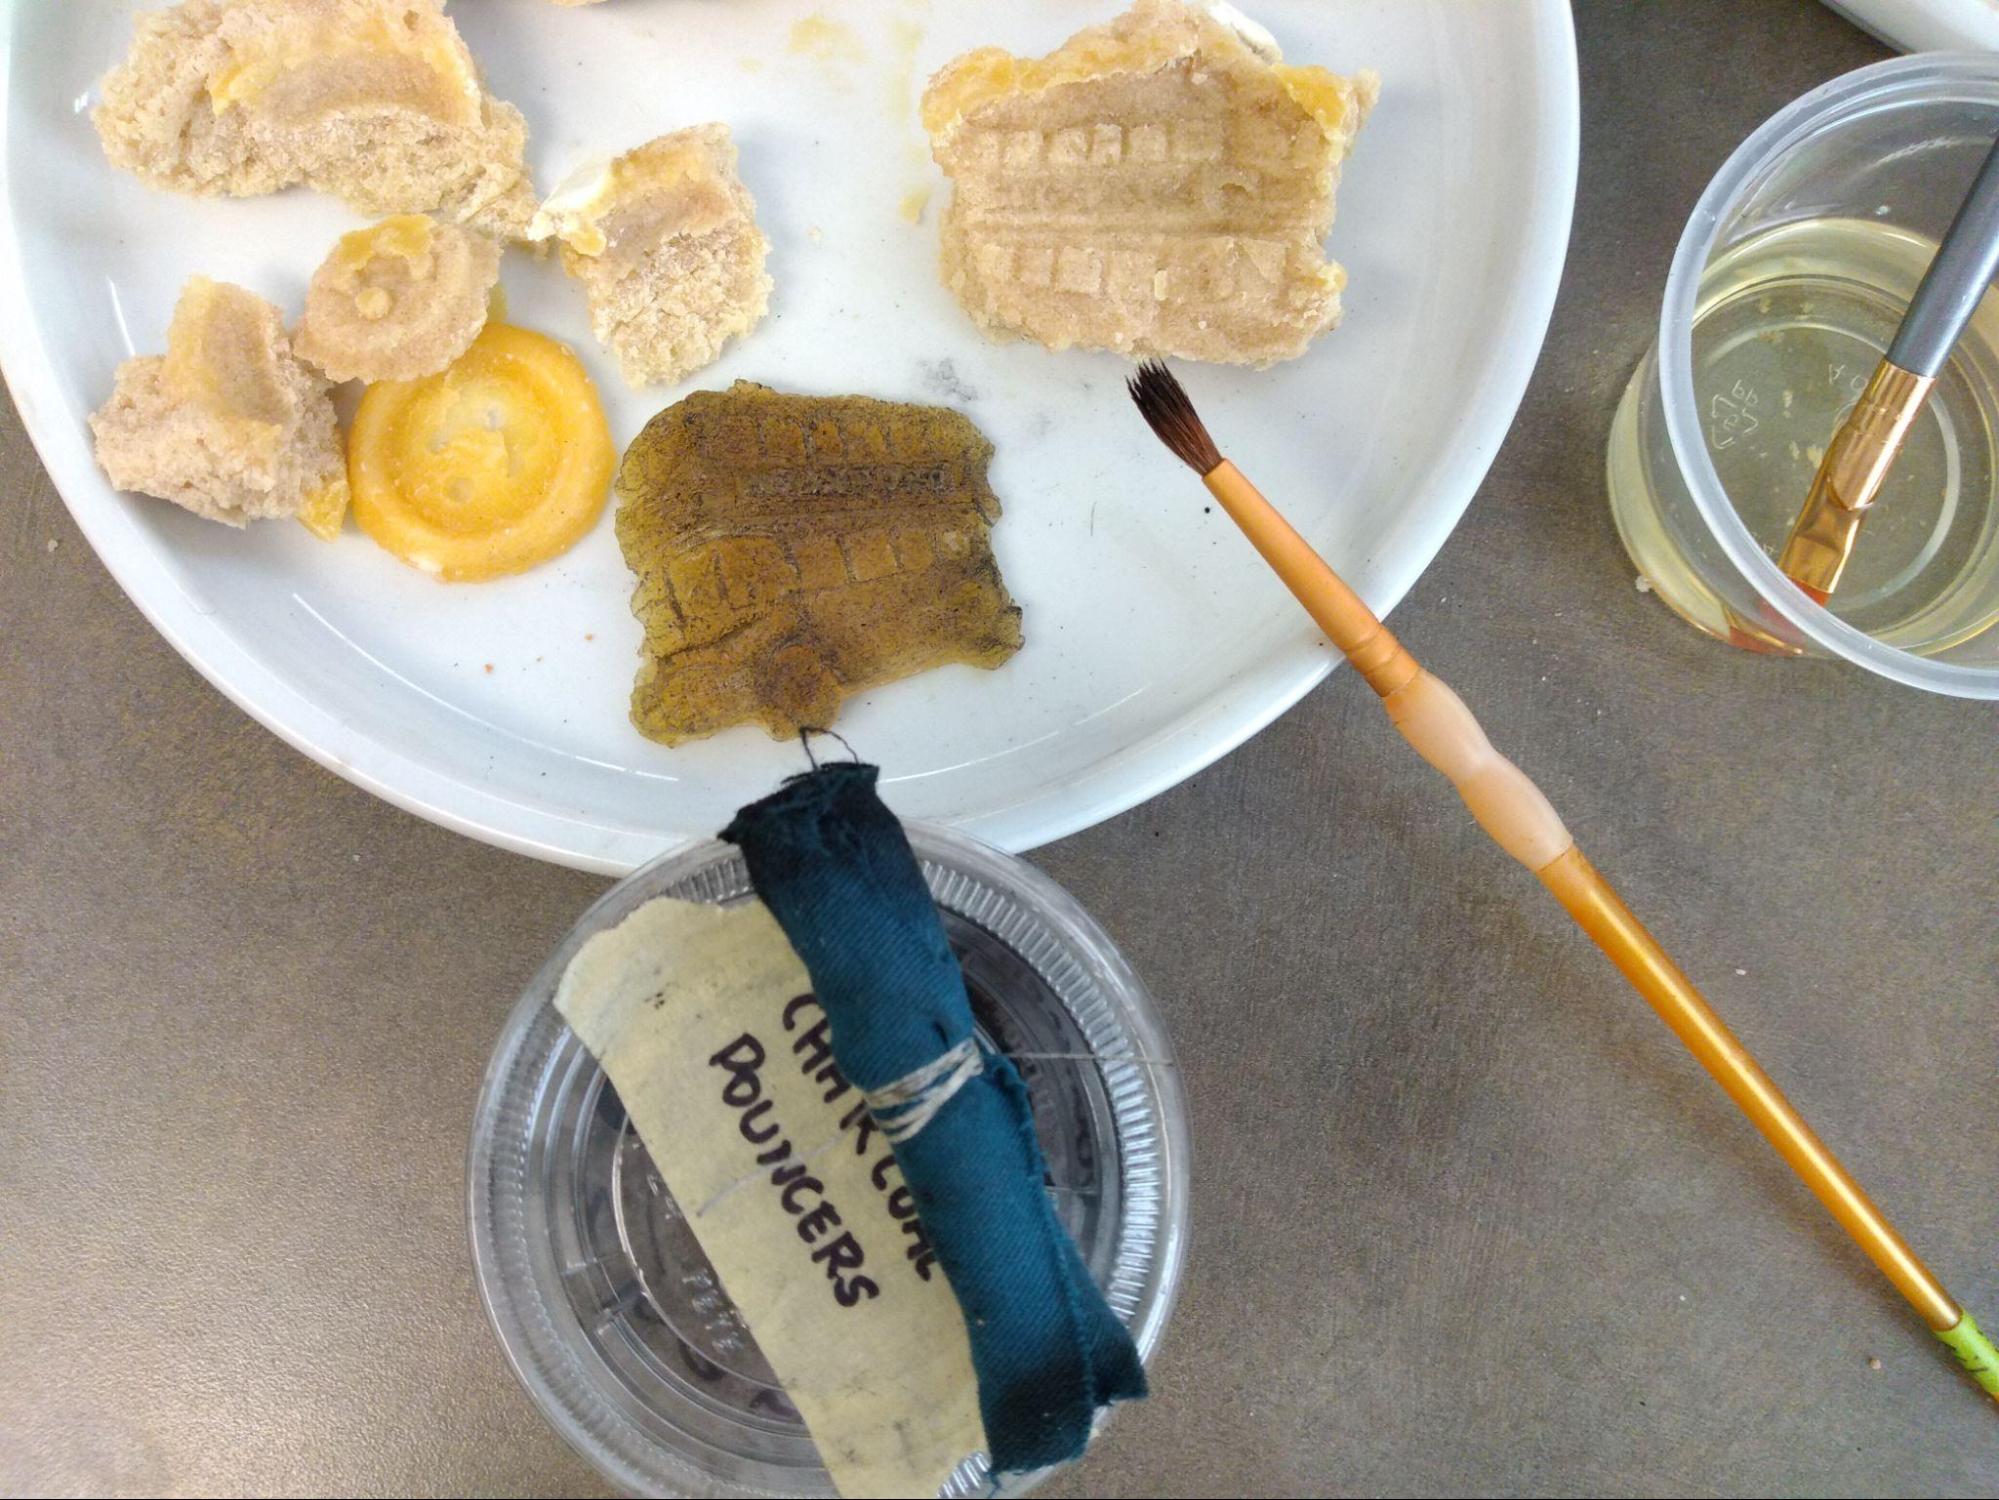
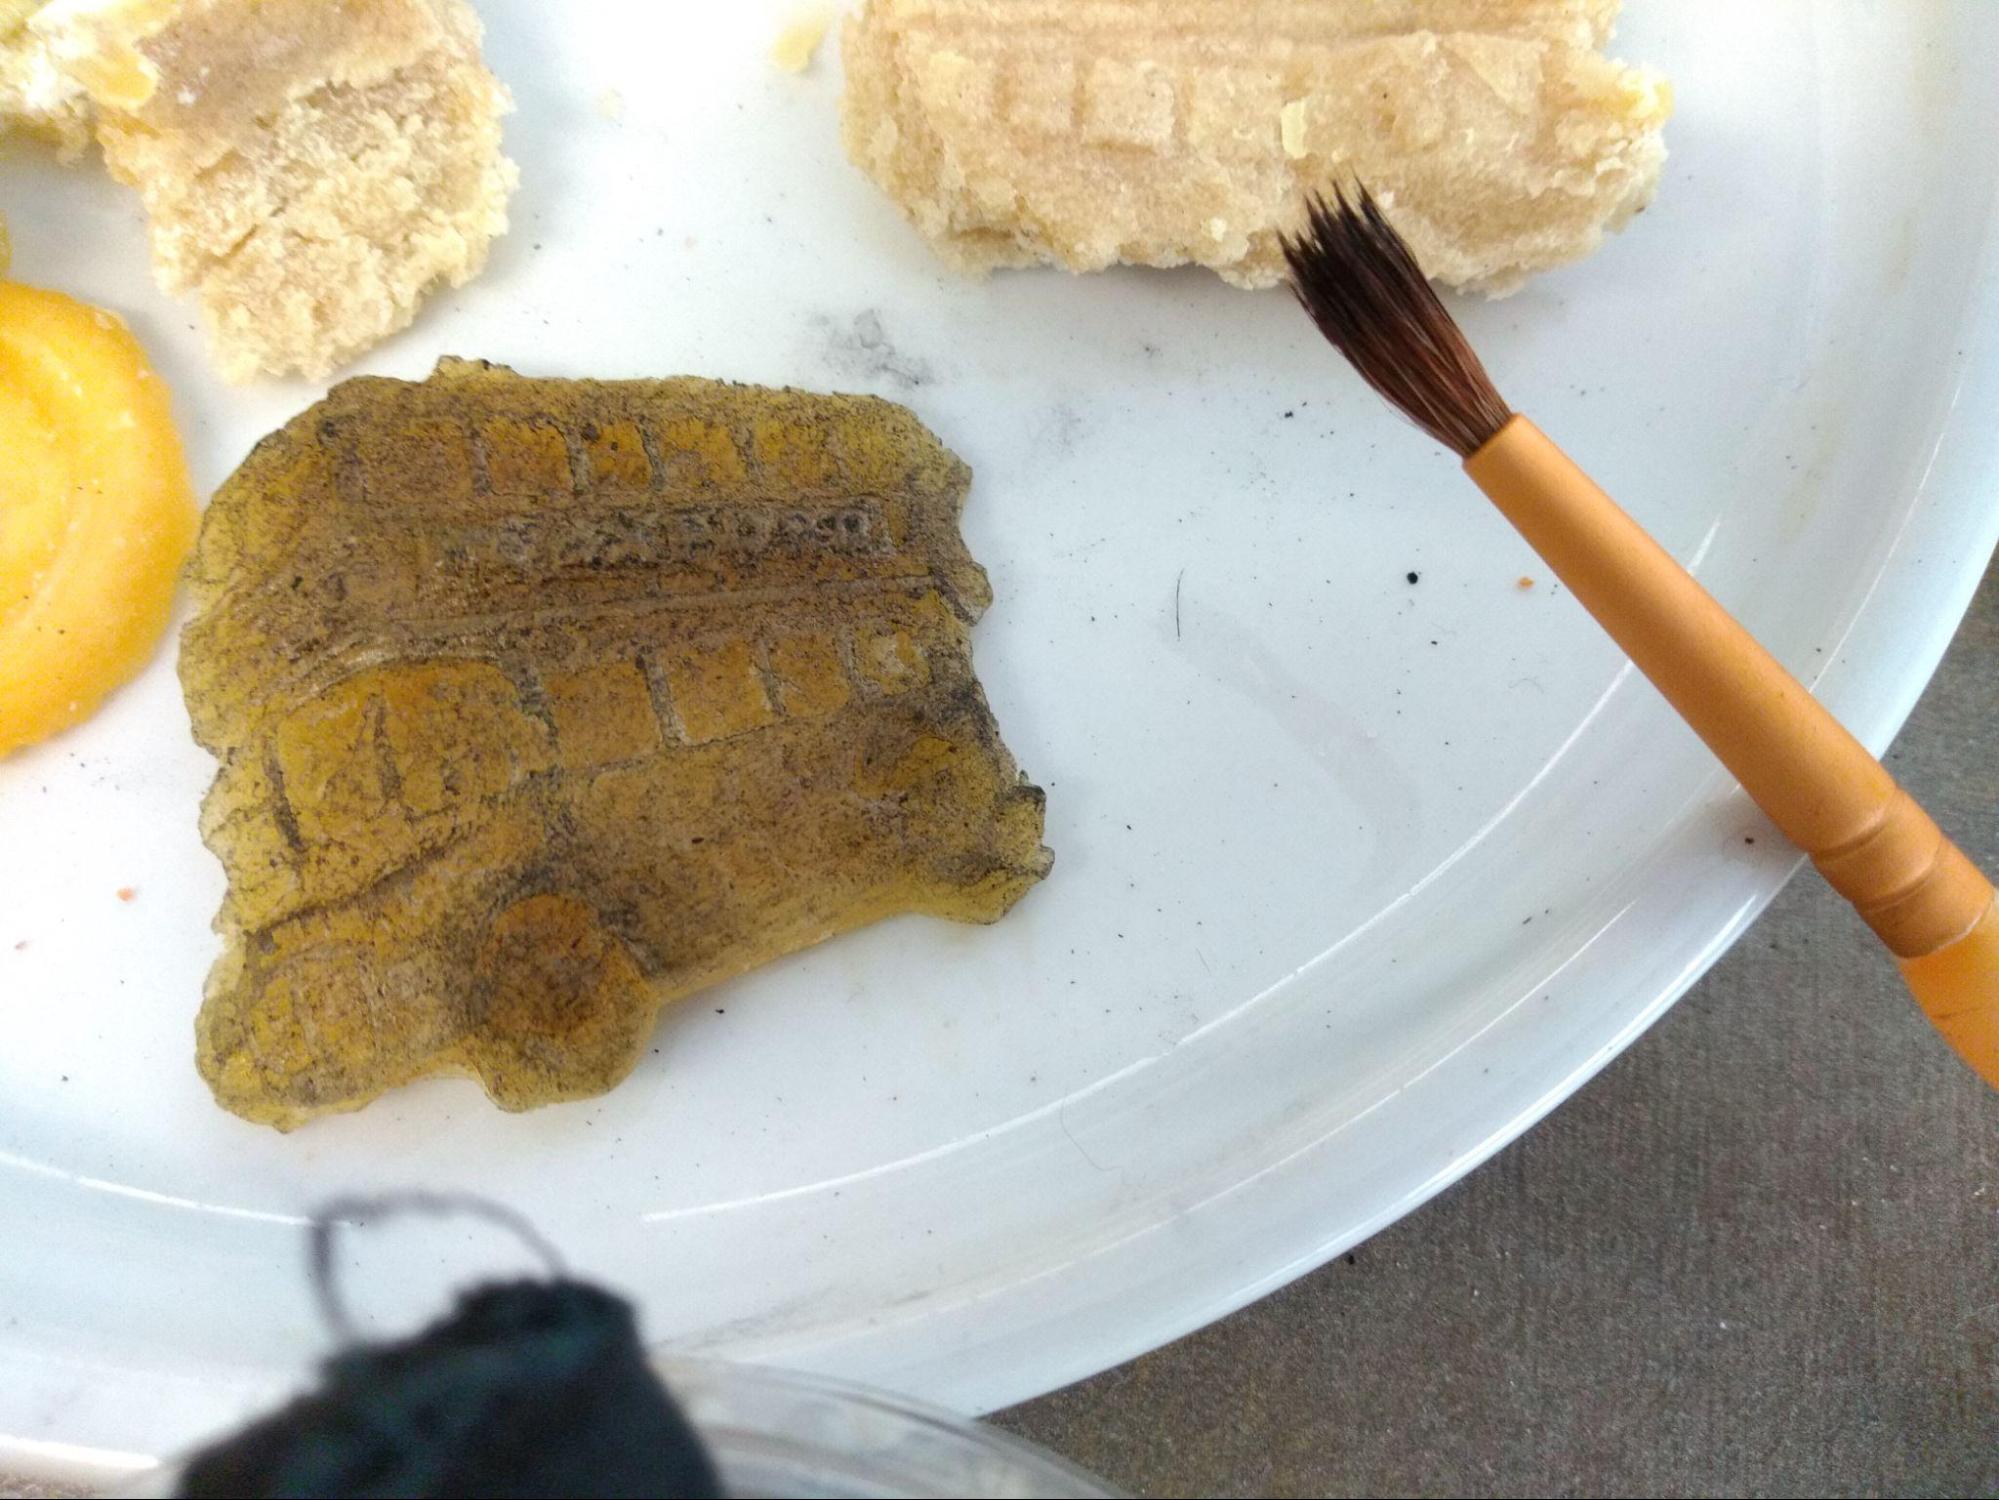
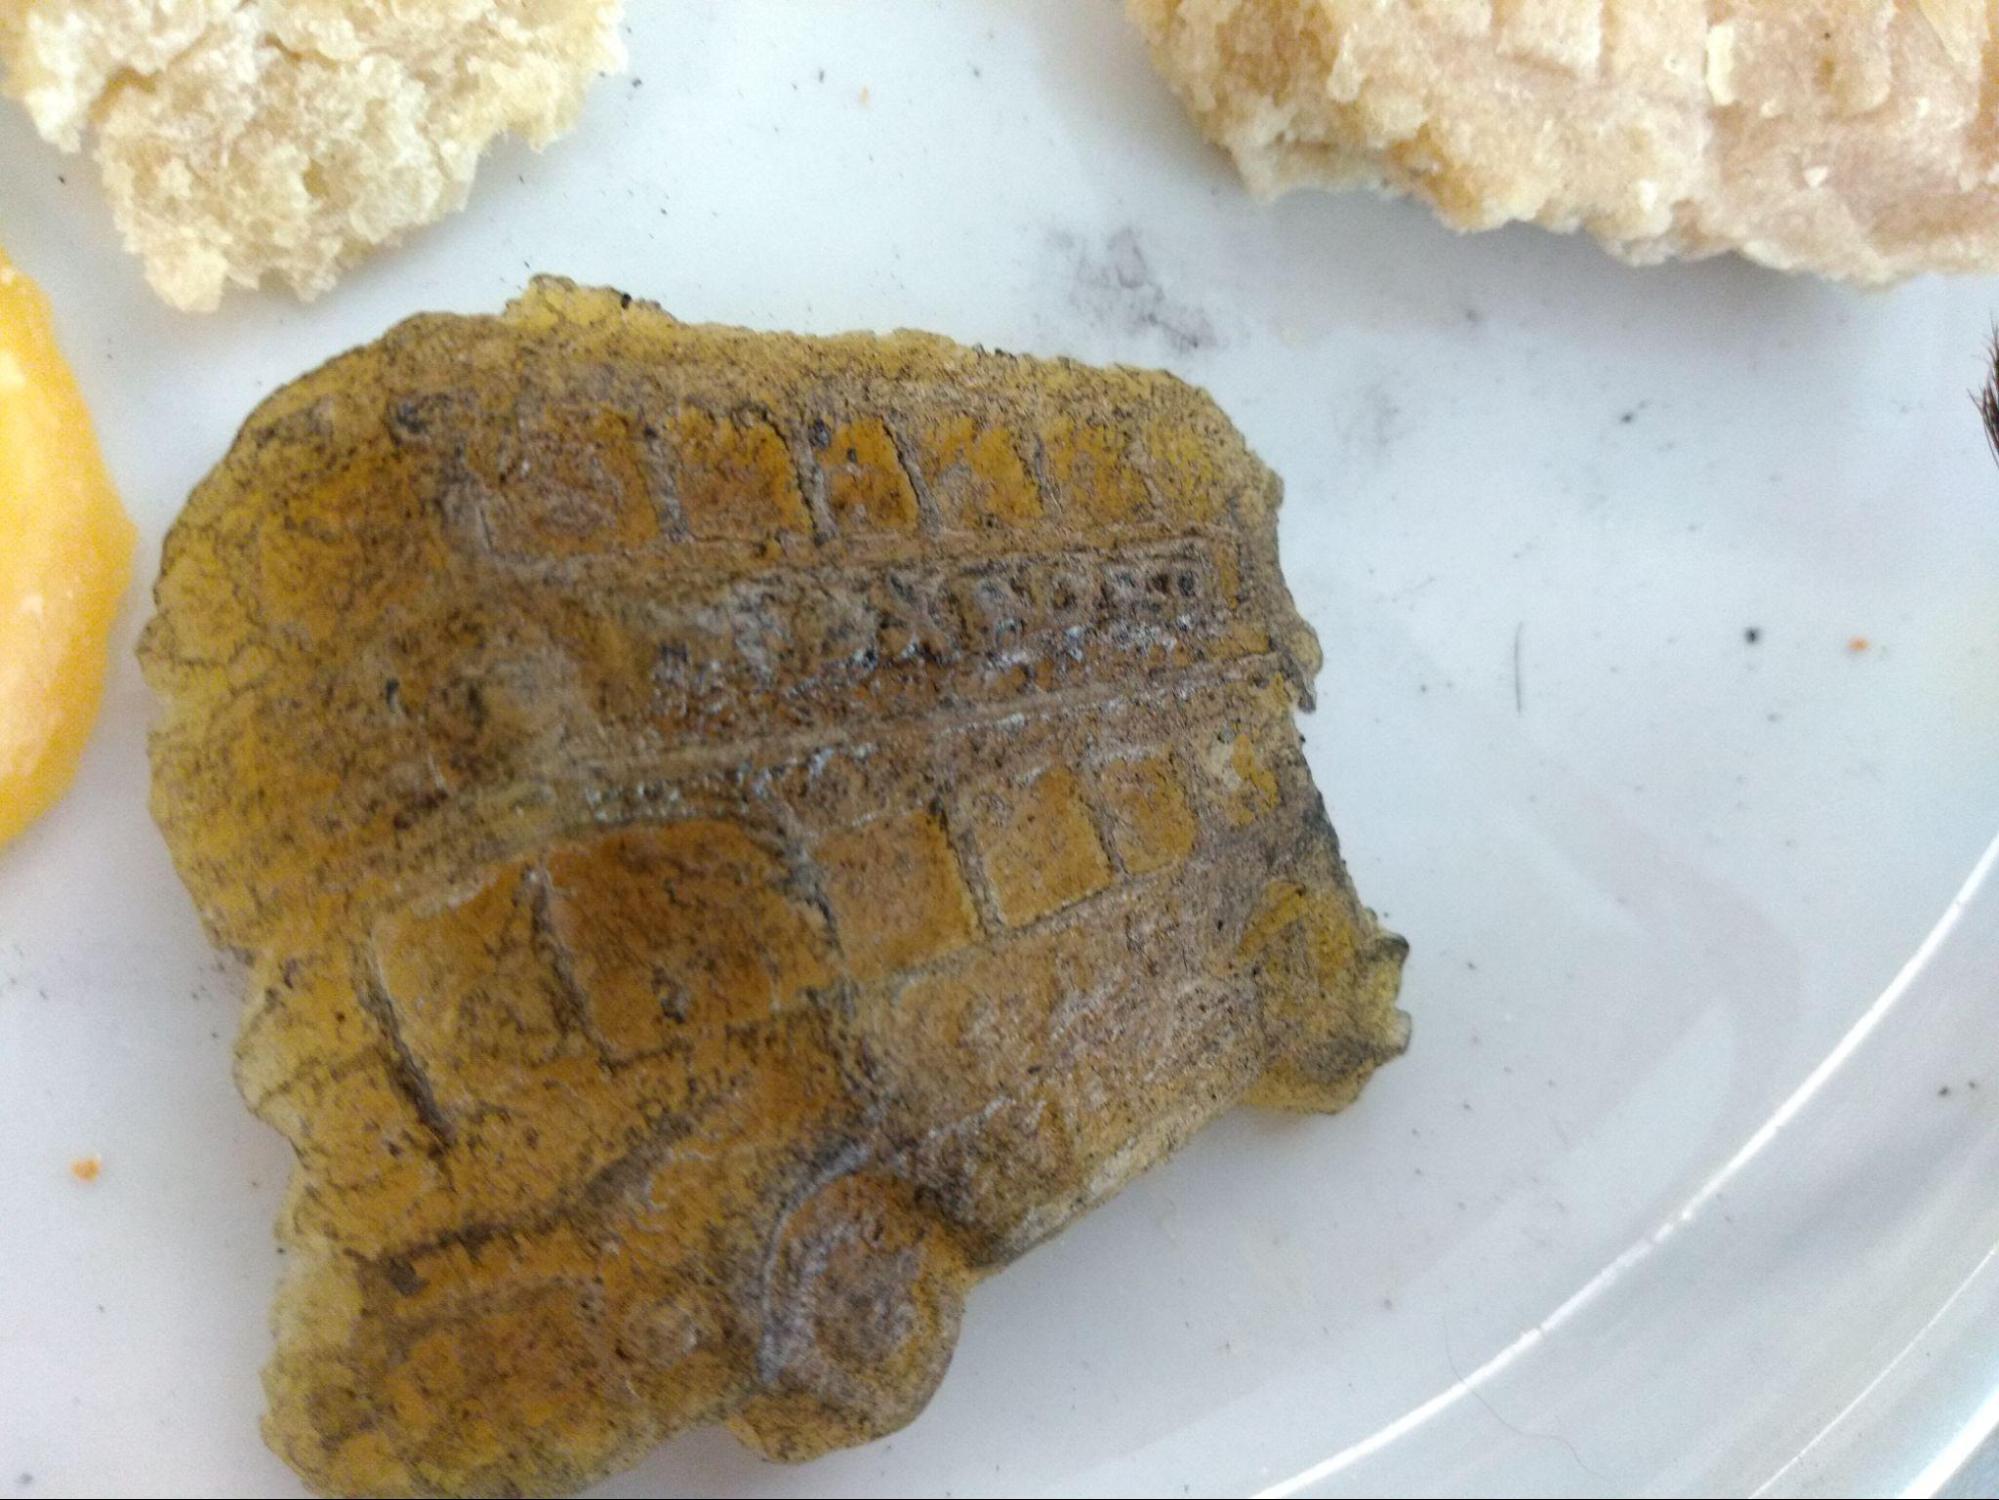
- Ceramic fridge magnet shaped like an English double-decker bus
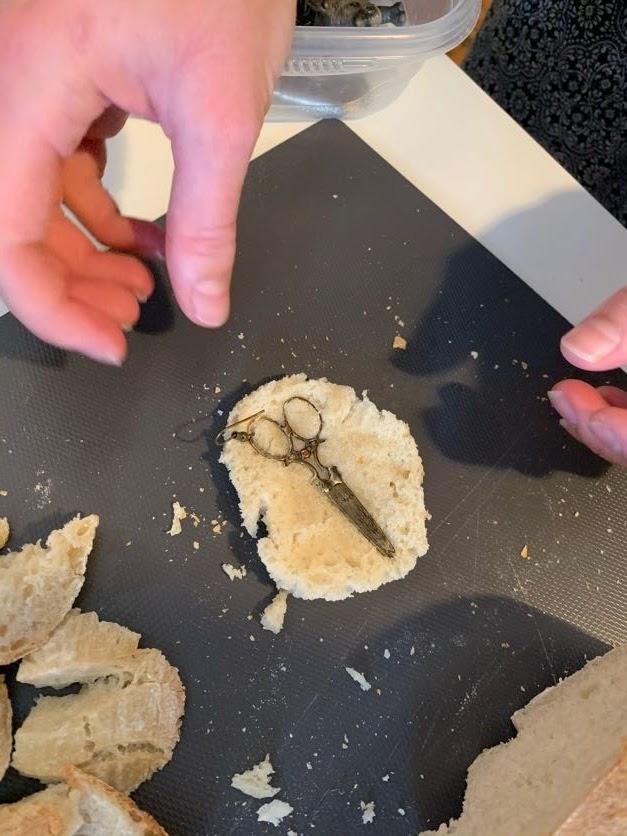
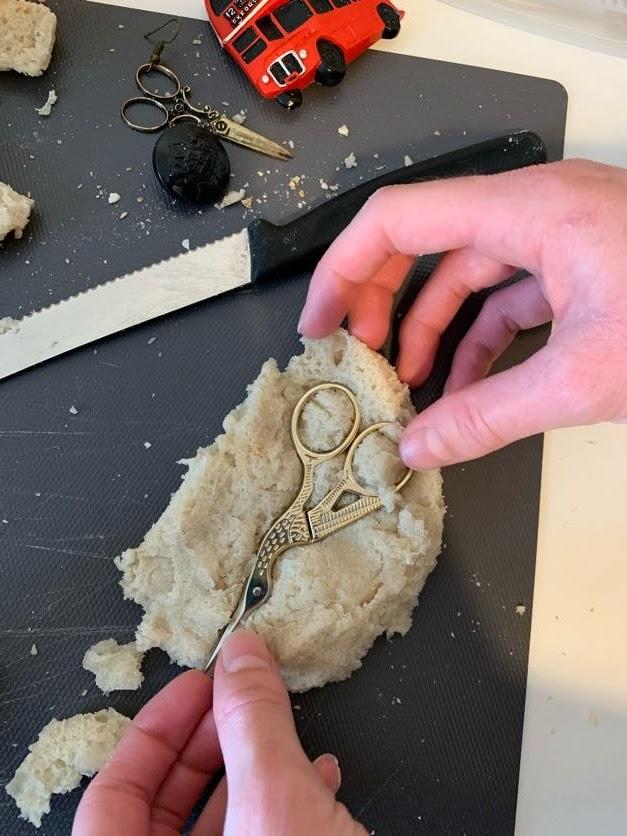
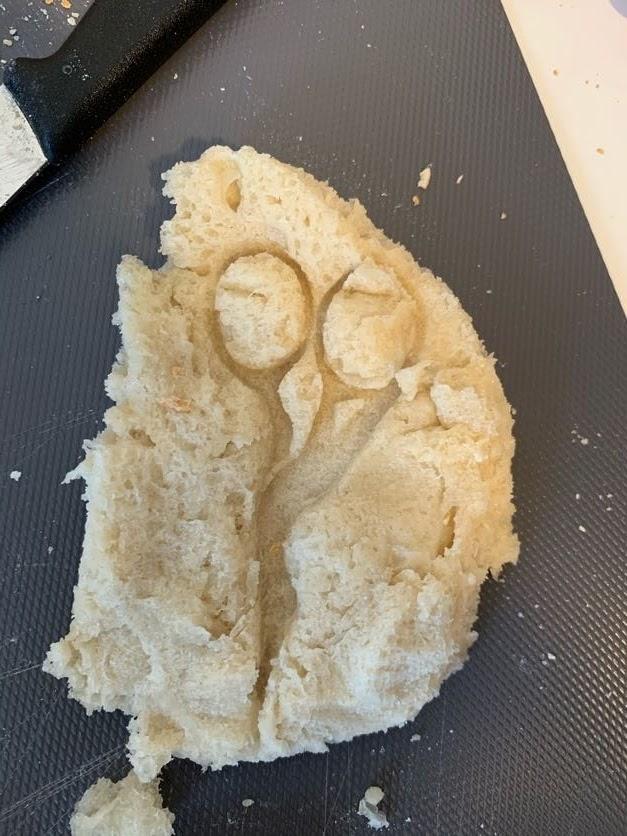
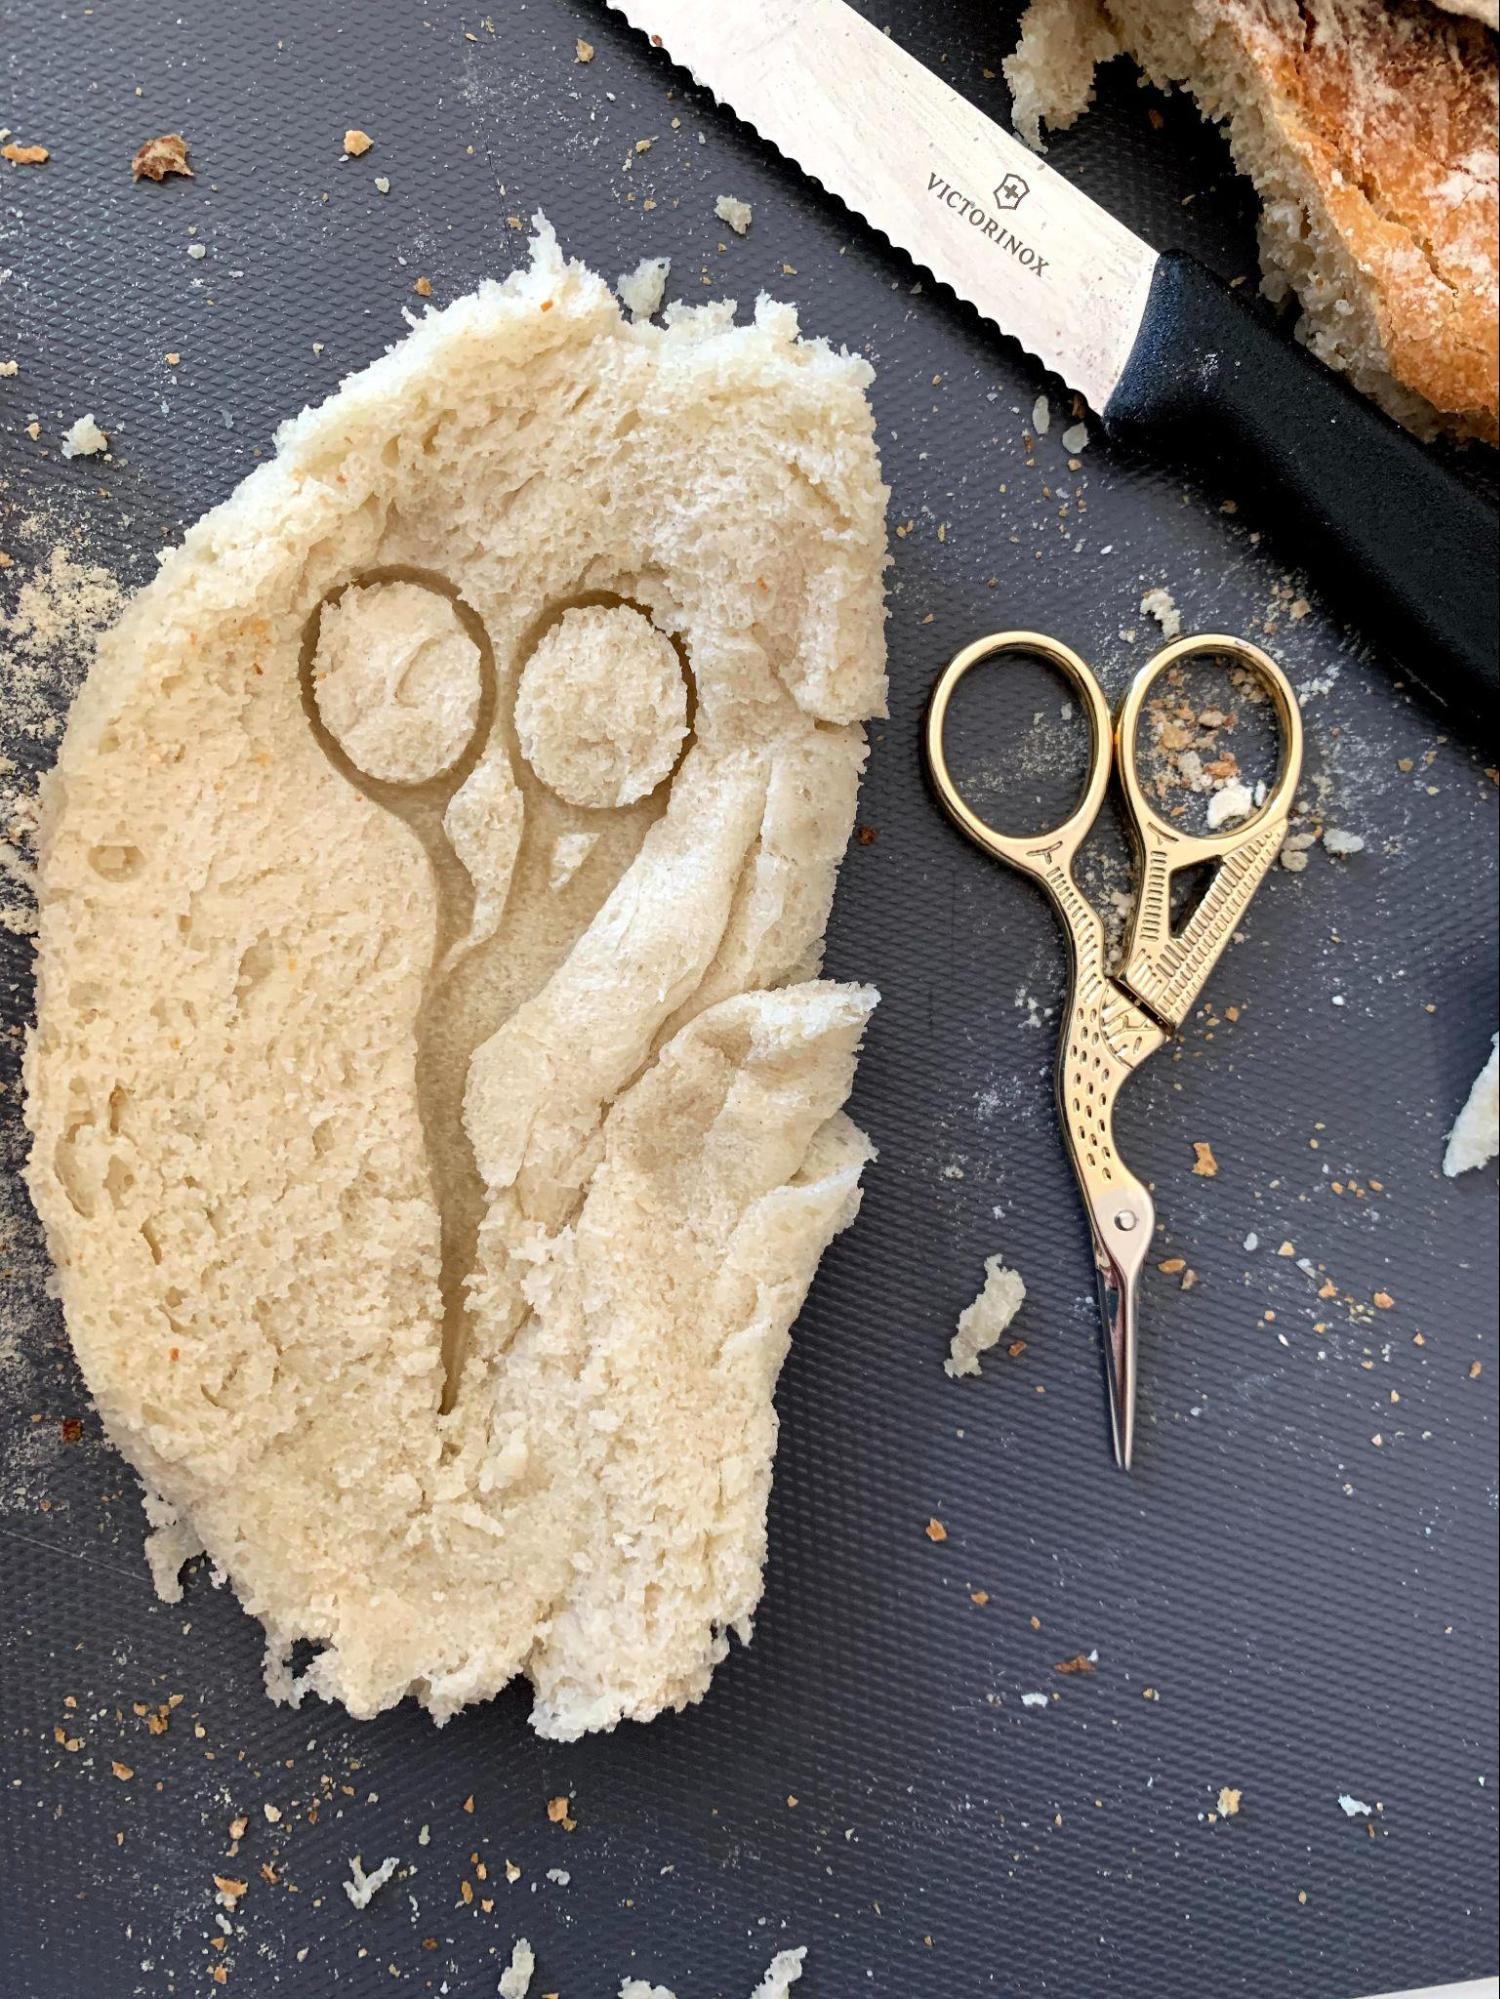
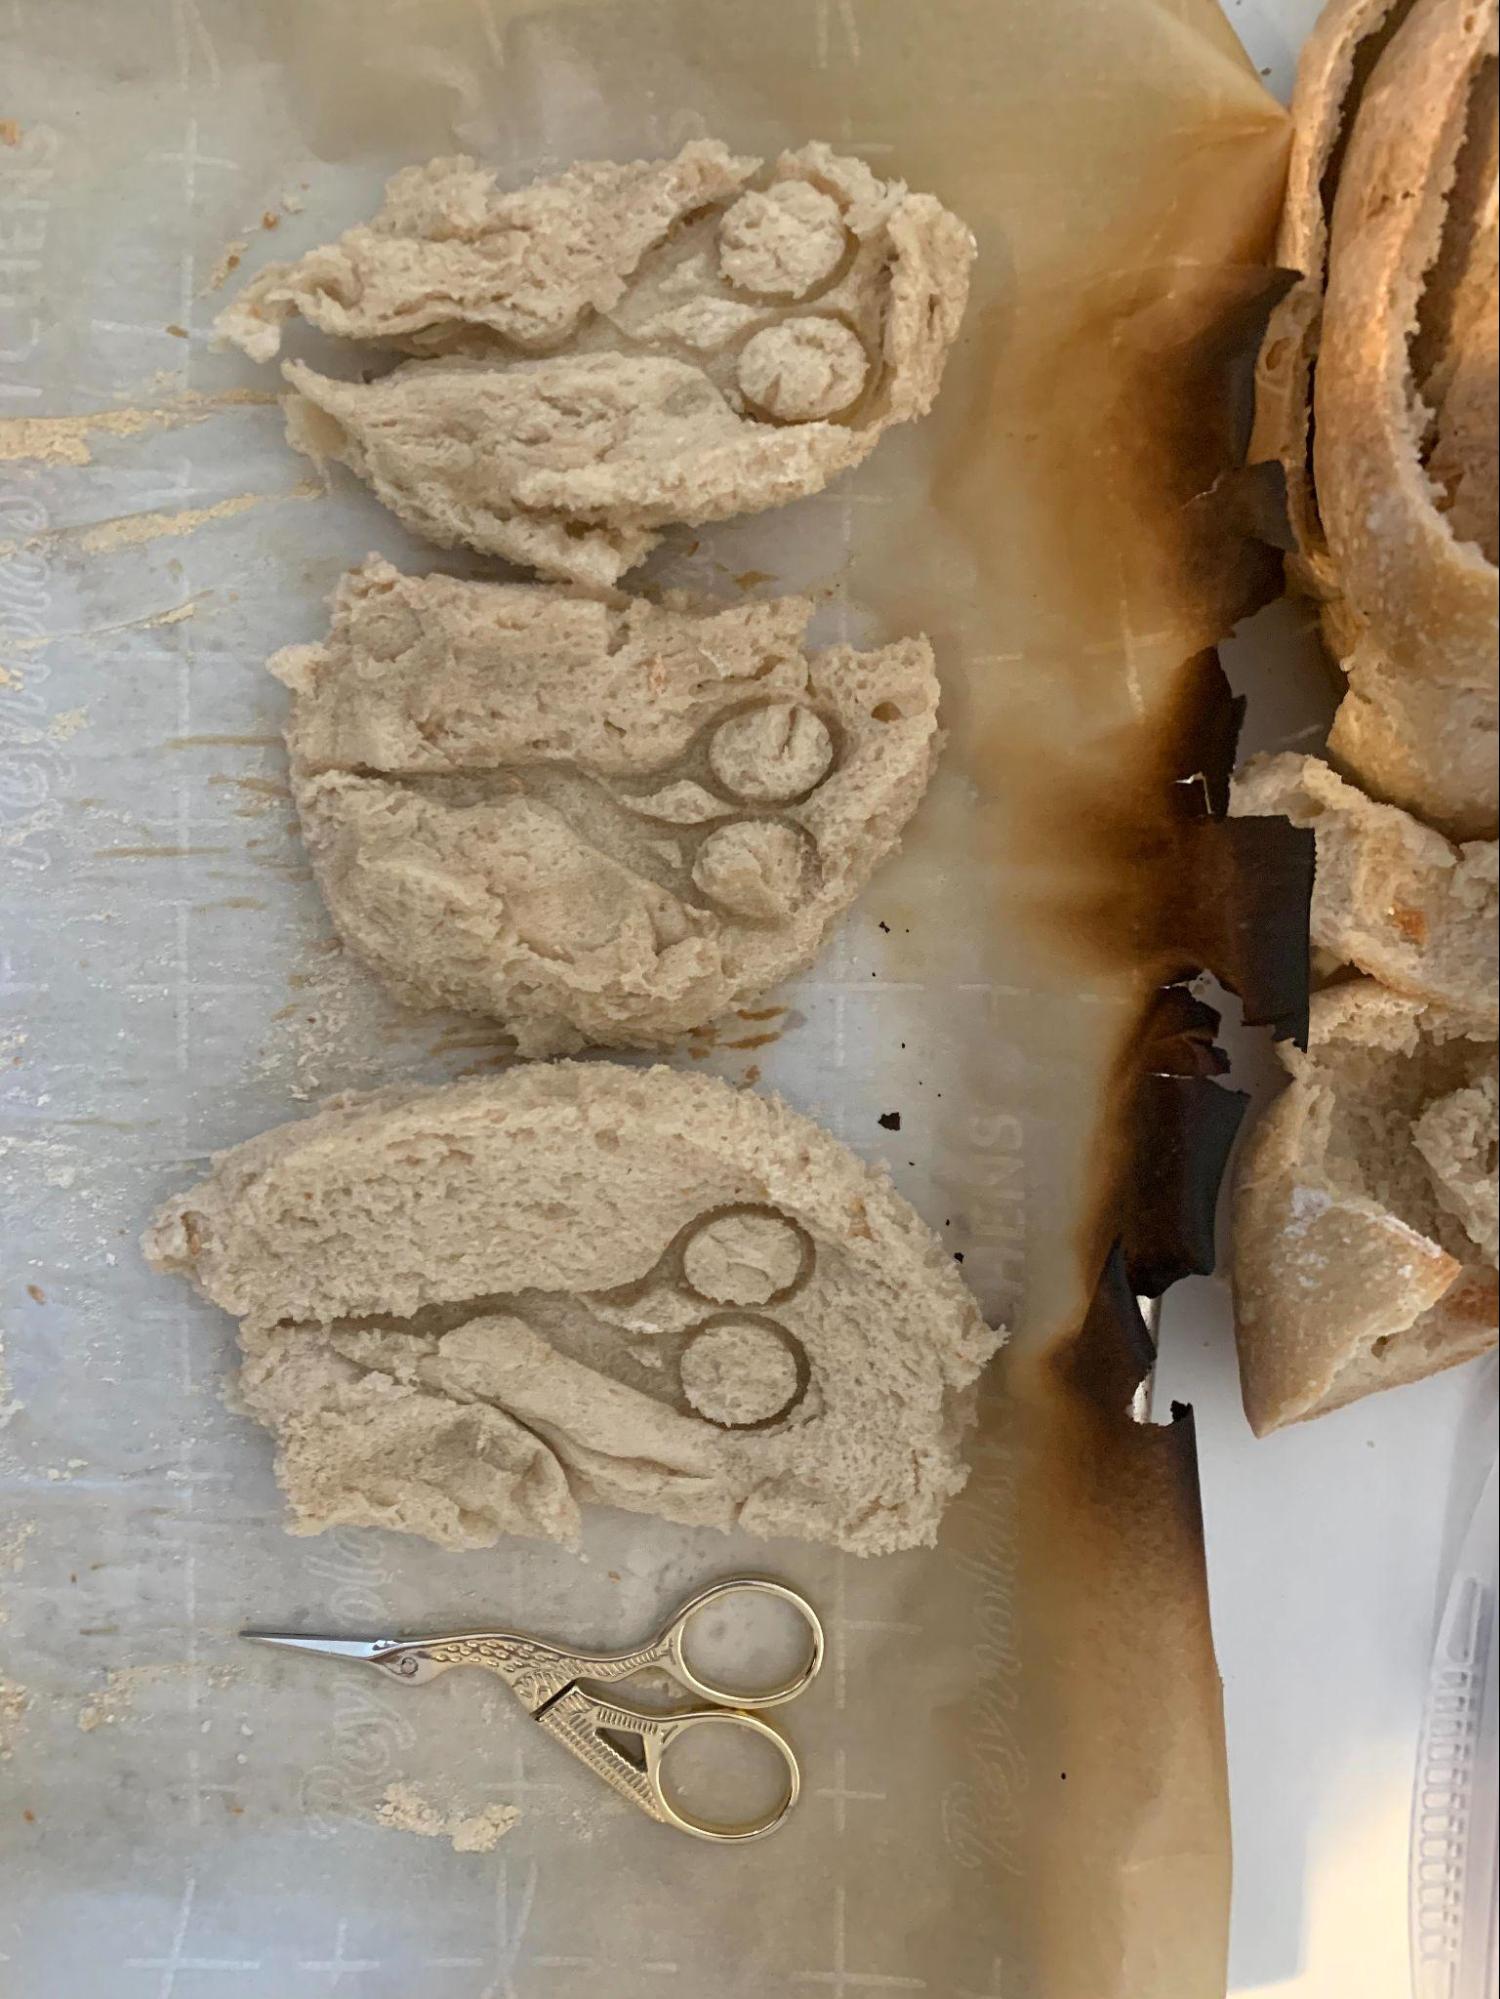
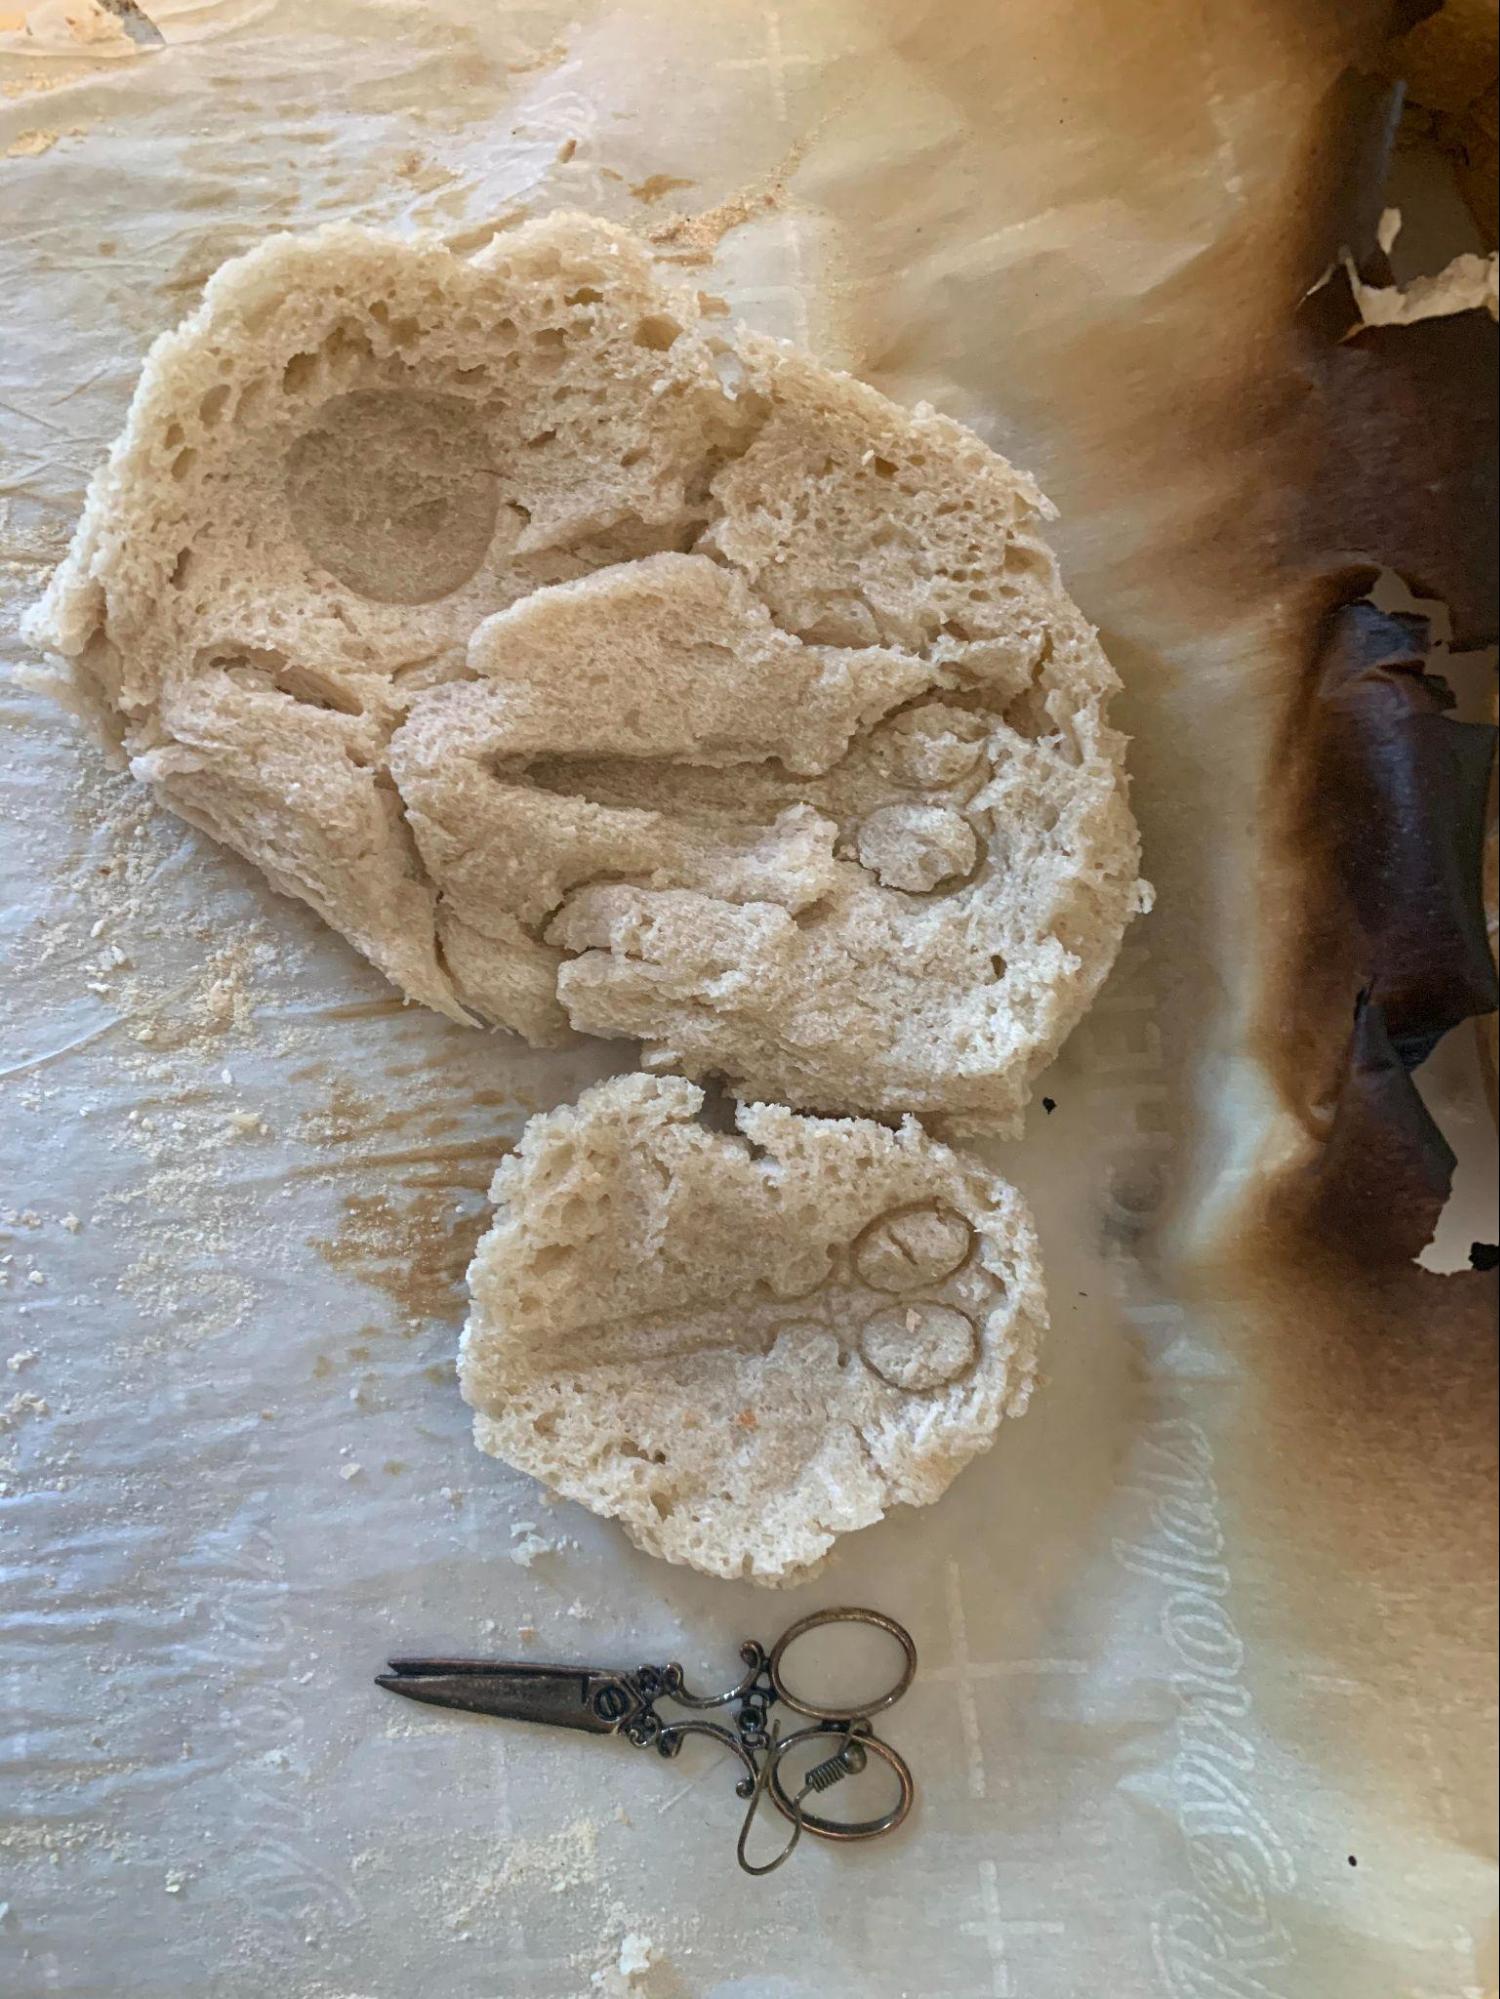
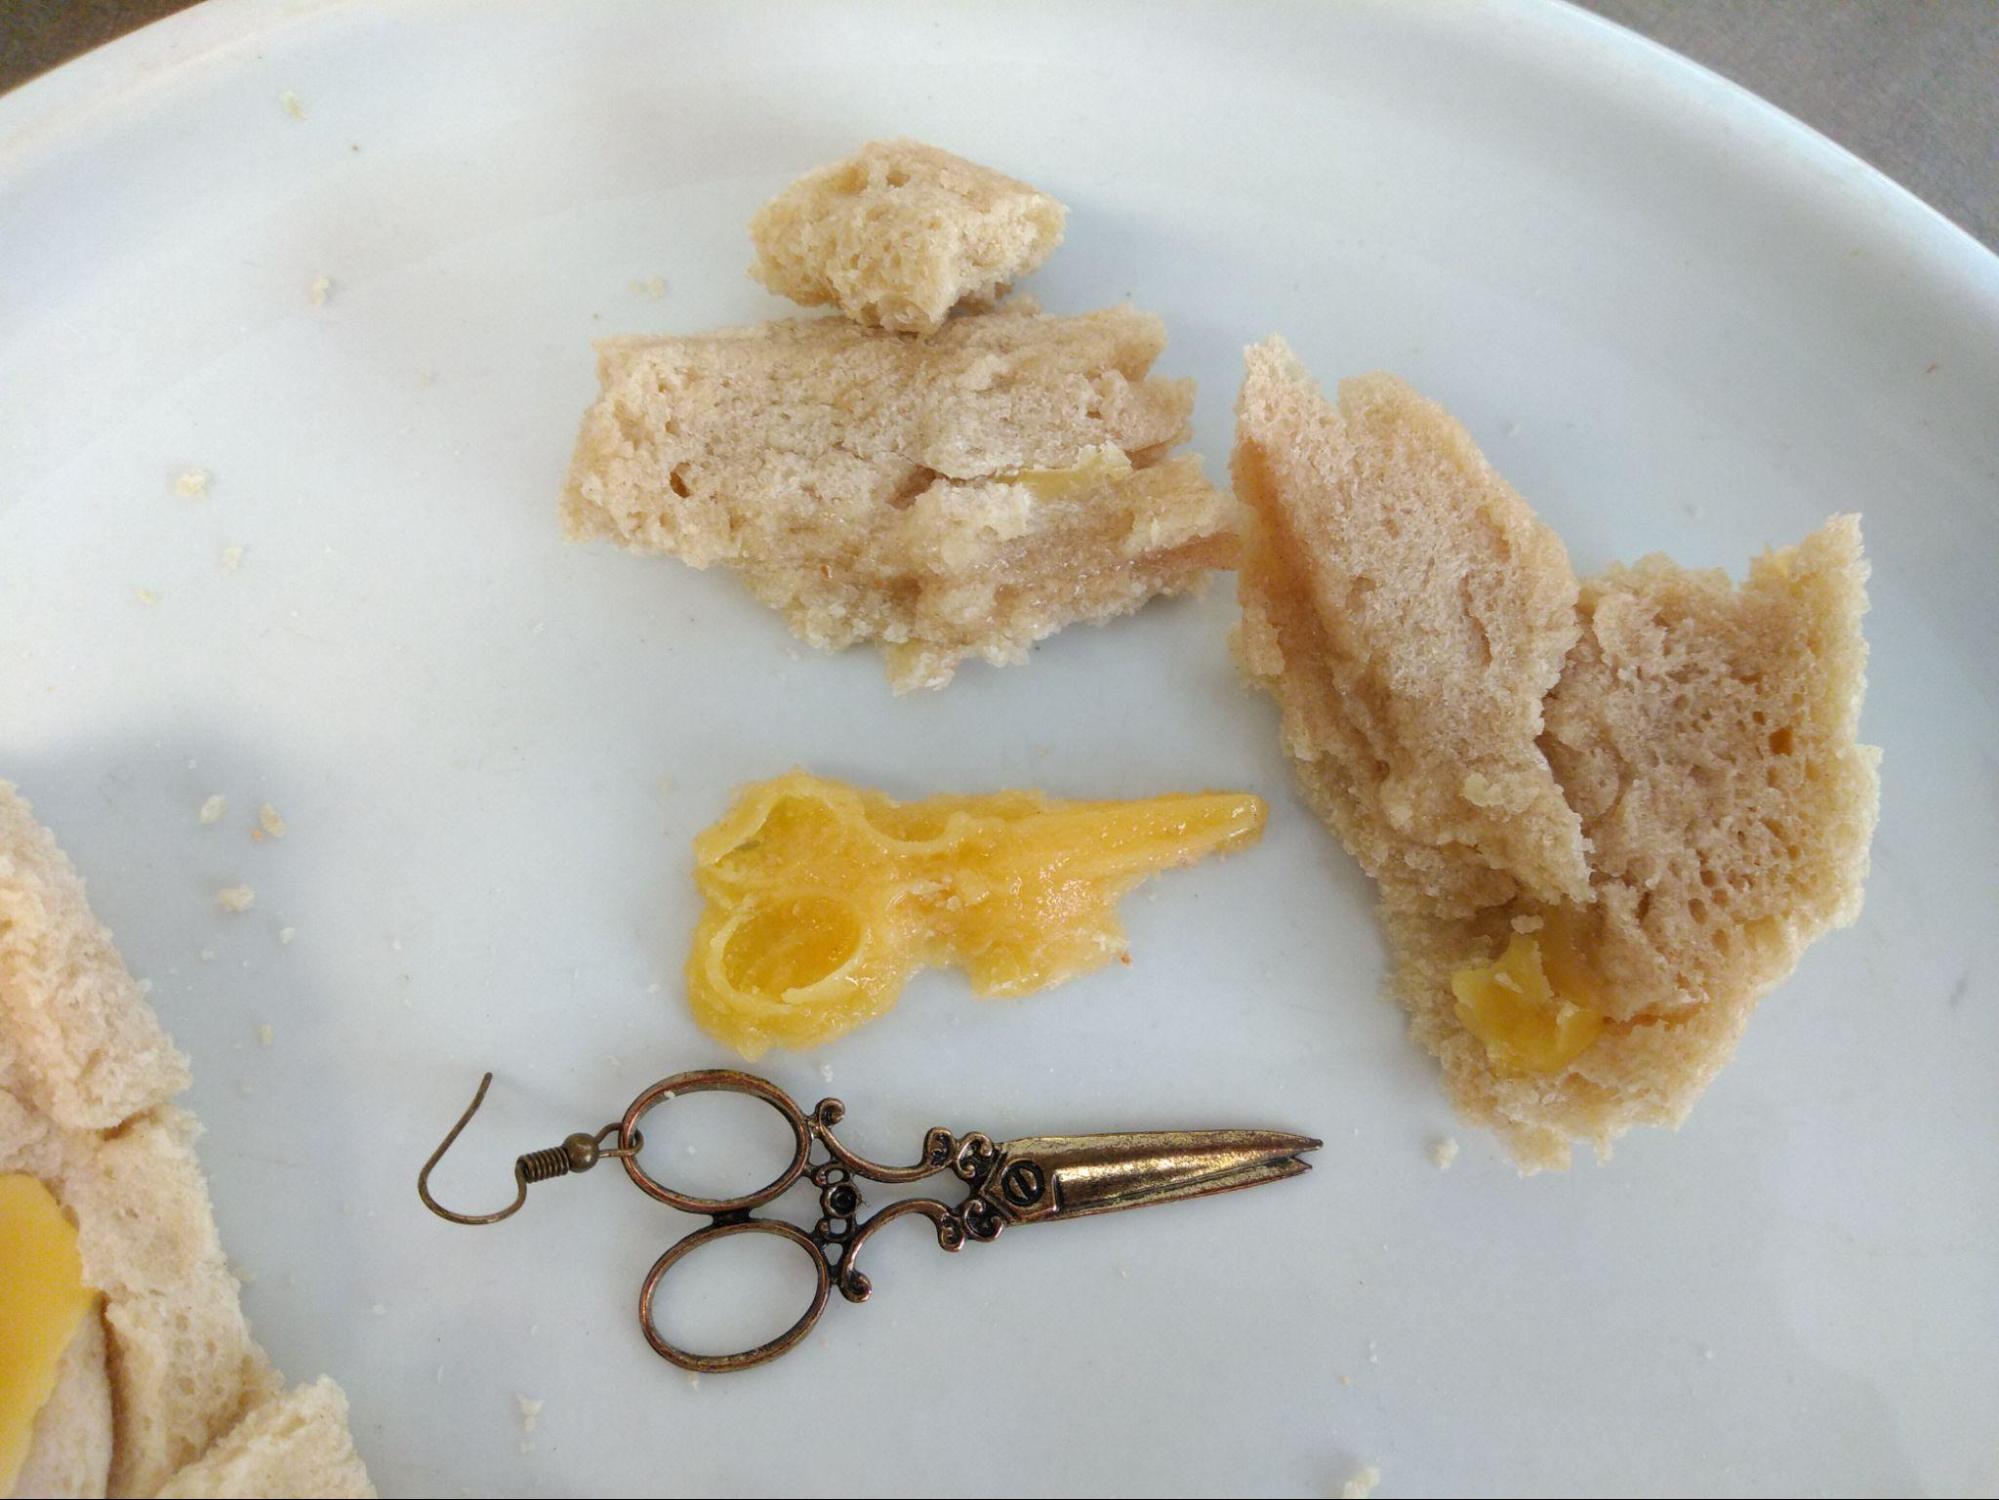
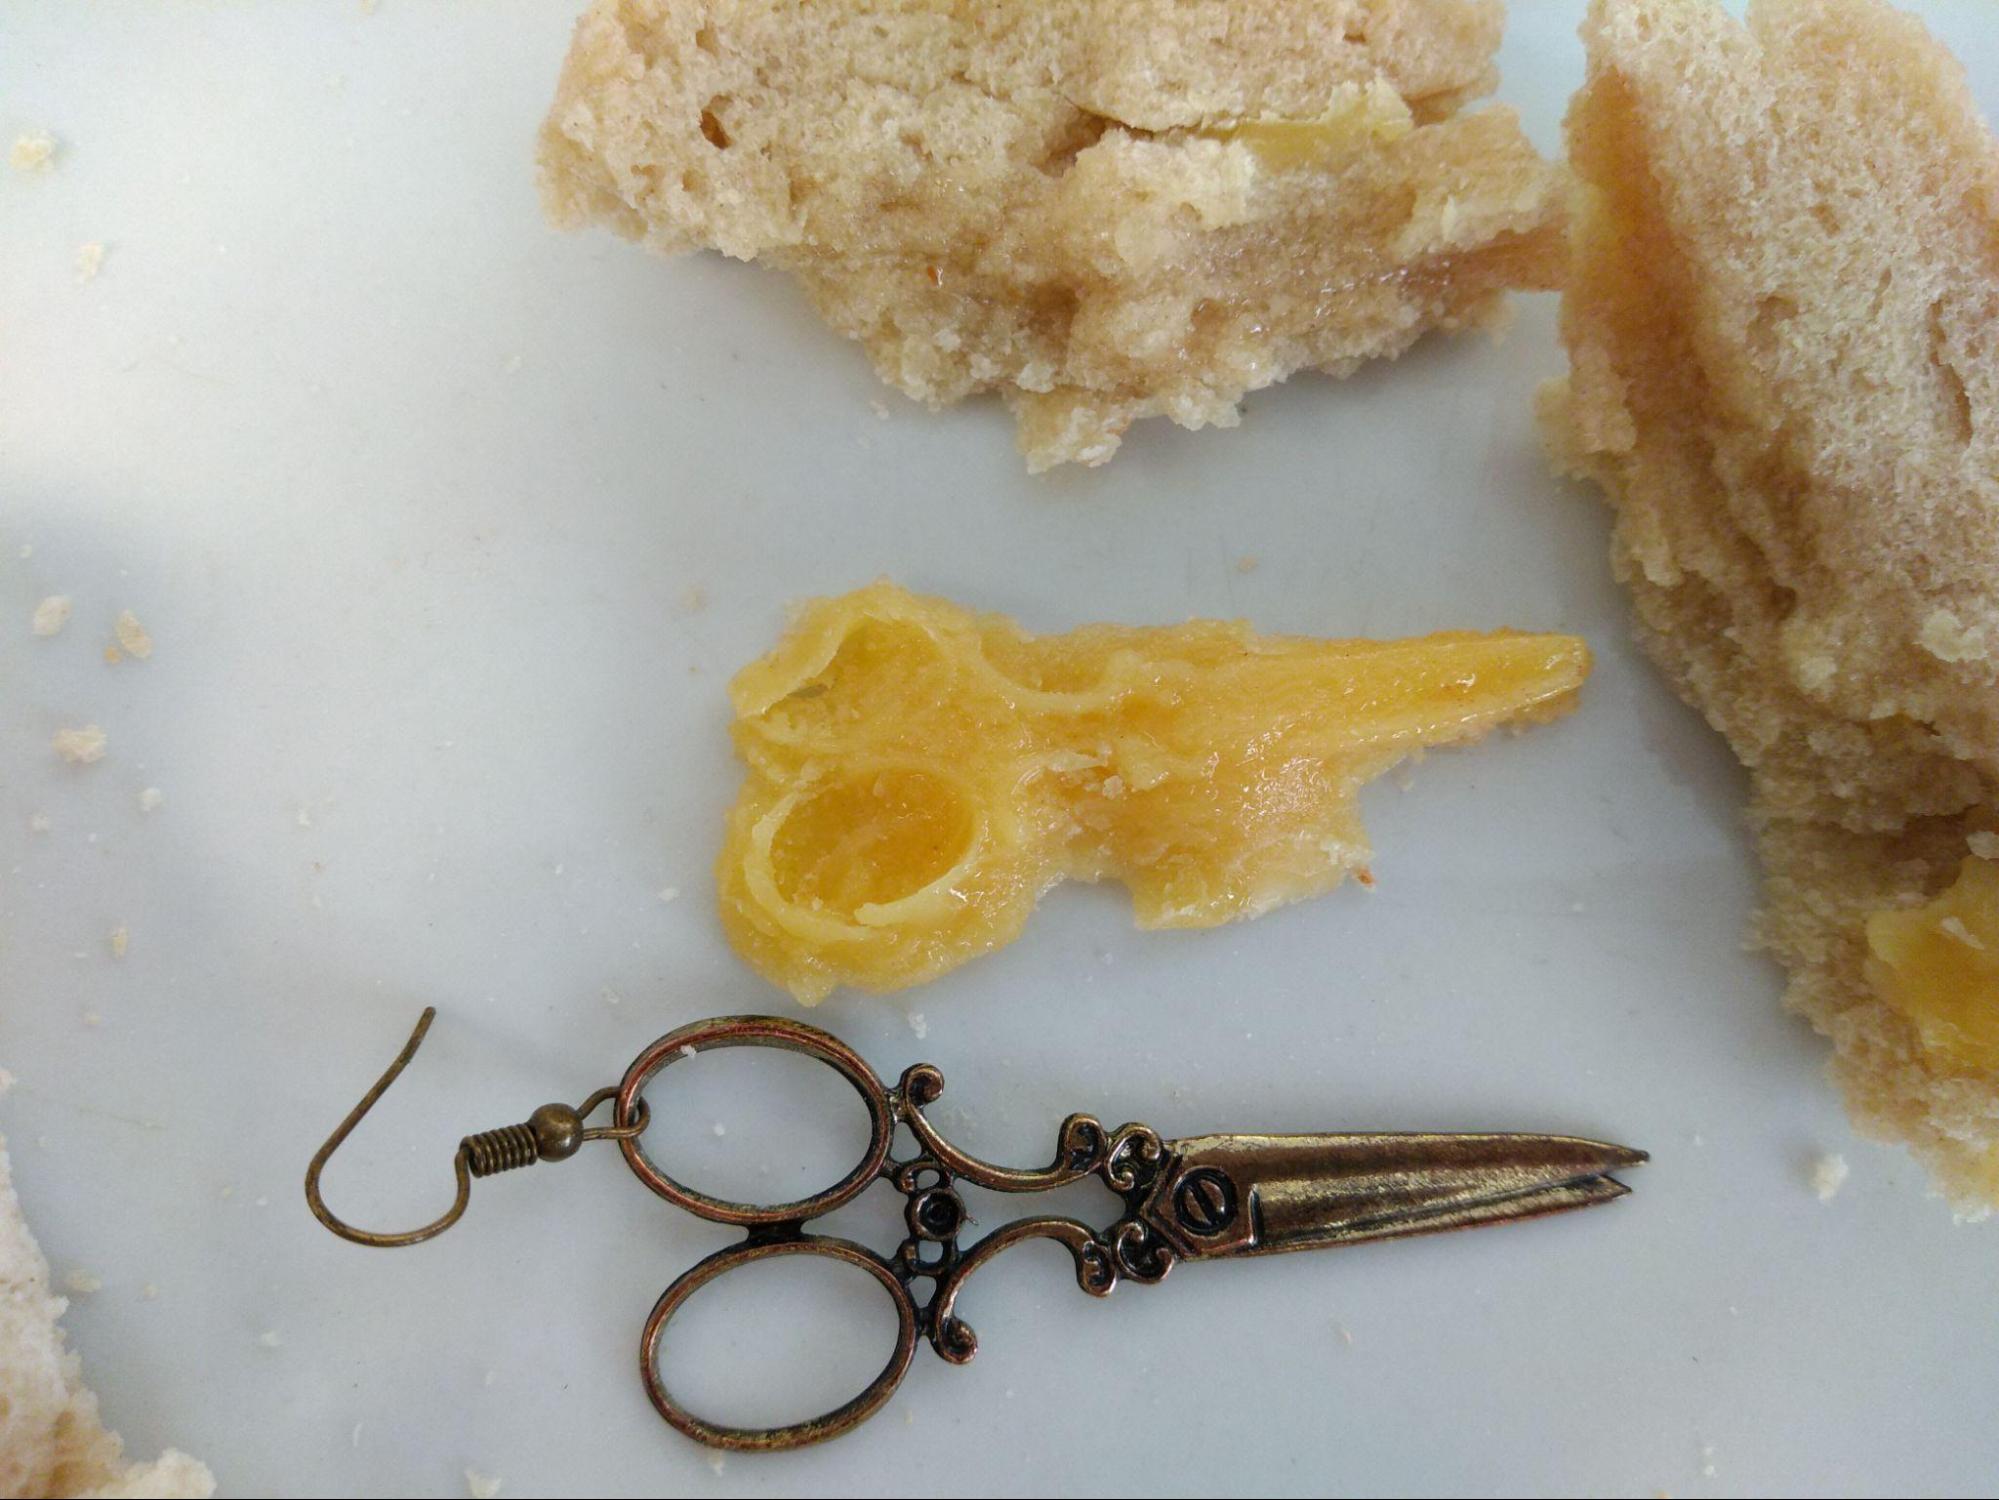
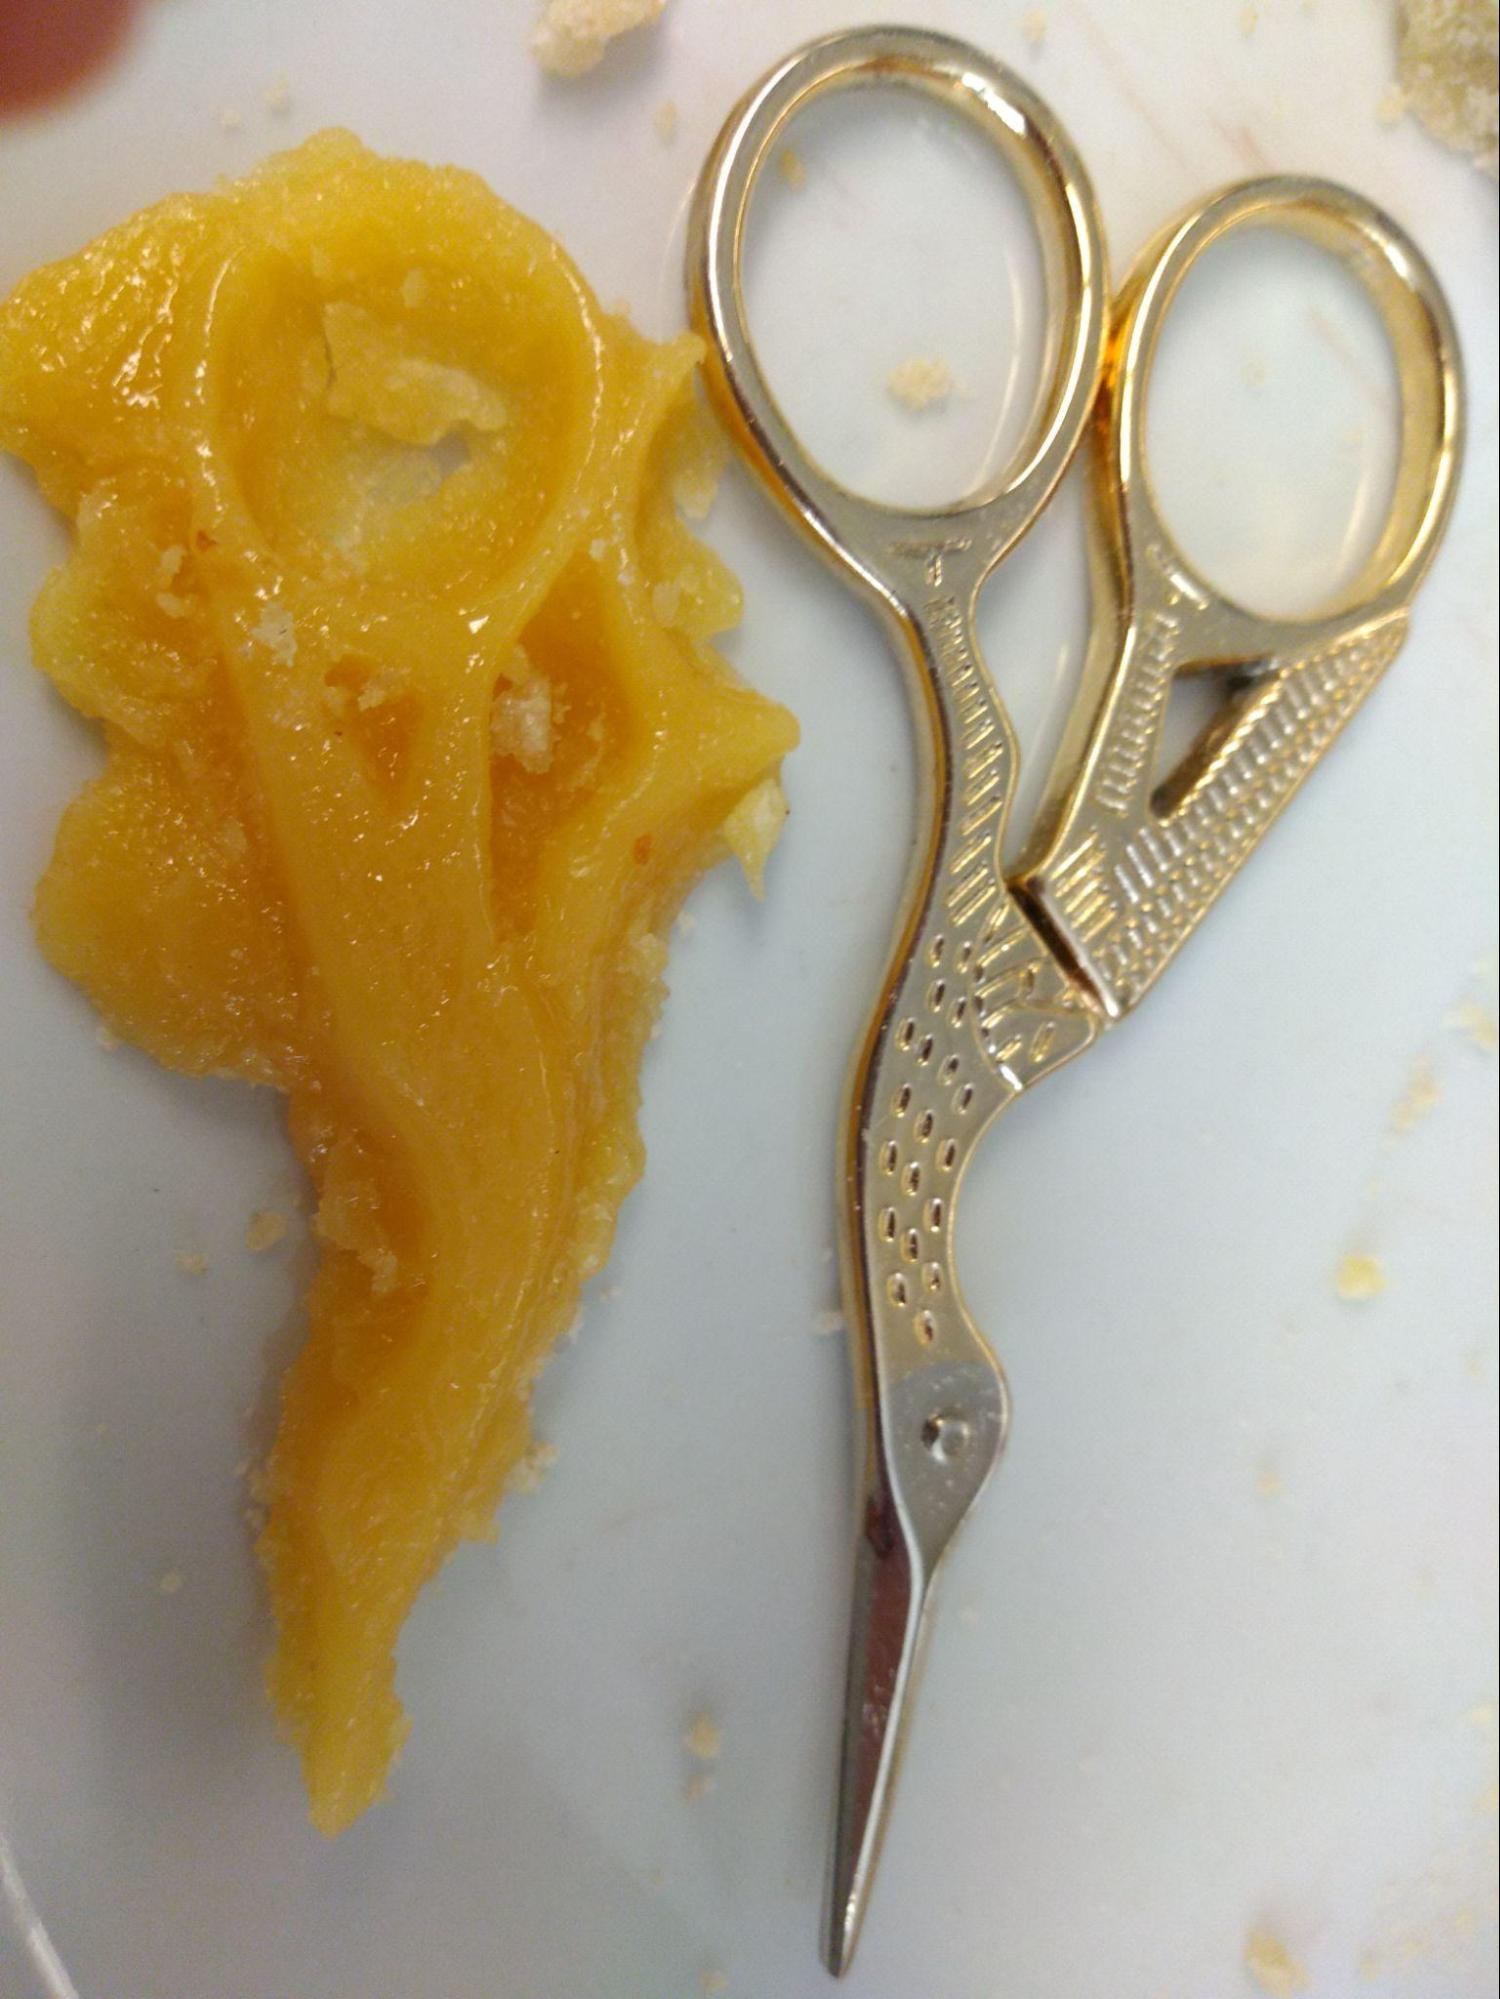
- A pair of sewing scissors with bird details
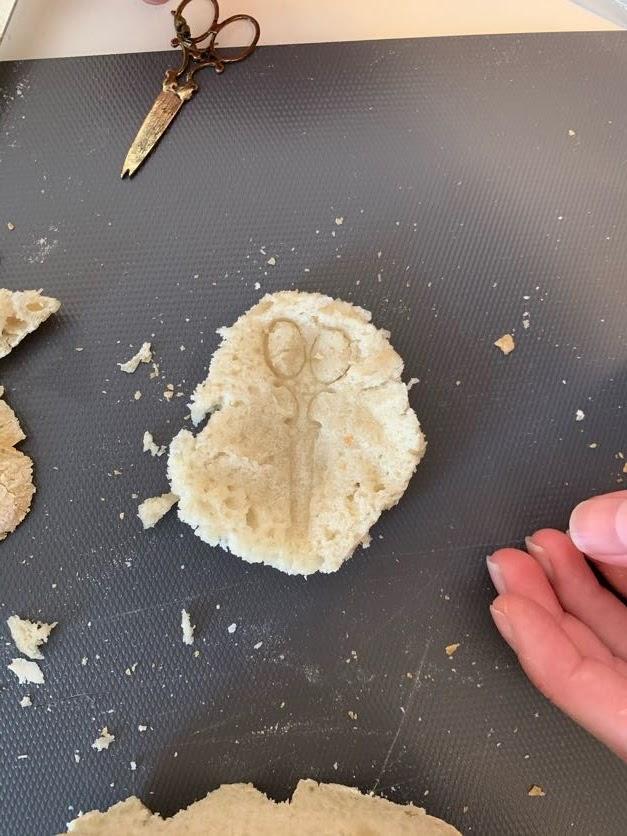
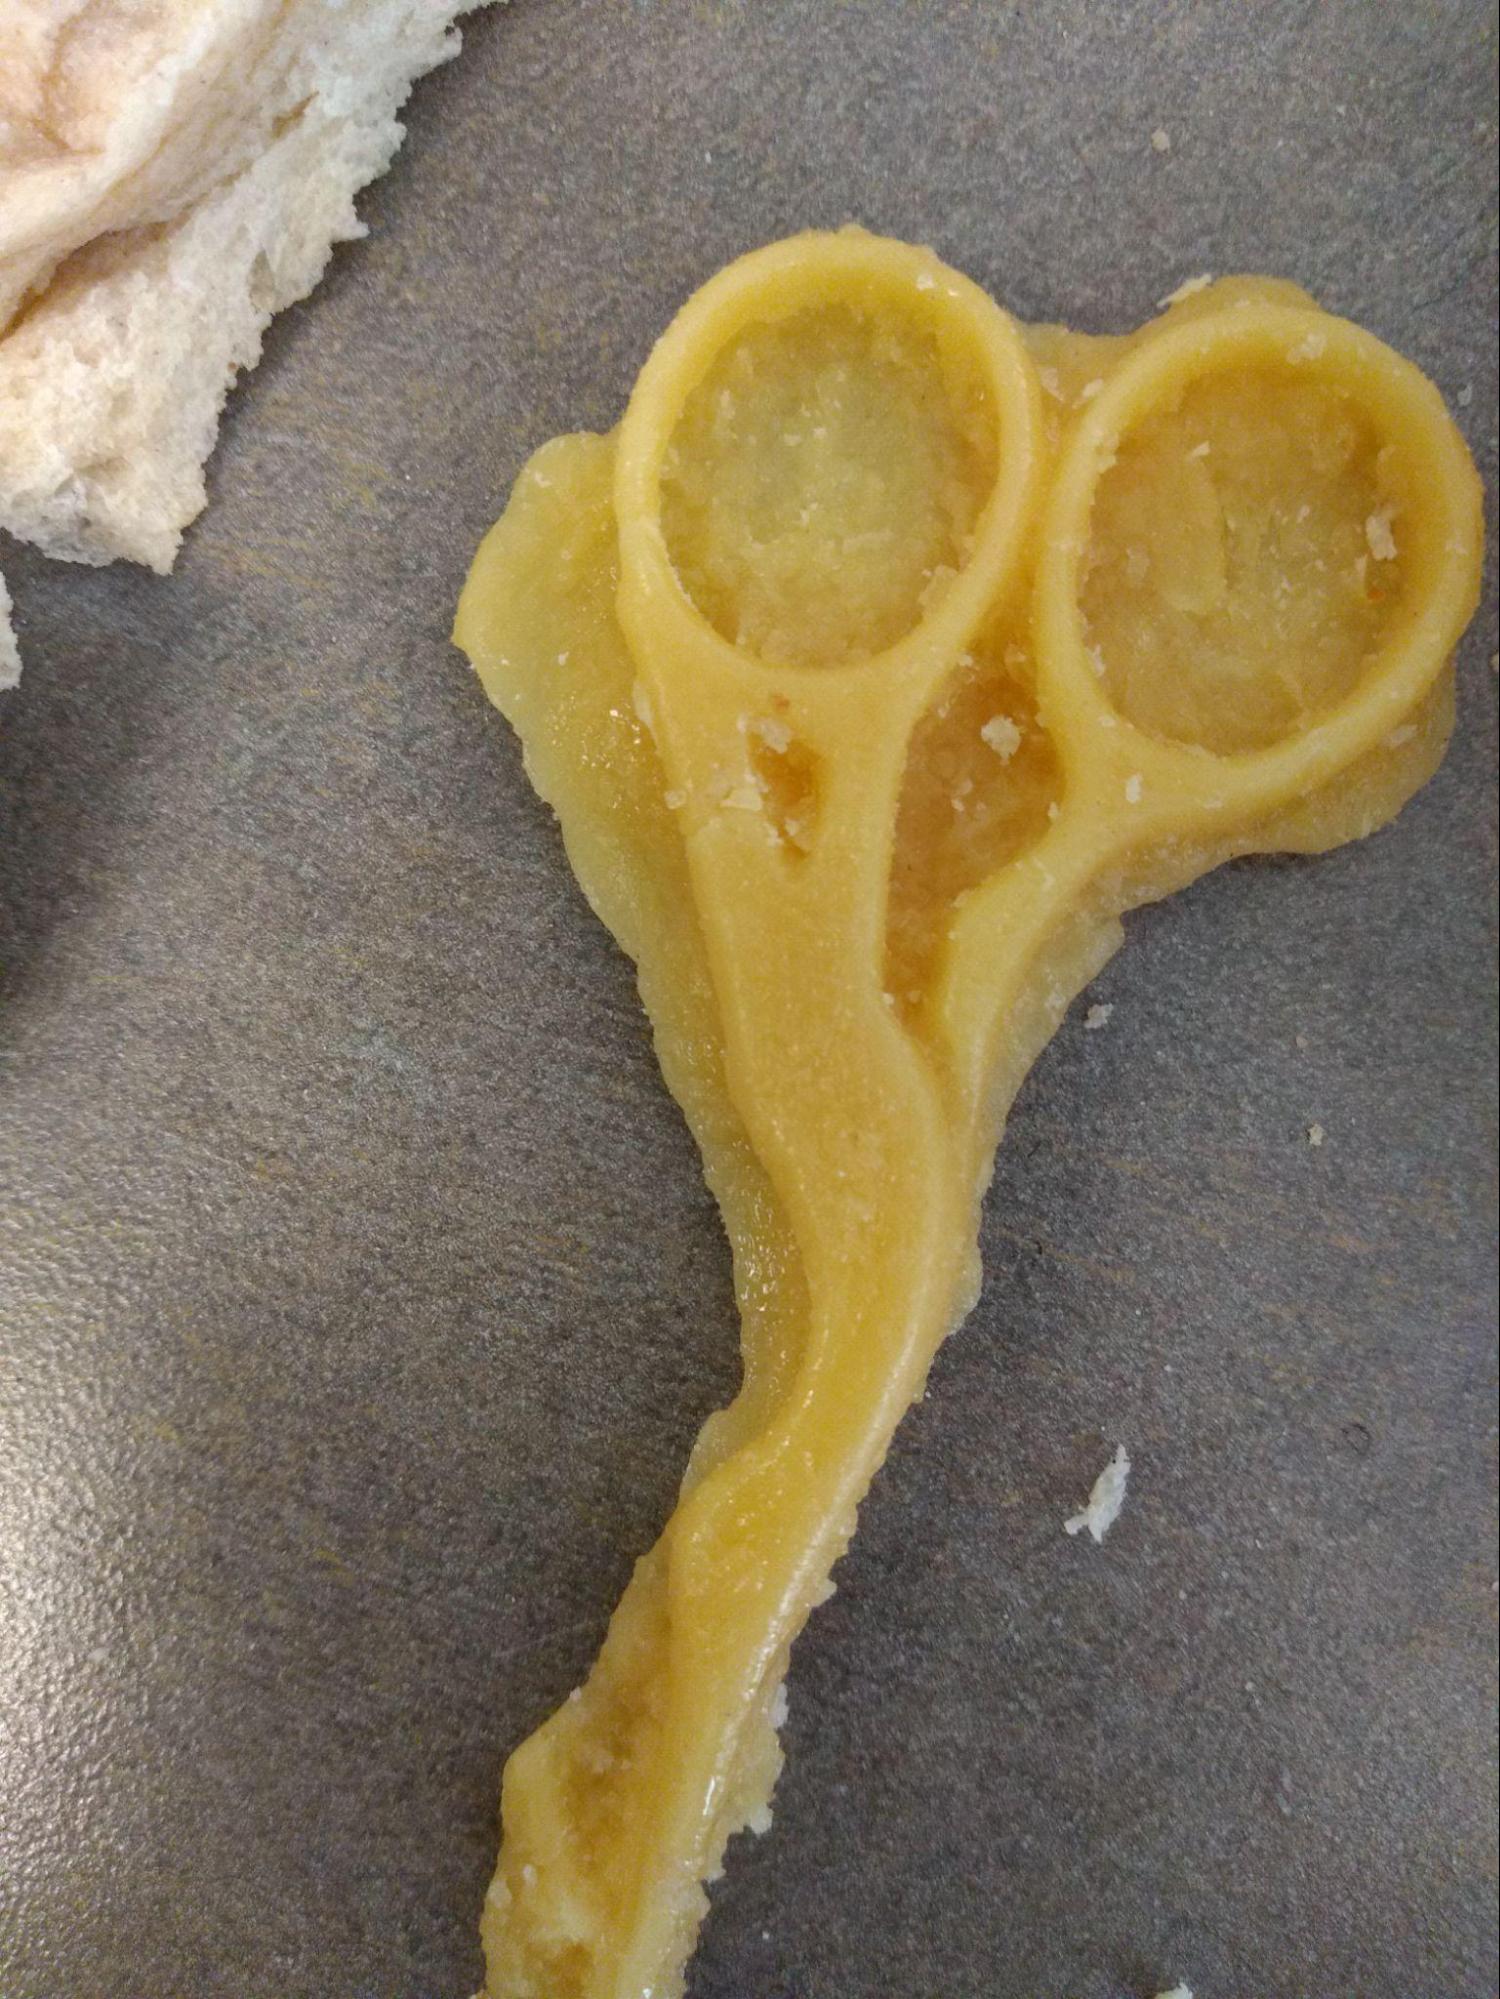
- An earring shaped like a pair of scissors
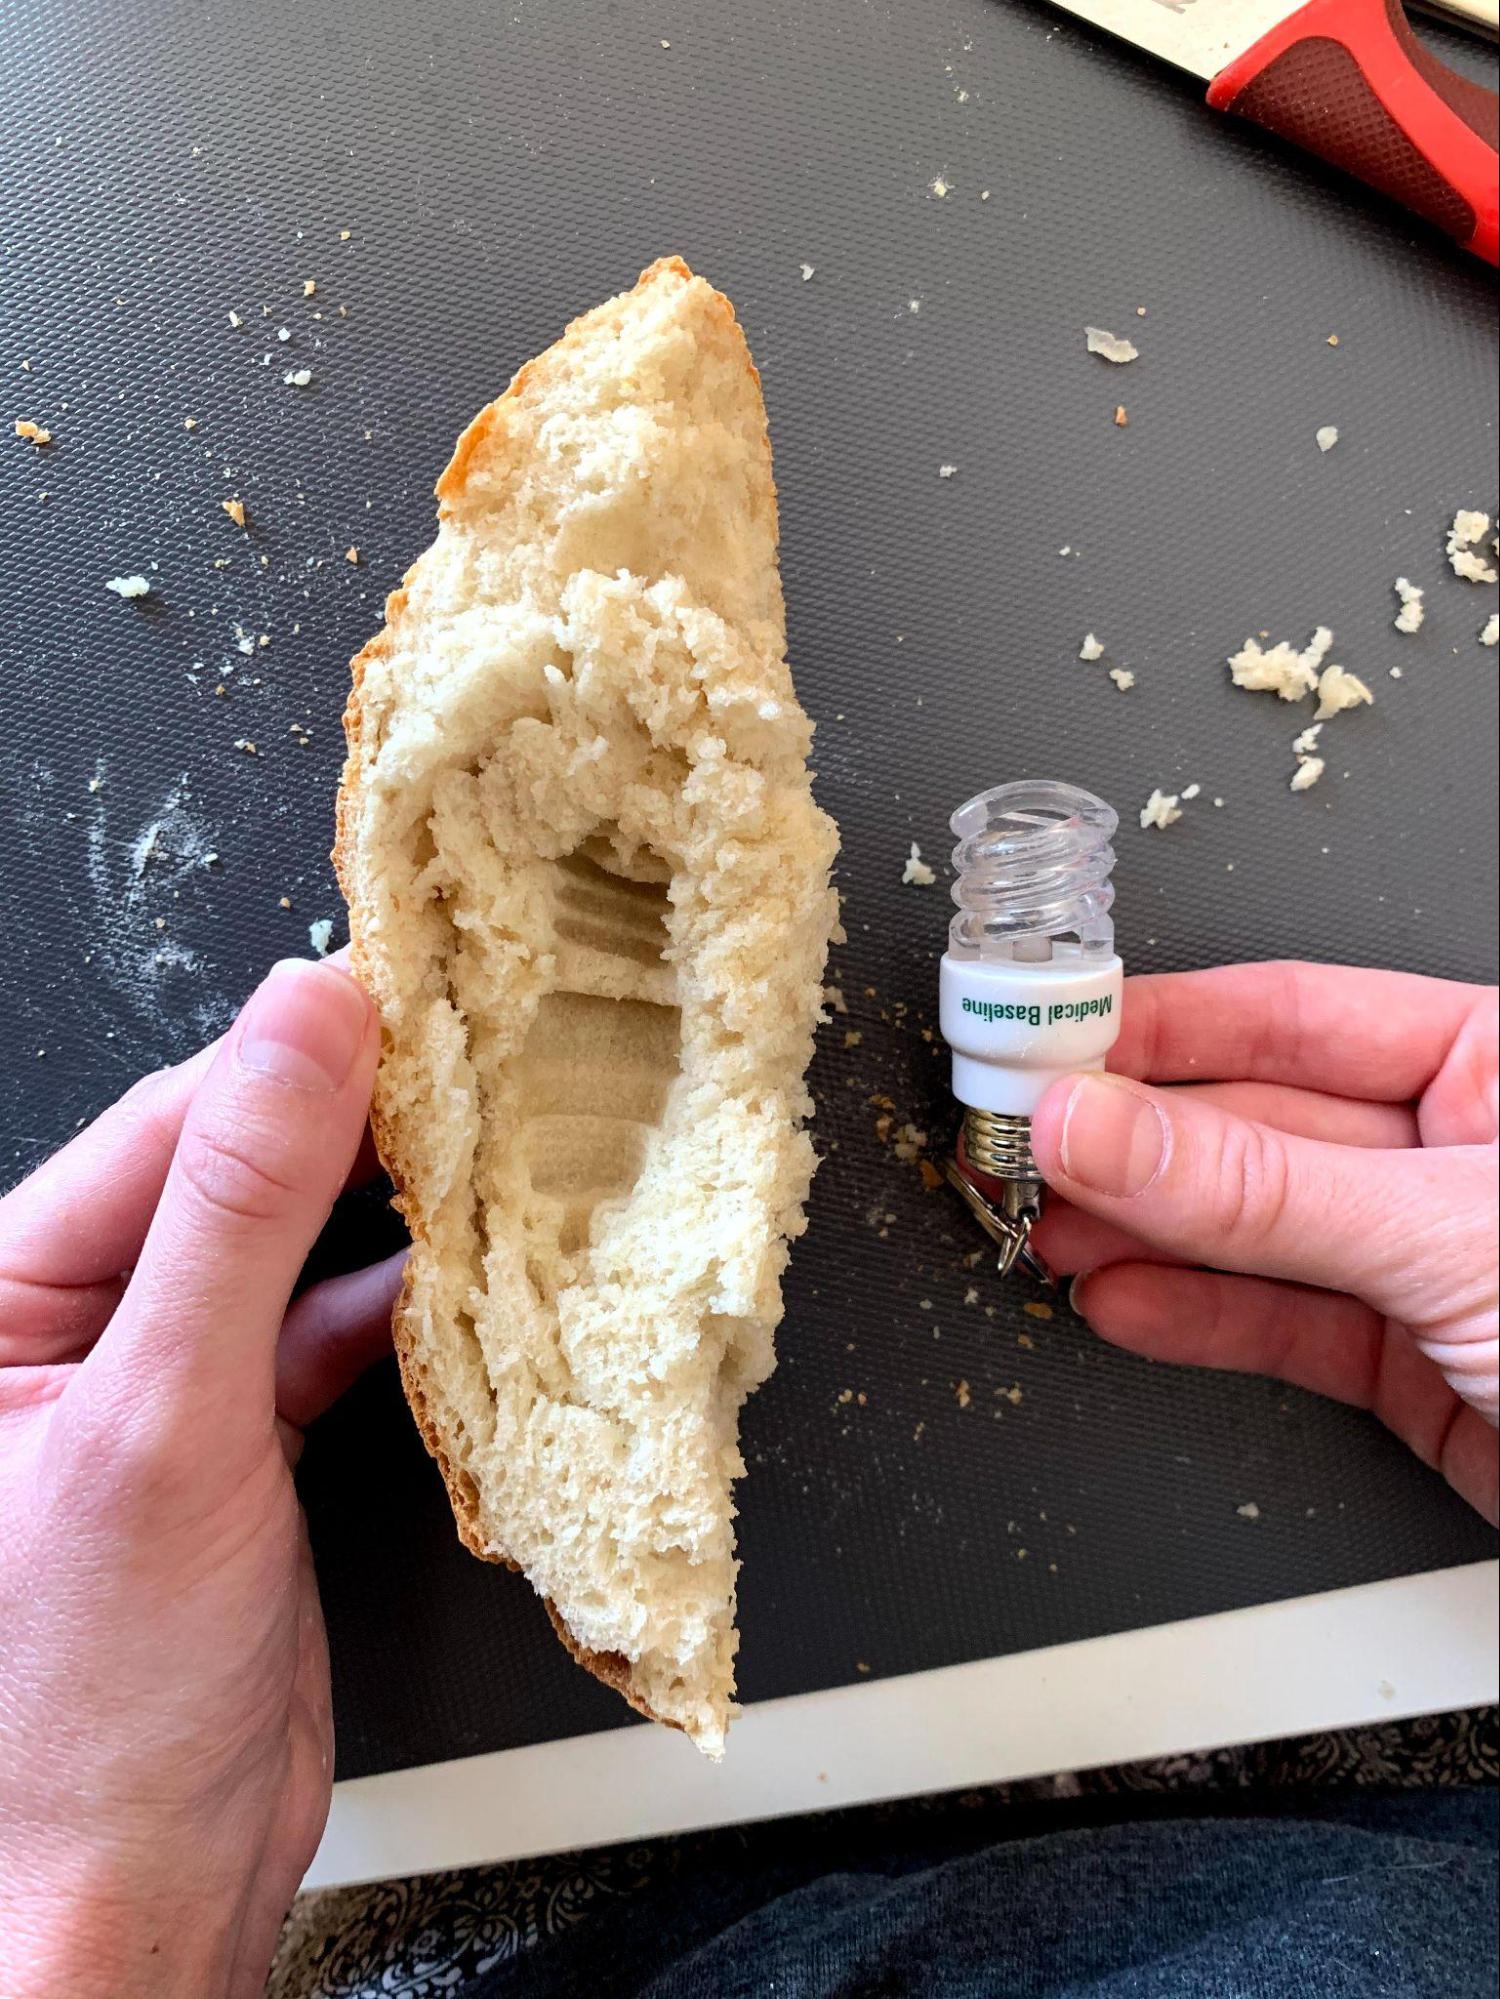
- A keyring light shaped like a twisted lightbulb
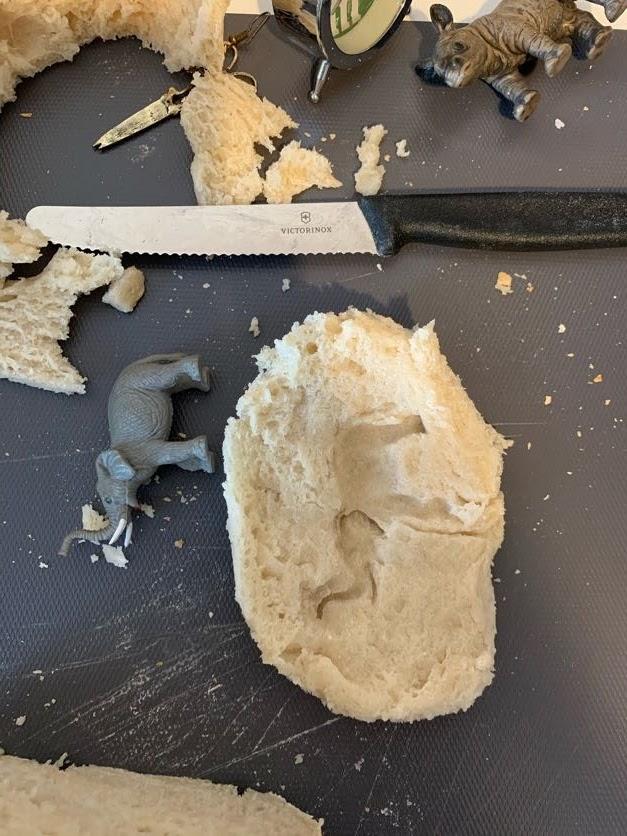
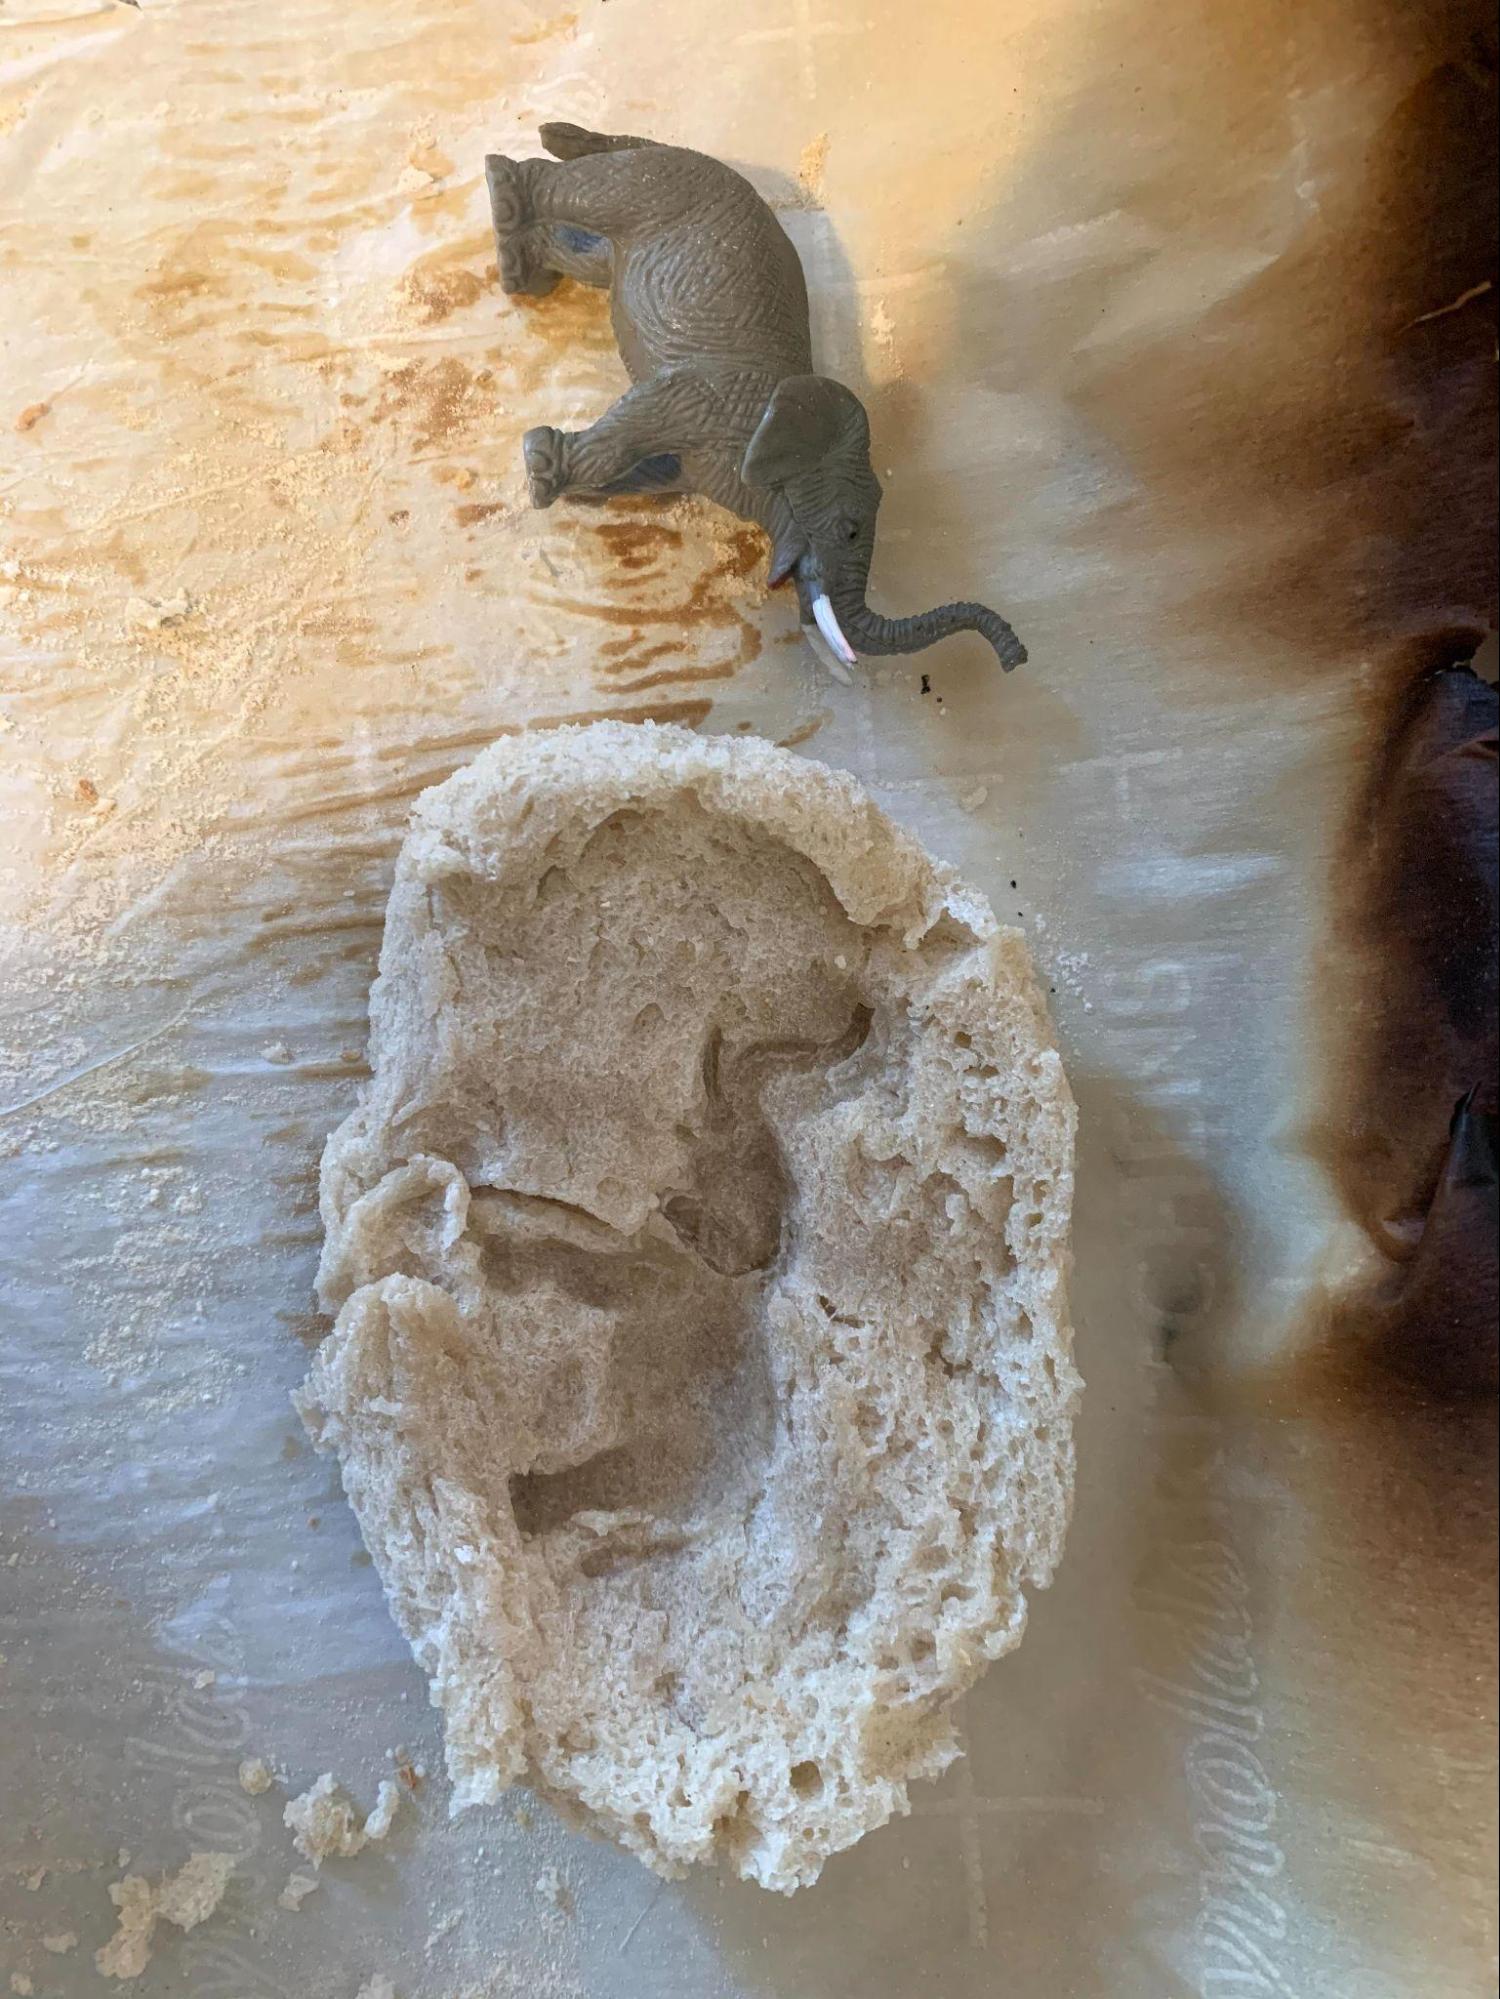
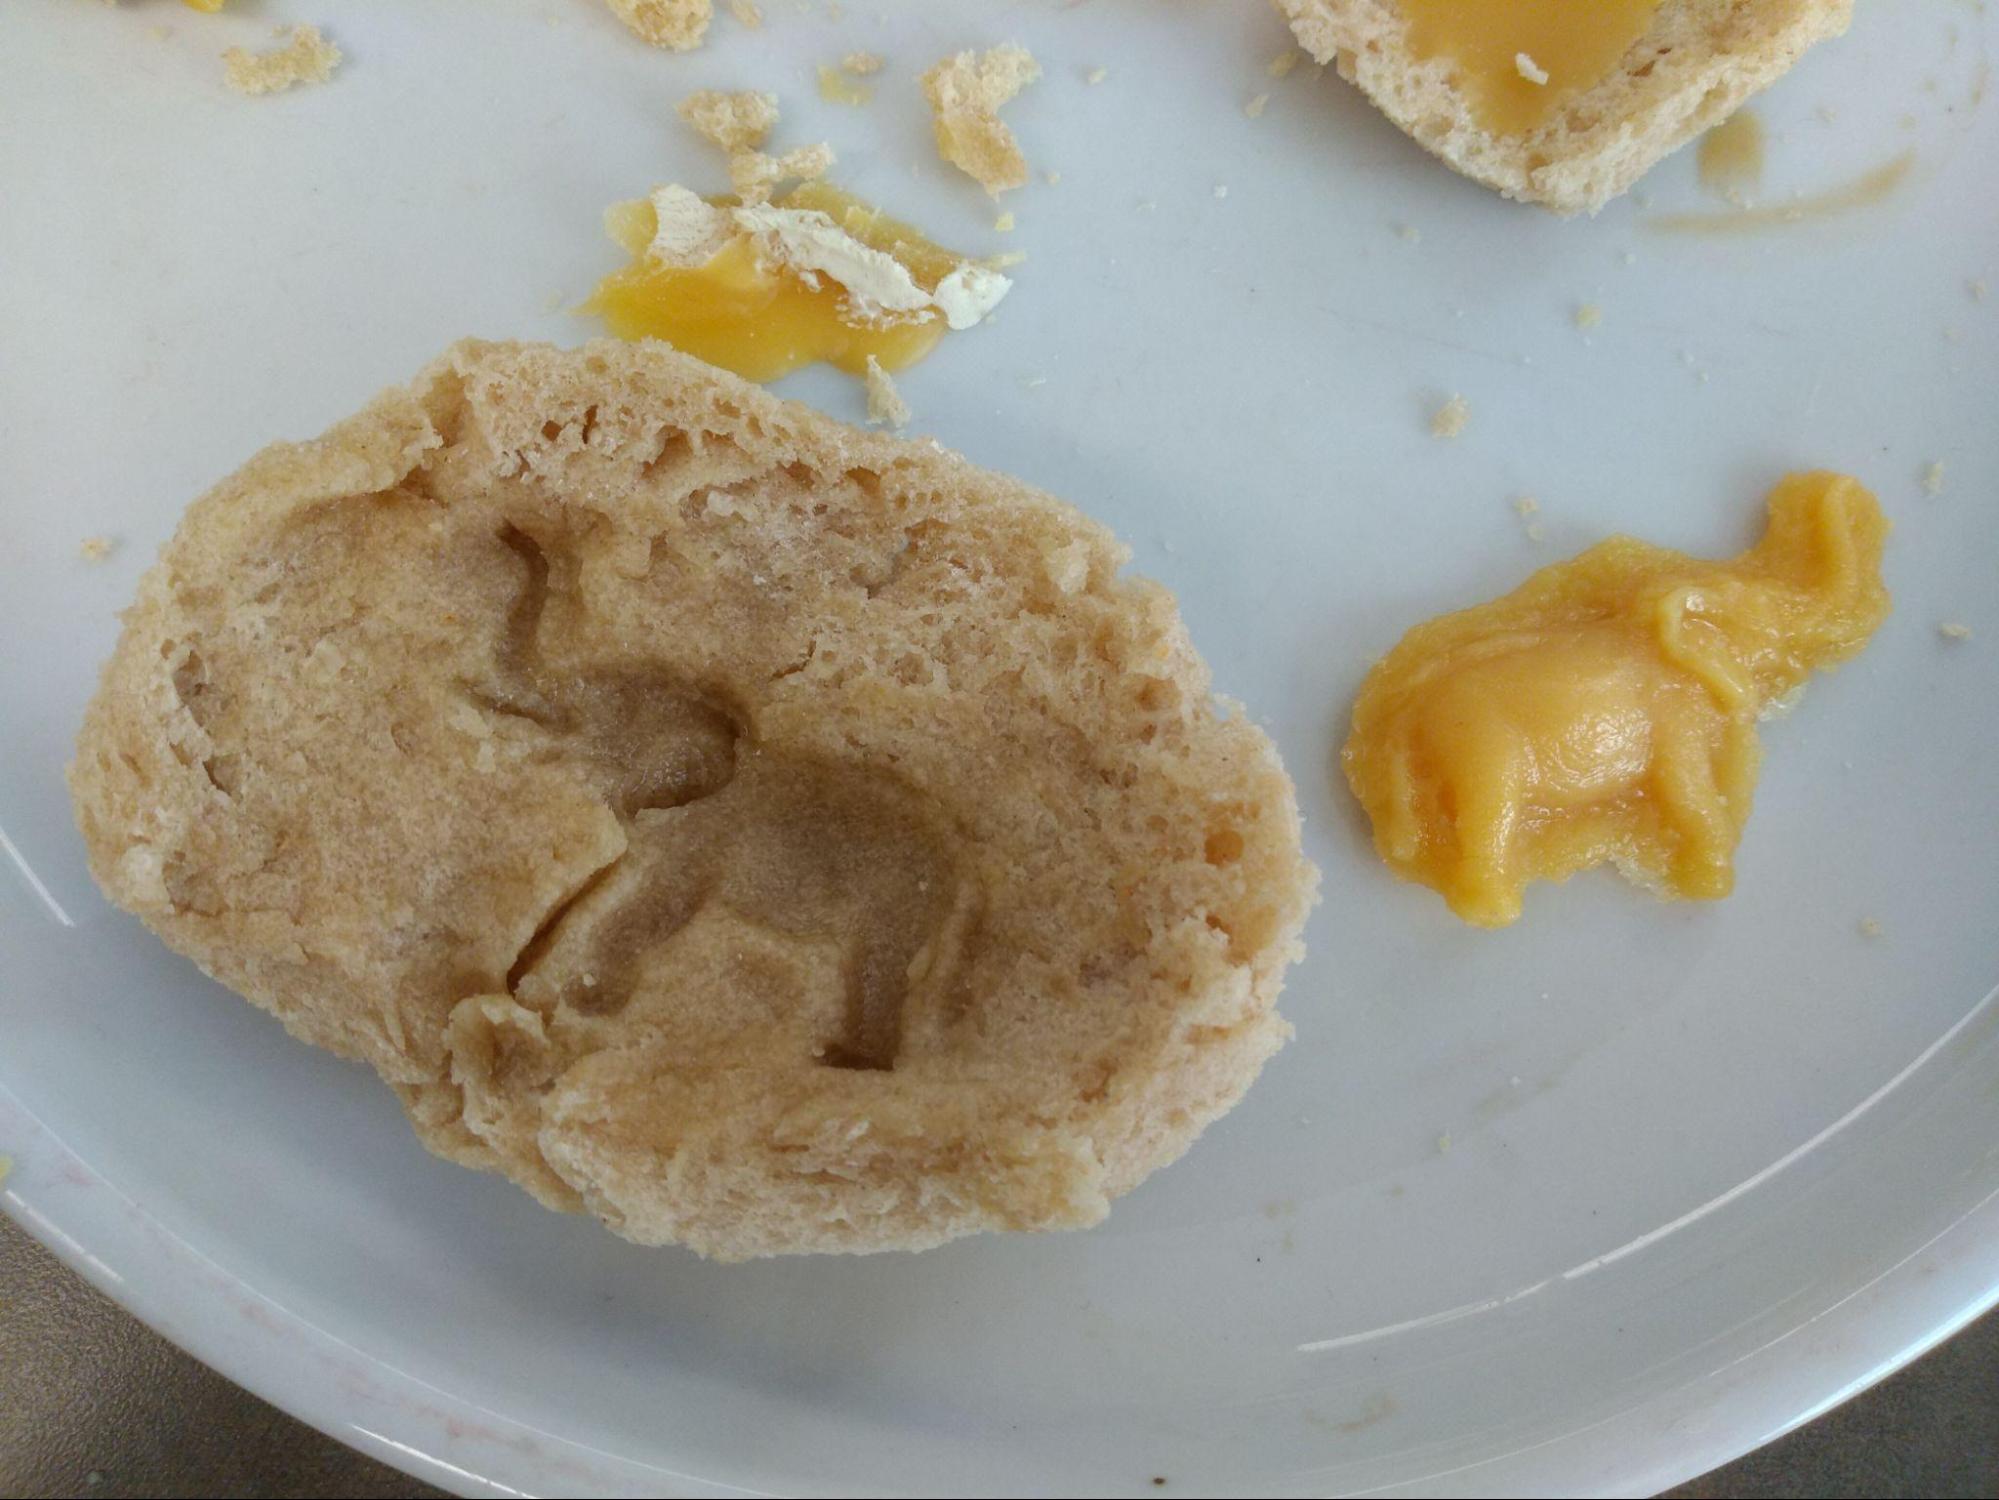
- Plastic elephant figurine
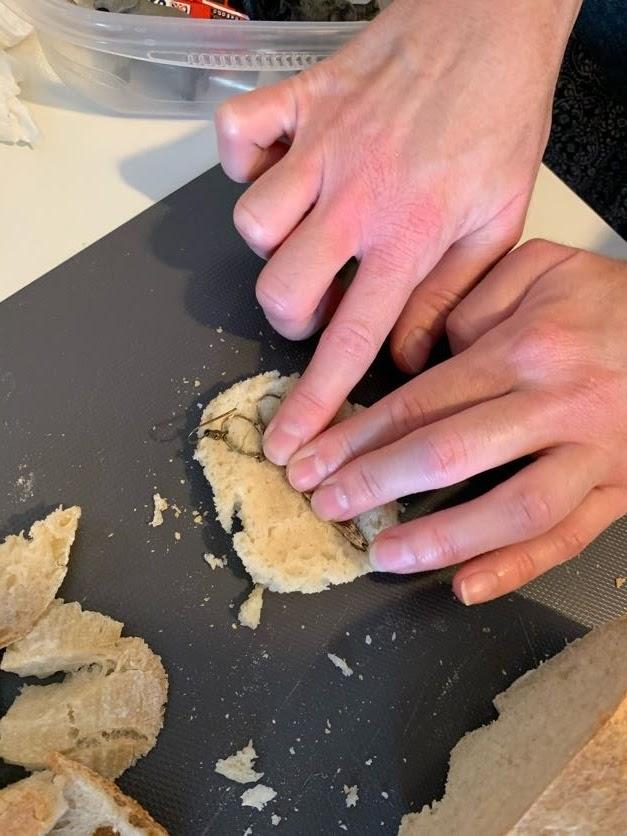
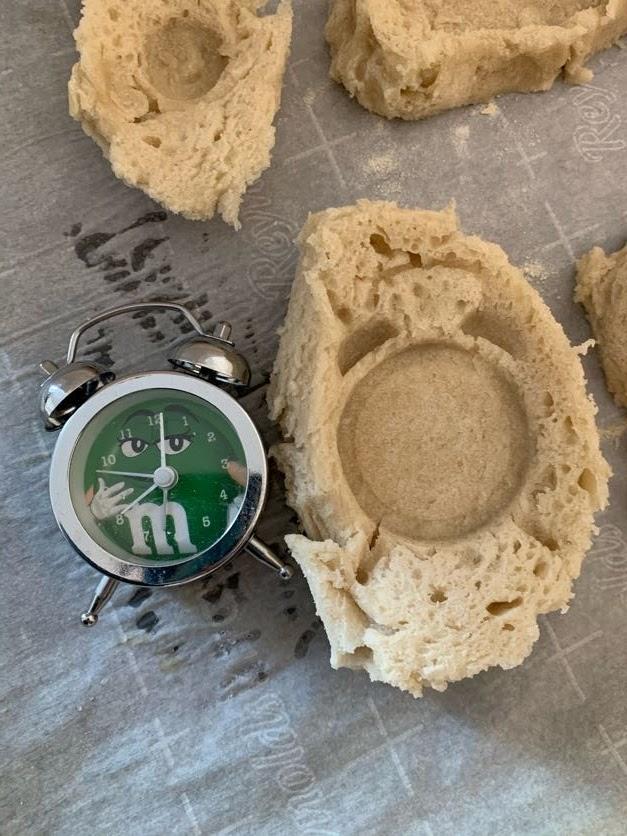
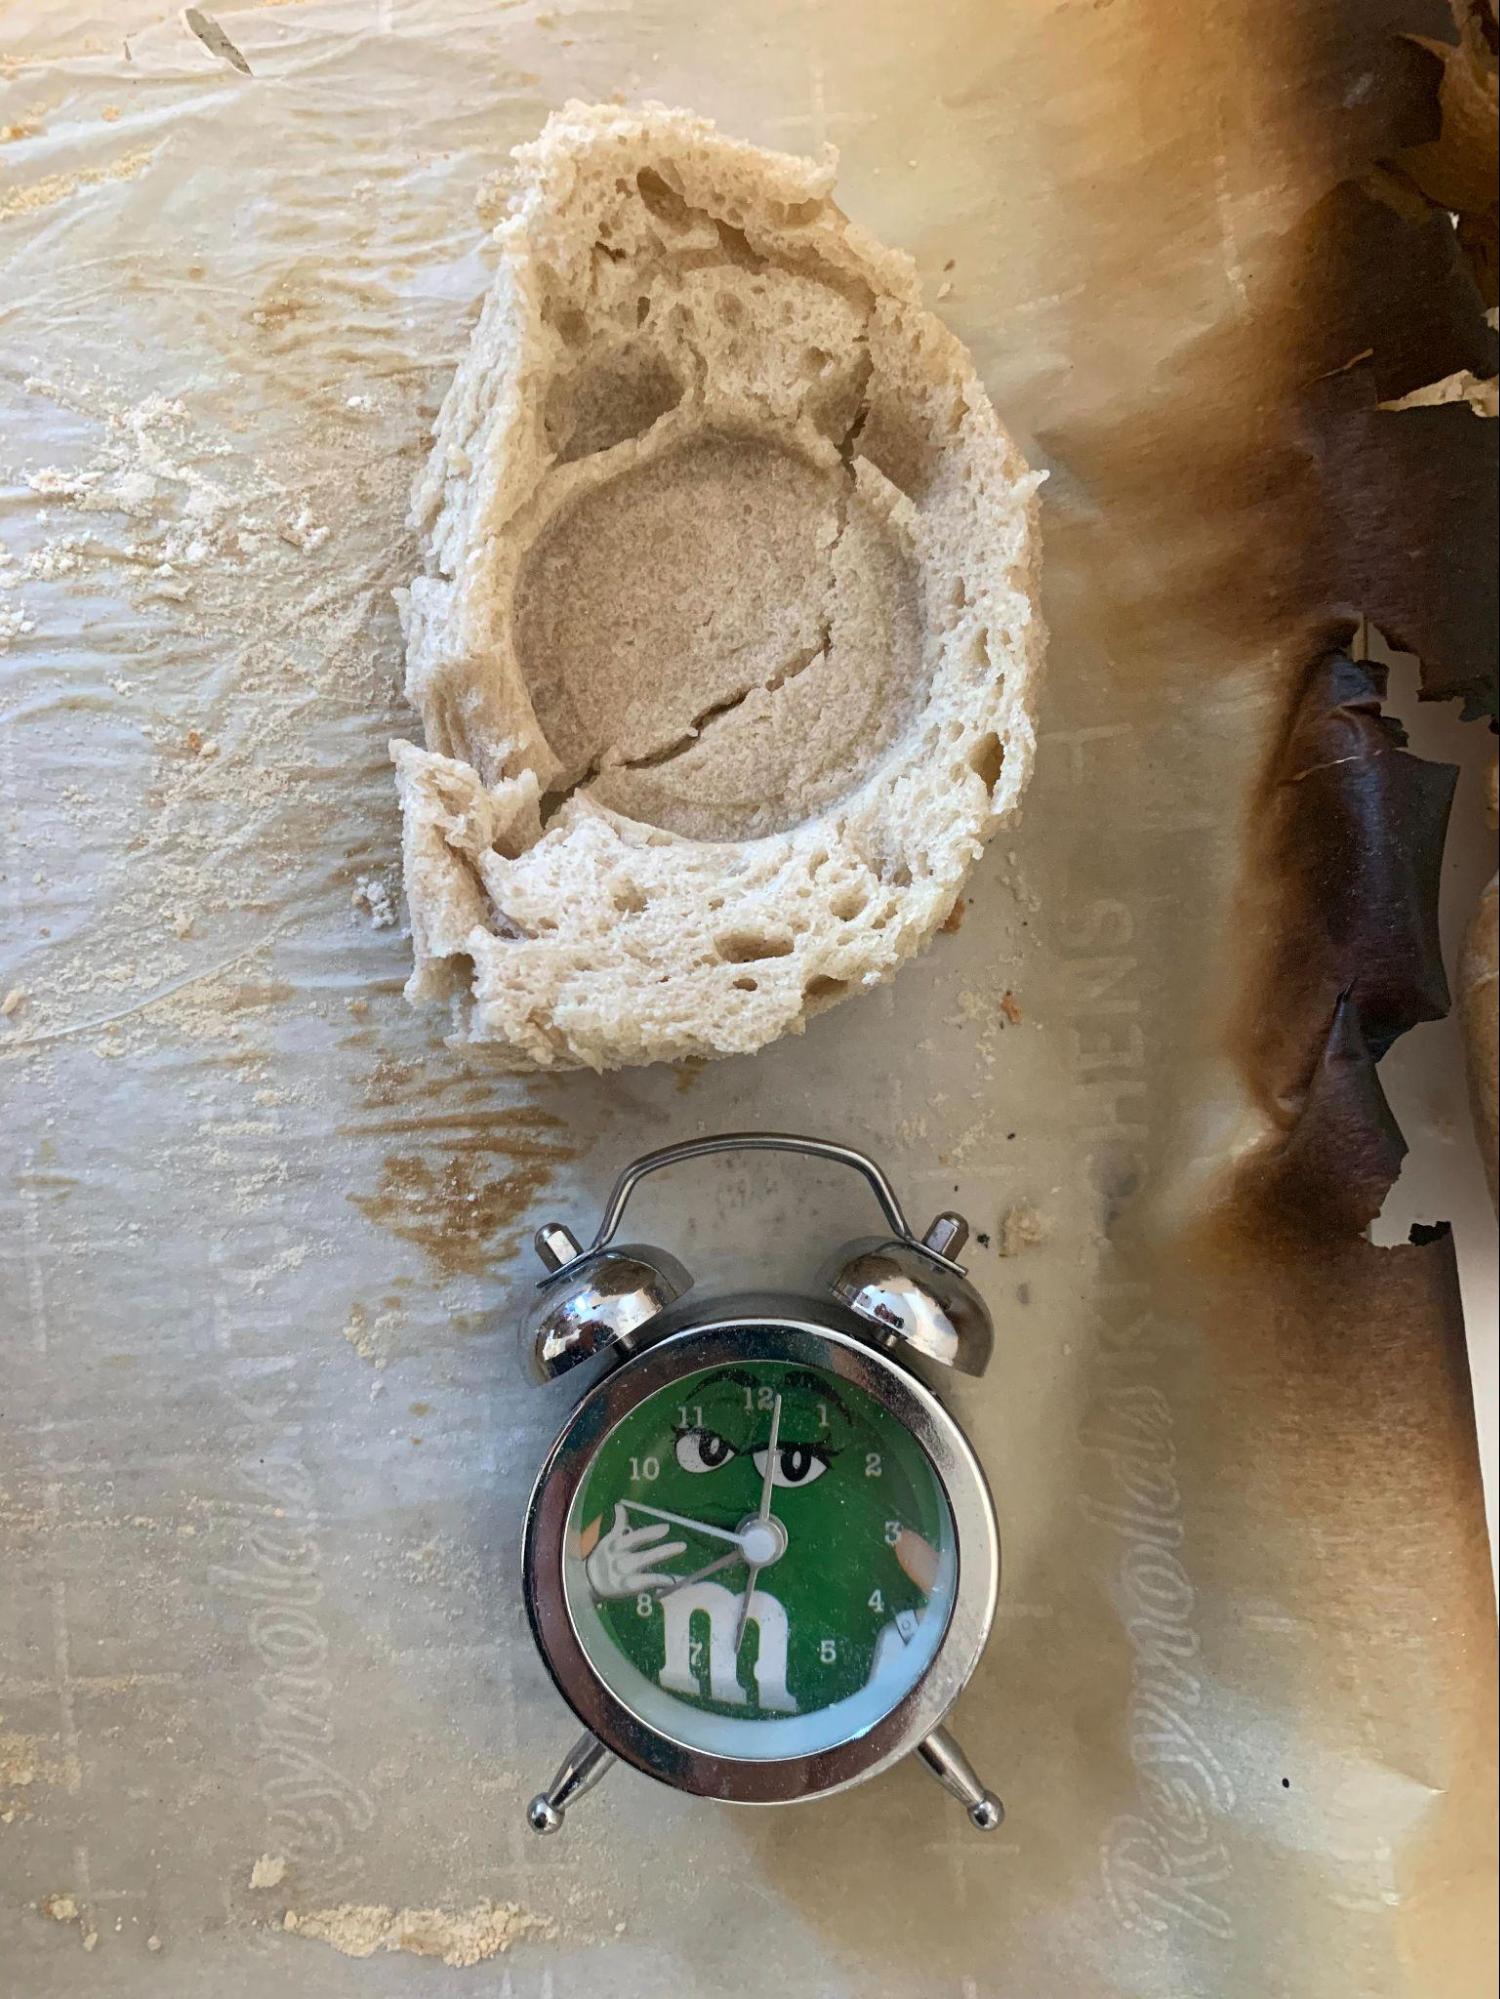
- Small alarm clock
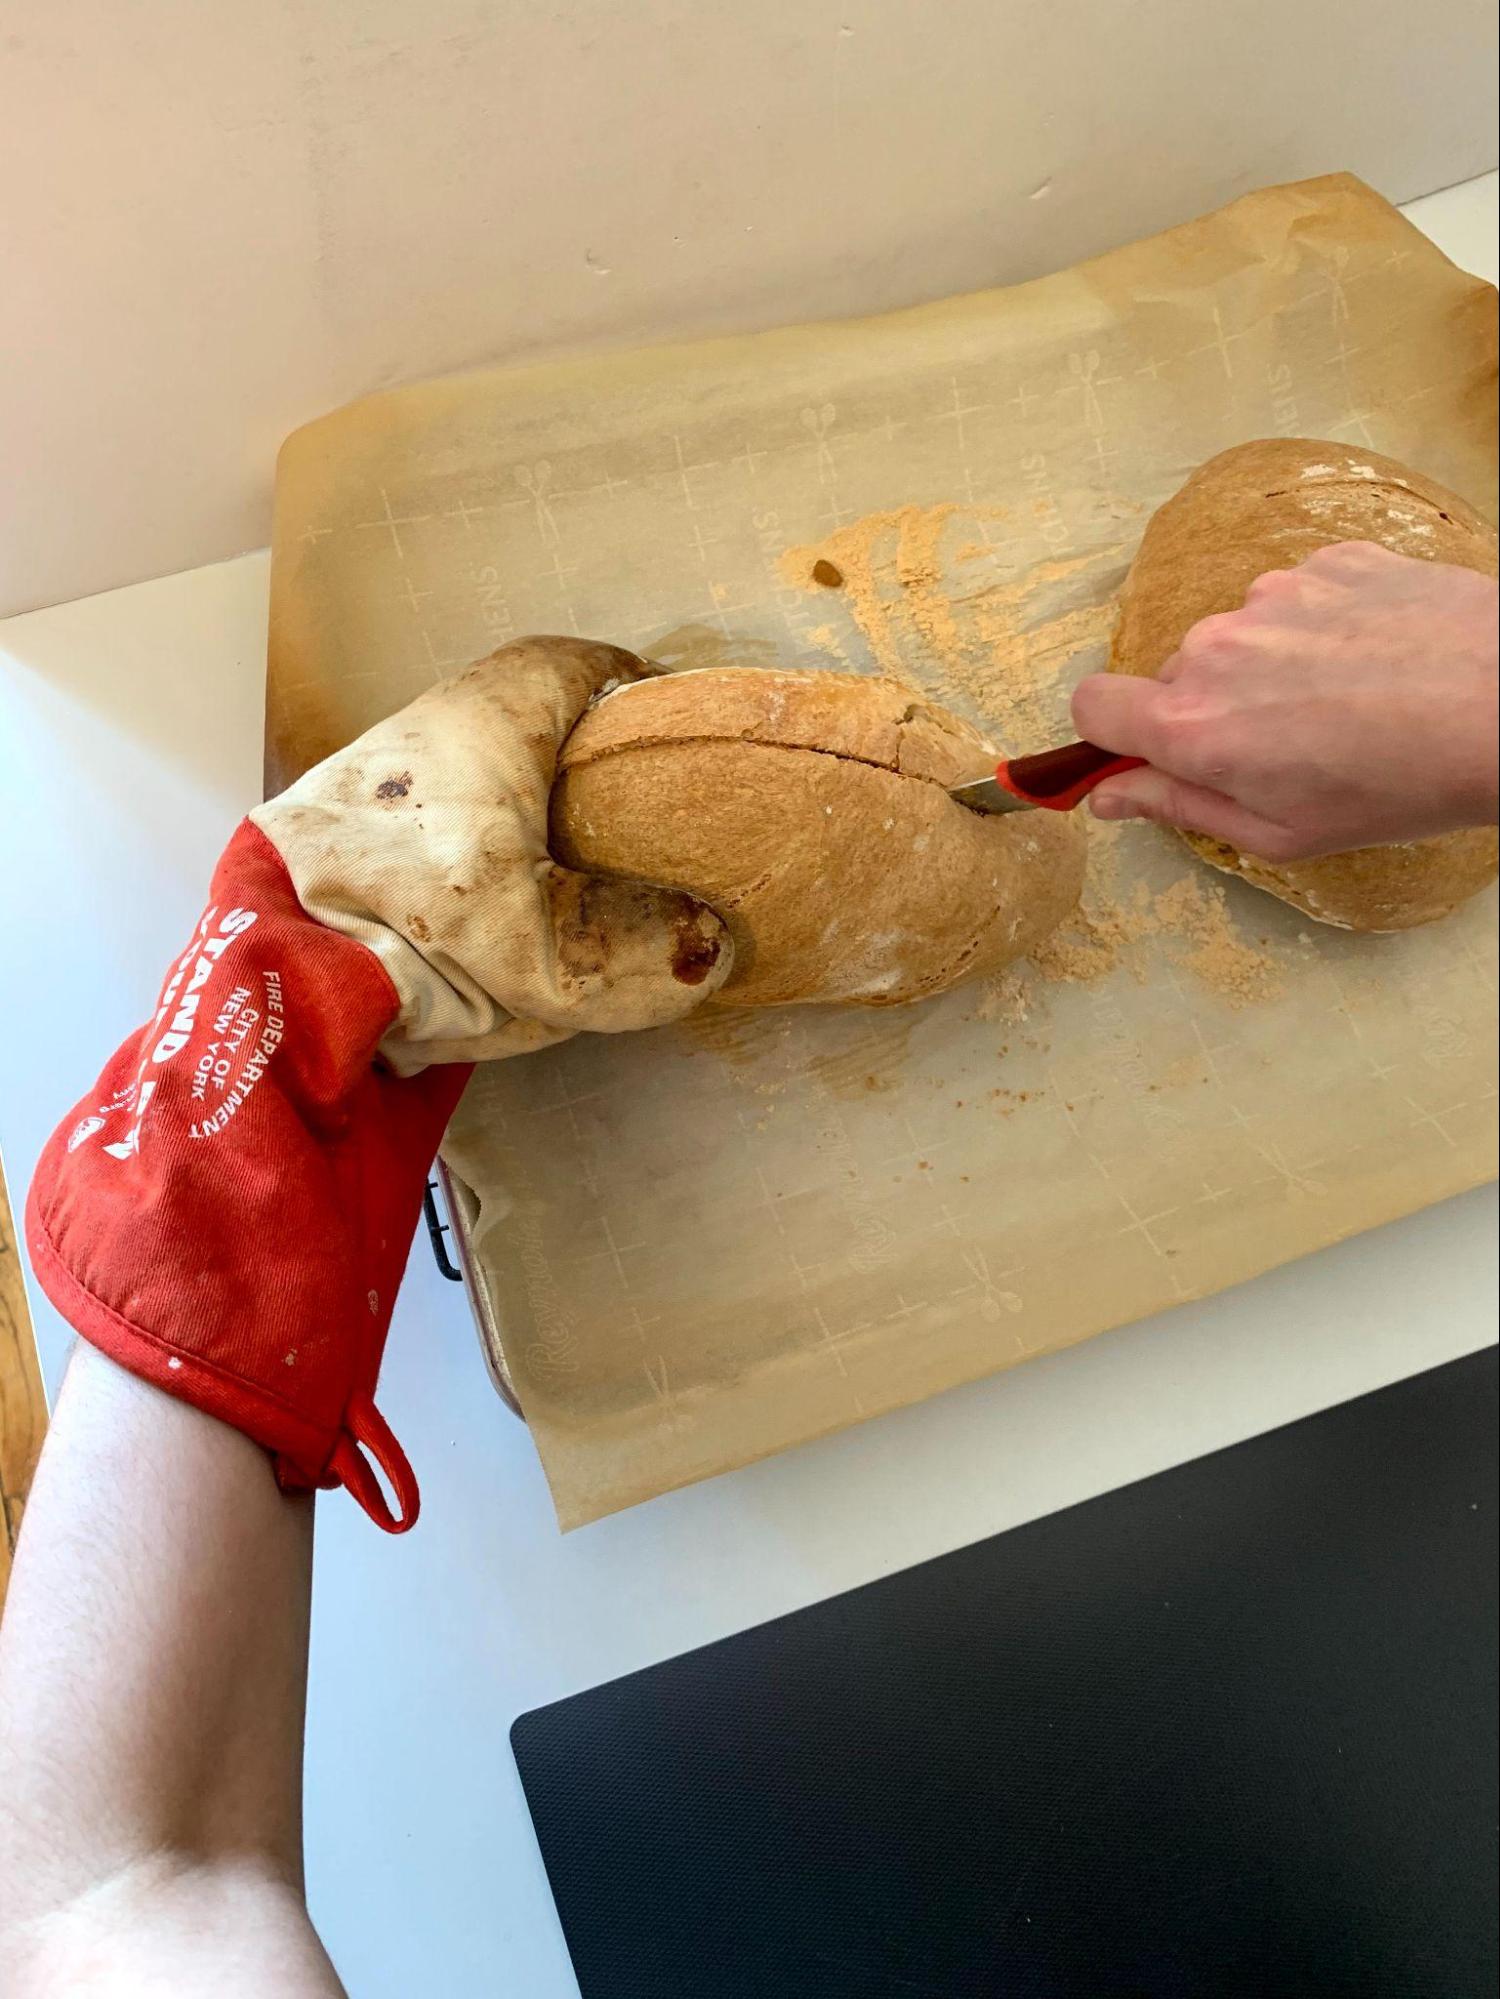
This video captures the eventual method we developed for creating consistent molds (and it helps that Naomi’s hands have a high tolerance for heat as the bread was very hot, still steaming with every cut).
The crust, which was very hard, kept impeding the molding process. We realized that removing the crust first helped to allow the object to be pushed into the pith unobtrusively.
The following are pictures of the molds right after pressing the objects into the bread. For many of the objects, more than one mold was prepared with the same object
Name: Naomi Rosenkranz & Megan Lennon (Naomi’s roommate)
Date and Time:
2021.05.16, 12pm
Location: Our apartment (Amsterdam and 140th St, NYC)
Subject: Molds dried overnight
The bread molds were left uncovered overnight to allow them to dry. The molds became very dry to the touch but not brittle, and the bread was no longer malleable. Any cracks or other tension in the bread became more apparent (as in the molds of the mini alarm clock below).
Name: Naomi Rosenkranz & Caroline Surman
Date and Time:
2021.05.18, 10am
Location: Chandler 260, Columbia University
Subject: Casting wax into bread molds
The process we followed for casting in wax was adapted from the M&K protocol used by previous semesters, as highlighted in the presentation: Resource: Breadmolding and casting Slideshow
Materials and Tools:
- Natural, yellow beeswax, Milliard (amazon)
- Sunflower oil (to lubricate the mold before pouring the wax, which eases removal of the object when the wax dries)
- Purchased at Food Universe Market in NYC (138th and Broadway); Kirlangic Sunflower OIl, 1liter (kirlangic.com.tr); turkish company
- Paintbrush (for oil)
- Chopsticks (for stirring)
- Hotplate
- Metal decanter (coffee pot adapted for beeswax pouring)
- Ceramic plate (to place molds upon)
- Modeling clay (plasticine) to repair holes in the bread molds
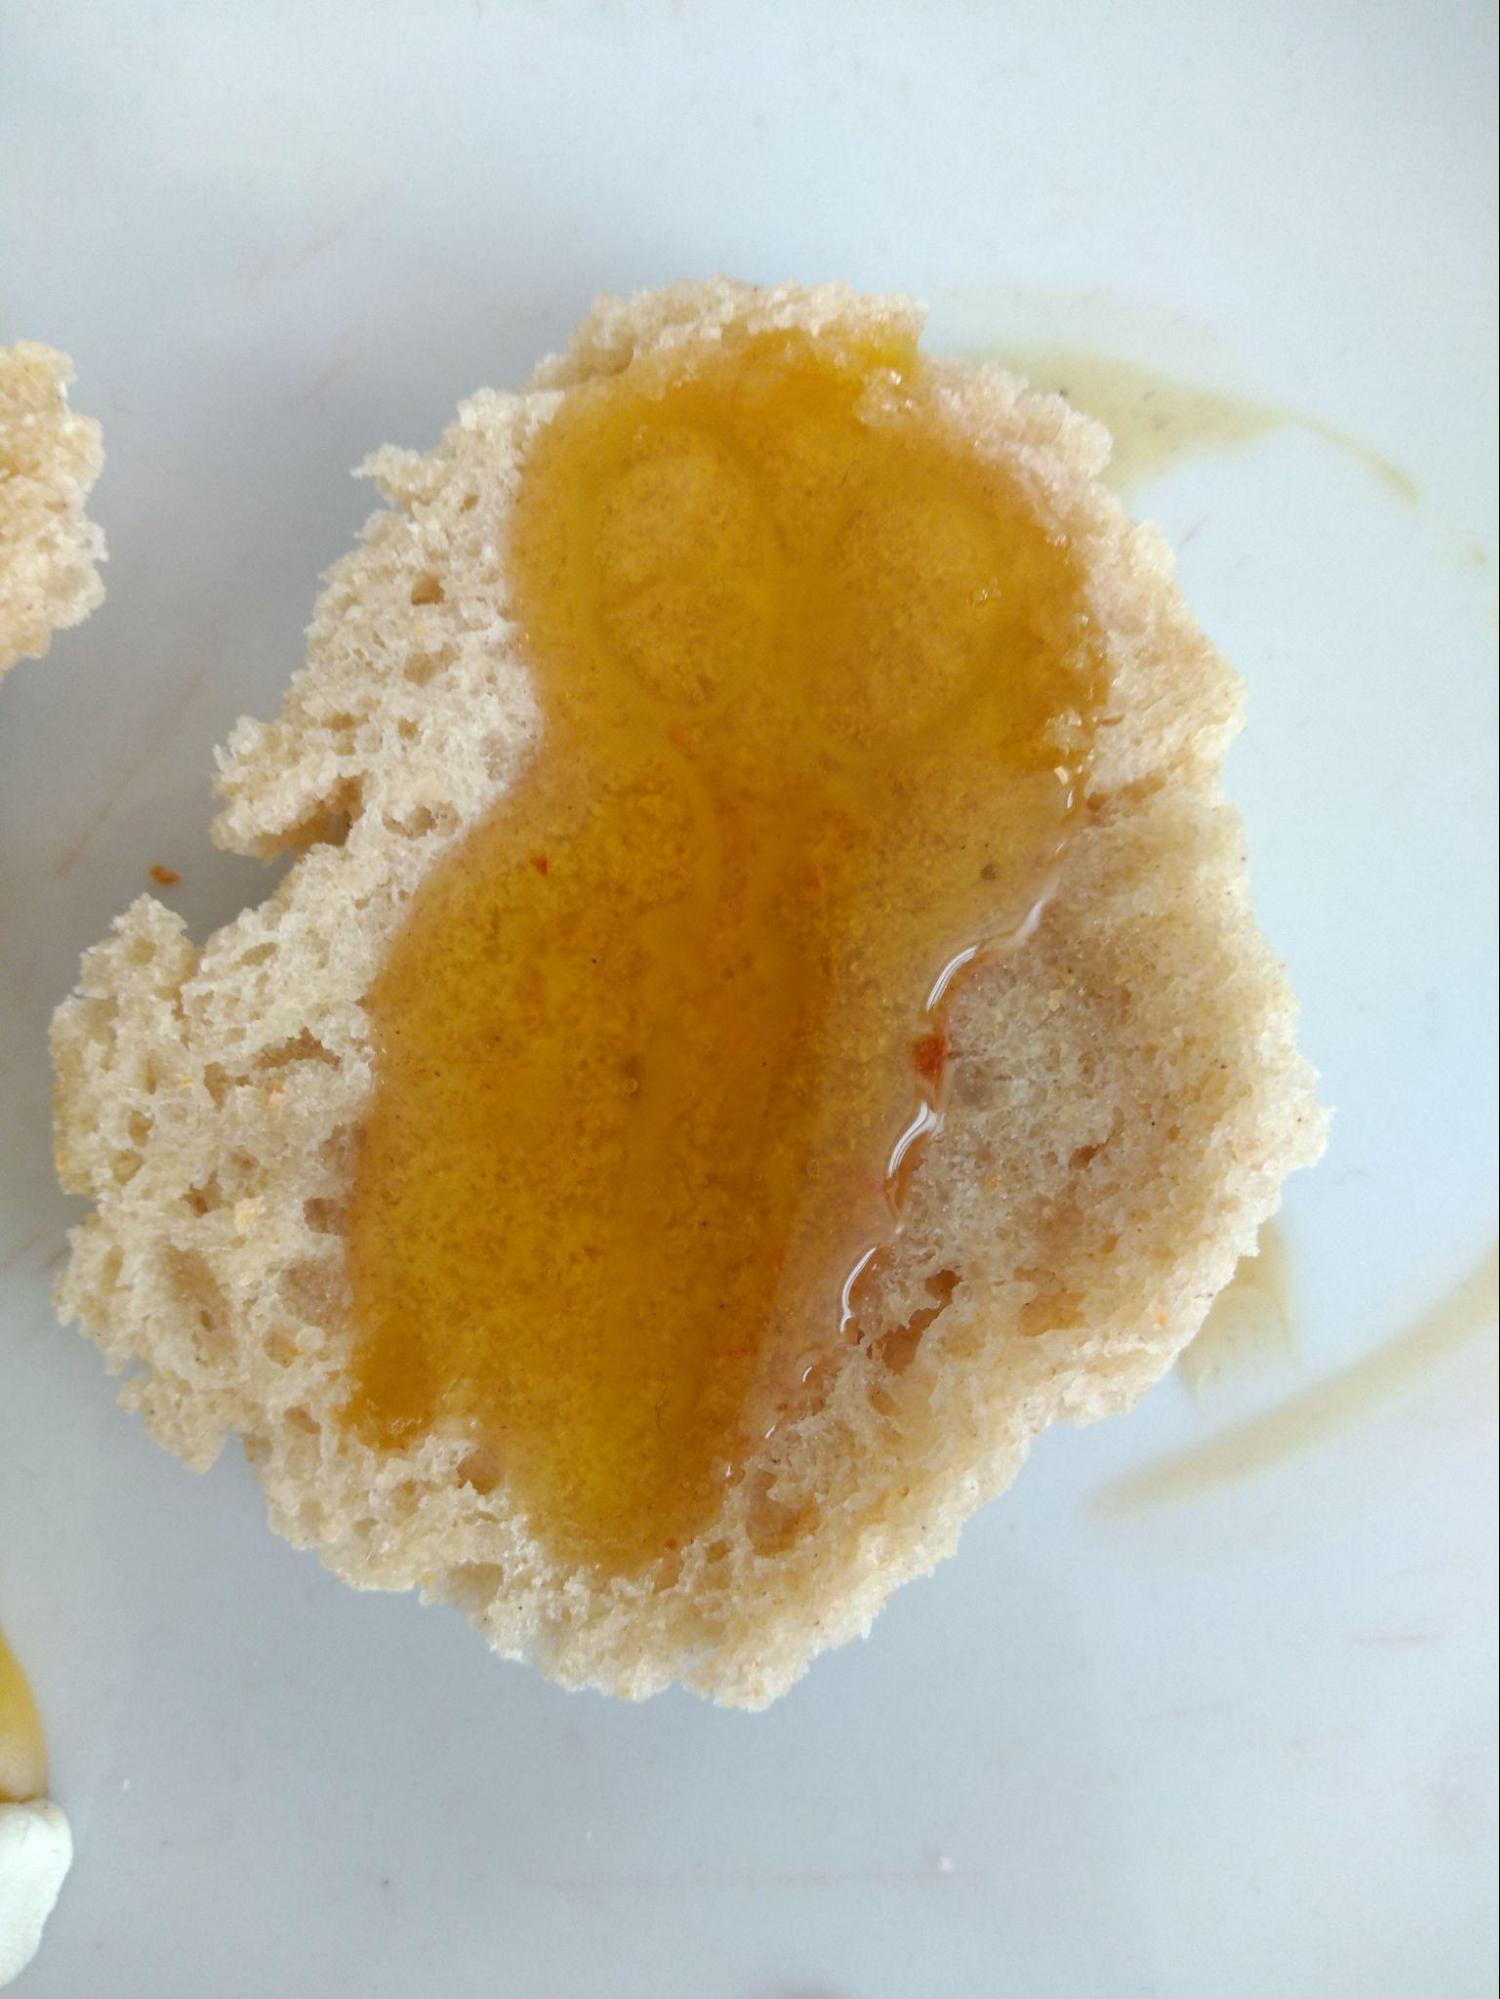
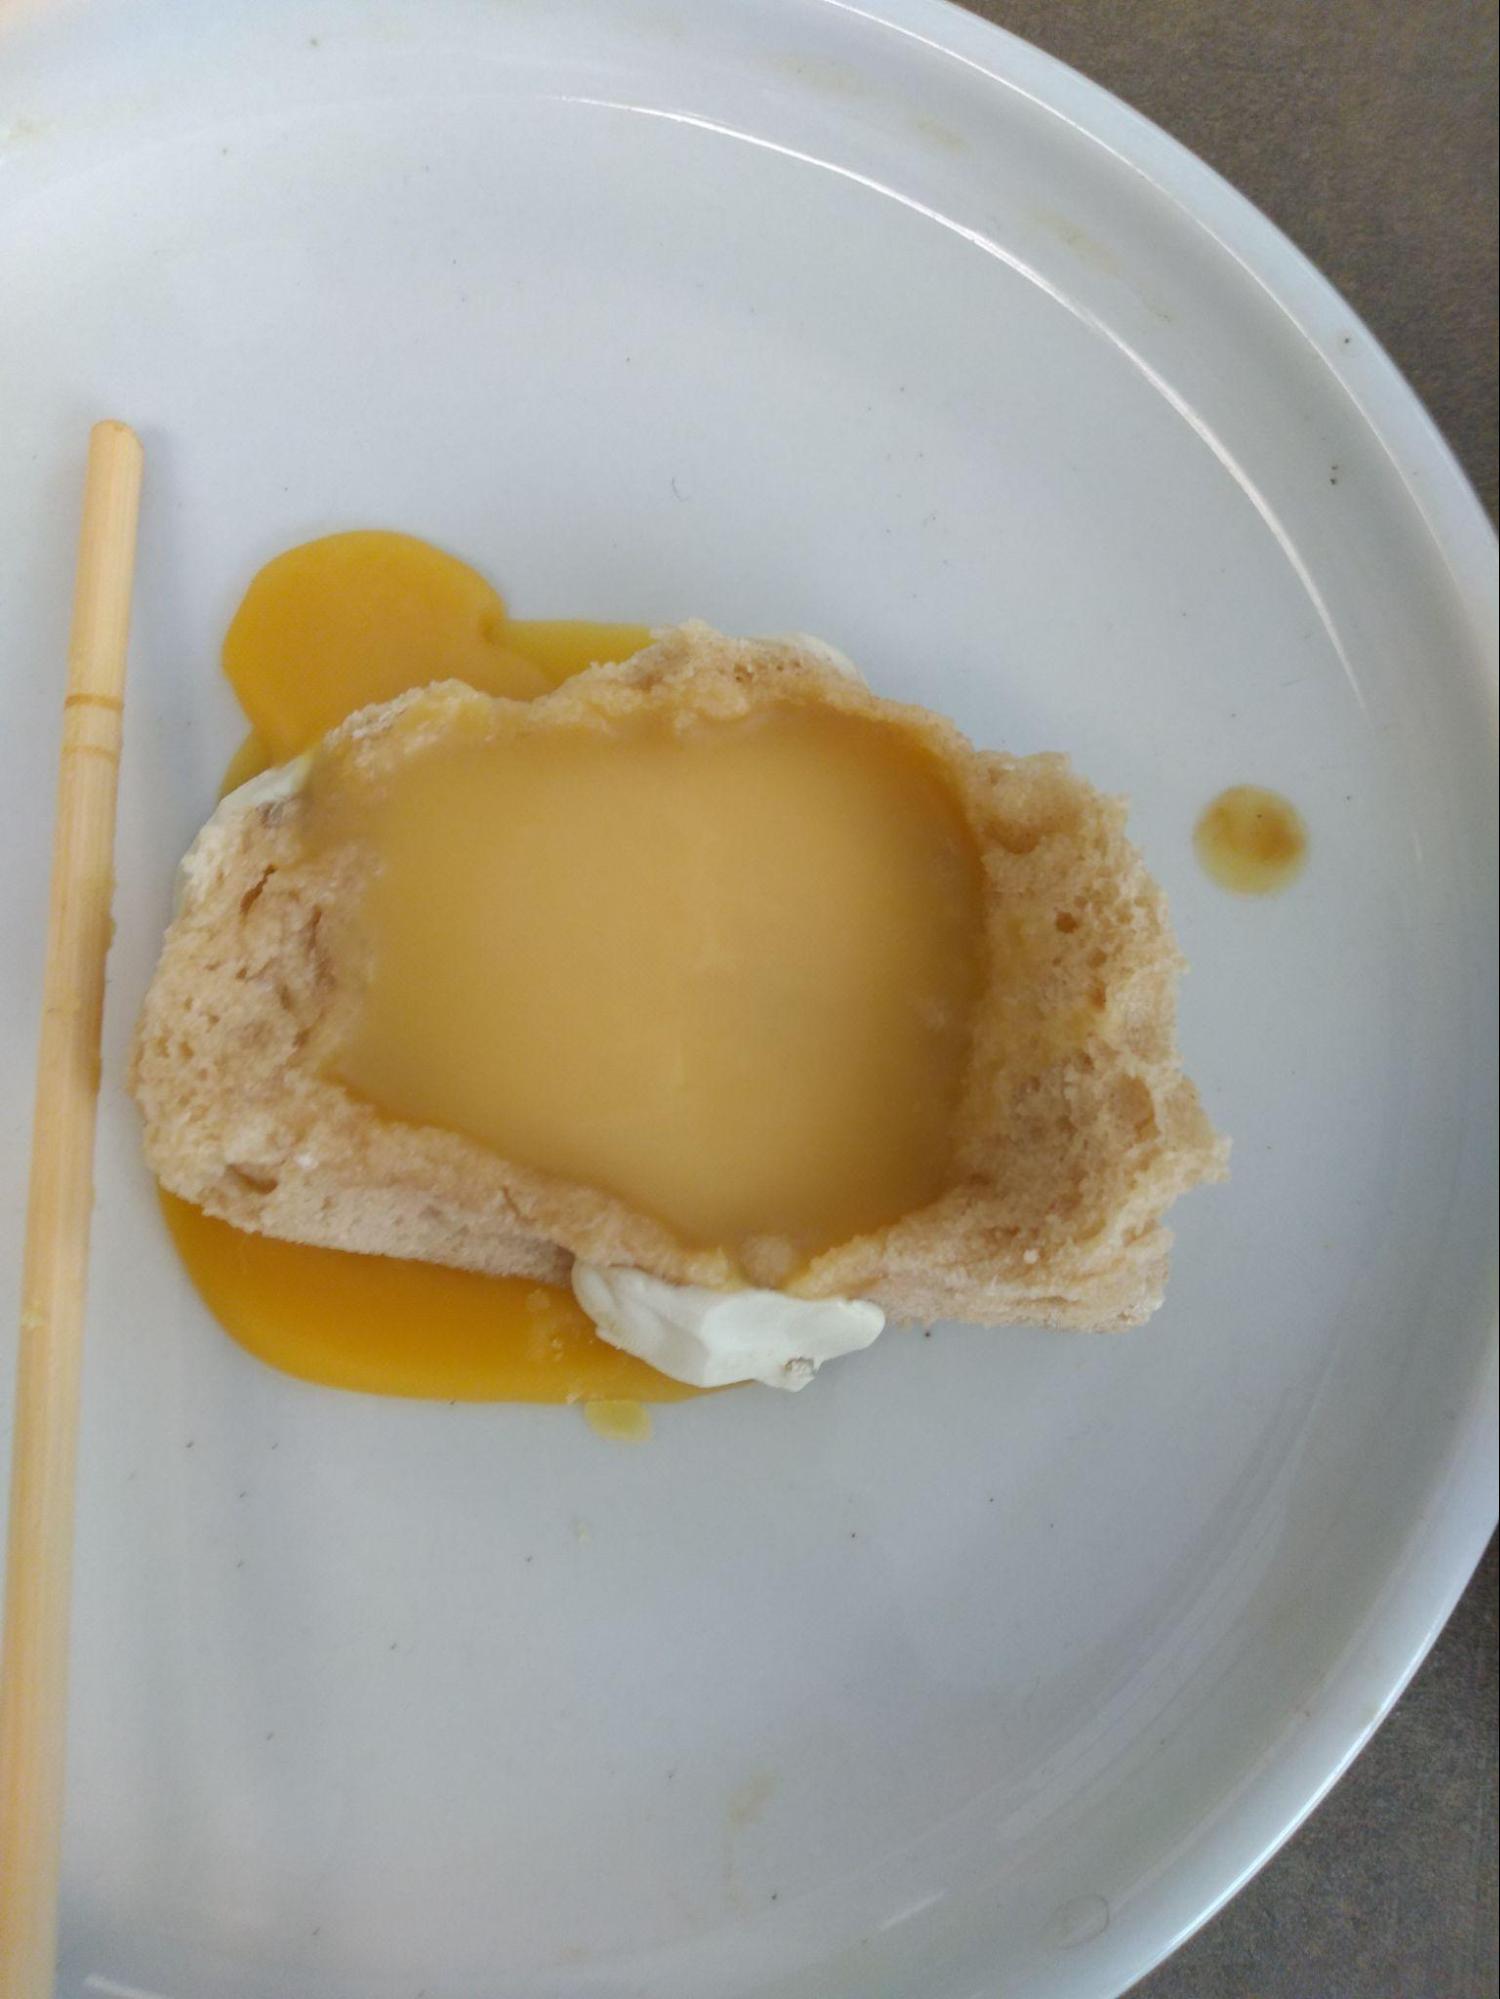
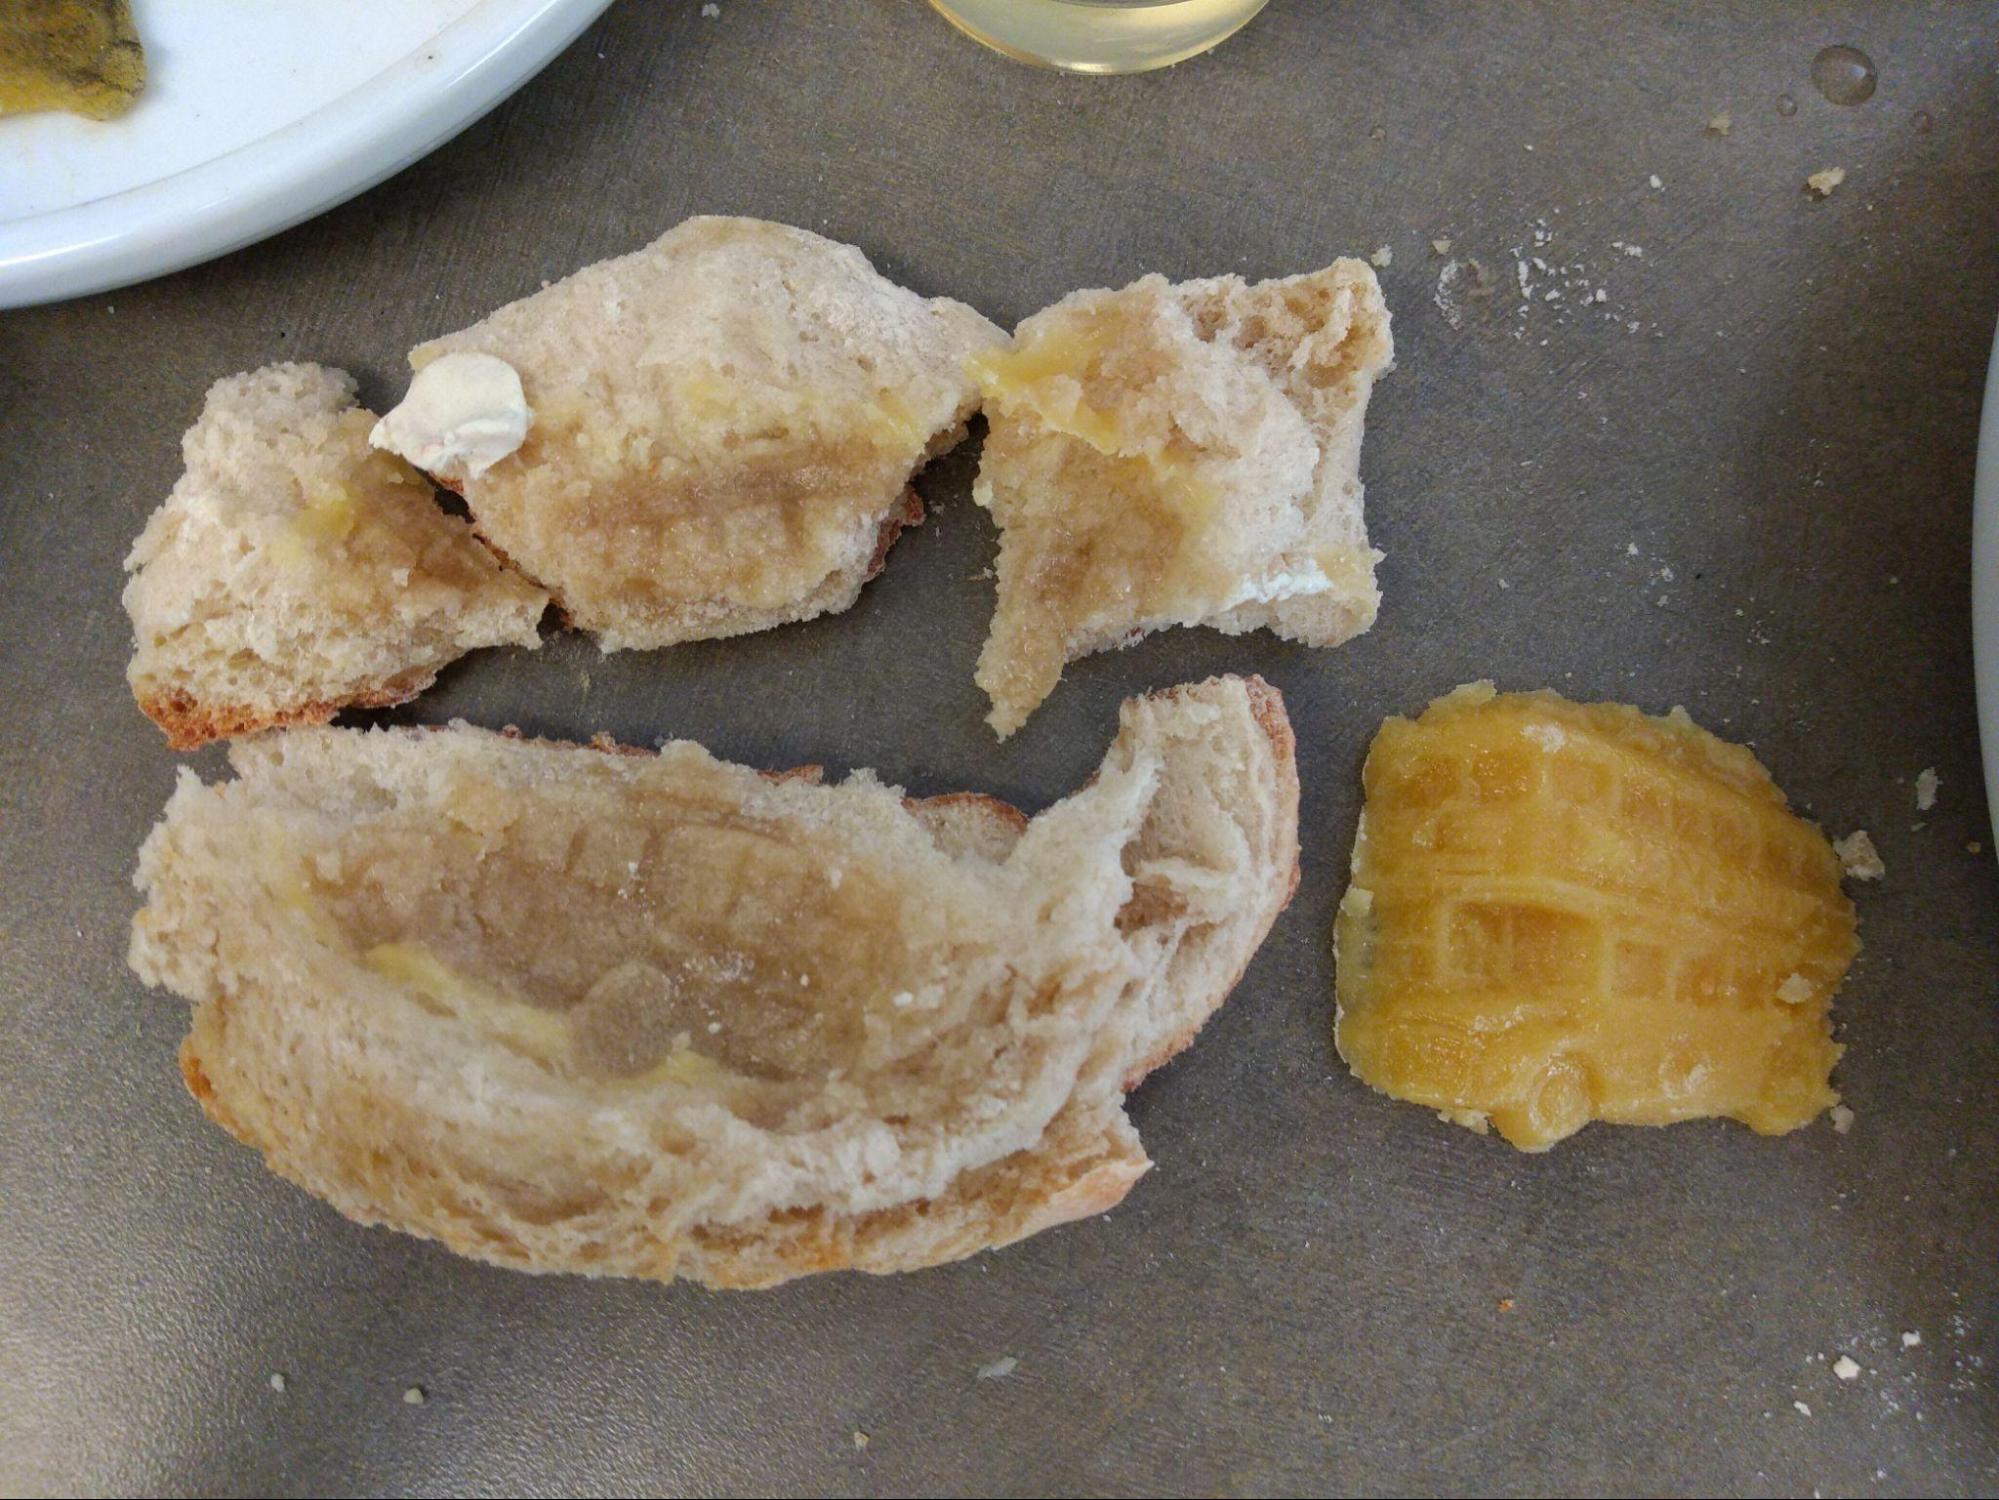
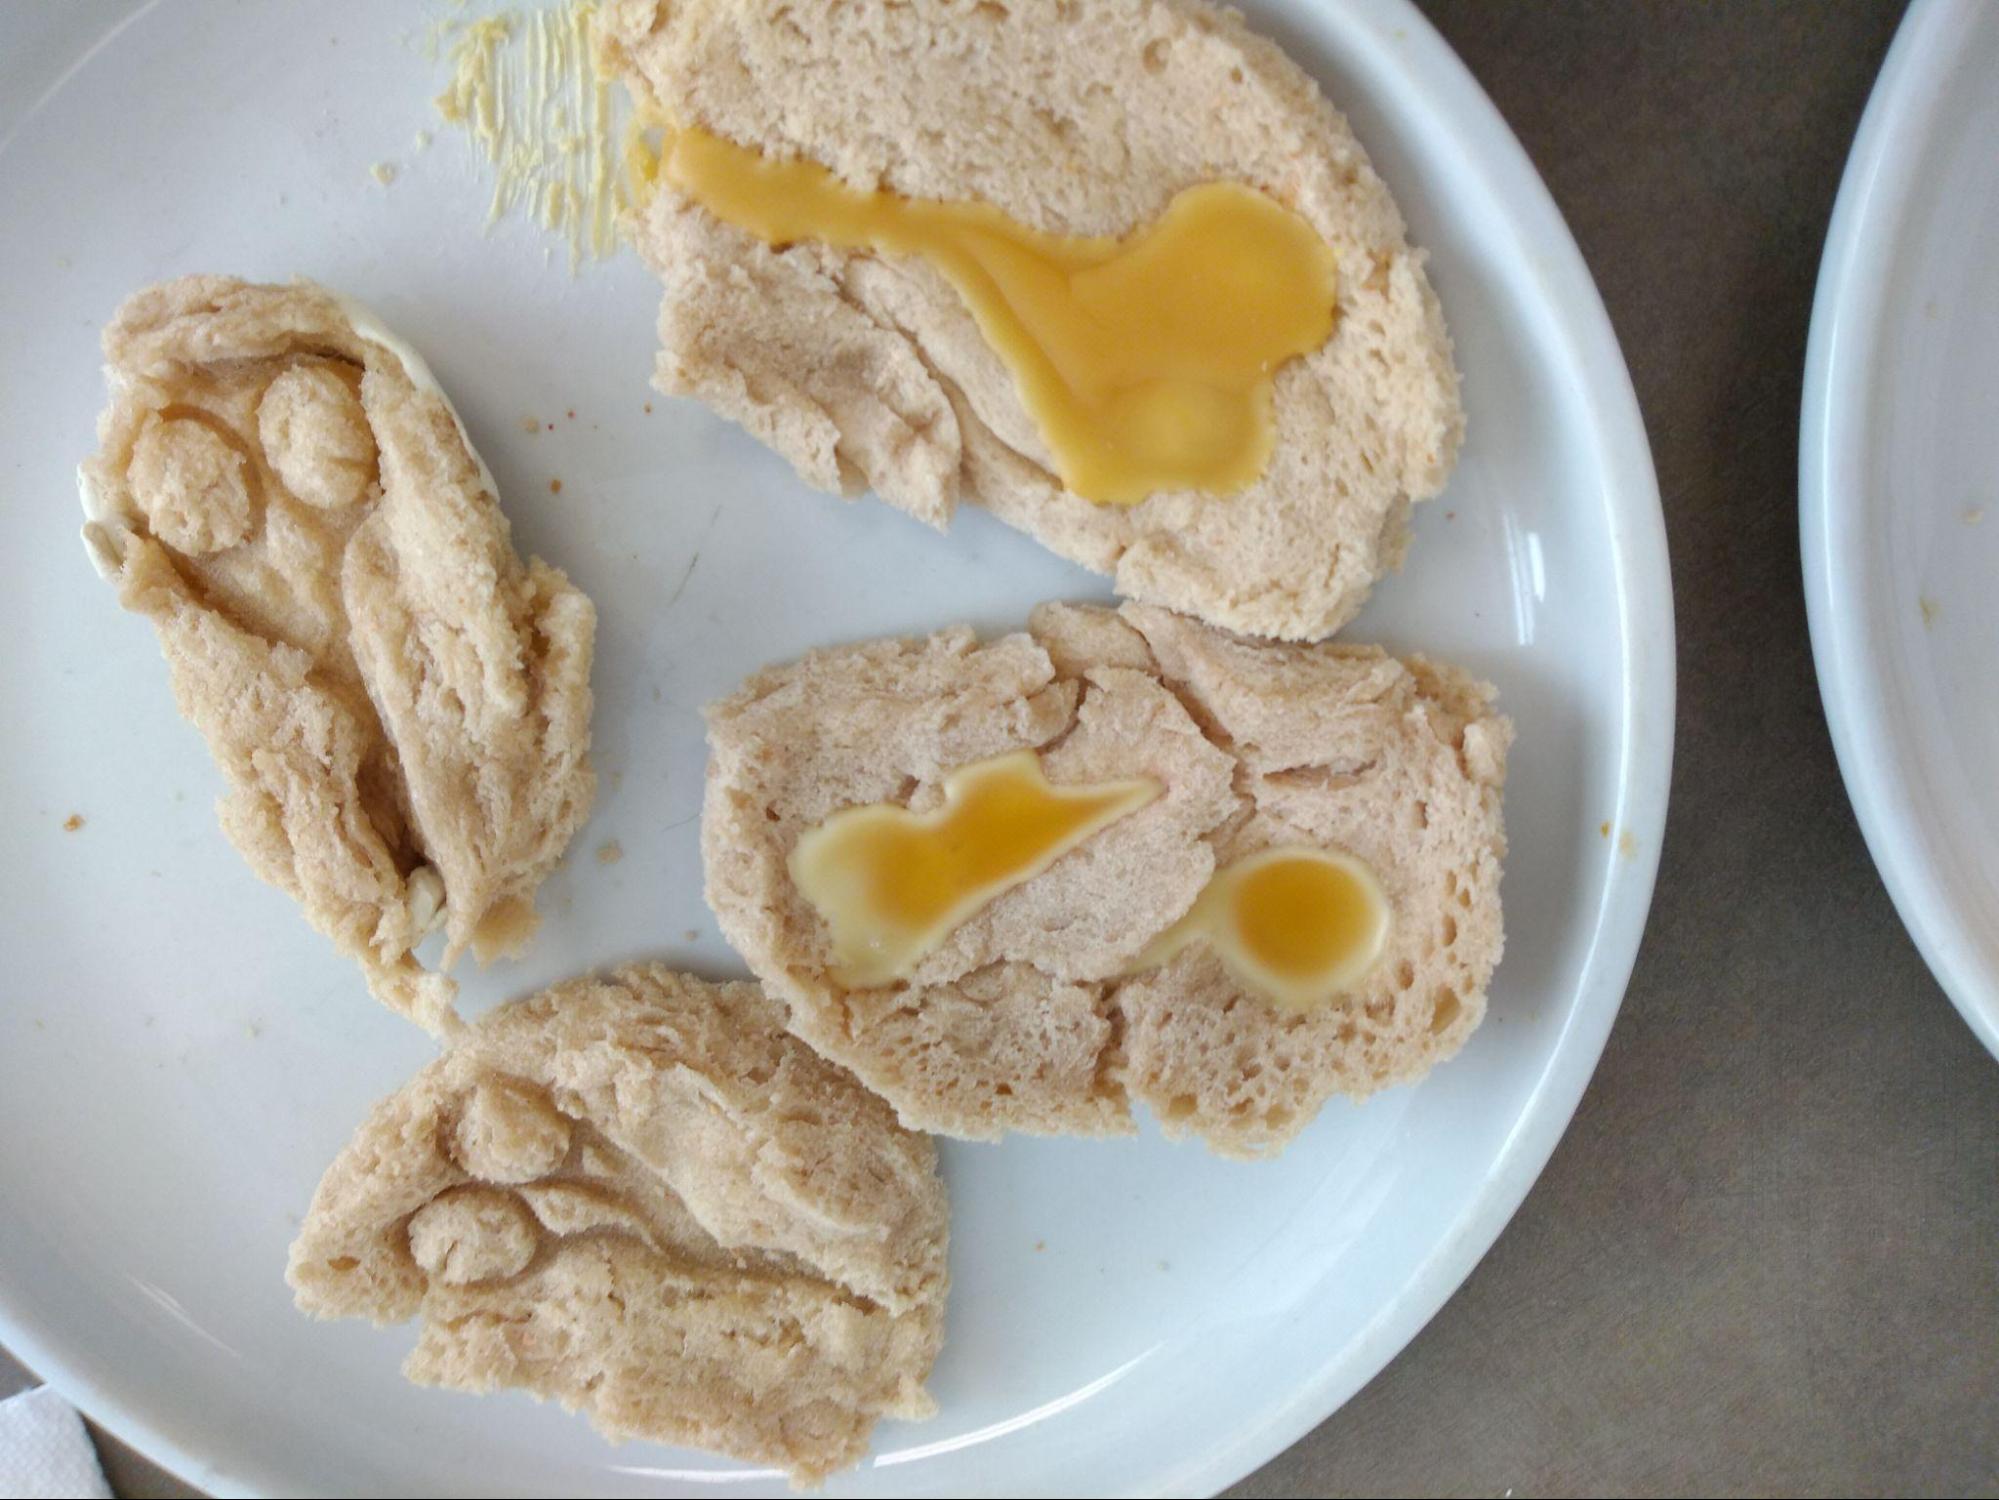
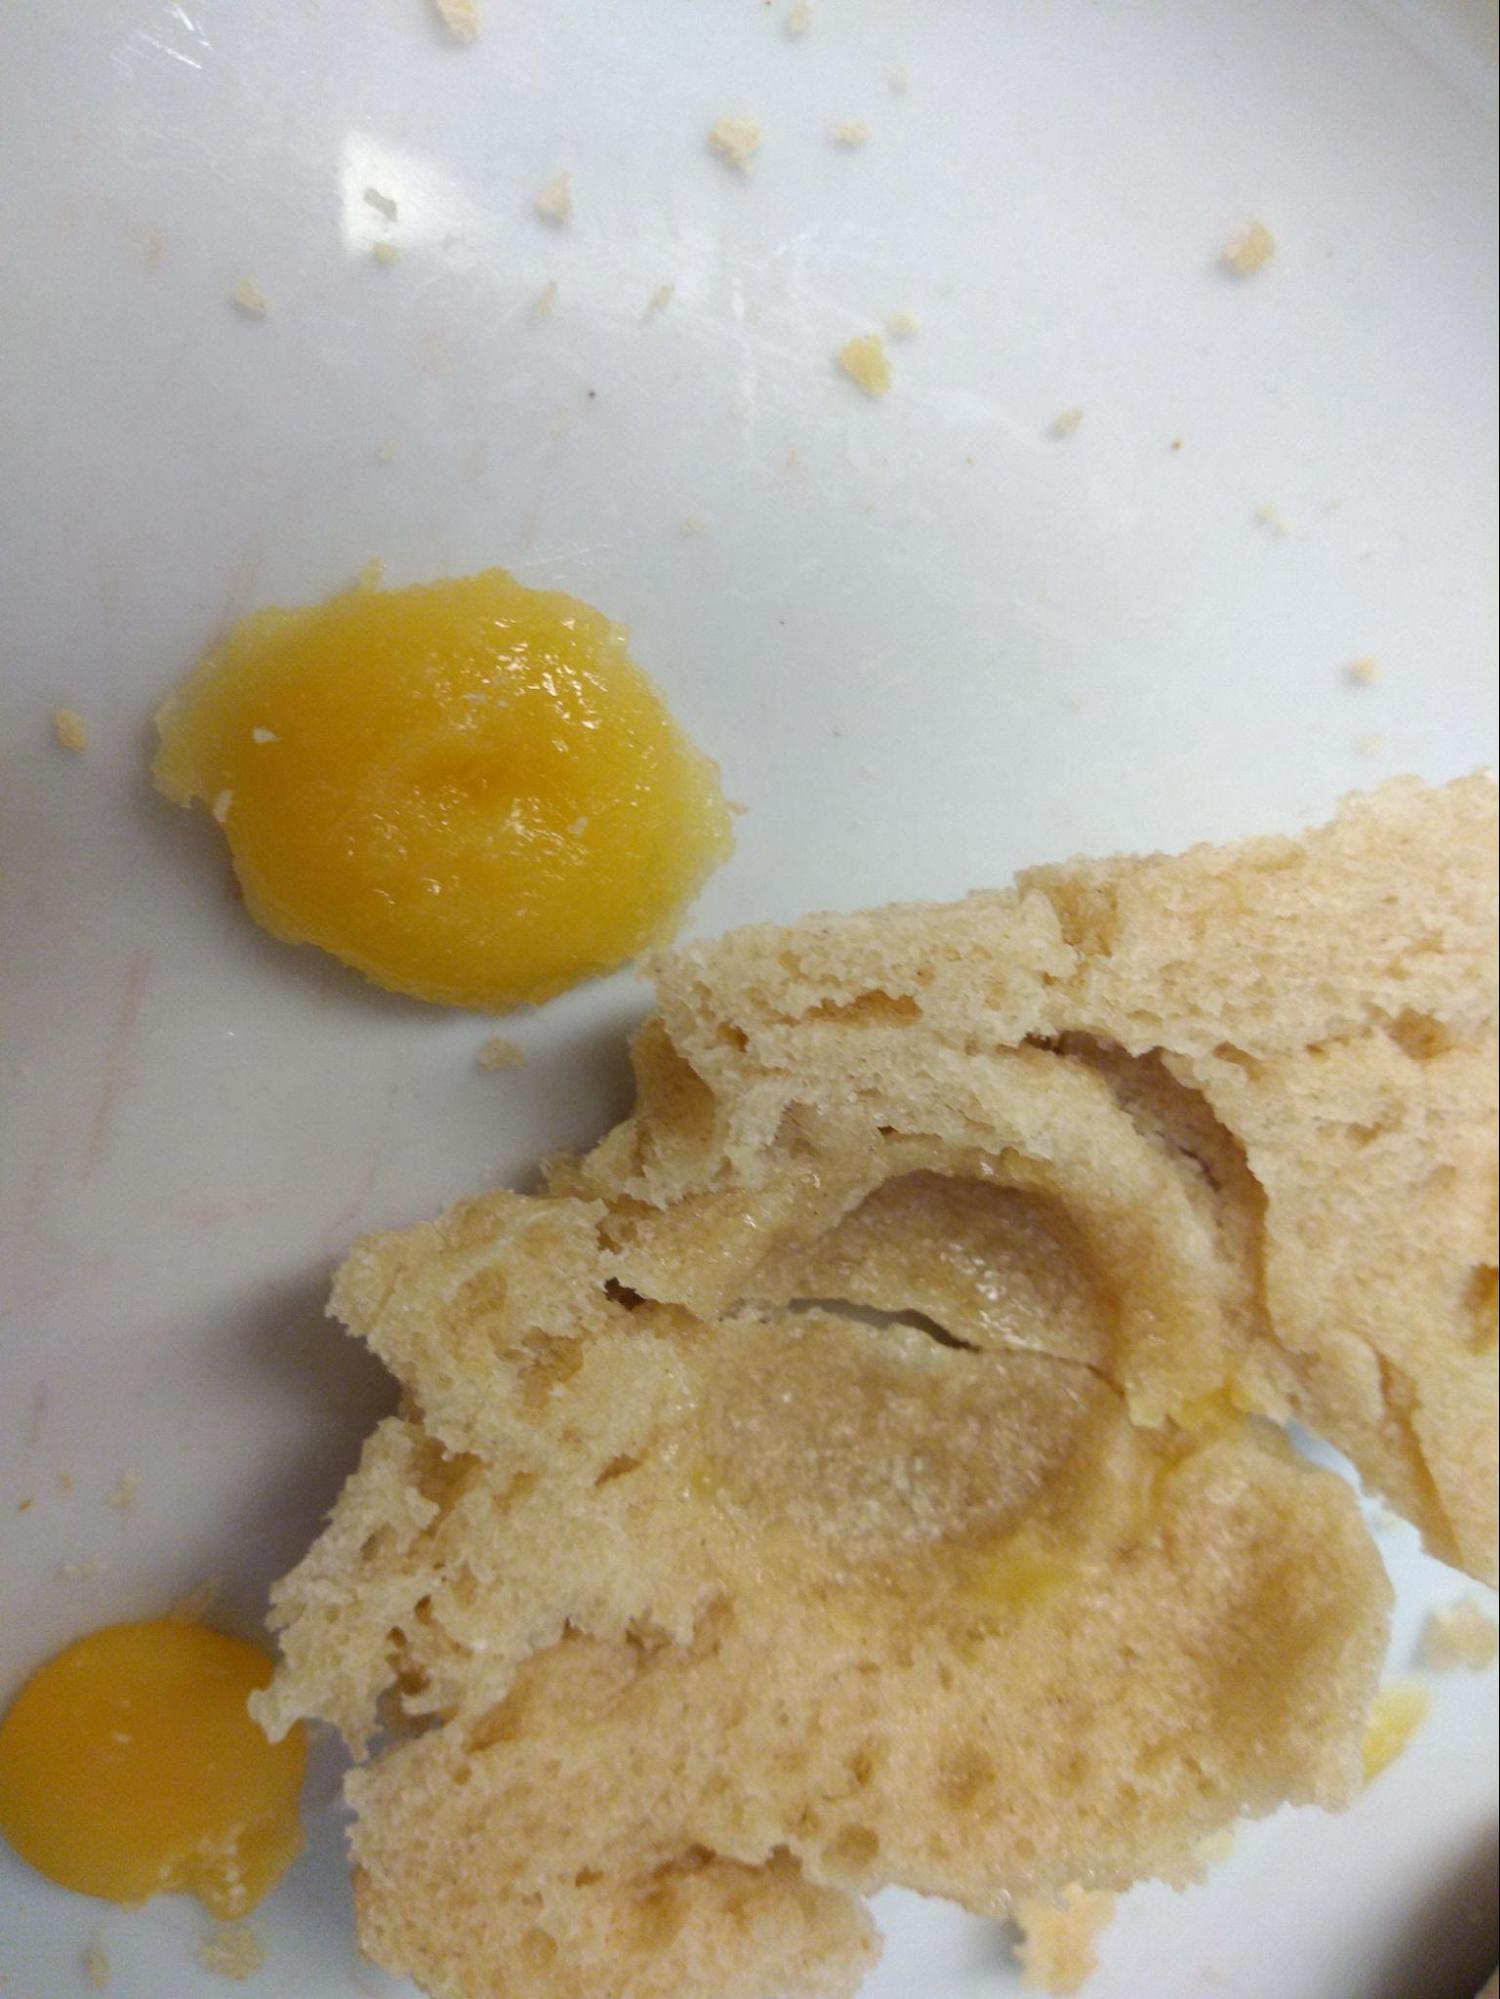
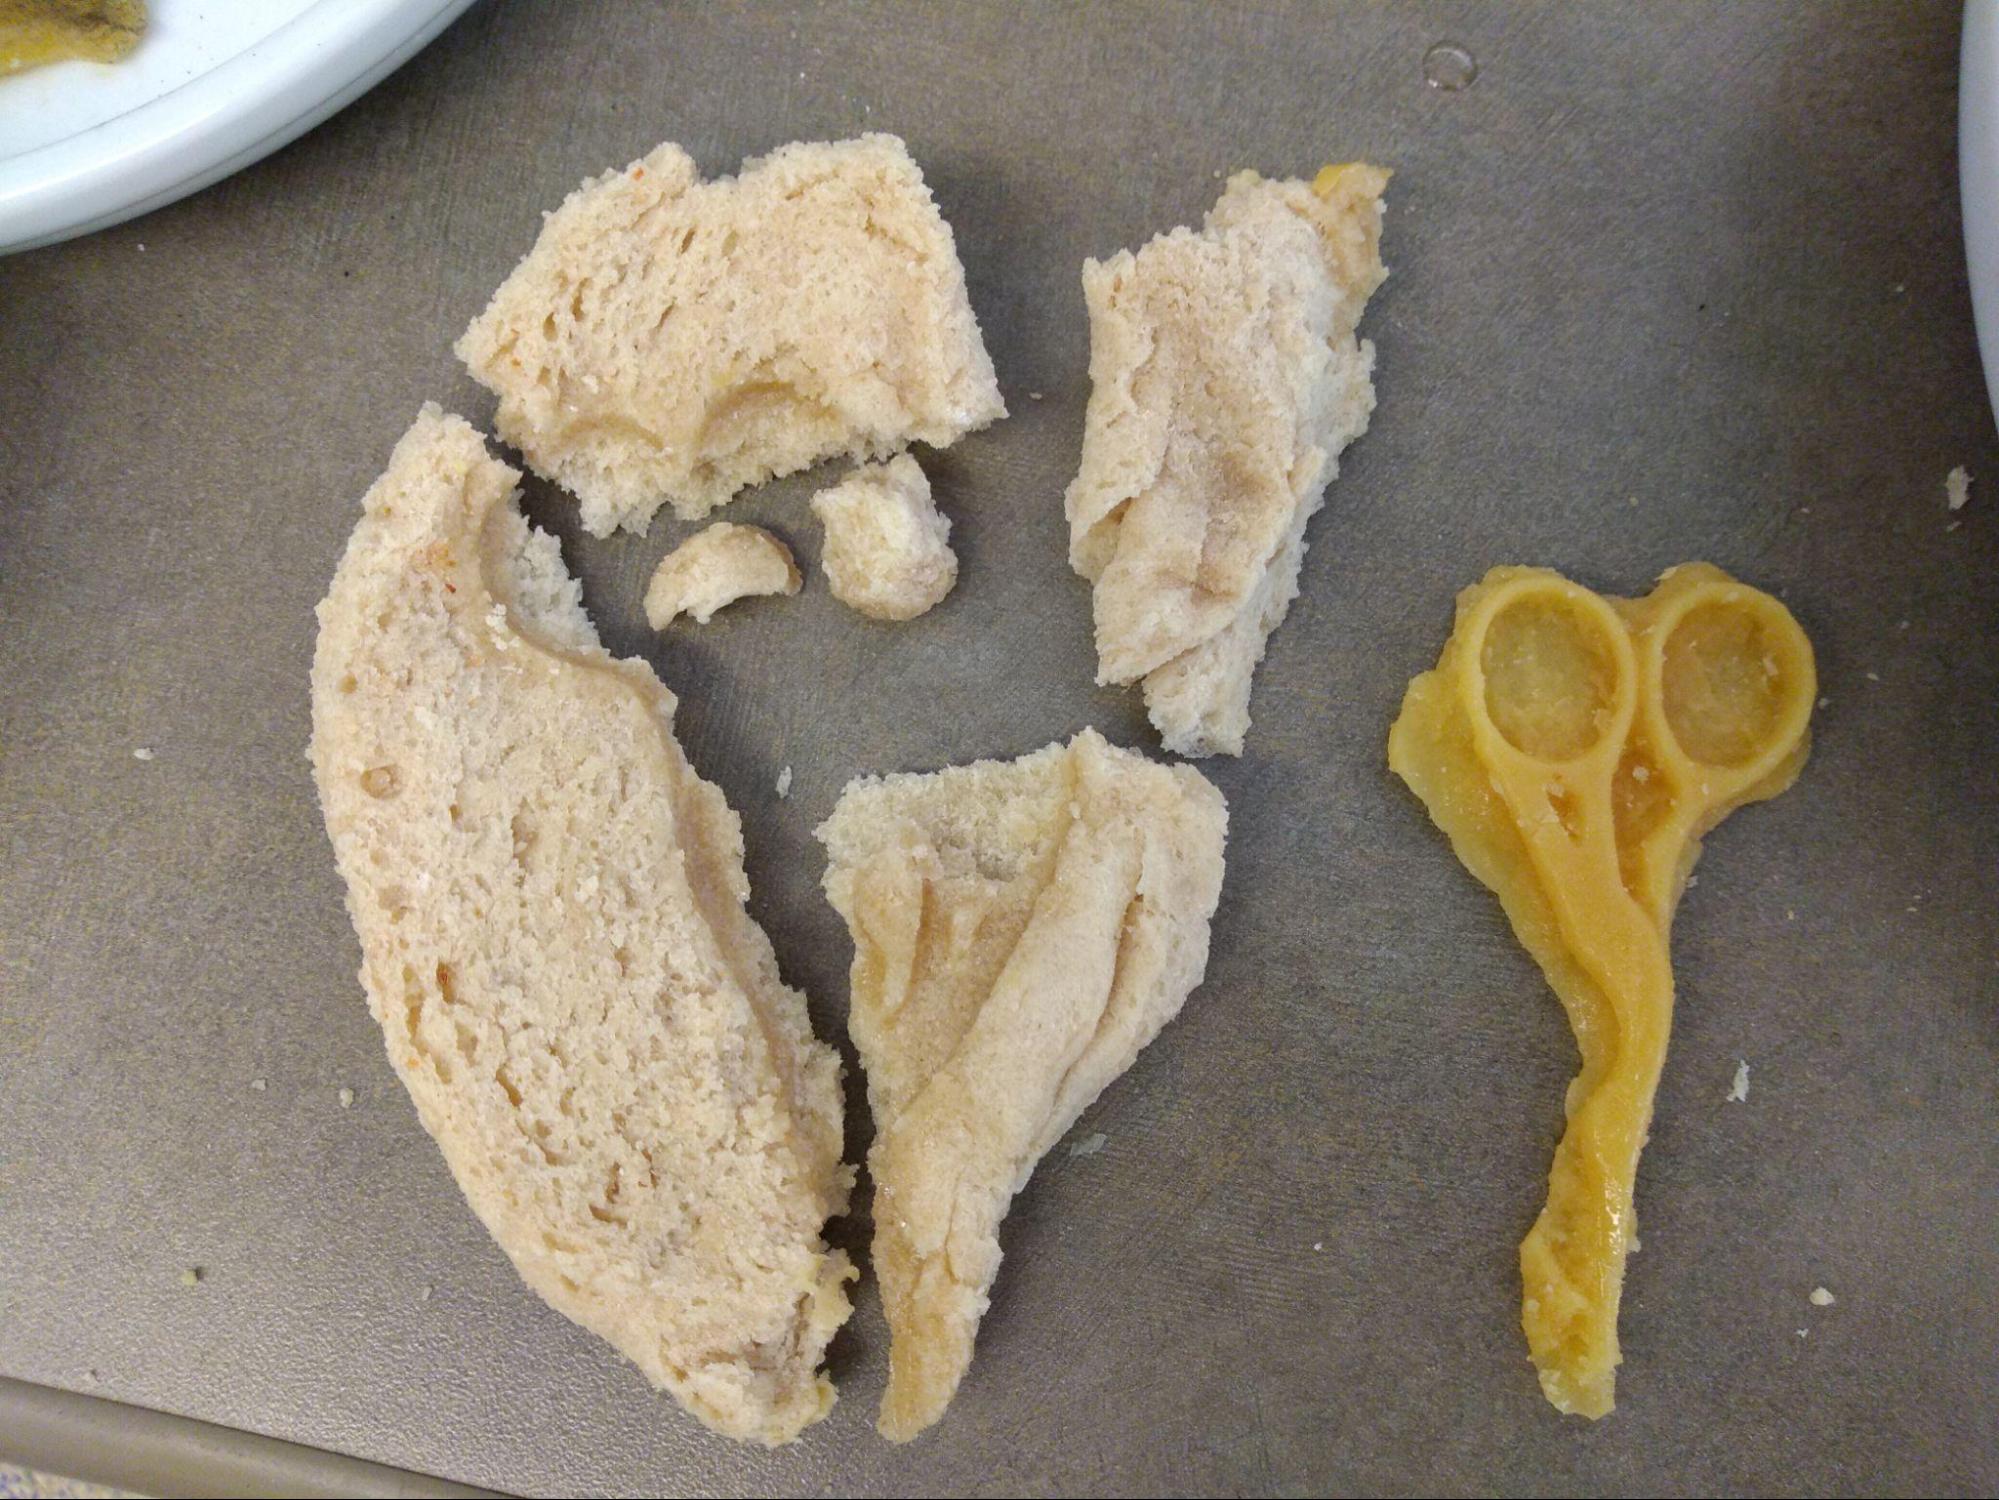
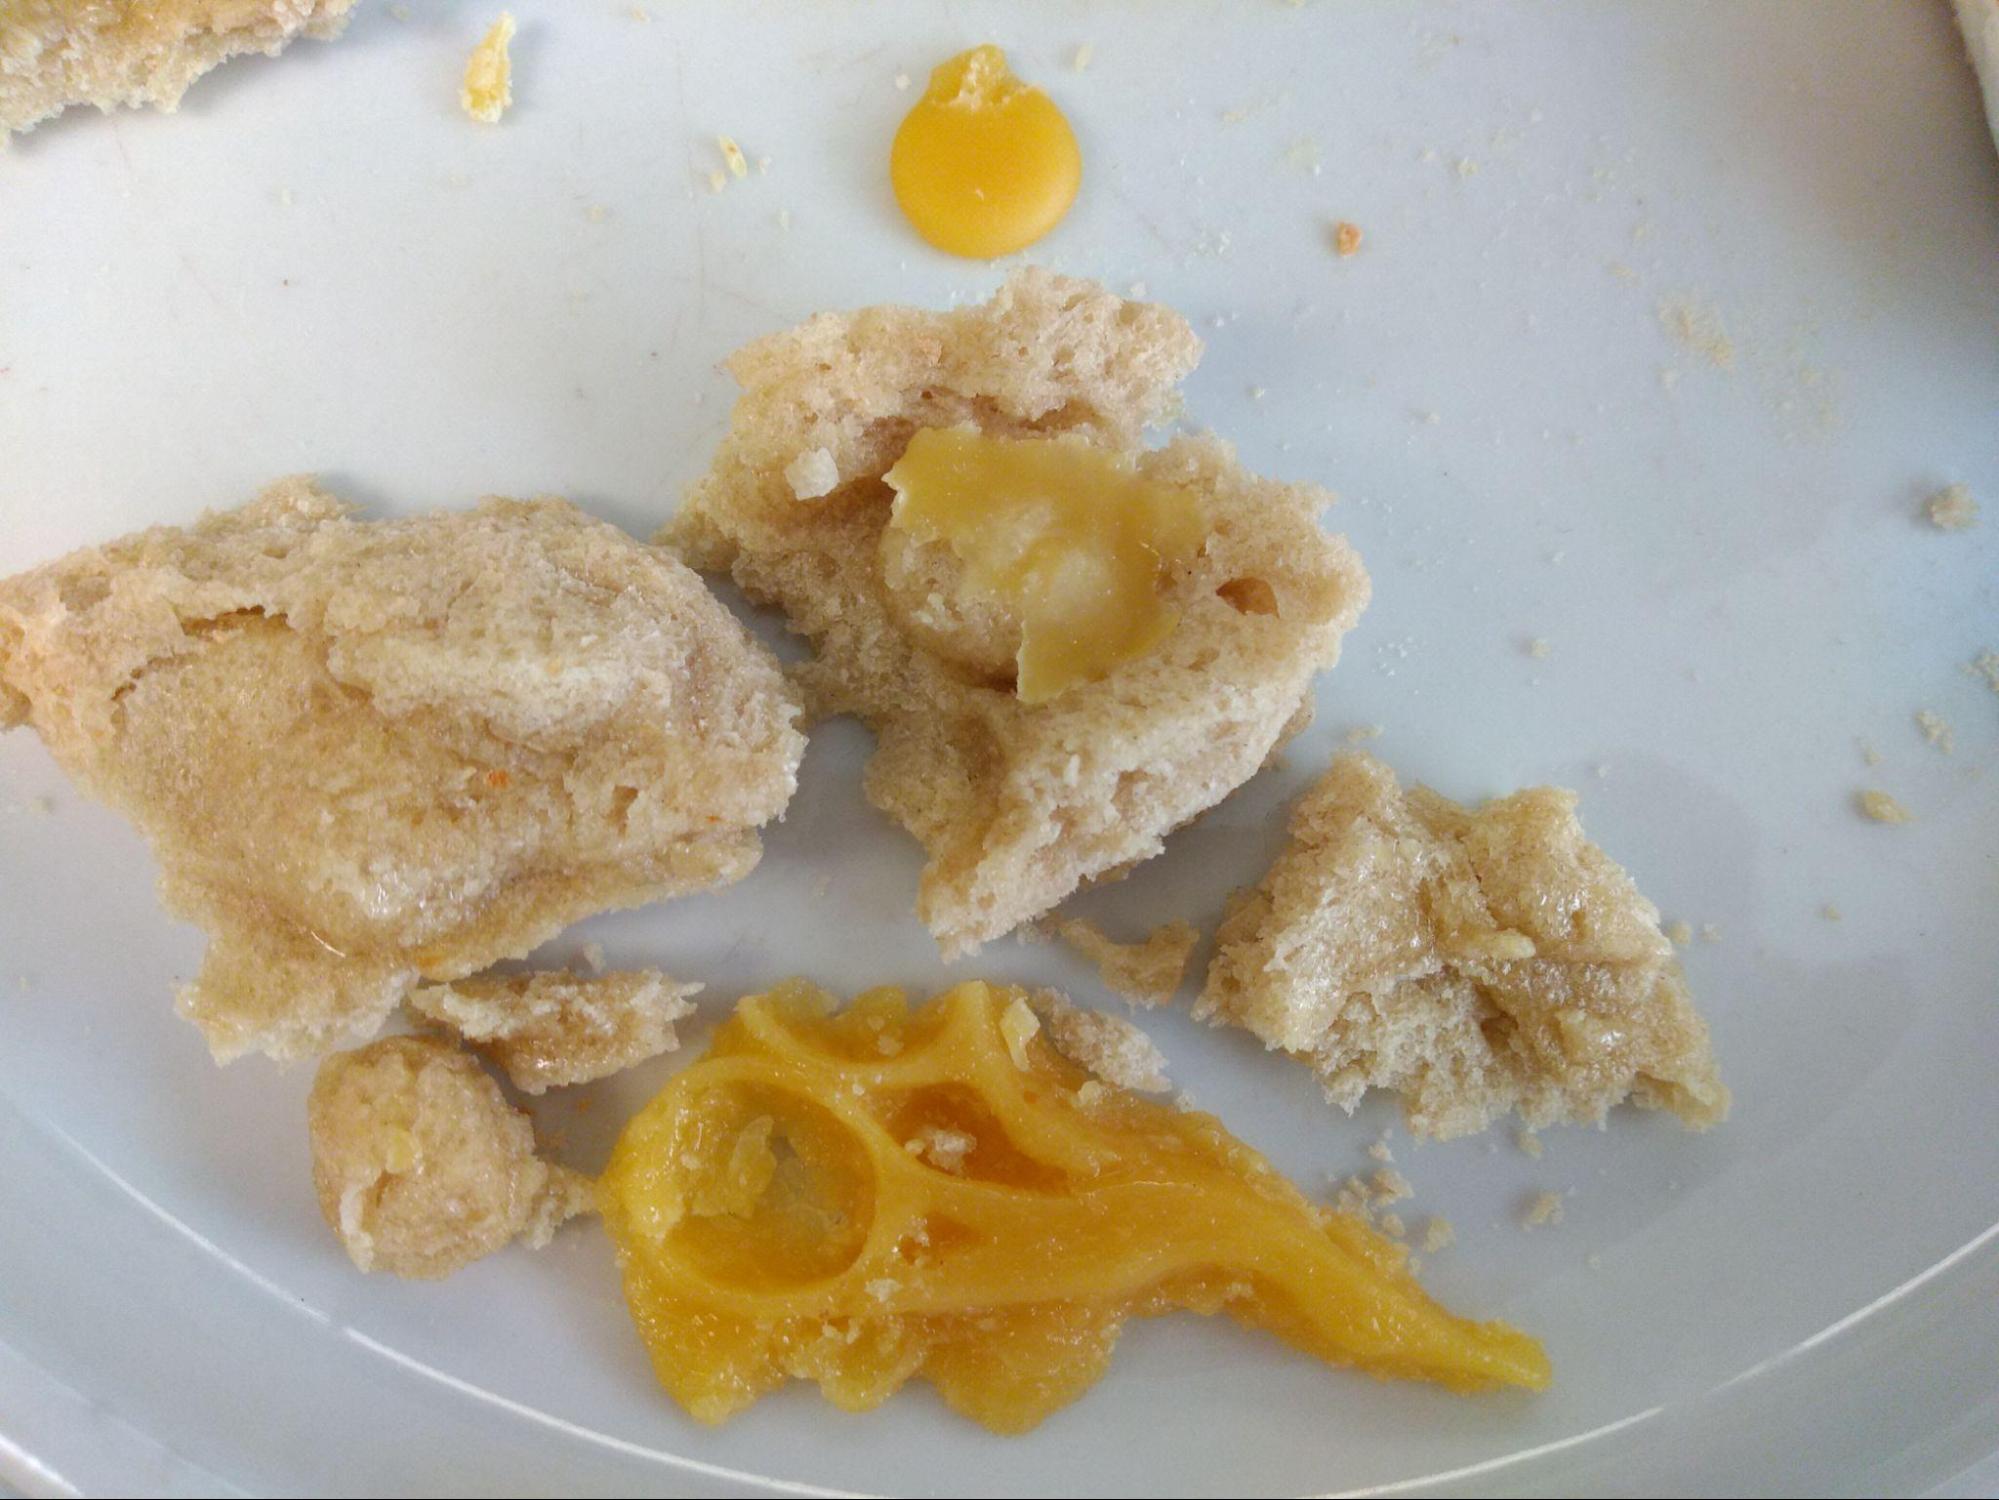
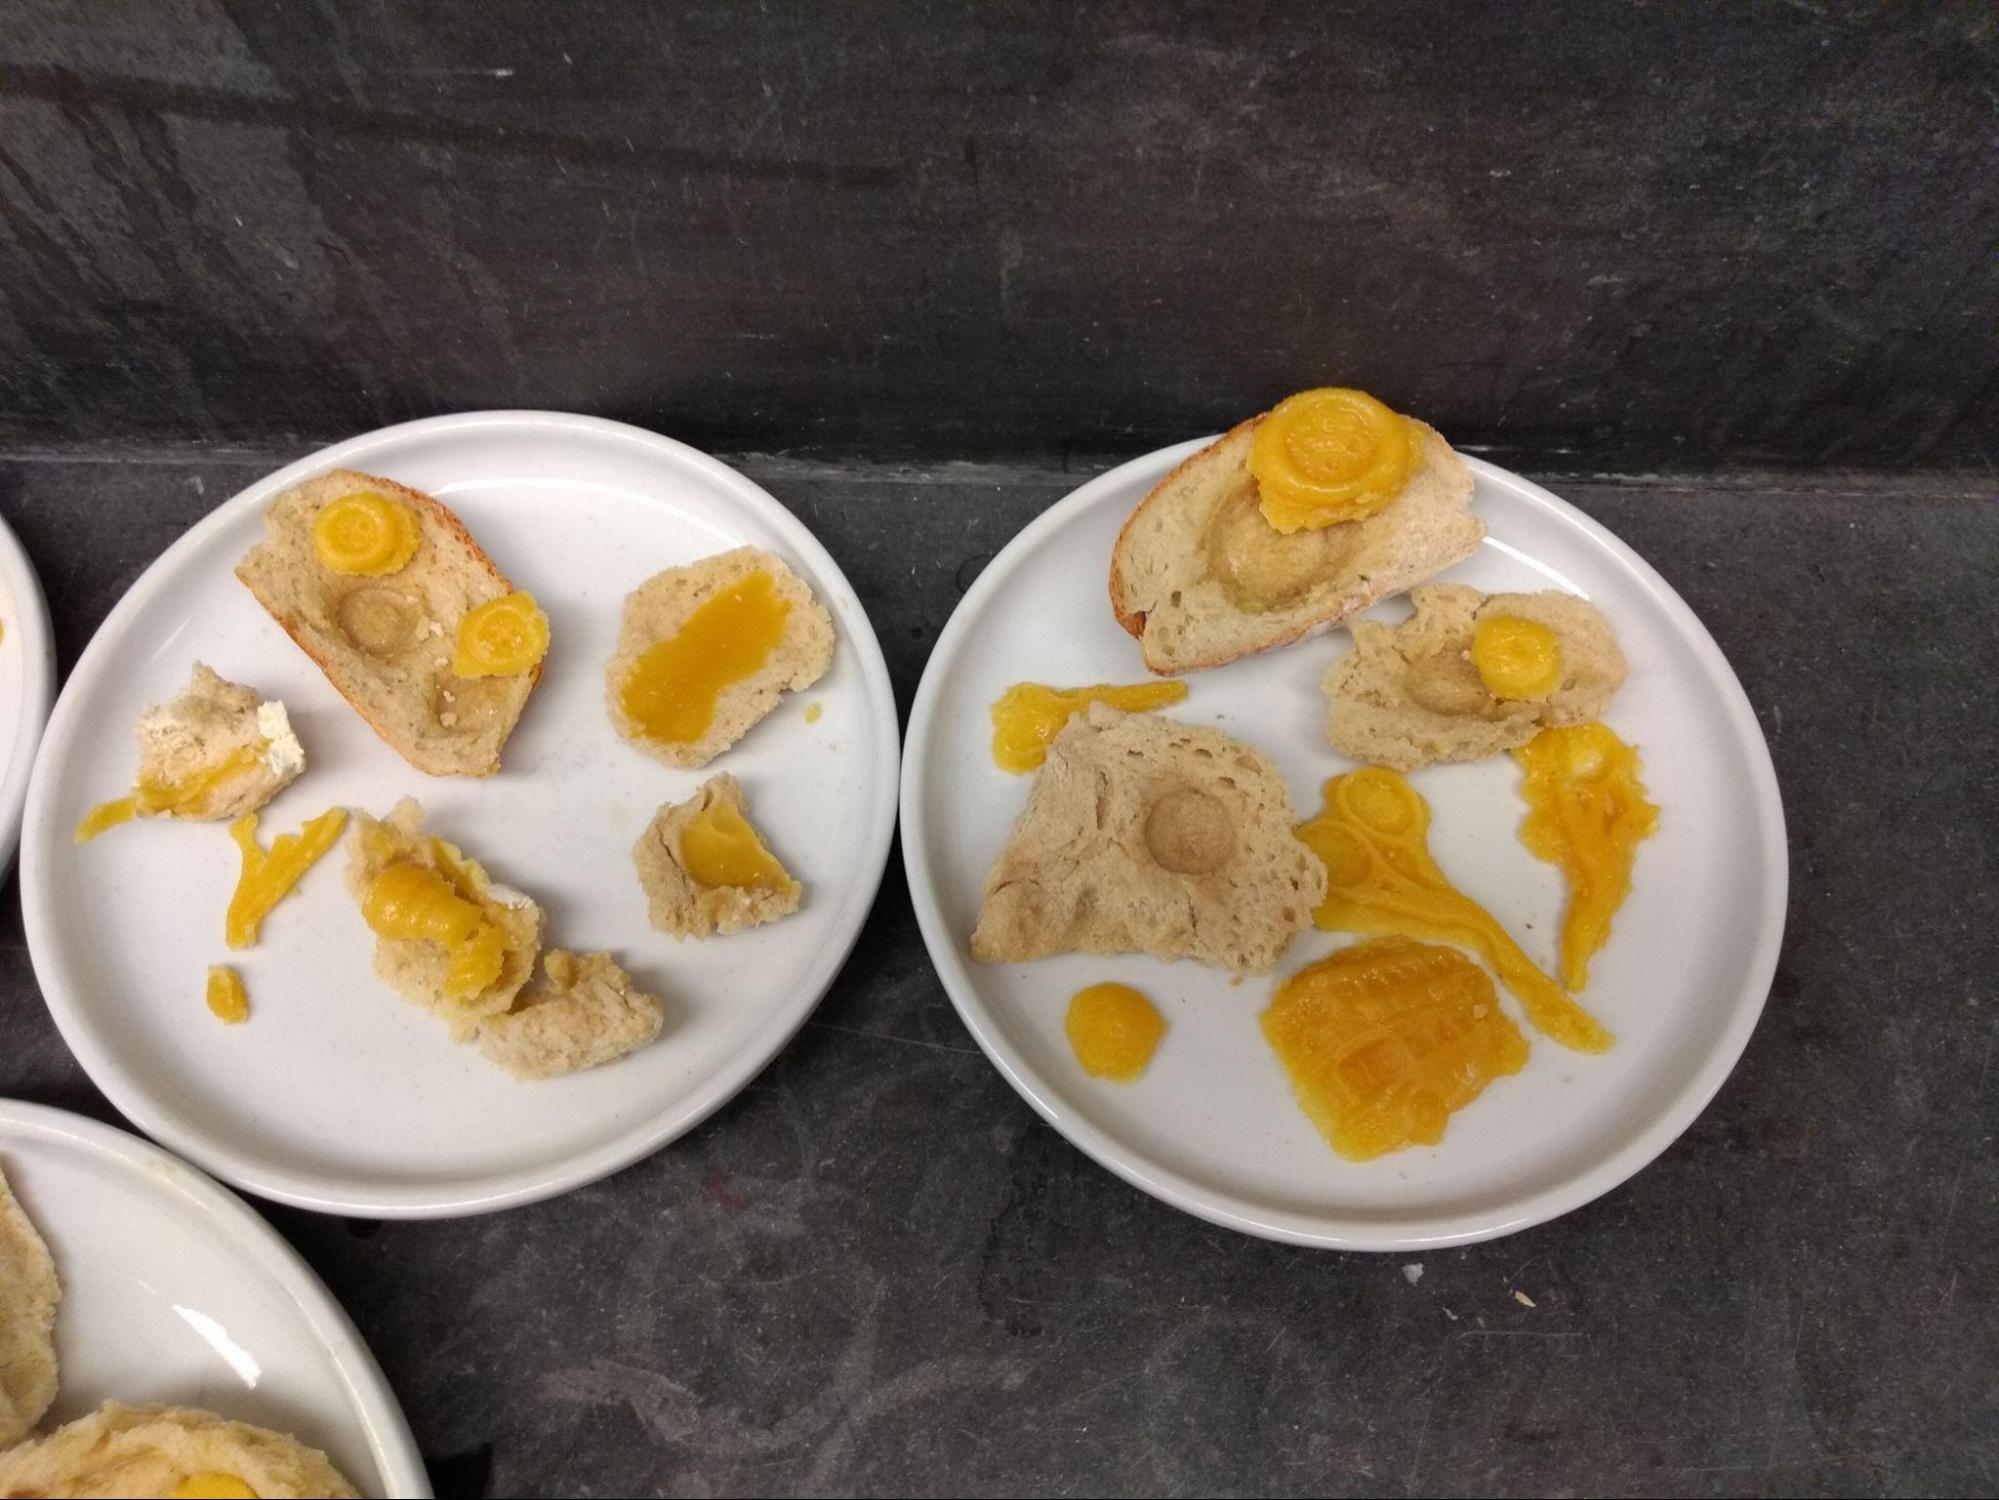
Some of the bread molds had holes or other ways for the melted wax to leak out of the mold, so we used modeling clay to help plug the holes or repair cracks.
A description of the casting process should be more fully detailed here when there is time to return to these notes. Caroline and I were conducting a demo for the summer 2021 students over Zoom, so it was difficult to capture the process of lubricating the bread, melting the wax, and pouring it into the molds as field notes at the same time as capturing the Zoom recording and live demonstration for students.
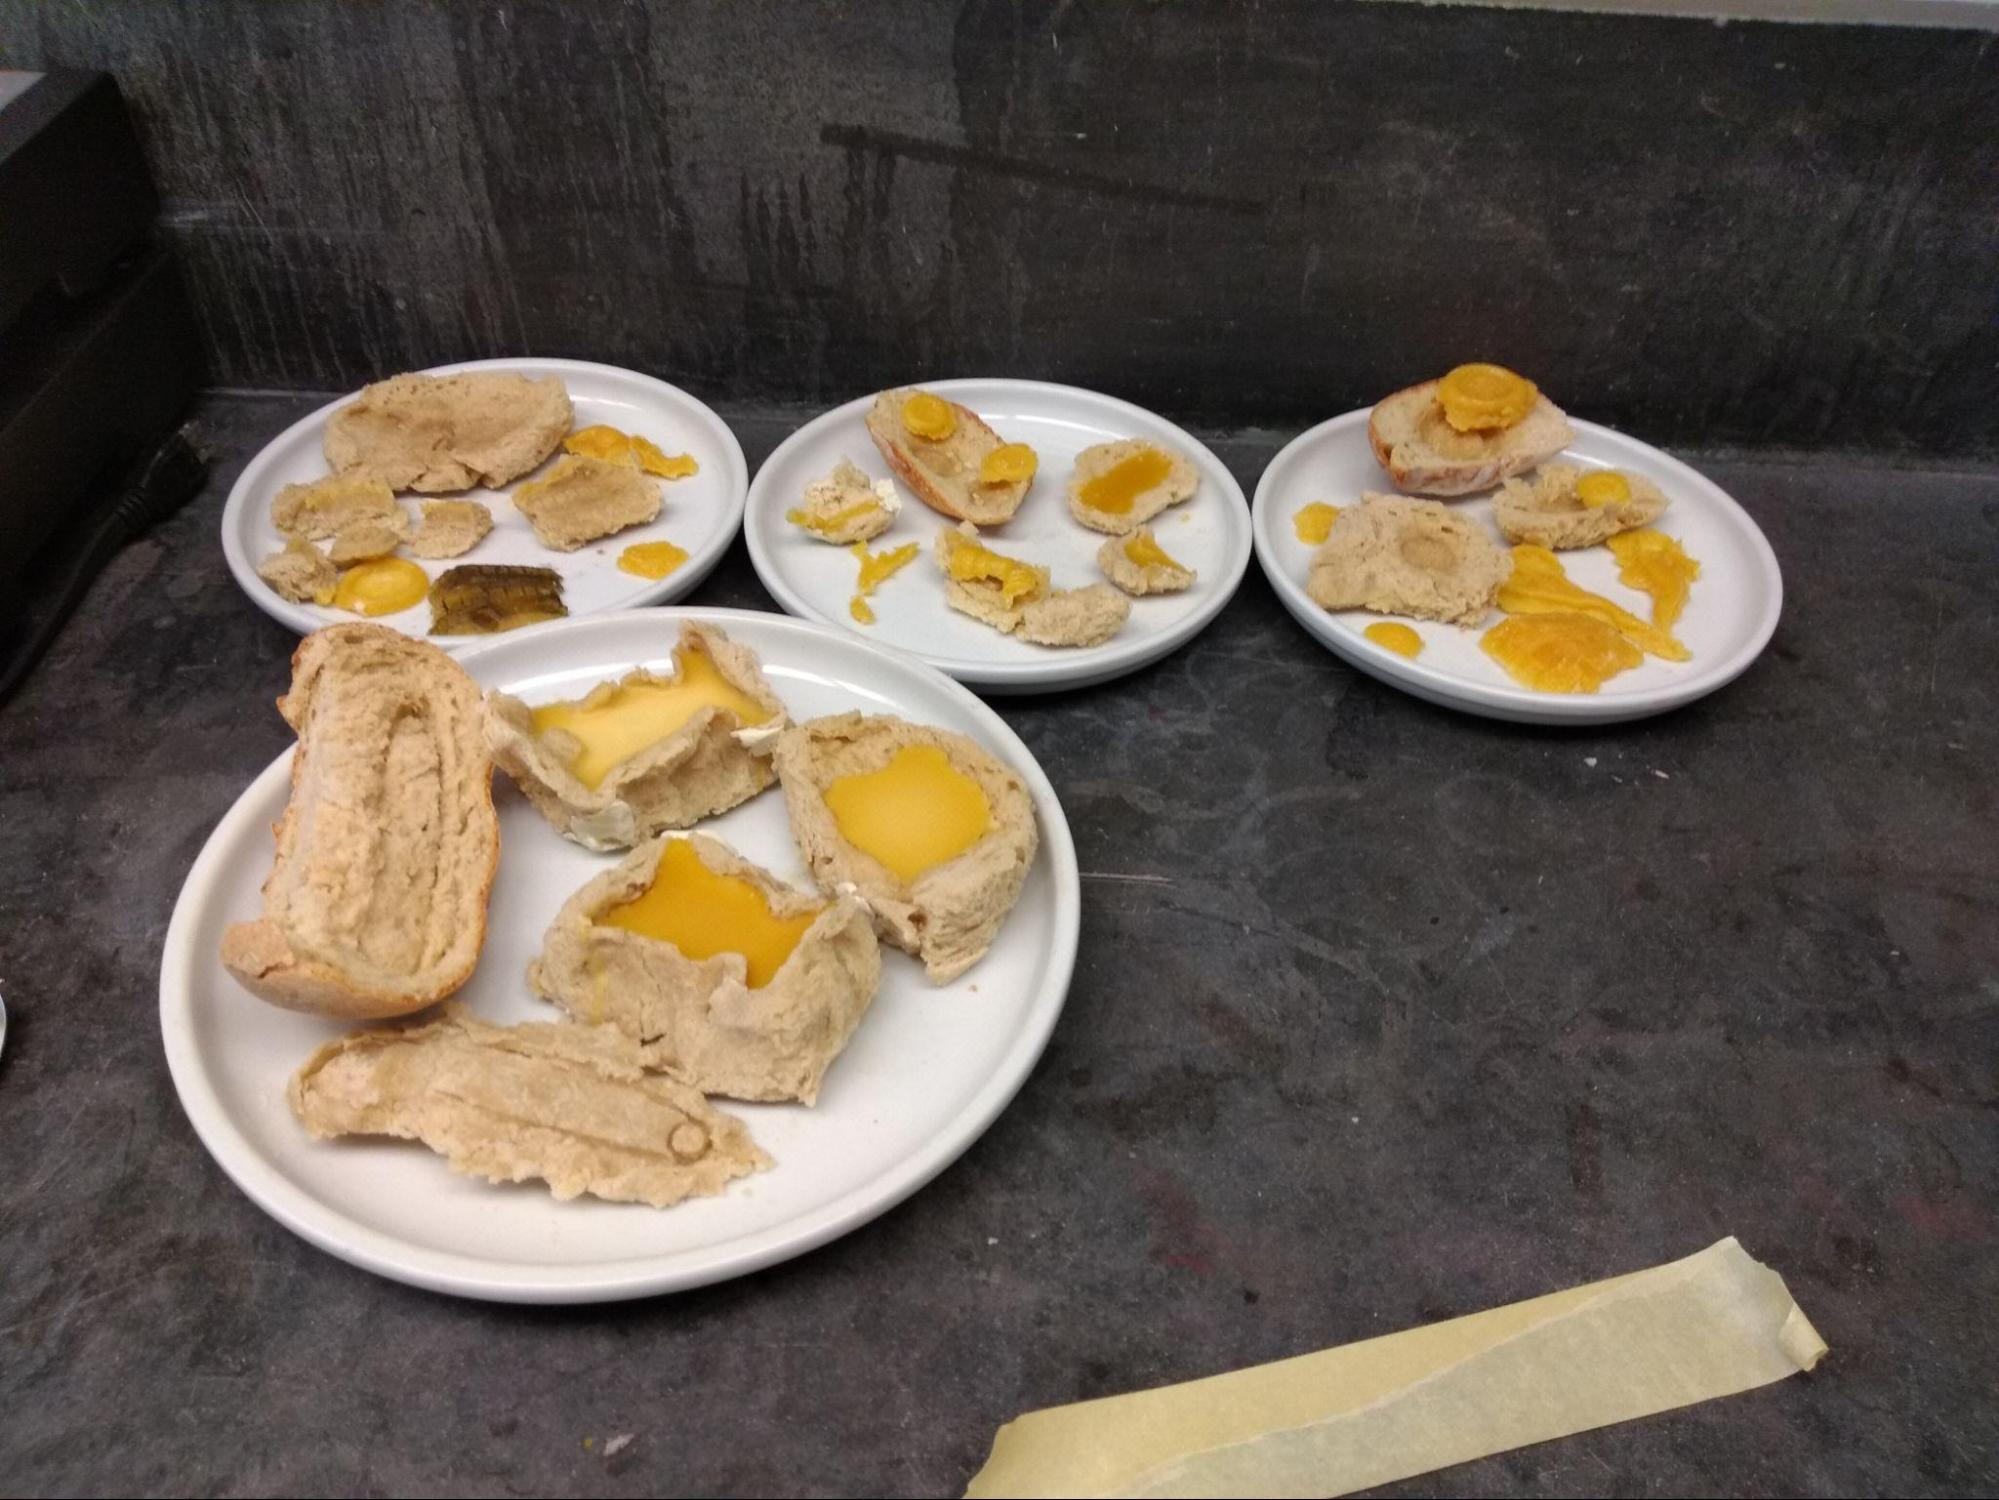
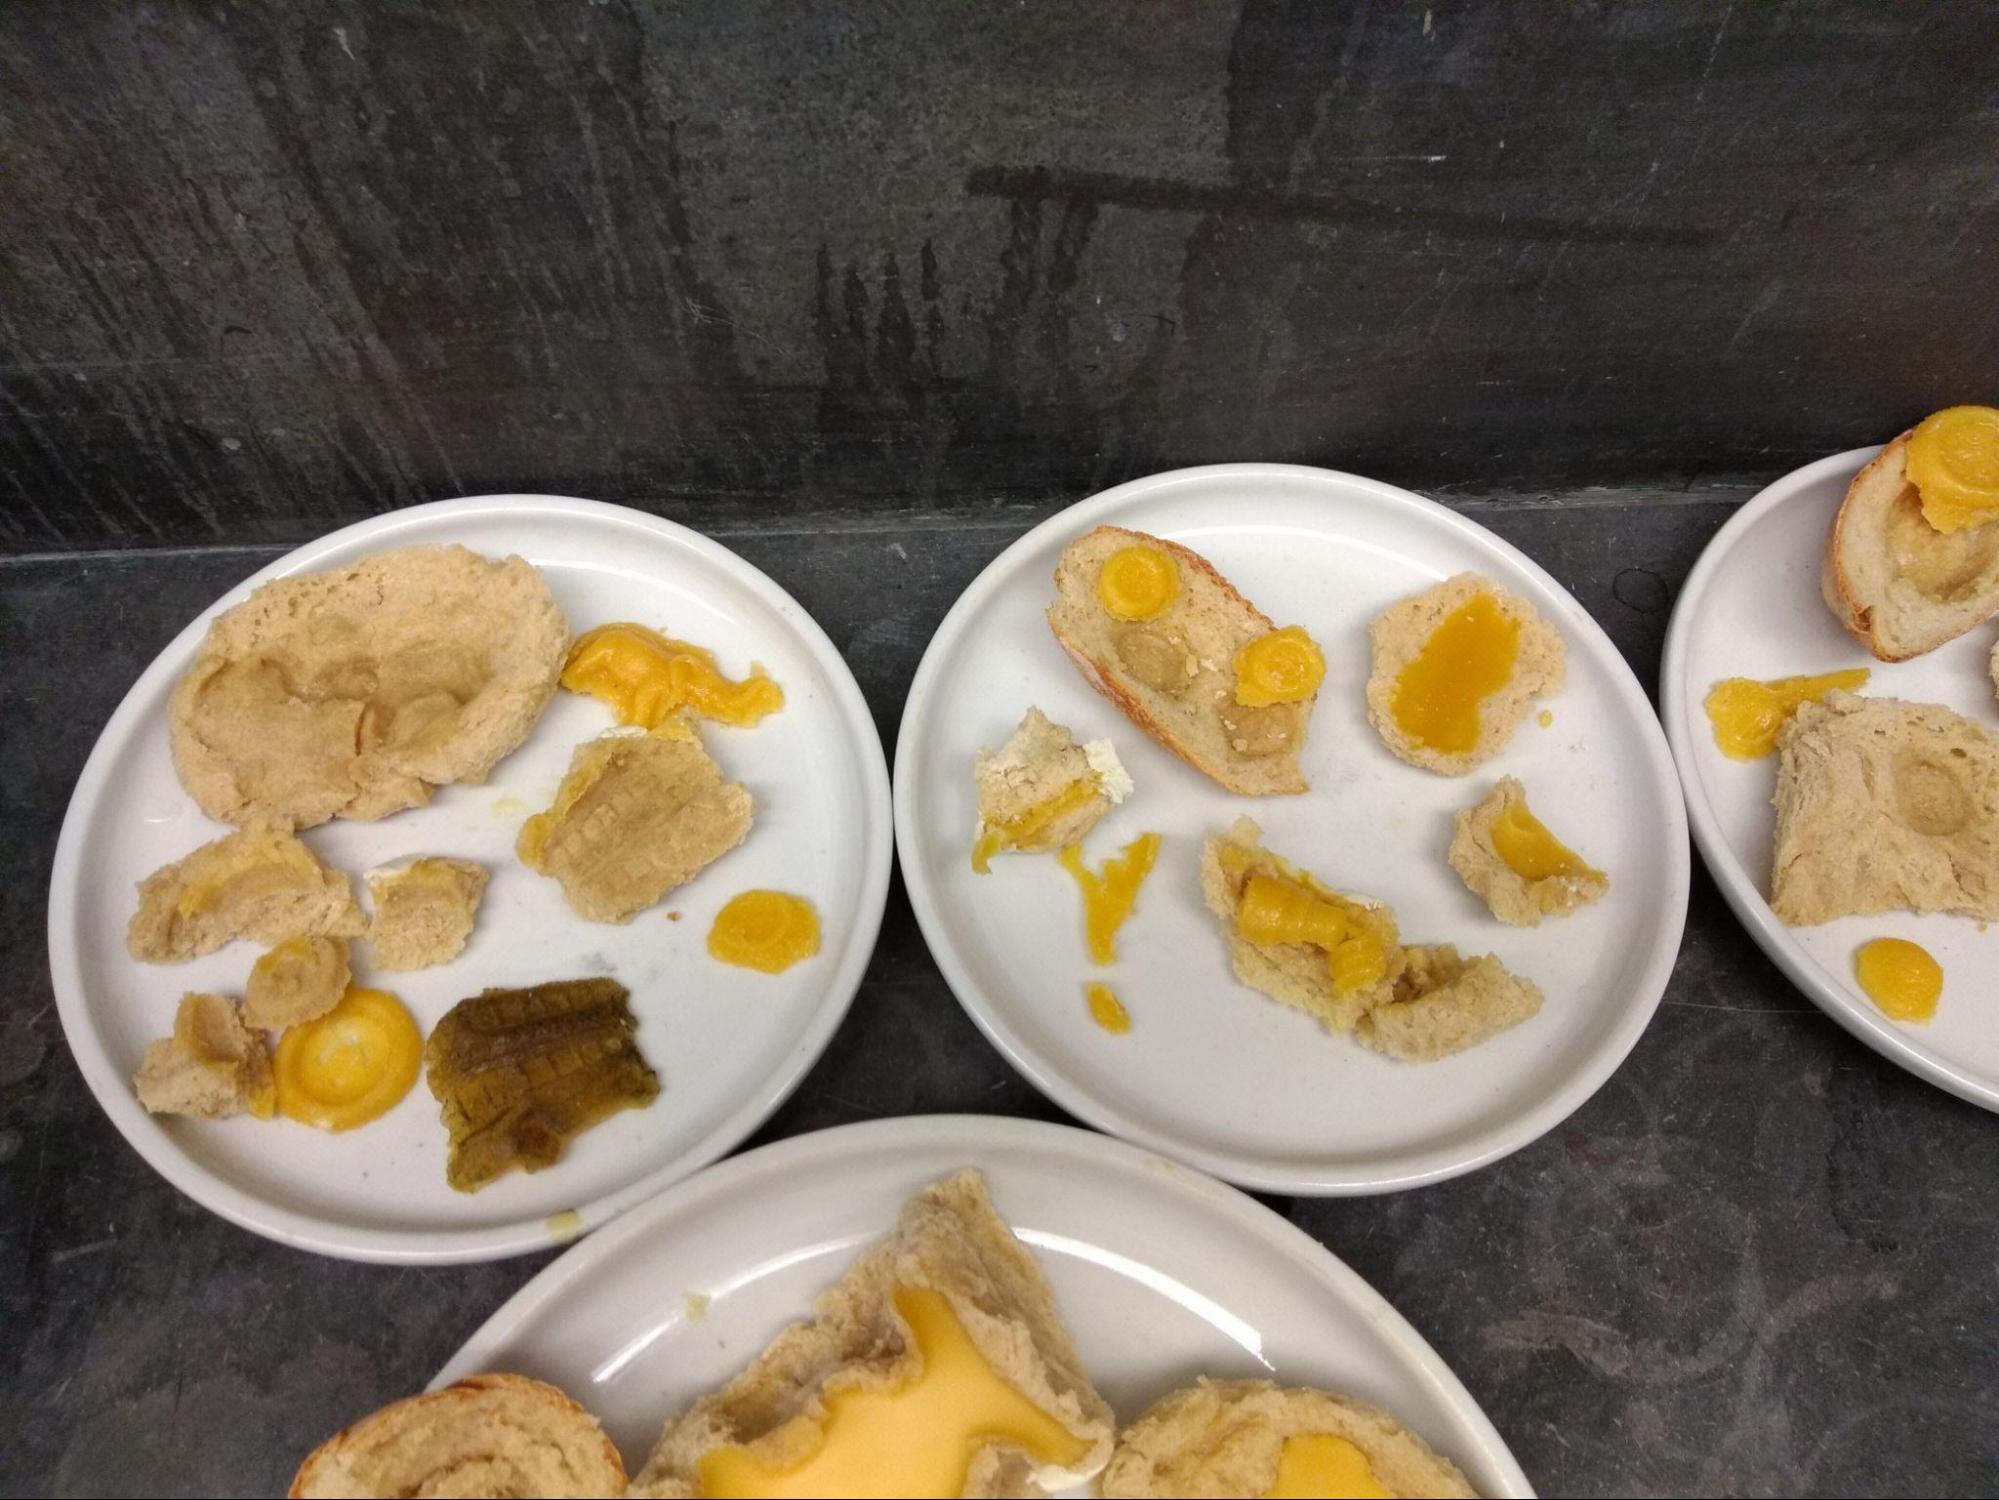
For now, we include the images of the molds (all found in the Flickr album with all Bread Molding photos: https://www.flickr.com/photos/128418753@N06/albums/72157719204099129)
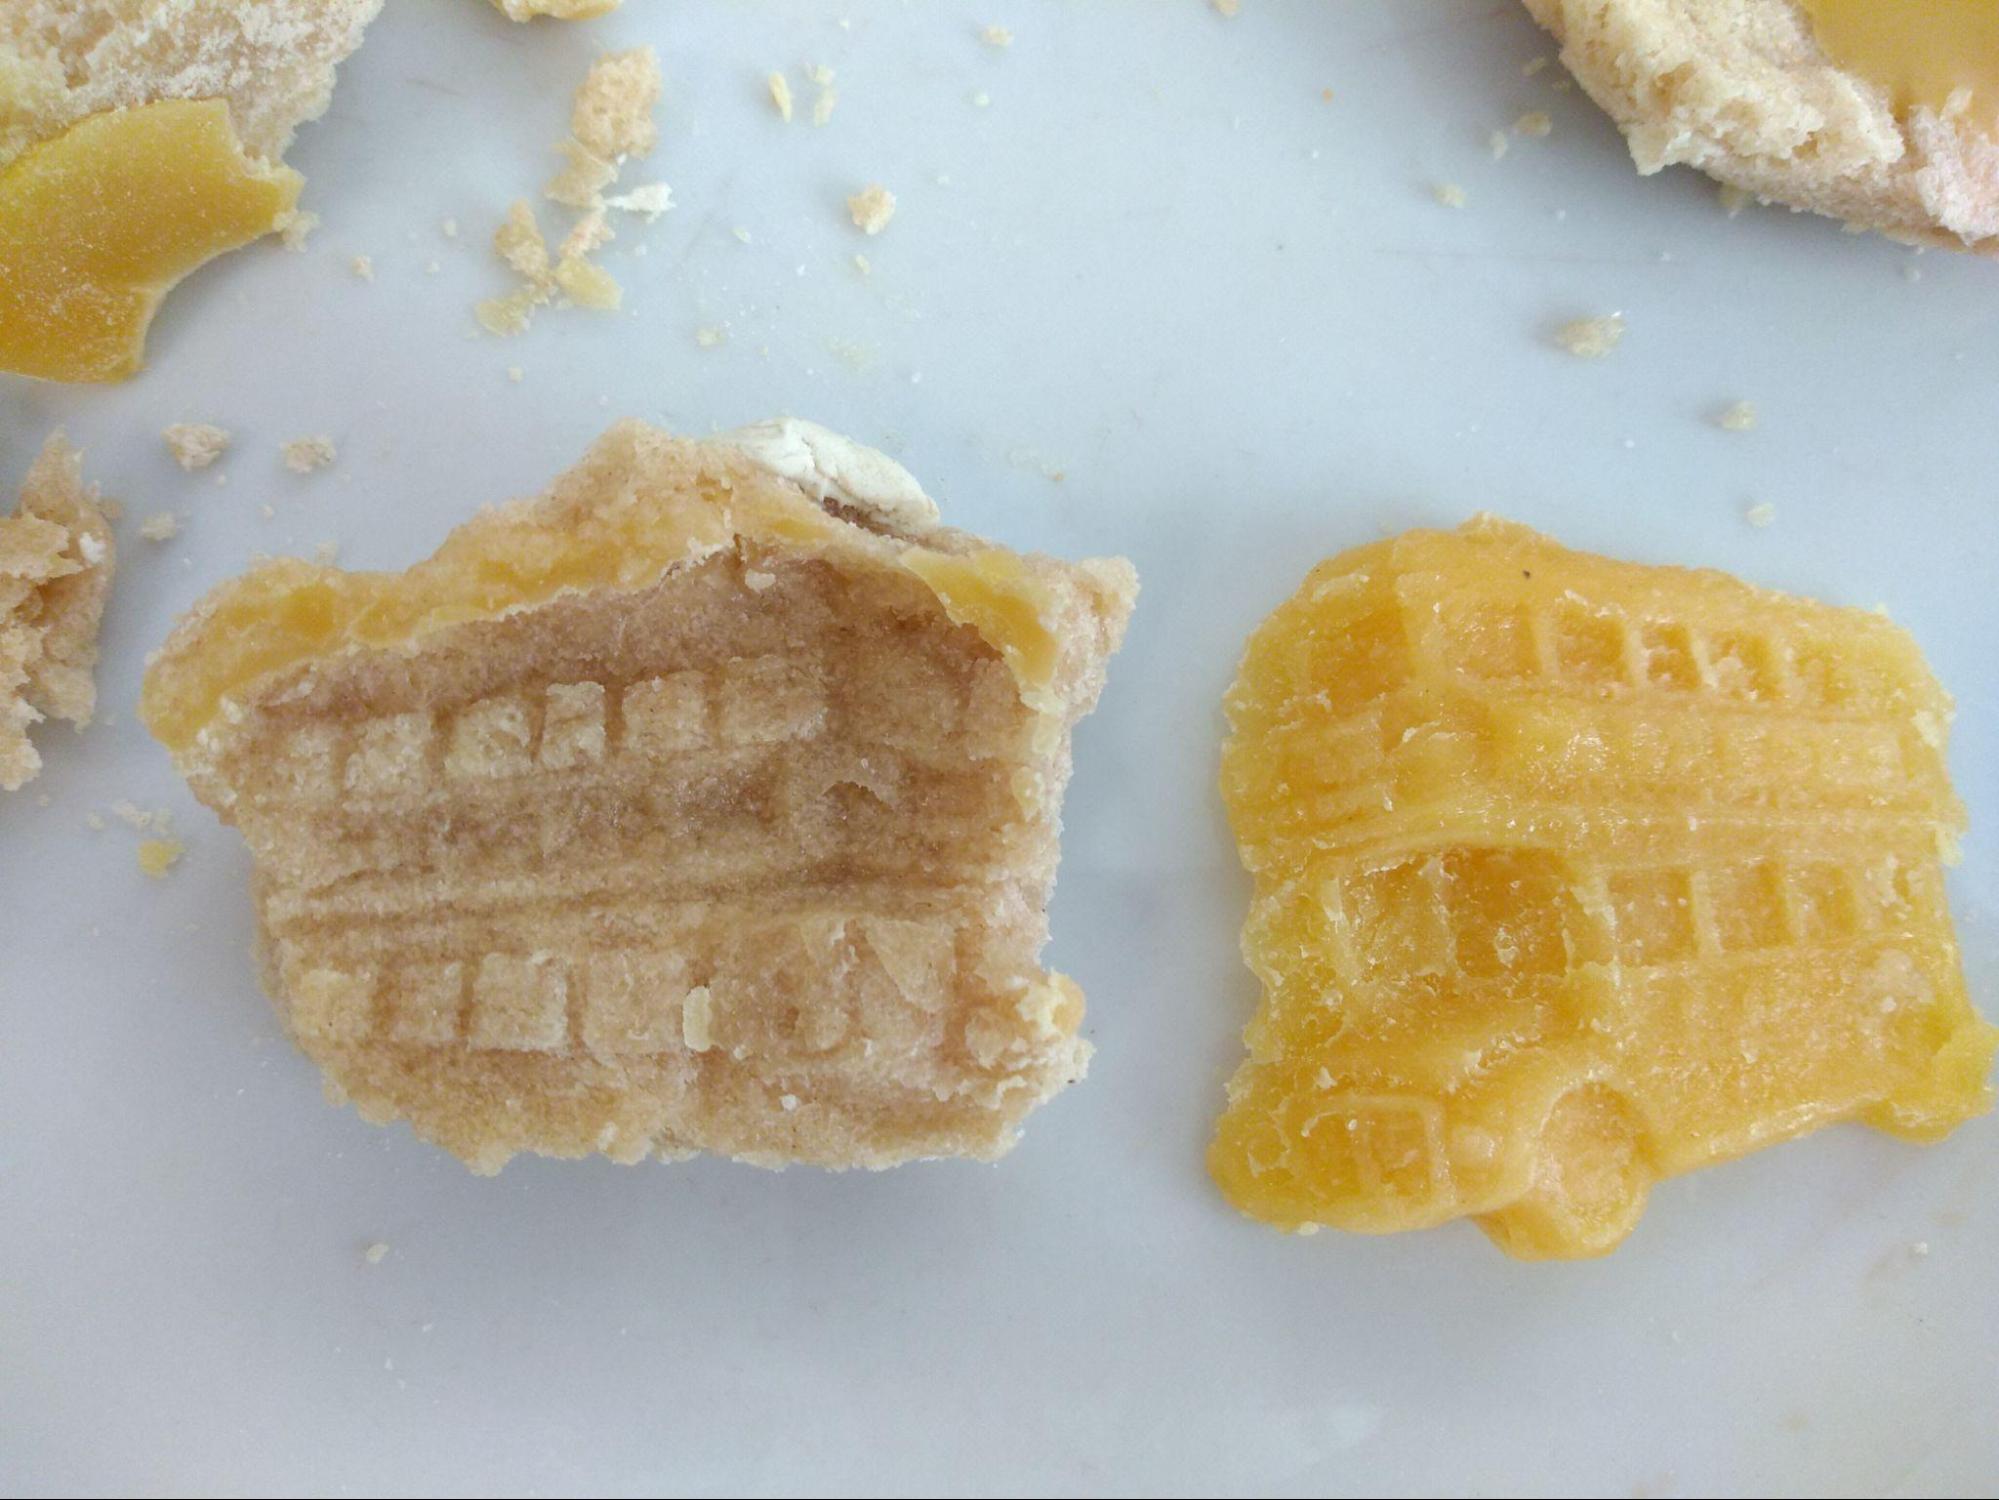
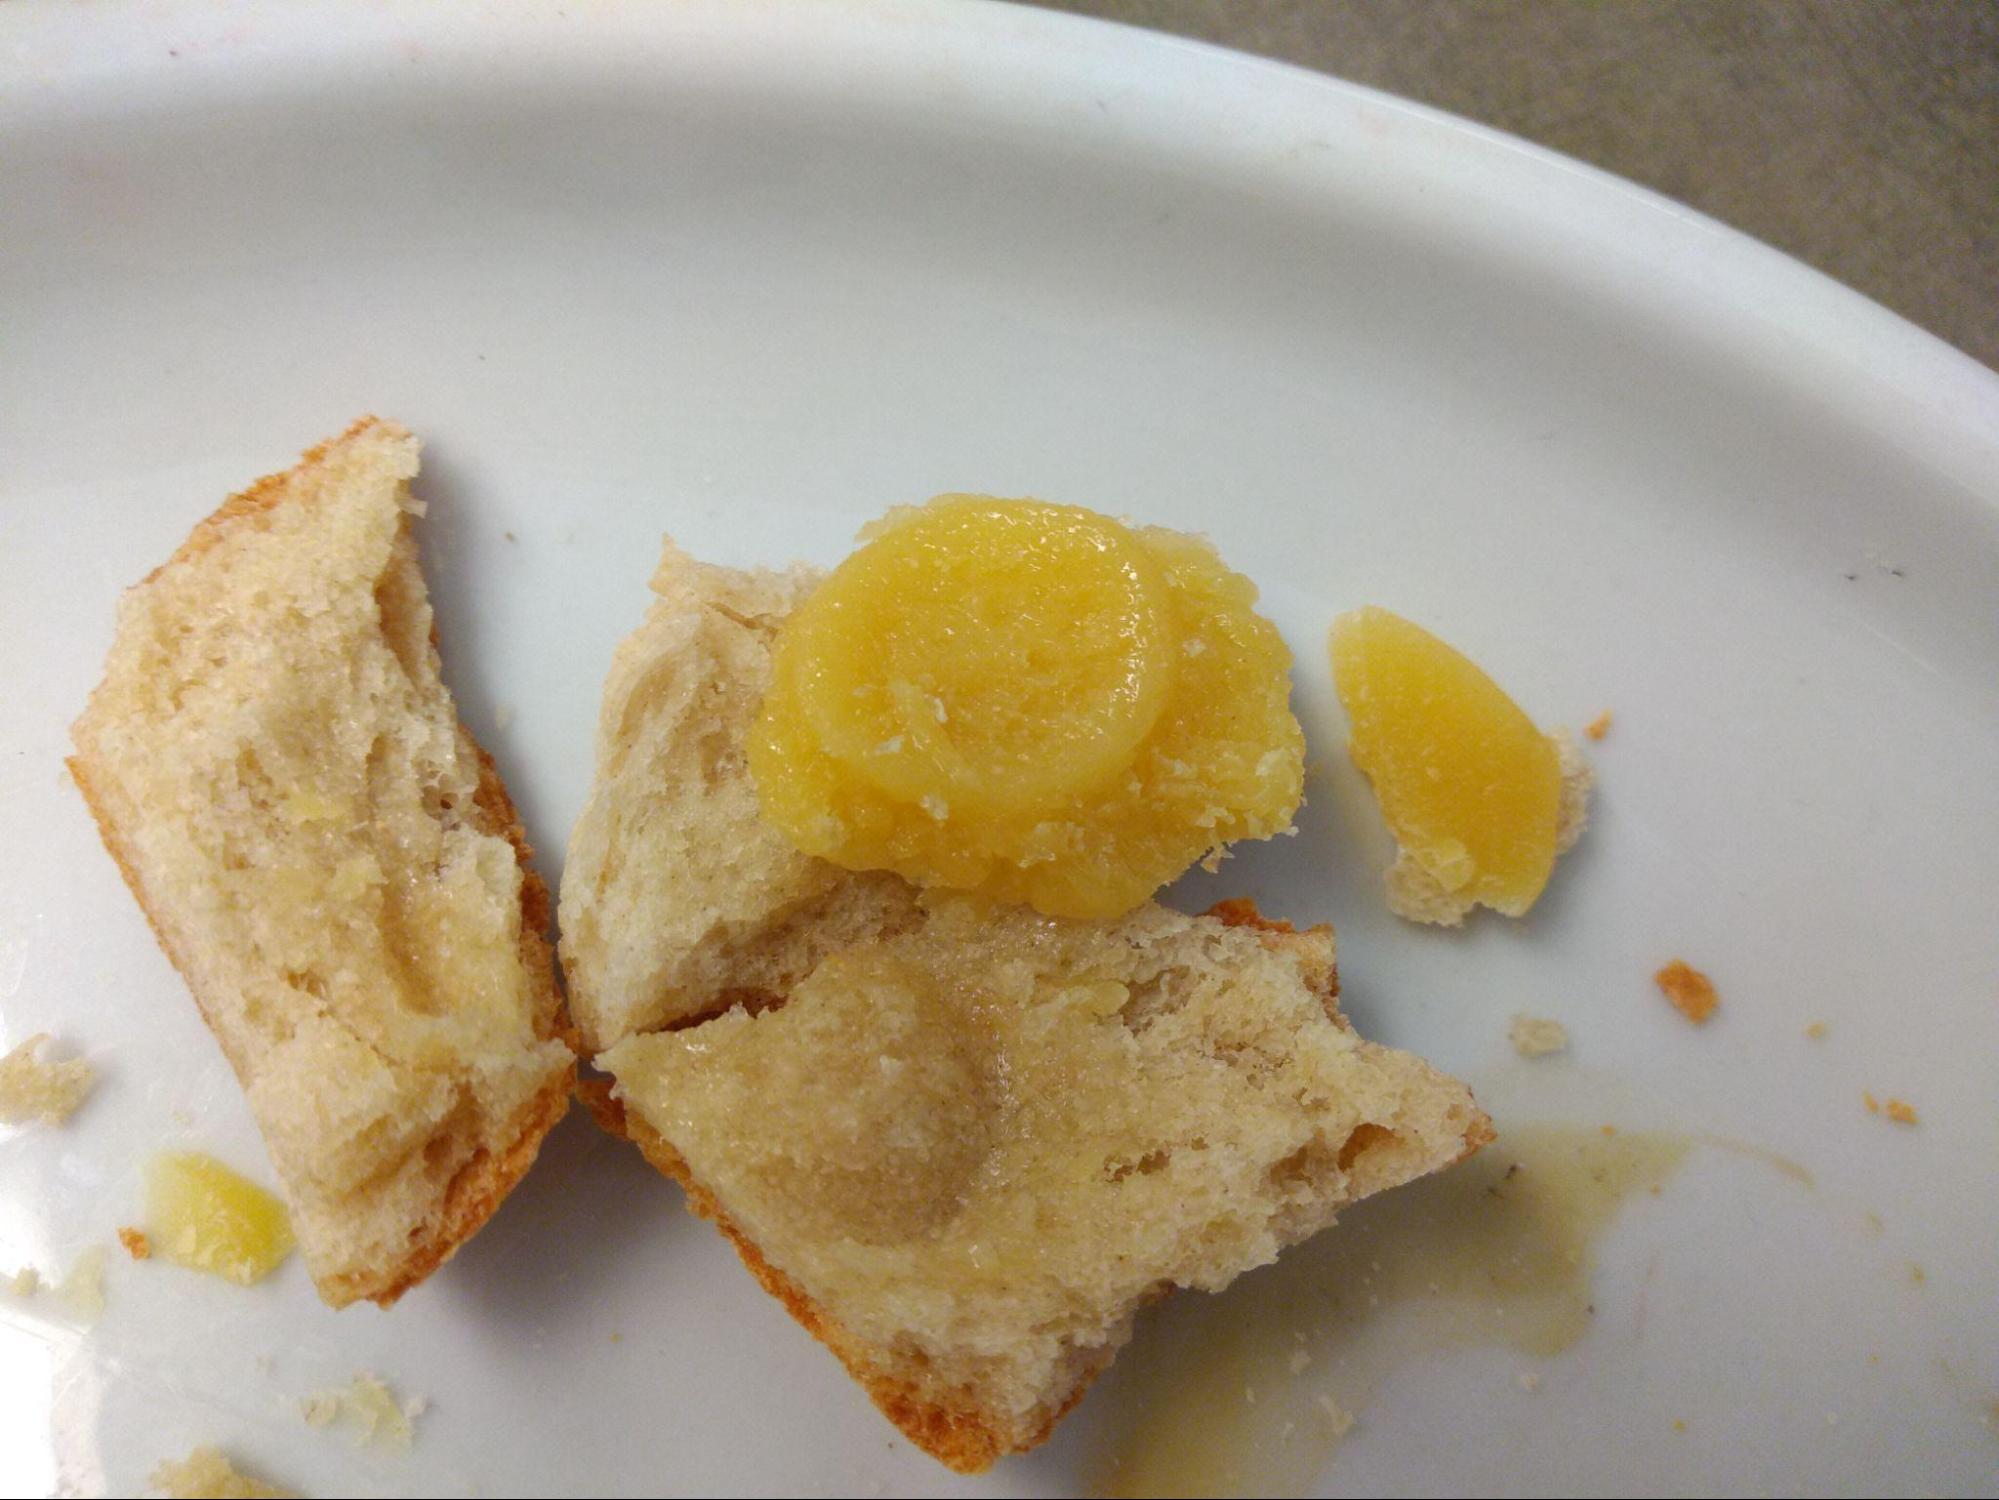
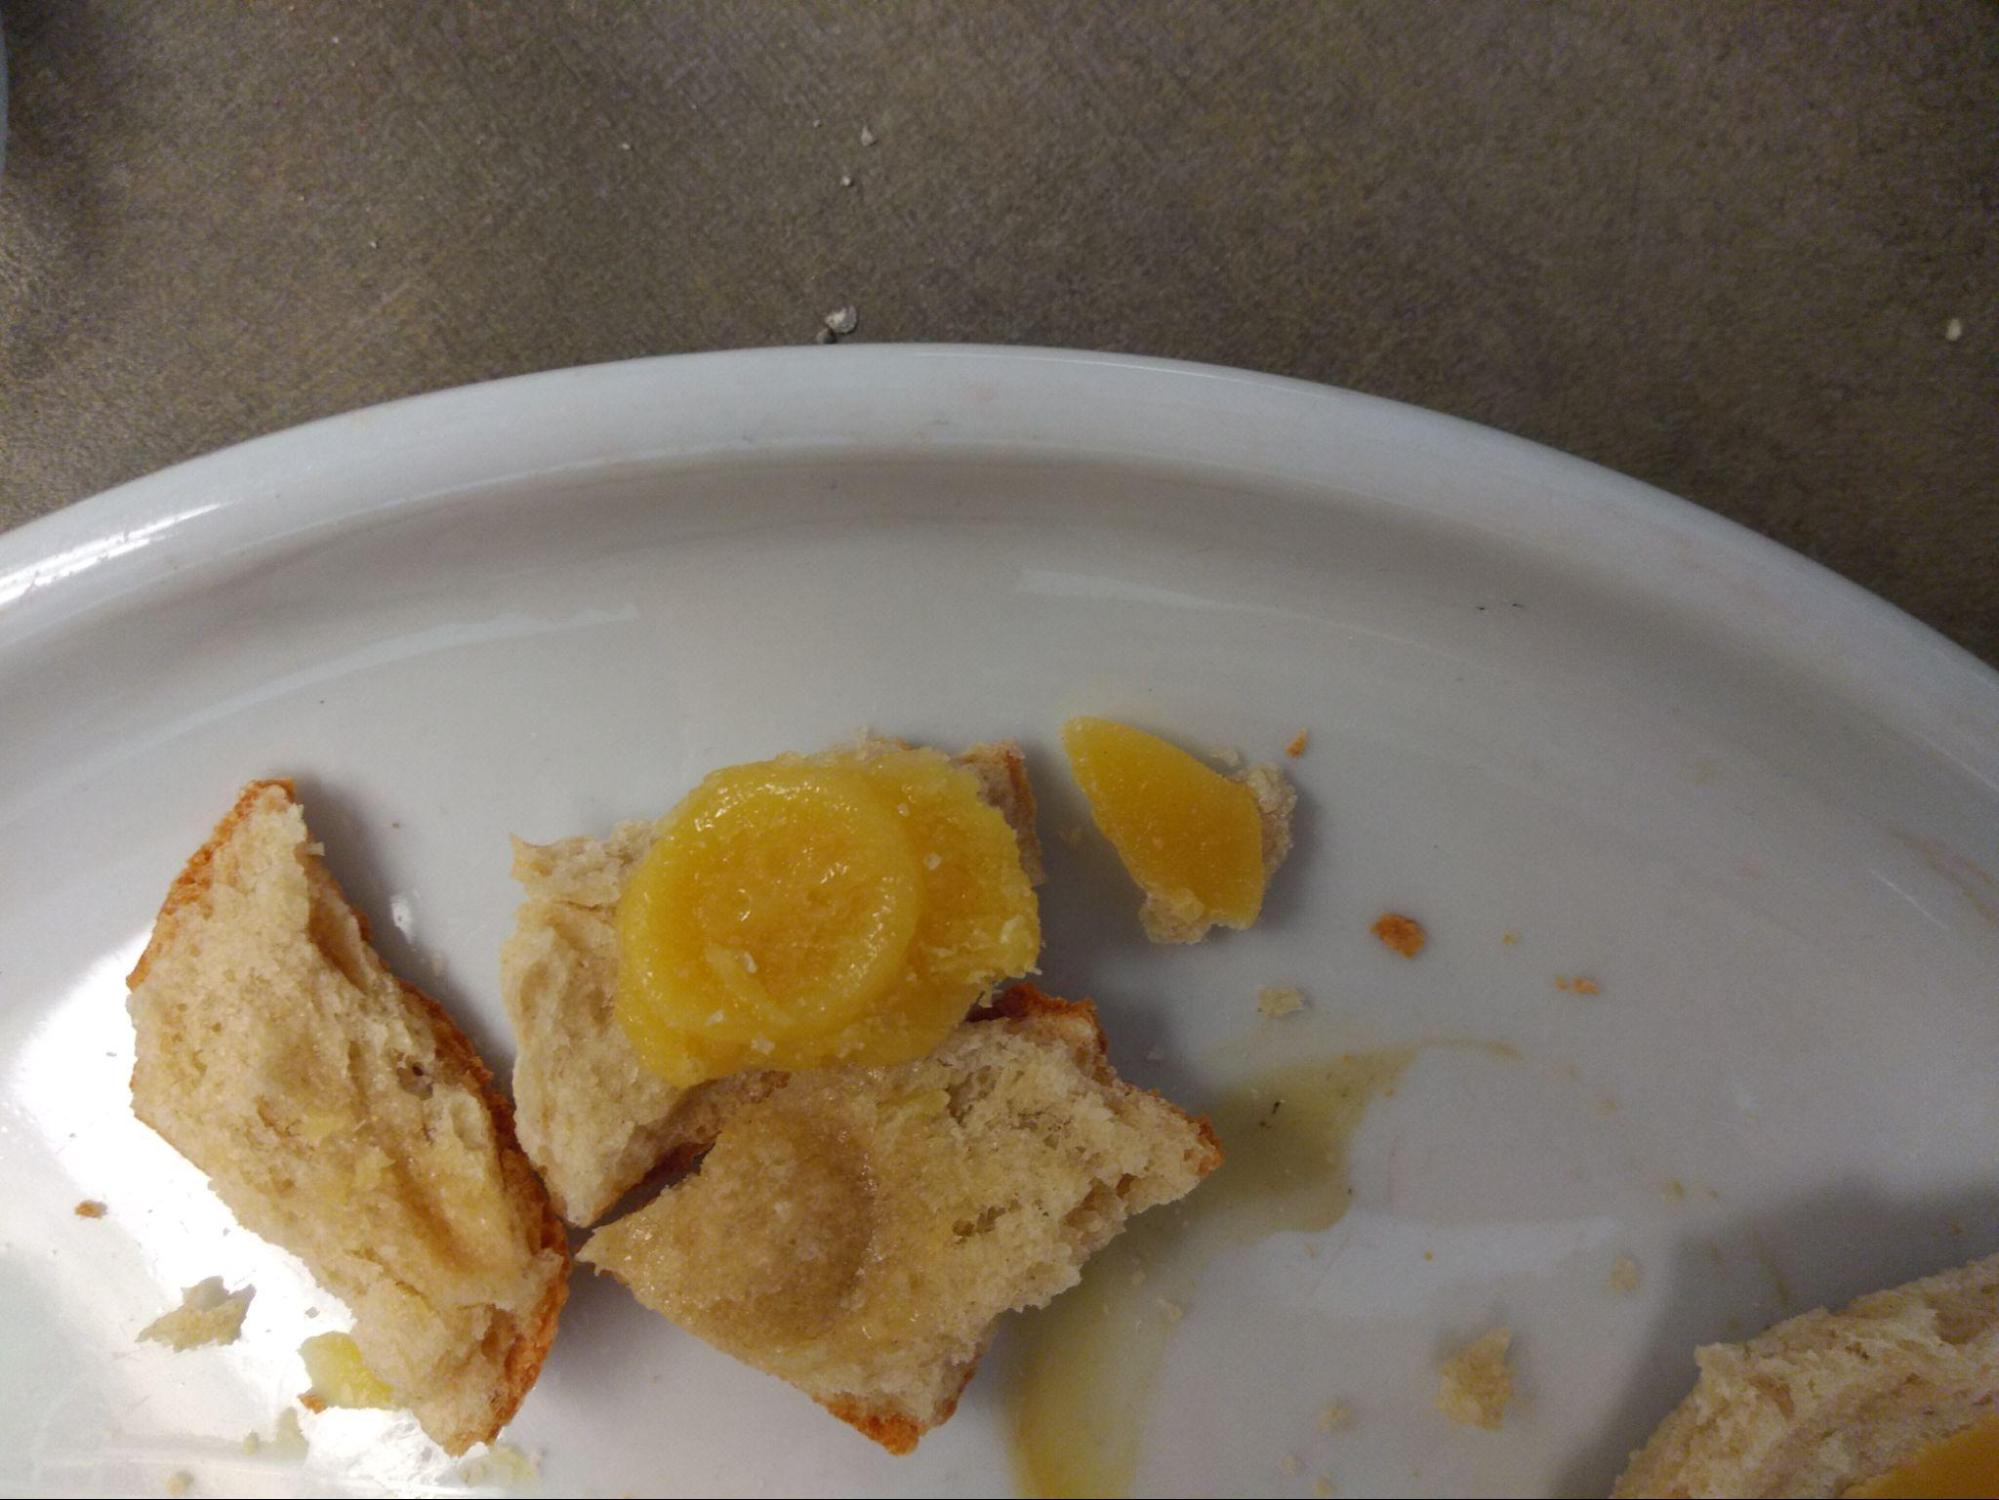
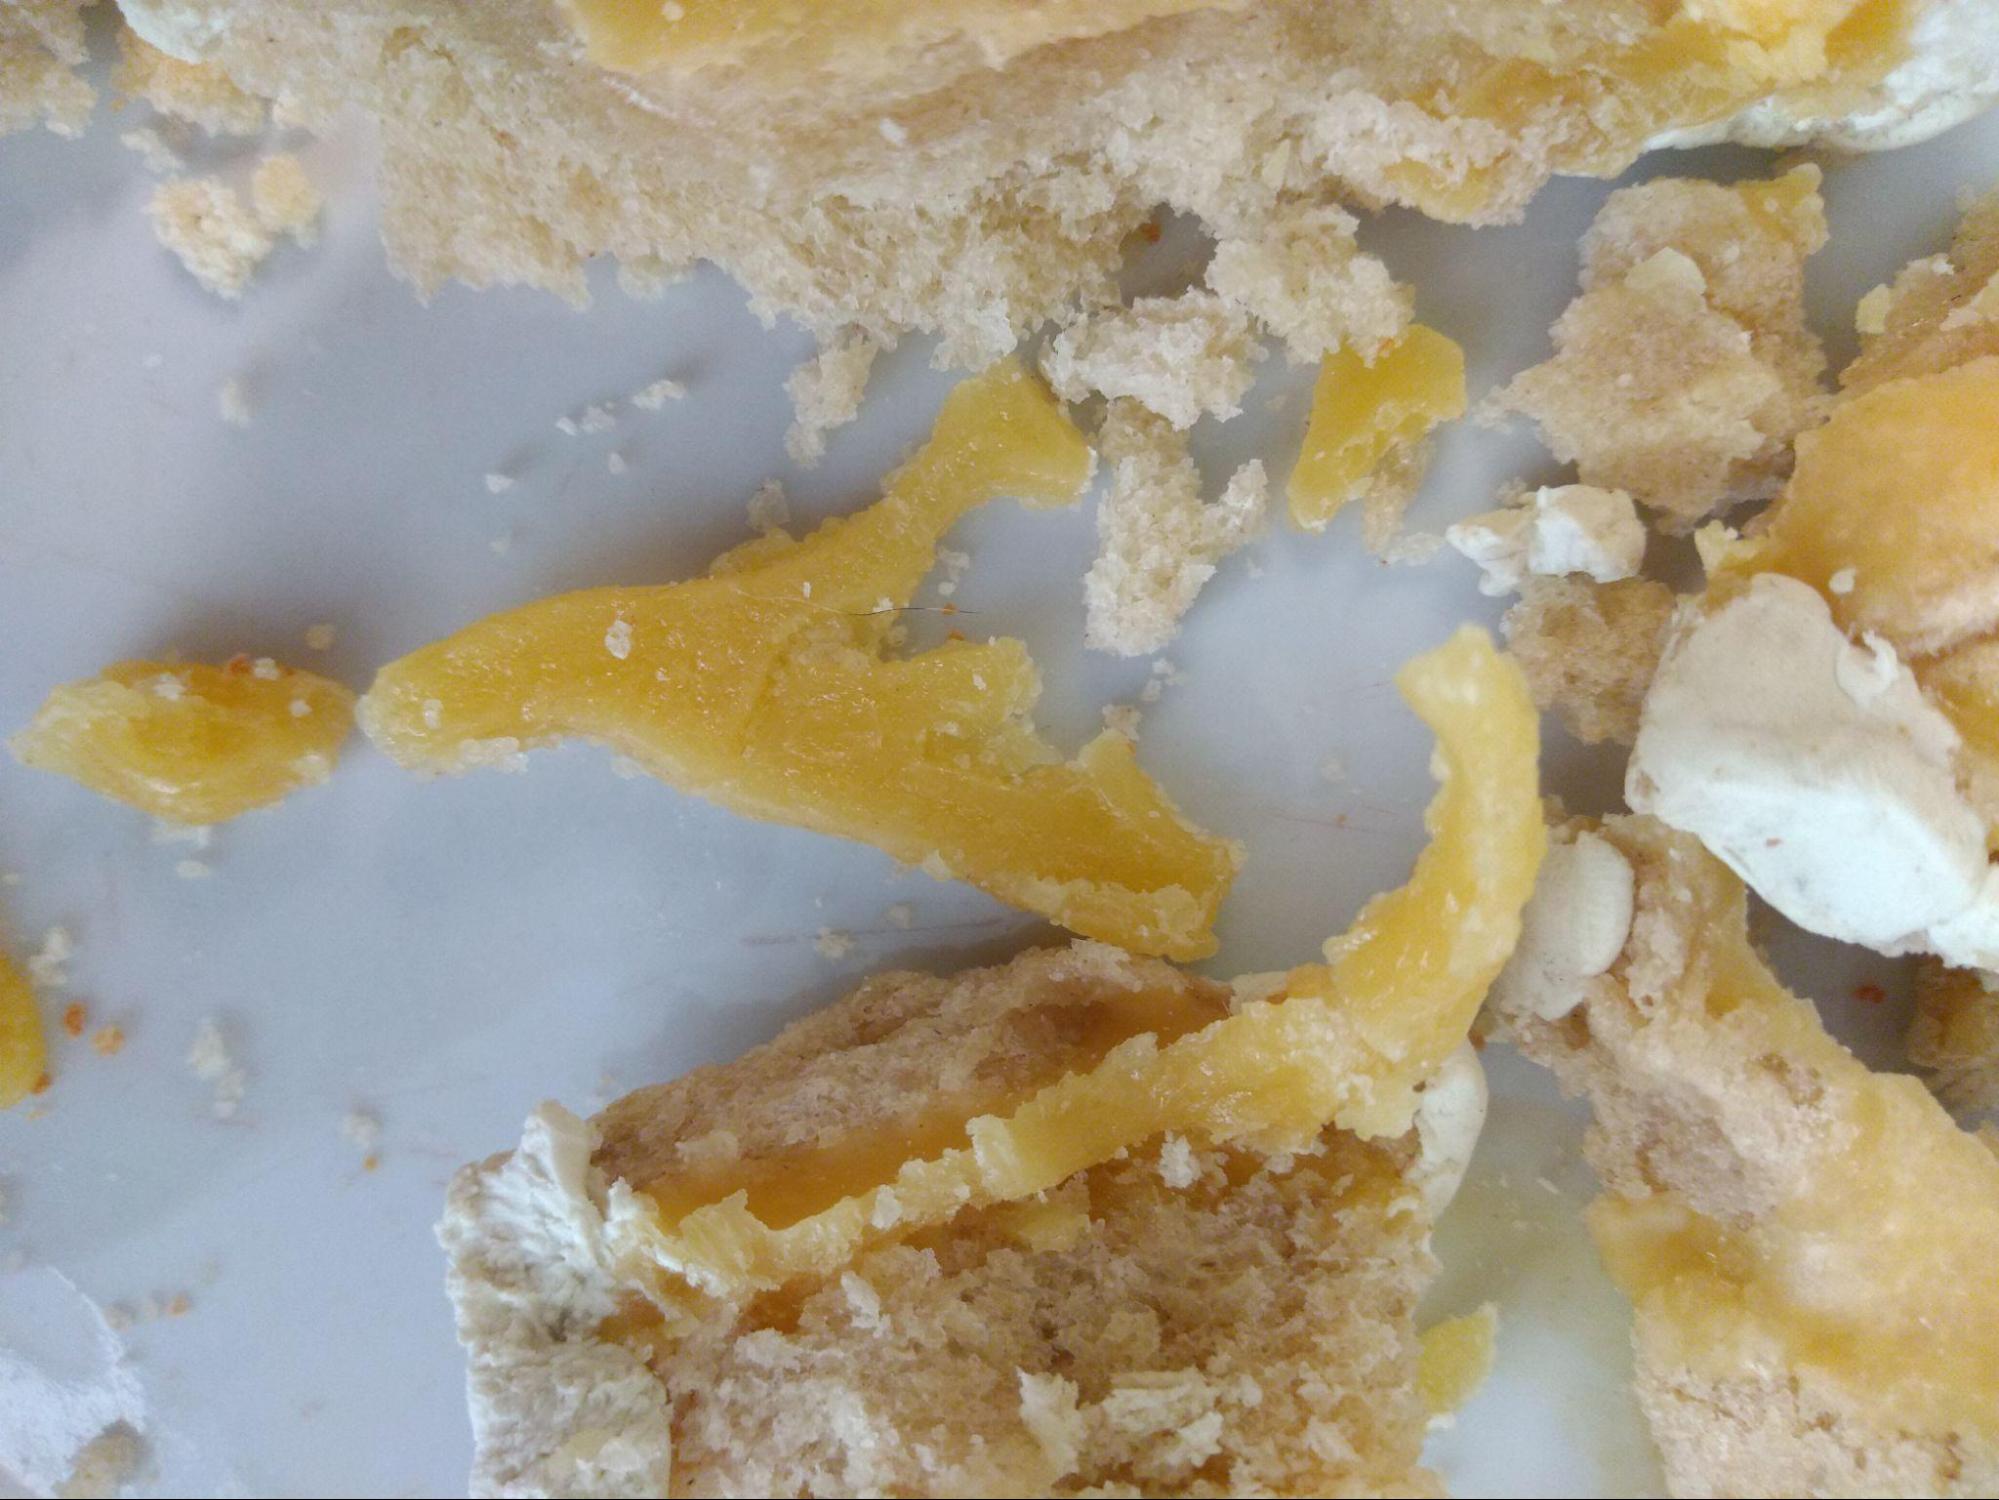
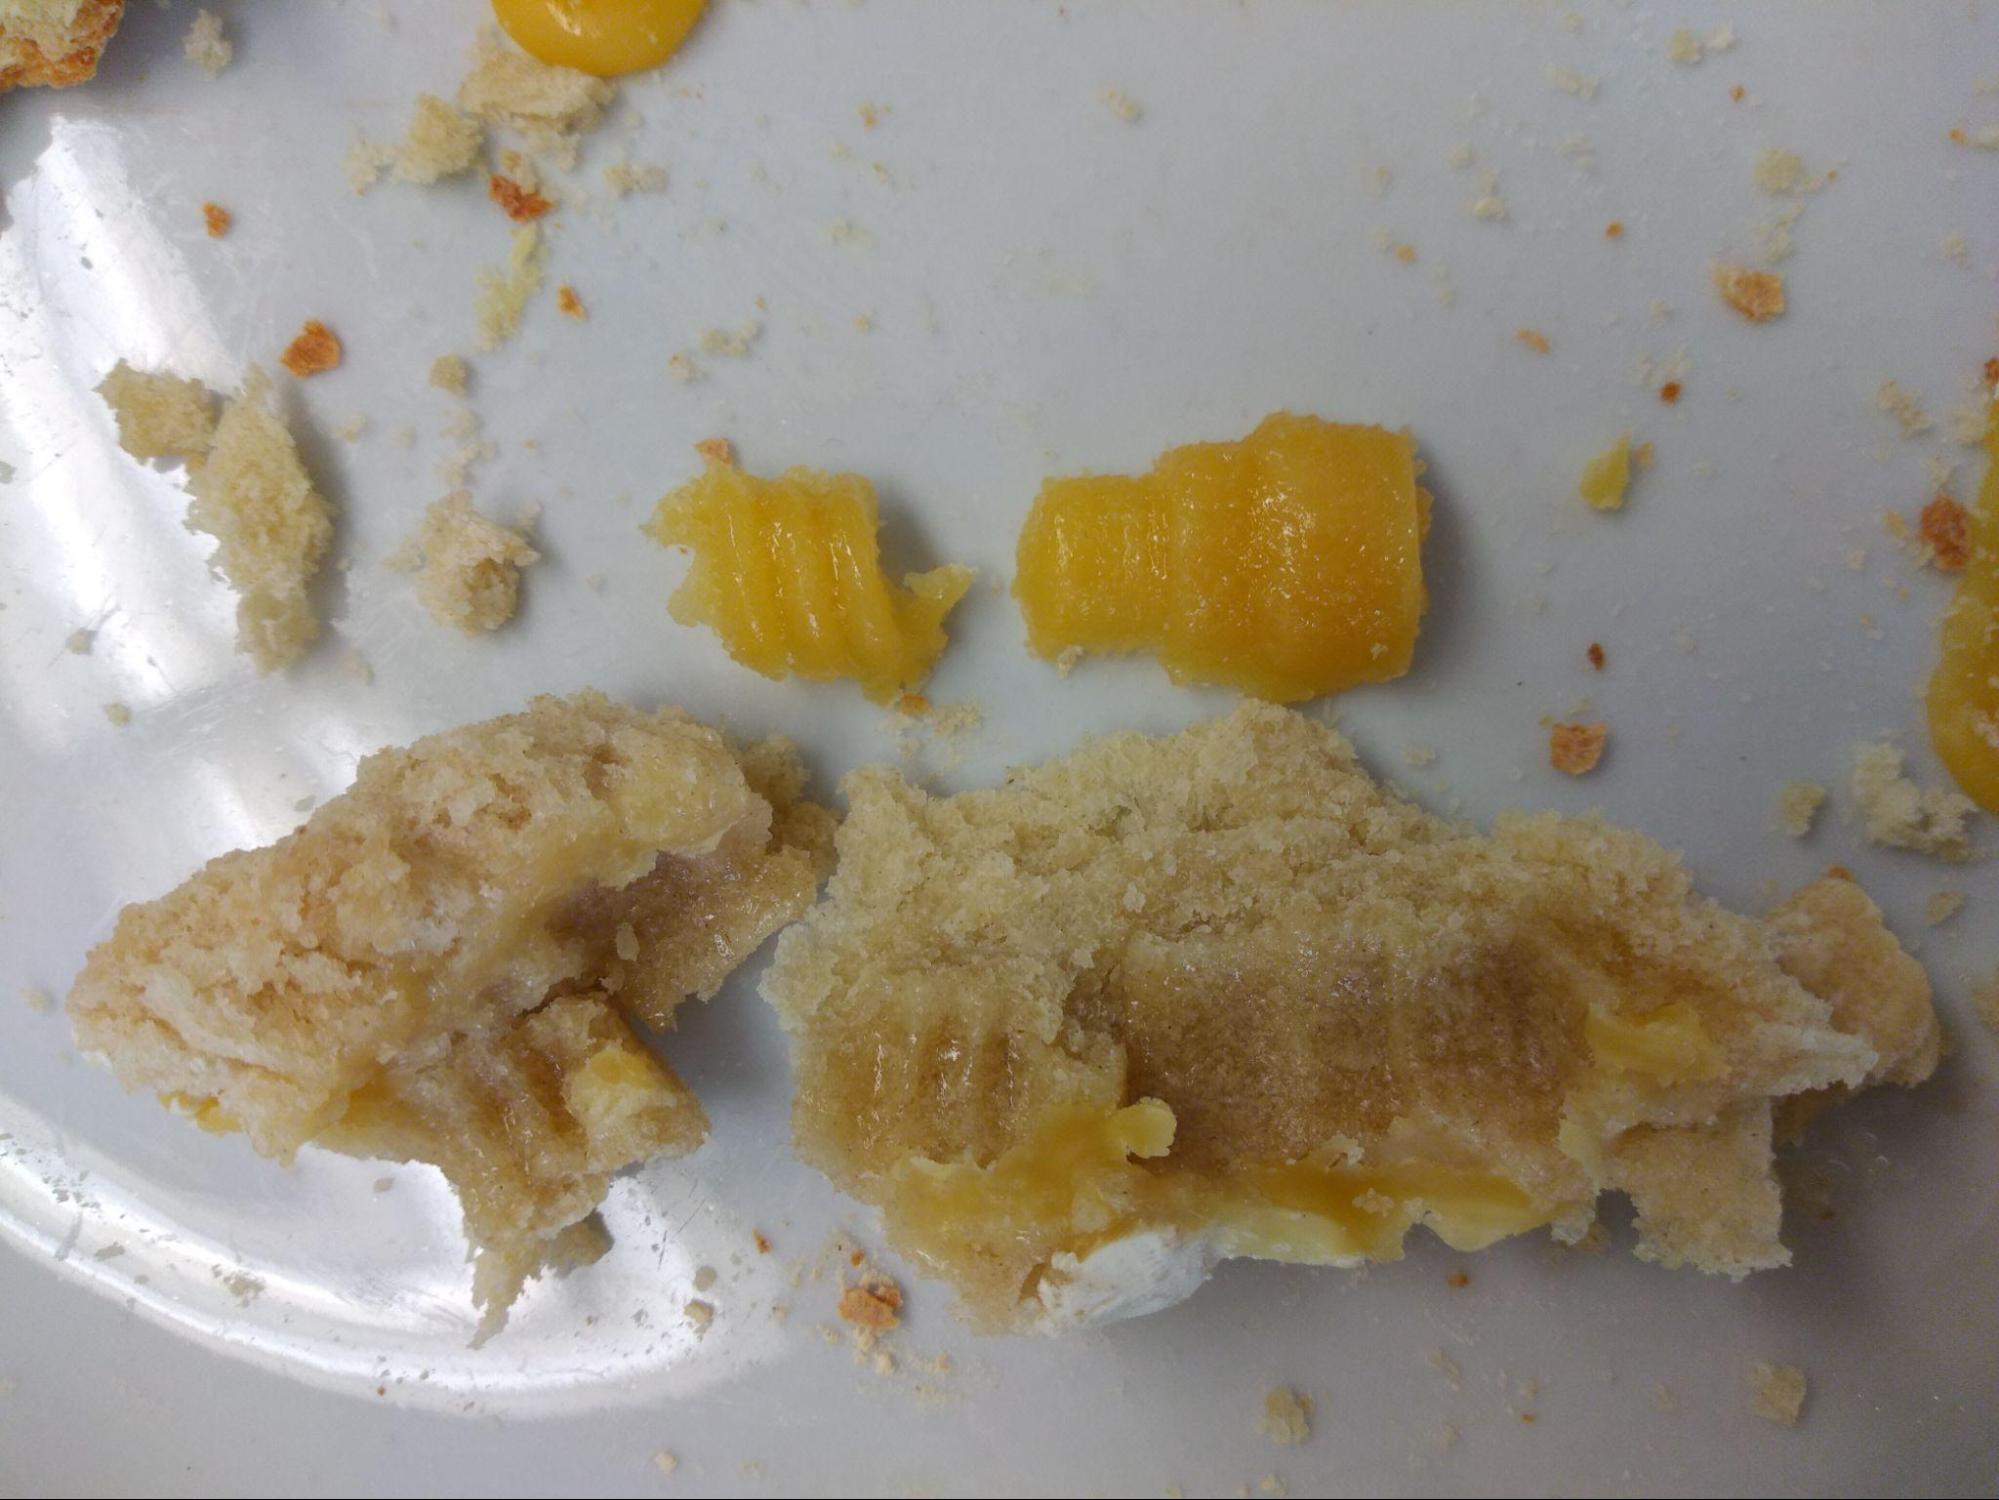
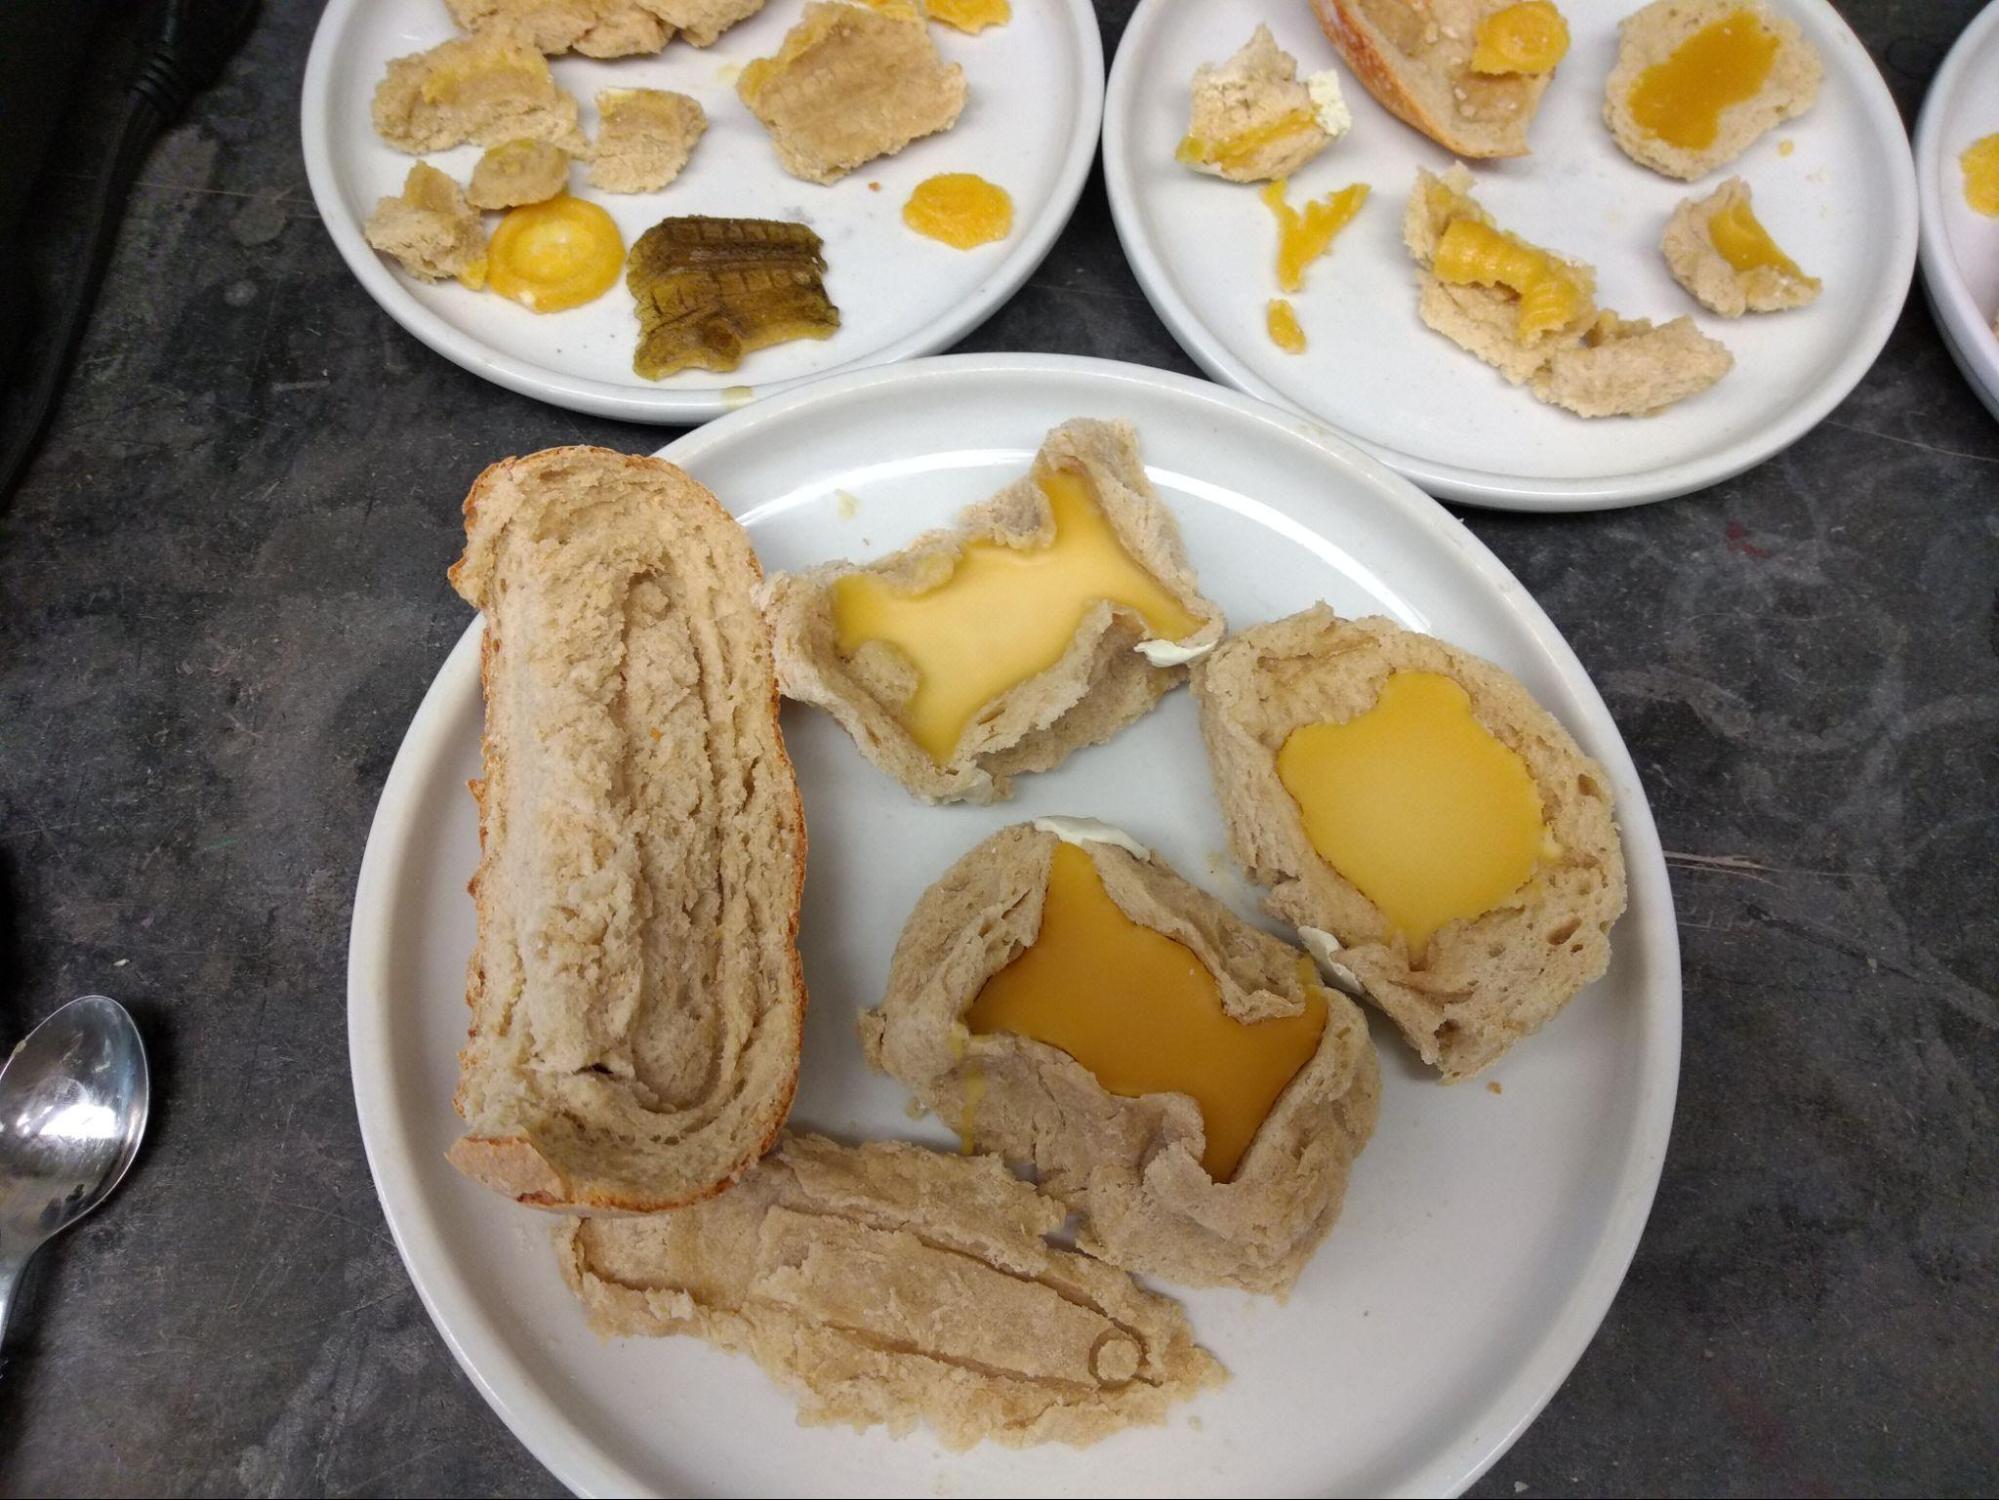
Most of the molds were destroyed when we tried to remove the cast wax from them. However, some of the bread molds stayed completely intact after removal of the cast wax. Others stayed partially intact.
For the casts of the double-decker bus, the detail captured was quite remarkable. In order to better see the detail, I brushed the surface with some charcoal (that the lab had used to create charcoal pouncers for image transfer). When this was done, the raised lettering (spelling out “Oxford”) became more visible.
We ran out of time before needing to head out of the lab. We poured wax into all of the usable molds and then left them to set until we could return to the lab at a later time to unmold the cast objects. Alongside these molds we also left the unmolded casts and any intact molds to completely dry.