Powder of ox bone and rock salt, p089r
Table of Contents
Dated Field Notes (scroll down for undated field notes):
NAME: Michelle Lee, Diana Mellon, Yijun Wang
DATE: Dec. 9, 2014
LOCATION: Chandler 260
SUBJECT: finishing the mold and casting in tin
- Reset the humidifier station, began to humidify the commercial version.
- Regrind the home made sand twice (altogether it is ground three times.)
- the home made sand feels like beach sand, and forms a “sand castle” which takes the form and the detail of the cup well.
- there is a huge difference in terms of the texture between the twice ground homemade sand and the thrice ground homemade sand. Maybe three is the magic number.
- regrind the commercial sand once to make sure it is fine enough, as the salt is still quite granular.
- Mold 1: homemade sand, in cut tin can, key impression, to be DRIED and cast in TIN [this one is ready and drying] two sided.
- - Michelle pours the tin into the mold
- - some tin flows out form the space between the two parts of the mold.
- - The tin comes out cleanly. The cast gets the “K” pattern on the key.
- - The surface is not very smooth due to the coarse of the sand.
- - Surprisingly, although we thought the sand will fall apart after casting, actually it forms a very hard mold when it has dried out. As hard as cement.
- Mold 2: homemade sand, portrait metal, remoistened/reground on 12/9, cast in tin, one side, mason jar lid. wait to dry,
- - Due the result of cast 3, we decide that we should cast in tin instead of sulfur.
- - We tried Brandy but it does not work out. So we decide to use charcoal instead of Brandy.
- - Michelle and Yijun pack the sand in the mason jar with the portrait metal at the bottom. The portrait metal is dusted with charcoal.
- - When we try to fill in the mold, the frame slippers around.
- - When we try to flit the mold and remove the portrait metal, the metal drops.
- - Michelle pours tin in the mold.
- - The tin mold gets almost all the details, but not as good as the commercial one. It might because the homemade sand is less fine than the commercial one, or it might be because the homemade sand is dryer than the commercial one, or it might be because the mold slippered around when we fill in the mold with sand.
- - Some black stains remains on the tin cast. Might be flux?
- Mold 3: commercial sand, wet, remoistened/reground on 12/9, cast in sulfur, one side, mason jar lid
- - press the shell in and pack the sand. The sand becomes so hard that Michelle breaks the shell when trying to make an impression
- - we try another shell. We fill in the shell with sand and put the shell and the bottom of the frame. Then we pack the frame with sand like what we did with sand box molding. Then Diana removes the shell from the sand.
- - it is bad idea to cast in sulfur because the sand sticks to the sulfur and cannot be cleaned
- Mold 4: sand mold with our magistry and sand that we used last time, double side, wooden frame box.
- - we use two claps to tighten the mold,
- - we put the mold in hood with an angle.
- - Michelle pours tin in the mold.
- - The tin comes out cleanly in gold. Prof. Smith thinks it is due to the salt we used in our binder/magistry.
- - The sand mold still holds pretty well. So the magistry can be considered successfully but not for casting in tin.
- Mold 5: commercial sand, sea shell, remoistened/reground on 12/9, cast in tin, one side, mason jar lid. wait to dry
- - Diana fills in the mason jar lid with sand, then dig a hole in the sand and presses the sea shell in to make an impression.
- - Then she uses Brandy to moisten the sand so that we can separate the two halves of the mold without breaking the patten in the mold. Diana also moisten the pattern.
- - It doesn’t work out. The sand is too wet and sticks together when we tries to separate the mold.
- - This time Diana uses charcoal instead of Brandy.
- - dusts the charcoal over the shell and over the surface between the two halves.
- - The sand needs to be ground again after being packed into the mold because the sand hardened so fast after being pressed into the mold.
- - Charcoal works really well.
- - Michelle pours the tin into the mold. Totally safe, nothing happened.
- Mold 6: commercial sand, portrait metal, remoistened/reground on 12/9, cast in tin, one side, mason jar lid. wait to dry
- - Diana packs the sand in the mason jar with the portrait metal at the bottom. The portrait metal is dusted with charcoal.
- - Blows the mold with the torch.
- - Michelle pours tin in the mold.
- - The tin comes out cleanly and gets all the details of the portrait metal including the feathers of the eagle.
- Mold 7: homemade sand thrice ground, same portrait metal, cast in tin, one side, mason jar lid. *I think mold 7 is mold 2. I made a mistake. (Yijun Wang)
- Yijun and Michelle pack the sand into the mason jar with the portrait metal at the bottom. the portrait metal had been generously dusted with charcoal before being packed with sand
- curiously enough, the metal falls right out of the sand when Yijun and Michelle turn over the sand, though the impression turns out well enough. was wary of this and redo the impression once more. however, it again falls right out when the mold is lifted. the impression is well done, however, and so we decide that it is good for casting
- quickly heat up the surface of the mold with the blow torch, then melt tin and pour
- the tin metal comes out very cleanly and also picks up quite a few of the detail, though some of the letters do not come out due to the impression/also the metal was not completely poured all the way to the rim.
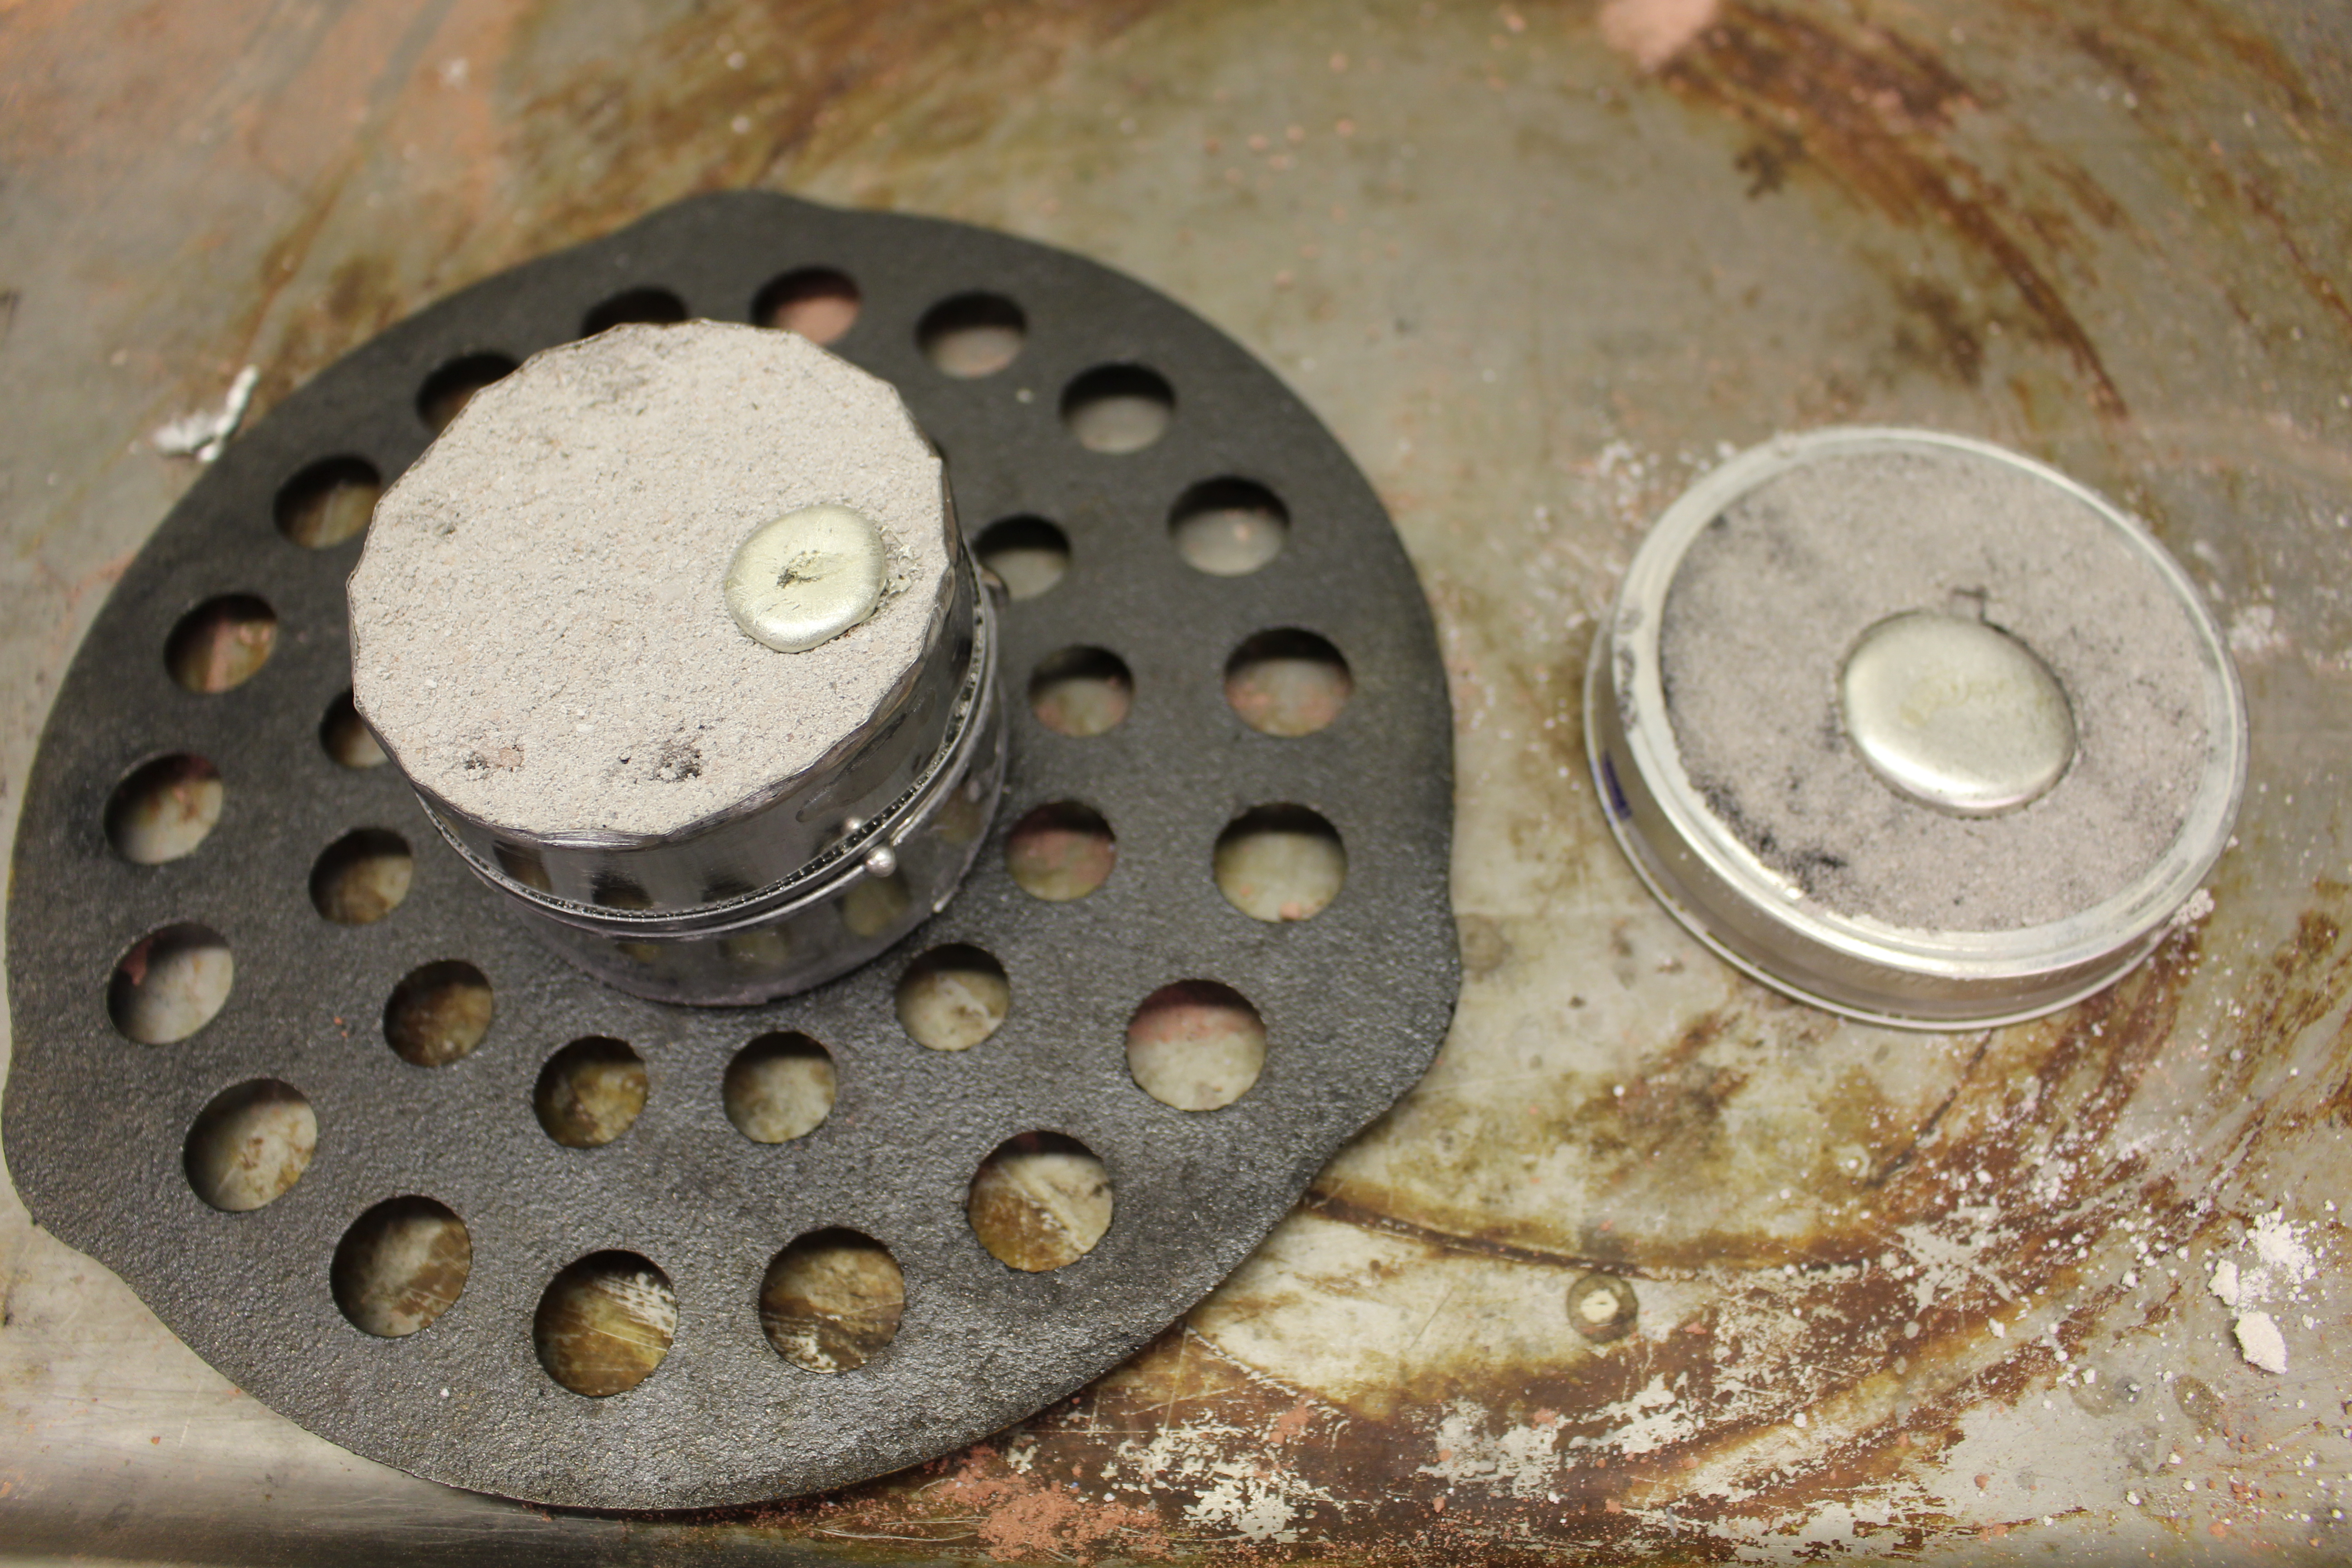 |
| right after pouring tin: from left to right, mold #1 (original sand, double sided, once ground) and mold #7 (original sand, one sided, thrice ground) |
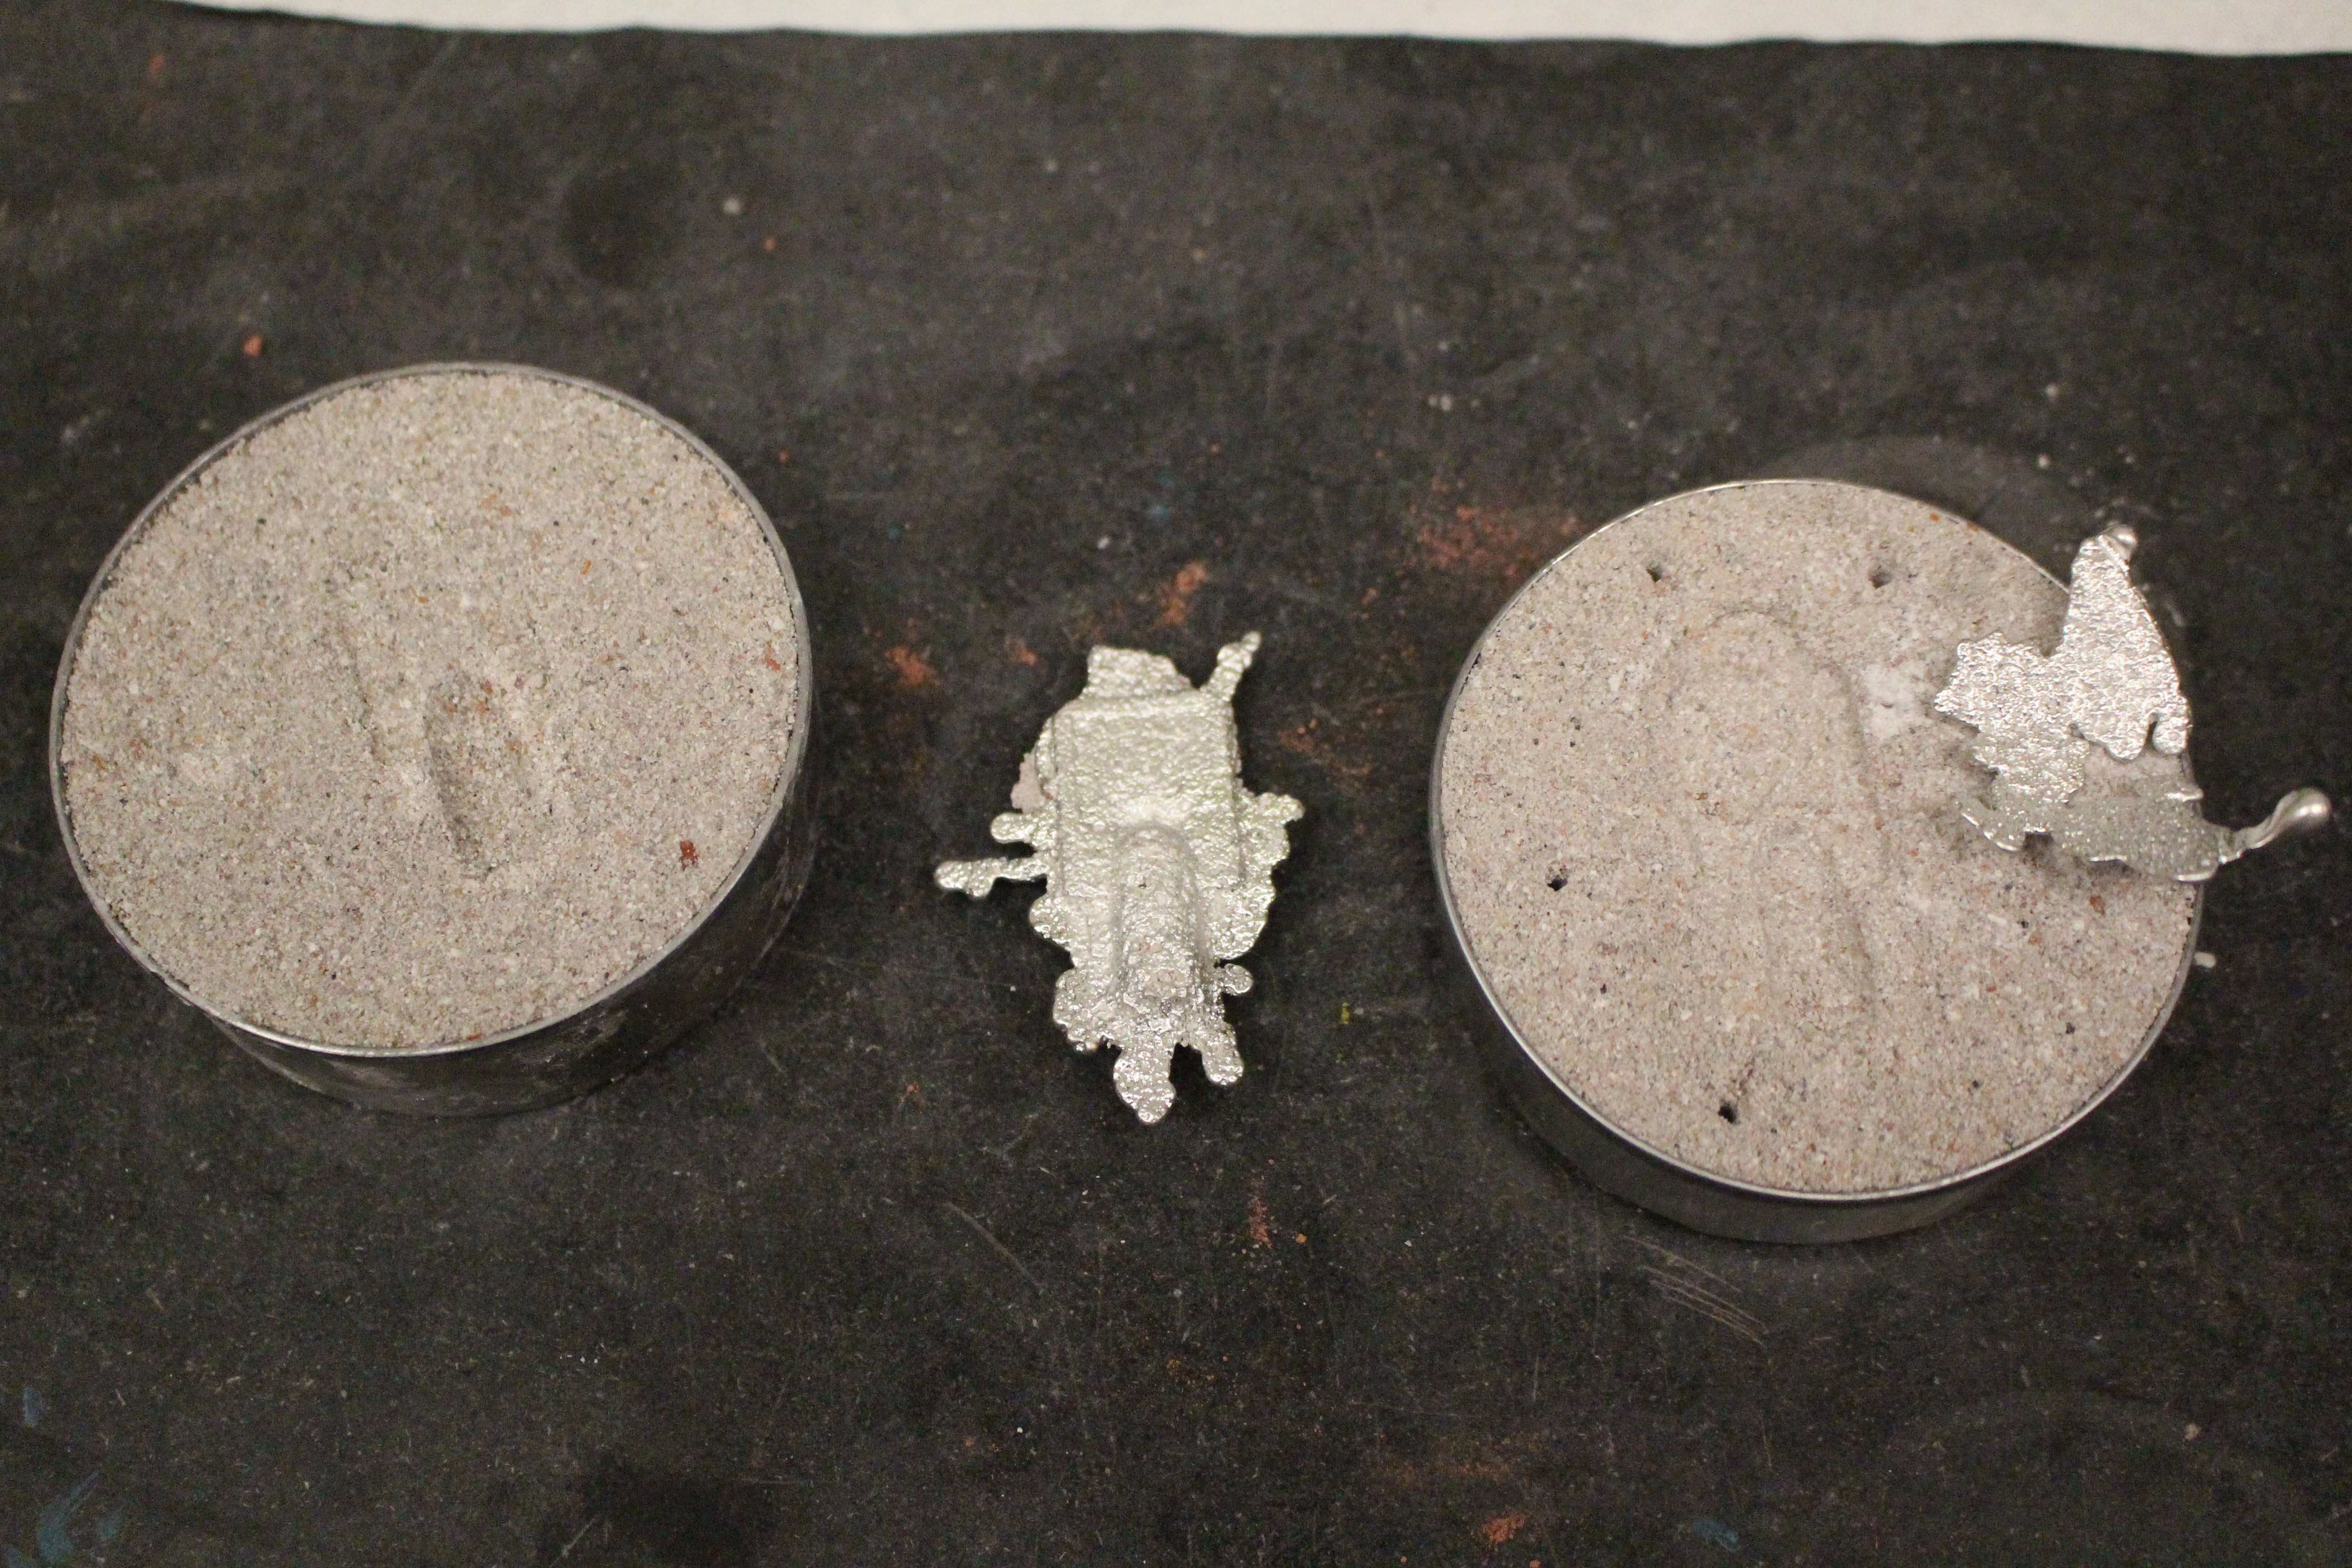 |
| double sided mold, with original sand once ground |
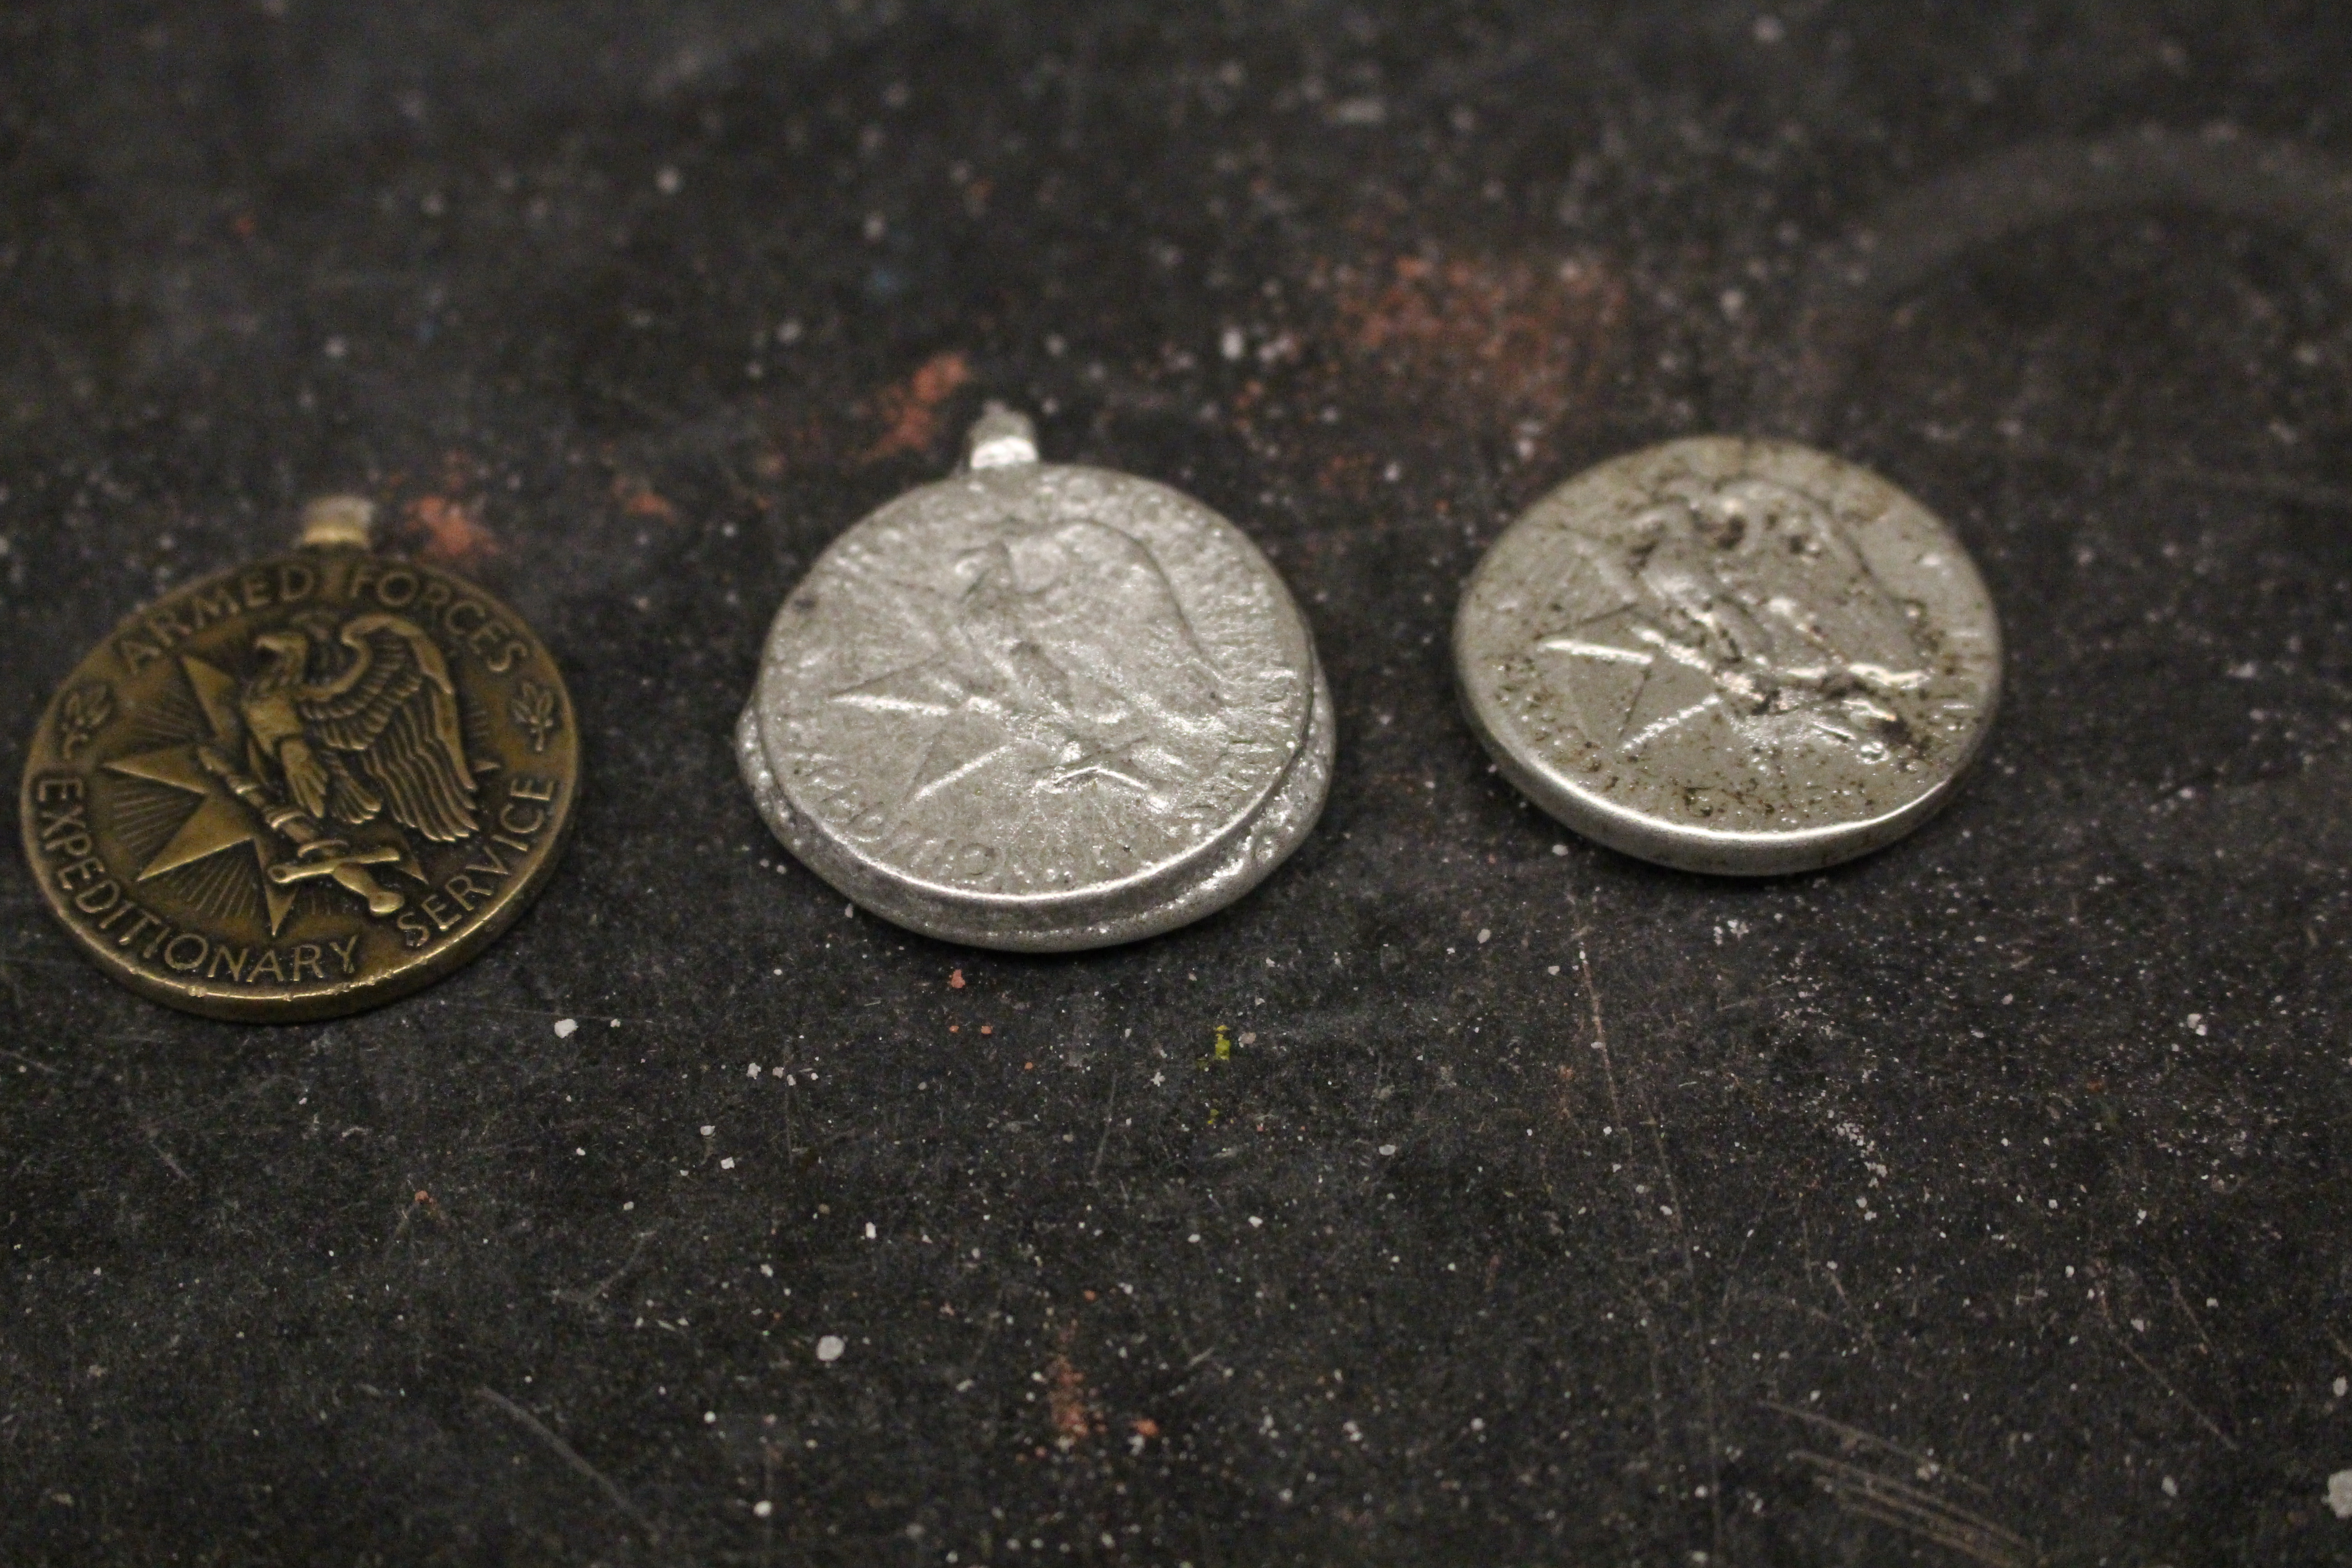 |
| from left to right: the original metal, the metal cast from mold #6 (commercial sand, one sided, twice ground), the metal cast from mold #7 (homemade sand, one sided, thrice ground) |
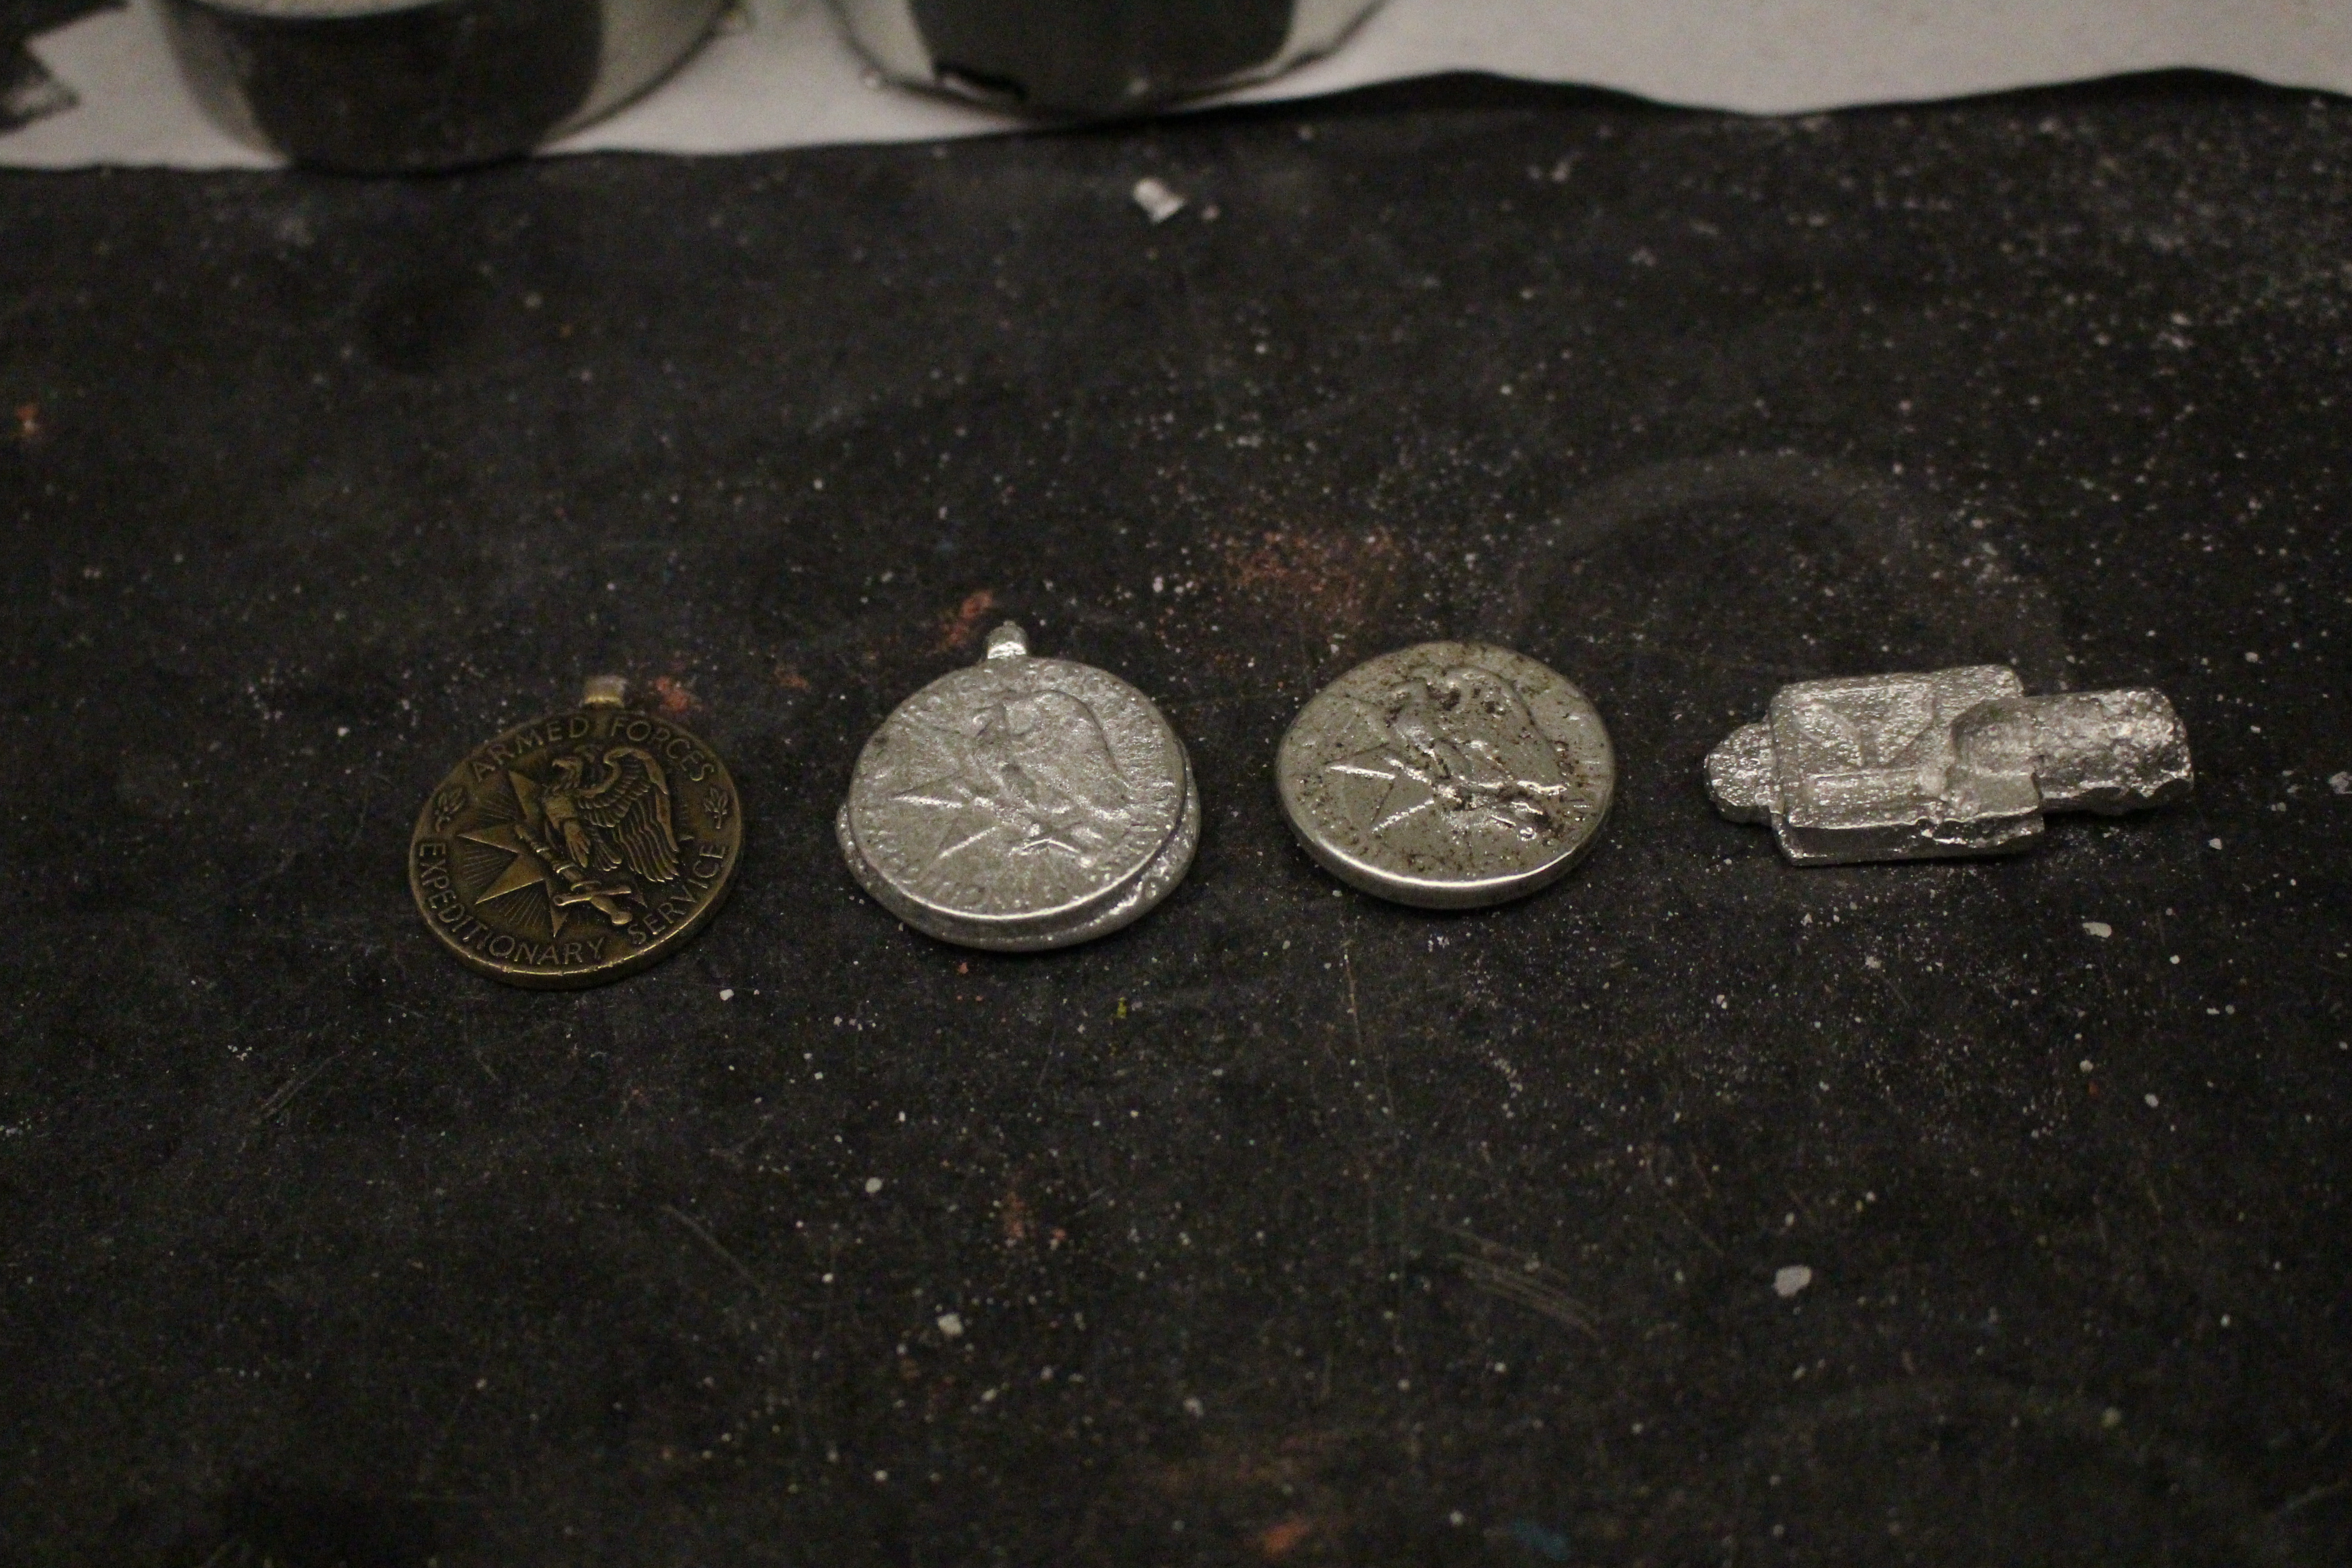 |
| all the metals together! from left to right: original metal, metal from mold #6, metal from mold #7, key metal from mold #1 |
Conclusion: the detail of the metals were very impressive. we had chosen a metal that had quite a bit of small, fine details, and almost all of them were picked up by both the commercial and homemade sand. if compared, we would say that the commercial picked up slightly more detail than the homemade, but we believe that could be due to the fact that the homemade sand was more dry when we casted the metal than the commercial sand. also, it is important to note that none of the molds steamed or ruined the metals when we poured tin, even right after making the molds. we believe this is most likely due to it being one sided molds, but nonetheless the fact that no steaming or reaction with water happened, even with damp molds, is noteworthy.
also: when we casted the mold that we had left to dry the previous day (mold #1), it actually casted very well, and the ventilation/drain system did work, despite some concern. though there was some filing and finishing that needed to be done from the excess that ran off the edges, we still got a surprisingly good impression for such a coarse sand, with much of the detail intact. we also found that the whole cast of the key was sort of bumpy, and we found that that is due to the coarser texture of the sand; the thrice-ground sand did not create a rough texture on the metal at all, so this indicates a great importance for well ground/finely ground sand.
one more thing: we found that the sand in mold #1 was ROCK solid. we were very surprised, because when we were packing the sand while wet, we all had many concerns about whether or not the sand would even hold when it dried out. however, it was so strongly bound together after being completely dried. something happened chemically to make it so solid, after being so loose while wet! we look forward to seeing if the other molds will be just as hard when we leave them to dry.
NAME: Diana Mellon (& Michelle Lee at around 4:30PM)
DATE: Dec. 8, 2014
LOCATION: Chandler 260**
SUBJECT: Finishing the mold
Prep & execution
- prepared two white flat ceramic plates, one for the rock salt and homemade bone ash mixture and one for the rock salt and commercial bone ash mixture - in each plate:
- folded piece of linen (so it's double-thick), wet with water and squeezed out so that it doesn't drip, folded around a piece of paper drizzled with water, folded around a layer of our mold material spread out as wide as possible on the plate
- each piece of linen is marked: "HOMEMADE" or "COMMERCIAL," referring to the bone ash used
- we are using a humidifier to accelerate the process and to keep the bone ash in the lab (it is not safe to use at home)
- placed HOMEMADE on improvised grill shelf system (see photo) so that it can receive the stream of moist air from the humidifier below - left the plate underneath to catch any dripping water
- placed COMMERCIAL nearby, so that it receives some of the vapor dropping down from the other bone ash above
- left it like this for at least 5 hours
- then took down HOMEMADE, placed COMMERCIAL on top of makeshift shelf, in line of humidifier
- HOMEMADE is now damp and a slightly darker shade of gray
- to Michelle's and Diana's gloved hands it felt exactly like wet beach sand -- seemingly too coarse to leave a good impression
- rock salt grains as still clearly visible, do not appear to have dissolved
- packed HOMEMADE into tin can rims to make mold while still wet, using brandy to allow the pattern to separate from the mold and to allow the two mold halves to separate from each other
- trial #1: ring - unsuccessful - part of the mold material from the top half stayed around the ring when the 2 halves were separated
- trial #2: bike lock key was successful enough, but the sand is so grainy that it is hard to make out all the details and whether the sand picked up all of them. Diana and Michelle decide that this impression will be enough, since the objective is to see just how cleanly the impression will turn out once tin is poured.
- once we decide this impression is clean enough, we begin to create ventilation holes on the side that will pour, as well as a funnel for the metal to go through (since it is a cylinder frame).
- we then left the mold to dry in the hood. we decided not to pour tin or sulpher into the mold that day.
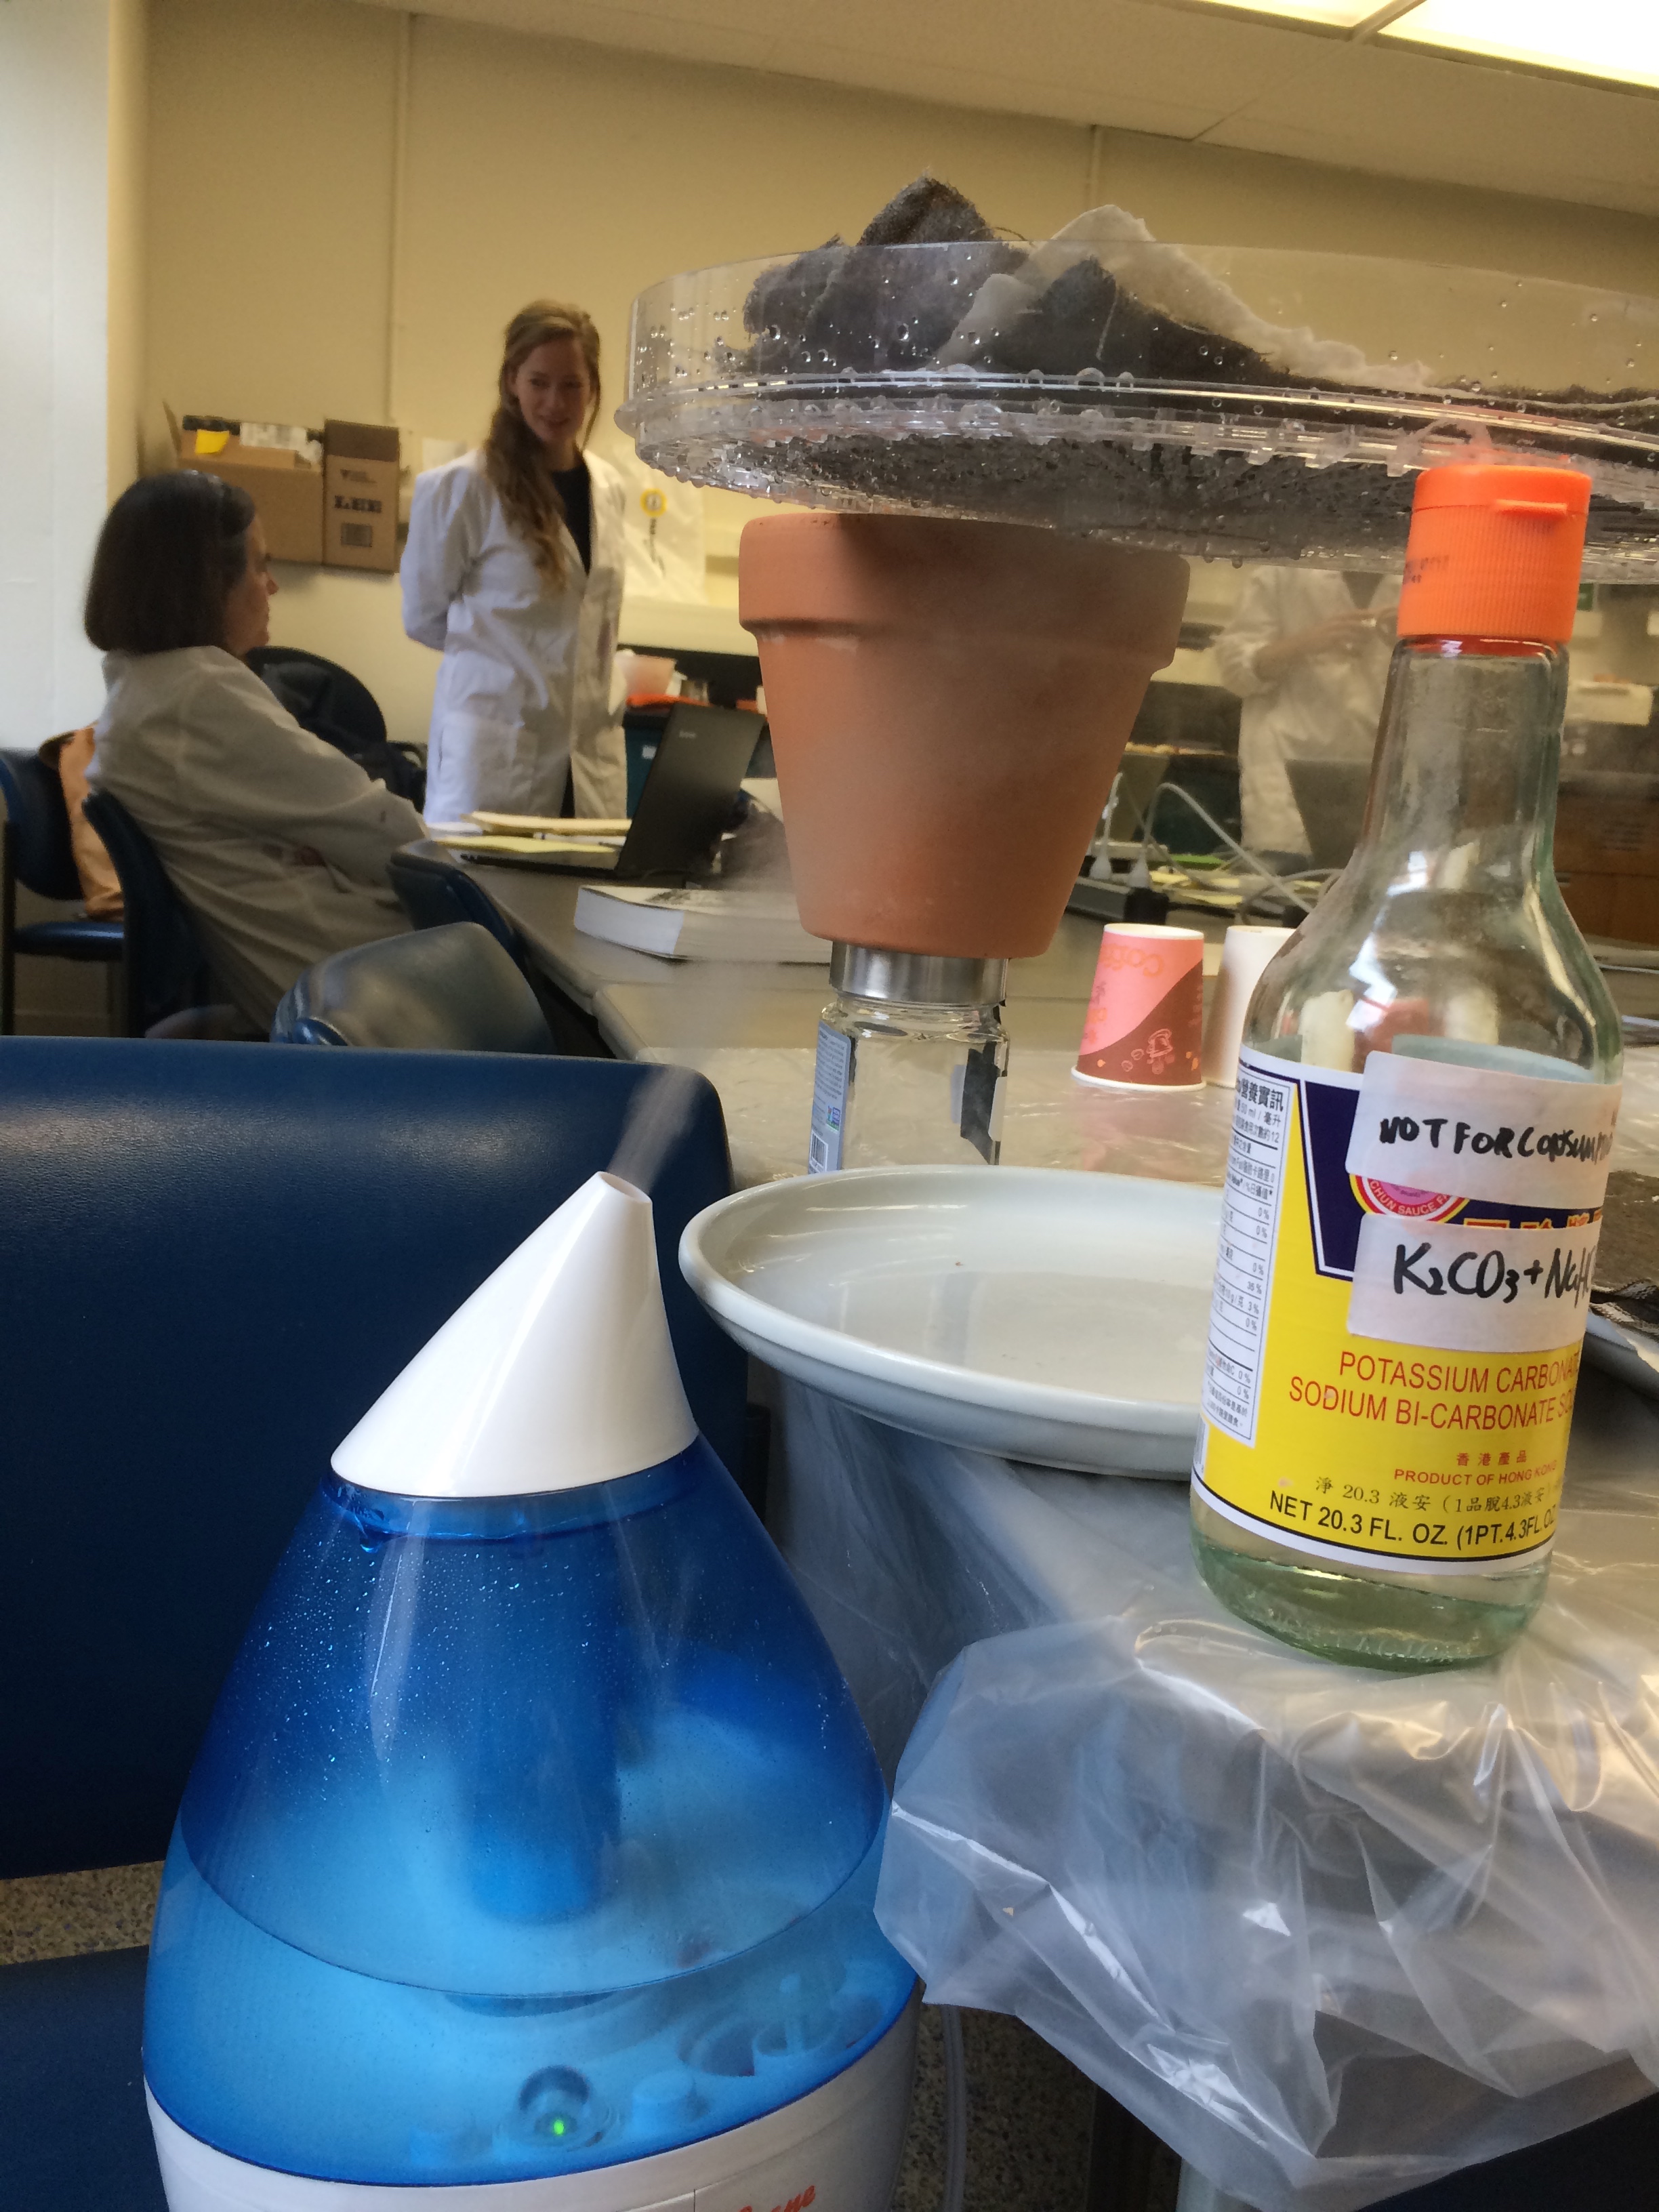 |
| our set-up to simulate overnight dampness! |
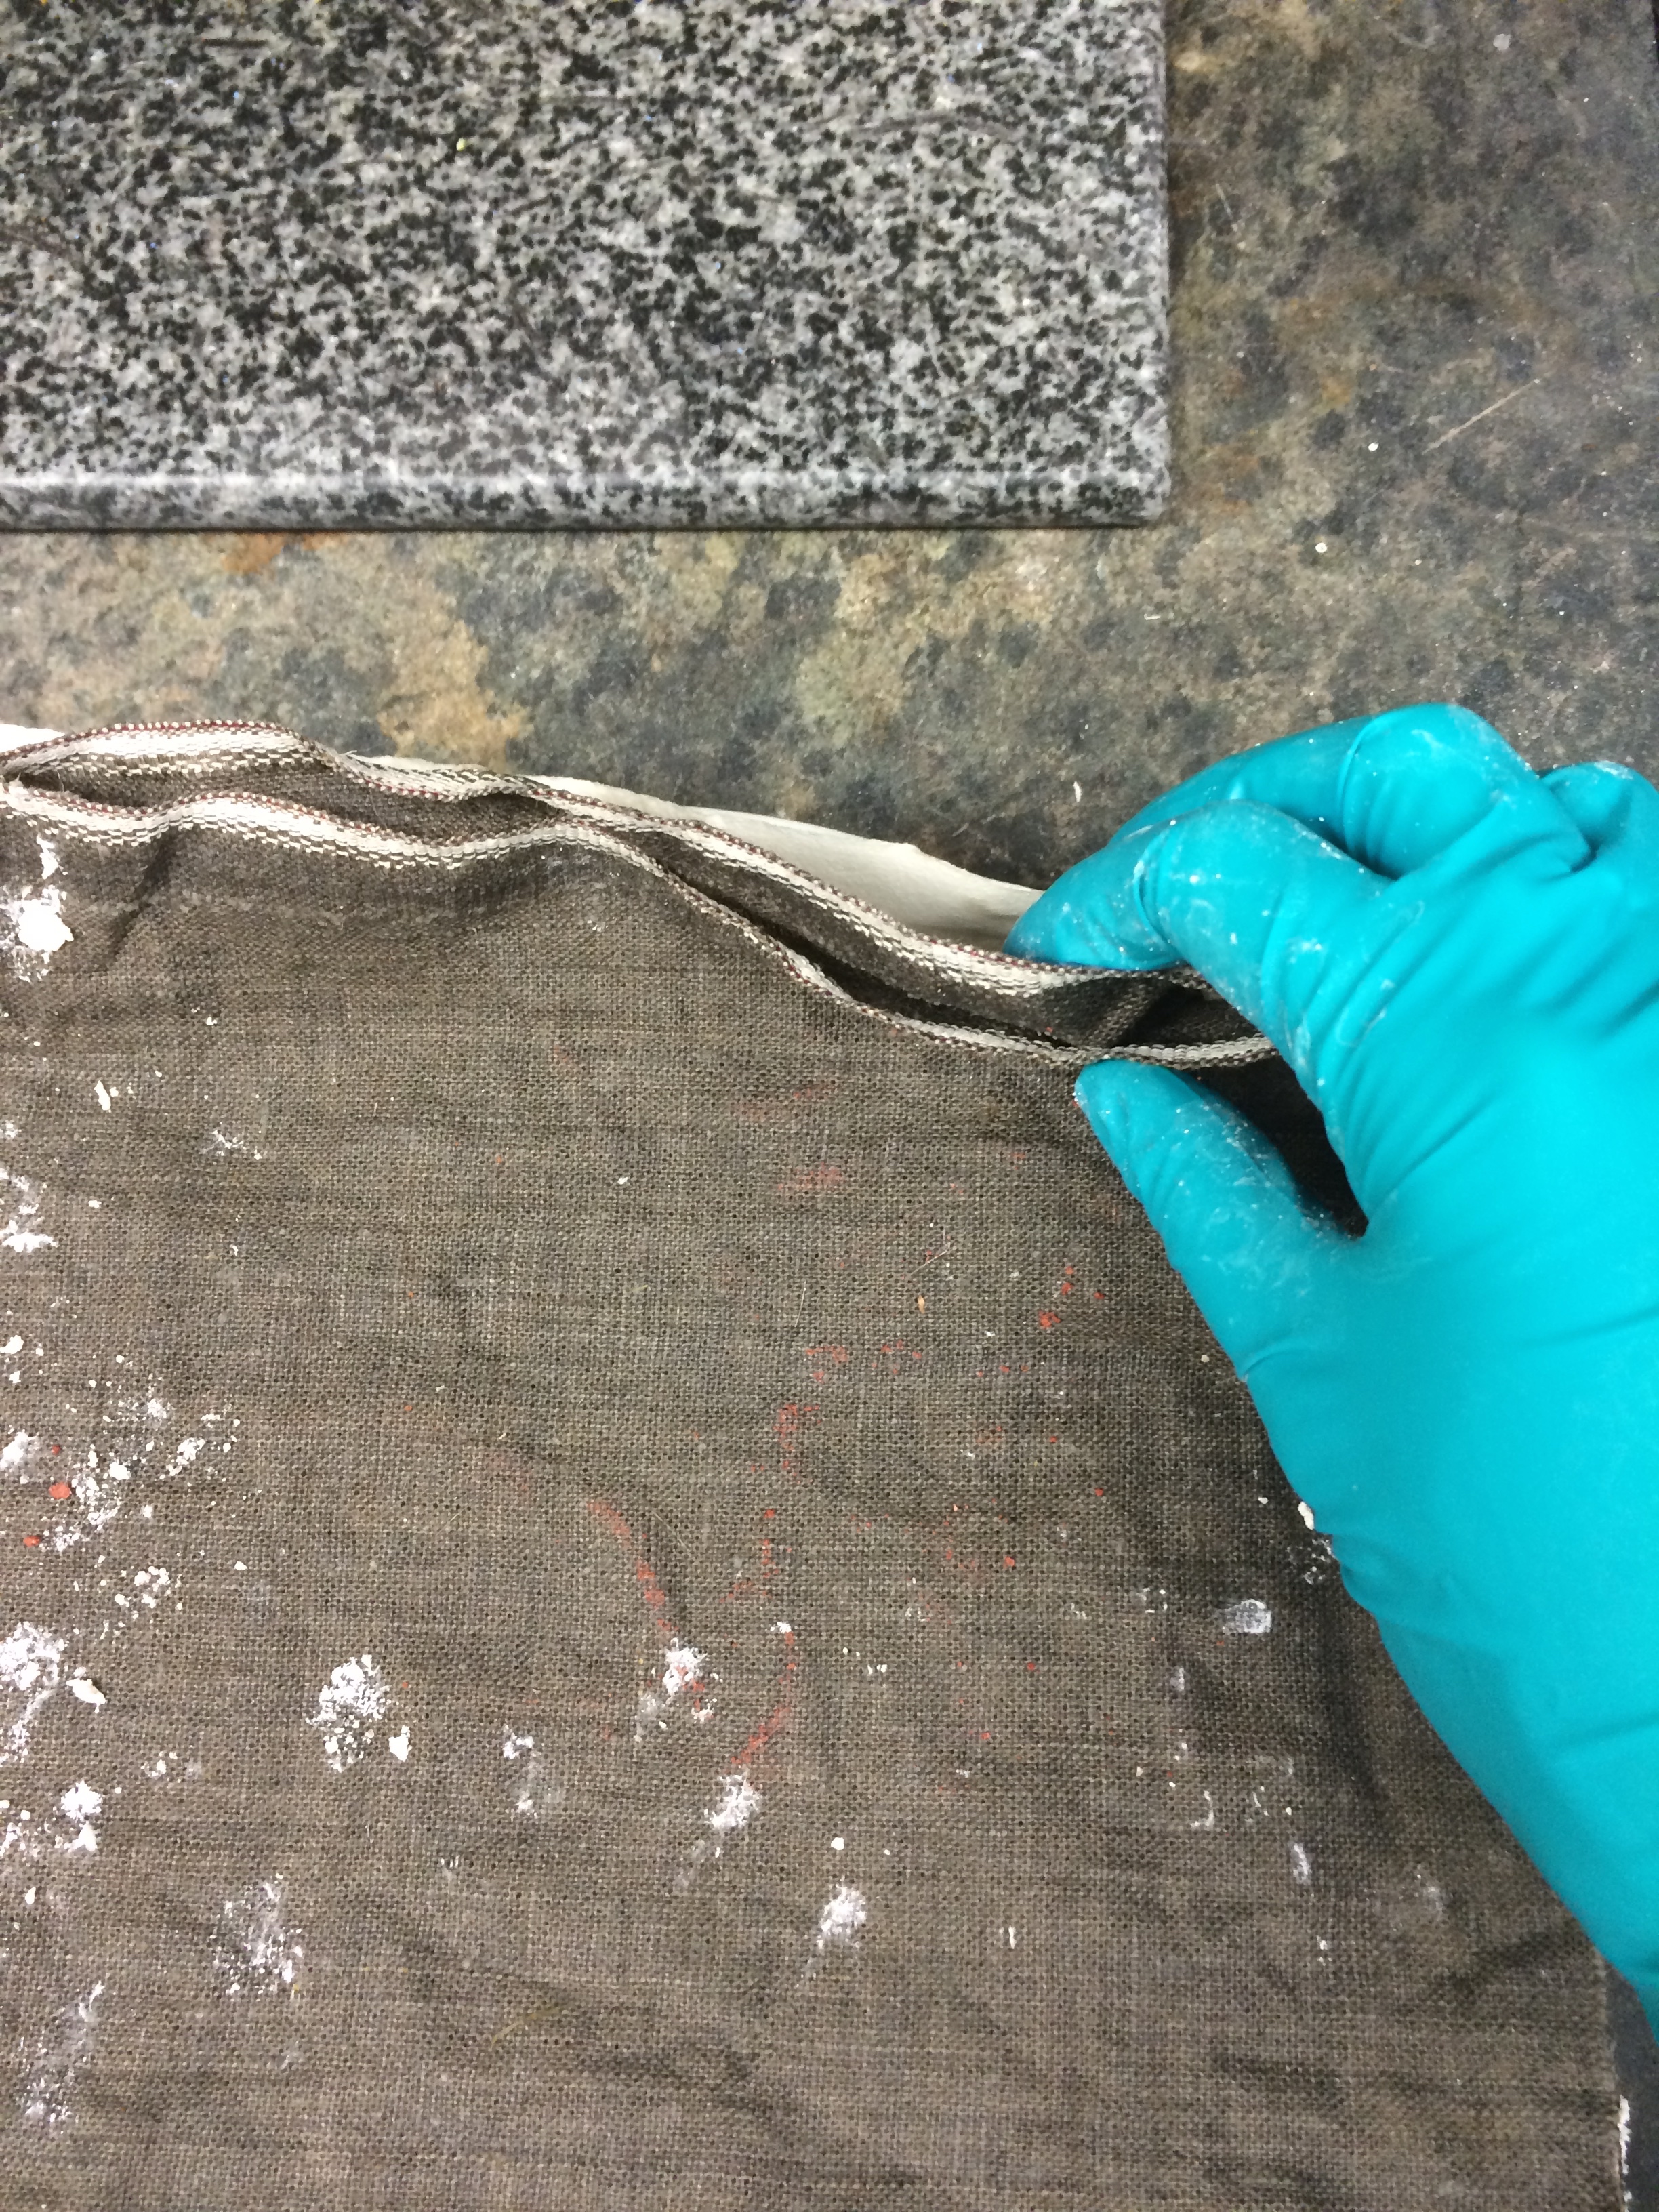 |
| peeling back the dampened linen... |
 |
| peeling back the partially dampened homemade mixture's layers |
 |
| texture of dampened, homemade rock salt and ox bone mixture |
 |
| peeling back the partially dampened commercial mixture's layers |
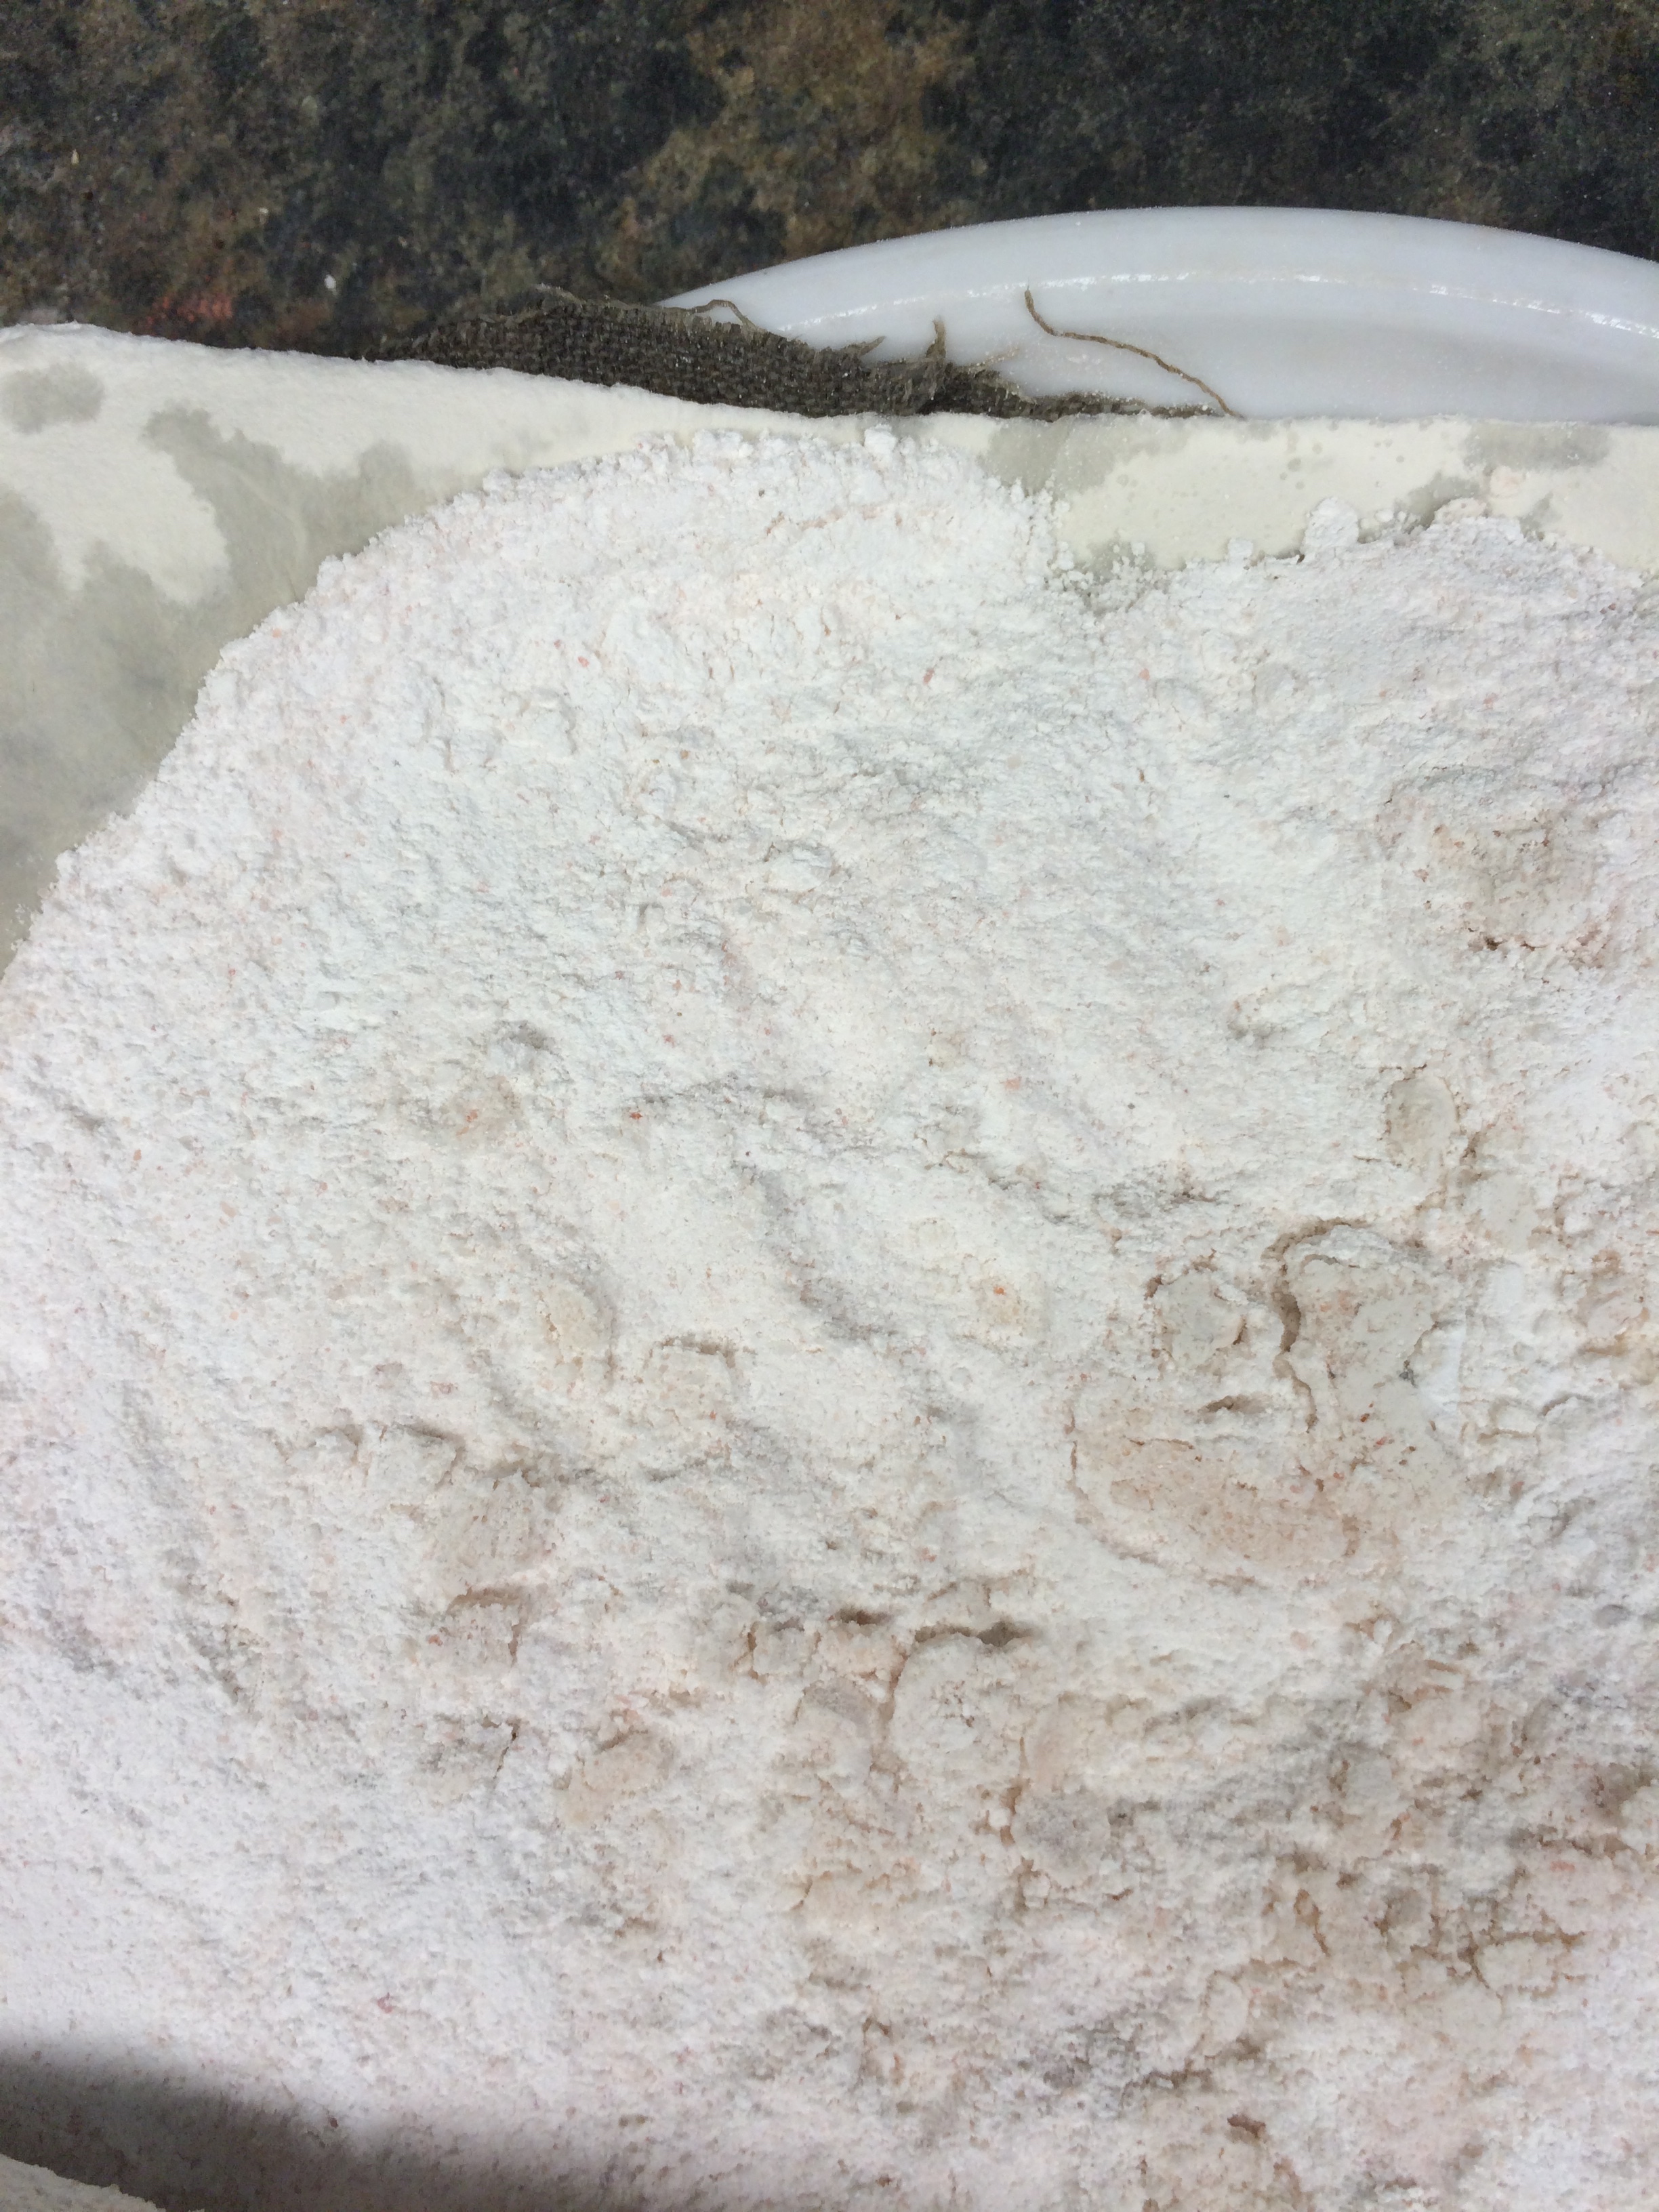 |
| texture of partially dampened, commercial rock salt and ox bone mixture |
 |
| failed attempt - brandy and ring |
Plan for finishing tomorrow
- mold 1: homemade sand, in cut tin can, key impression, to be DRIED and cast in TIN
- mold 2: homemade sand, remoistened/reground on 12/9 (tomorrow), in mason jar rings, to be WET and cast in SULPHUR
- mold 3: commercial sand, remoistened/reground on 12/9 (tomorrow), in mason jar rings, to be WET and cast in SULPHUR
- mold 4 (from before, with our binder in it): should be dry now, in wood box frame, to be cast DRY in TIN
NAME: Michelle Lee, Diana Mellon, Yijun Wang
DATE: Nov. 26, 2014
LOCATION: Chandler 260
SUBJECT: Calcining Ox Bones
Experiment plan
set the ramp at a rate of 1100 F/hr
hold the temp at 400 F for 1 hr
set the ramp at a rate of 1100 F/hr
keep at 1500 F for 1 hr
Protocol:
Ram up 1100F/hr to 400F (30 min)
Keep at 400F for 2 hr (120 min)
Ramp up 1100F/hr to 1500F (60 min)
Keep at 1500F for 1 hr (60 min)
Cool down!
Put a few pipes under the shelf, then a few pipes on the shelf, and a terra-cotta tray on the pipes.
9:38 we start the kiln at 82F
9:59 overshoot to 471 F
10:01 the temperature started to decrease
10:07 the temperature is at 422F
10:11 drop to 396 F
10:45 there is moist coming out from the kiln, and we start to smell the beef…it stinks.
12:10 temperature reaches 692 and smoke comes out. the smoke changes color from white to black
Jeff open the flue on the top with a hammer, and smoke goes out smoothly. JEFF SAVES THE DAY
12: 16 the smoke changes color from black to grey.
Donna checked the inside and the interior was smoked.
12:17 at 800 a gust of smoke comes out and a sound of a short and intense whuff. Yijun freaks out…
12:19 much less smoke now
12:20 834 F almost no smoke comes out.
12:21 840 a puff of smoke from the bottom of the kiln, like farting…
12:24 940 F no more smoke after 900 F
12:32 the temp reaches 1040. the rim of the kiln is blackened by the smoke coming out previously.
12:39 1199 all silent, nothing happened.
12:41 we hear a little pop.
1:12 1500 F
1:56 pm complete the cycle at 1500 F: timing shows 4 hr 17 min in total.
2:18 pm 1245F
4:19 pm 786 F. remove the peeps.
4:38 pm pull out the bone from the kiln at a temp of 744 F.
NAME: Michelle Lee, Diana Mellon, Yijun Wang
DATE: Nov. 21, 2014
LOCATION: Kitchen at Apartment at 521 W. 112th St
SUBJECT: Plan for this afternoon: programing the kiln
1. apply the power to the kiln. 8888 then idLE will appear. (Press ENTER if IdLE does not appear)2. Press 4. USER will appear. Enter a program number from 1 to 9 (choose 1).
3. Press ENTER rA 1 will appear. Enter firing rate for segment 1 (enter “600” for 600 C per hour)
4. Press ENTER F 1 or C 1 will appear. Enter the target temperature (800 C)
5. Press ENTER Hd 1 will appear. Enter segment 1 hold time in hours. 1 hour???
6. Press ENTER if FN 1 appears, and you have an AOP receptacle on your kiln, use th 1 or 2 key to select ON or OFF. Press ENTER
7. Contnue entering values for the segments needed. When RA_ appears for the first segment you don’t need, press 0, then ENTER. IdLE will appear. The kiln ins ready to fire.
NAME: Michelle Lee, Diana Mellon, Yijun Wang
DATE: Nov. 21, 2014
LOCATION: Kitchen at Apartment at 521 W. 112th St
SUBJECT: Scraping and drying ox bones and hooves
- We continued to dry out the hooves in the oven at 200 F.
- We scraped our bones again, this time with a stainless steel wire brush.
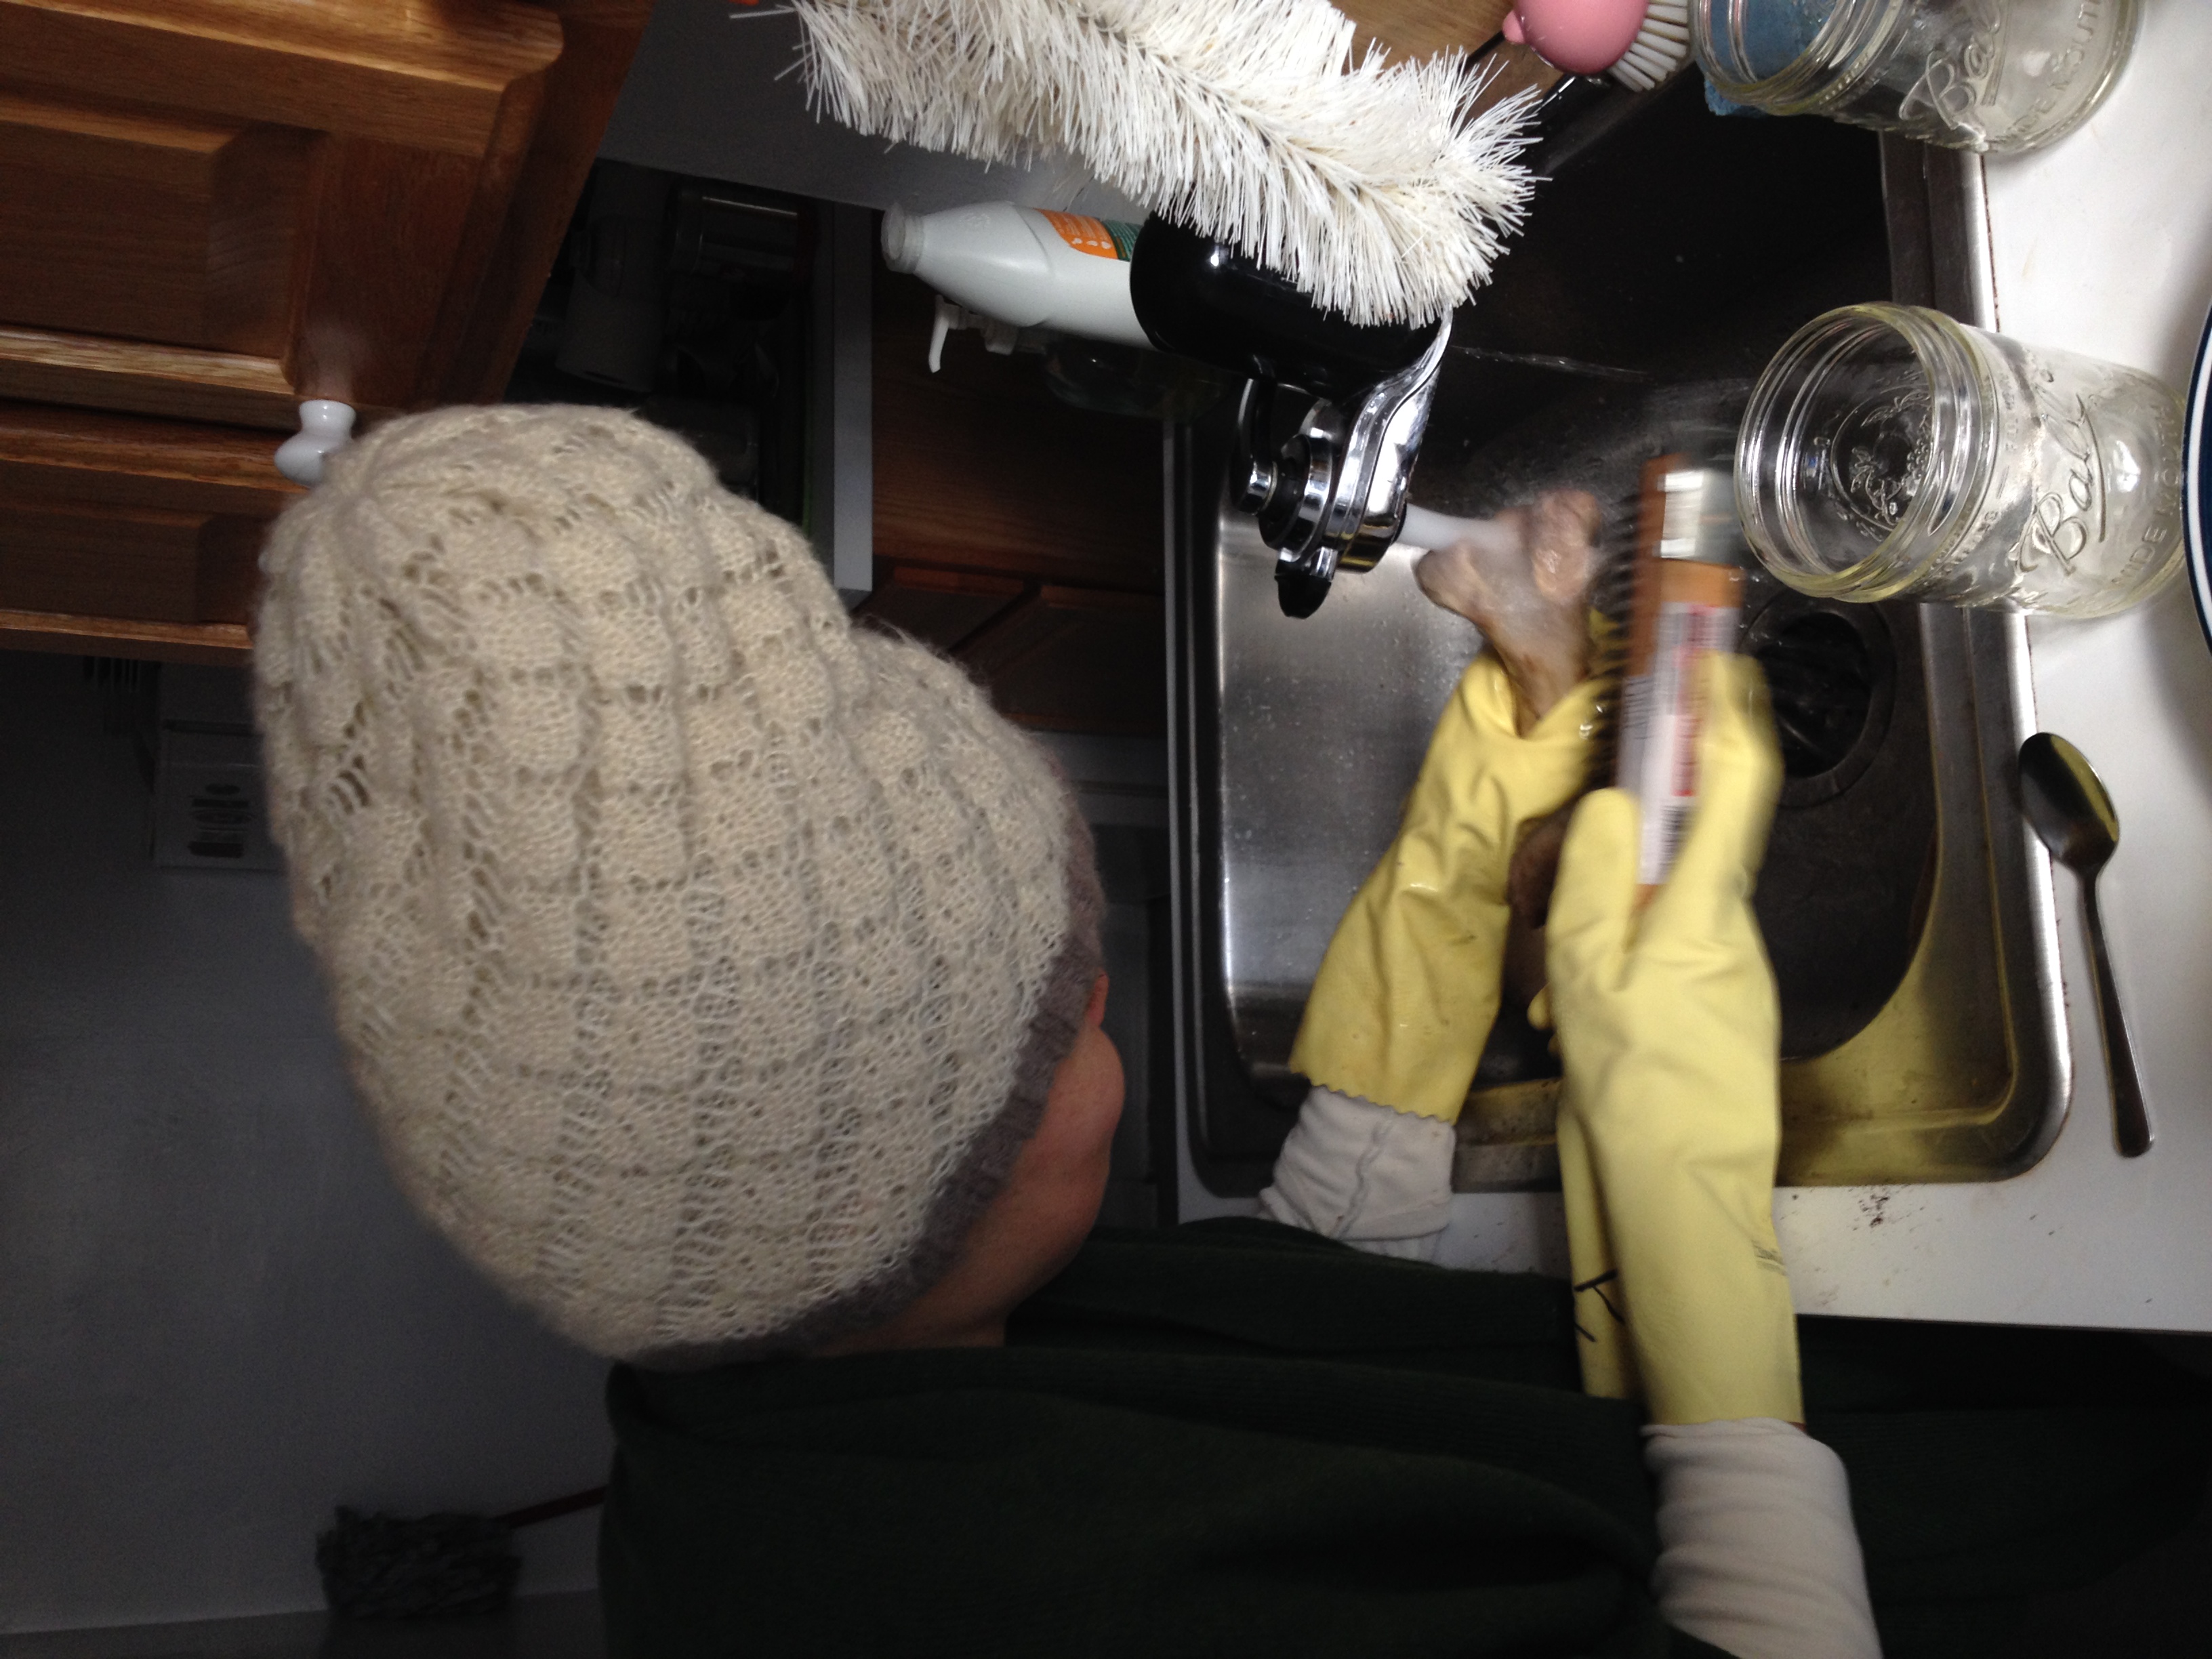
Diana Mellon brushing the leg bone using a stainless steel wire brush - The ends of the two long bones are made of spongy bone material and appear to be more porous and soft than the shaft of the bone. The spongy bone is separated from the hard bone by the epiphyseal plate, or growth plate, and at this juncture we see a layer of cartilage. In order to remove the cartilage, we snap off the ends of the bones by hand.
- Today, pushing a thumb into the spongy bone, it quickly took the imprint of the thumb. Seeing this softness we decided to discard the spongy bone material.
- We now have 3 cleaned long bones from the upper and lower arms.
- All long bones and hoof bones are in the oven again, drying at 200 F and then at 300F (to speed up the process).
- At 3:18 PM we turn off the oven. Some parts of the hoof bone turn grey.
- NOTE: Last night we received 6 sheets of paper from Tim Barrett at University of Iowa Center for the Book. He describes this paper as: "6 sheets of BHC heavyweight, gelatin sized, broke. This means 50-50 hemp and cotton, heavy weight for a book paper, and third quality." (From e-mail sent to Diana Mellon, 11/13/14)
NAME: Michelle Lee, Diana Mellon, Yijun Wang
DATE: Nov. 18, 2014
LOCATION: Kitchen at Apartment at 521 W. 112th St
SUBJECT: Boiling and drying ox bones and hooves
- We boiled the leg bone purchased at the kosher butcher on the West 72nd street on 10/28/2014 in order to remove the flesh on the bone.
- The bone is so big that we can only boil one side at one time.
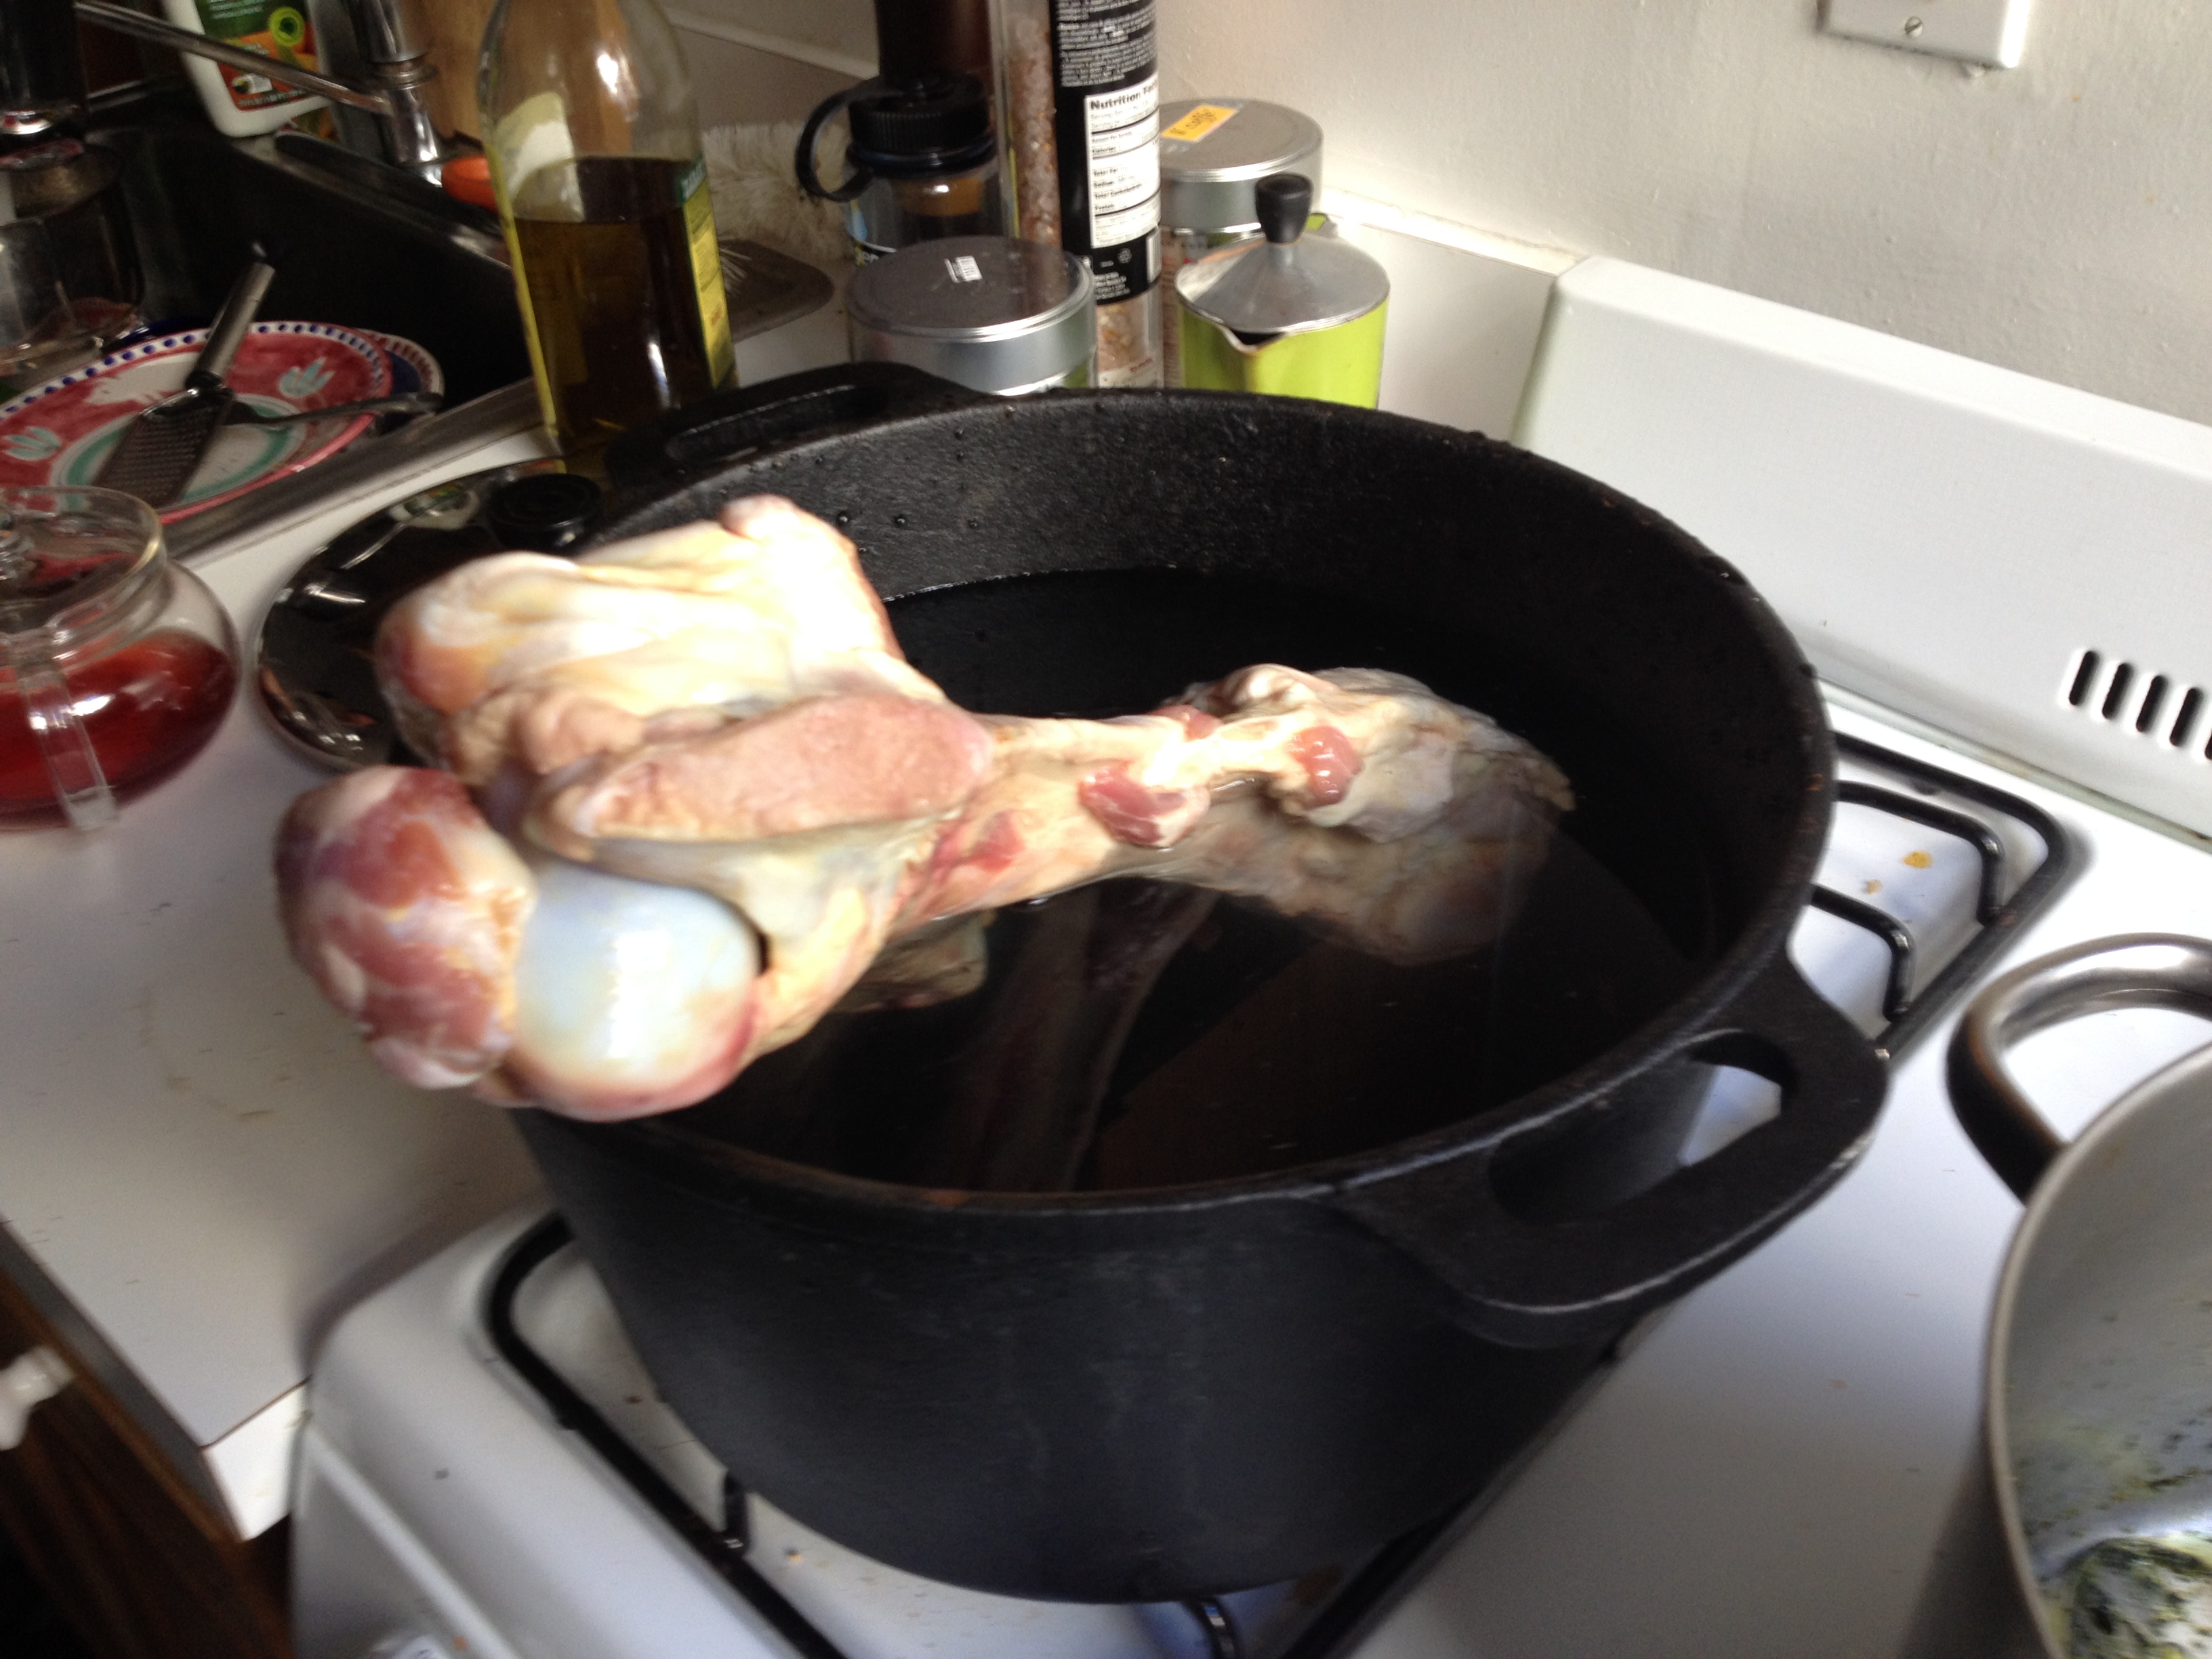
Boiling the ox leg bone that Diana Mellon purchased at the kosher butcher at 72nd street in Diana Mellon's kitchen. 09:54 AM - There is quite a lot of flesh left on the bone, and the flesh turned brown.
- The bone smells really bad.
- When the bone started to boil the smell got better. A lot of foam came out.
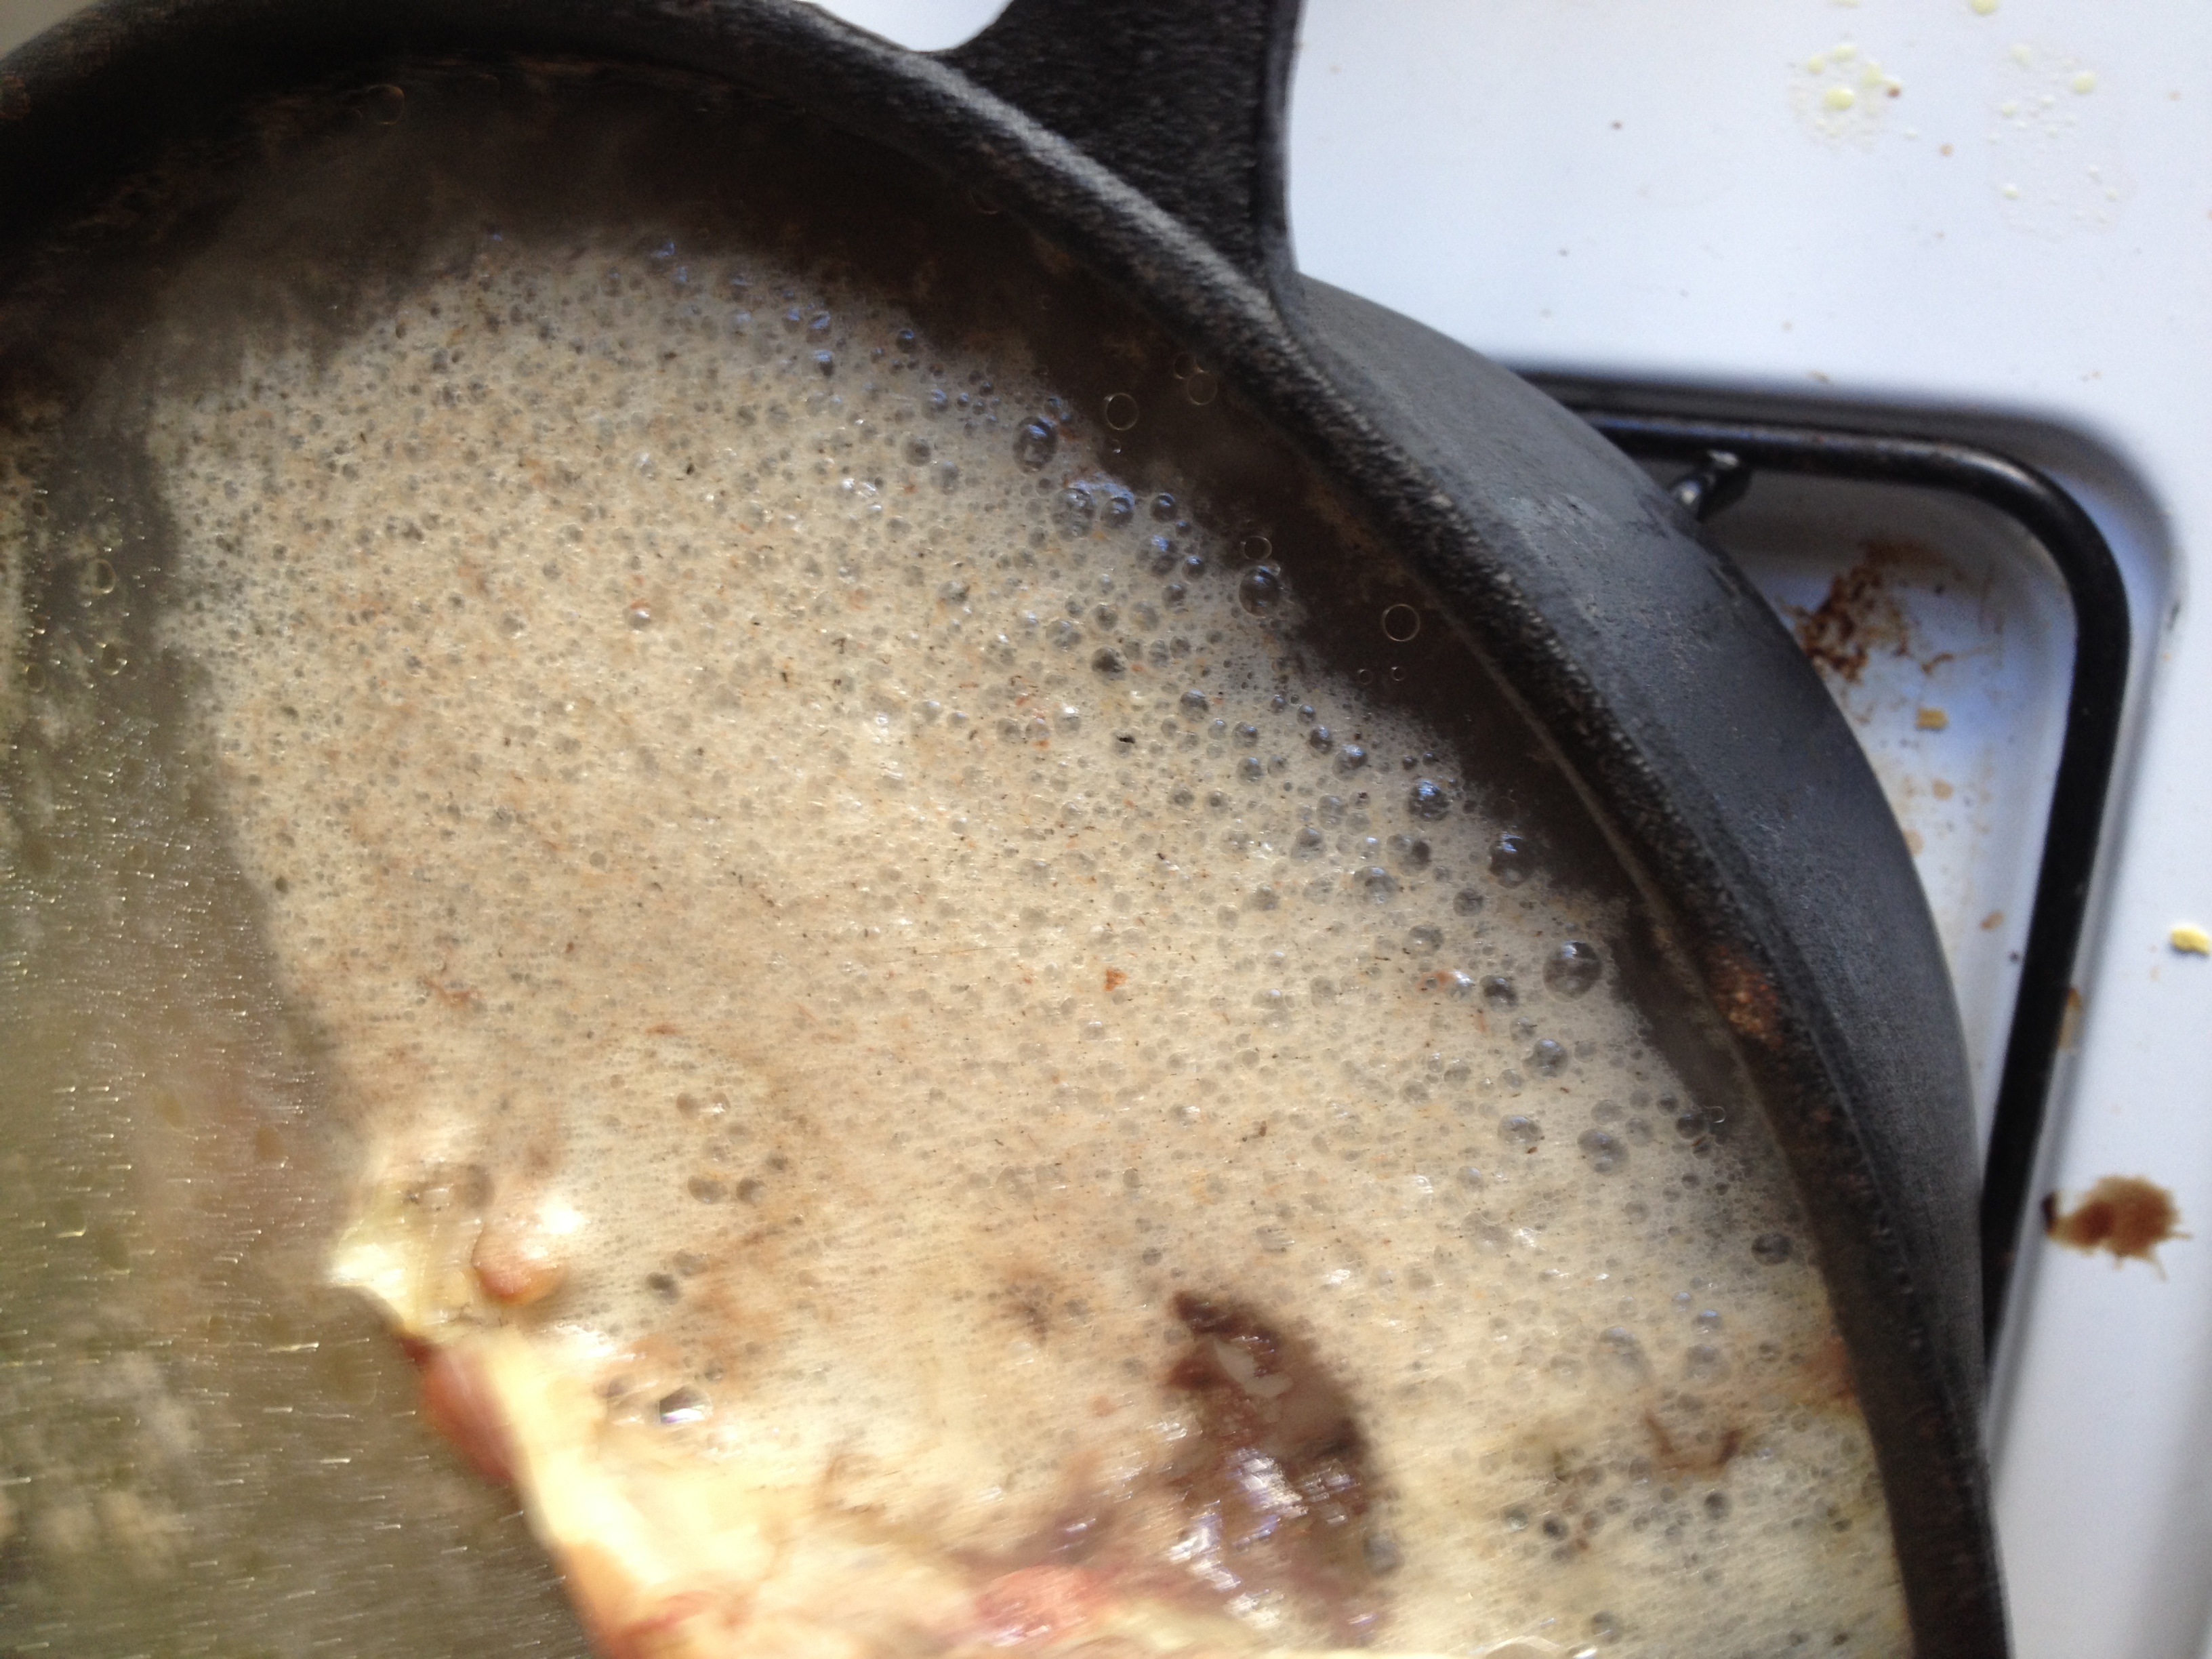
A lot of foam comes out when boiling the leg bone. 10:39 AM. - Michelle scooped out the foam, because her mother alway scoops out the foam and the scum when making beef broth. Michelle and Yijun periodically added water to the pots, scooped the foam, and flipped over the leg bones periodically to make sure it was evenly cooked.
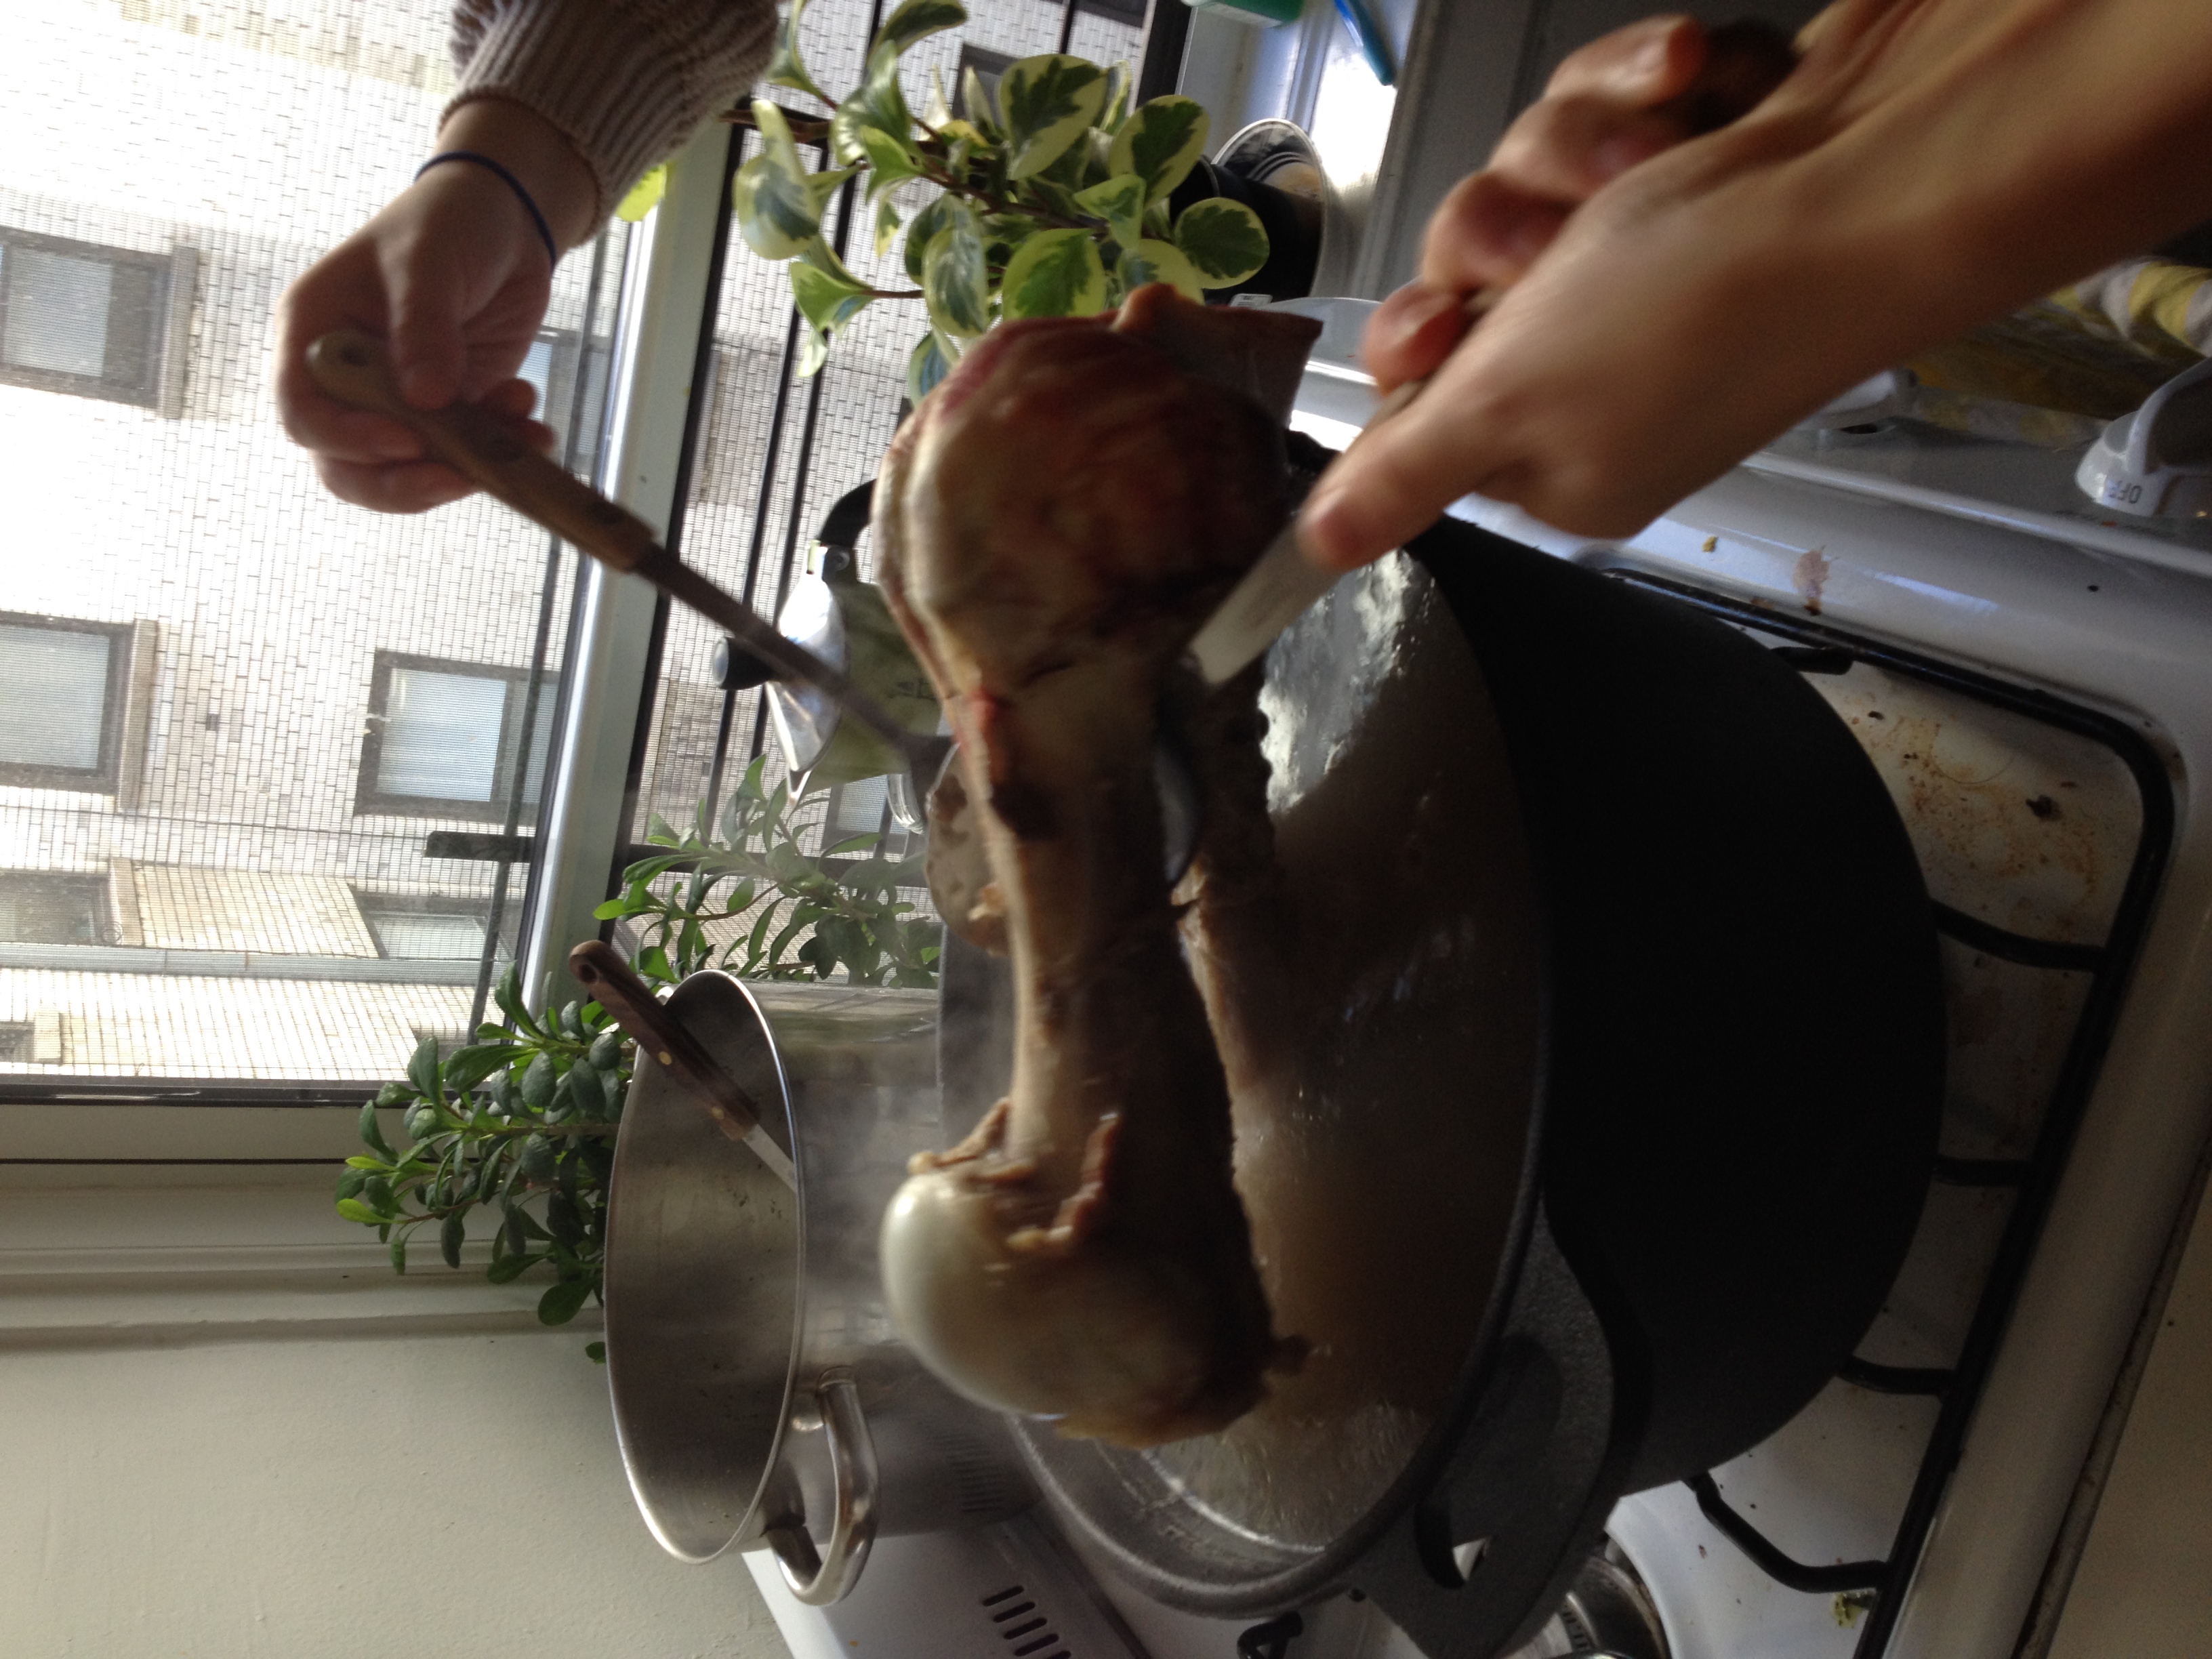
Diana Mellon is flipping the leg bone so that it will be cooked evenly. 10:44 AM - We boiled the hooves Diana purchased at the kosher butcher on the West 72nd street on 11/14/2014.
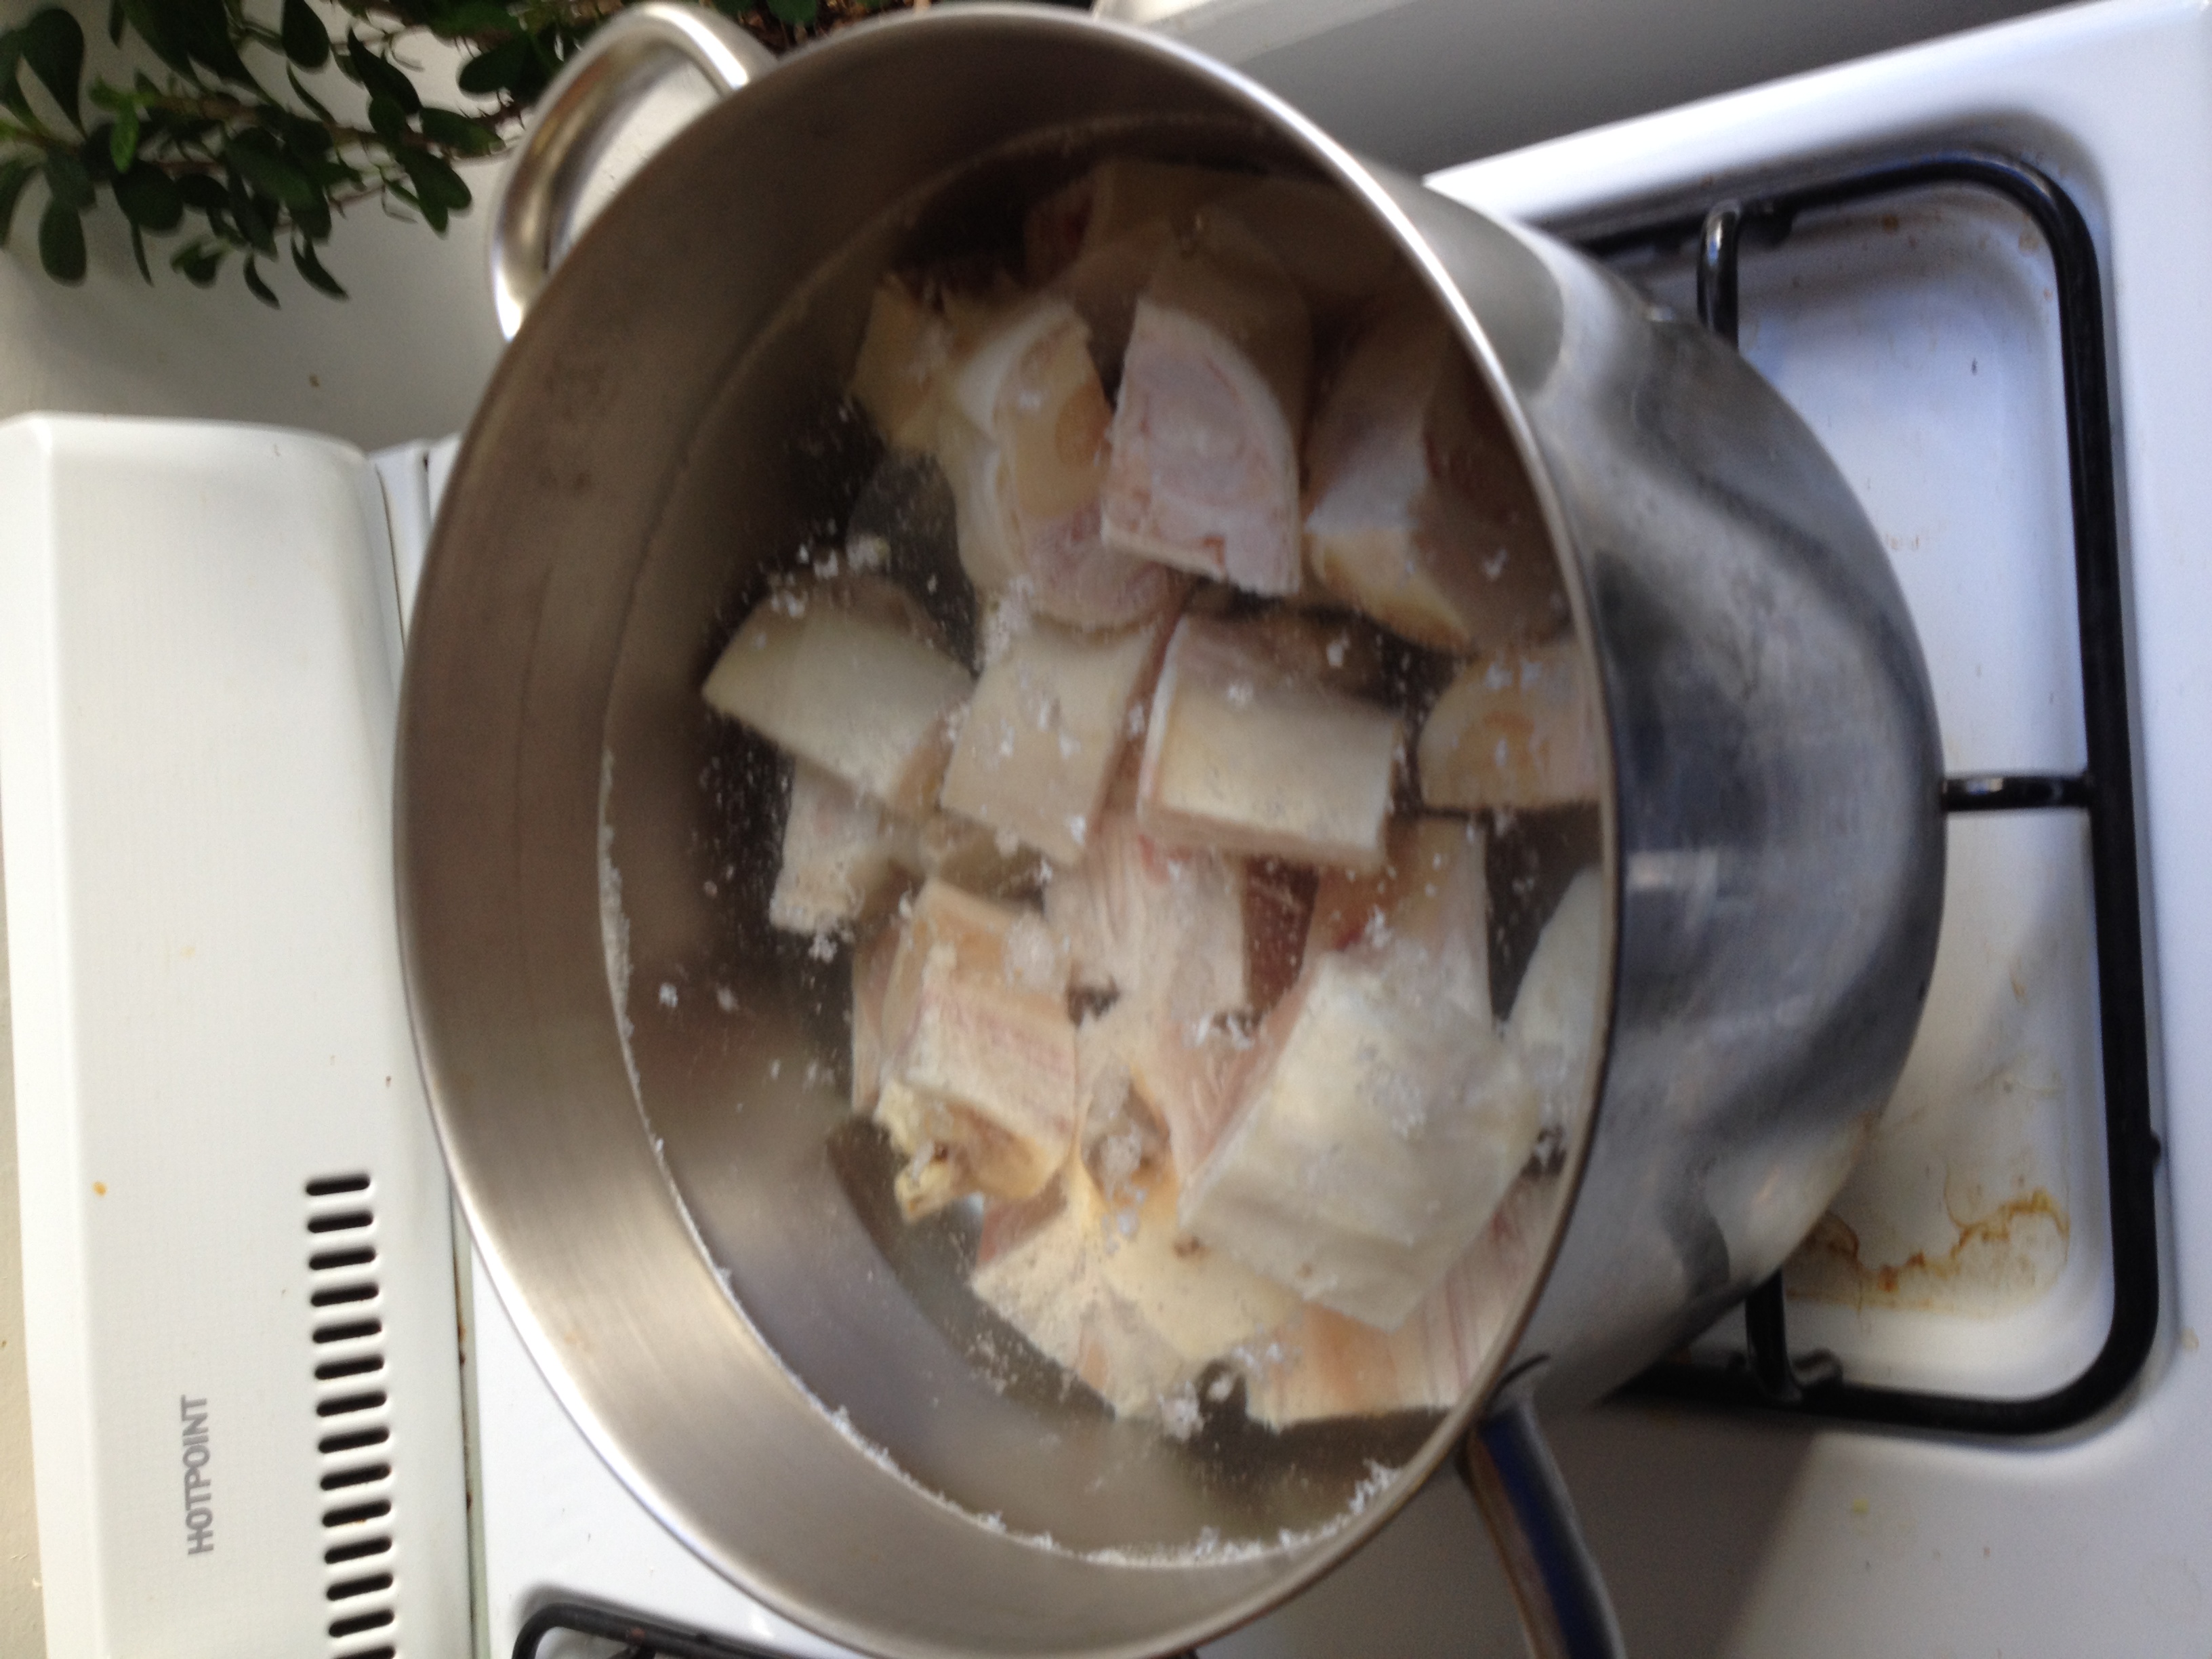
Michelle Lee and Yijun Wang put the ox hooves purchased by Diana Mellon at the Kosher Butcher at 72nd street in the pot and start to boil them at 10:57 AM - More foam came out when boiling the hooves.
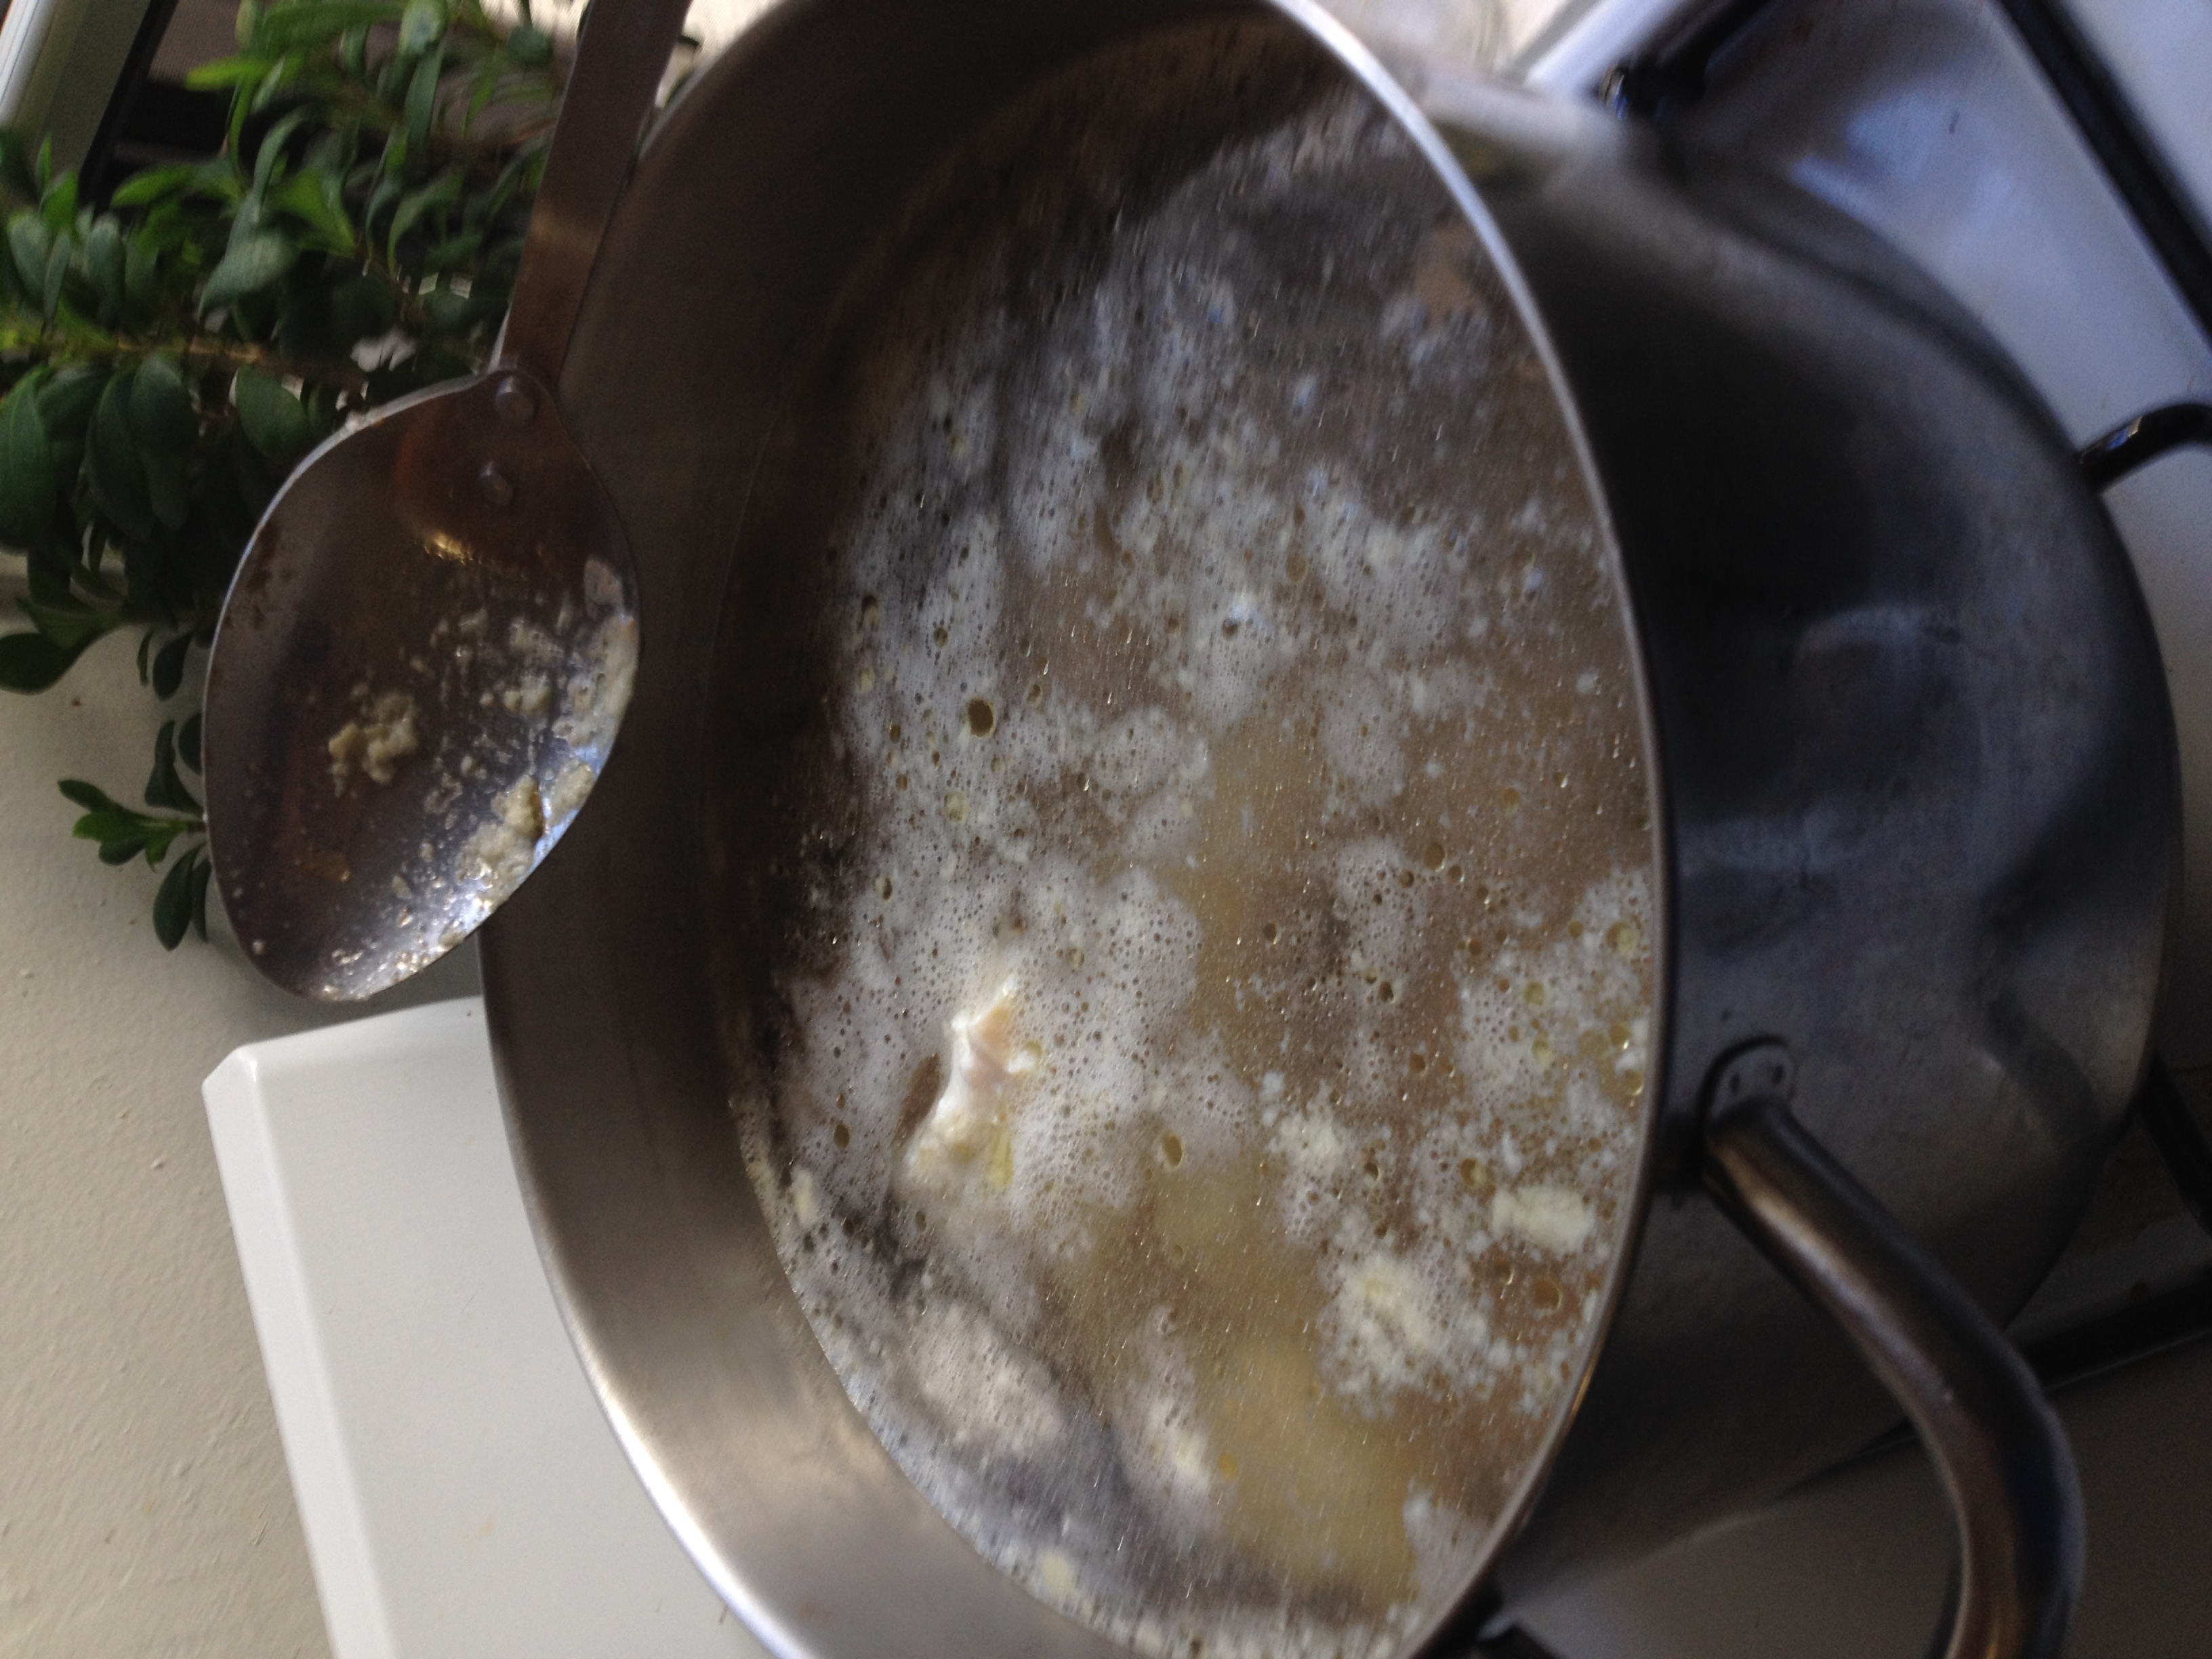
The hooves create a lot of foam and oil when boiling. And the foam is very sticky. 11:10 AM - After around 104 minutes of boiling, the tissue, including the skin and the cartilage came off cleanly.
- Michelle and Yijun manually separate the bone and the soft tissue by hand. Some of the cartilage was too hard to separate via hand, so we separated them and the bone using knives.
- The hoof bone is extremely white and clean comparing to the leg bones.
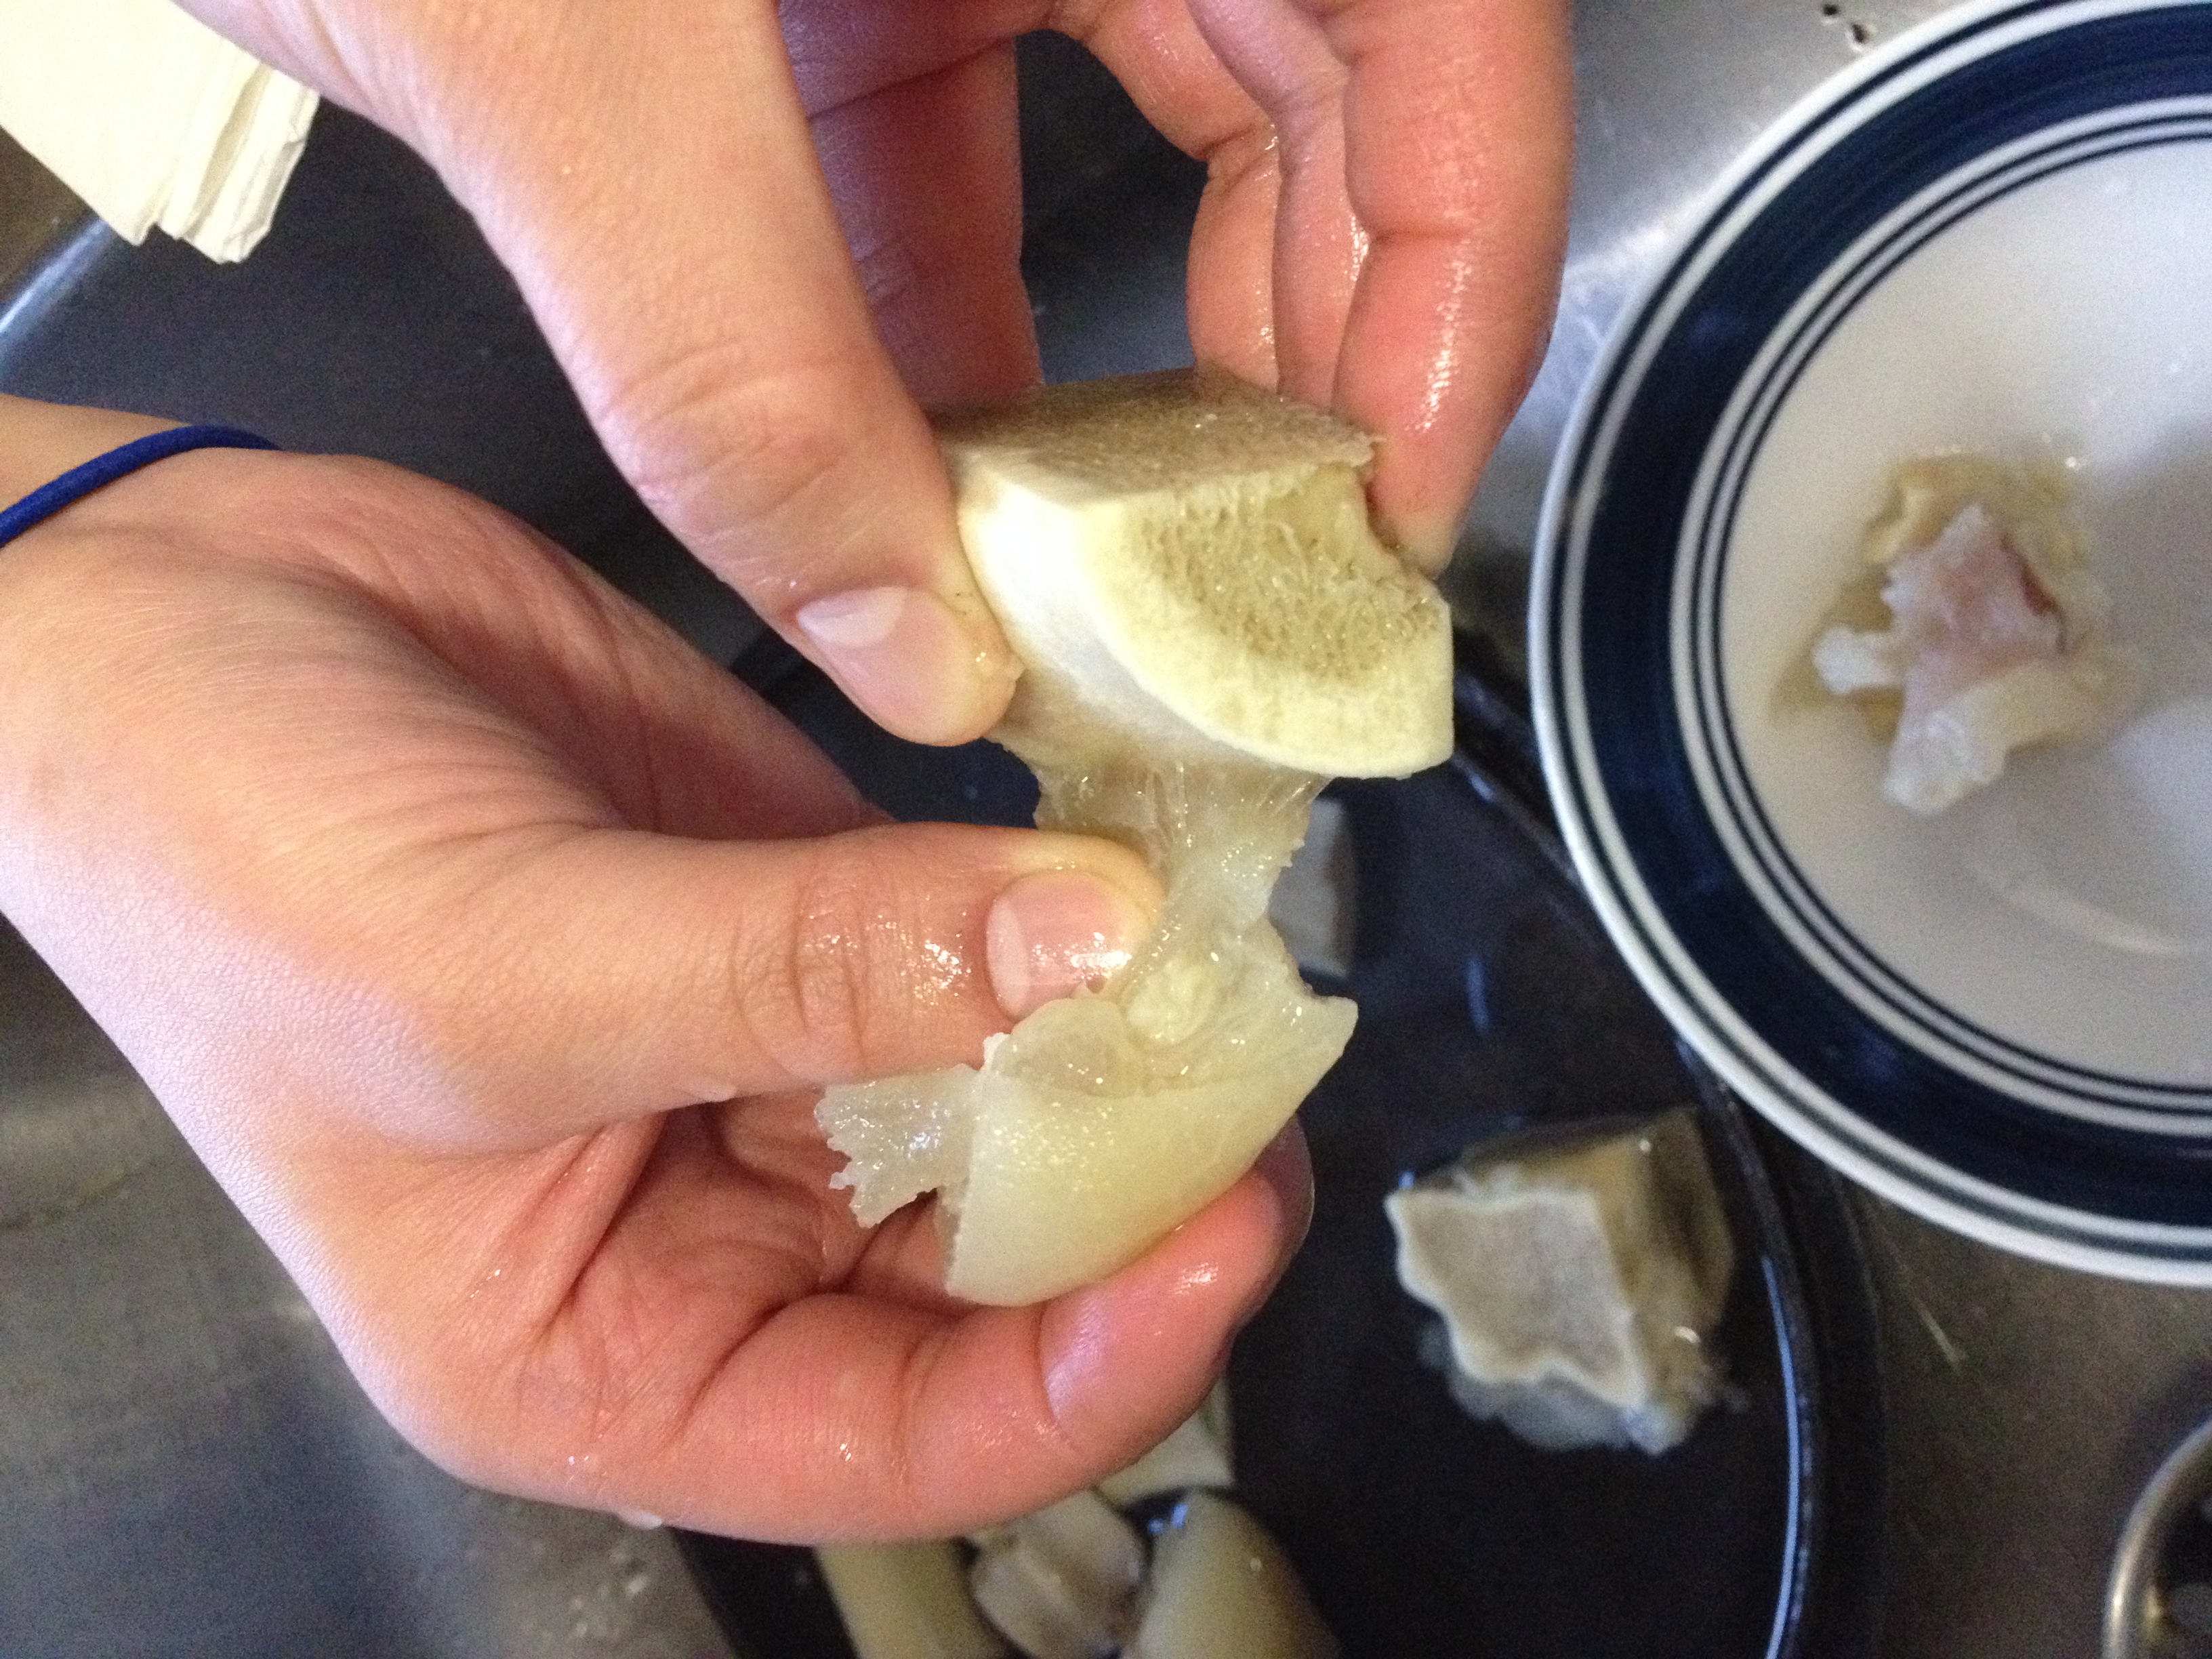
Michelle Lee is trying to seperate the cartilage from the bone in the hoof. - We collected the cartilage-skin-marrow in a ziplock bag.
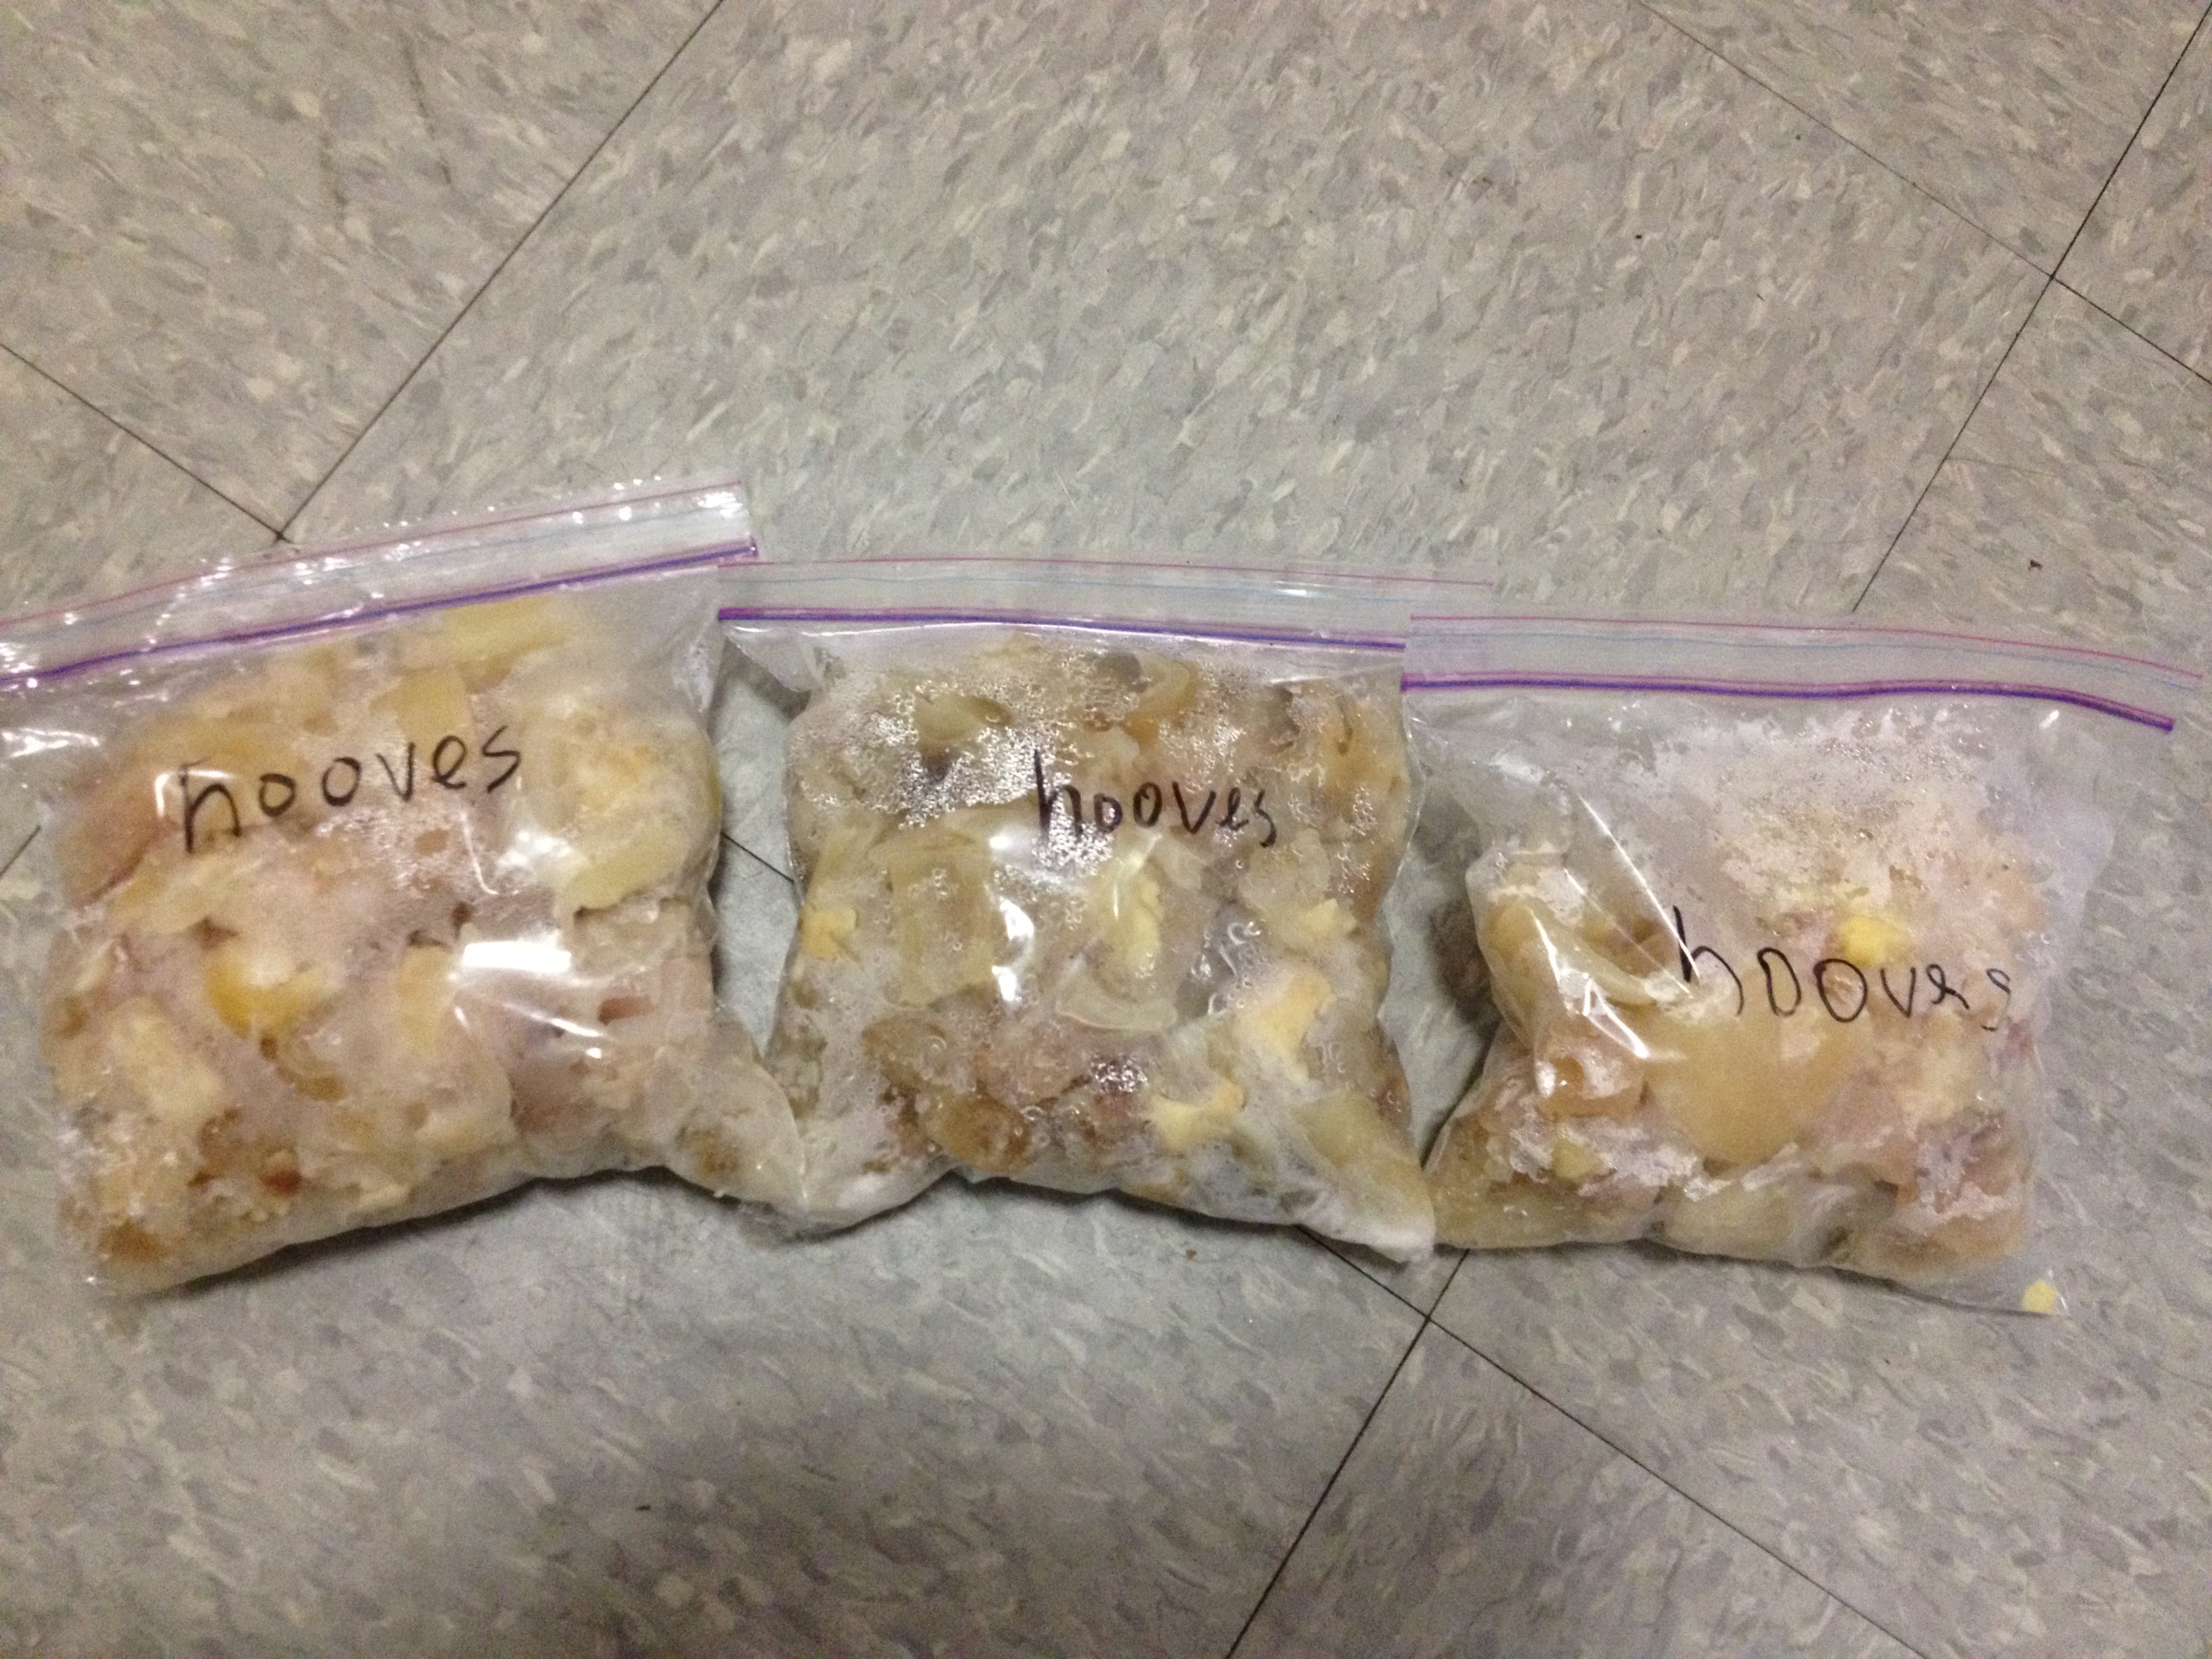
All the soft tissues from the ox hooves. 16:04 PM - We put the other half of the hooves into the pot and boiled them at 1 pm.
- After boiling the hooves for 104 minutes, Yijun took them out and got rid of the soft tissues on the bone using knives.
- At 3:44 pm, Yijun put the bone from hooves, cleaned, in the oven and let it dry at a temperature at 200 F.
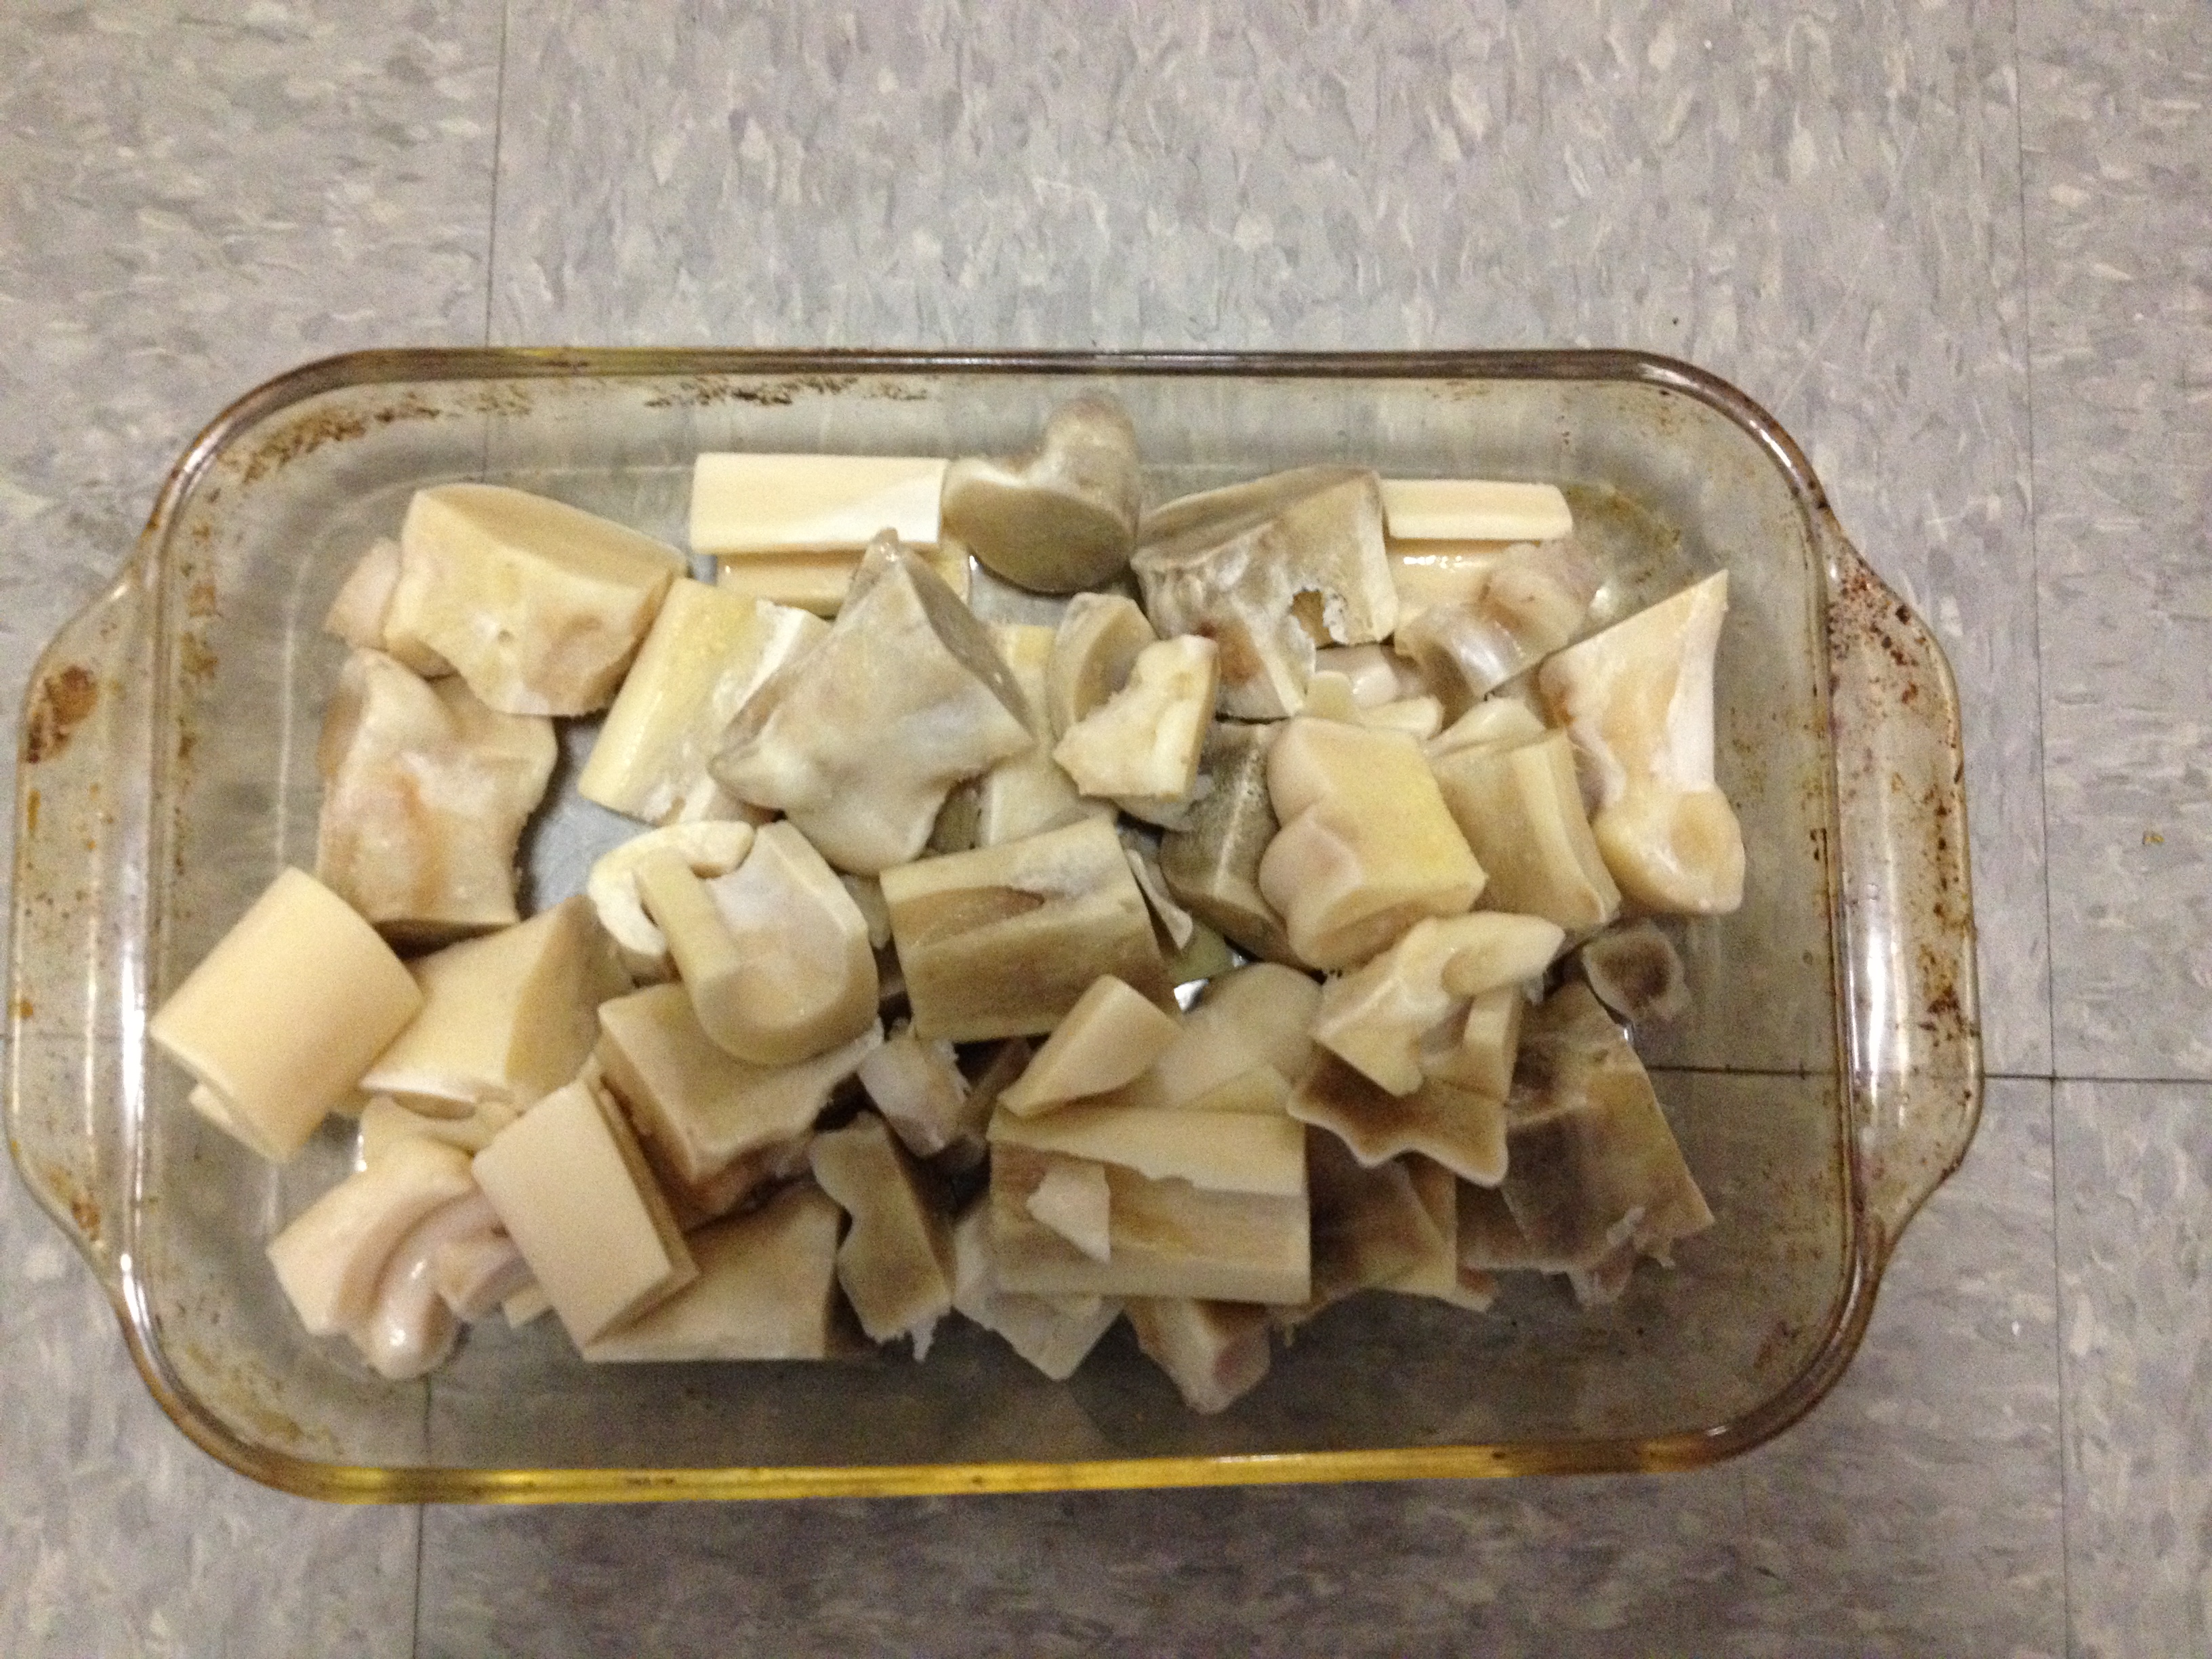
Yijun Wang seperated all the hoof bones from the soft tissues around them. 15:38 PM 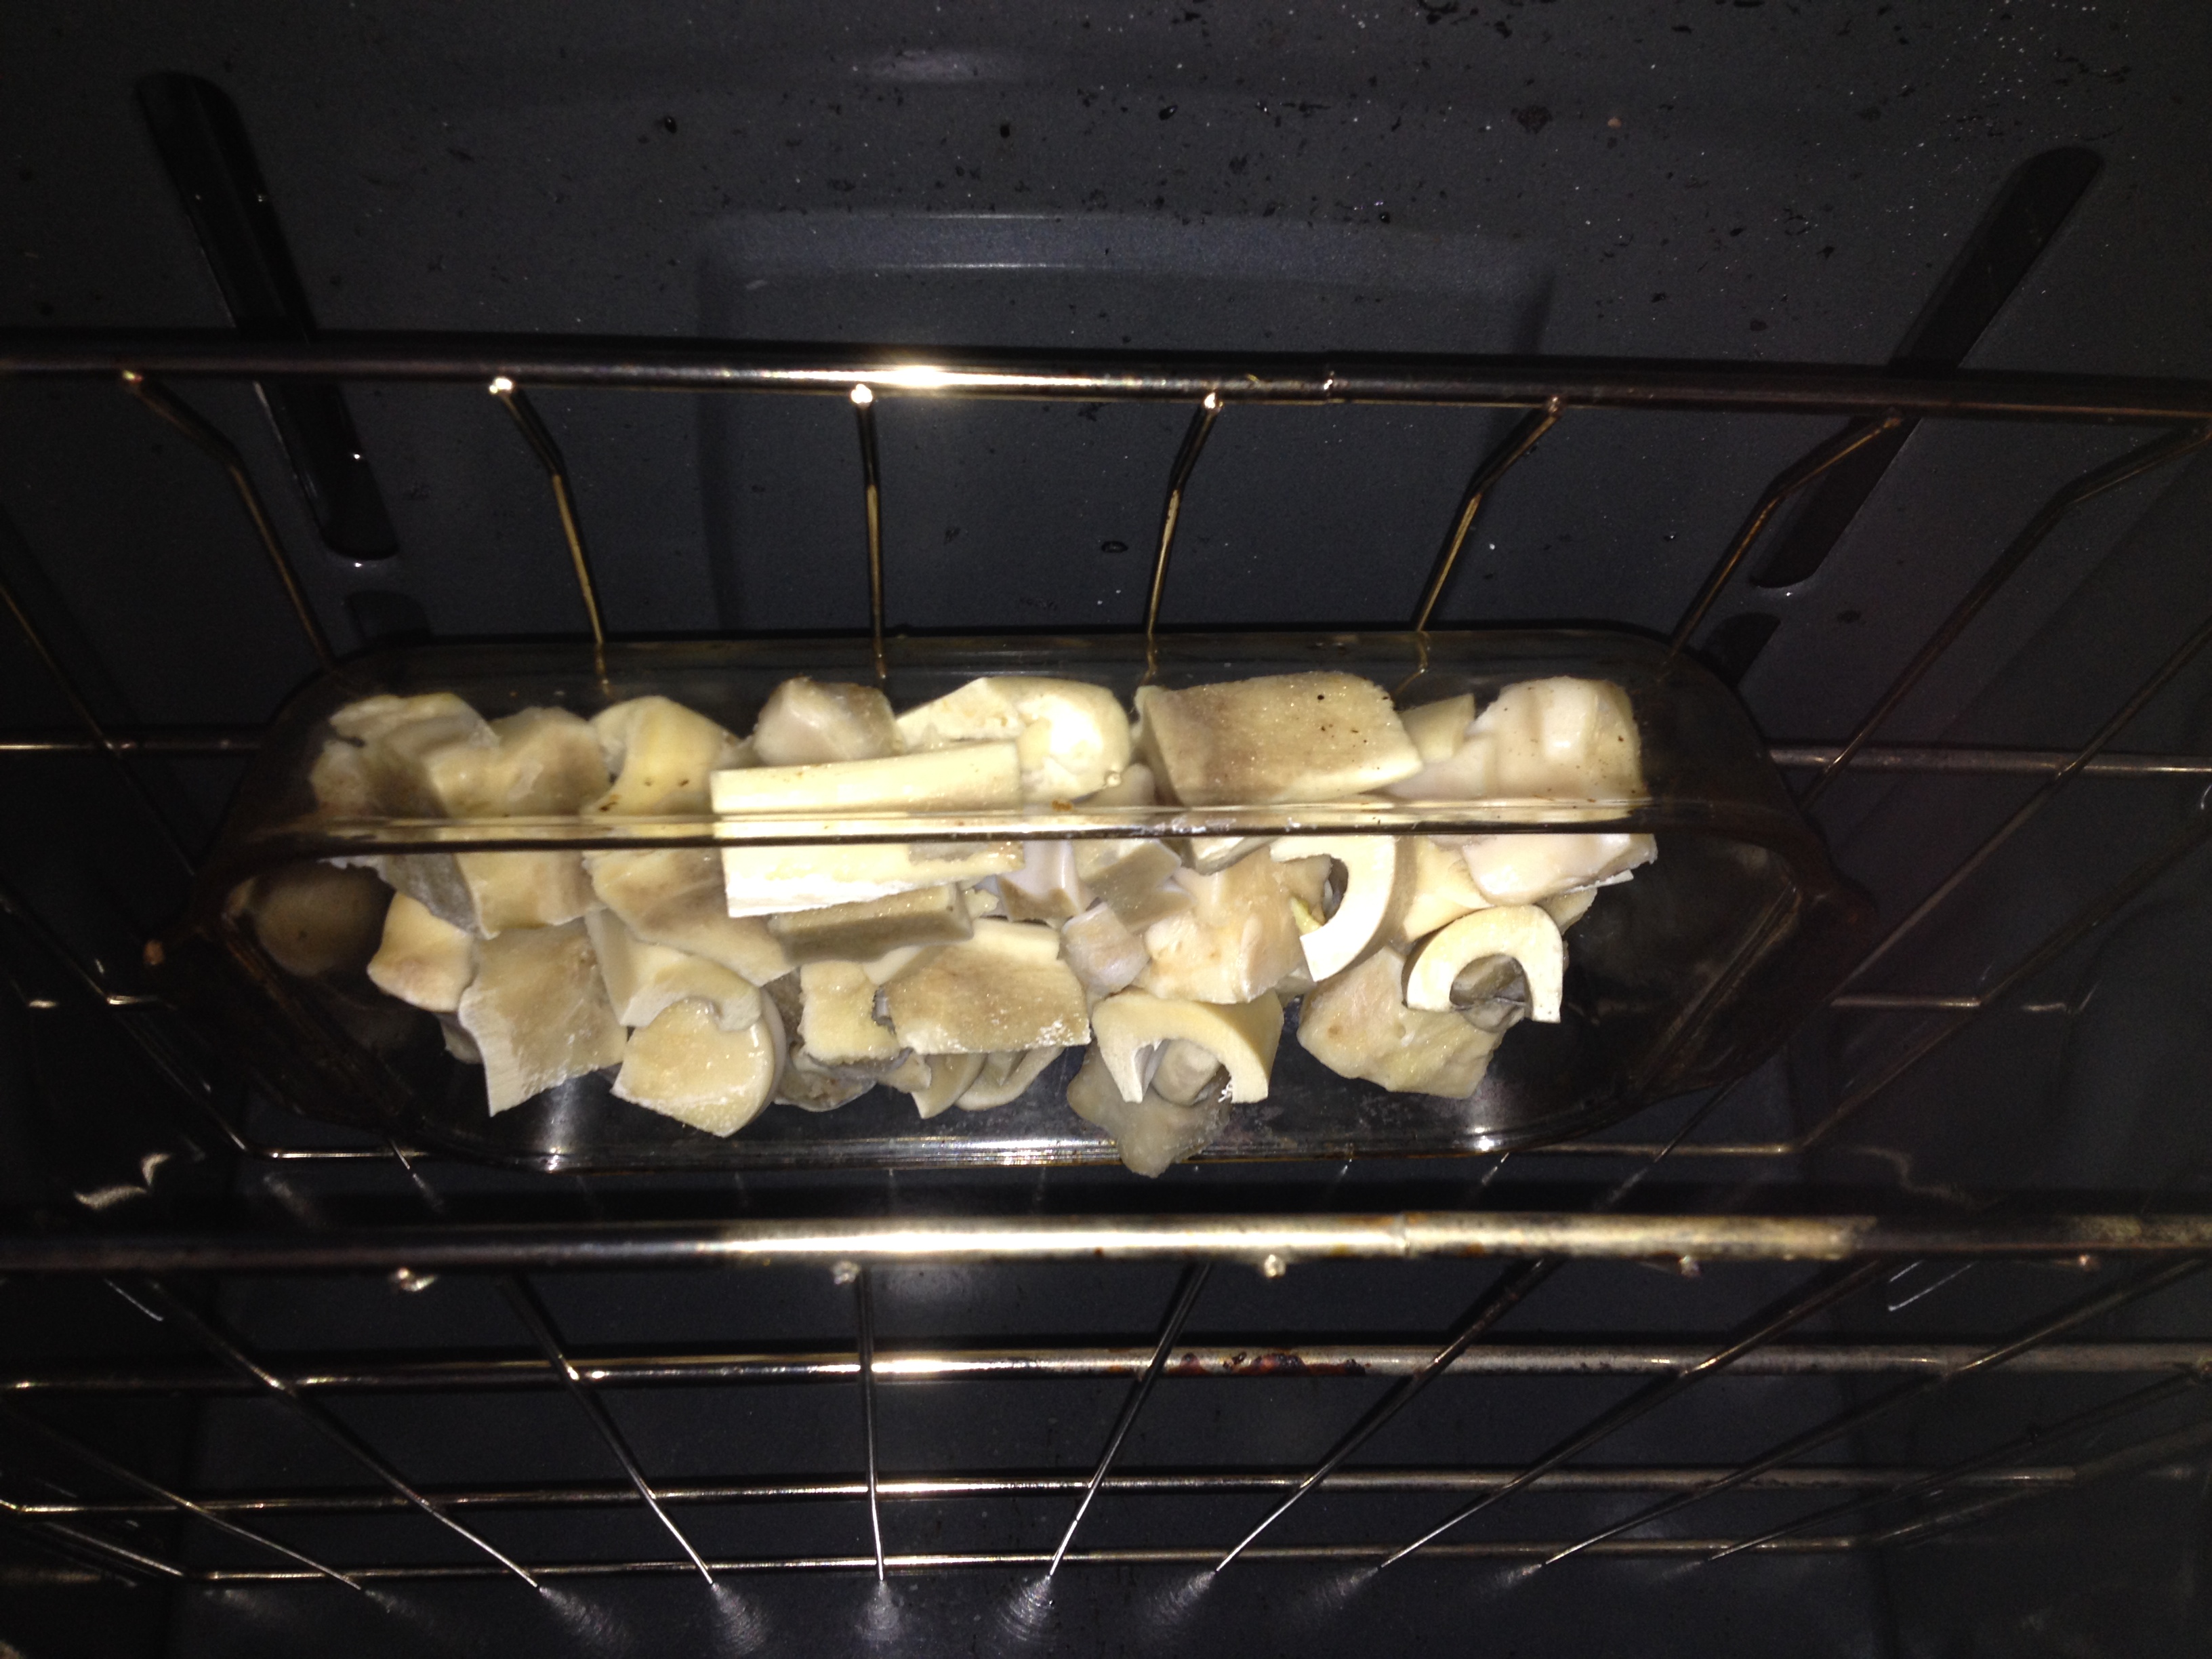
Yijun Wang puts the cleaned hoof bone into the oven and dries them at 200 degrees F. 15:42 PM - The leg bone was still cooking. After over six hours of boiling, the two leg bones connected by a joint (probably the knee?) separated.
- Yijun turned off the oven at 5:15 pm.
- Diana scraped the leg bone with a knife (only a thin layer of cartilage remains on the articular surfaces), threw away the water from that pot, and placed skimmed liquid from the hoof pot in a glass jar in the fridge. The remaining liquid from the hoof pot will stand on the stove (off) overnight. The hoof pieces will remain in the oven (off) overnight. The scraped bones will rest in the sink overnight.
The article about the calcination of bone we read today.
Sergio Galeano, M.Sc. and Mari Luz García-Lorenzo, “Bone Mineral Change During Experimental Calcination,” J. Forensic Sci, Nov. 2014 (6).
- at over 650 C, all the organic components and carbonate substations were completely removed.
- bones are white above 650 C
- method
- preheating at 200 C removes the potential impact of extremely rapid heating as an influence on hard tissue microstructure
- heat-treated with a heating rate of 10 C/min at selected temperature for 60 min in air
- powdered by manual grinding in an agate mortar.
NAME: Michelle
DATE AND TIME: December 11, 2014
LOCATION: Starbucks on 103rd
SUBJECT: Some research into calcining/finding if it is common knowledge, etc.
Author: Basilius Valentinus.
Title: Of natural & supernatural things also of the first tincture, root, and spirit of metals and minerals, how the same are conceived, generated, brought forth, changed, and augmented / [by] Basilius Valentinus ; translated out of high Dutch by Daniel Cable ; whereunto is added Frier Roger Bacon, Of the medicine or tincture of antimony; Mr. John Isaac Holland, his Work of Saturn; and Alex. Van Suchten, Of the secrets of antimony.
Date: 1671
Bibliographic name / number: Wing / B1020
Physical description: 238 p.
Copy from: British Library
Reel position: Wing / 1395:23
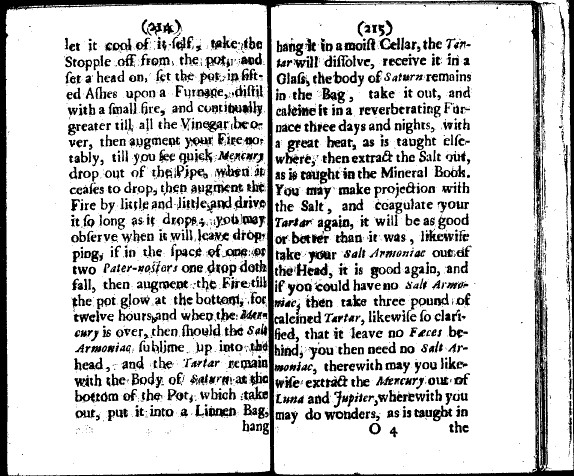
"..and calcine it in a reverberating Fur|nace three days and nights, with a great heat, as is taught else|where..."
NAME: Diana
DATE AND TIME: 11/17/2014
LOCATION: 521 W. 112th St
SUBJECT: Research on kiln use and calcining bone
Five not-necessarily-academic sites on how to calcine bone...
1. potters.org thread post response
Martin Howard on mon 12 aug 02
"Bone ash can be made from any bones.
Just put them in a saggar or similar and kiln to 1100 degrees C.
That is what a pet crematorium near me does and I then use the ash in glazes
to give strength.
A few old pots with lids, seconds, are very useful to have near the kiln for
just this kind of purpose.
Some are used for "silver" paper (tinfoil) to give alumina for use in making
a bat wash and for adding to clay for making balls to keep bottoms off the
kiln shelf. Sometimes these second casserole dishes contain quantities of a
herb or other plant, to see what they will do as an addition to raw clay
tile samples."
Martin Howard
Webbs Cottage Pottery
Woolpits Road, Great Saling
BRAINTREE, Essex CM7 5DZ
01371 850 423
martin@webbscottage.co.uk
http://www.webbscottage.co.uk
Updated 6th July 2002
http://www.potters.org/subject55695.htm
2. PREPARATION OF BONE CHAR BY CALCINATION, paper by W Puangpinyo* and N Osiriphan*
"MATERIALS AND METHODS
Calcination. Twenty kilograms of cattle bone were cleaned, all meat remnants, lipids and tendons being removed, and then dried in the sun for 2-3 days. Batches of 3 kg at a time were heated on the plate of a cross draft kiln with a thermocouple. Atmospheric air was flushed into the kiln chamber from room temperature for approximately 1 hour. Then the firing was stopped and the kiln-gate opened gradually to cool down. The process was performed at 300, 400, 500, 600, 700, 800°C for 1.5 - 2 hours. This yielded 6 batches of bone char weighing 1 kg each. The bone char was ground in a mortar and sieved to obtain 3 - 5 mm grain size. Conventional calcination. For comparison purposes bone char was also prepared as normally used in the ICOH defluoridator, i. e. calcined up to 500°C, then firing stopped.
Bone char properties. The colours of the bone char batches were recorded. The defluoridation capability of the bone char batches was tested by placing 80 g in 3 plastic columns imitating defluoridators. The plastic column set-up is shown in Figure 1. The columns were loaded at the rates of 1 or 4 L/h using water containing respectively 2.56 and 2 mg fluoride/L. Treated water samples were collected every 5 respectively 10 minutes of filtration. The fluoride concentrations were measured using Ion Selective Electrode Orion 720A and Orion 720.
Defluoridation capability. The mean residual fluoride for each kind of bone char tested in the columns was calculated. The mean percentage of fluoride removed was used as an expression of defluoridation capability.
RESULTS
Colour of bone char. The colour of bone calcined at the different from low to high temperatures was different, changing respectively from black to brown, grey and white. For each batch the fraction of the different colours was determined, Table 1."

http://www.de-fluoride.net/2ndproceedings/90-93.pdf
3. Digitalfire Ceramics Materials Database
"Real bone ash is obtained by calcining bone up to approximately 1100°C and then cooling and milling. This material is still manufactured today since some of its important properties are due to the unique cellular structure of bones that is preserved through calcination. Real bone ash has excellent non-wetting properties, it is chemically inert and free of organic matters and has very high heat transfer resistance."
http://digitalfire.com/4sight/material/bone_ash_123.html
4. The effect of sample preparation and calcination temperature on the production of hydroxyapatite from bovine bone powders, paper by Jay Arre Toque et al.
"II. MATERIALS AND METHODS
A. Sample Preparation
Cortical bovine bones were collected from the local slaughter houses. The procured bone samples were cleaned using boiling method to remove organic substances and collagen. This was done to avoid soot formation in the ma- terial during the calcination process. Raw bone was boiled in water for 30 minutes at 99.5oC, and then the water was removed and the bones were washed using fresh water. This process was repeated trice until it yielded white and clean samples. Before boiling, the macroscopic adhering impuri- ties and substances, which include the ligaments and tissues that stick on the bone were shaved and removed. After boil- ing, the bone samples were sun-dried for 3 days. The dried cortical bone samples were cut into shape using hacksaw. The bone powders from cutting chip or sawdust were col- lected and used for this experiment.
The bone powders were calcined in a box furnace at the following temperatures: 700oC, 800oC, 900oC, 1000oC, and 1100oC; with a temperature rate of 5oC/min. The tempera- ture was maintained for 2 hours to remove the organic ma- trix. The bovine bone powders were cooled to room tem- perature by slow furnace cooling."
http://download.springer.com/static/pdf/58/chp%253A10.1007%252F978-3-540-68017-8_39.pdf?auth66=1416281591_6eba0bd74aebee46581c04f85596251e&ext=.pdf
5. Effect of the calcination temperature on the composition and microstructure of hydroxyapatite derived from human and animal bone, paper by M. Figueiredoa
"Abstract
The present work focus the study of cortical bone samples of different origins (human and animal) subjected to different calcination temperatures (600, 900 and 1200 °C) with regard to their chemical and structural properties. For that, not only standard techniques such as thermogravimetric analysis, Fourier transform infrared spectroscopy, X-ray diffraction and scanning electron microscopy were used but also mercury intrusion porosimetry. The latter technique was applied to evaluate the effects of the temperature on the microstructure of the calcined samples regarding porosity and pore size distribution.
Although marked alterations in structure and mineralogy of the bone samples on heating were detected, these alterations were similar for each specimen. At 600 °C the organic component was removed and a carbonate apatite was obtained. At 900 °C, carbonate was no longer detected and traces of CaO were found at 1200 °C. Crystallinity degree and crystallite size progressively increased with the calcination temperature, contrary to porosity that strongly decreased at elevated temperatures. In fact, relatively to the control samples, a significant increase in porosity was found in samples calcined at 600 °C (reaching values around 50%). At higher temperatures, a dramatic decrease was observed, reaching, at 1200 °C, values comparable to those of the non-calcined bone.
2.1. Sample preparation
Hydroxyapatite derived from natural bone (femur diaphysis) of different origins (human, bovine and porcine) was obtained under similar processing conditions. The human bone used in this study was a biologically no longer active femur from a 39-year-old male donor, supplied by the bone bank of Coimbra University Hospital (Portugal) [28].
The fresh bones of each specimen were cut into smaller pieces and cleaned well to remove most adhering impurities. Afterwards, the bones were boiled in distilled water for 30 min for degreasing and easier removal of tissues and bone marrow. This procedure was repeated twice with fresh water. Each diaphysis was then transversely cut into 1.5 cm thickness slices and the trabecular bone inside was carefully removed to obtain only compact bone samples.
Subsequently, the bone samples were totally degreased through immersion in an alcohol series (ethanol at 70%, v/v), followed by washing with distilled water. Then they were kept in hydrogen peroxide (30%, v/v) for at least 48 h and rinsed again. Finally, they were stored in formaldeyde solution (4%, v/v) at 4 °C. Before use, the samples were thoroughly rinsed with distilled water and subsequently dried in a vacuum oven at 50 °C for 3 days. These dry bone samples represent the controls in this study.
Natural hydroxyapatite was obtained after calcination of the human, bovine and porcine bone samples at 600, 900 and 1200 °C. These temperatures were selected after a preliminary thermogravimetric analysis. A systematic series of test samples was prepared by heating the bone slices in an electric furnace at each temperature for 18 h, under air atmosphere. After calcination, the samples were placed inside a desiccator at room temperature and naturally cooled.
Depending on the characterization techniques, samples were used as blocks (the whole slice/half-slice) or as particles (obtained by crushing the slices into smaller pieces and reducing the fragments to powder form by hand grinding in an agate mortar)."
http://www.sciencedirect.com/science/article/pii/S0272884210002683
NAME: Diana Mellon
DATE AND TIME: Nov. 12, 2014 4:30 PM
LOCATION: Fischer Bros. & Leslie kosher butcher, 230 W. 72nd St.
SUBJECT: Ingredient Shopping
Diana picked up 2 calf's feet, cut into pieces, ordered the day before.
NAME: Yijun, Michelle, Diana
DATE AND TIME: 11/11/2014, from 9-11AM
LOCATION: 260 Chandler Hall
SUBJECT: Salt Grinding, Part 2
After receiving the 5 pound bulk bag from Amazon, we decided to grind the salt down a little more, as it was not quite fine enough and too granular. We ground it to a fine powder, but noticed that for whatever reason, the 5 pound salt was lighter in color and much drier than the rock salt we ground earlier in the week from Whole Foods. To our surprise, when we opened the jar of the Whole Foods salt once more, it was definitely "wetter" than the bulk salt, and easily stuck to itself; we can probably say it was quite "fatty" and not "lean." We postulate that this wetter quality is from the minerals contained in rock salt, but we are confused as to why the bulk sand doesn't share the same quality. Perhaps grinding it from larger chunks (since the Whole Foods jar of salt contained substantial pieces of salt that were not ground) contained the mineral content much better from already pulverized salt, or maybe the bulk salt is not true Himalayan rock salt?
NAME: Yijun, Michelle, Diana
DATE AND TIME: 11/07/2014, from 9-11AM
LOCATION: 260 Chandler Hall
SUBJECT: Salt Grinding
We began to grind the Himalayan rock salt purchased at Whole Foods, and it ground fairly well into a grainy powder. We were worried that we would not have enough from the jar that we purchased (the salt is quite expensive), and so Yijun found a bulk bag of finer Himalayan rock salt.
NAME: Yijun, Michelle
DATE AND TIME: 11/06/2014, from 9-10PM
LOCATION: Whole Foods Market on 59th Street, Columbus Circle
SUBJECT: Ingredient Shopping
Yijun and Michelle went to Whole Foods to purchase ingredients for the annotations. While there, we purchased whole pieces of Himalayan rock salt, cream of tartar, 100% concord grape juice, artisan white bread, and cheesecloth (the three last ingredients were for the mustard experiment). Since Whole Foods at Columbus Circle doesn't sell alcohol, a sweet red moscato wine was bought at a local liquor store afterwards.
NAME: Diana
DATE AND TIME: 10/28/2014, early afternoon
LOCATION: Fisher Bros. and Leslie, Kosher Butcher shop on West 72nd Street
SUBJECT: Ingredient Shopping
Diana purchased the upper portion of a cow’s leg from the kosher butcher shop.
Undated Field Notes:
French Transcription:
Sable dos de bœuf brusleet sal gemme
Je les ay pulverises separem{ent} & subtilies sur le porphire le plus
que jay peu Puys jay mesle aultant dun que daultre & repasse
sur le porphire Je lay apres humecte dans un papier replie dans
une serviette mouillee qui est plus tost faict quau serain de la nuit
ou a lhumeur de la cave Et nen ay point trouve qui despouille plus
net que cestuy cy Il veult estre asses humide Et si tu le veulx gecter
fort tanvre fais quil soict plus chault Il est venu en estain doulx fort net
co{mm}e le principal Et ha soubstenu plusieurs gects Pour lestaim je
croy quil nen fault point chercher de meilleur Ne pour le plomb fin
aussy qui vient quasi plus net que lestaimTou Los de pied de
bœuf est tousjours si aride tout seul que sans estre mesle
dune part ou deulx de quelque sable gras & ayant liaison co{mm}e
le tripoly les sels le foeultre les cendres & choses semblables
il ne despouilleroit pas & ne mouleroit pas net aussy car il sesmie
English Translation:
I pulverised them separately and ground them finely on the porphyry as much as I could. Then I mixed all of one with the other and re-ground it on the porphyry. Afterwards I moistened it in [a sheet of] paper folded in a moist napkin which is made wet more quickly from the moisture of the night, or the [moisture of] the cellar. I have never found [one] which can be removed more cleanly from the mold than this, though it needs to be quite moist. And if you want to cast small works, make it very hot. For tin, I believe that you cannot find a material that takes to powder better, and even for use withfine lead which has almost better results than tin. The bone of an ox hoof is always dry, that is why you must mix it with fatty sand, so it will bind like tripoli, salts, felt, ashes and similar materials. [If you do not mix ox-hoof bone,] it will not turn out from the mold and will not mold cleanly because it crumbles.Similar Recipes:
p069r: SandOnce you have molded, it is good to reheat your mold with the smoke of the material you are melting, because the cast would absorb the quality of the metal, then this metal will flow more easily in something thattakes after itself.
The human bones are the best for casting when they are calcined.
Sheep foot bones are even better than the ox foot bones.
p067v: Ox hooves for sand
Being well burned two times & pulverized, they mold very cleanly as sand and do not need to be recooked, but just heated with the flame of straw. But if you are doing core molding, apply the first coat very thinly with your brush, and leave it to dry. Then strengthen the next coats with wadding mixed with this aforementioned sand of bone [hoof] dampened.
It is the cleanest sand one can find for firing.
p088v: Sand from pulverised rock salt and sand from a mineral finely ground on a marble
After they have been dryly ground and beaten in the mortar, they are ground finely on the marble [slab]. I mixed the same quantity of each material, and in order to mix them better, I ground them on the porphyry [slab] again, and then filtered this through a double sieve or the sleeve of a shirt. Then, I put them on sheets of paper and stored it on a marble [slab] in a cellar. In one night, they were both moist enough [that there there was no need] to dampen them further because rock salt, like all other salts, dissolves in dampness. I molded with this very neatly because both should be quite fine. They should be moist enough so it can be removed easily [from the mold].
From other recipe books:
Cennini, The Craftsman’s Handbook- 5 “What kind of bone is good for treating the panels” Chapter VII
- 5 “How you should start drawing with a style, and by what light” Chapter VIII
Biringuccio, Pirotechnia
- pg. 137: “The cupels are little vessels ready to receive a certain quantity of lead or other melted metal in order to refine it. They are made of the ashes of young ram’s horn or some other kind of ashes and have a shallow cavity on top…”
Author: Charas, Moyse, 1619-1698.
Title: The royal pharmacopoeea, galenical and chymical according to the practice of the most eminent and learned physitians of France : and publish'd with their several approbations / by Moses Charras, th Kings chief operator in his royal garden of plants ; faithfully Englished ; illustrated with several copper plates.
Date: 1678
Bibliographic name / number: Wing / C2040
Physical description: [8], 272, 245, [15] p.
Copy from: Cambridge University Library
Reel position: Wing / 450:21
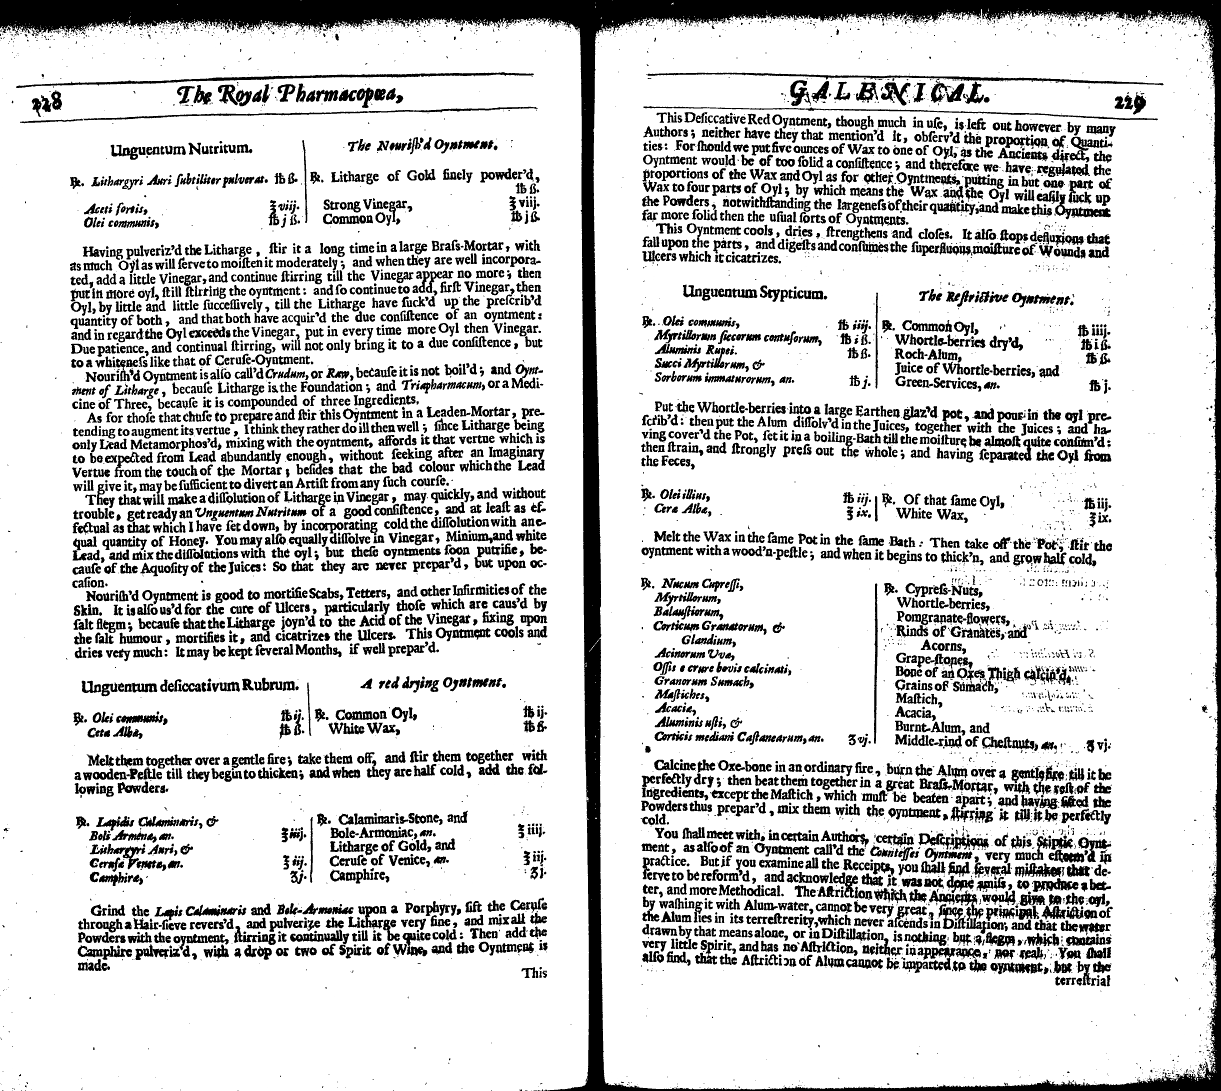
Transcription:
| Unguentum Stypticum. |
The Restrictive Oyntment. |
||
| Rx. Olei communis, |
lb iiij. |
Rx. Common Oyl, |
lb iiij. |
| Myrtillorum siccorum contusorum, |
lb i ss. |
Whortle-berries dry'd, |
lb i ss. |
| Aluminis Rupei. |
lb ss. |
Roch-Alum, |
lb ss. |
| Succi Myrtillorum, & |
Juice of Whortle-berries, and |
||
| Sorborum immaturorum, an. |
lb j. |
Green-Services, an. |
lb j. |
| Rx. Olei illius, |
lb iij. |
Rx. Of that same Oyl, |
lb iij. |
| Cerae Albae, |
{ounce} ix. |
White Wax, |
{ounce} ix. |
| Rx. Nucum Cupressi, |
Rx. Cypress-Nuts, |
||||
| Myrtillorum, |
Whortle-berries, |
||||
| Balaustiorum, |
Pomgranate-flowers, |
||||
| Corticum Granatorum, & Glandium, |
Rinds of Granates, and Acorns, |
||||
| Acinorum Uvae, |
Grape-stones, |
||||
Ossis
|
Bone of an Oxes Thigh calcin'd, |
||||
| Granorum Sumach, |
Grains of Sumach, |
||||
| Mastiches, |
Mastich, |
||||
| Acaciae, |
Acacia, |
||||
| Aluminis usti, & |
Burnt-Alum, and |
||||
| Corticis mediani Castanearum, an. |
{dram} vj. |
Middle-rind of Chestnuts, an. |
{dram} vj. |
You shall meet with, in certain Authors, certain Descriptions of this Stiptic Oynt|ment, as also of an Oyntment call'd the Countesses Oyntment, very much esteem'd in practice. But if you examine all the Receipts, you shall find several mistakes that de|serve to be reform'd, and acknowledge that it was not done amiss, to produce a bet|ter, and more Methodical. The Astriction which the Ancients would give to the oyl, by washing it with Alum-water, cannot be very great, since the principal Astriction of the Alum lies in its terrestrerity, which never ascends in Distillation; and that the water drawn by that means alone, or in Distillation, is nothing but a flegm, which contains very little Spirit, and has no Astriction, neither in appearance, nor real. You shall also find, that the Astriction of Alum cannot be imparted to the oyntment, but by the
--page break--
terrestrial part; and that the choice, quantity, and use which is here made of the A|lum, as of all the other Ingredients, are undeniably more regular, then any thing that is to be met with in the Dispensatories, in reference to this oyntment.
The terrestrial and astringent part of the Oxe's Thigh-bone being only necessary for this oyntment, the dissipation of the flegm, spirit, salt, and volatile oyls is not regard|ded, no more then the consumption of the watry and spiritous parts of the Alum, since there is no need of the terrestrial.
They who have this oyntment well prepar'd, need take no care for the Countesses oyntment, the preparation whereof is troublesome, and the vertues much inferiour.
The Styptic oyntment apply'd to the Reins, strengthens them, as also the Ligaments of the Matrix, the descent whereof it hinders, and prevents abortion, anointing the entrance thereof, and the lower part of the Belly. It is also succesfully us'd to close the Neck of the Matrix after lying in, and to consolidate such tearings of the parts as hap|pen sometimes after difficult Labour. It is also very proper against the Relaxation of the streight Gut, apply'd without, and put into the Fundament, and to stop unreason|able losses of blood in Women, apply'd to the Region of the Reins, the Liver, and all the Belly: It is also laid upon the Stomach to stay vomiting. This oyntment causes no heat at all, and may serve in word upon all occasions where there is need of closing and consolidation.
The Materials:
- ox hoof anatomy: https://theadventuresofbecky.files.wordpress.com/2011/01/crosssection.gif
- we decided that we would use both the leg bone and the actual hoof bone for the bone ash; both were purchased at the kosher butcher on West 72nd street
- porphyry: a variety of igneous rock consisting of large-grained crystals, such as feldspar or quartz, dispersed in a fine-grained feldspathic matrix or groundmass.
- rock salt: Halite: http://en.wikipedia.org/wiki/Halite; http://rruff.info/doclib/hom/halite.pdf
- nature of rock salt: Van Nostrand’s Engineering Magazine, Vol.1 Decarburization and Purification by Means of Cinder, Ashes, Salt, Silex, Potash and Clay. by Josh Payne, 21 November 1728: “The improvements in the manufacture of iron consist “in putting certain in putting certain ingredients into fusion with pig or sow iron; videlicet, the ashes of wood and other vegetables, all kinds of glass and sandever, common salt and rock salt, argile…”
- http://www.amazon.com/gp/product/B00657CLMM/ref=pd_lpo_sbs_dp_ss_2?pf_rd_p=1944687502&pf_rd_s=lpo-top-stripe-1&pf_rd_t=201&pf_rd_i=B00657S9OQ&pf_rd_m=ATVPDKIKX0DER&pf_rd_r=1YM4NCQ4H4KCJ2MB2G37
- after consulting Professor Smith, we decided to purchase any mined rock salt not specific to France or Germany, as long as it has minerals in it (eventually decided on pink Himalayan rock salt)
- napkins: most likely 100% linen cloth, plenty of which is available as lab material for class
- paper: two suggestions that made from fabrics and not just with cotton
- http://apps.webcreate.com/ecom/catalog/product_specific.cfm?ClientID=15&ProductID=24943
- http://apps.webcreate.com/ecom/catalog/product_specific.cfm?ClientID=15&ProductID=24680
- http://paper.lib.uiowa.edu/
- http://book.grad.uiowa.edu/content/pc4-flax-paper-case
- extremely helpful site on early modern European paper put together by Timothy Barret of U of Iowa Center for the Book: http://paper.lib.uiowa.edu/european.php
- From e-mail to Diana from Tim Barrett on 11/11/14: “PS The most authentic fiber for making period paper would be a blend of old linen and hempen rags but we do not have access to large quantities of that type of raw material known to be free of synthetic fibers. For conservation and fine book printing, the cotton and hemp blend gives us a paper that has the right color and is sympathetic to the original papers. TB”
- tripoli (an example of a “fatty sand” mentioned in the recipe): most likely tripoli rock, a siliceous rock of sedimentary origin that is composed chiefly of chalcedony and microcrystalline quartz
- from p069r, a note: It is good for big work. But for small it is troublesome to take away. This is because it crumbles. It would be good for it to be a little glued together with something fatty that binds, like molded tripoli or burned felt or salt ammoniac or tripoli & similar things.</note>
- from p068v: Your work in pure lead and tin will be clean, as tripoli stone sofly pulverized which is not softened
- mention of “tripoli from Brittany” in p037v
