10/16/2014, morning
NAME: Rozemarijn Landsman & Jonah RowenDATE AND TIME: 10/16/2014, 9:30-12:30
LOCATION: Ubaldo's workshop, NJ
SUBJECT: Sand Casting - Pouring silver and pewter
Synopsis:
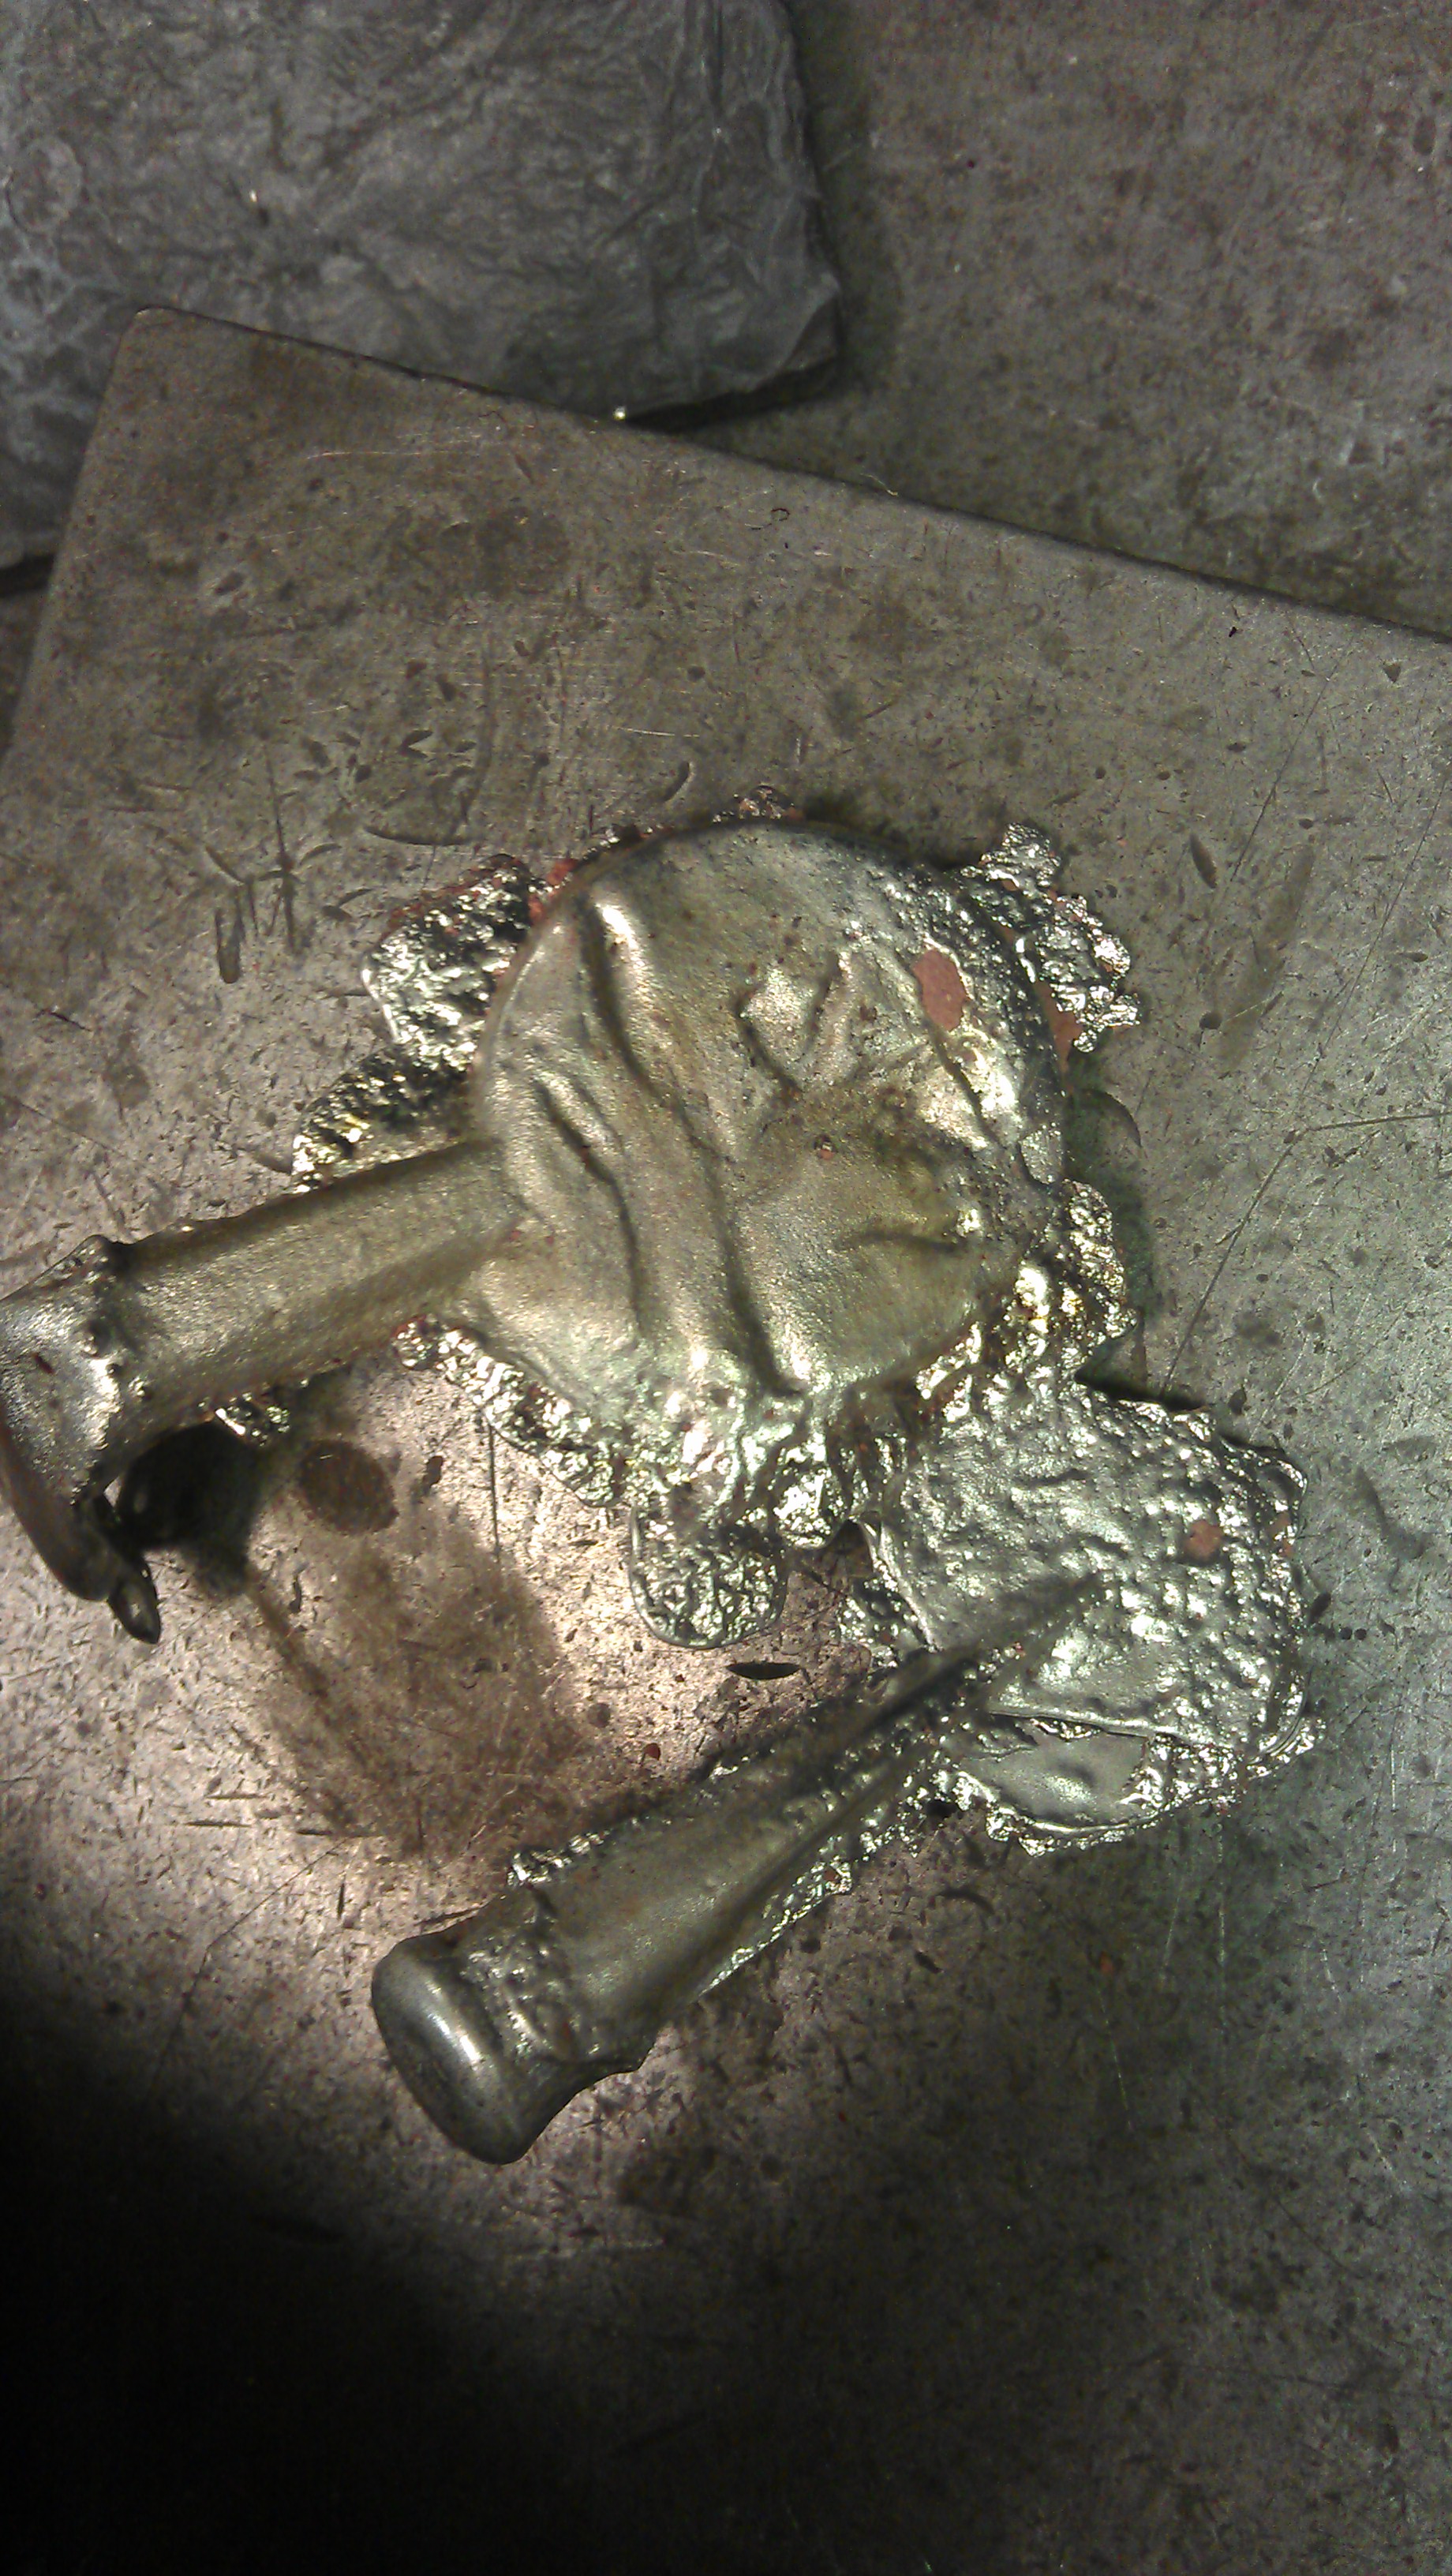
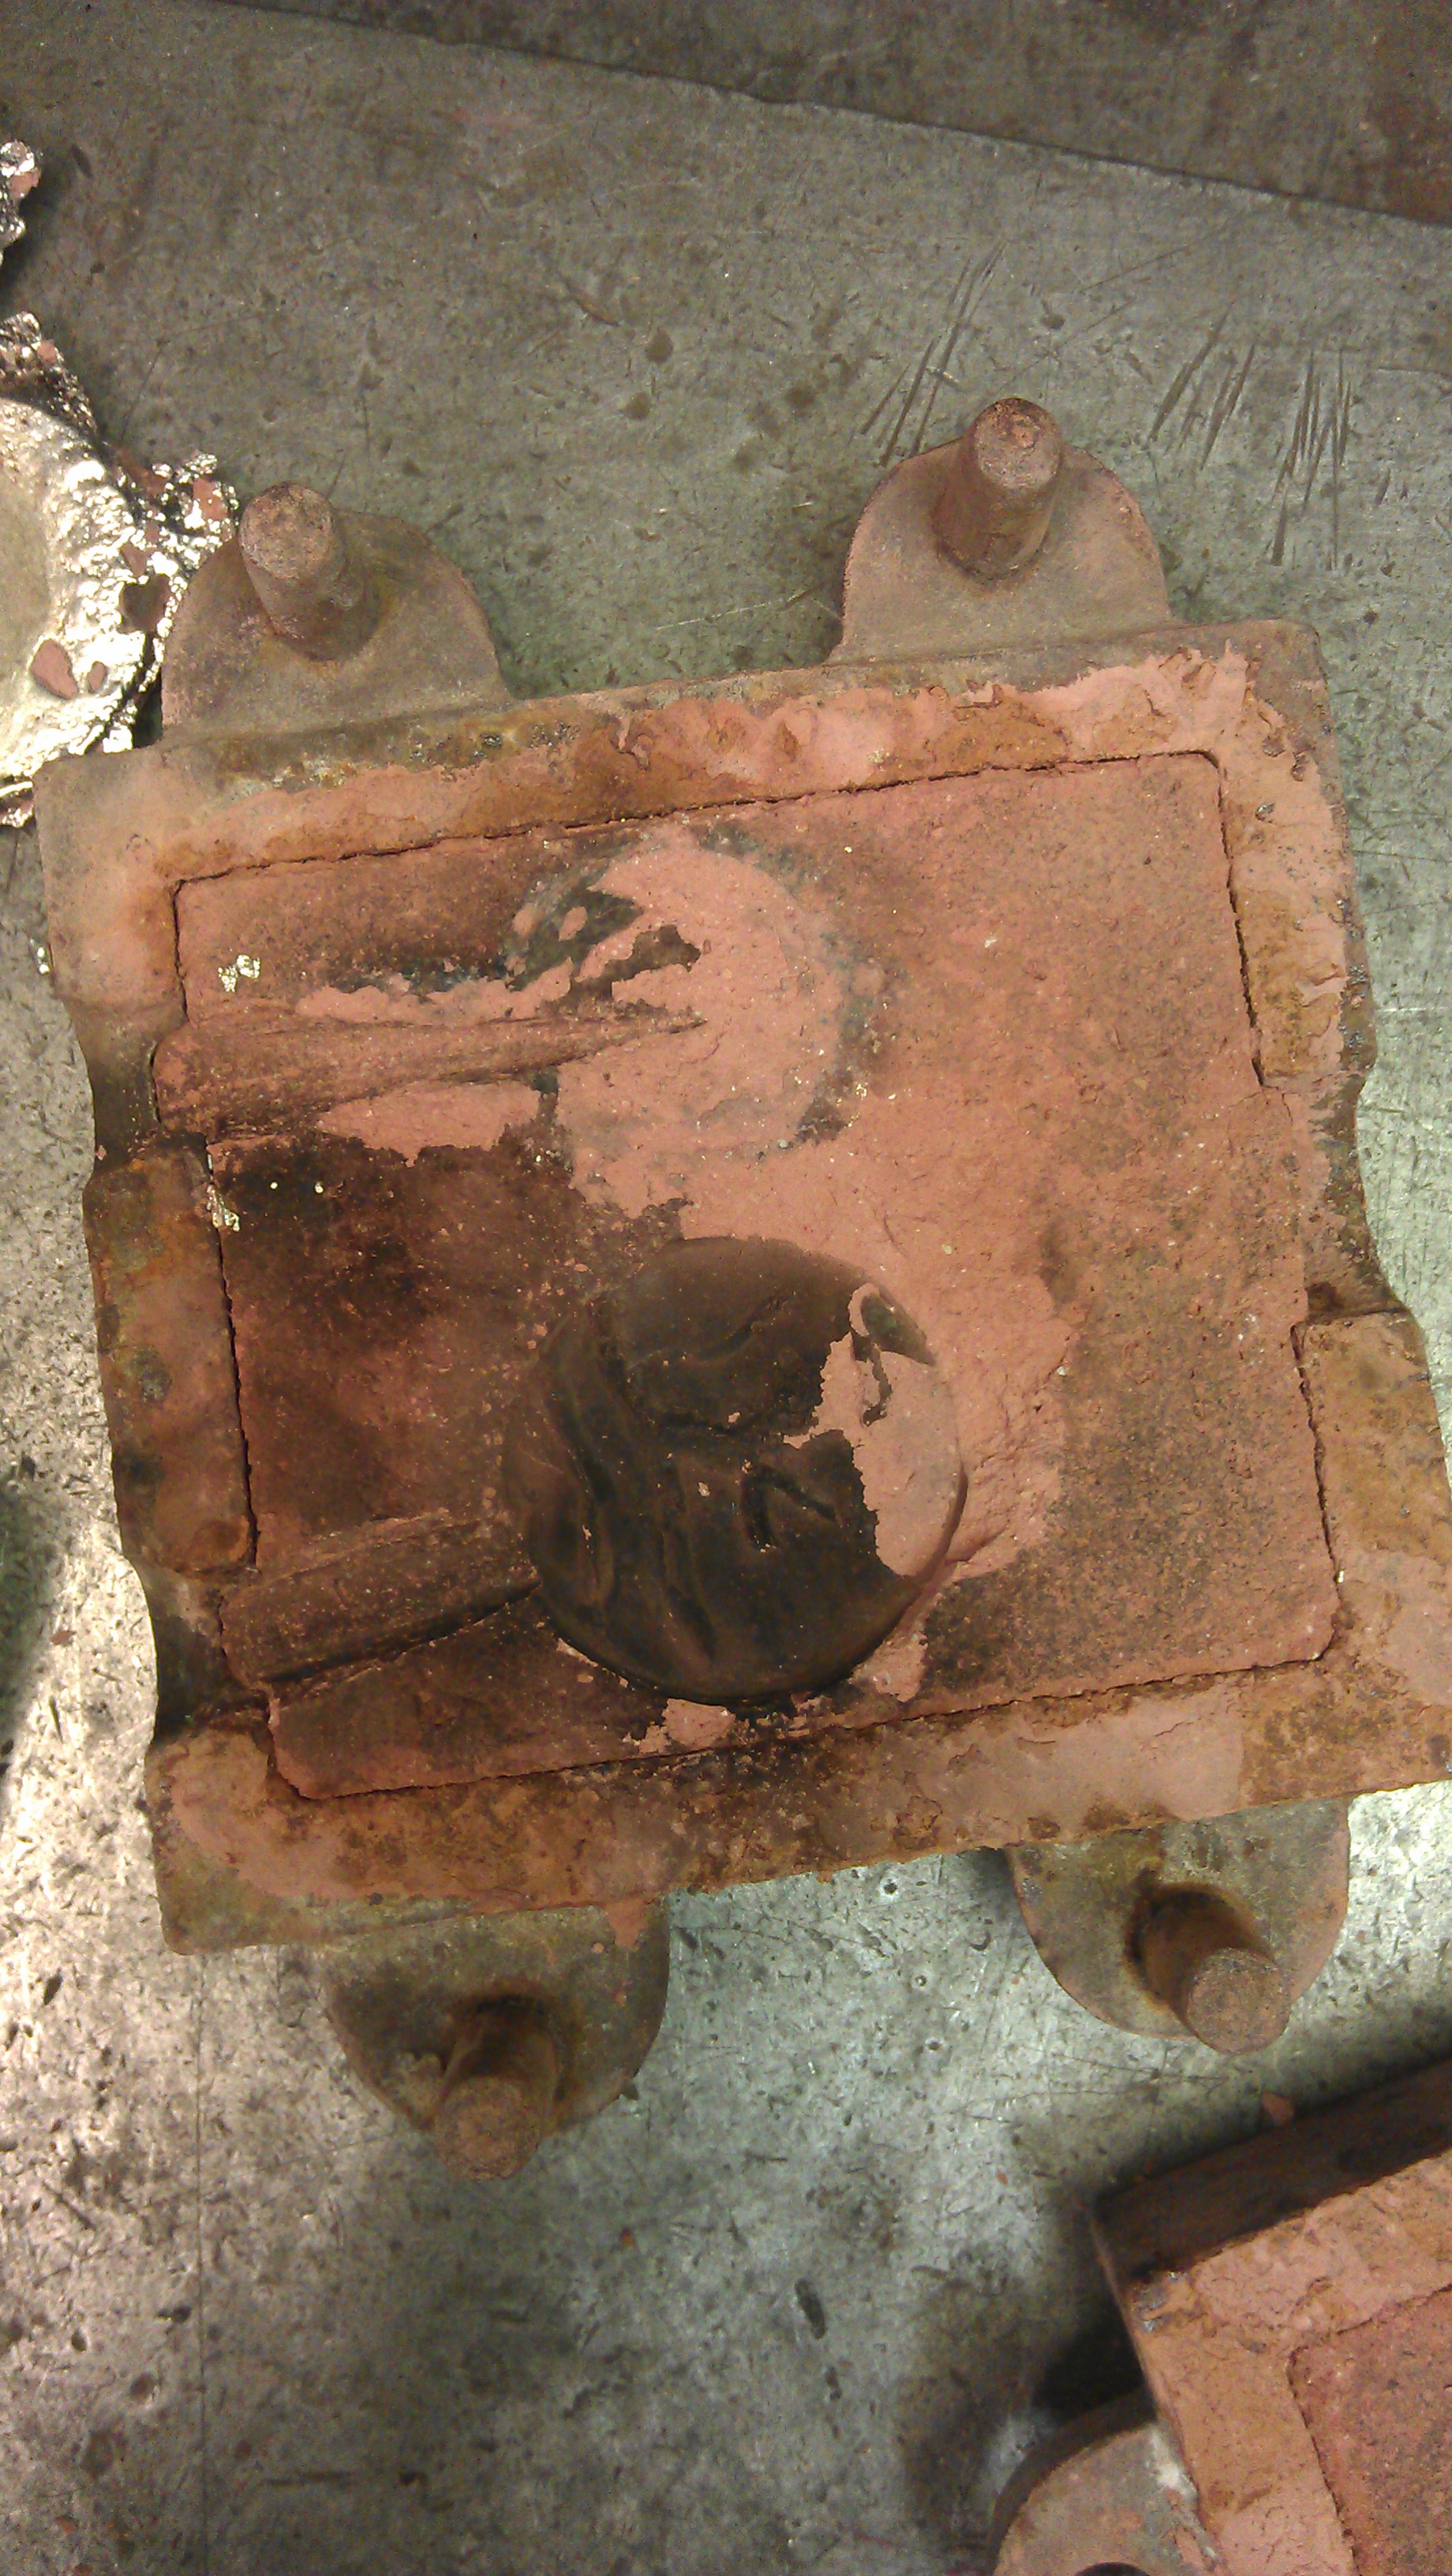
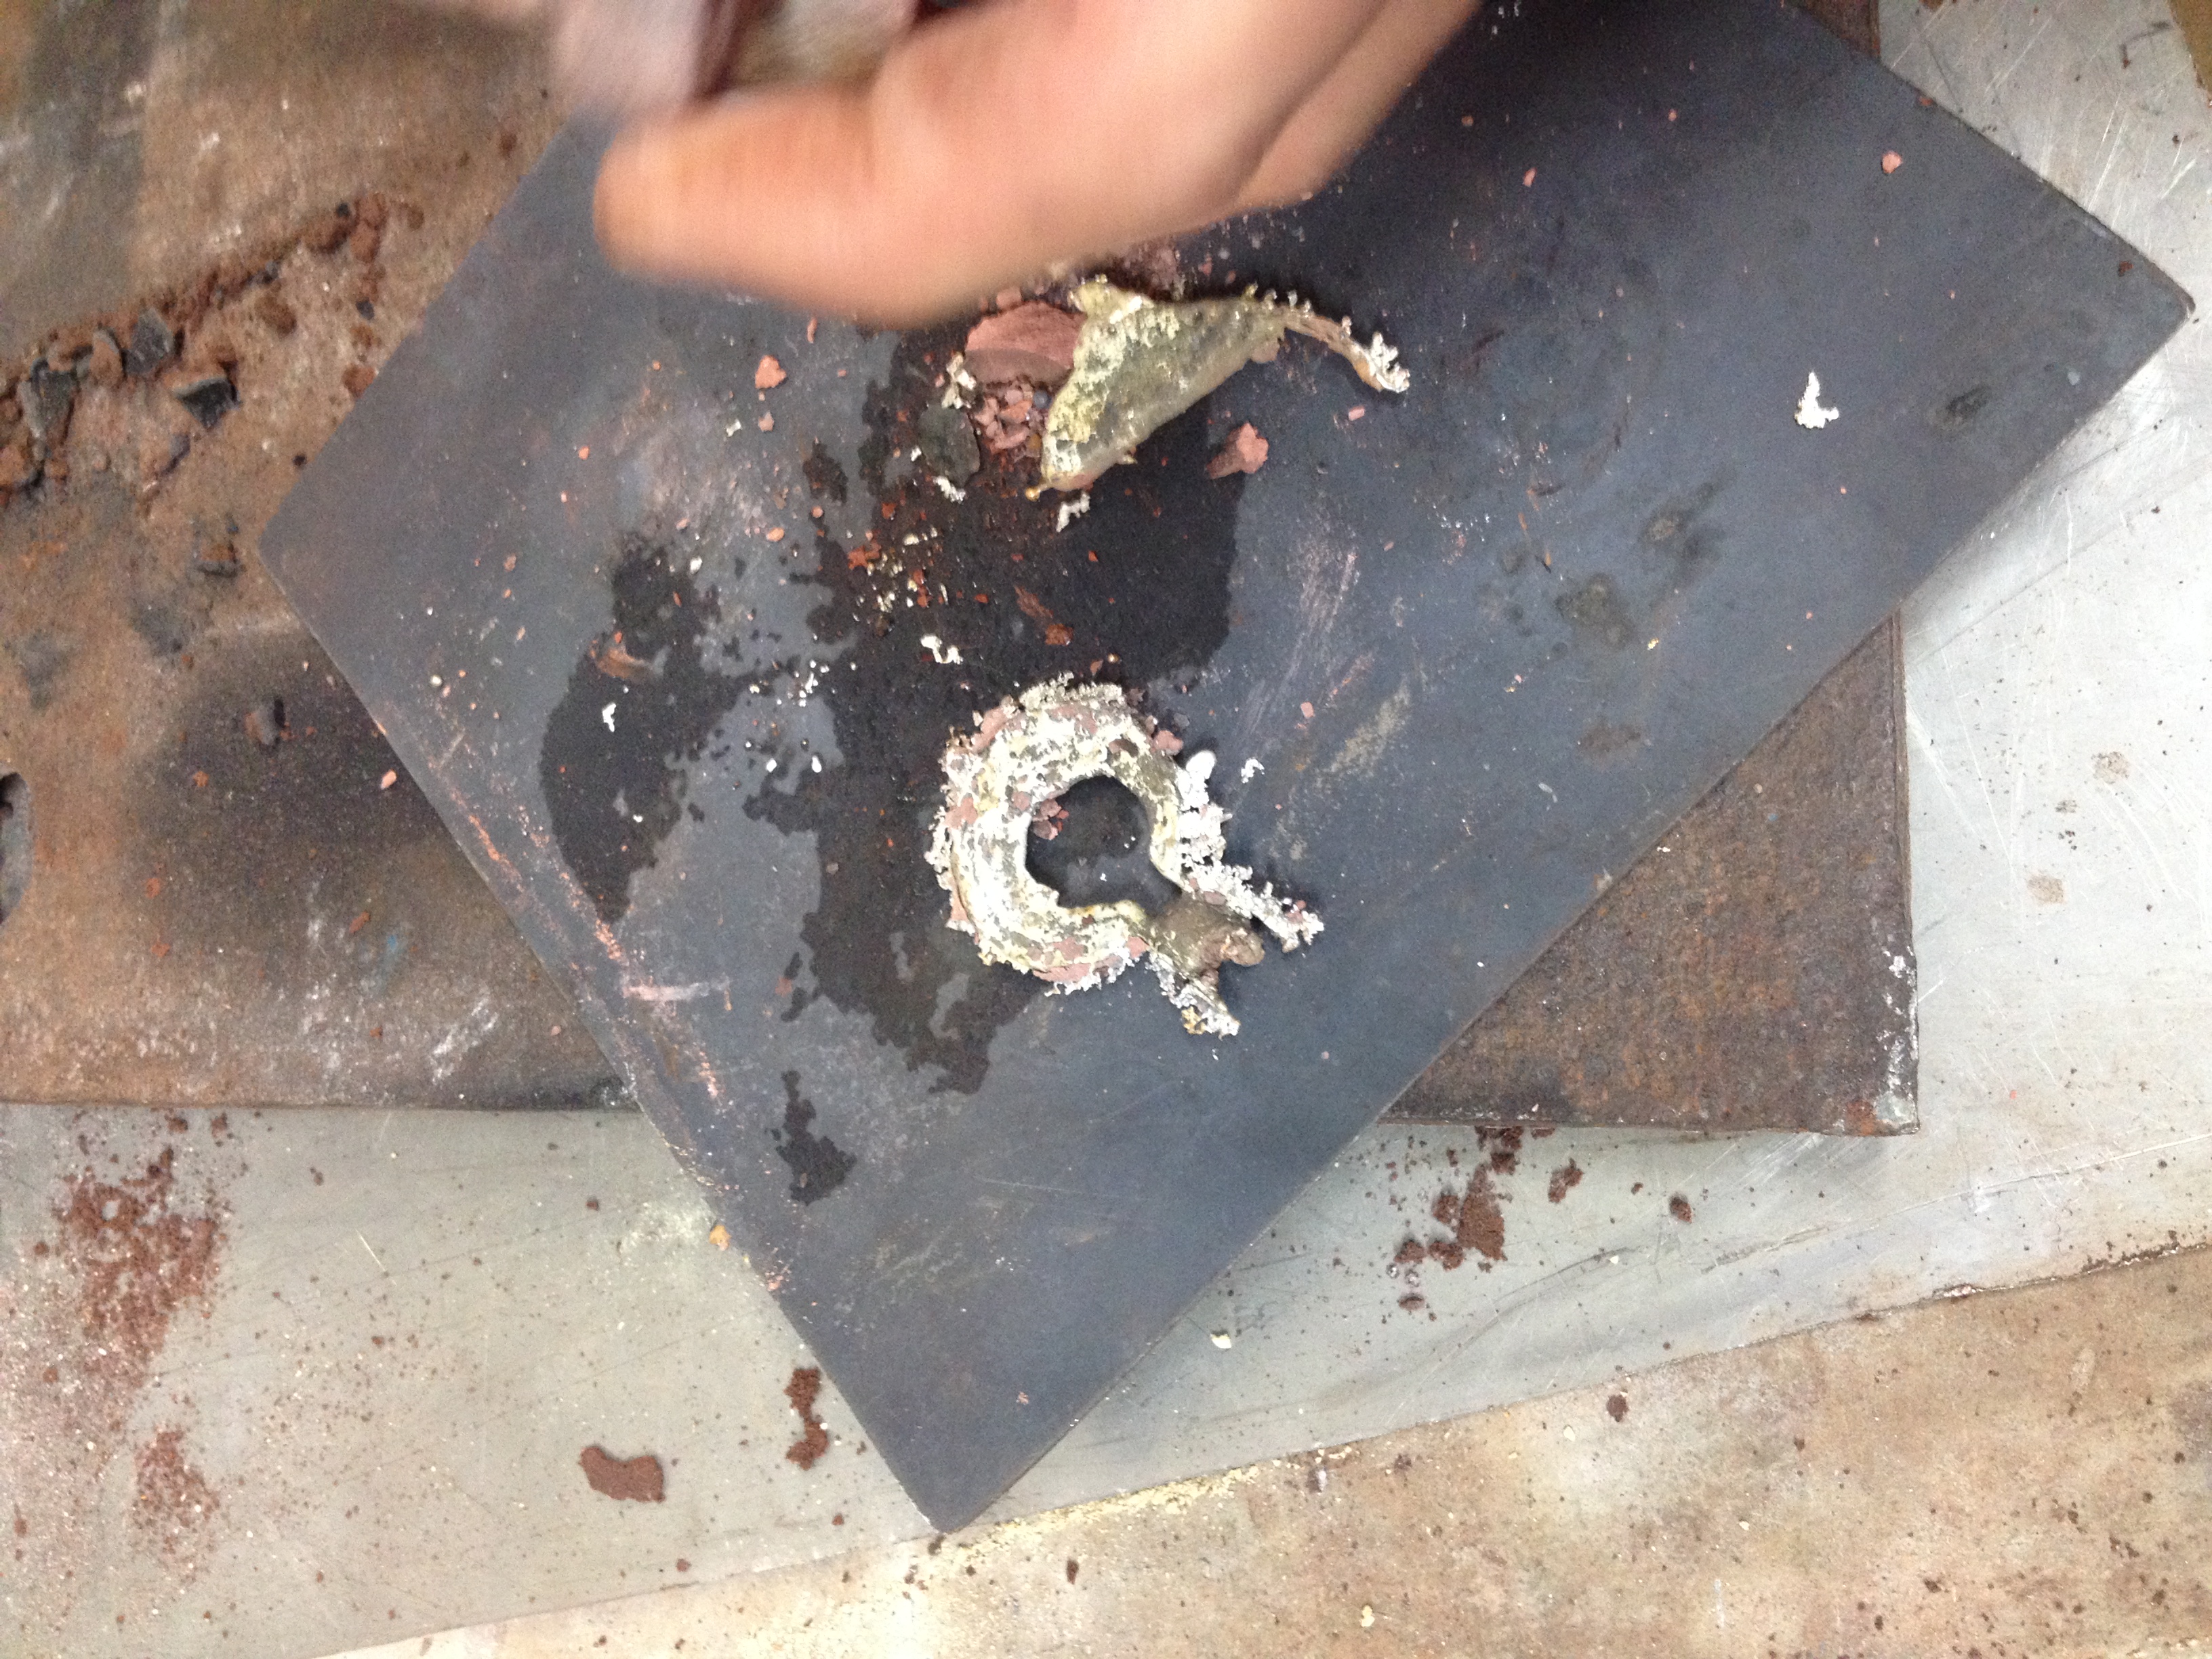
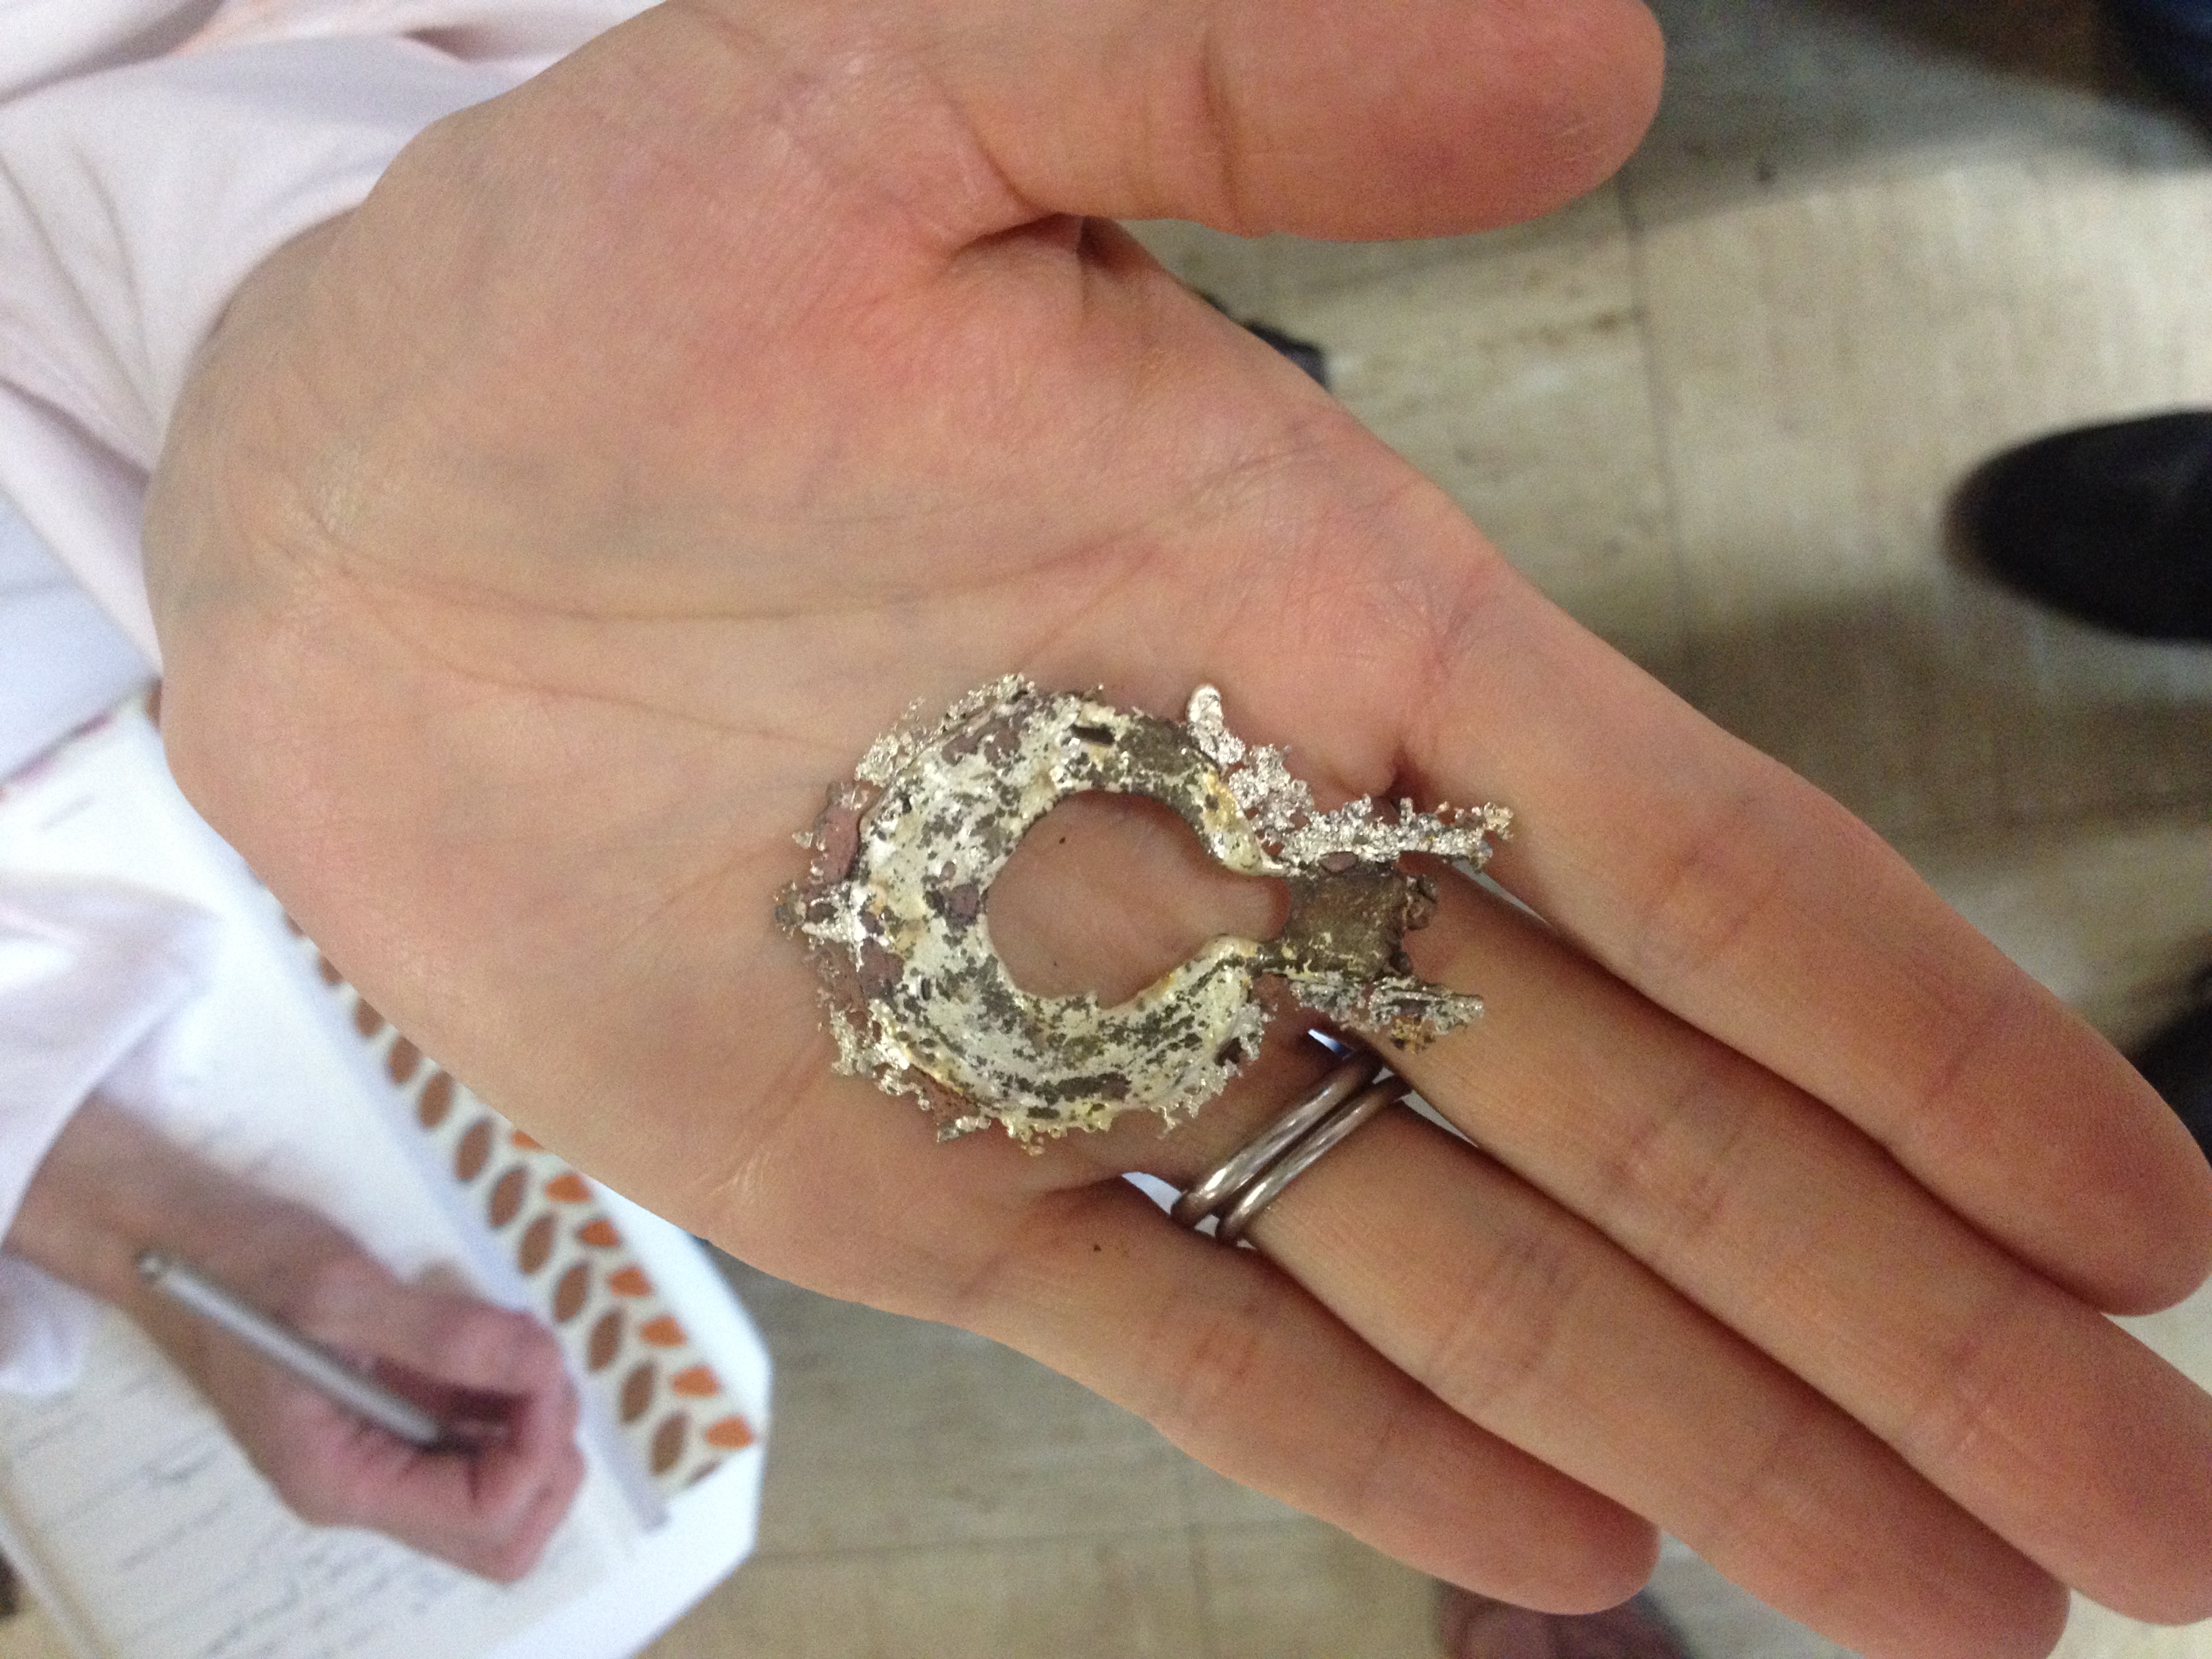
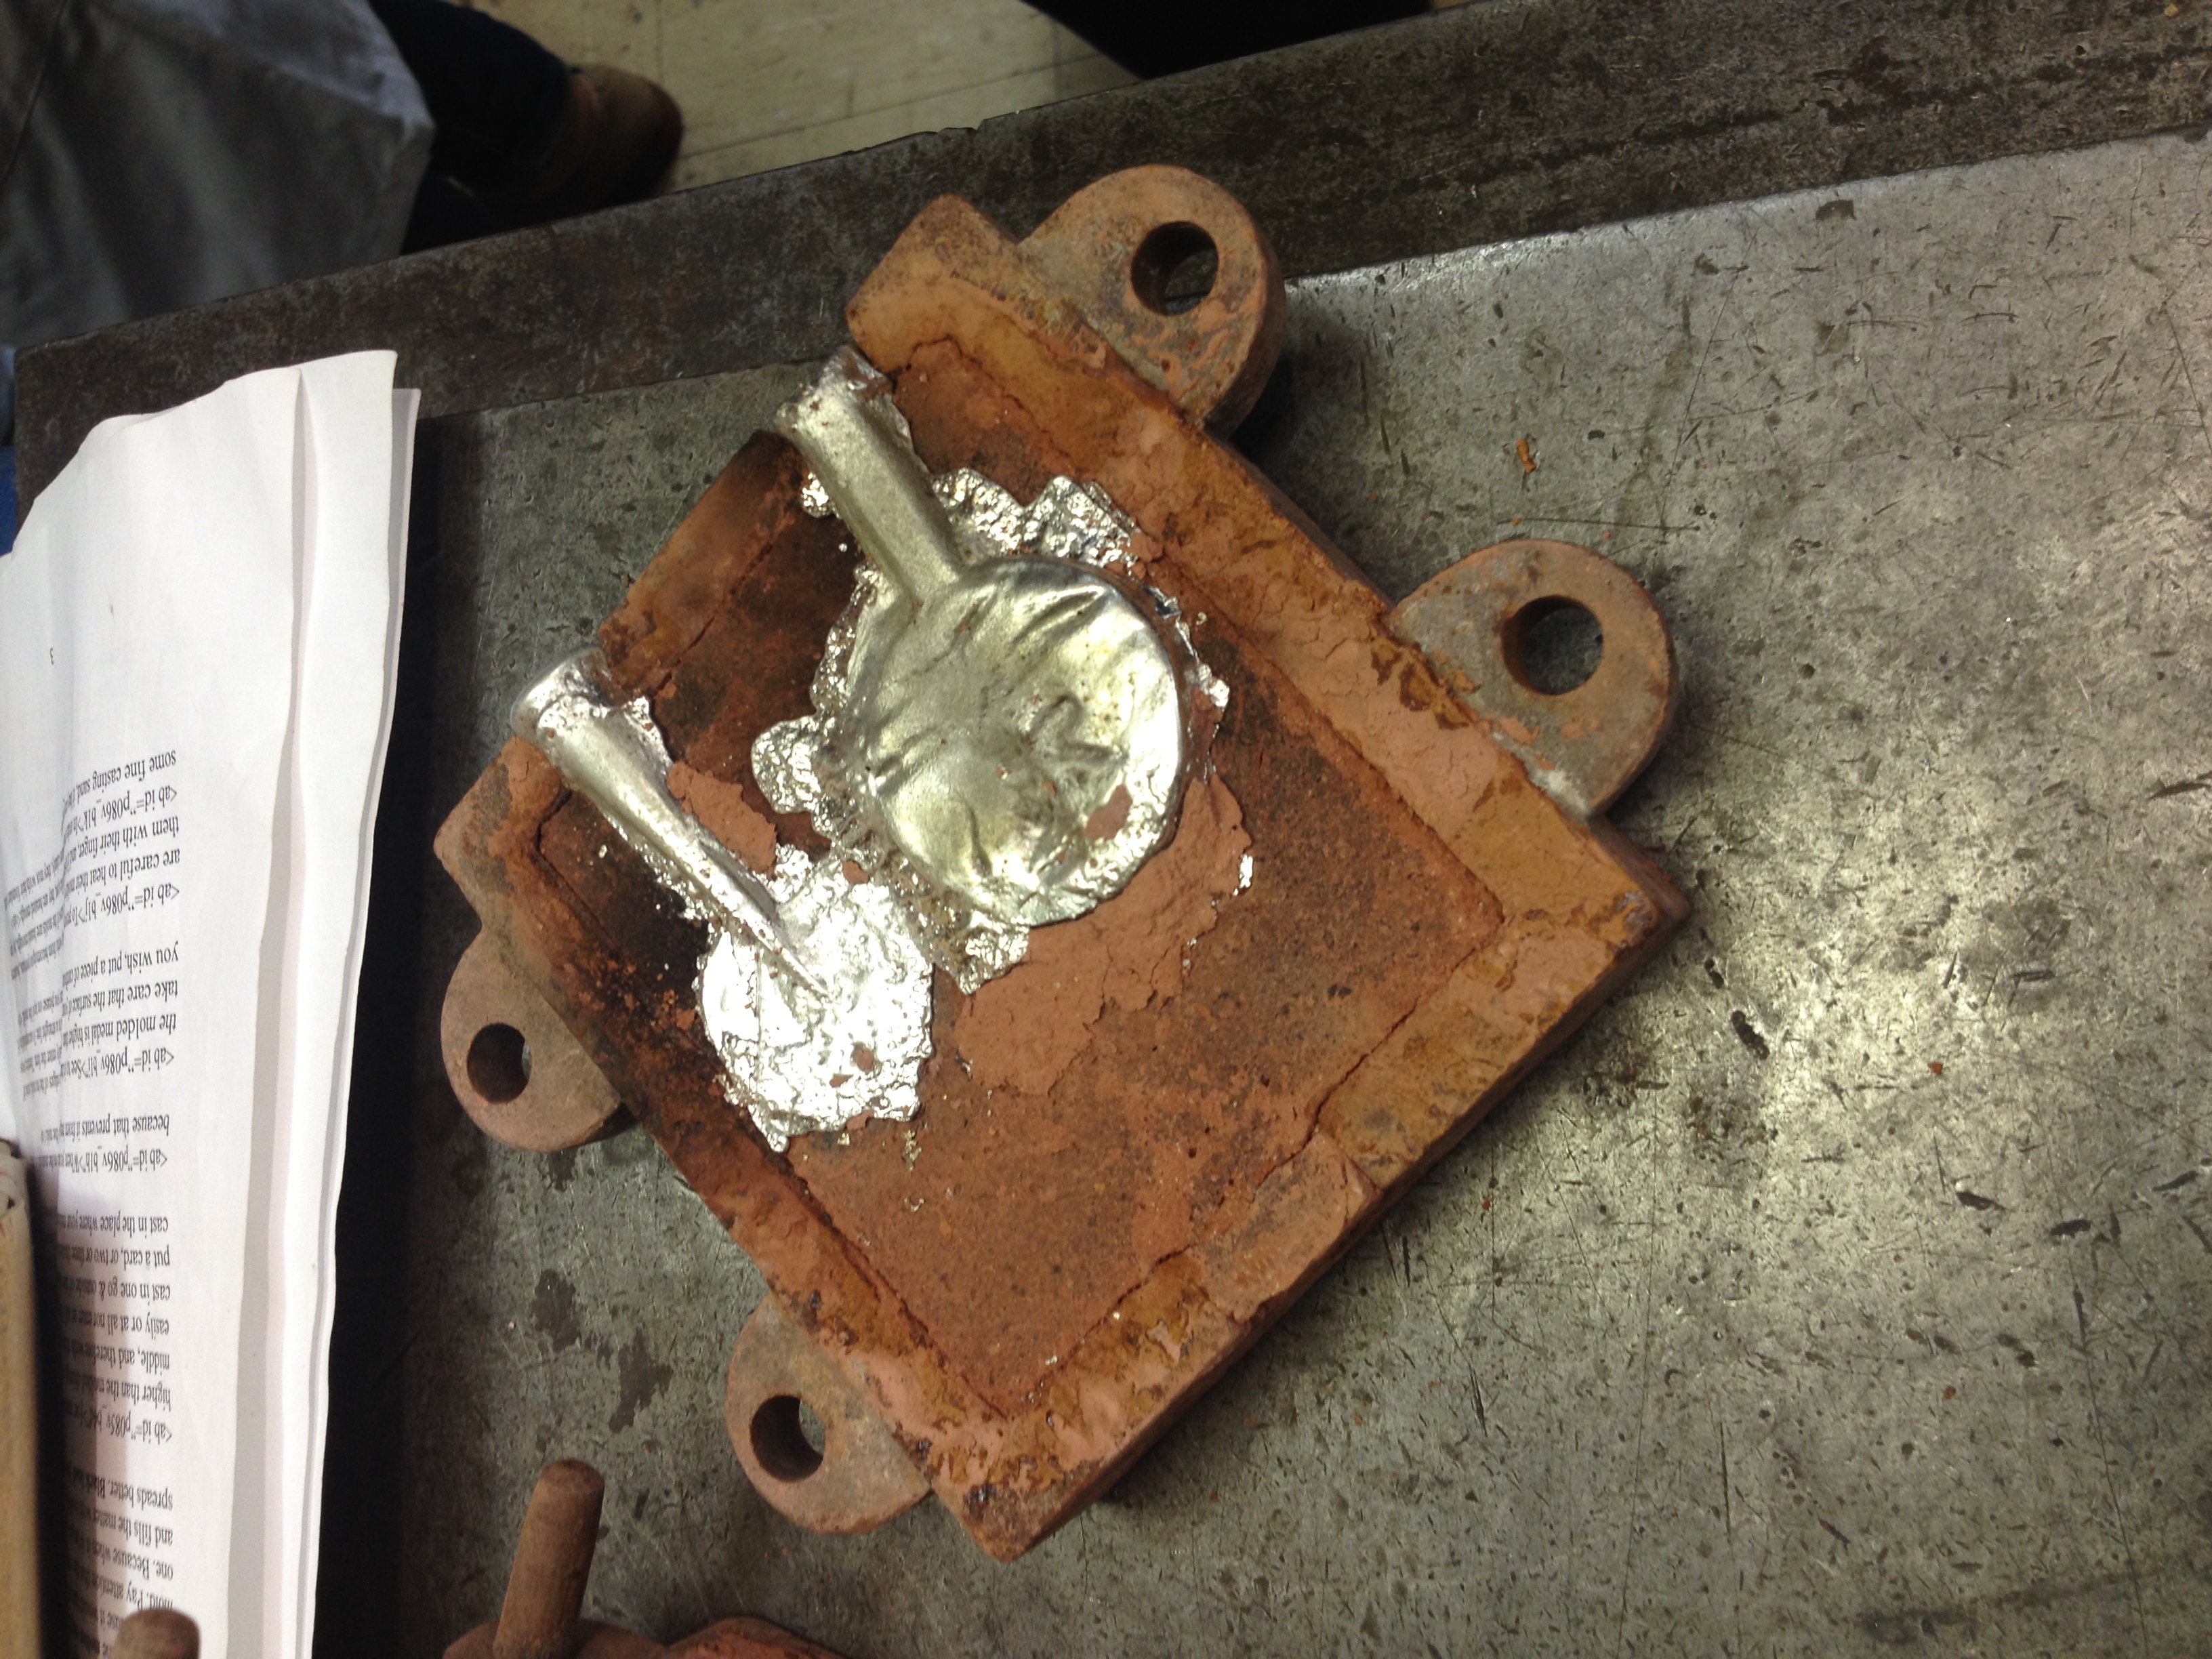
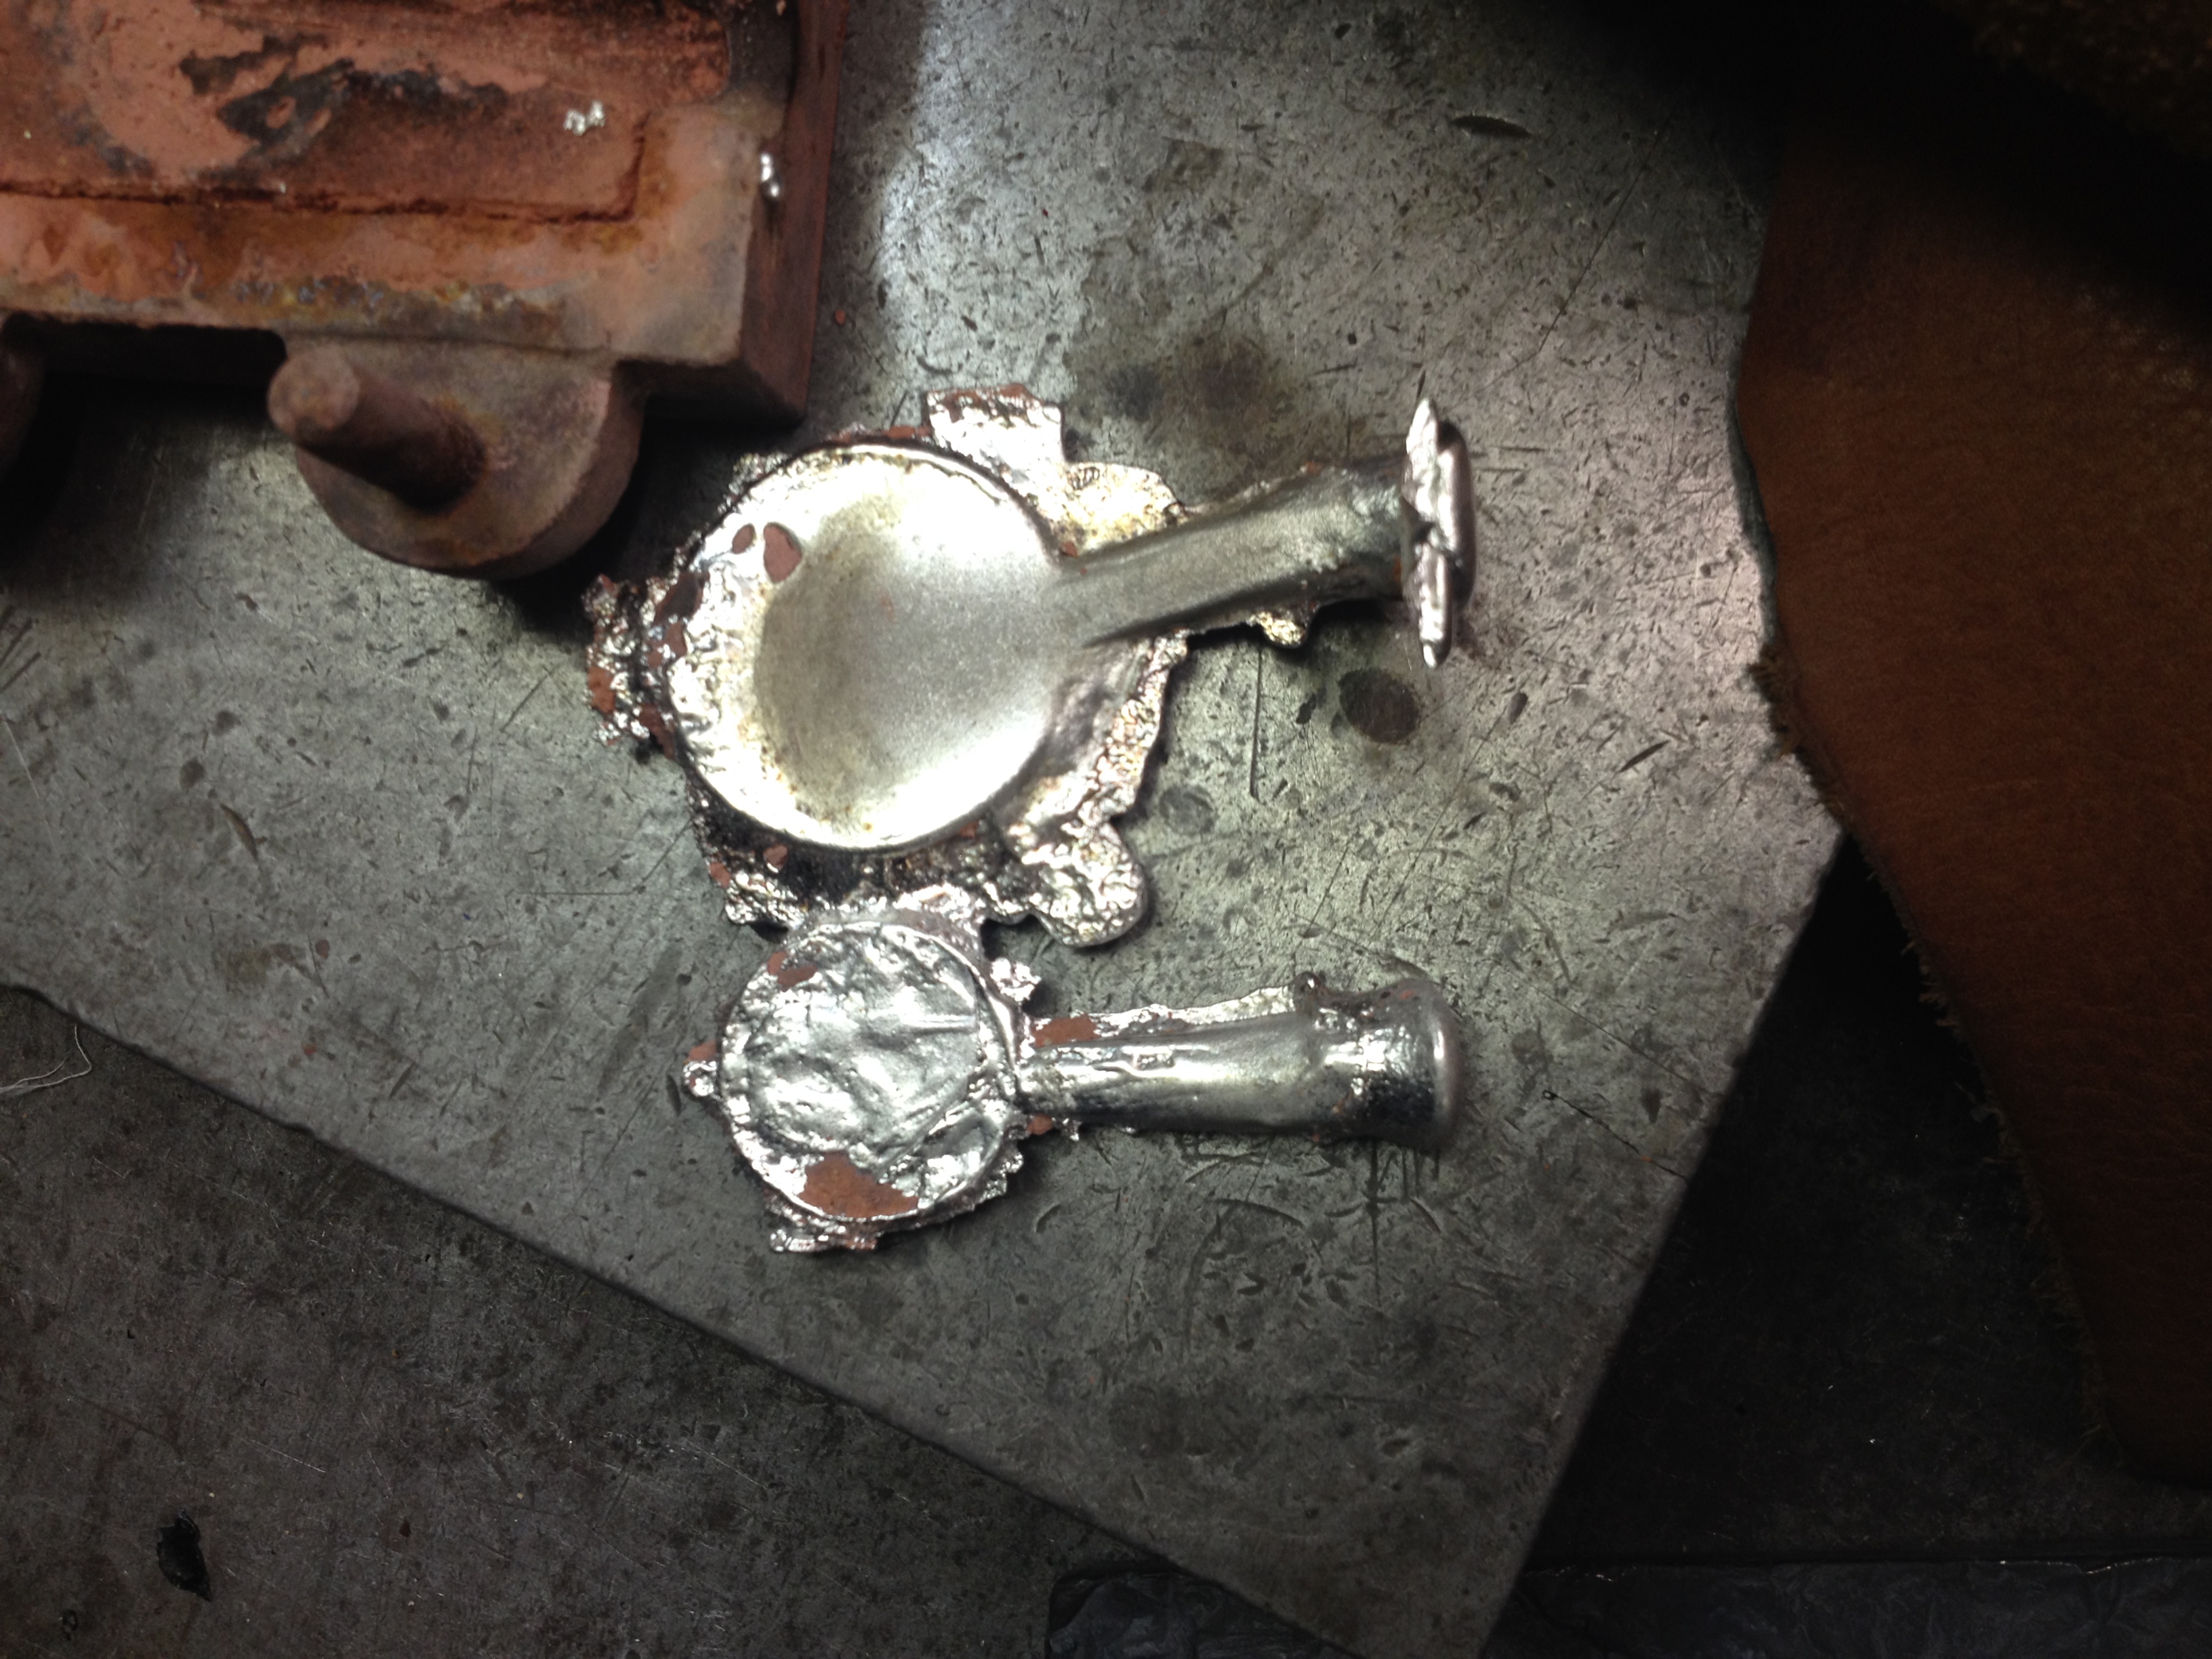
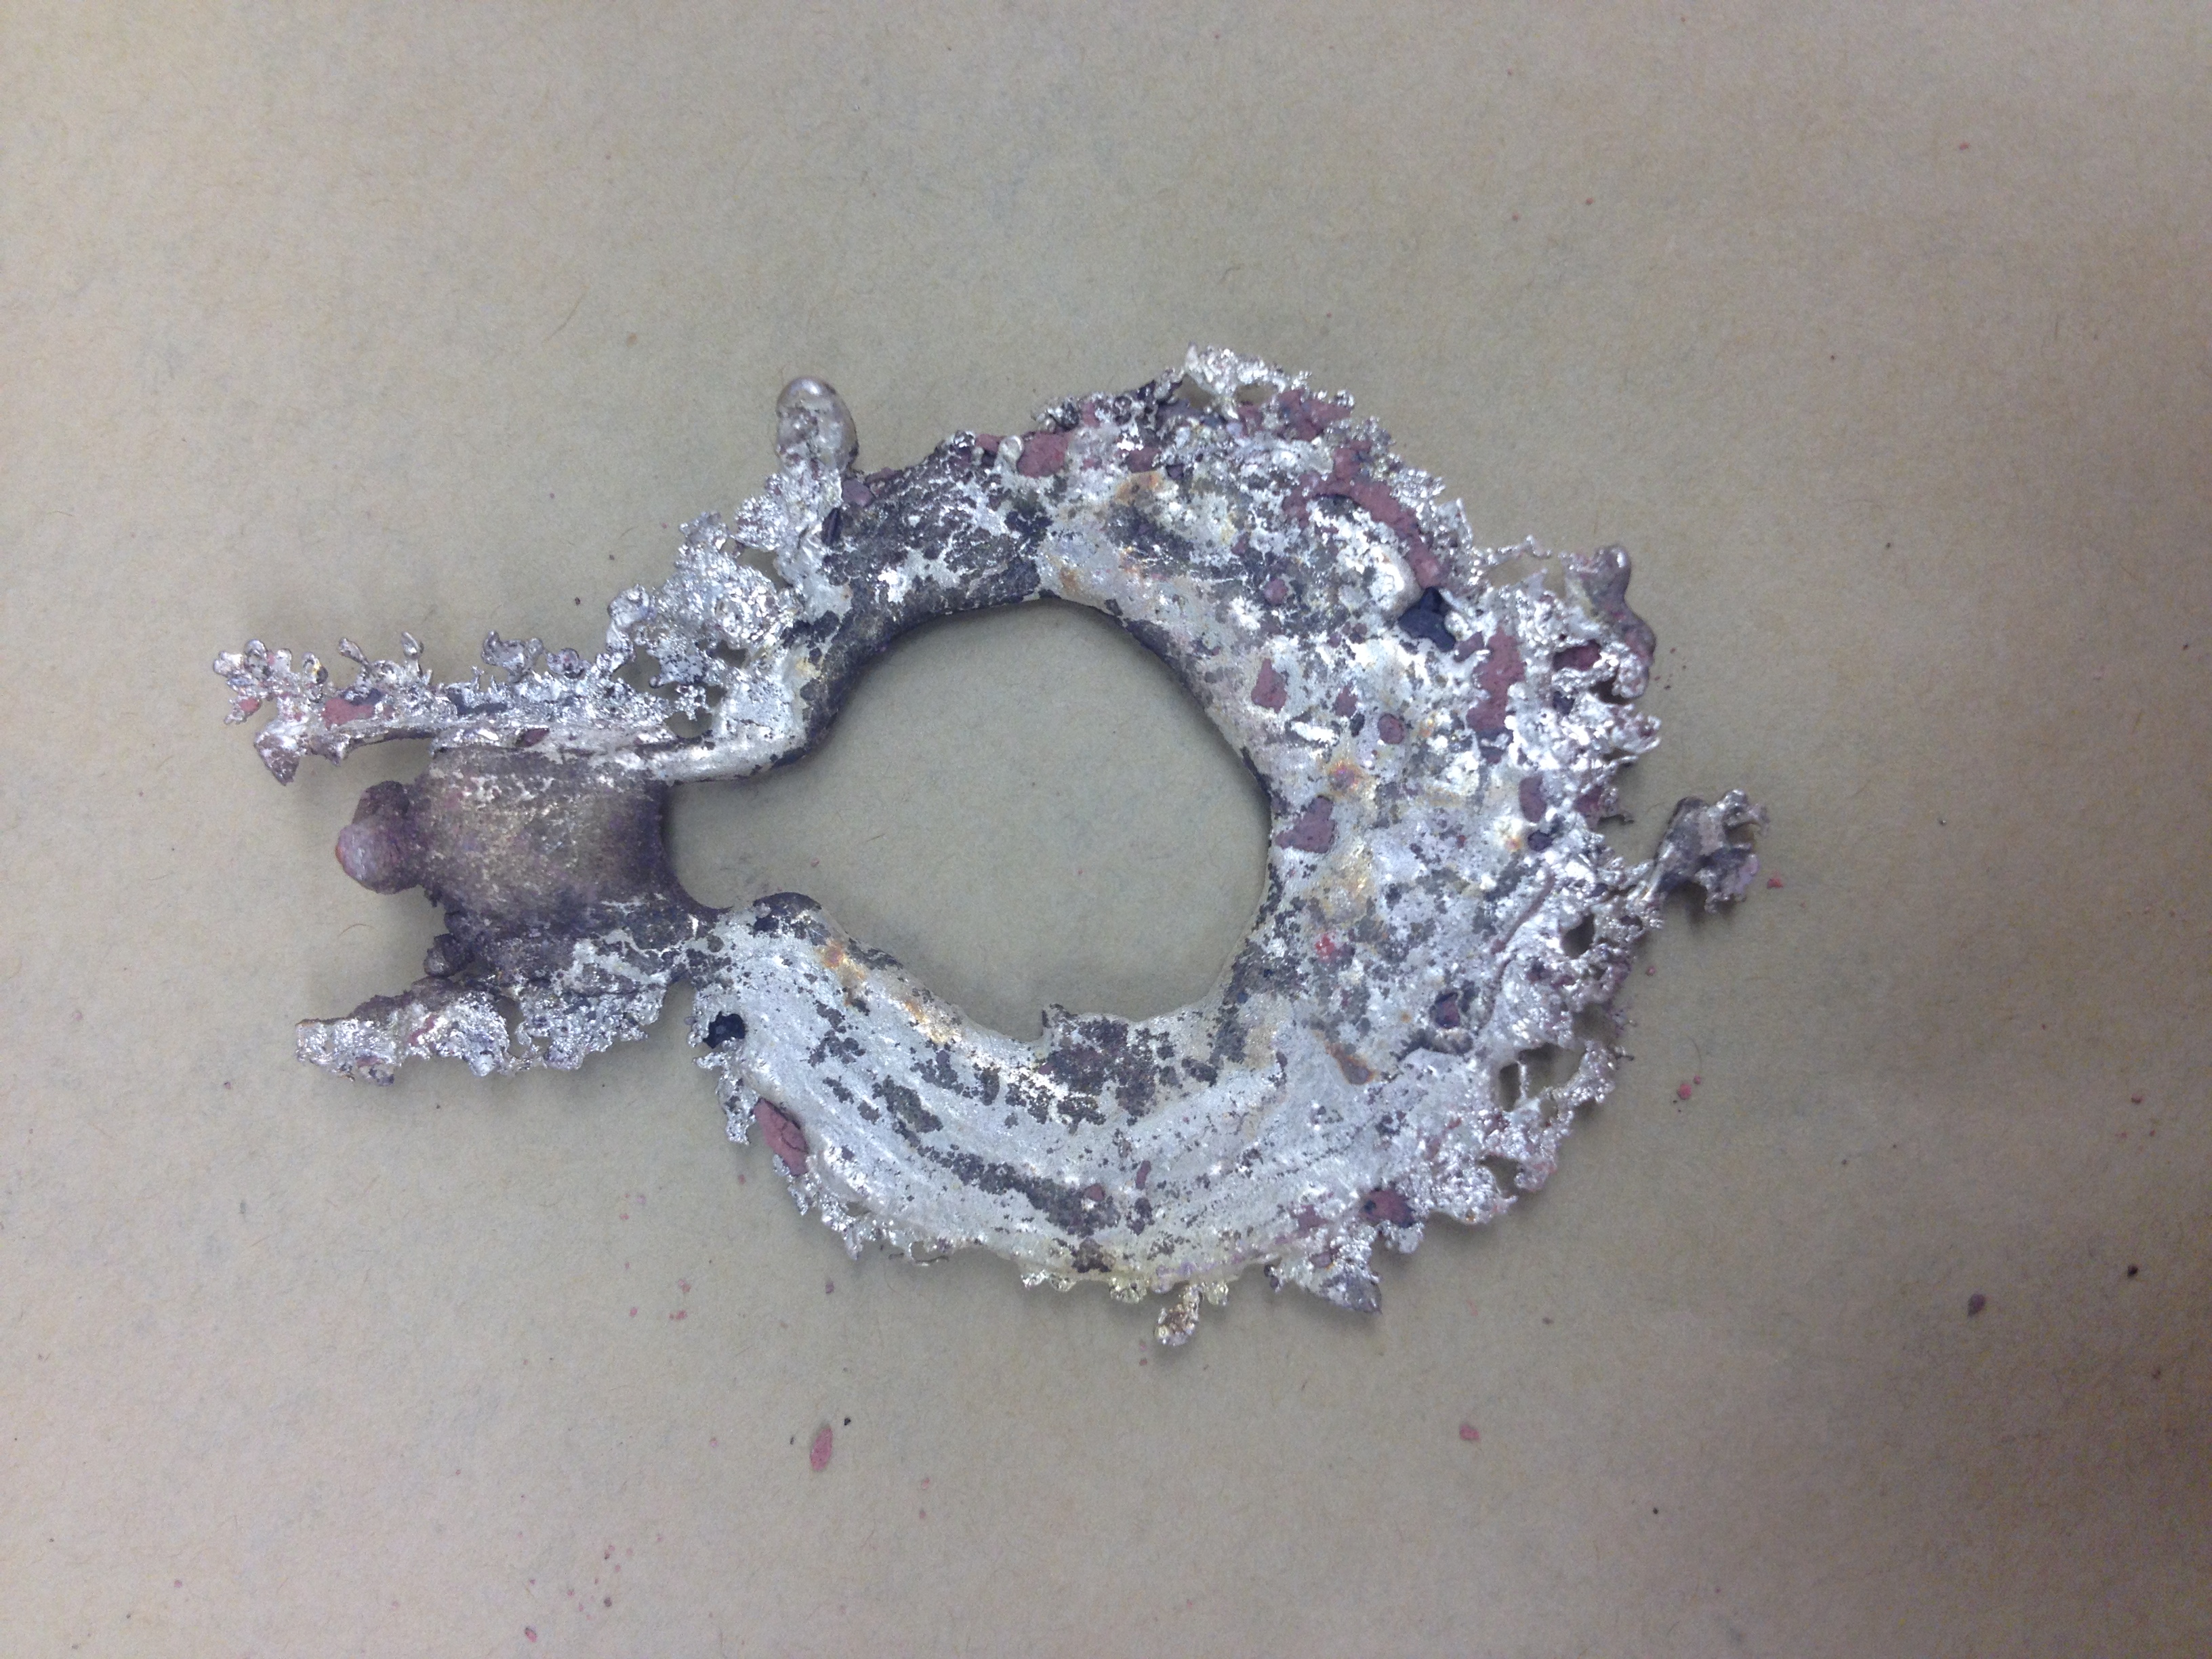
After several of the molds with sand from MS Fr 640 fol.118v with our adjustments turned out to be to moist to be vast in silver, ours was tried because it was a relatively dry sand that we used. It was, however, still too moist for the silver. The liquid silver was poured into one of the two sprews only - as it turned out this was the one for the smaller medal (Jonah's). After we let it cool down for a few minutes, the mold was opened to inspect the result/damage. Jonah's medal was now hollow in the middle, from where - so it seems - the liquid silver was pushed outwards with some force, leaving a thin, tentacled, somewhat symmetrical object with a whole in the middle.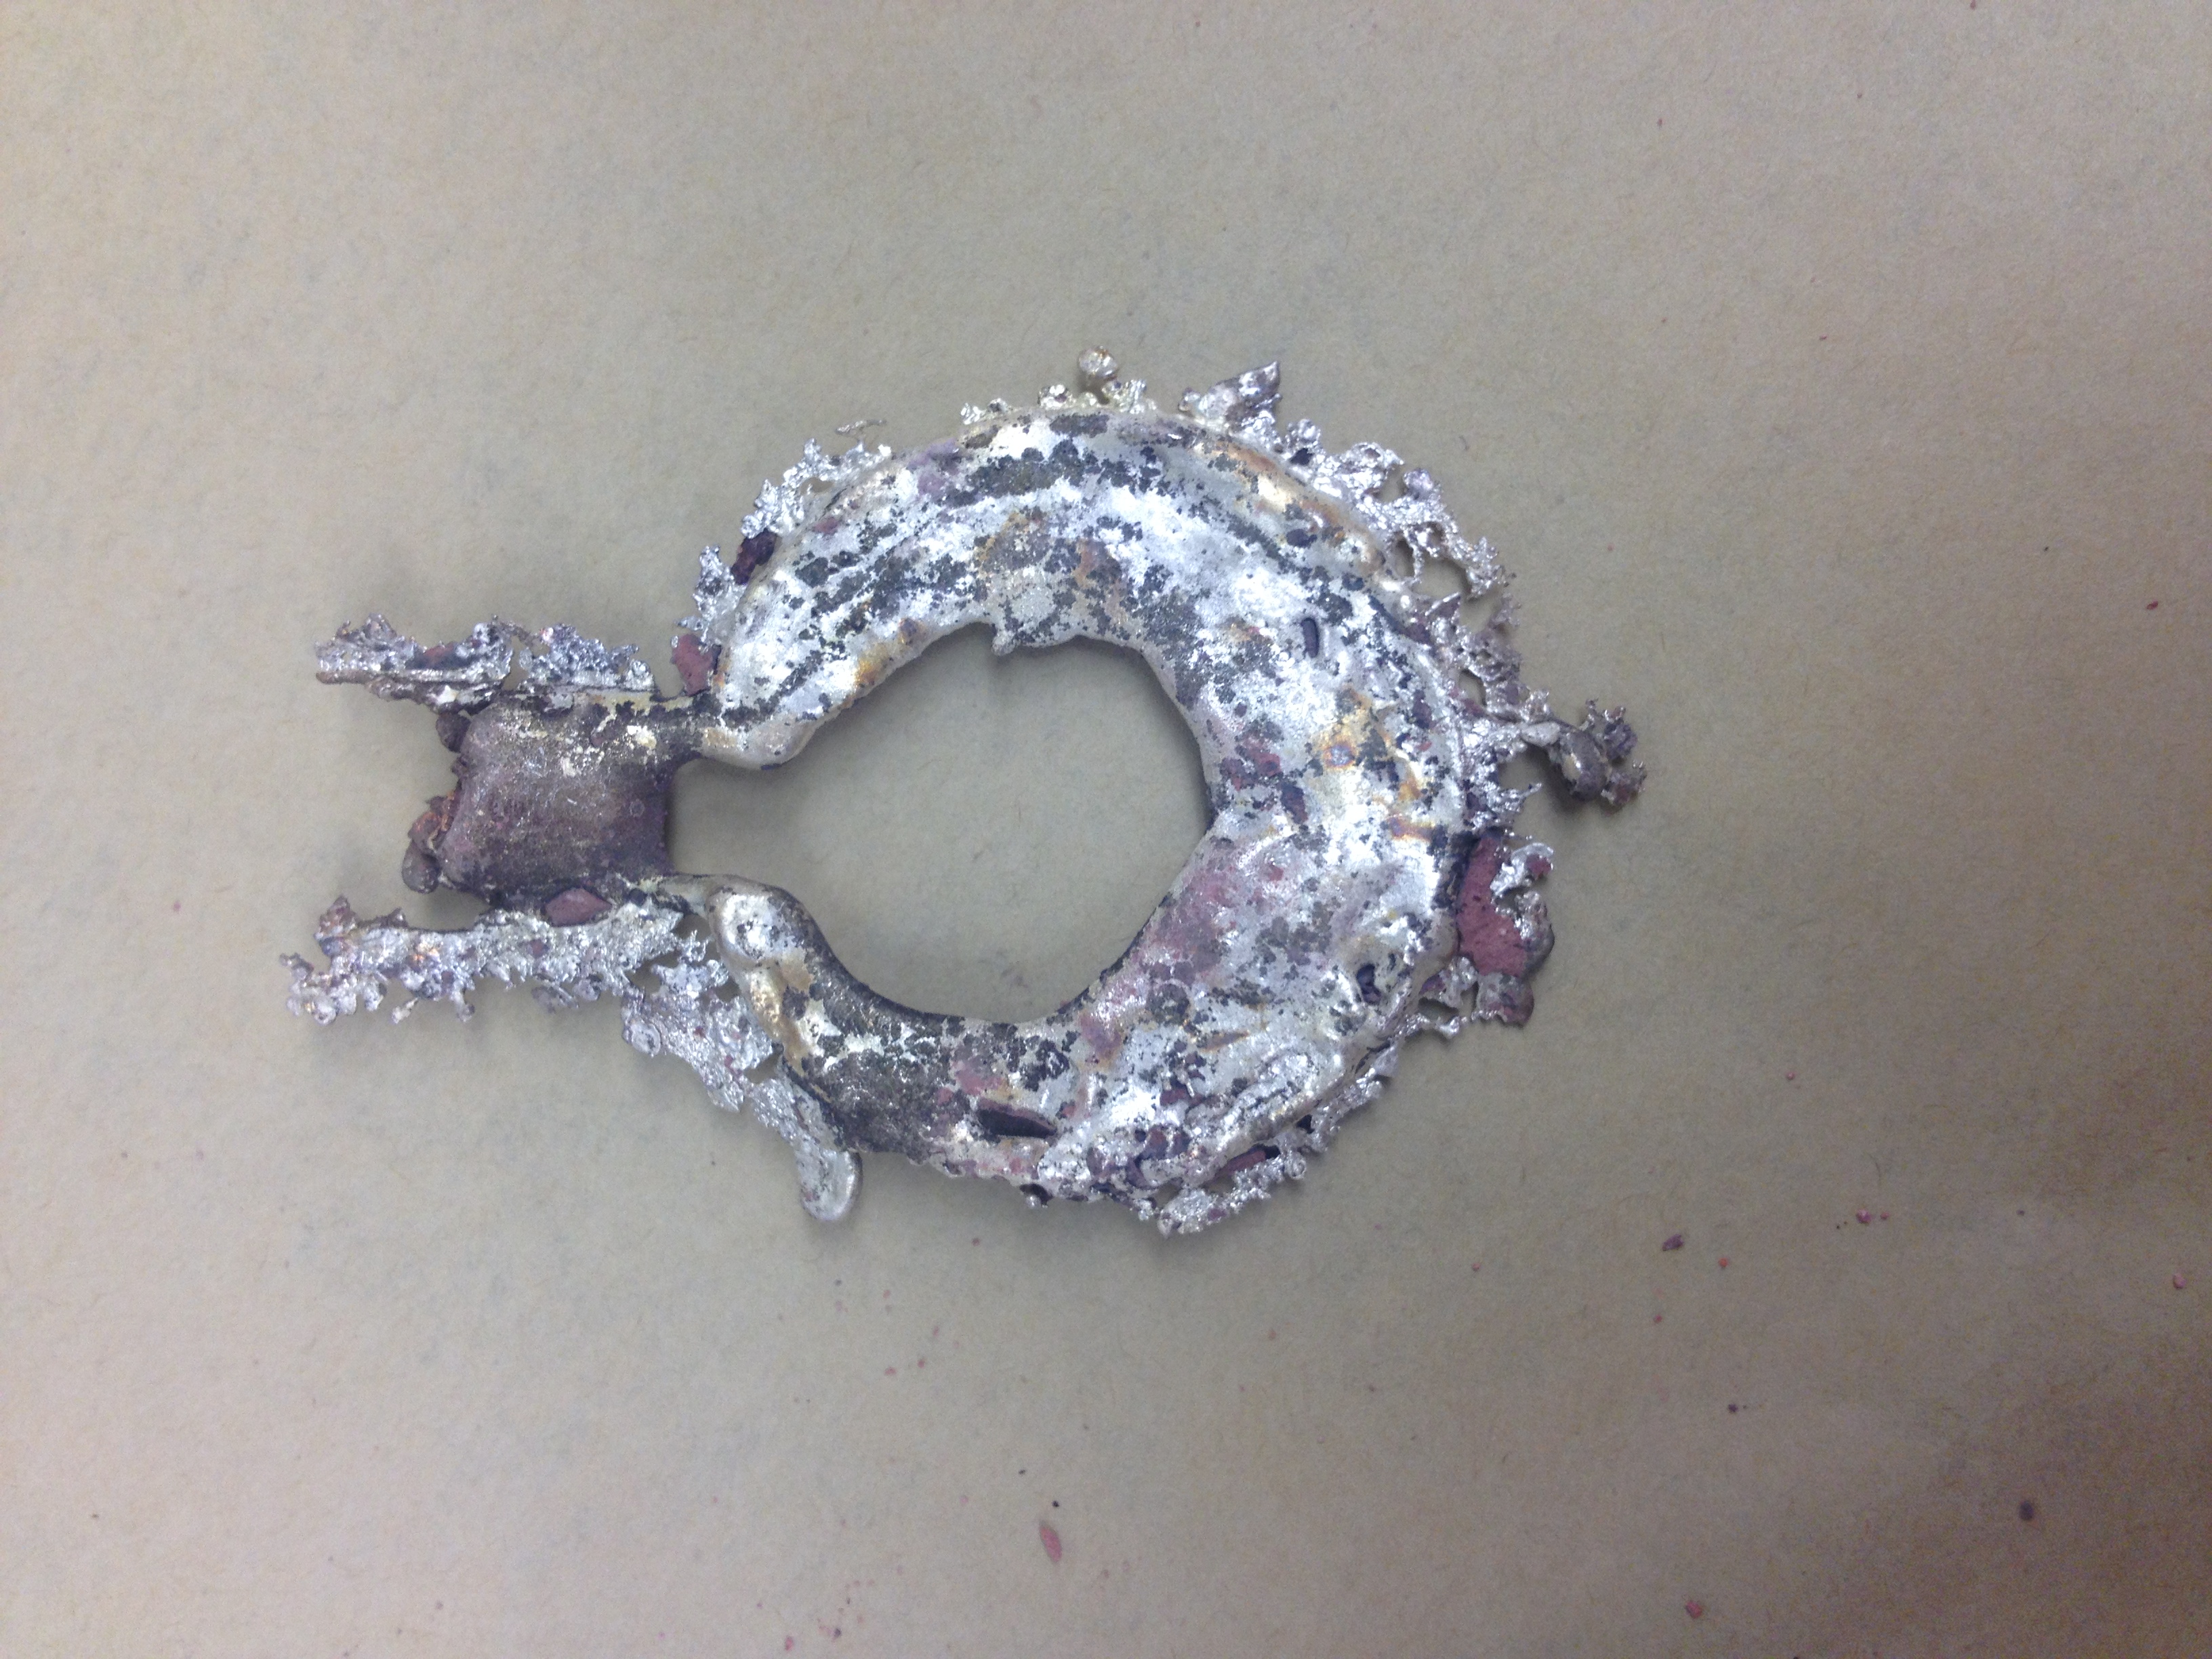
There seemed to be some damage to the mold, but we decided to try casting it again using the pewter.
Questions:
- effect/damage of silver pour to all parts of the mold?- level of detail not as high as expected -- result of the use of pewter? Would the heavier lead (for which the recipe seems originally intended), with more weight pressing the metal down into the mold, have yielded better results?
- effect of moisture in mold on pewter-casting?
- what would a mold that was more warm, hot even, have done differently?
Detailed Notes:
We began by heating our molds for about ten minutes, not especially hot, in Ubaldo Vitali's oven/kiln, in order to dry out the molds and get rid of any remaining moisture in the sand. The recipe said to smoke the molds with a candle; we tried to do this with a tallow candle, but Tonny Beentjes couldn't hold the flame close enough to the sand to actually smoke the surface, so we switched to a wax candle, which worked better. Smoking the mold apparently is done both to preserve detail on the surface of the sand and to provide a very, very thin carbon coating between the sand and the metal.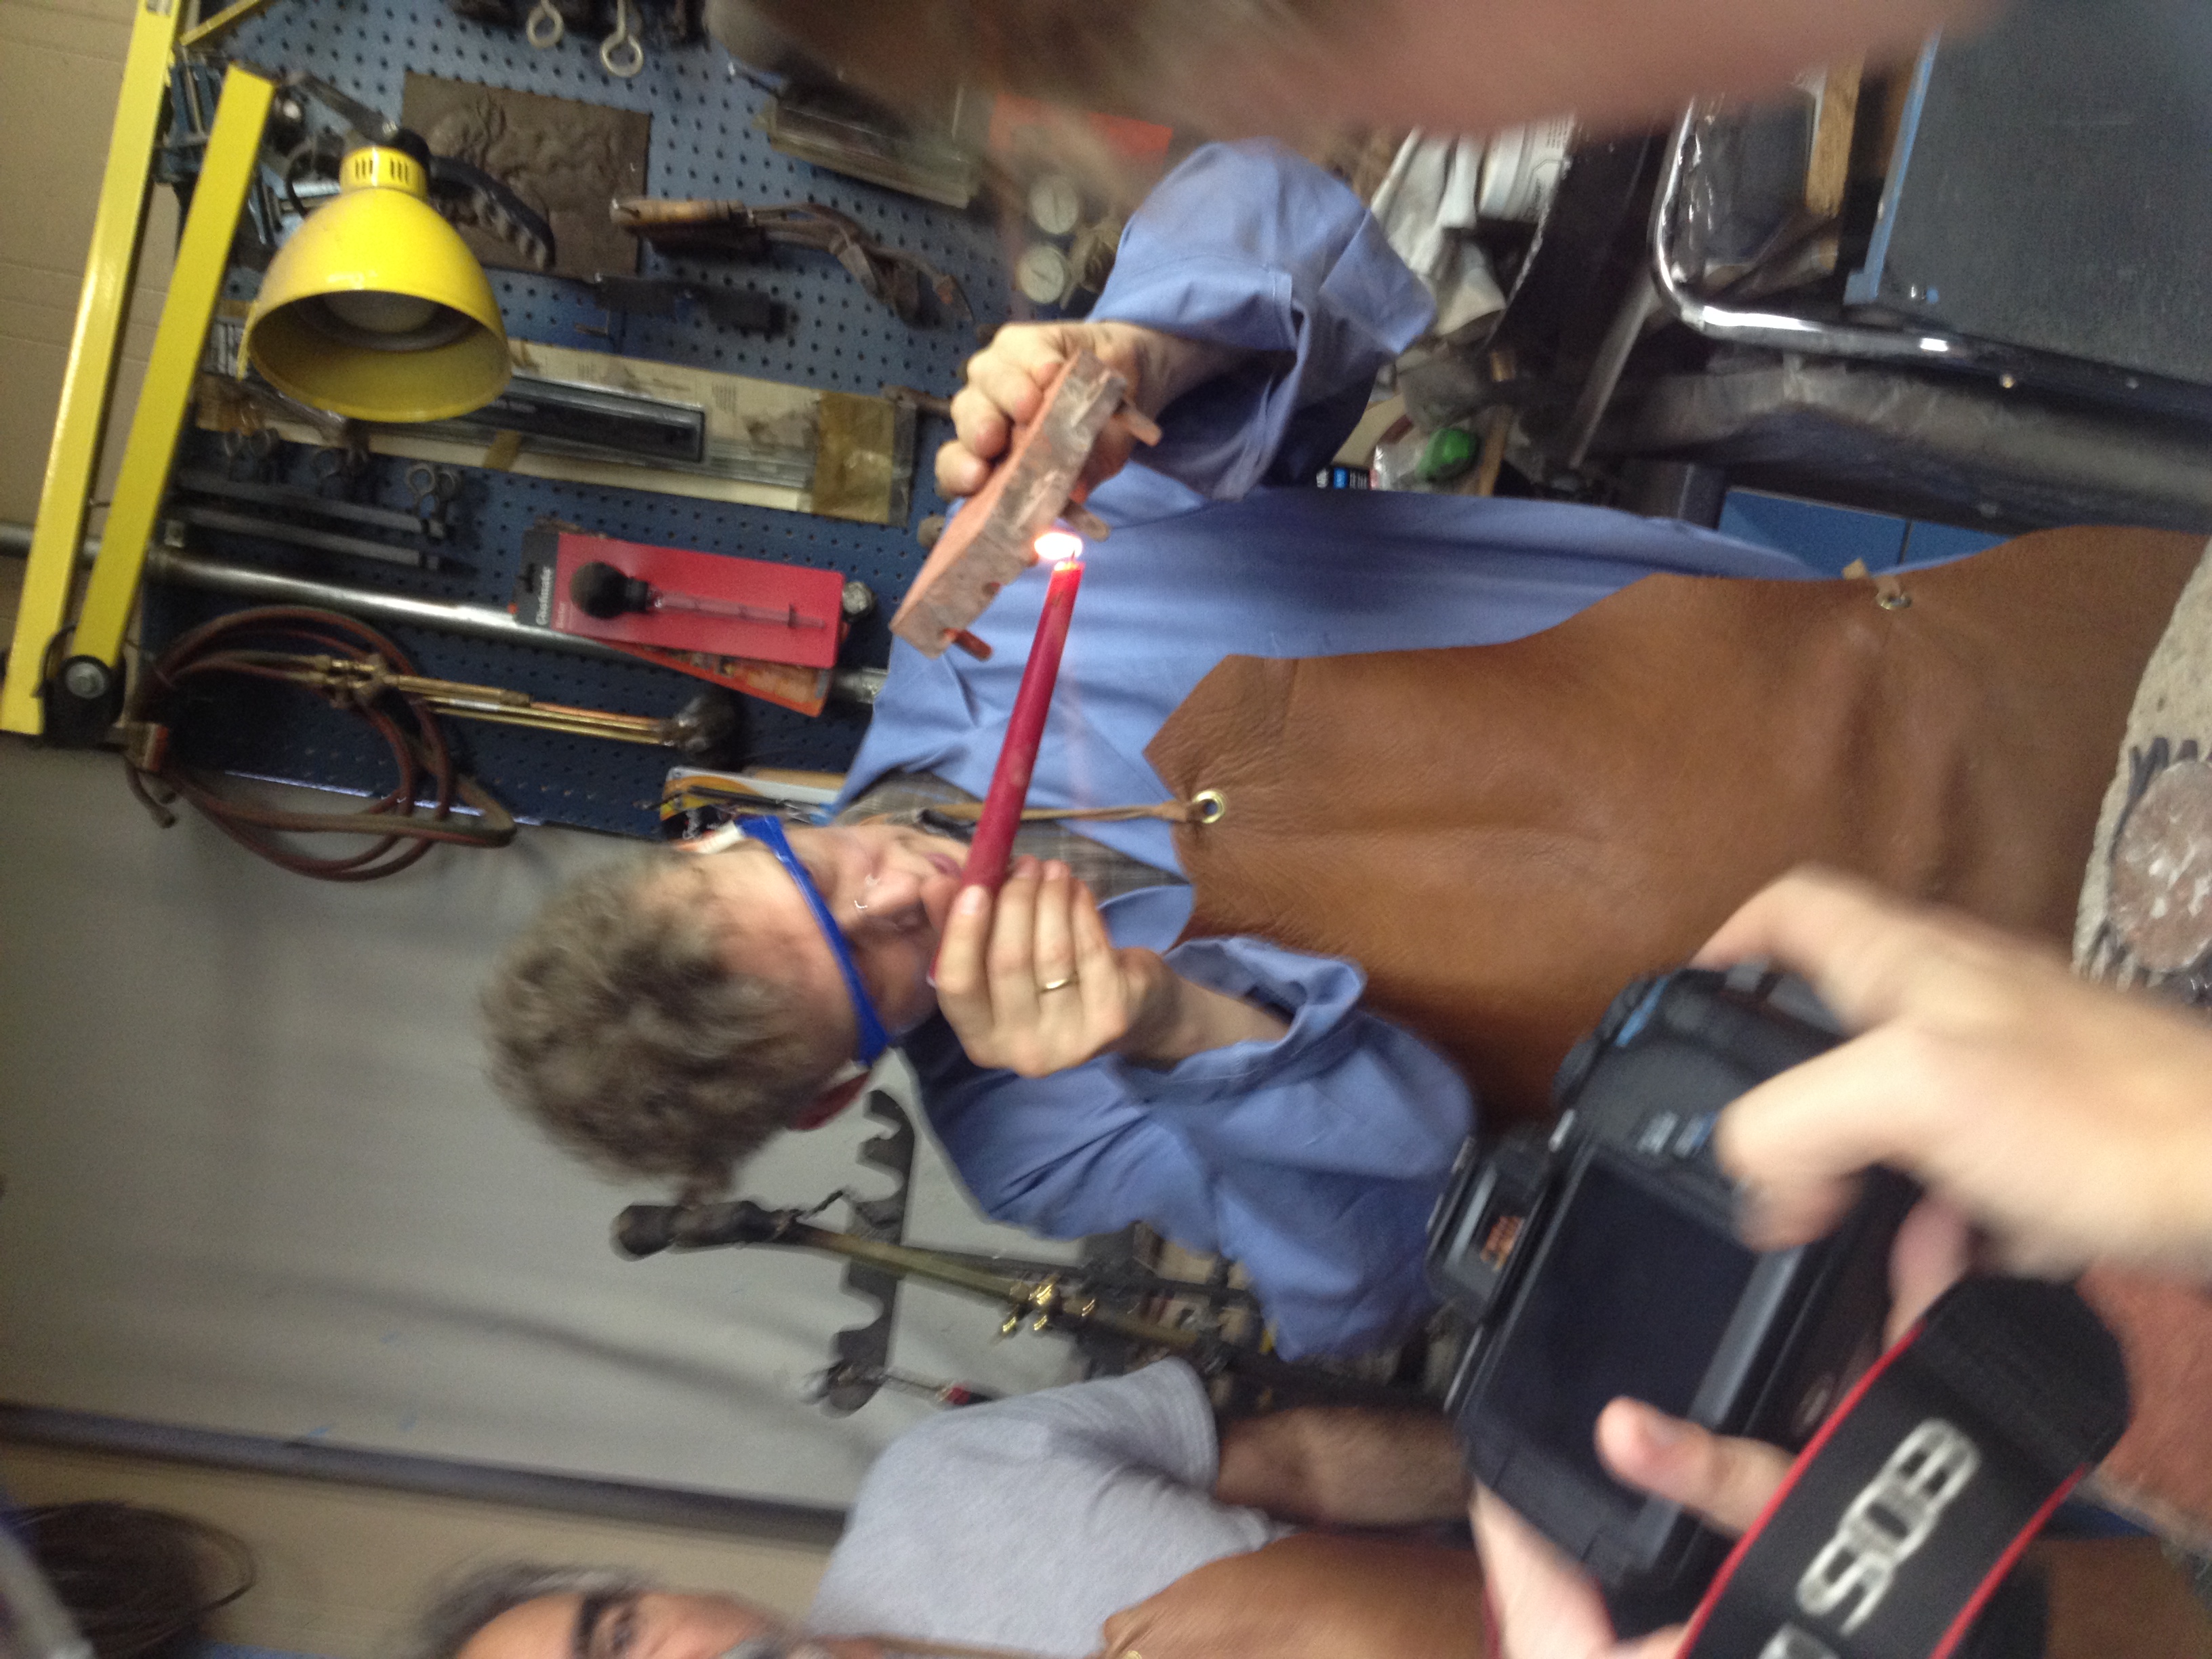
Shortly after switching to a wax candle, Tonny switched once again to an acetylene torch for an even coating of smoke on the molds' surface. When smoking the sand molds, we could see black particles floating in the air of the workshop.
The manuscript also specifies adding rosin to the molten metal in order to clean the metal (more on this below); our metal, at this point, however, was quite clean. The metals (tin with a very small amount of silver mixed in) were heated in a pot on a trivet above a coal flame inside the furnace. The flame was made of hardwood charcoal, which was very porous and heated slowly.
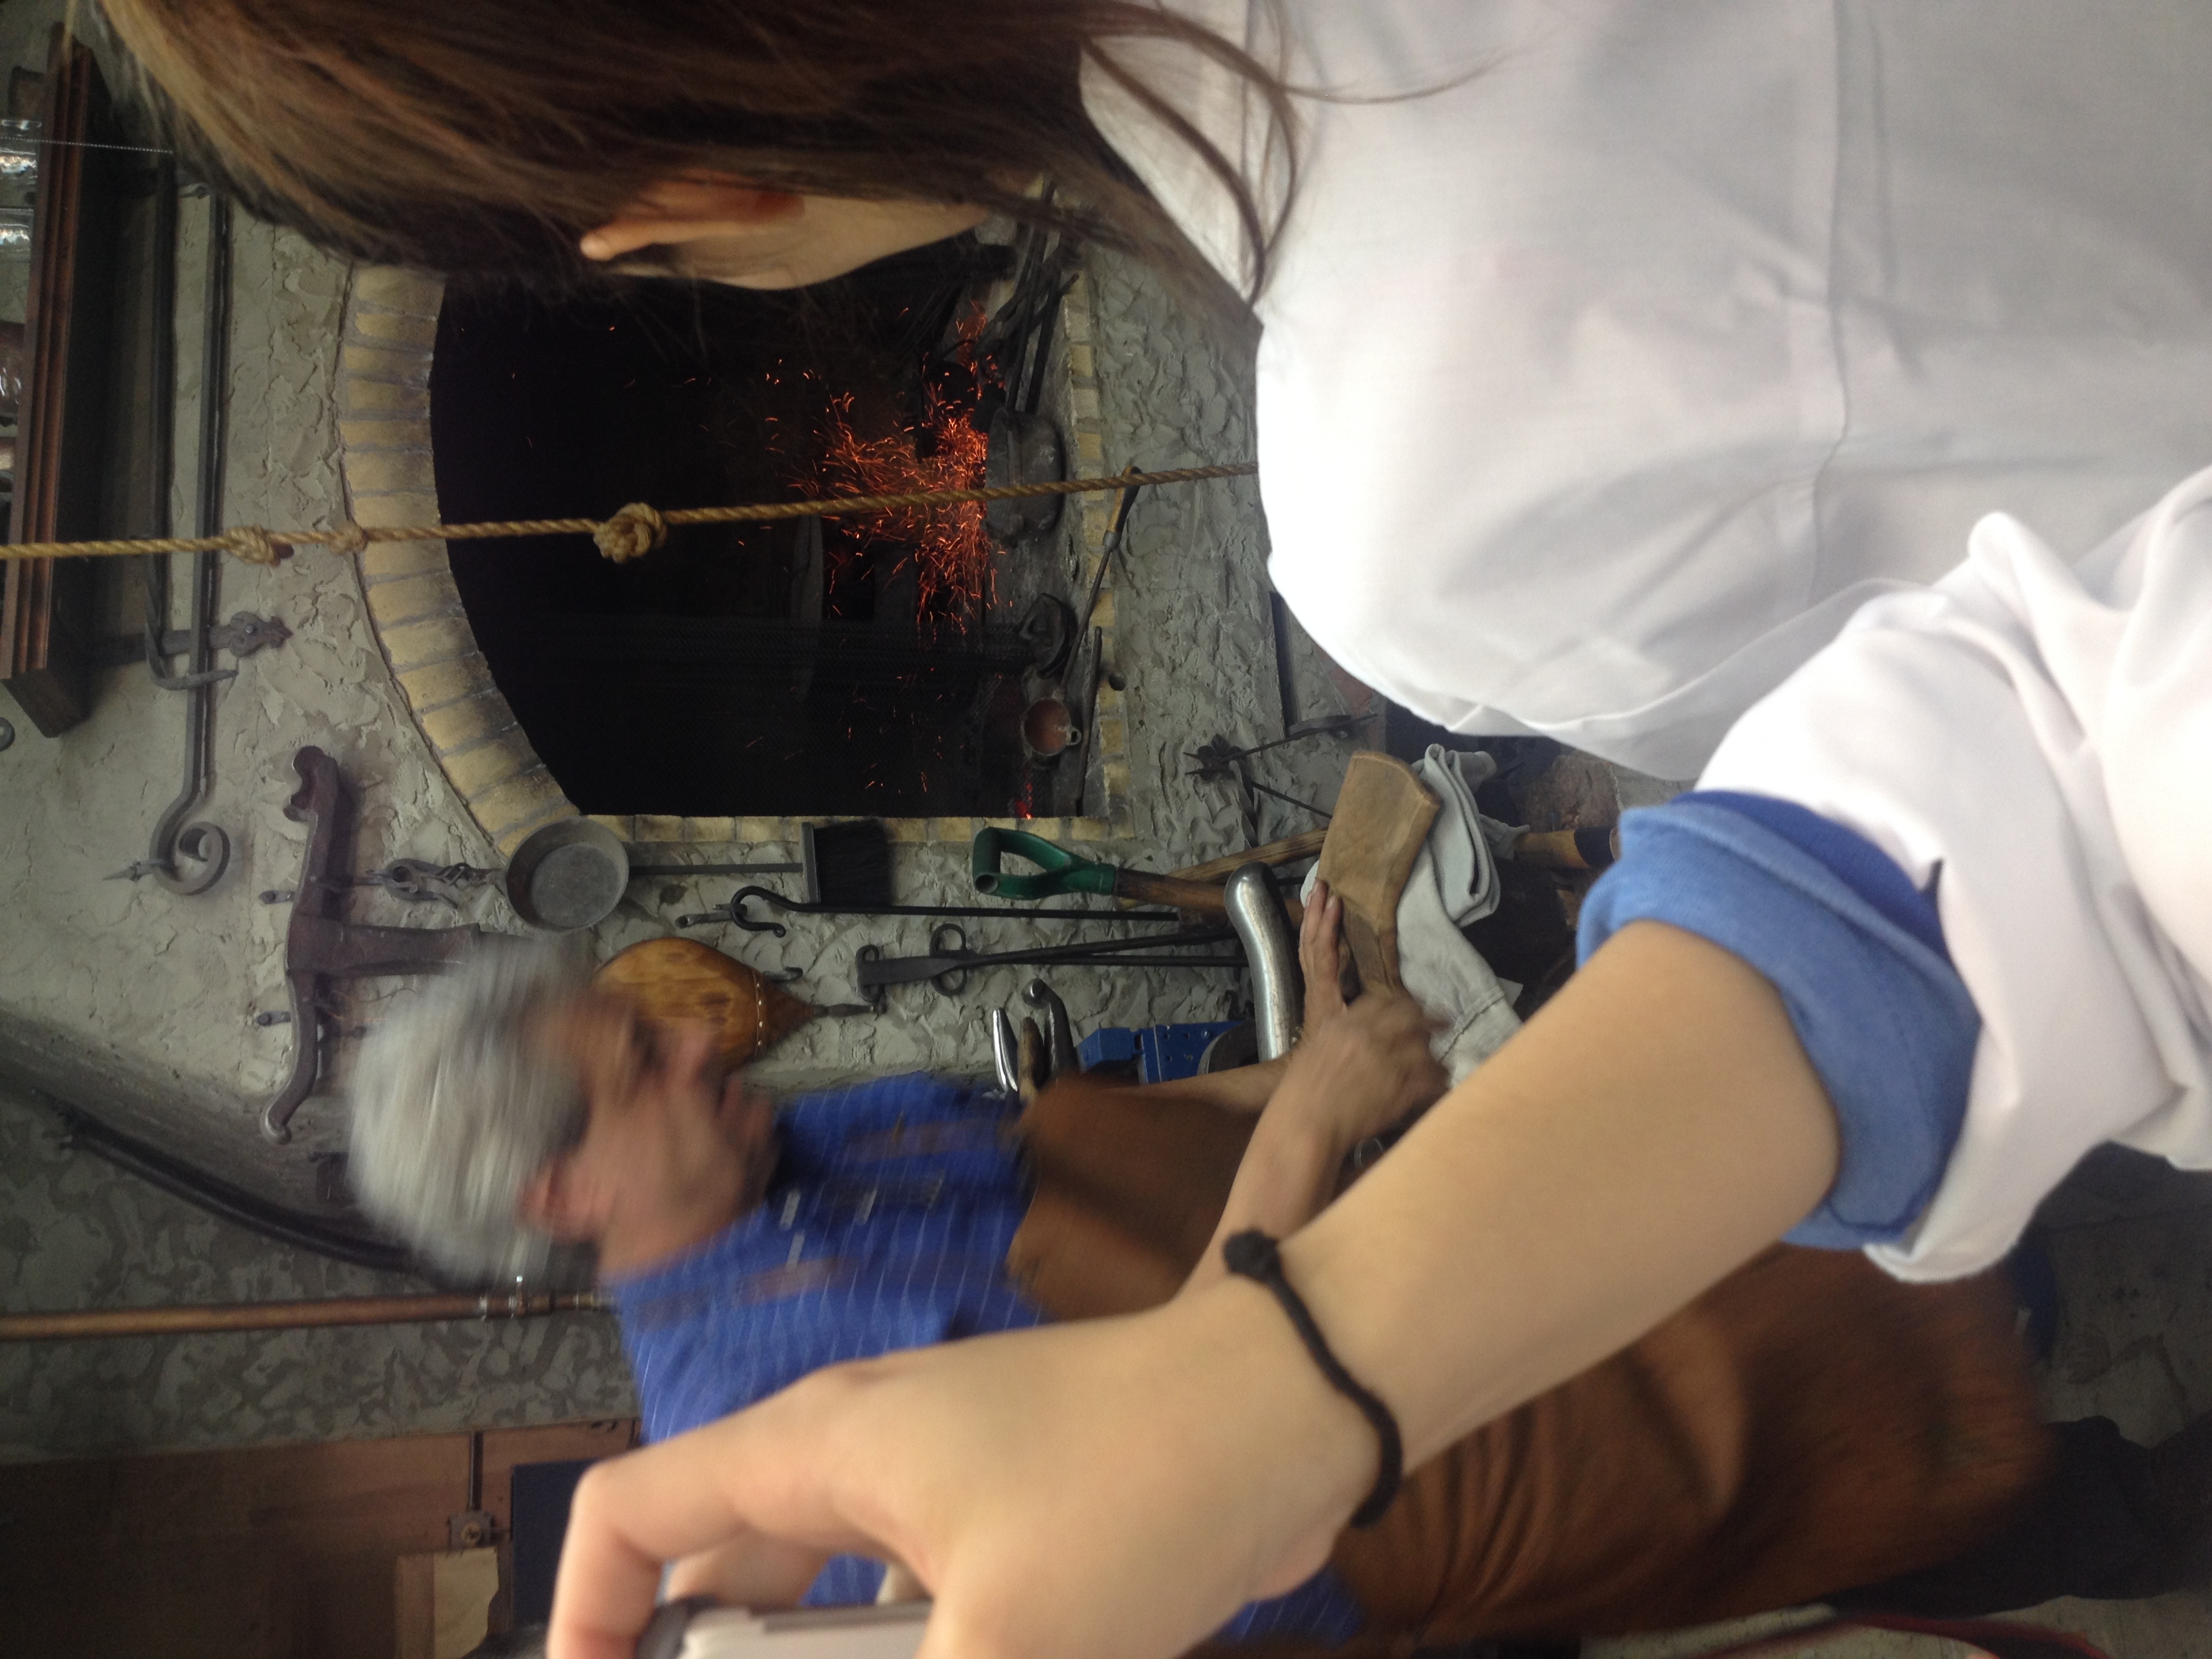
More tin was gradually added; original solid metals were in triangular stick/dowel form, and added tin was in the form of pellets, about 3/4" in diameter and 1 1/2" in length.
Tonny heated up the ladle that he would use to pour the metals into the molds, in order that the molten metal wouldn't solidify upon contact with the much cooler temperature of the ladle. He then poured the metal into the first set of molds, and poured in some extra into the gate for added pressure, so that the metal would make its way all the way into the mold and pick up as much detail as possible.
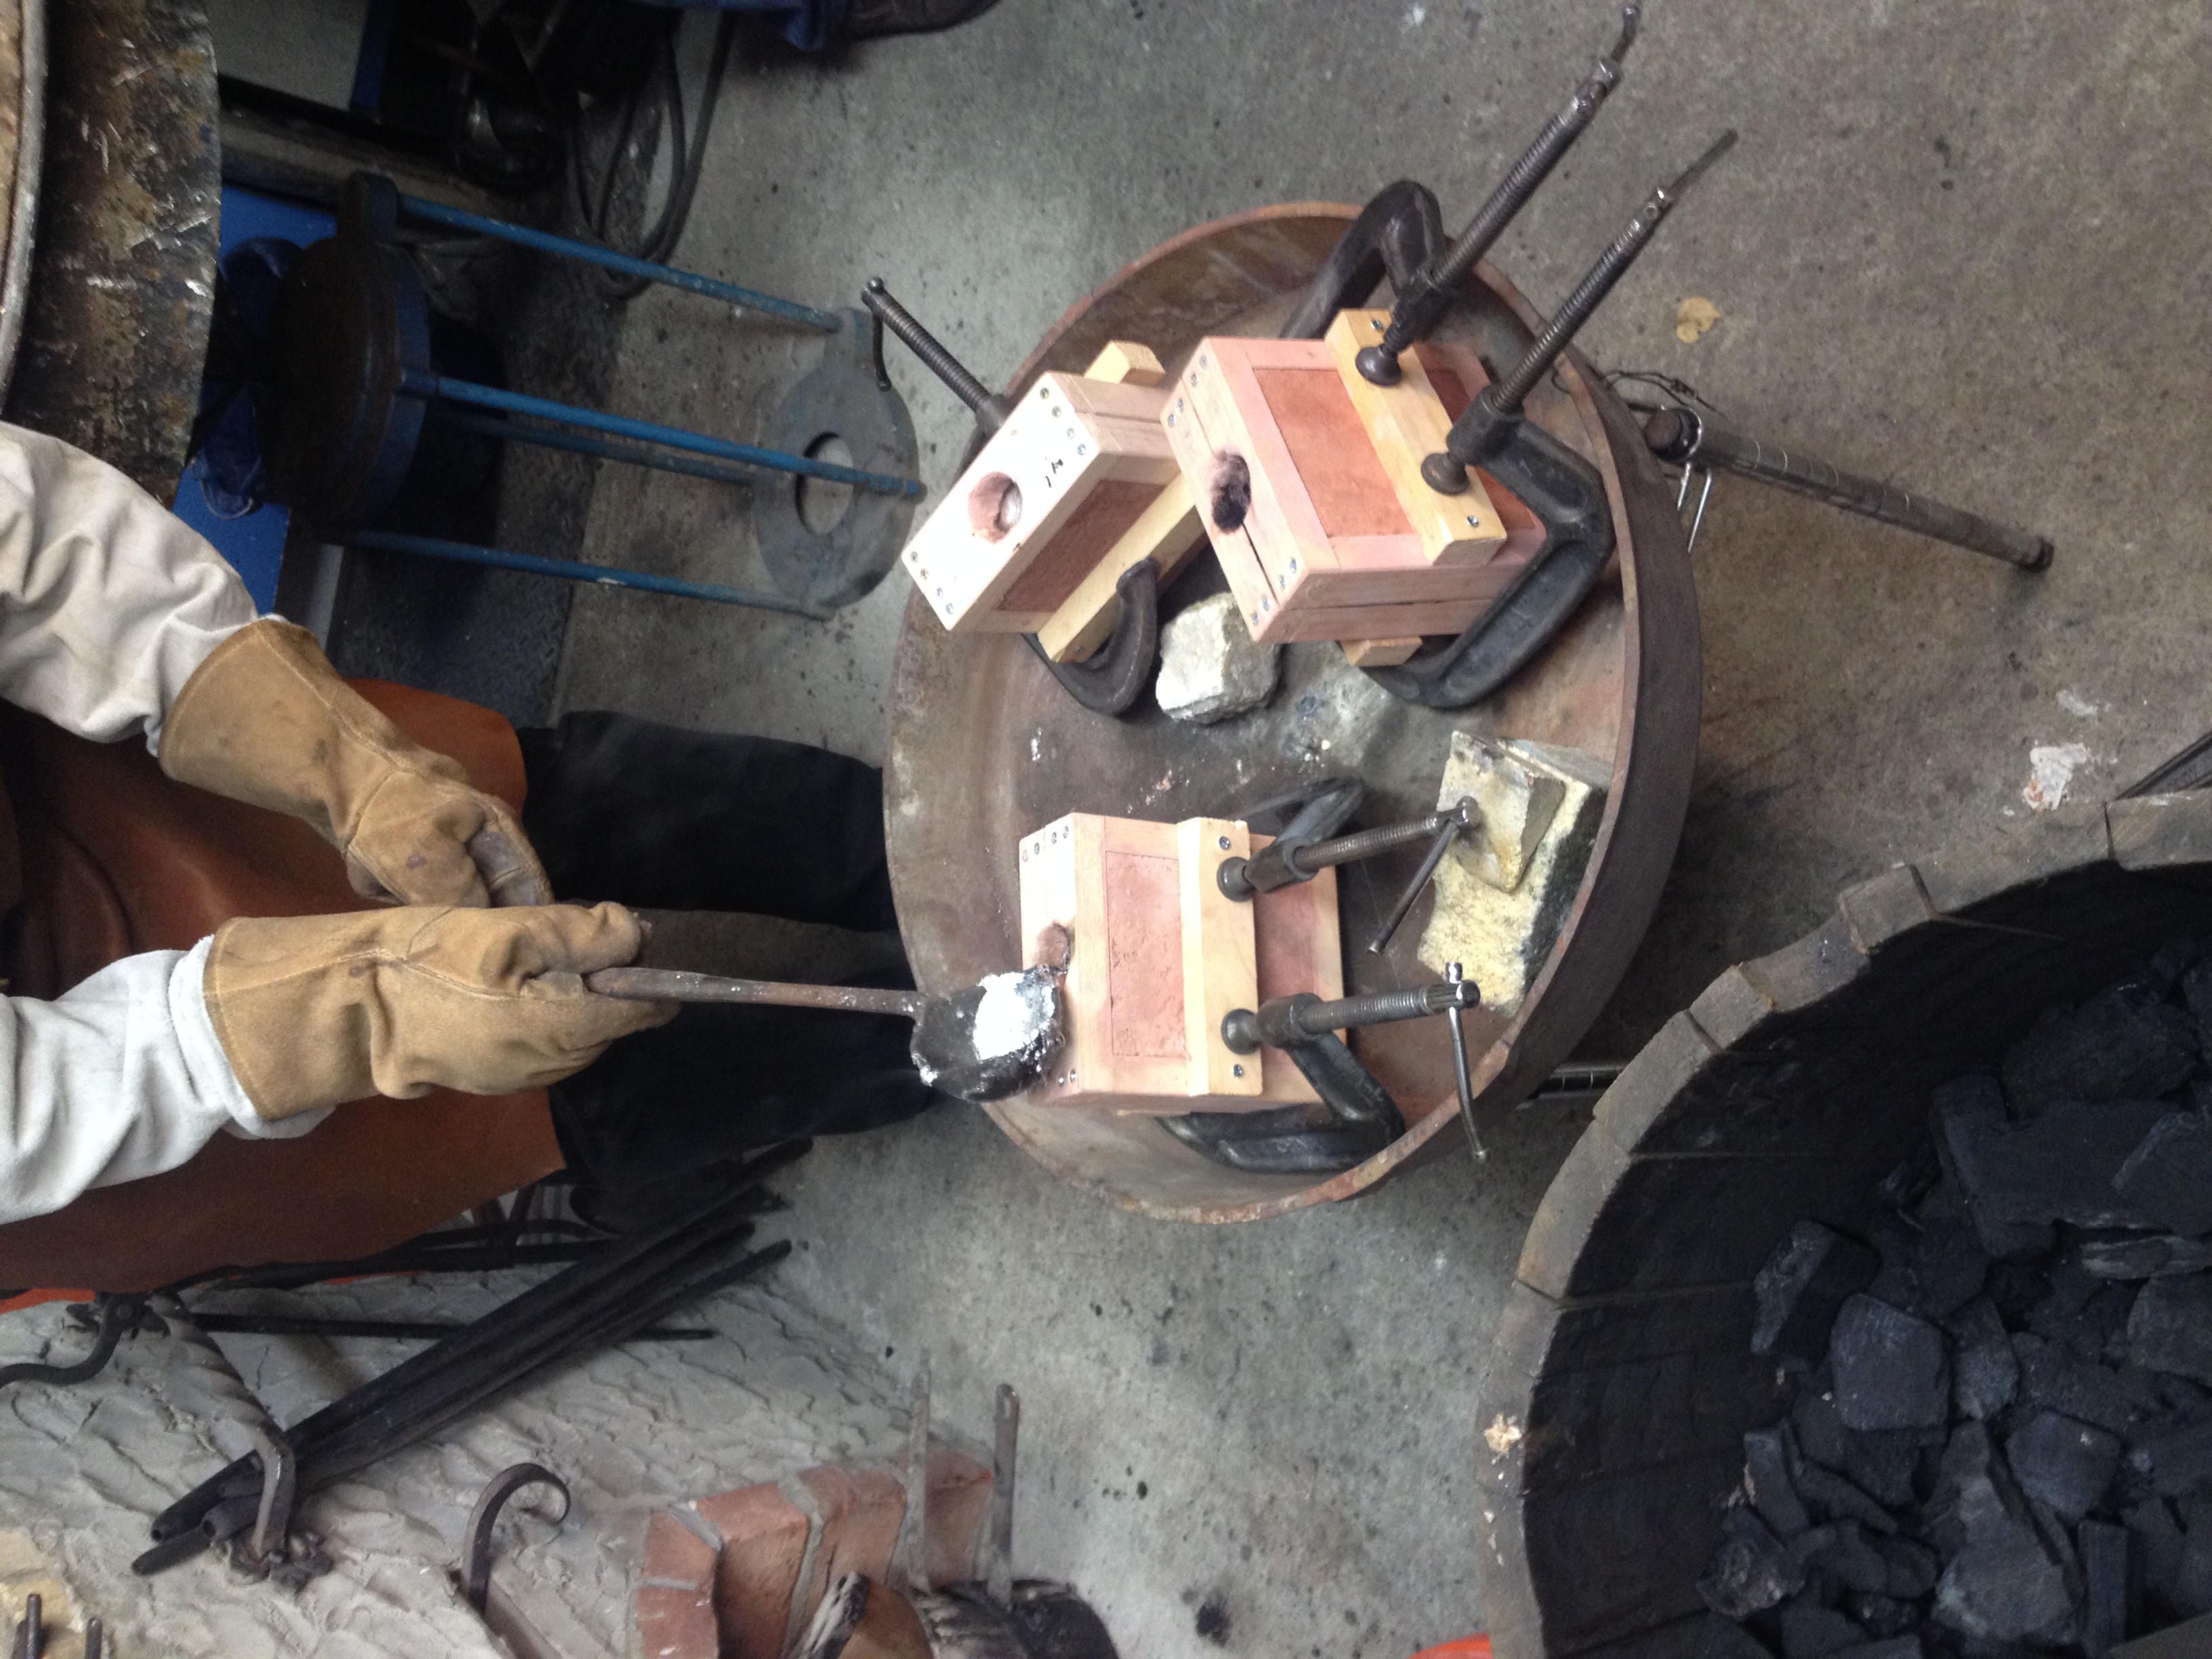
Manuscript recommends tapping on mold, but that might not have had much of an effect, due to the weight and density of the tin. The metal cooled very quickly.
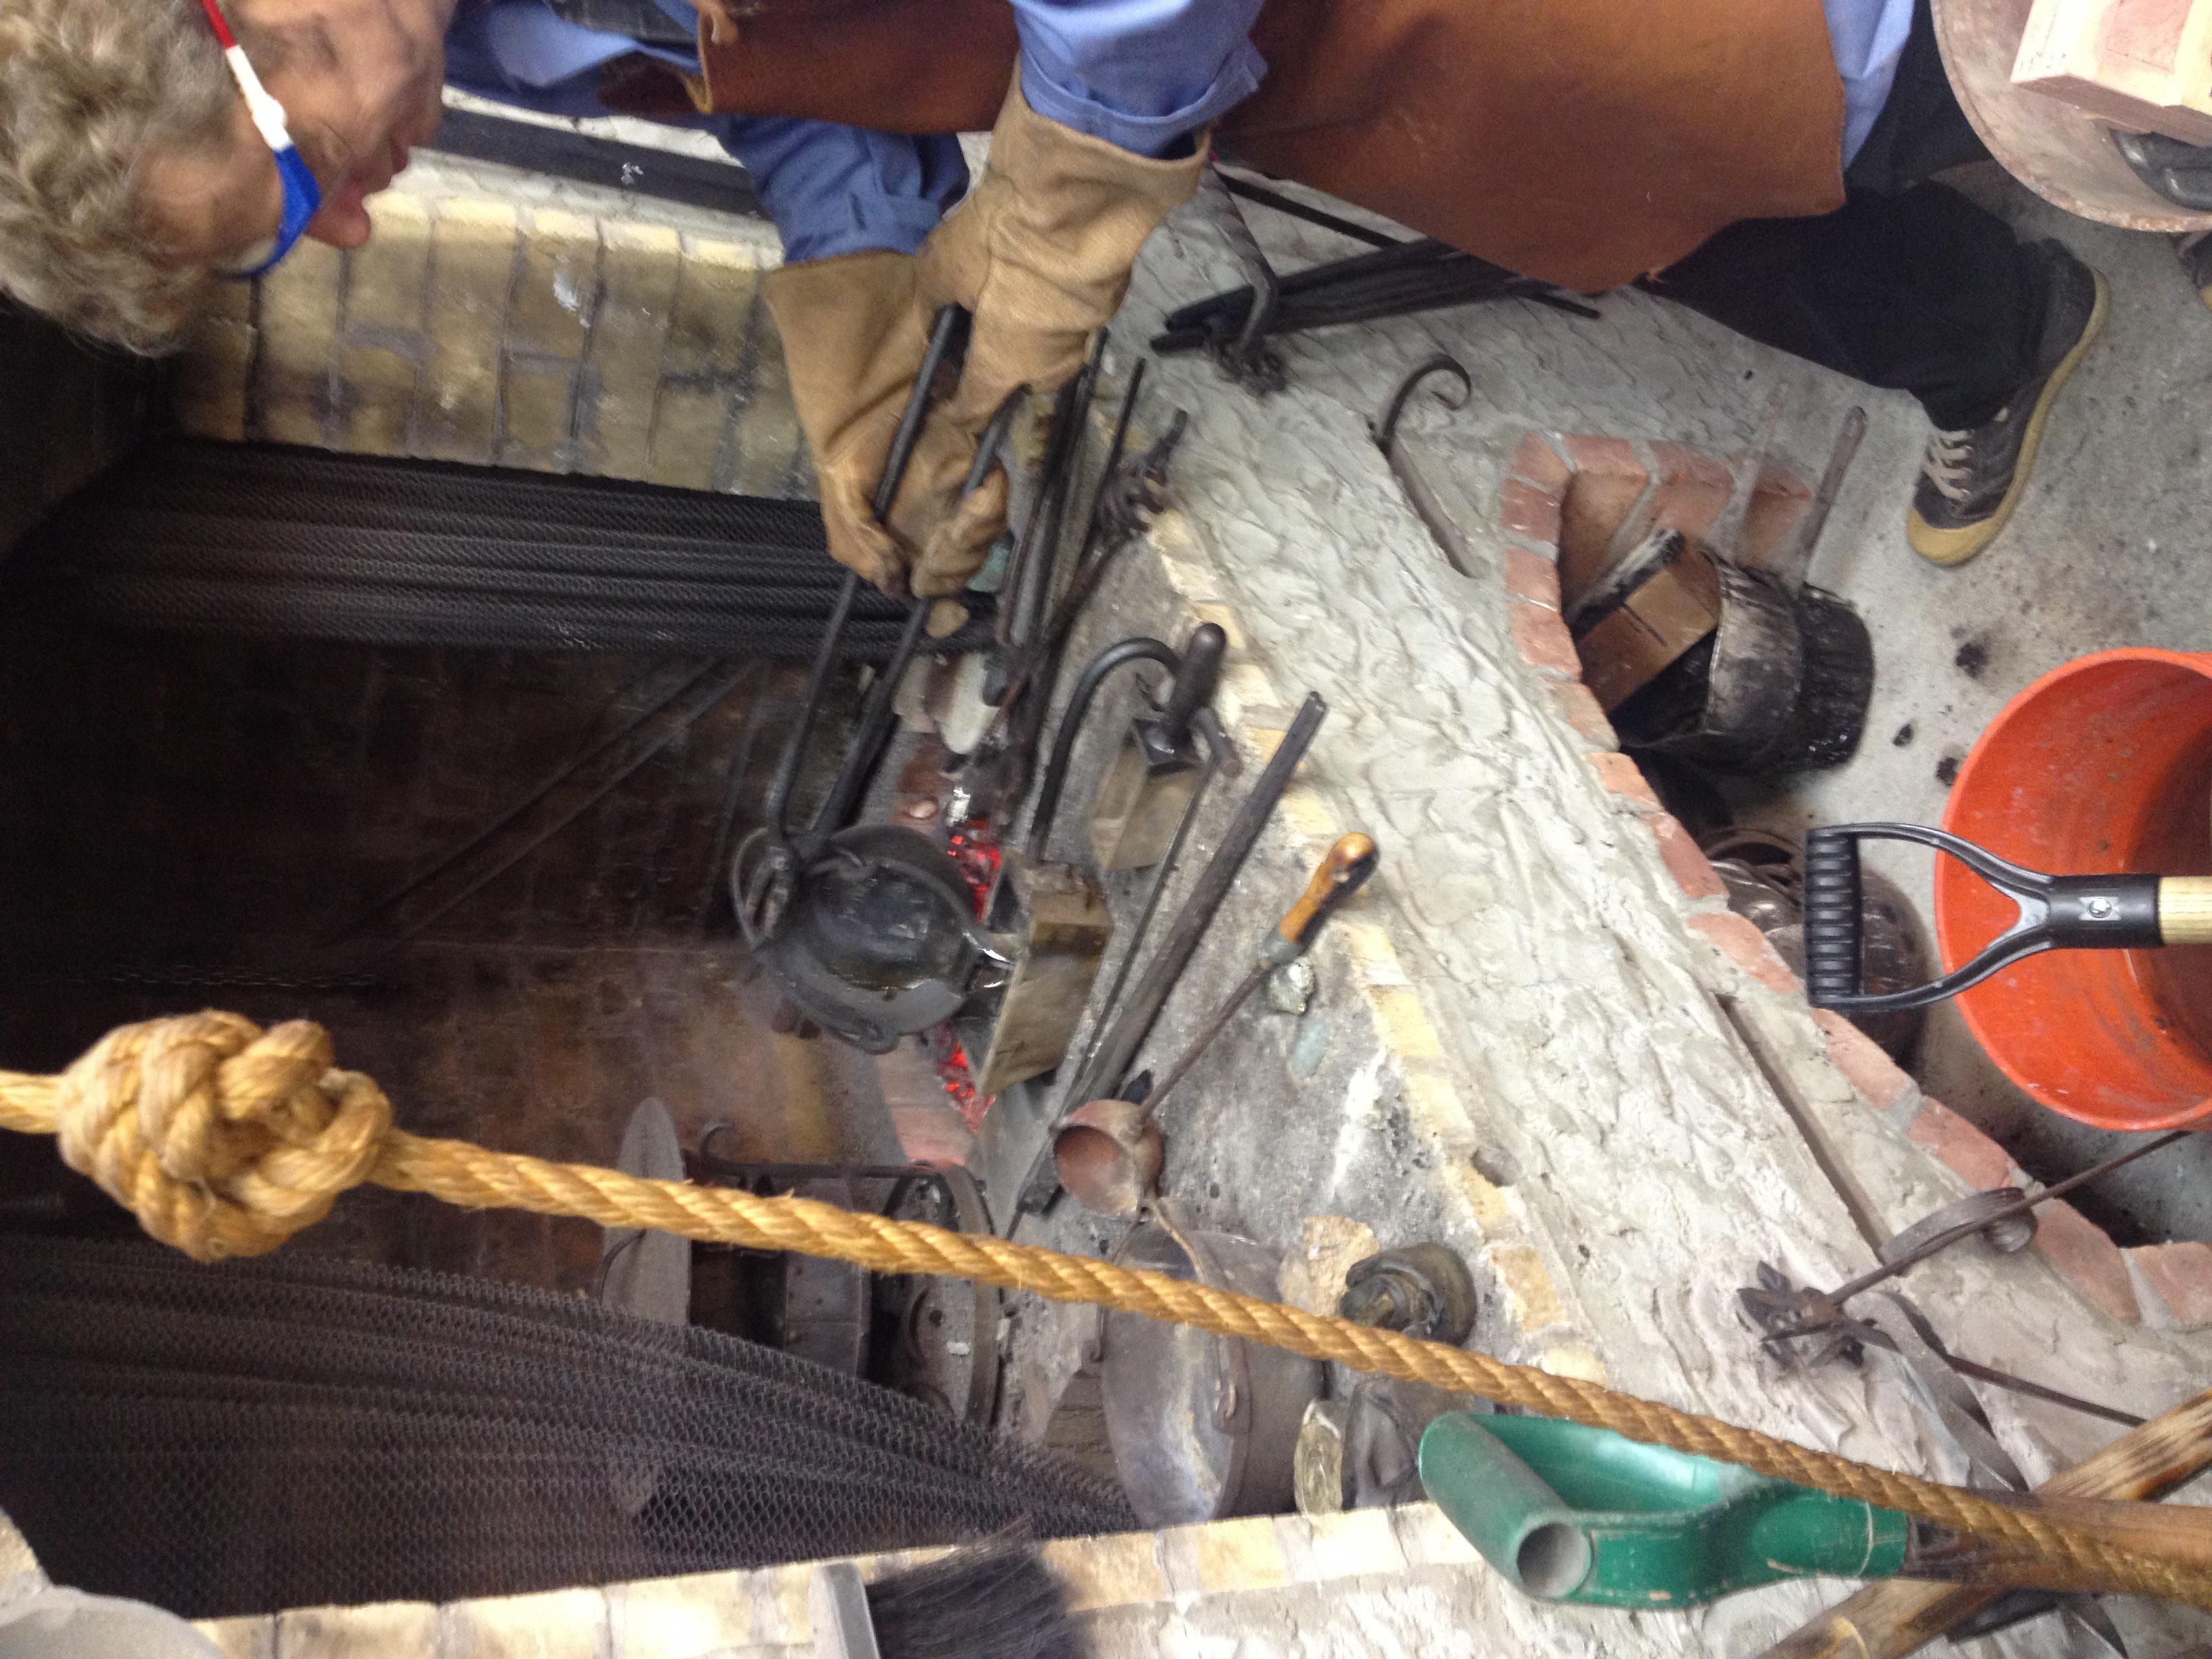
The extra molten tin was poured into ingot molds that Ubaldo had in the shop. The ingot molds are made of iron, and Ubaldo said that the tin doesn't bind to the iron, and releases easily; this is in contrast with silver, for which ingot molds are coated with linseed oil.
Our molds, which we hadn't cast into yet, looked like they had come out very nicely and had picked up almost all of the detail of the patterns. We conjectured that this was because the patterns had been pressed into the sand (see field notes for 10/14), rather than most others, which had packed sand around patterns.
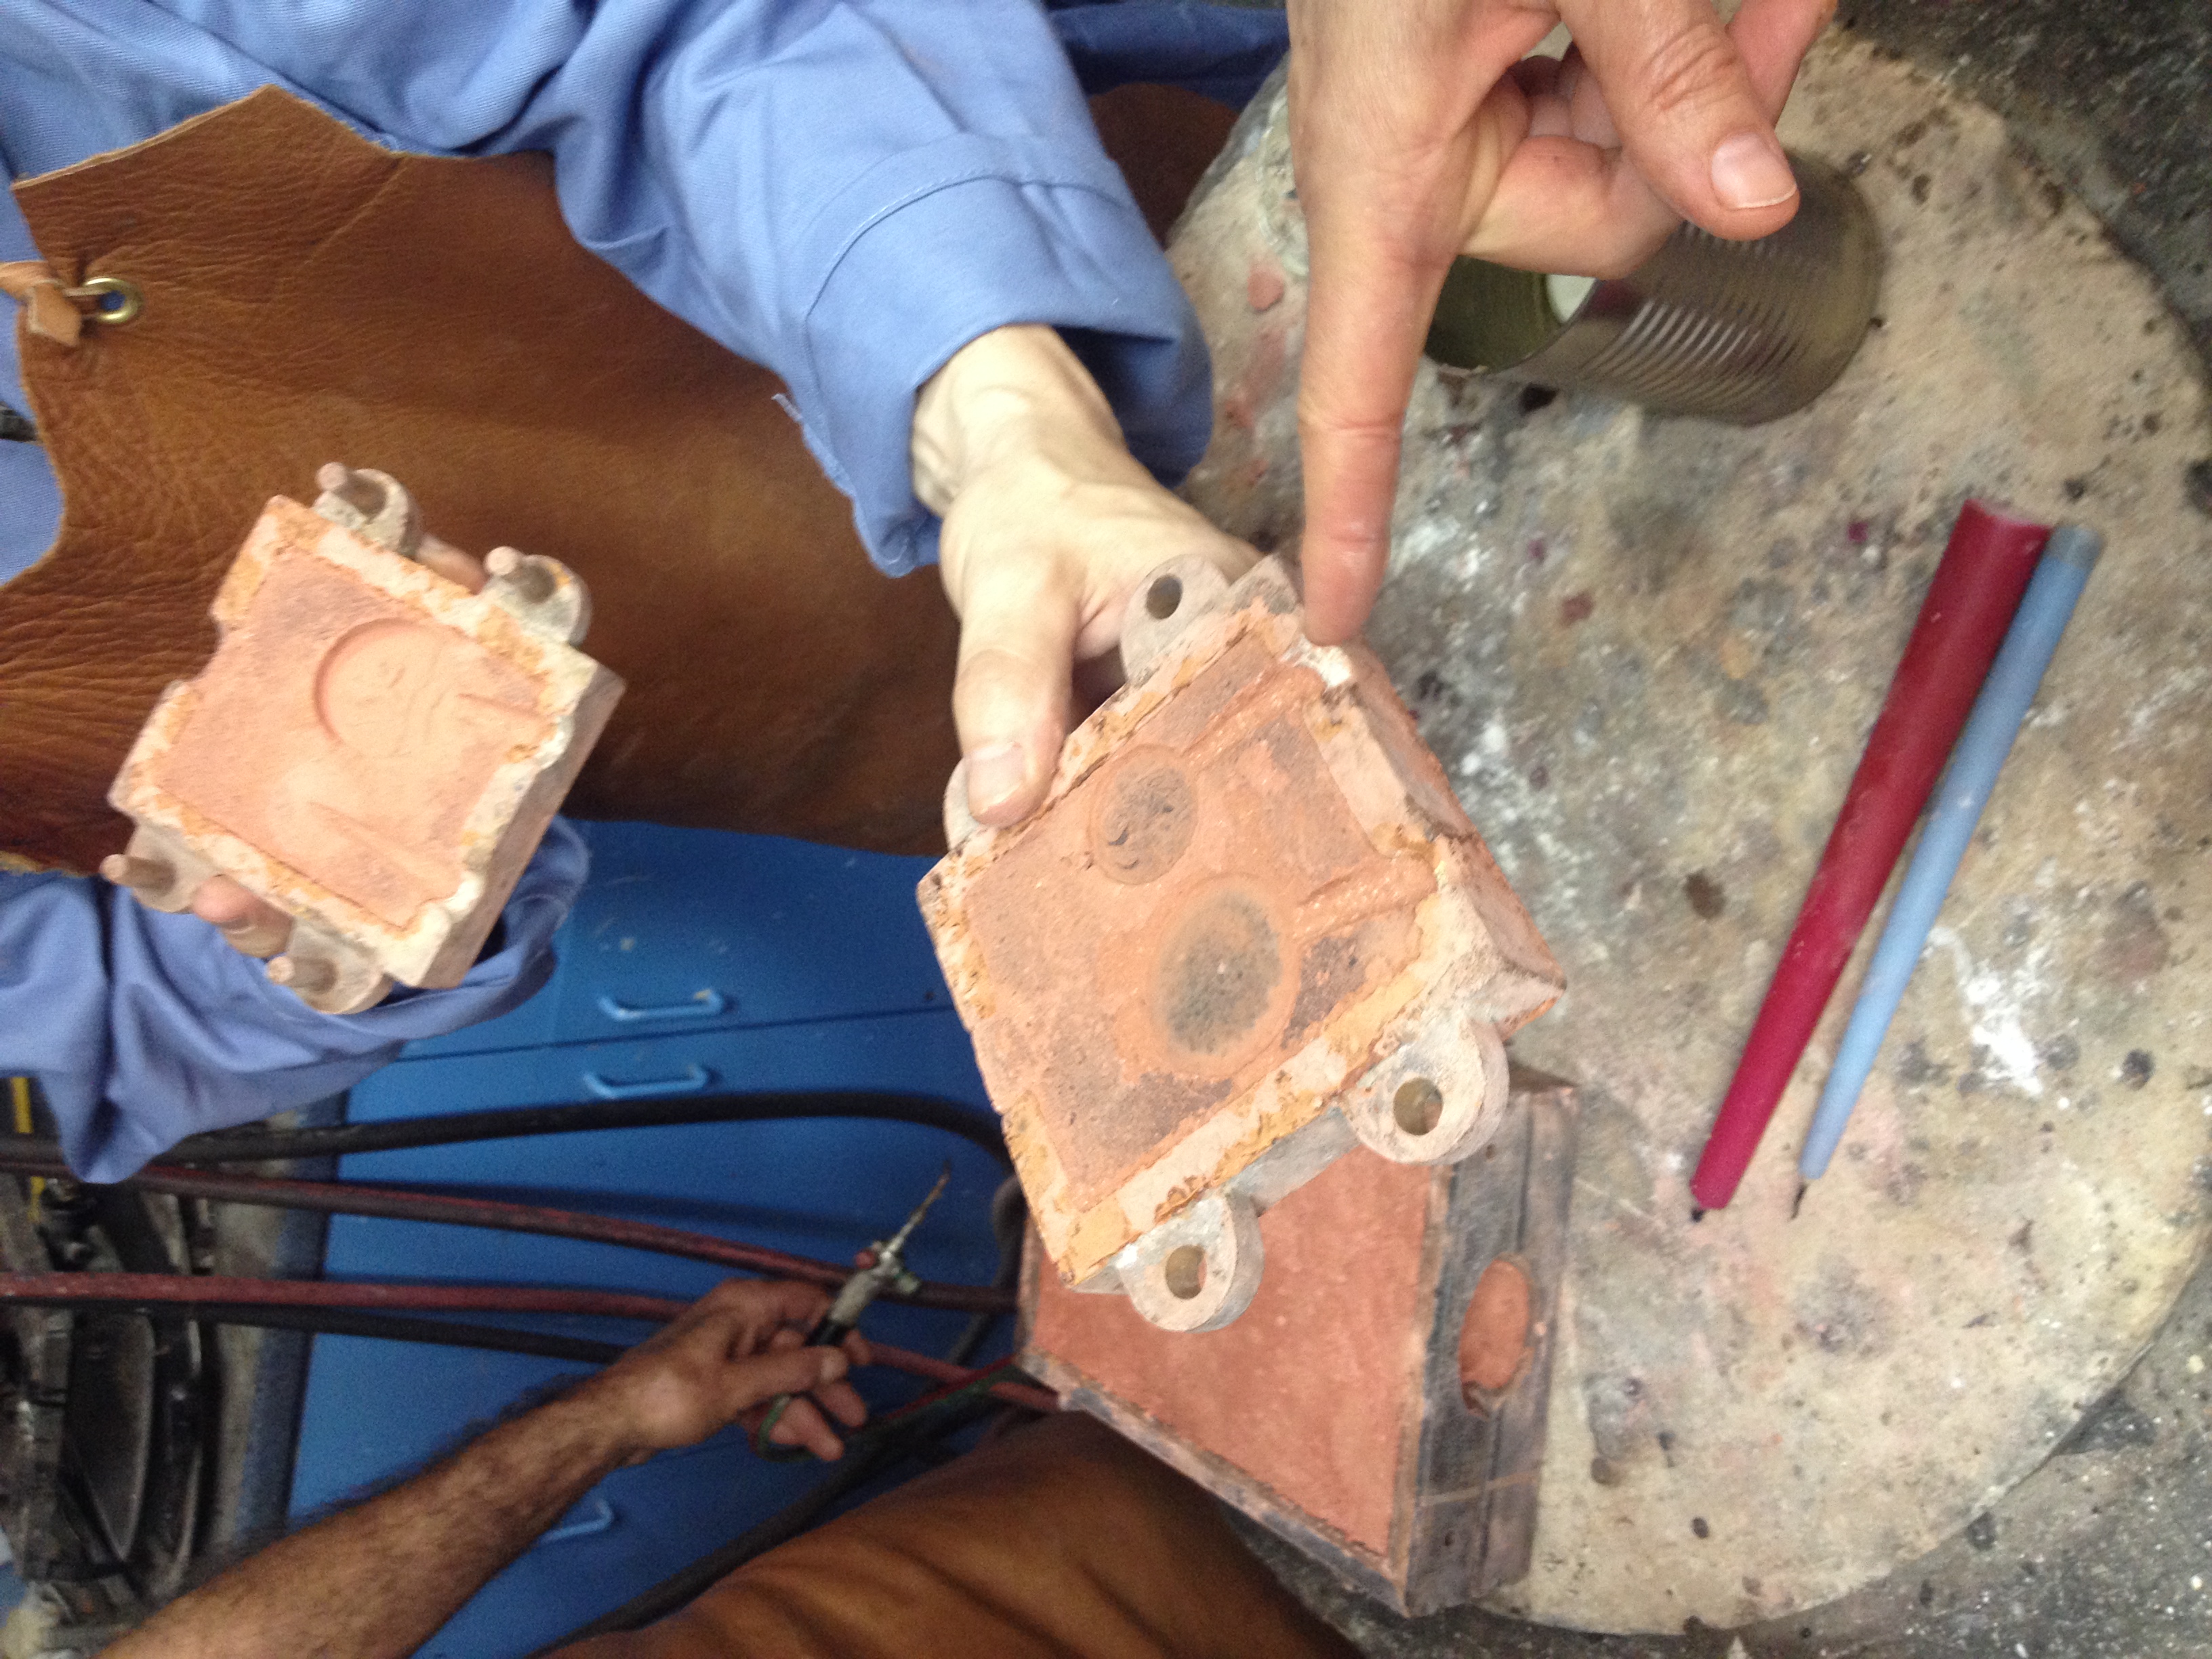
Another possibility for the accurate impression in the molds might have been the sand that we used (unfortunately the exact composition of it was unknown to us), which apparently included "grog," dry red sand/clay used for ceramics. The other sand that appeared to have taken a very good impression was the Delft sand, the industrially produced sand, for which oil was the binder, which didn't evaporate—in contrast to our sal ammoniac/brandy binder. These were the two sets of molds for which we would try to pour silver.
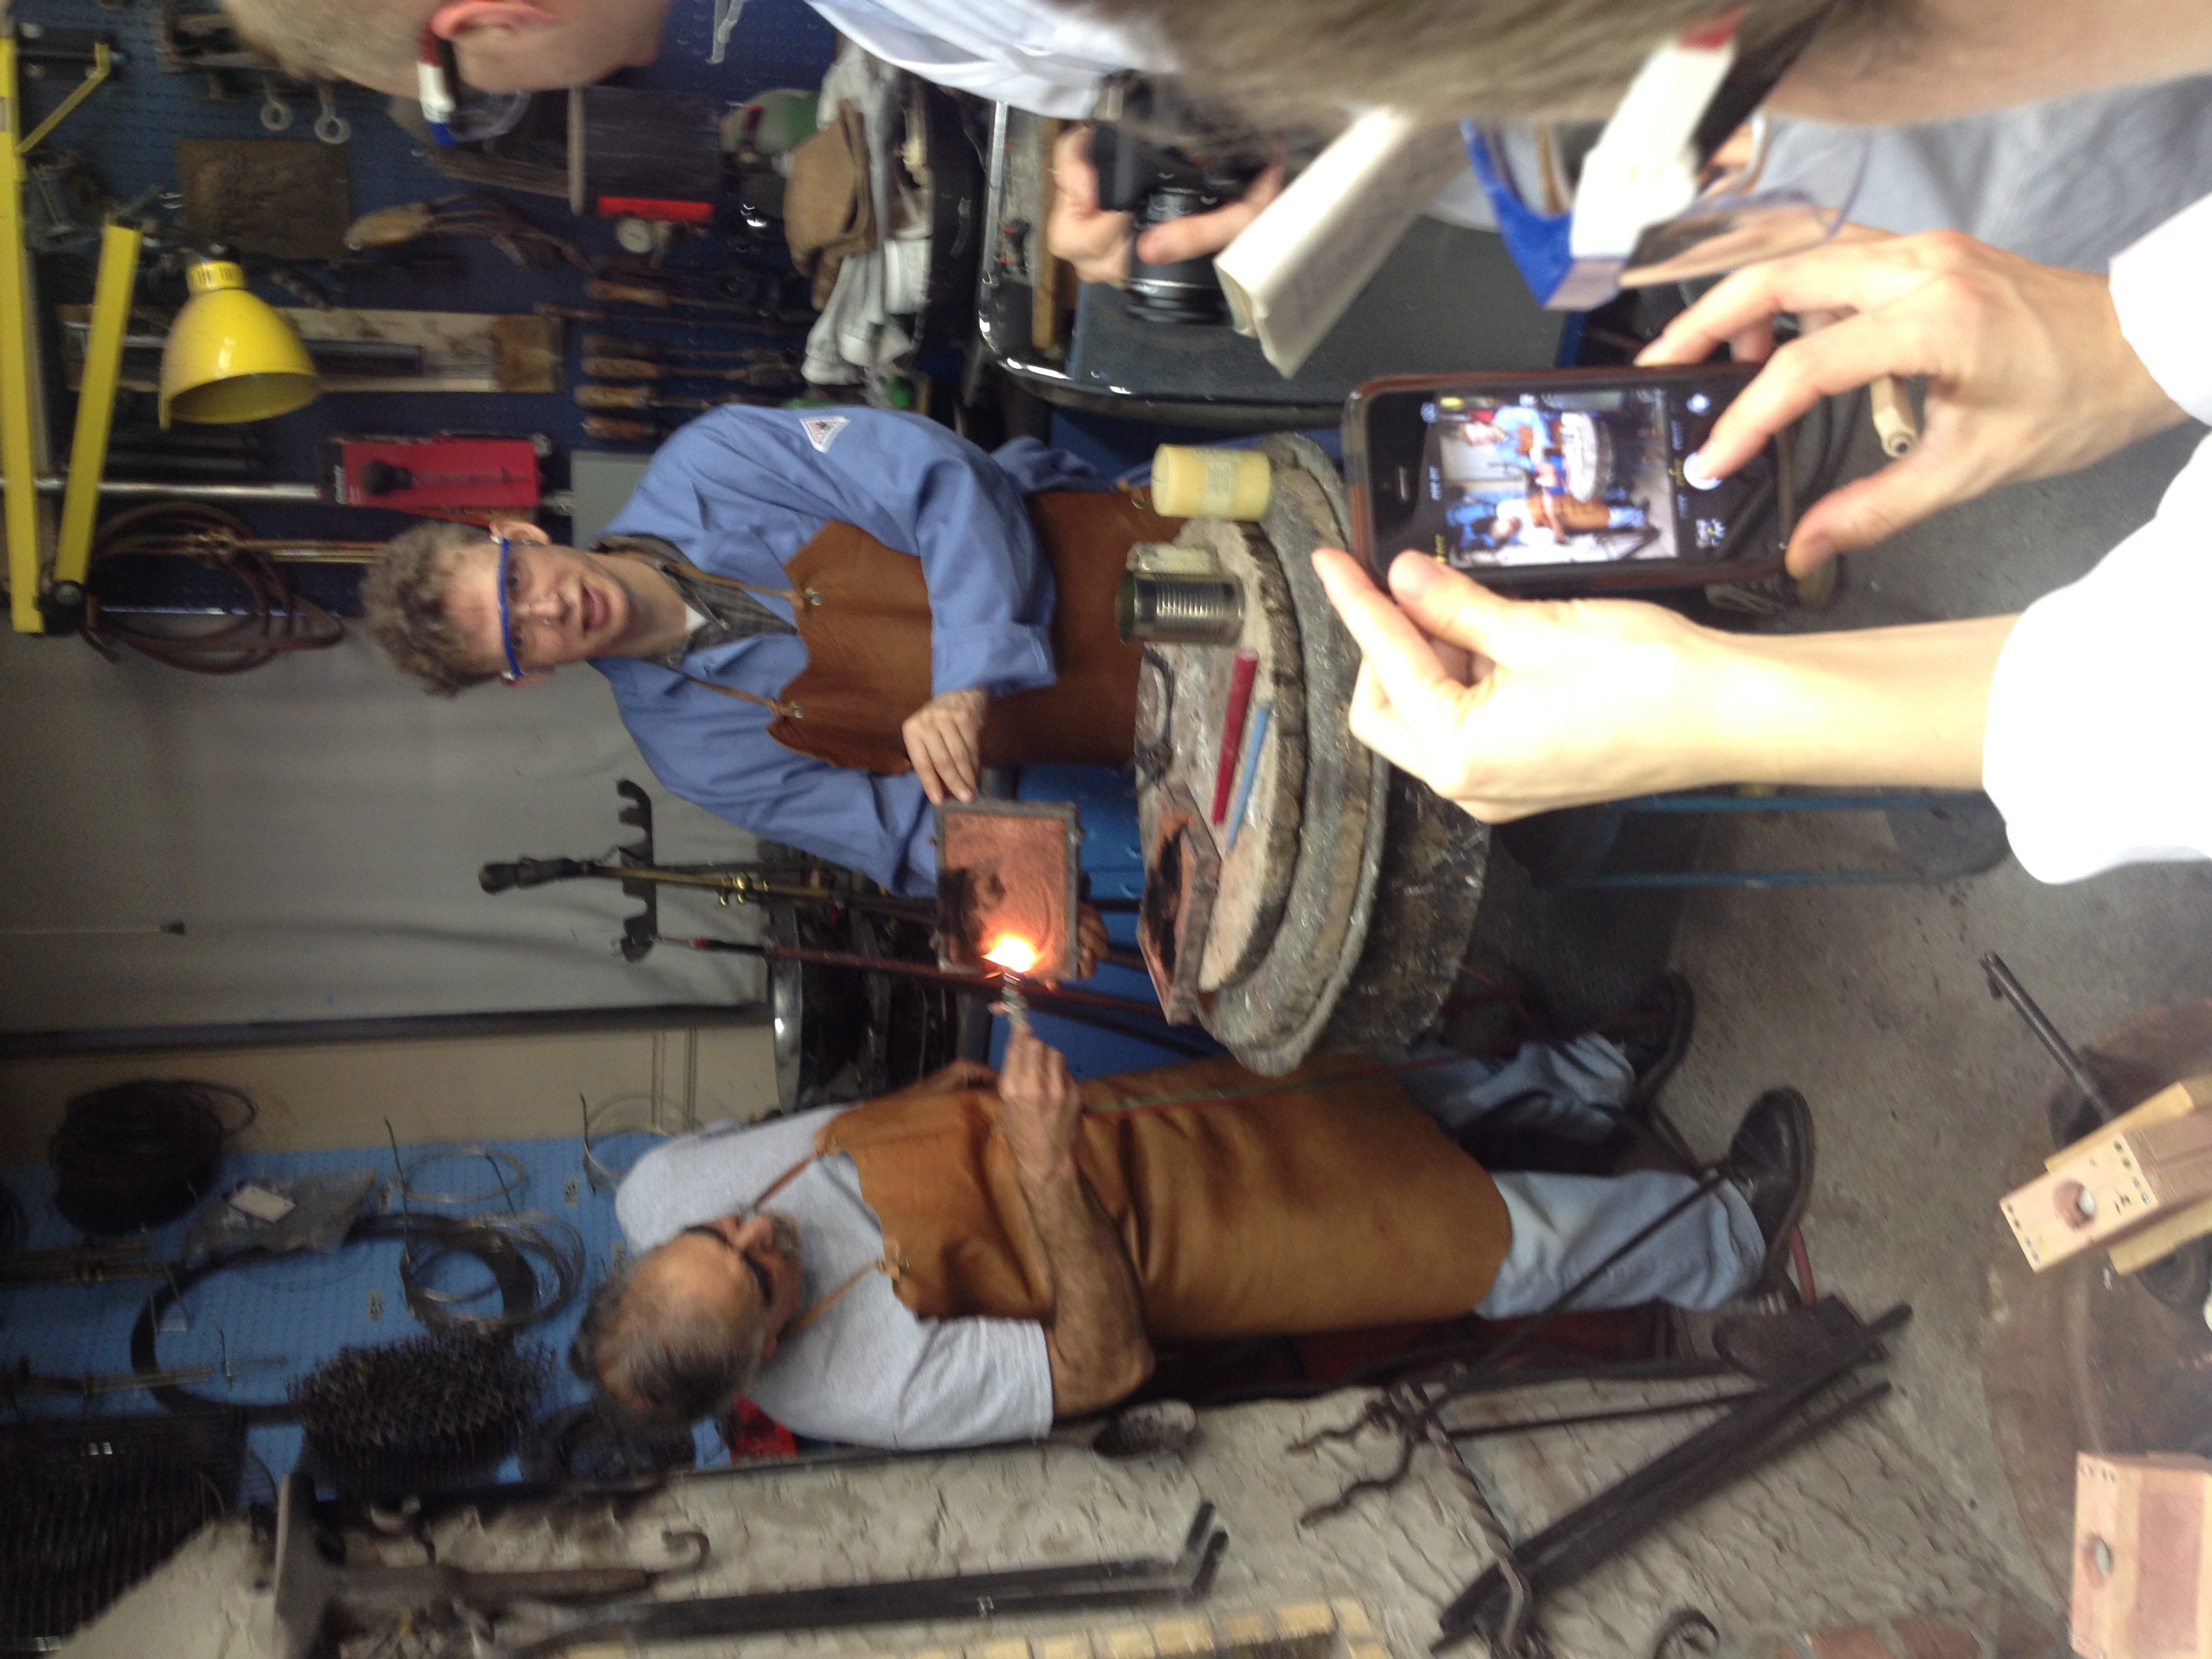
We moved to the other area of Ubaldo's workshop in order to pour the silver, because he had equipment there that would allow him to melt the metal much faster than was possible in the furnace. The molds were clamped around with thin-gauge steel sheets on either side and C-clamps holding them together.
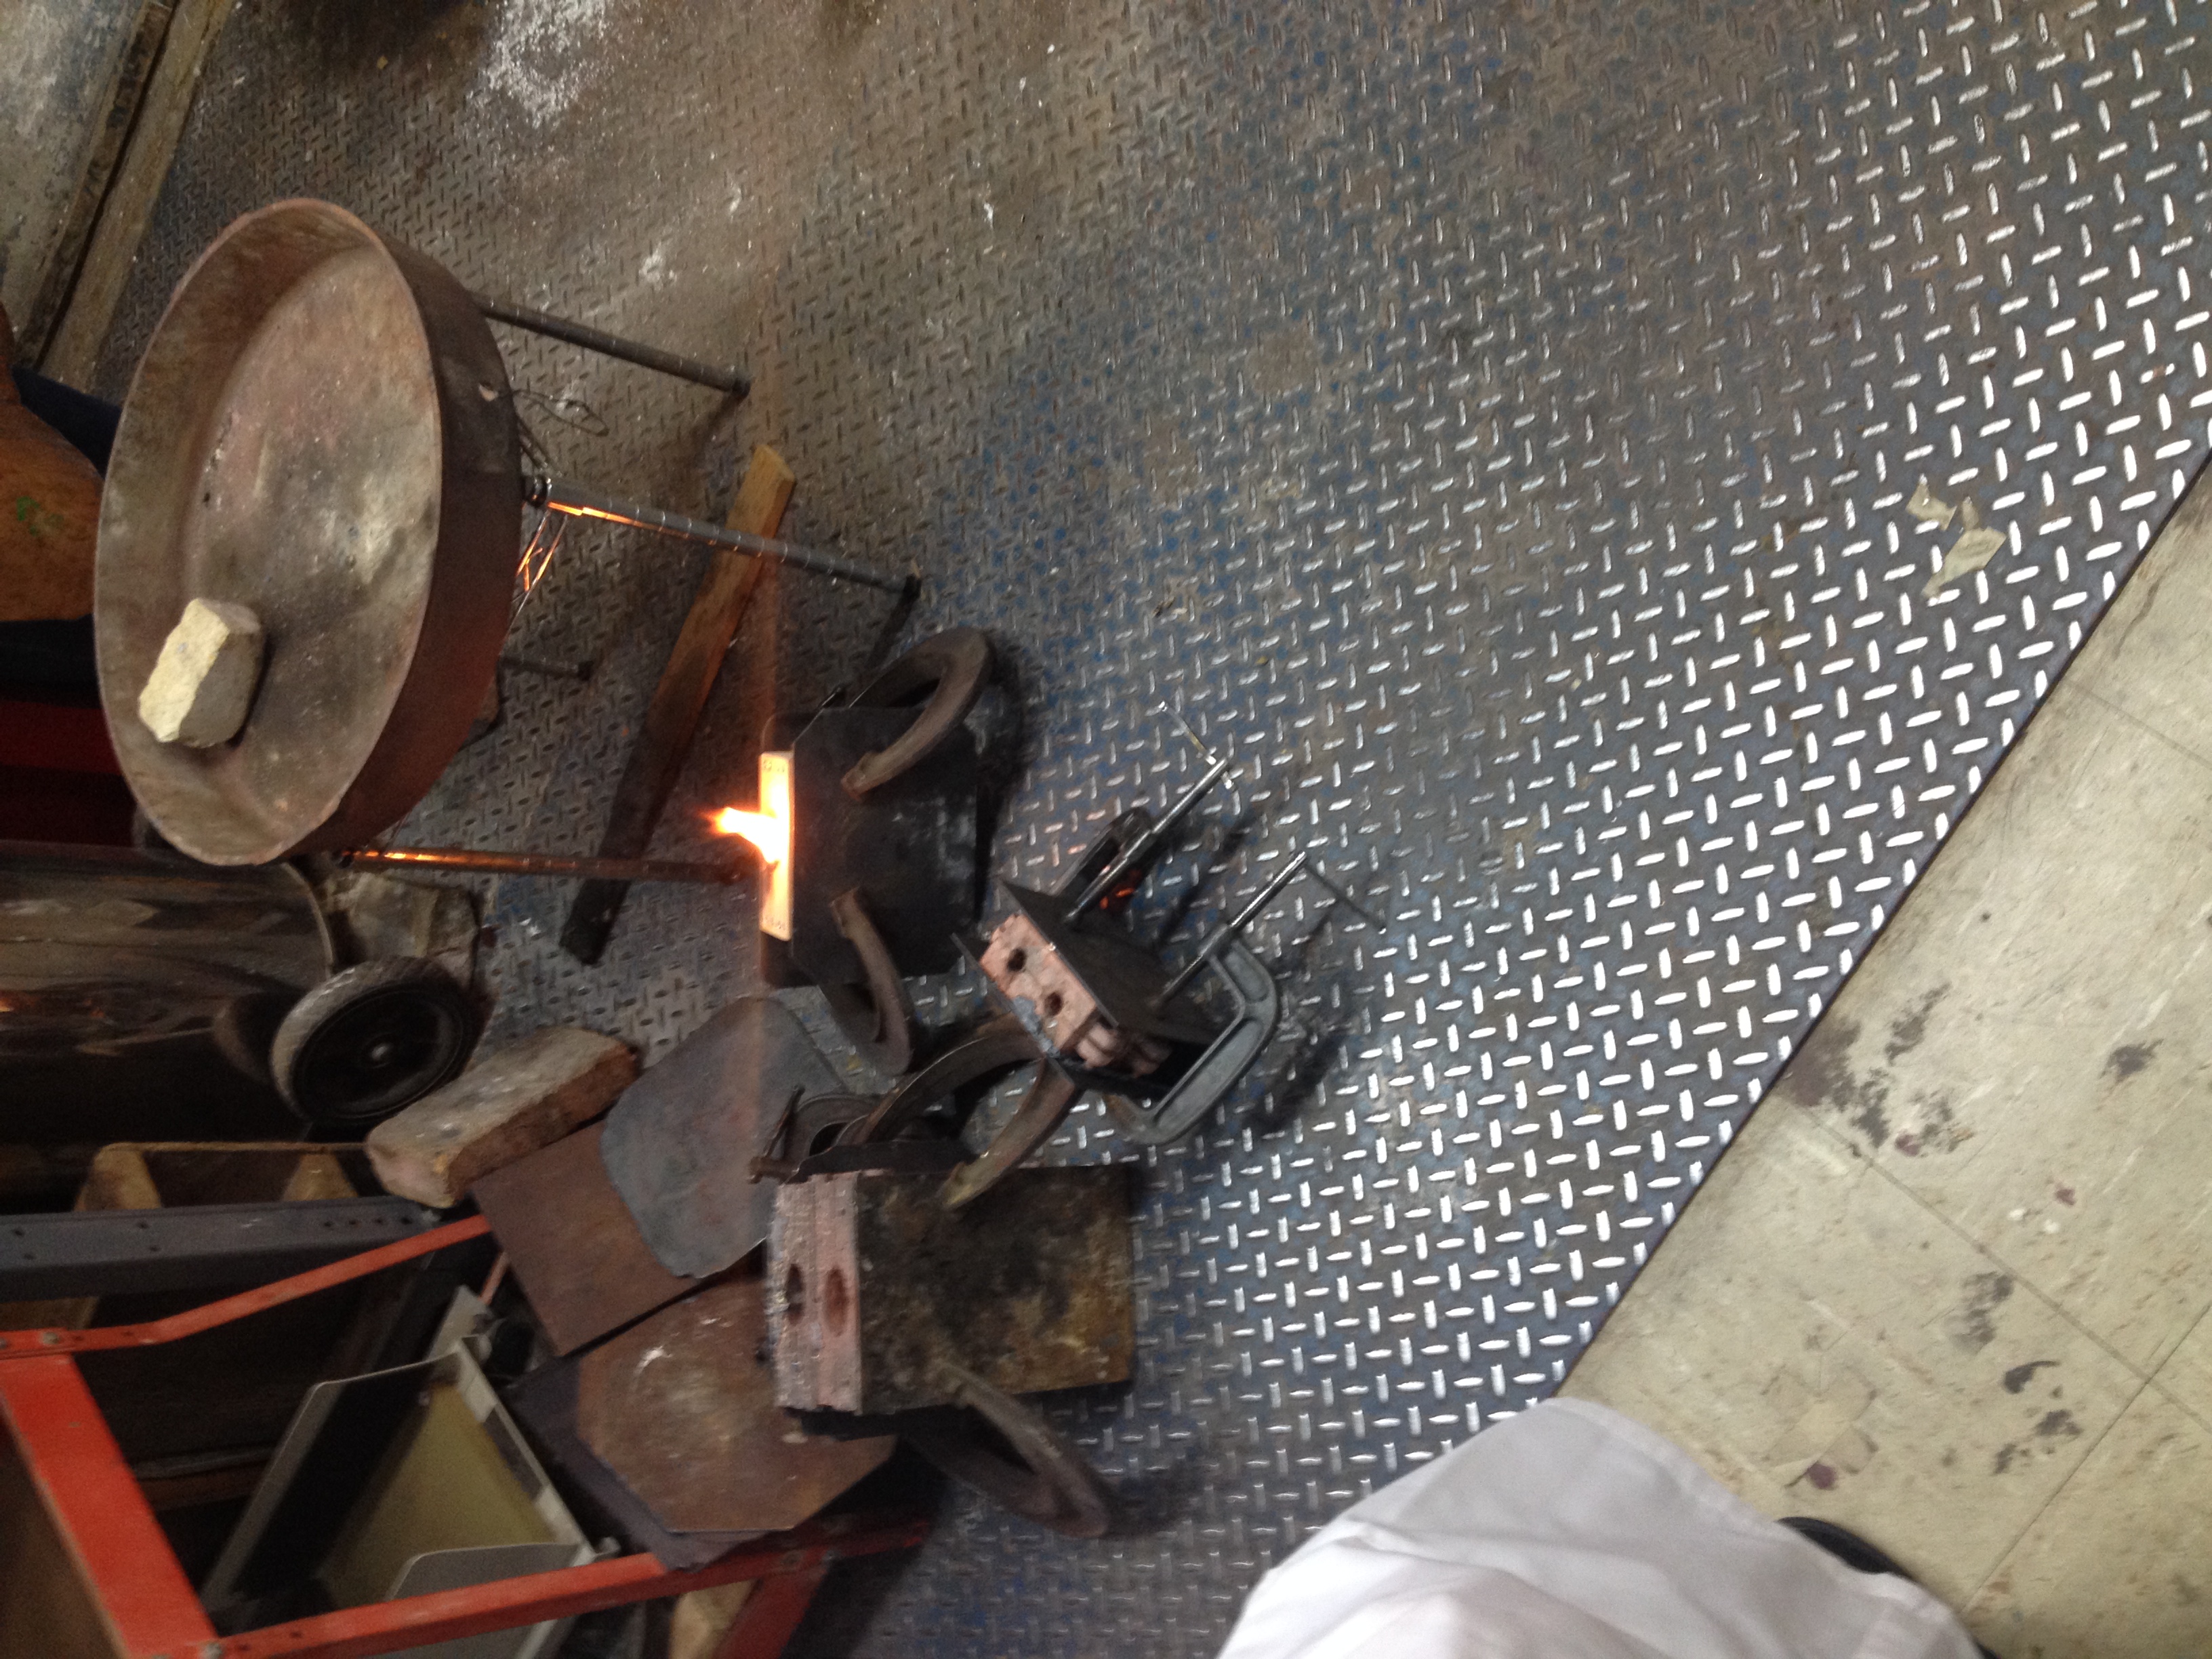
The molds were propped at an angle to allow air to escape when metal was poured. The silver was heated to around 1200º C, in contrast to the tin, which melted at only around 230º C. Ubaldo used a piece of wood while pouring silver to reduce oxygen in metal; flame of burning wood consumes oxygen in the air, which pulls oxygen away from the metal.
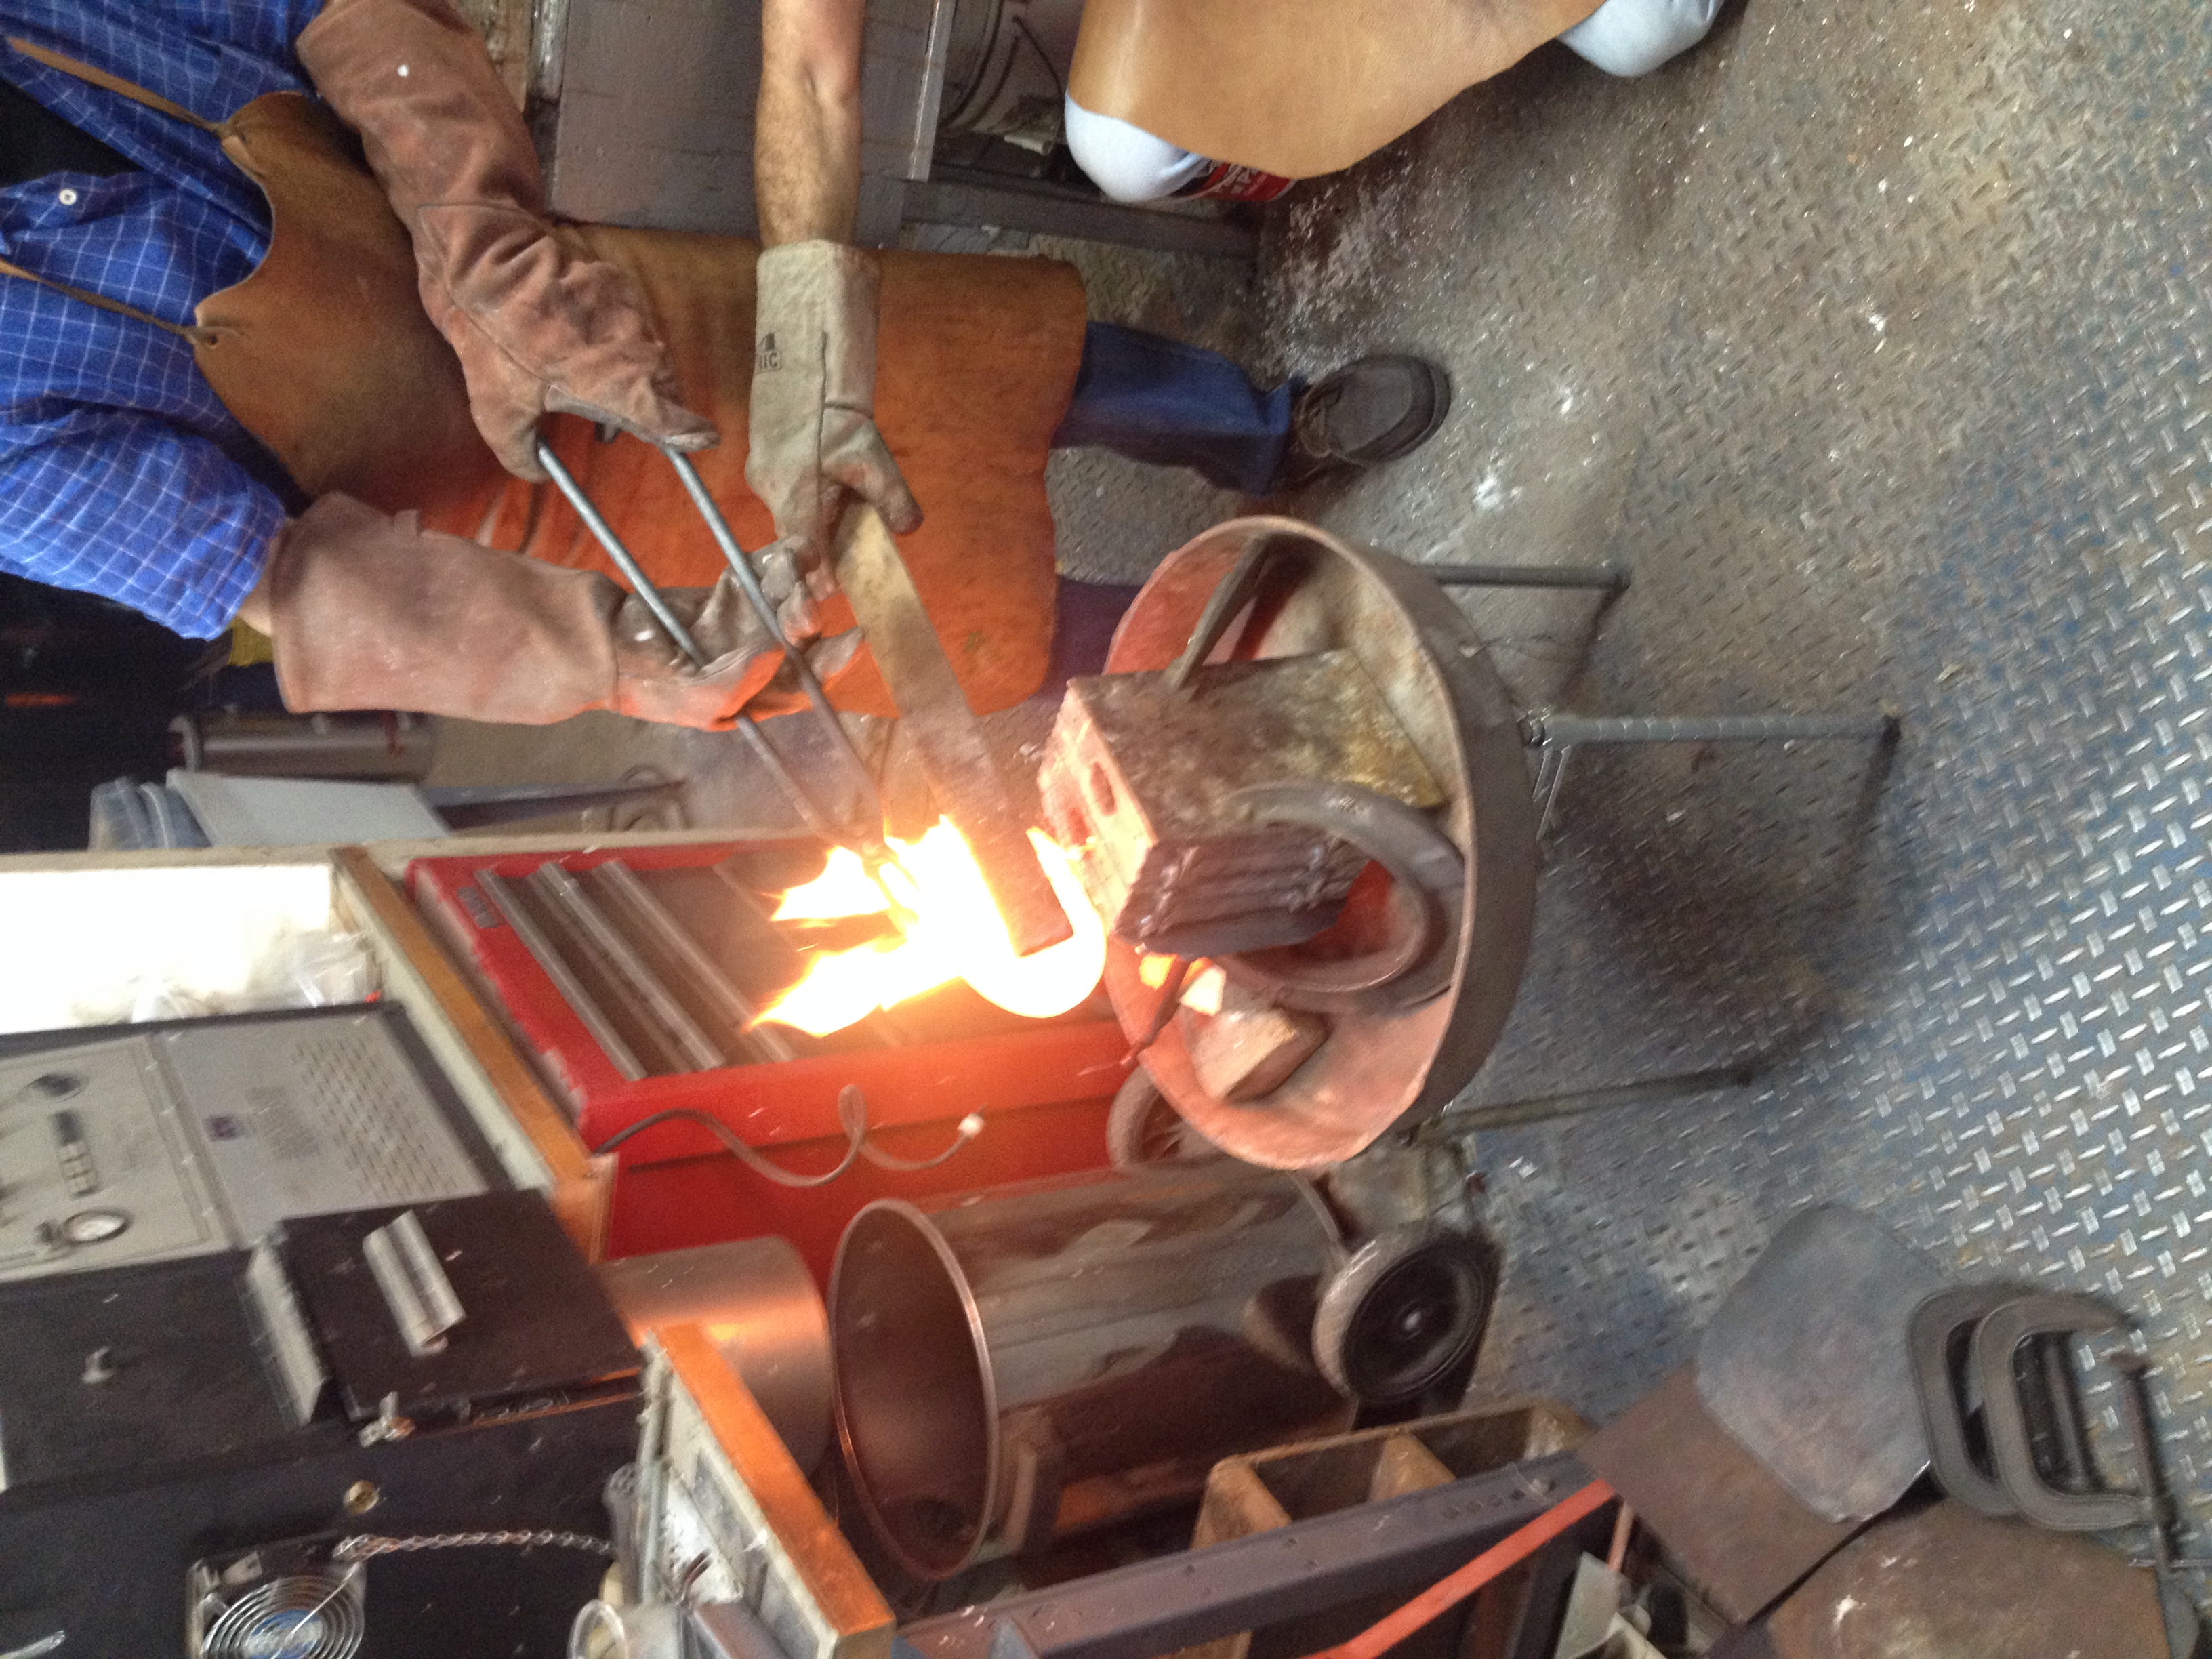
The red-hot silver crucible came out, but when they tried to pour the metal, it sputtered and bubbled out of the mold. The steam indicated that either there was still moisture in the sand or that something inside of the mold was combustible, so we couldn't continue pouring. The Delft sand worked very well, though, and we could see the silver burning off the oil in the sand.
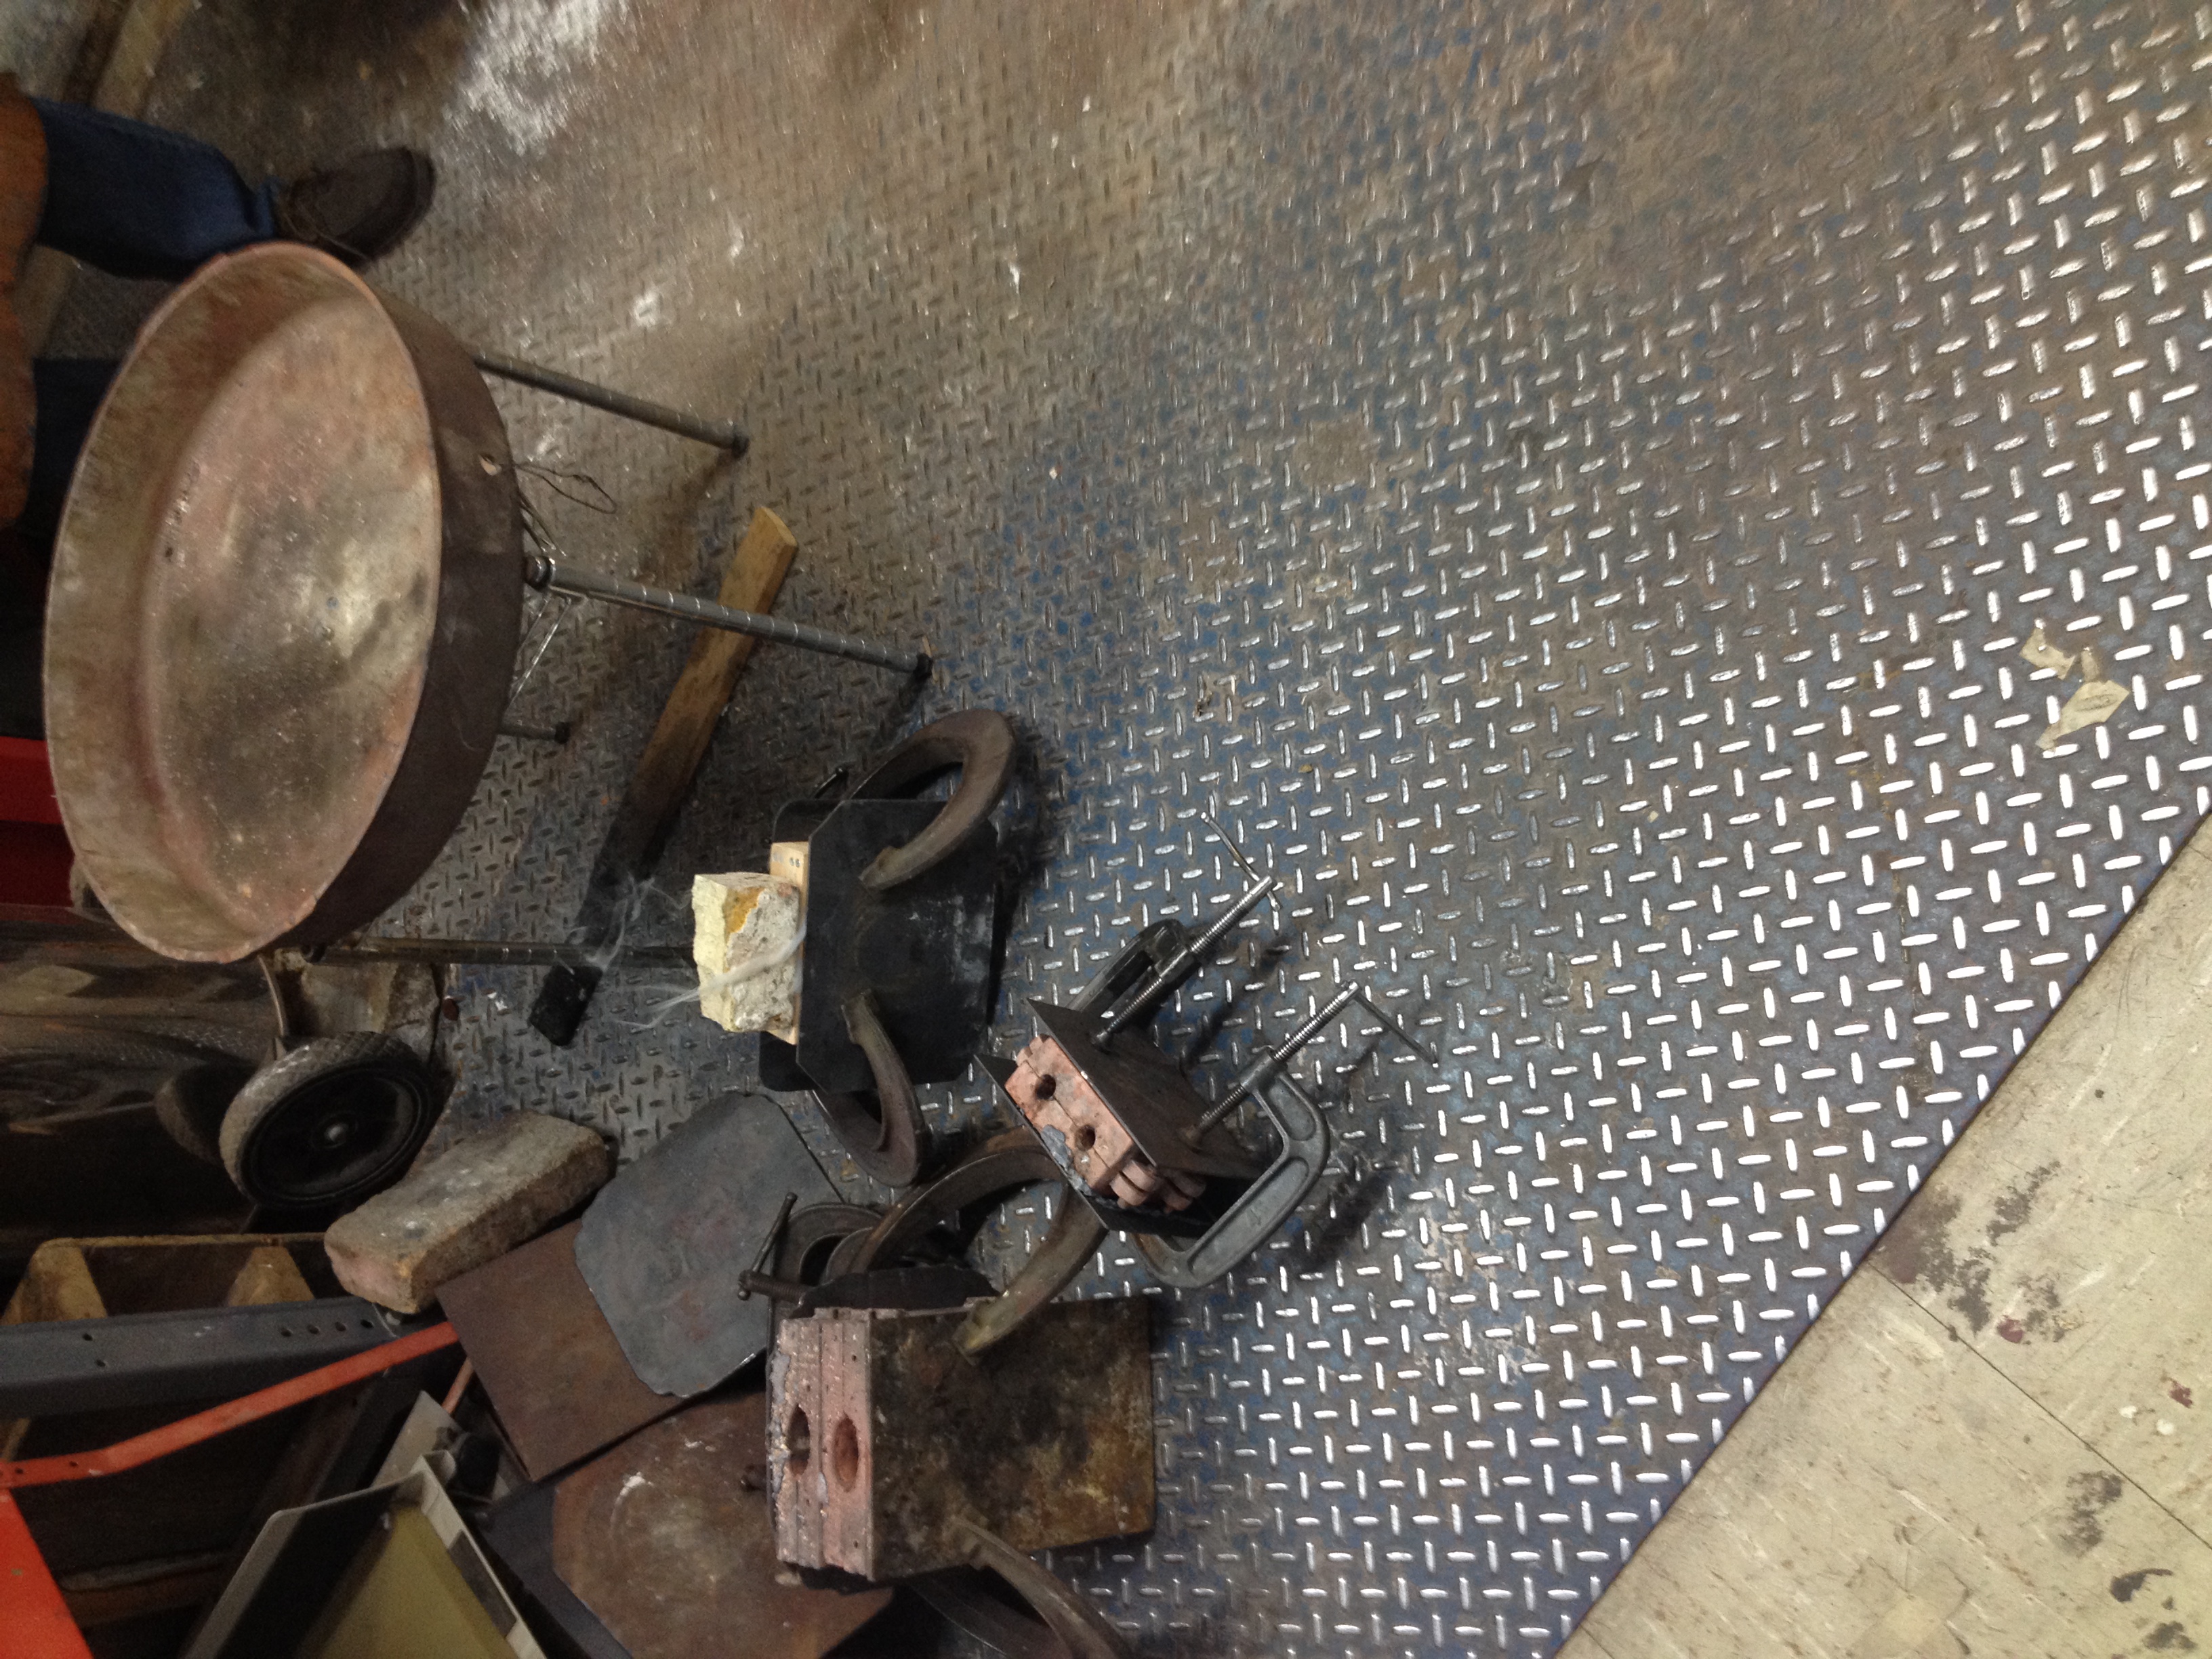
The molten silver burned the wood at the gate of the mold, and they put a brick on top in order to quench the fire. The extra silver was poured into an ingot mold.
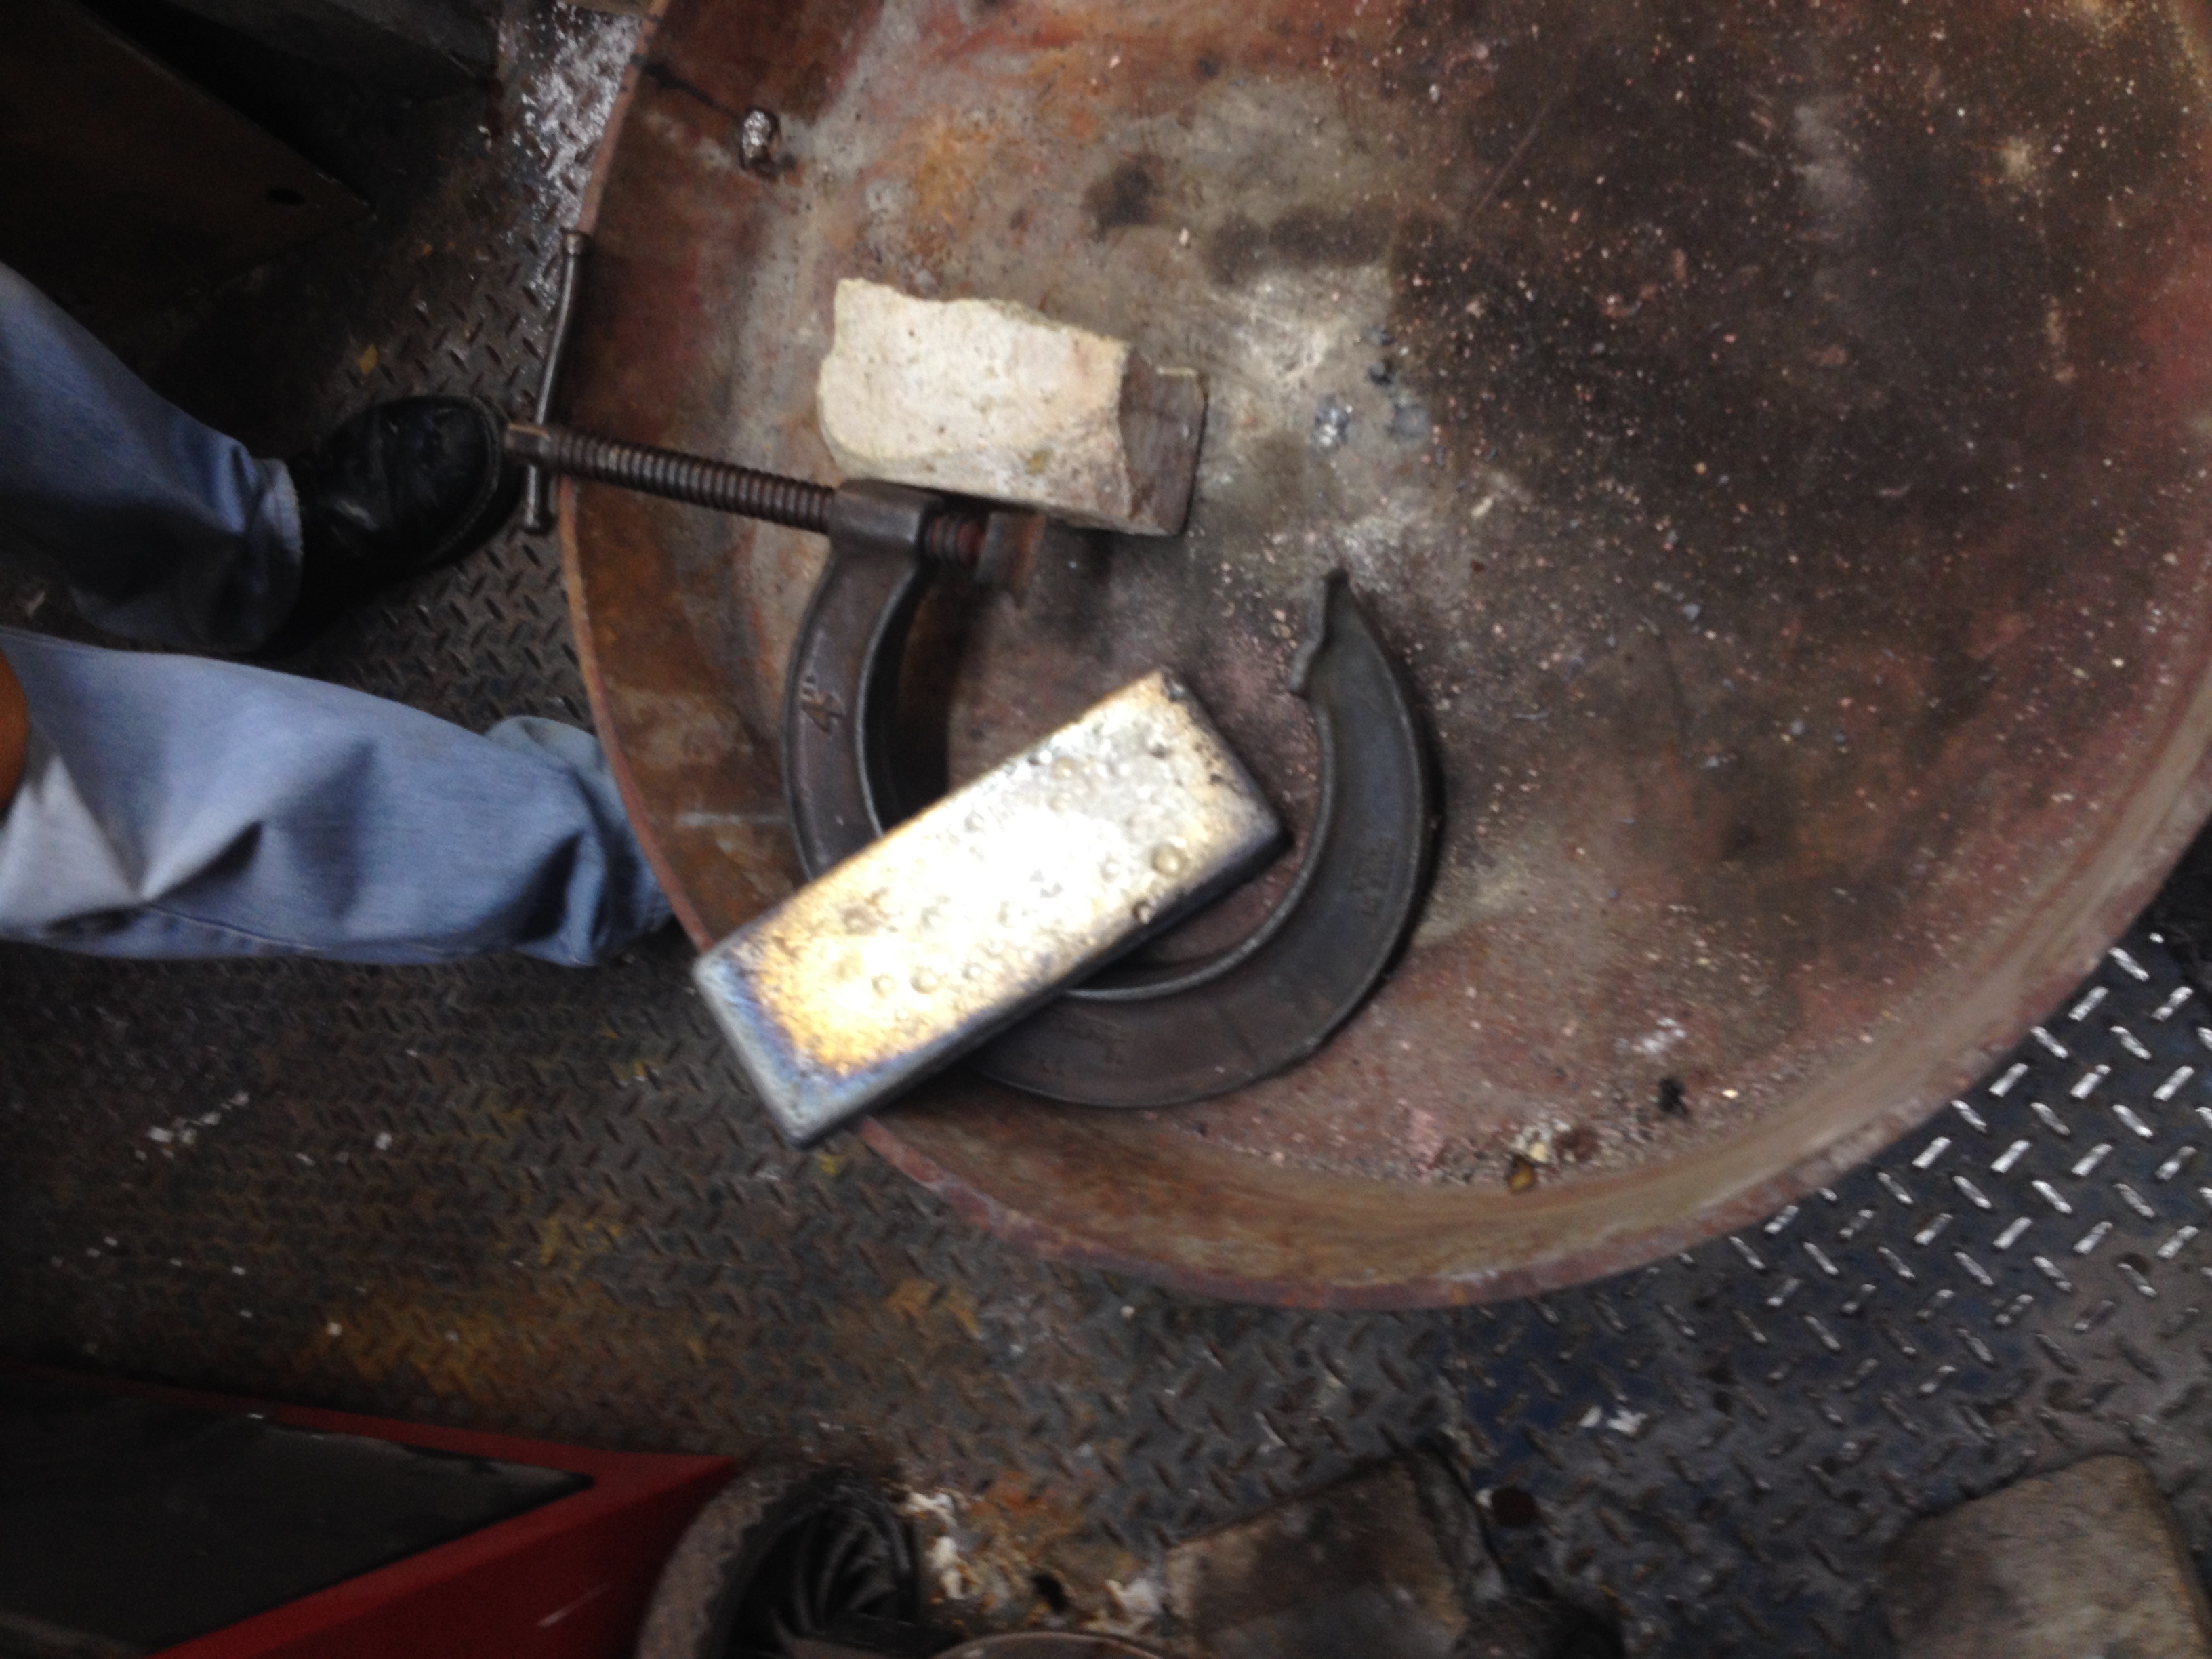
In the failed silver pour, all definition was lost, since the silver oxidized. Still, the solidified silver allowed for a clear portrayal of what happens inside of the mold when the metal is poured.
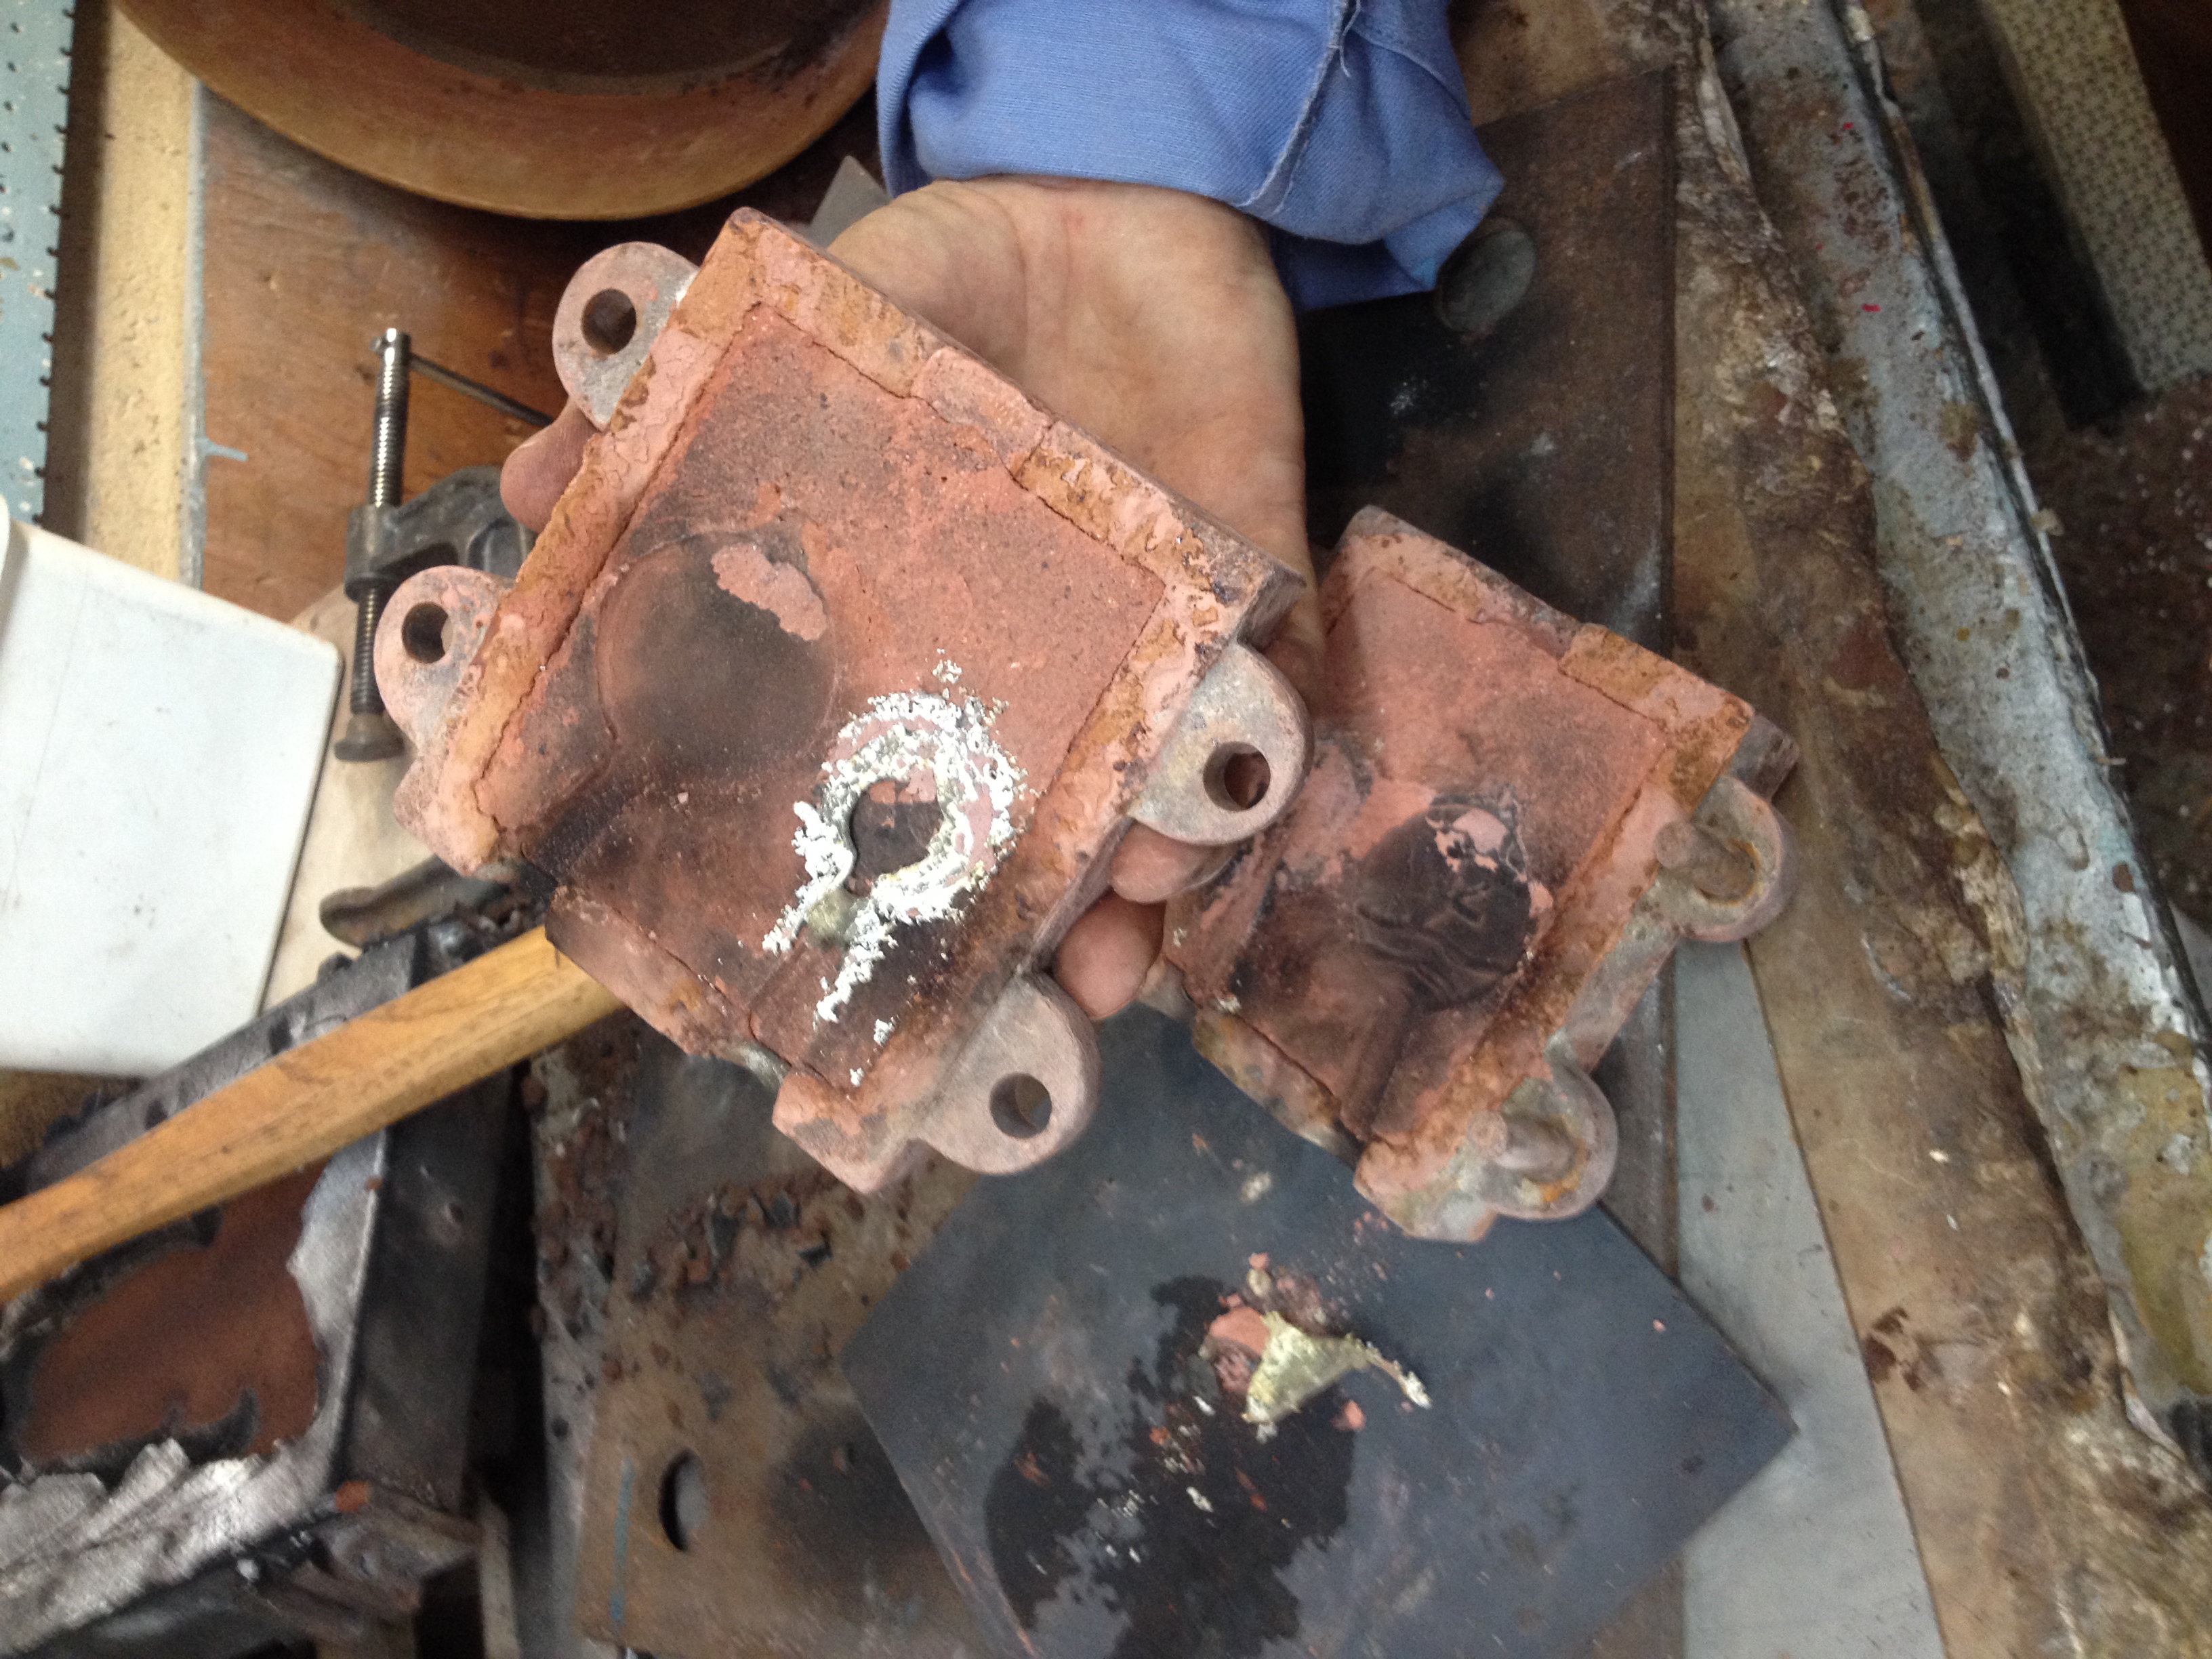
The moisture did not affect the pewter/tin nearly as much, since that metal is not nearly as hot, and it allows for much more time for moisture to escape. This time, we used the rosin to clean the molten tin, as a flux. When dropped into the liquid metal in the crucible, the rosin evaporated with oxides that accumulated in the metal. Ubaldo explained that the flux was used to draw oxygen from the metal in a process of reduction; metal workers have to constantly try to remove oxygen. The molten tin in the crucible was much heavier than expected. We poured tin into our mold, which came out with less detail than we thought, and the two pieces of the mold were more porous than we thought, so we ended up with our two medals fused together.

10/14/2014, morning
NAME: Rozemarijn Landsman & Jonah RowenDATE AND TIME: 10/14/2014, 9:00-11:00
LOCATION: Morningside Heights
SUBJECT: Sand Casting - Making Sand & Sand Mold
We began with a comparison to commercial foundry sand brought by Tonny Beentjes as a model for the consistency and granularity of the sand that we were attempting to make, according to BnF. Ms. Fr. 640, folio 118v. Accordingto Tonny, the binder in the foundry sand was oil. That sand was bright reddish/orange in color was dry and crumbly, similar in consistency to brown sugar, but drier. As a test, Tonny recommended two tests for sand: to toss a clump of it in the air, and if nothing came off then it was coherent enough; also, to be able to press it in a fist and it would keep its shape.
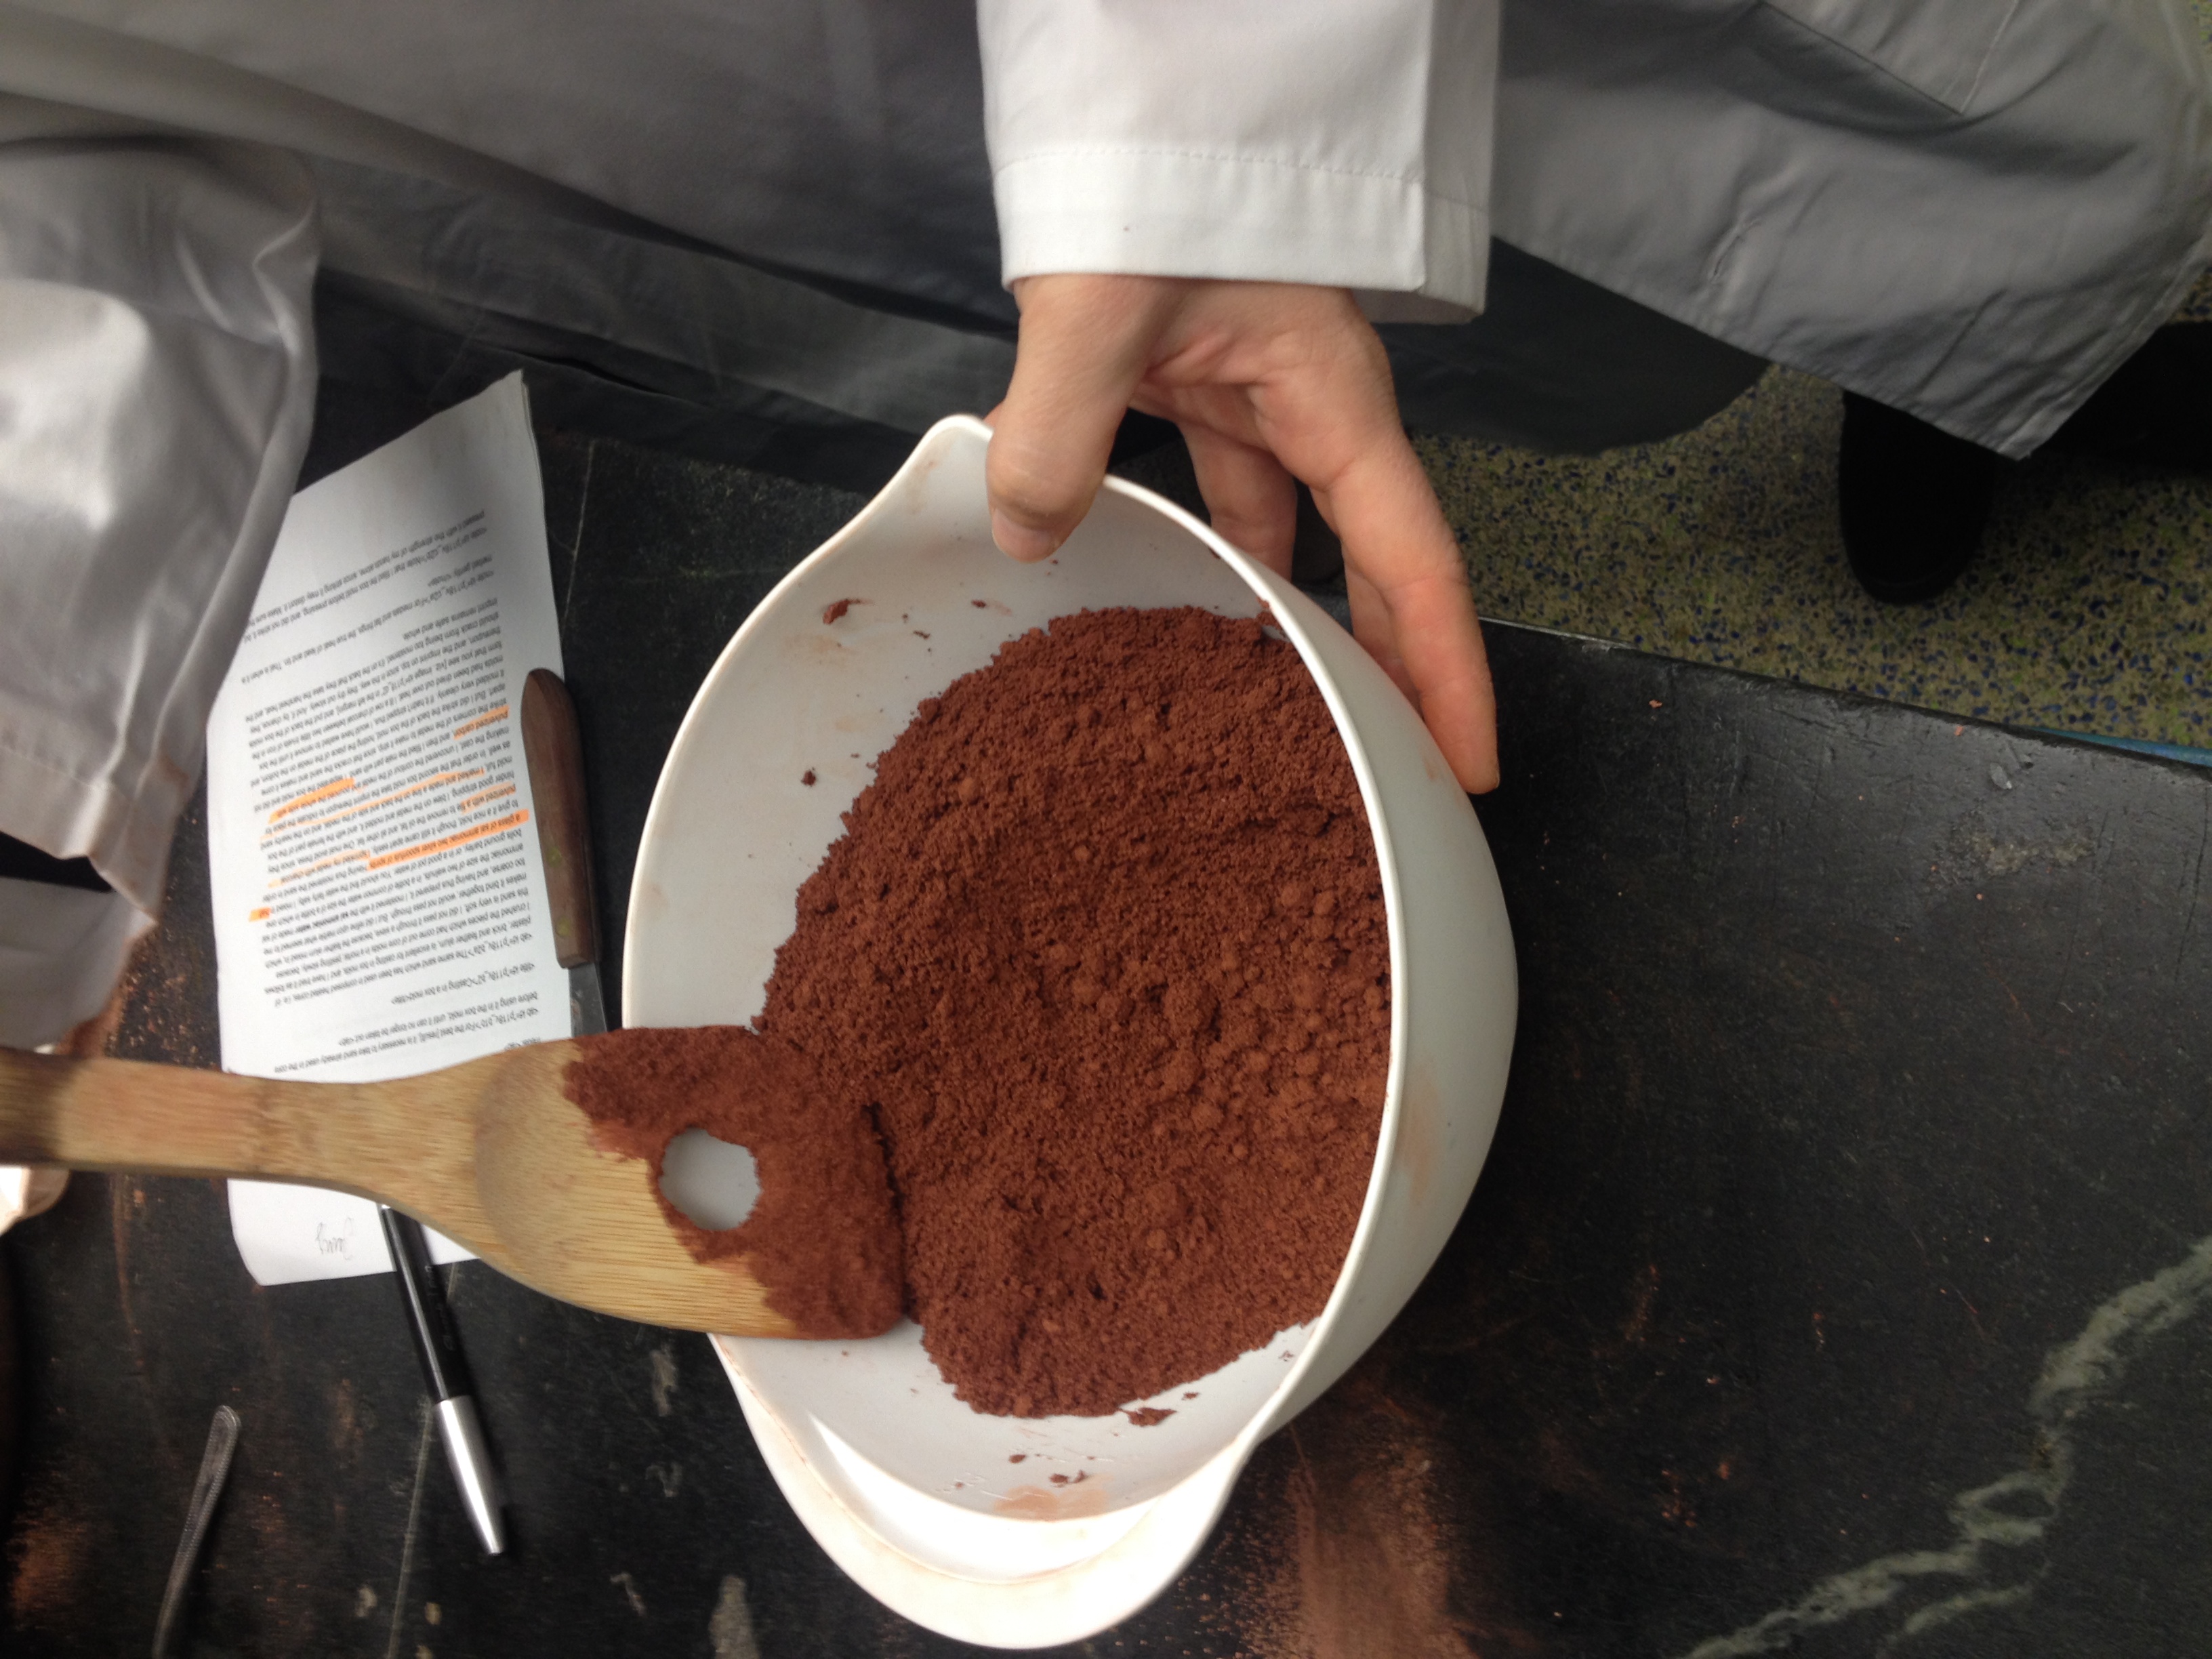
We cleared off a large space on the counter of the lab, and with a mixing bowl. We measured three cups of dry red clay, which we sifted to slightly less; after sifting, only very small pieces (coarse grains) of red clay were left in the sieve. The clay was fine enough that it packs on its own. Sifting took more force than we expected.
The manuscript did not give clear instructions for measurements, so those were uncertain. We started with the following proportions:
3 cups red clay
1/2 cup sal ammoniac (recipe specifies "half a glass of sal ammoniac")
2 tbsp. brandy
The mixture smelled strongly of brandy, and was hard to mix. We started mixing with a small spackle knife, but switched to a wooden spatula. The mix seemed very dry and still crumbly compared to the foundry example, and we discussed adding more liquid. We consulted with Tonny, who recommended adding slightly more liquid, although said that we were not far off. We added another 1/4 cup of sal ammoniac and 1 tbsp. brandy (another half measure of the liquids), making the proportions:
3 cups red clay
3/4 cup sal ammoniac
3 tbsp. brandy
The mixture did not combine easily, and we observed that it might be easier to mix with hands. We began mixing at 10:10, and mixed for about twenty minutes, at which time the sand appeared thoroughly mixed. It seemed very dry still, and quite lumpy. We observed also that the pre-mixed foundry sand seemed finer than ours. By this time the alcohol smell was no longer present, and instead the sand had a more earthy/moist smell. It seemed very dry, but we tested it by packing it into the bottom of an iron box mold, and it held together very well. The box mold does not have a bottom; Tonny explained that this helps in the casting process because gases can flow out through the porous sand. He also suggested that the author of the manuscript would have probably kept grinding the sand finer, but for our purposes, our sand would probably do.
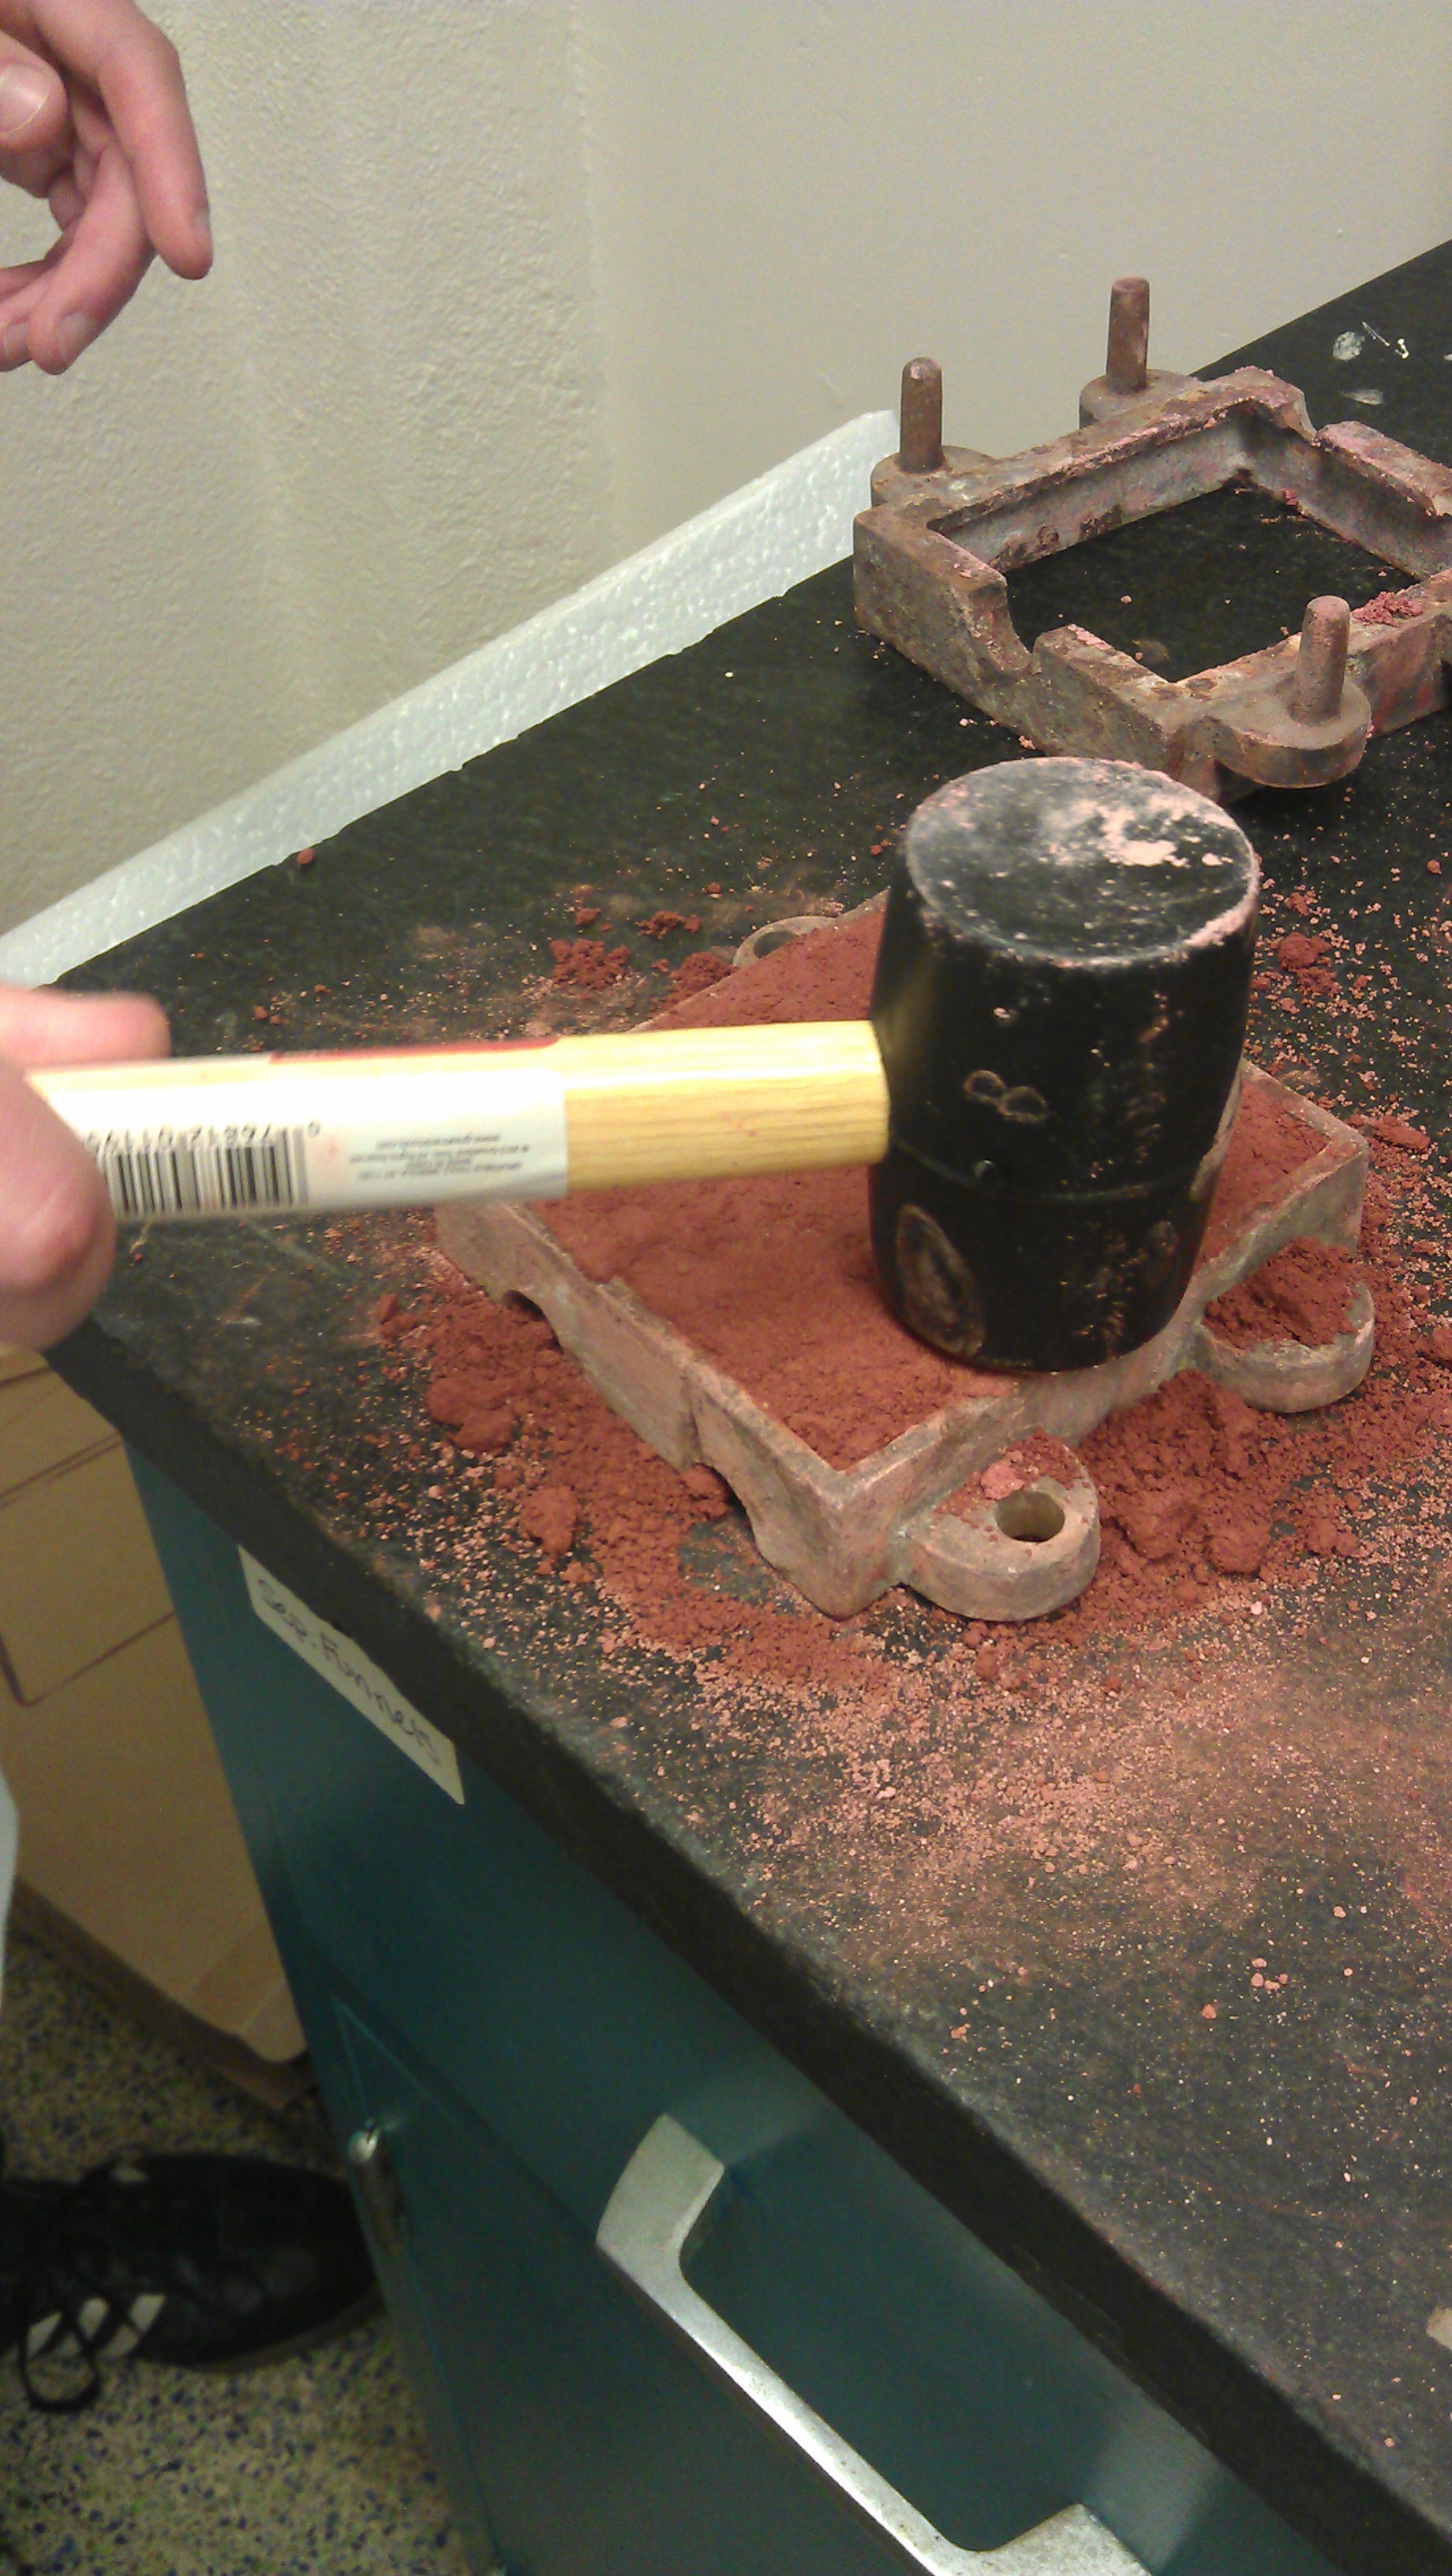
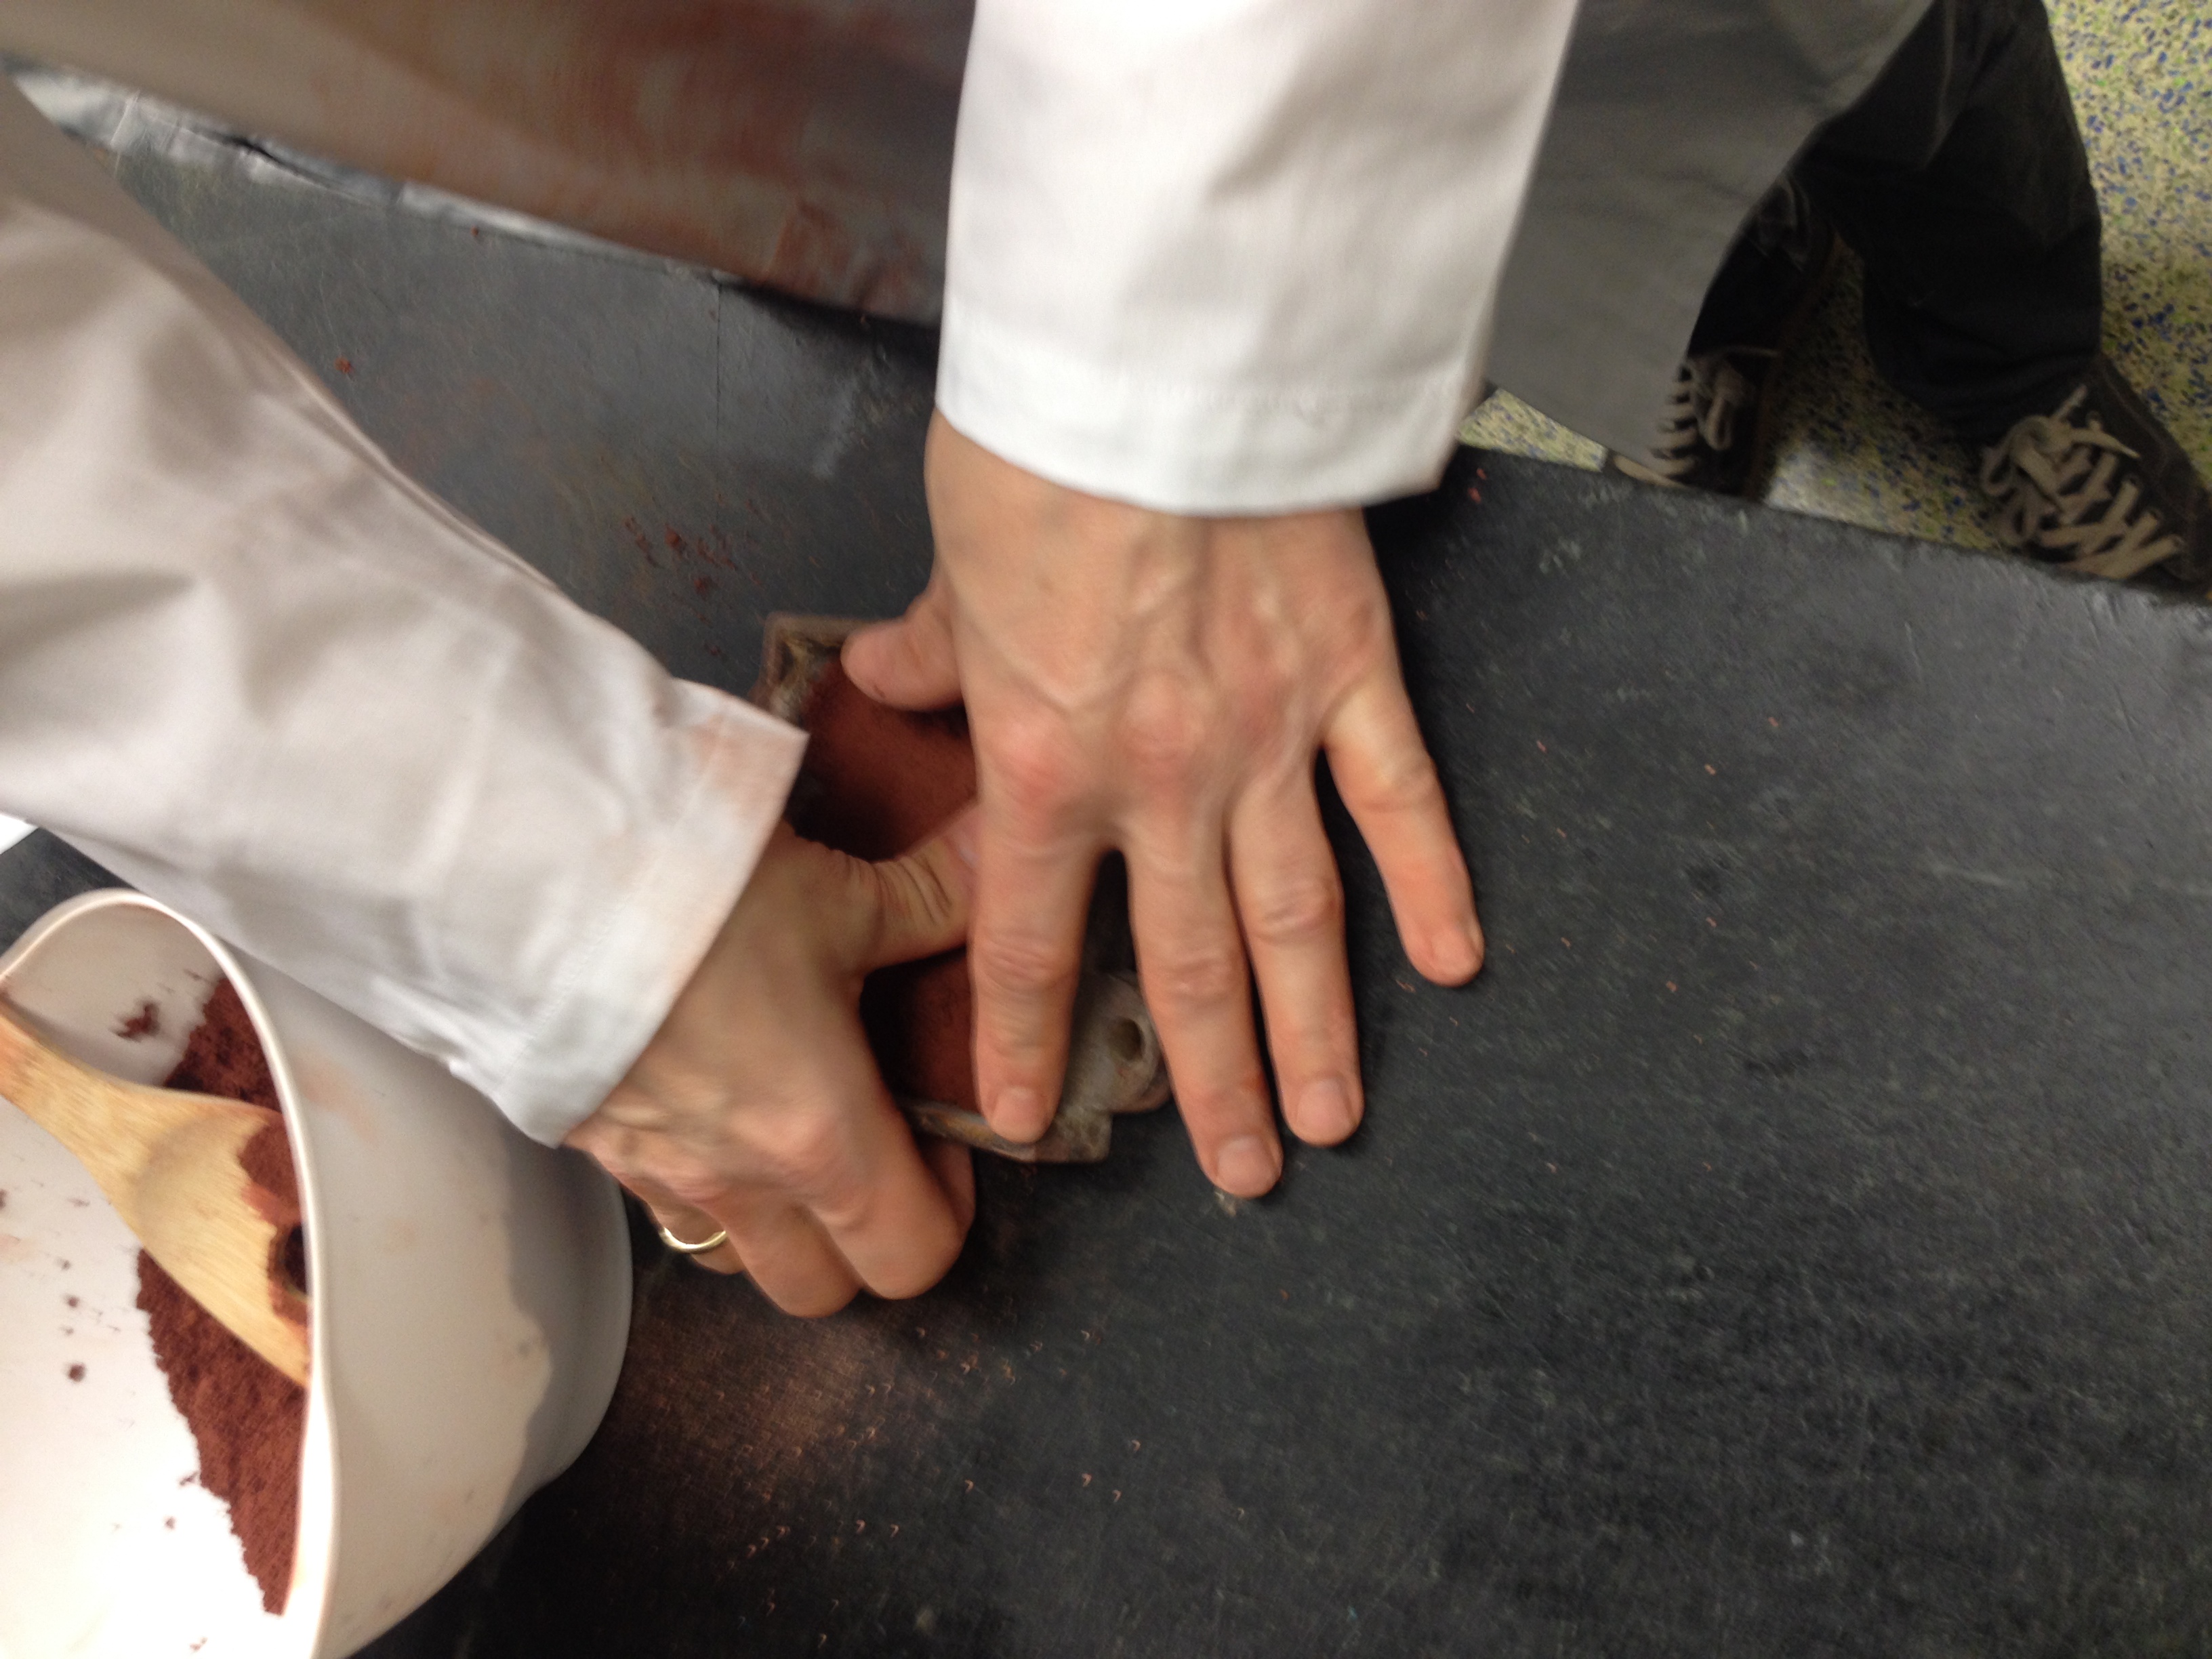
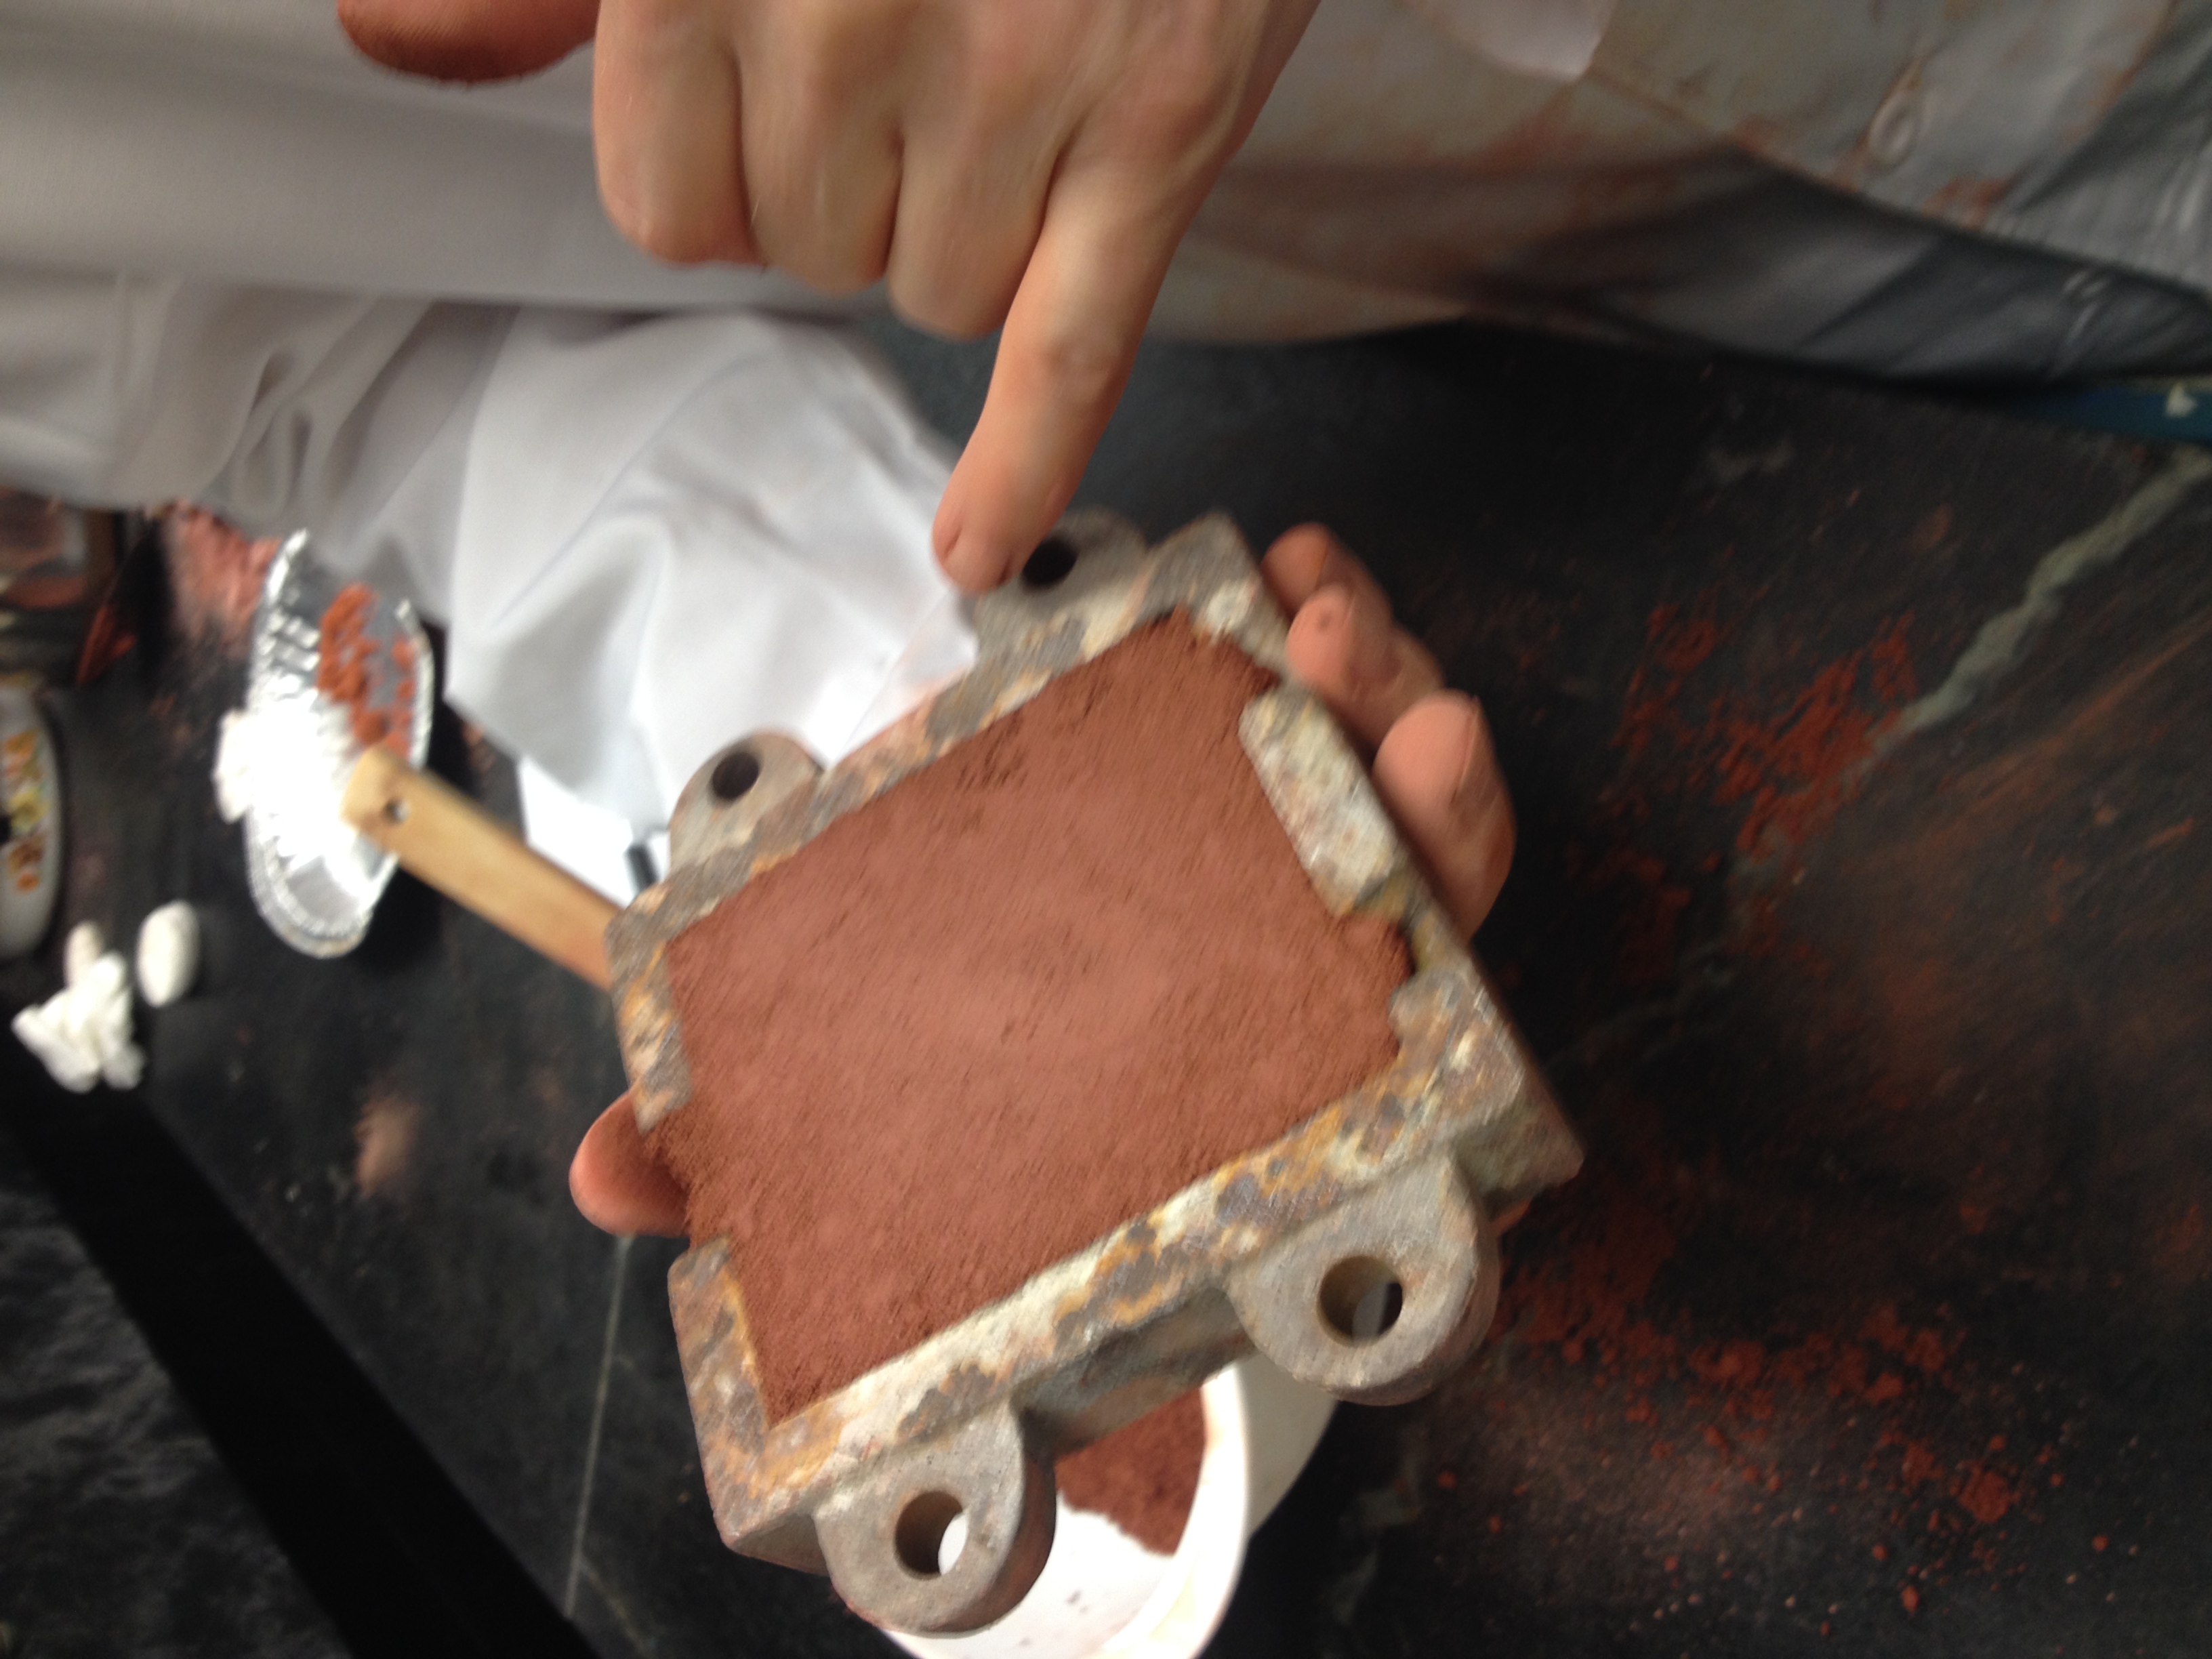
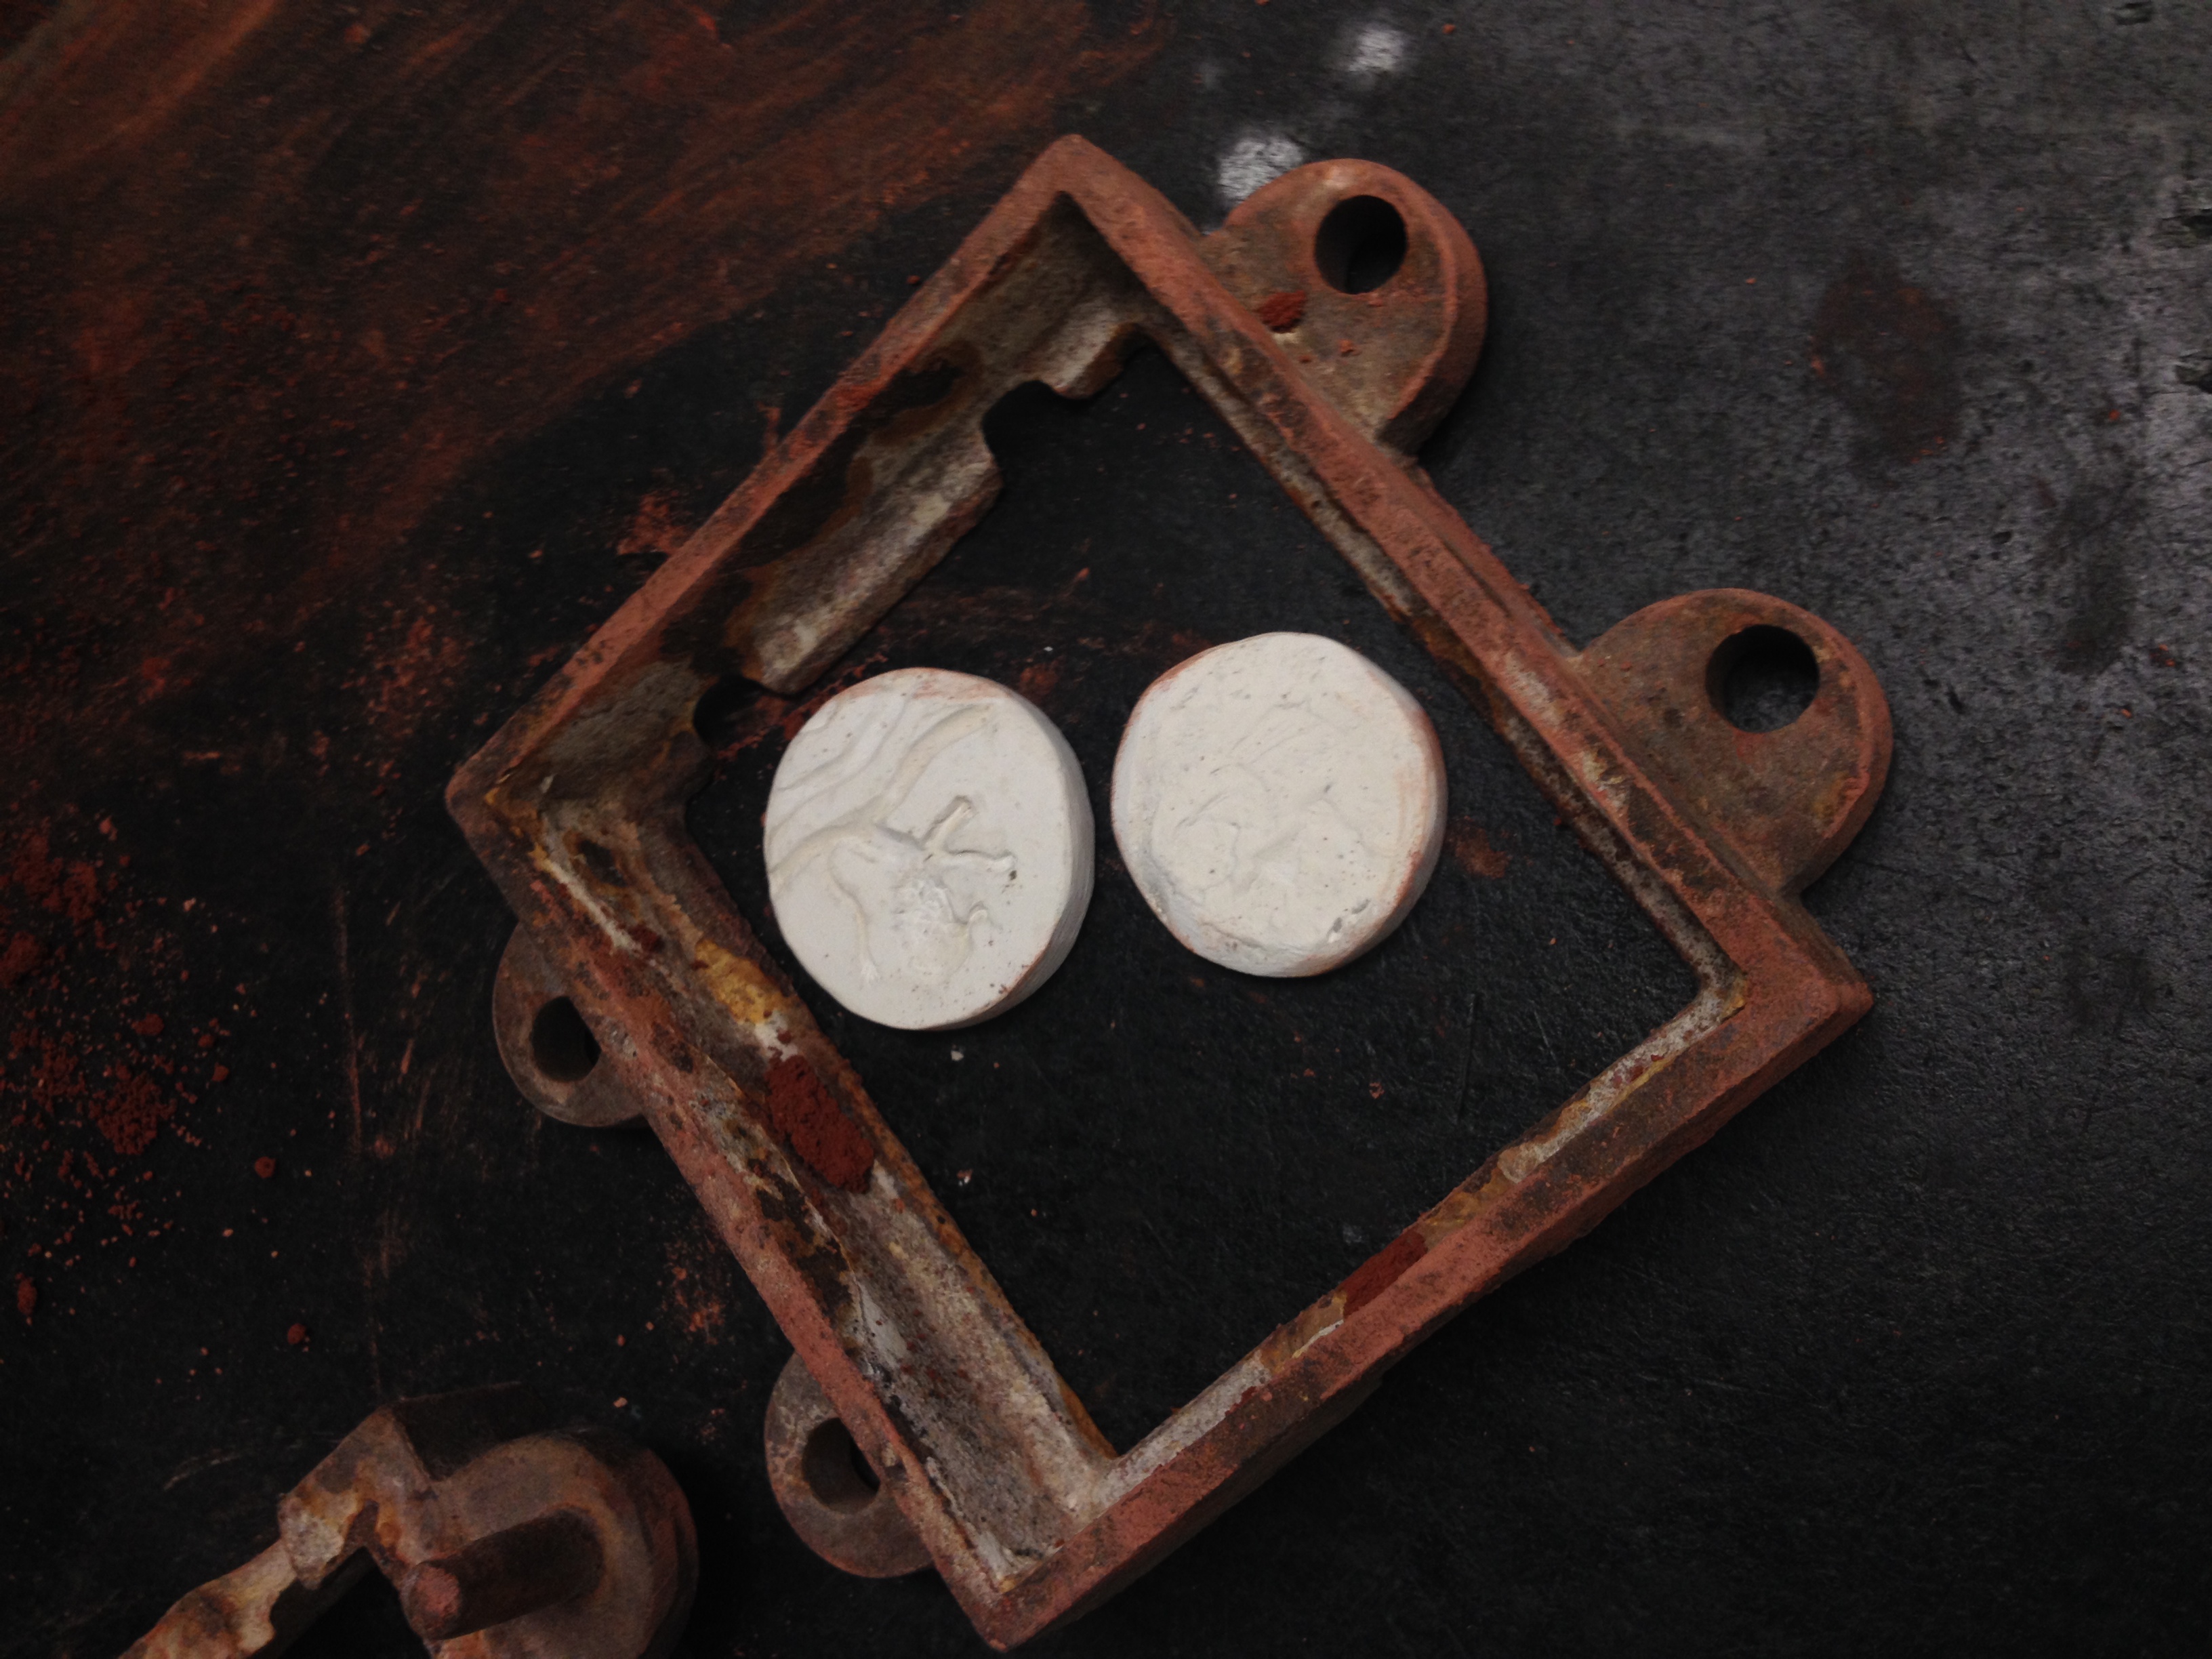
We then placed our plaster casts in the mold diagonally with one another and brushed them with charcoal dust ground with a mortar and pestle, which we subsequently blew off, to achieve a thin film of charcoal coating.
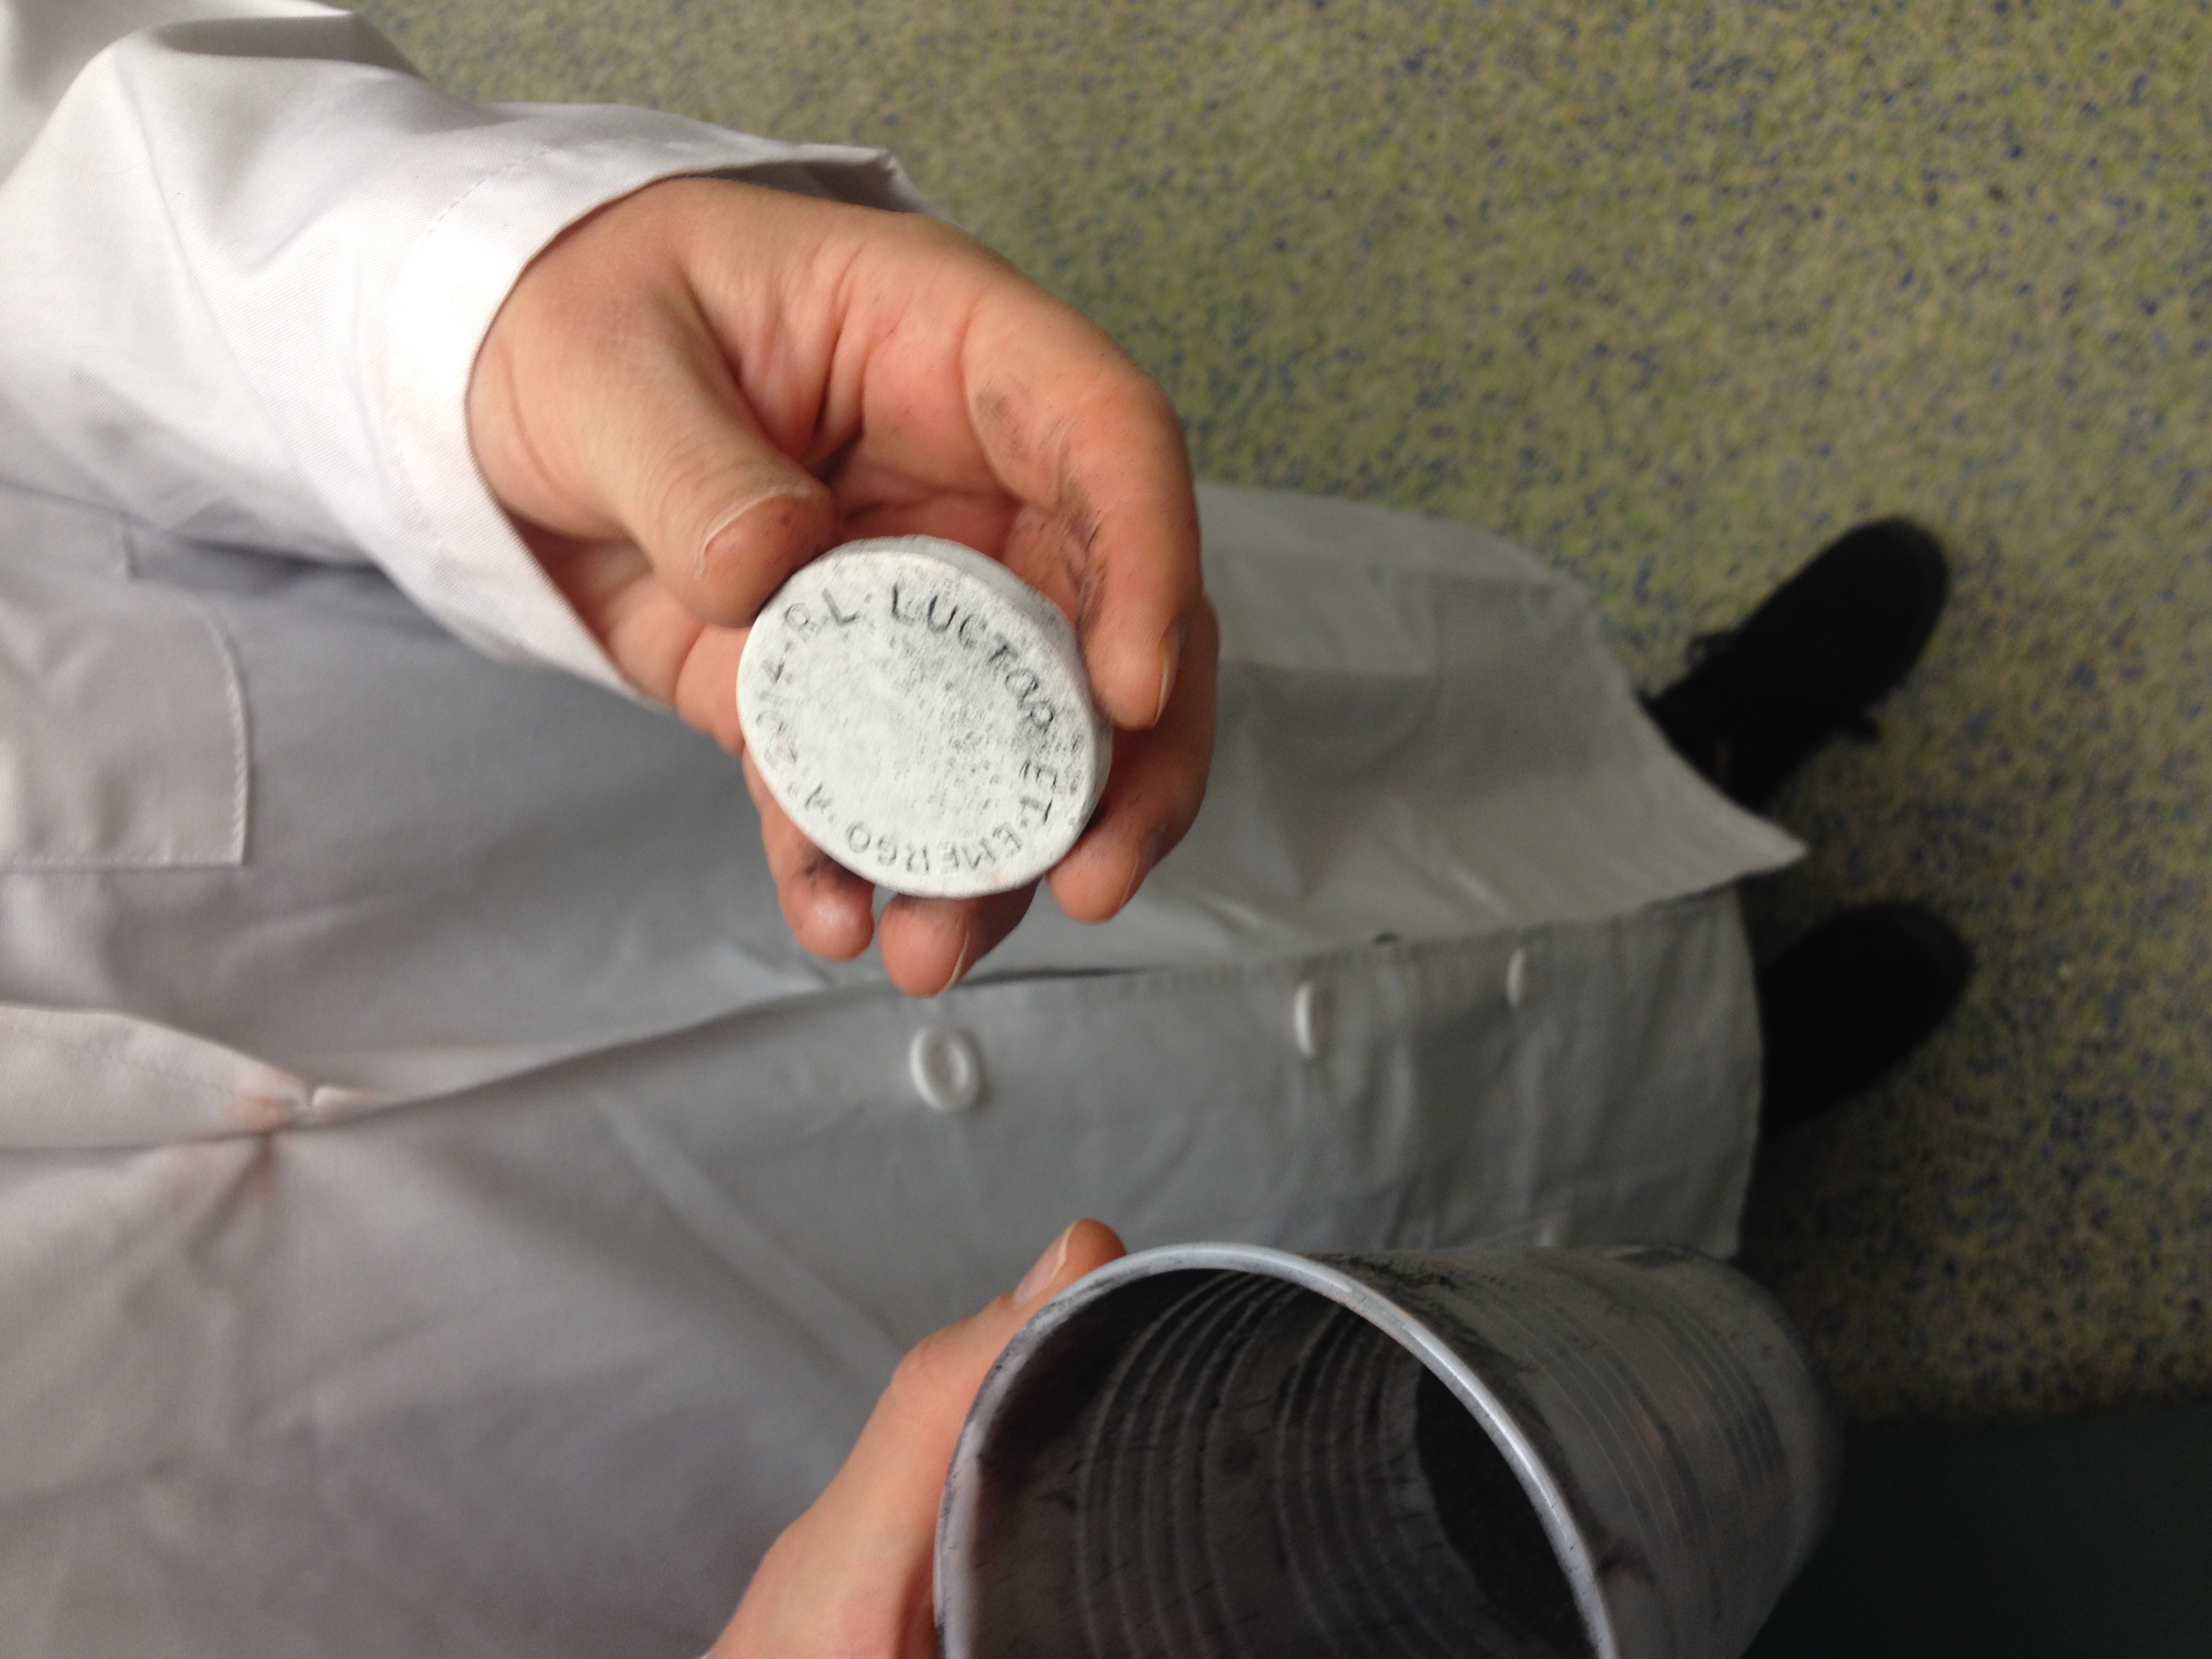
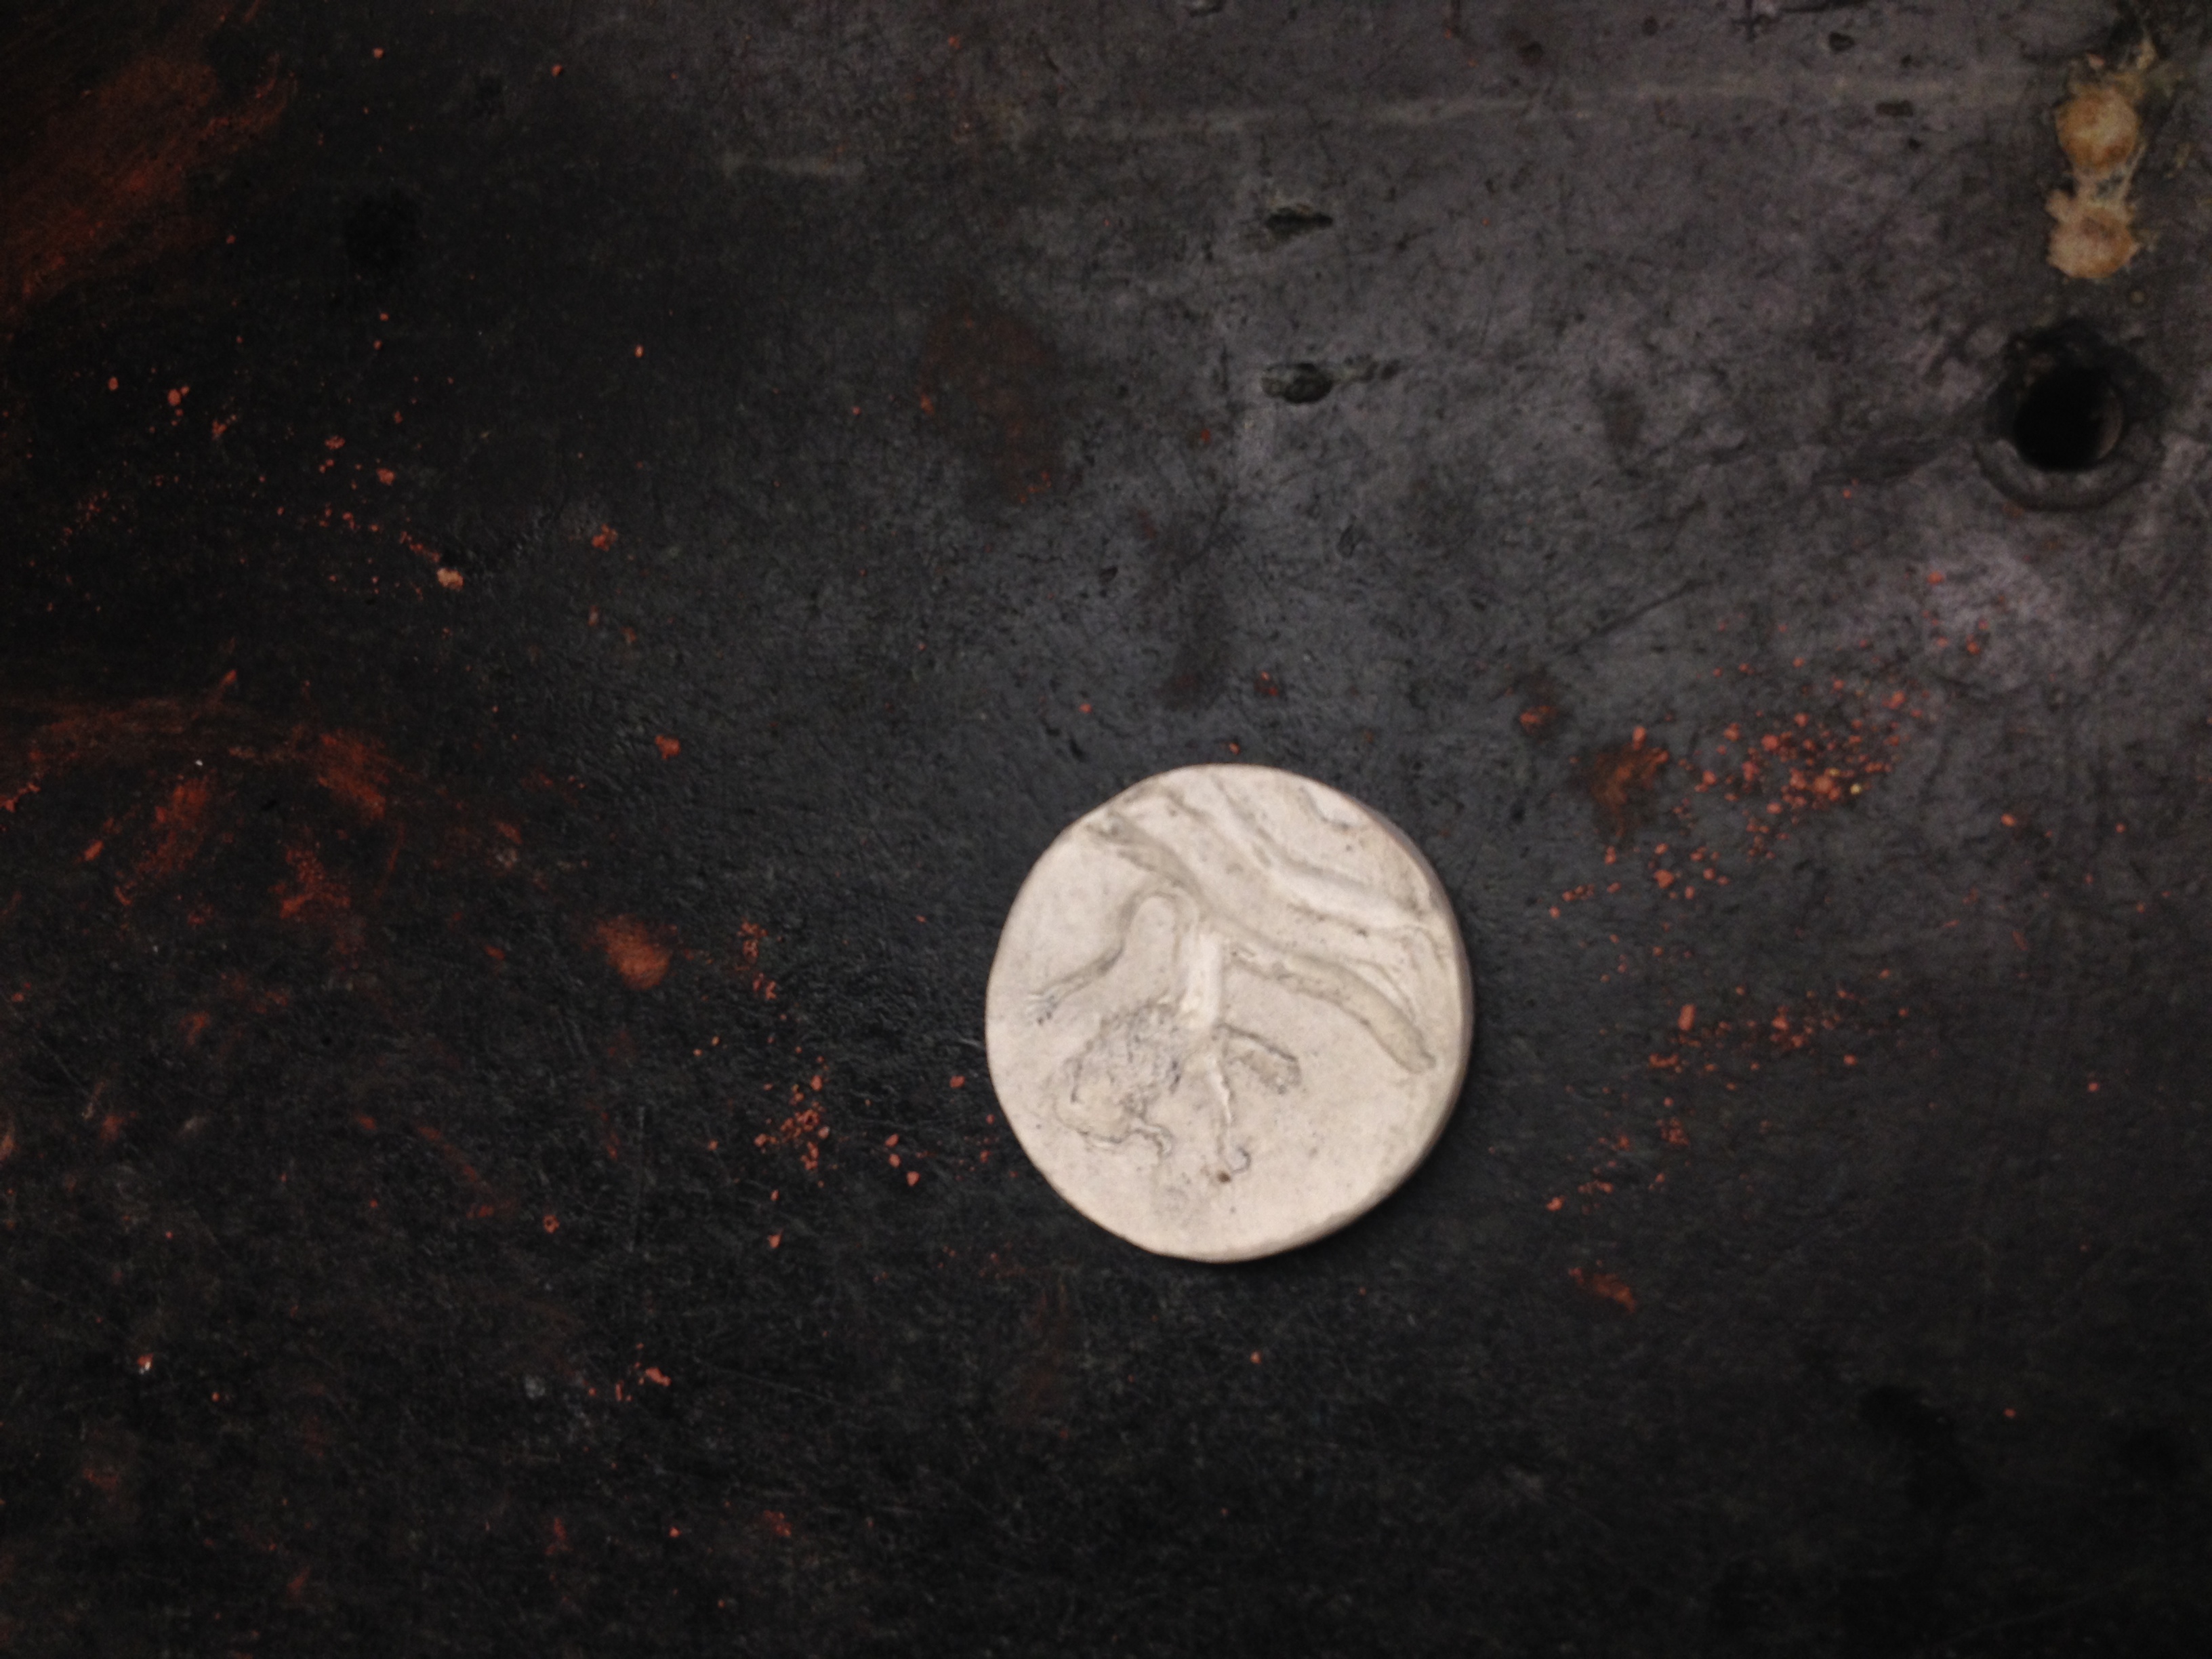
Detail in the plaster patterns emerged with the charcoal dust that was difficult to see previously. We then packed sand around the plaster casts. The sand packed densely, but looking at their positioning Tonny decided that the larger one would be too close to the place in the box mold where a channel would be cut, and that we should re-pack them. An issue of making channels between the two molds would also be the possibility of collapse when metal is poured.
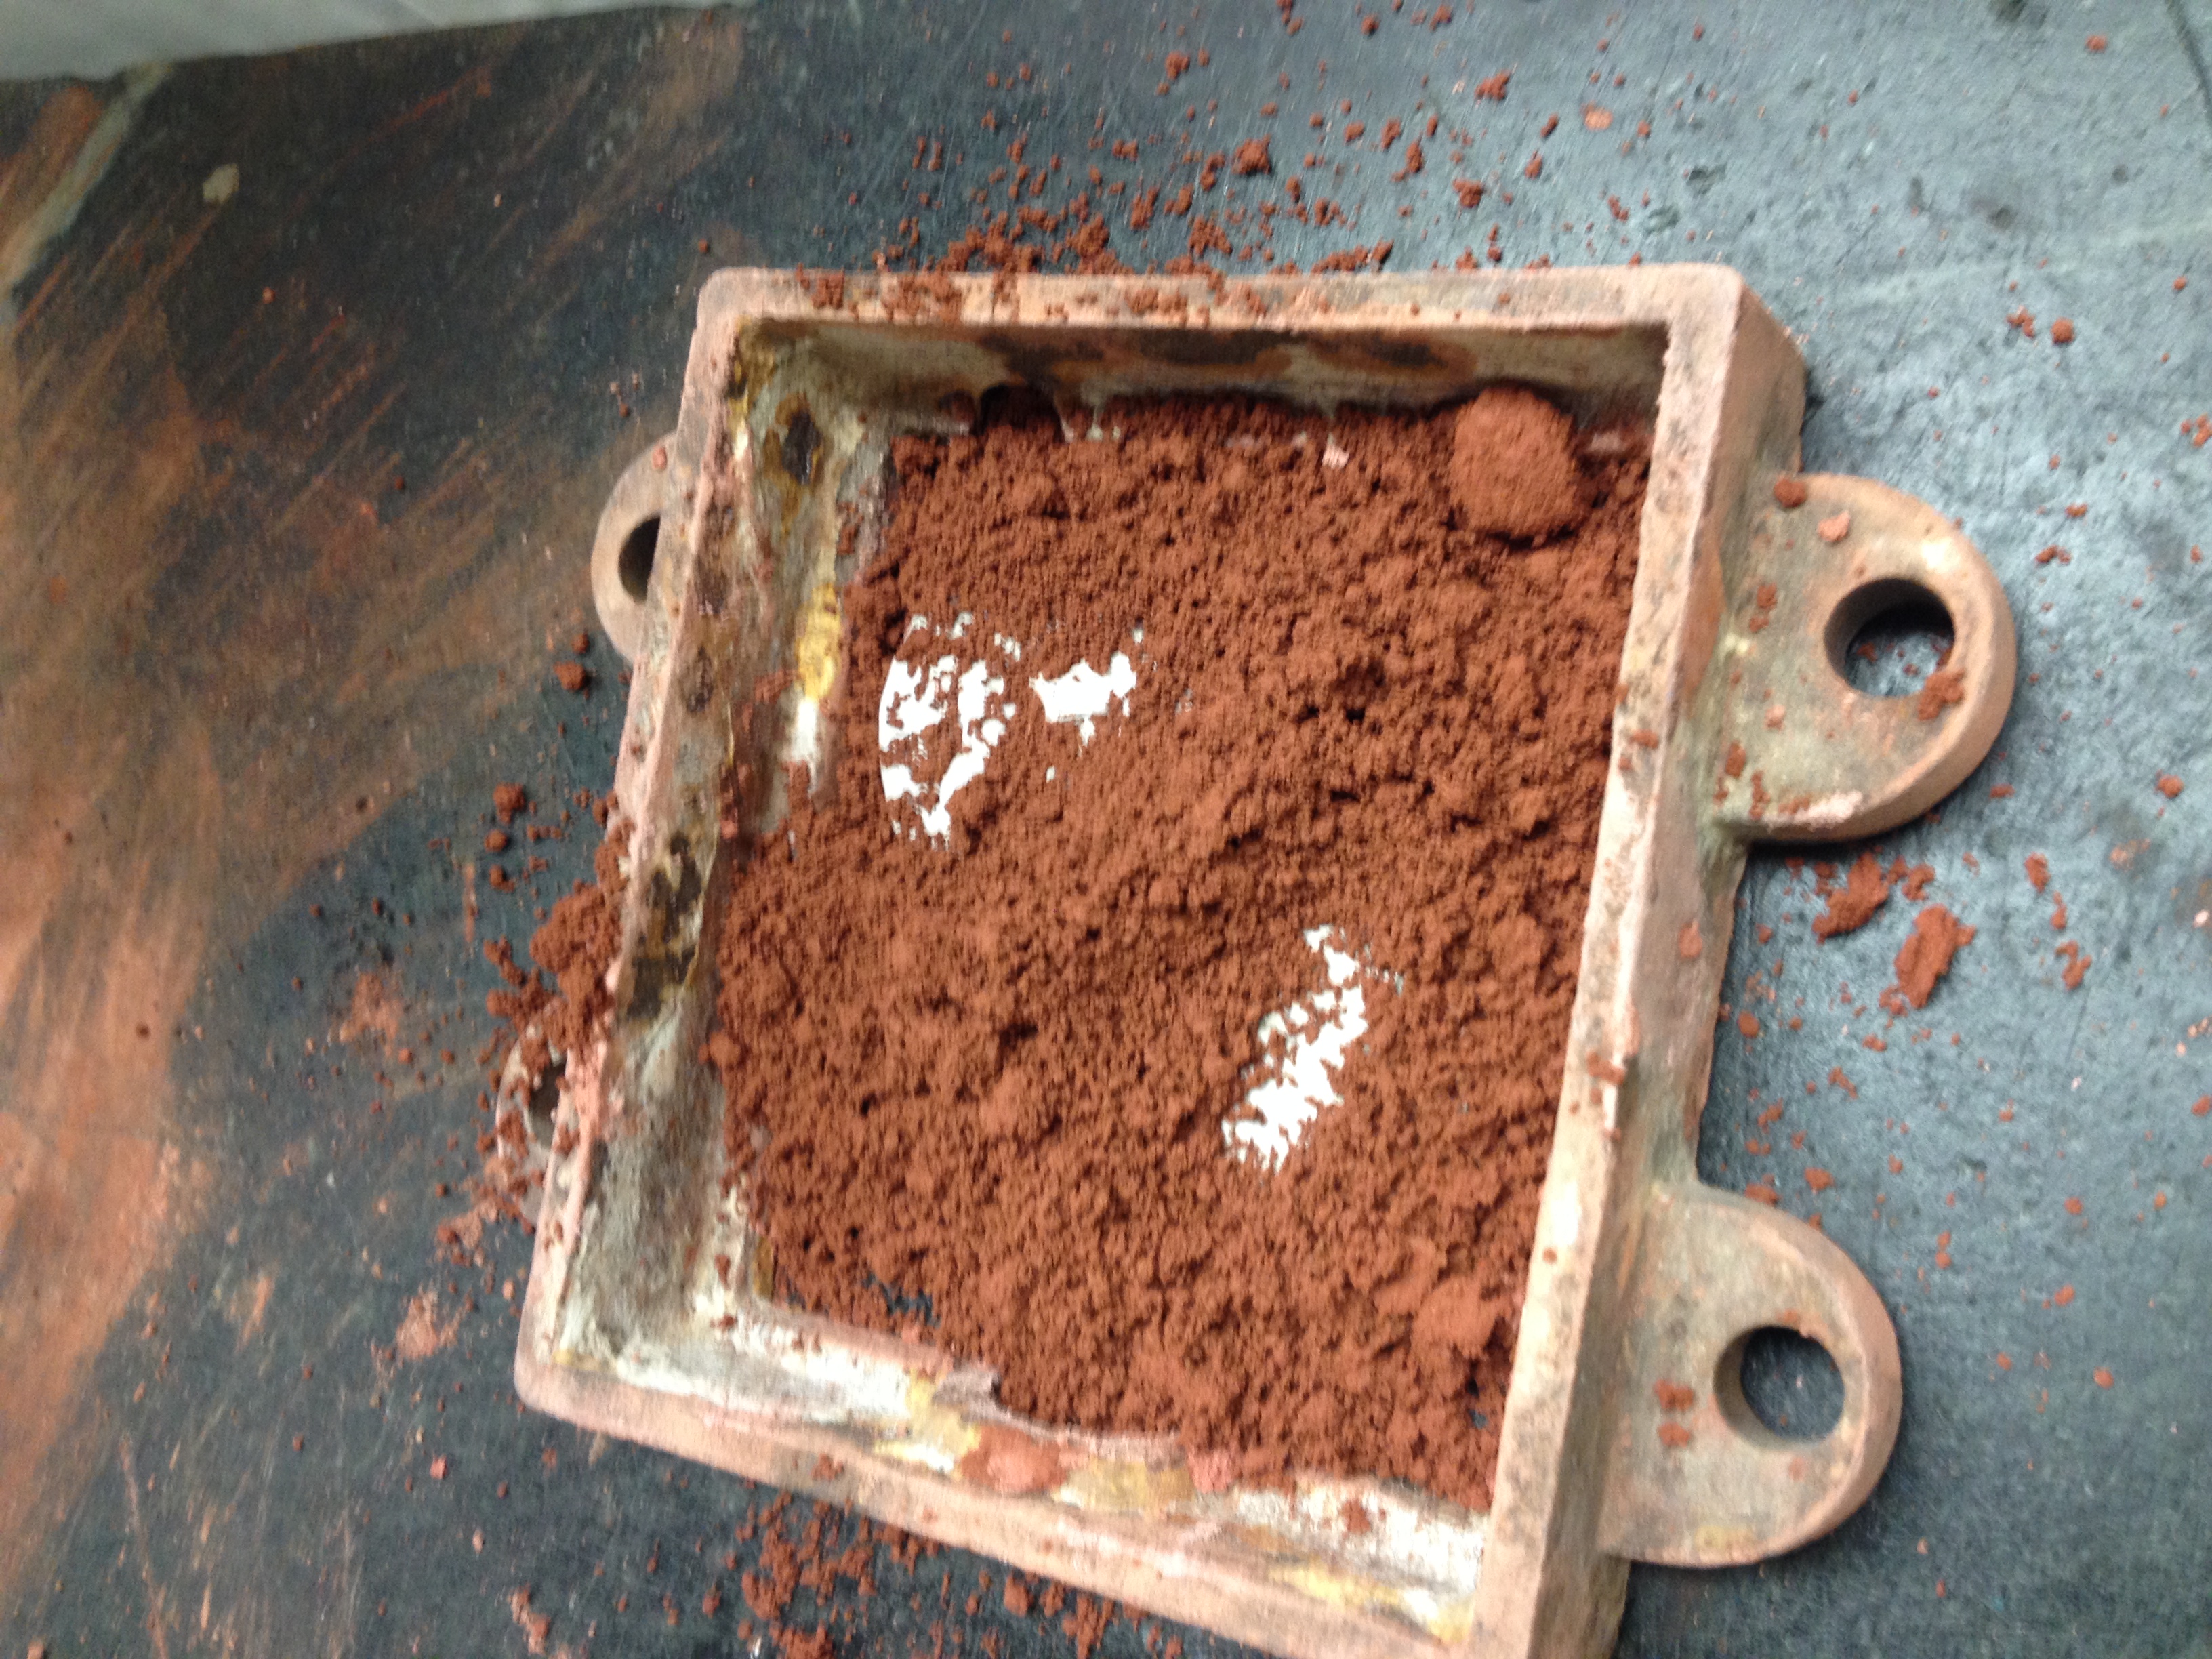
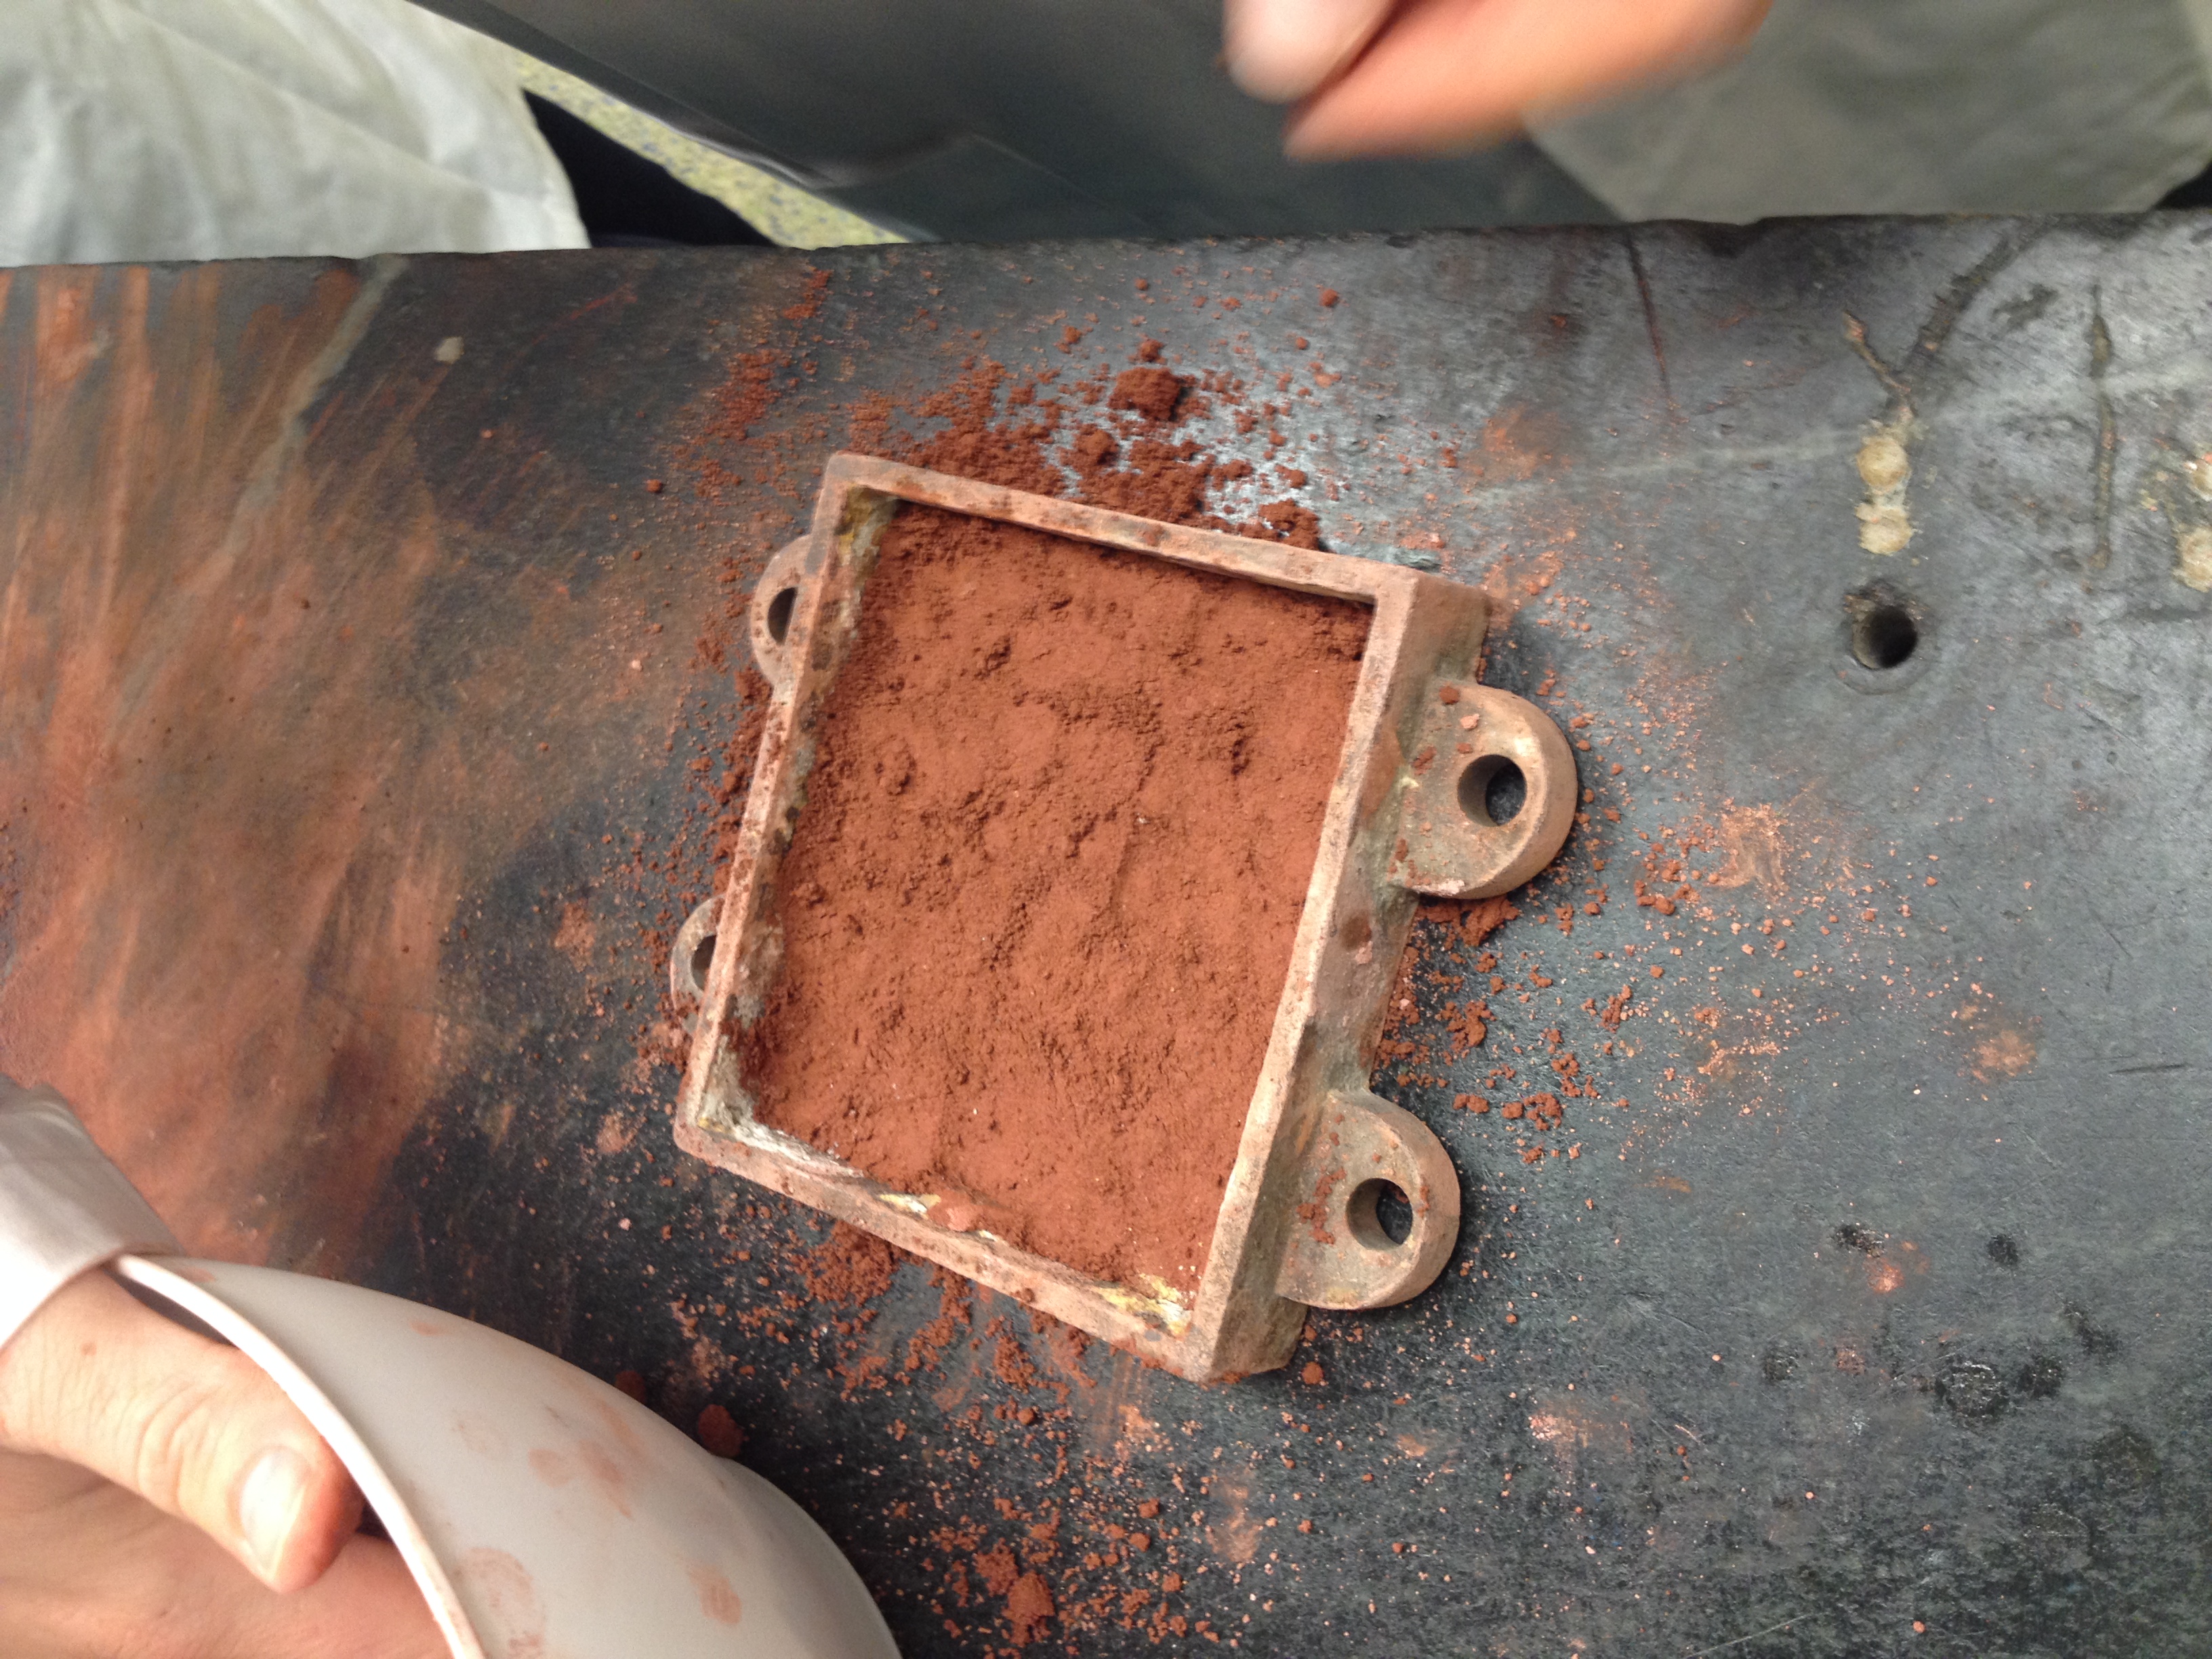
We then re-packed sand over and around plaster patterns. The sand went over the plaster because of a fear that pressing plaster into sand might break the plaster. The sand did not pack as easily this time, and appeared to be drying out, although by the time we got toward the top of the box mold the sand felt very wet. We again emptied out the mold, and discovered that moisture had made its way onto the plaster surfaces. For the larger one (Rozemarijn's) this was not a problem, but for the smaller (Jonah's), which had very low-relief from the start, much of the detail that had made it into the surface of the plaster had been erased. As a means of working around this issue, we decided to remove that plaster disc and substitute it for the medallion from which it had been cast (instead of carving wax, this wax pattern had been poured over/cast from a medallion).
We also discovered this time that the quantity of sand that we began with would not be adequate to fill the two sides of the box mold, so we made a new batch from 2 cups of red clay and about 2/3 of the other ingredients from the second set of proportions above.
Once again, we began packing sand, but this time instead of doing it around the patterns (now a metal medallion and a plaster disc from cast clay around a carved piece of beeswax), we just packed the entire bottom half of the box mold. Once this was done, we skimmed off the top of the sand with a knife. We then pressed the medallion into the sand, which left a good impression, and attempted to press the plaster disc in as well. This did not work, and we were afraid that with any more pressure the plaster might break. Instead we placed the plaster facing upwards (rather than pushing it downwards), coated the entire top layer of the bottom half of the box mold with more charcoal dust, and began to pack sand again for the top half of the box mold. The consistency of this sand started out apparently well, but gradually seemed wetter as we packed more sand in. By the time we got to the top of the box mold, the sand was quite moist to the extent that pushing on the sand made it move around. It felt as though there were air bubbles—there were not—and in order to mitigate the sand's wetness we added more red clay powder. This helped to soak up much of the sand's moisture, but it appeared also to decrease much of the function of the binding agent. Cracks began to appear at the top of the mold. We added a very small amount of brandy again, which appeared to help close some of the cracks, but the top half of the mold looked much less smooth and uniform than the bottom half had.
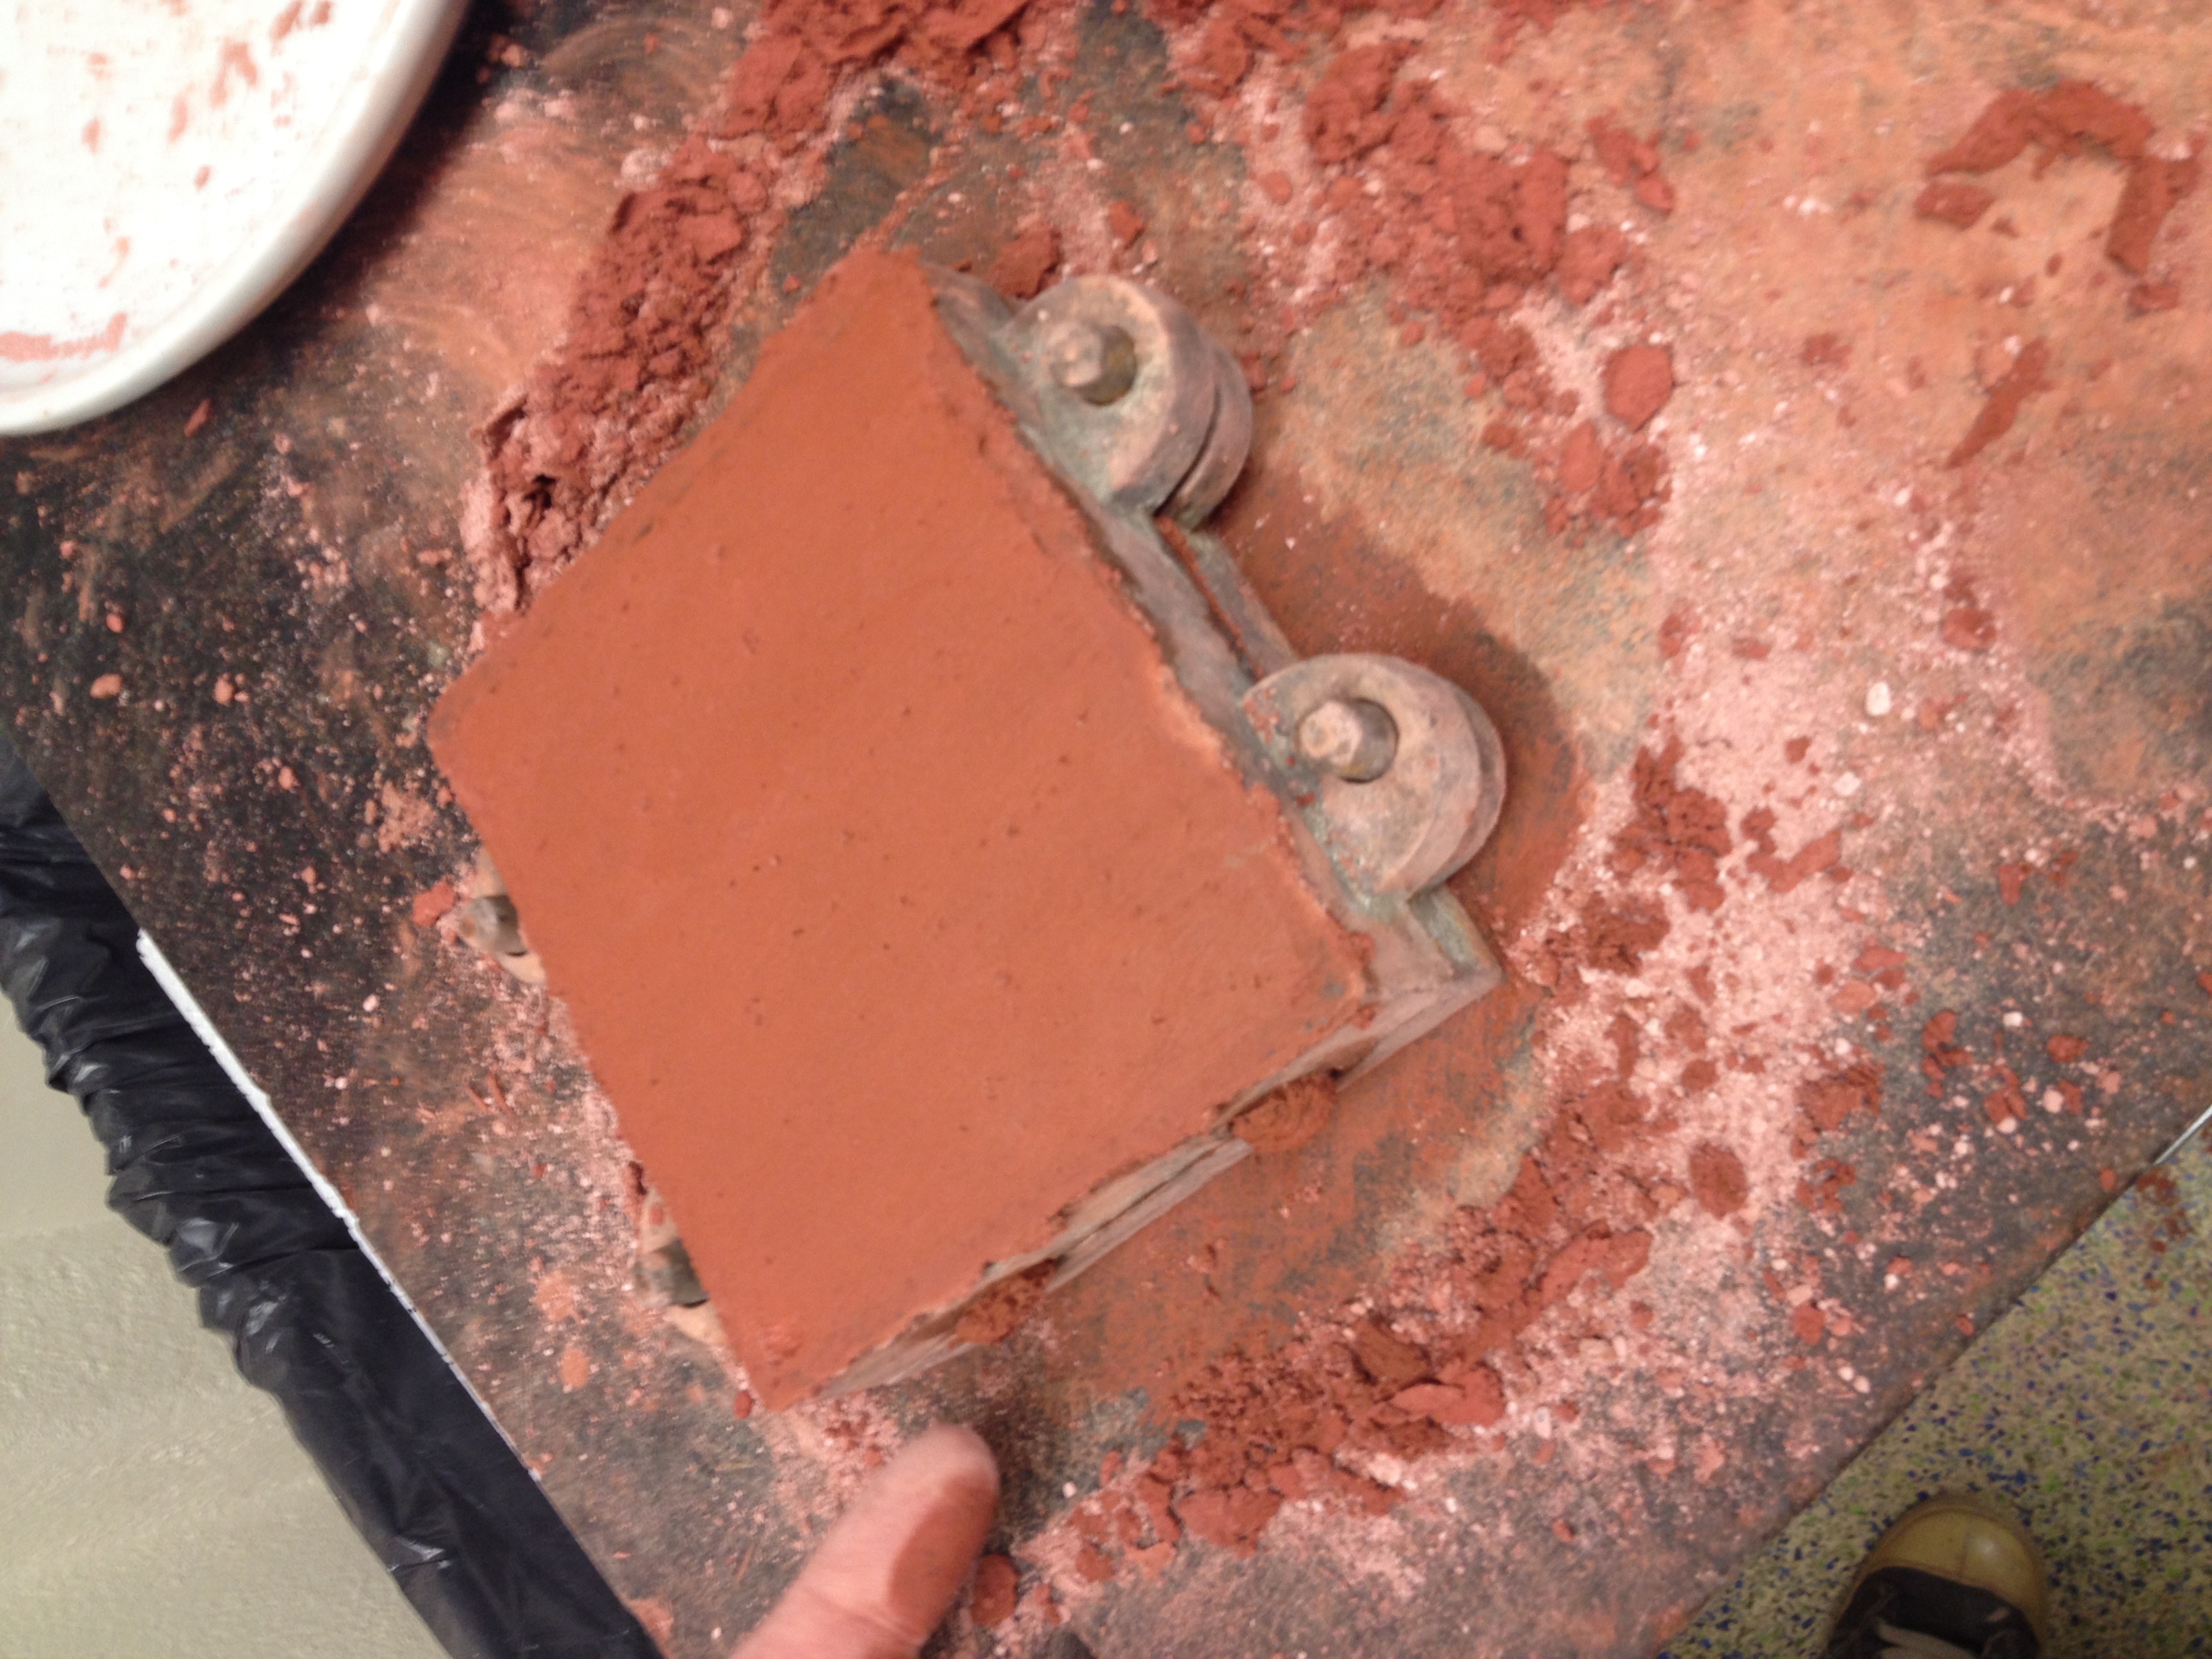
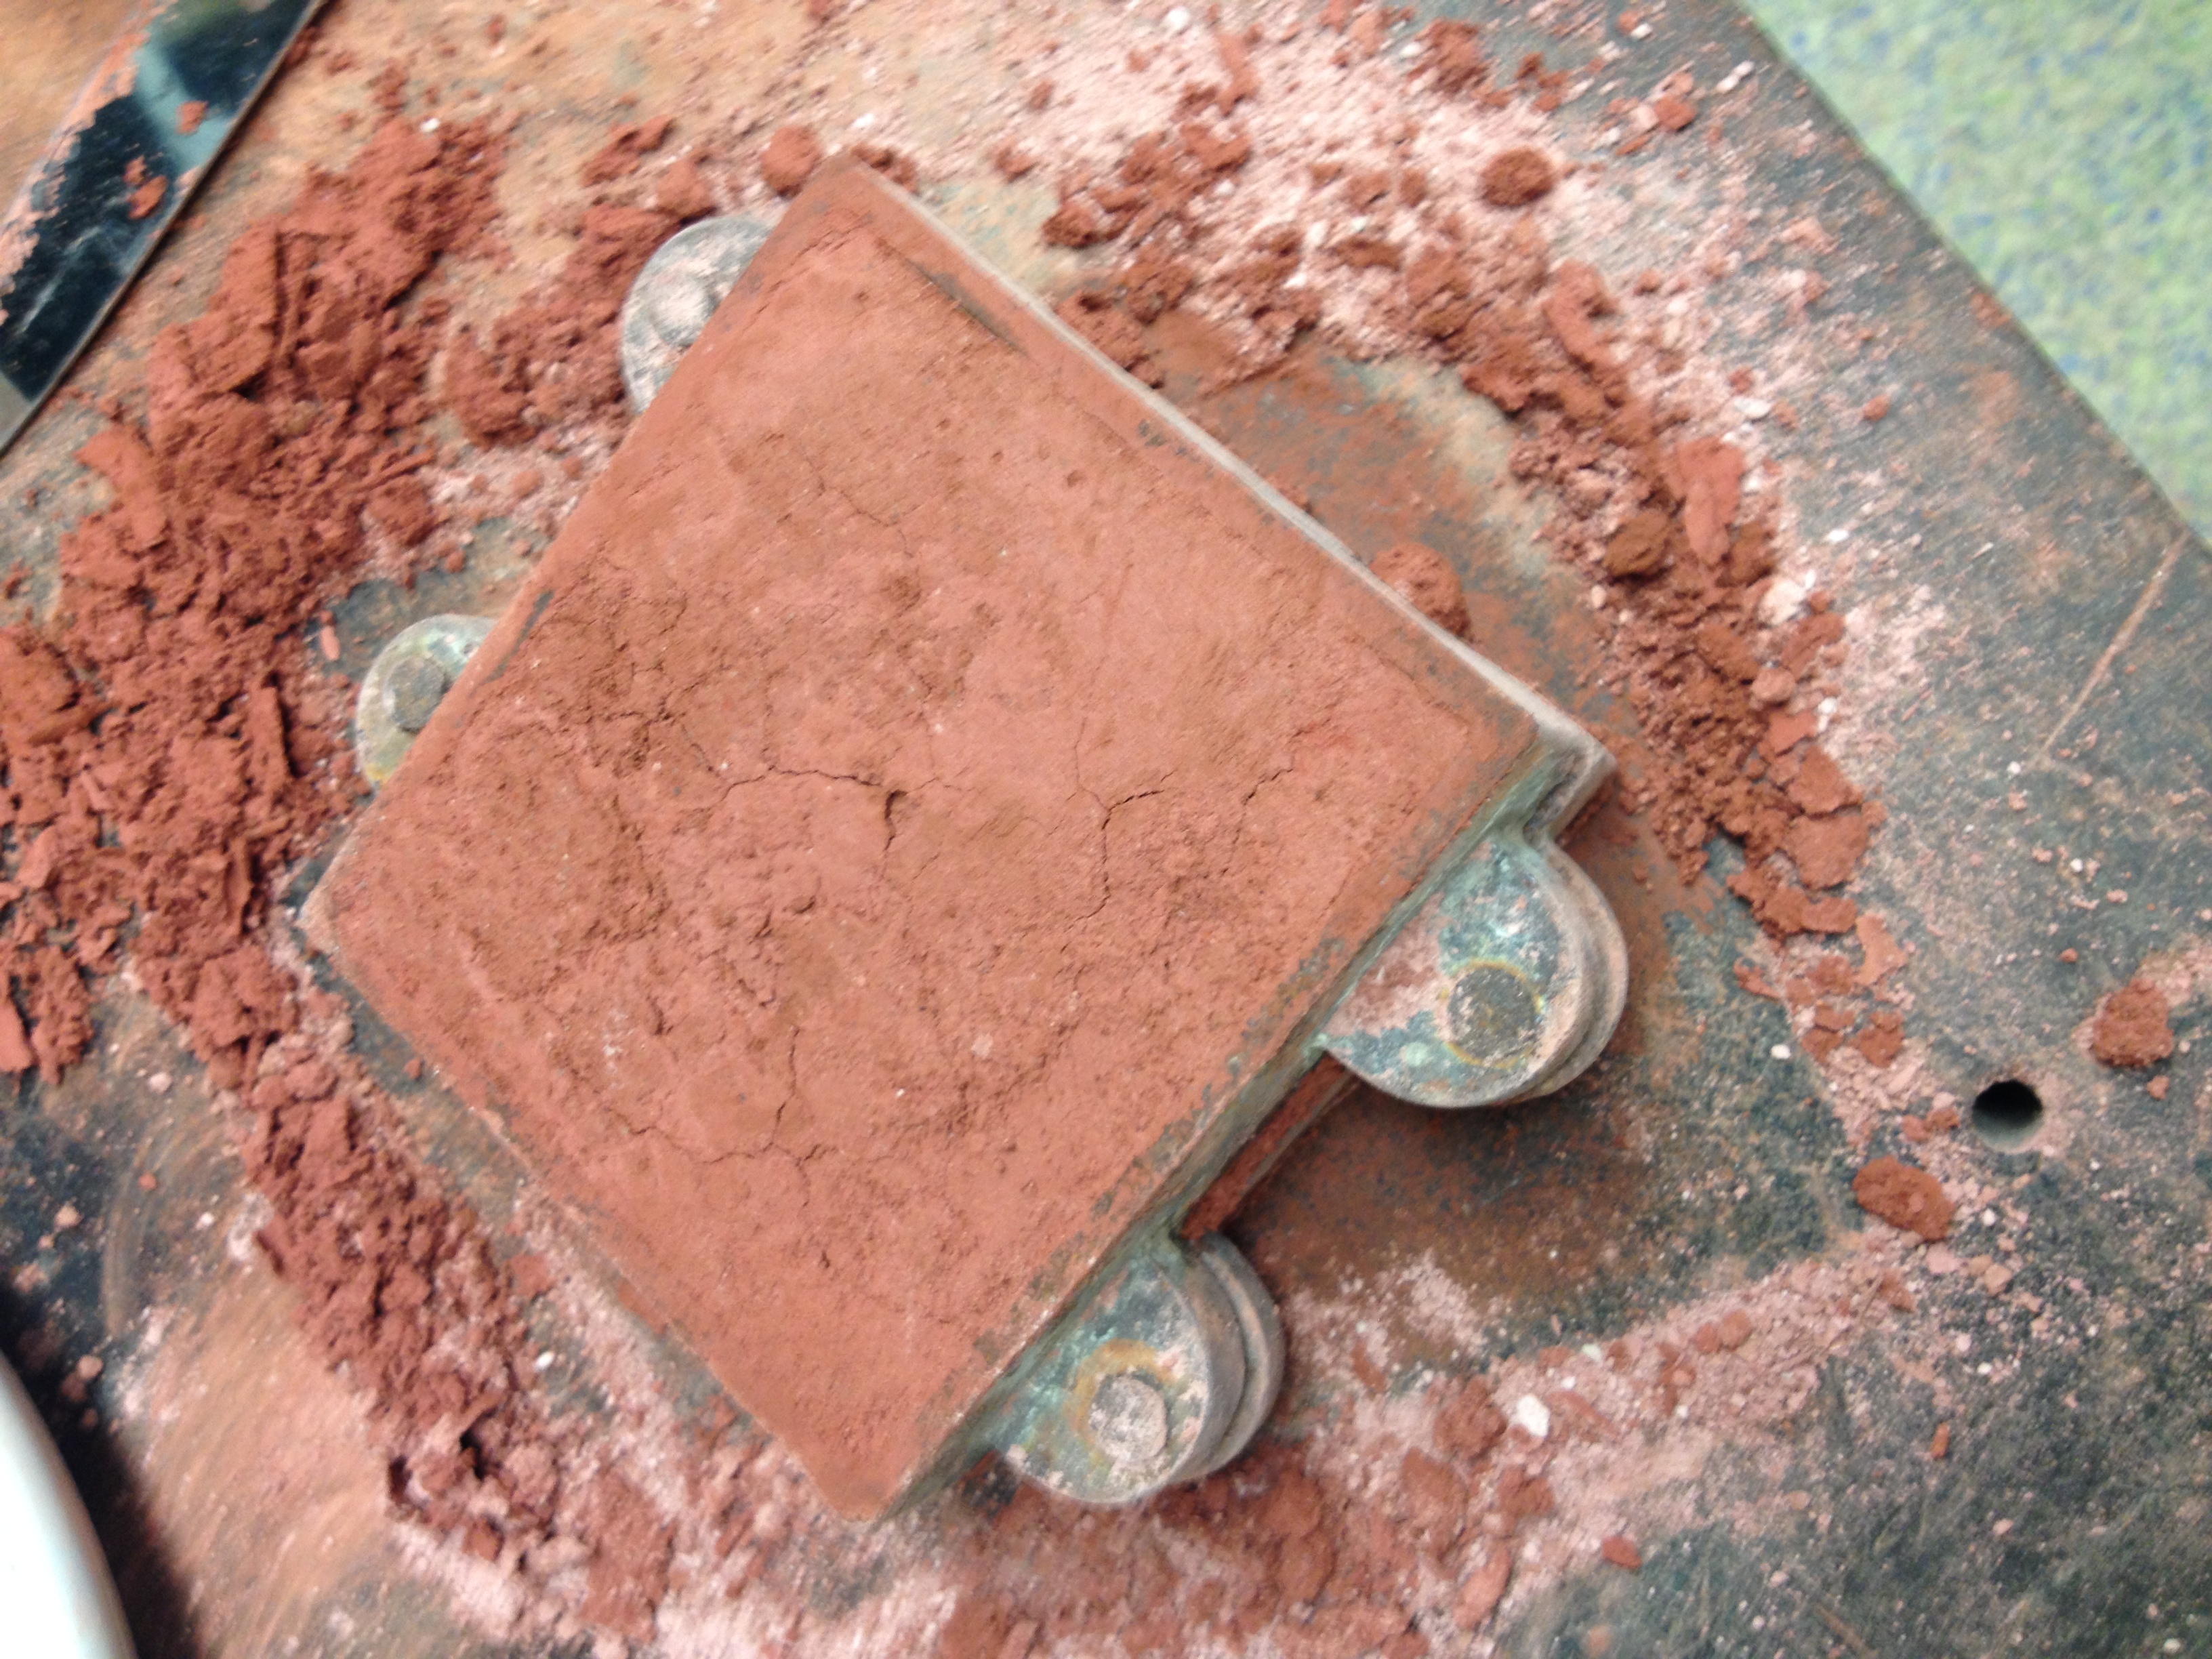
Skimming off the top layer of the sand again, we turned the mold over to find that some of the moisture had made its way down to the bottom half of the mold. We turned it over and stored it in a Zip-loc bag, in the hopes that some of the moisture on the bottom might makes its way down to the cracked side and even out again.
