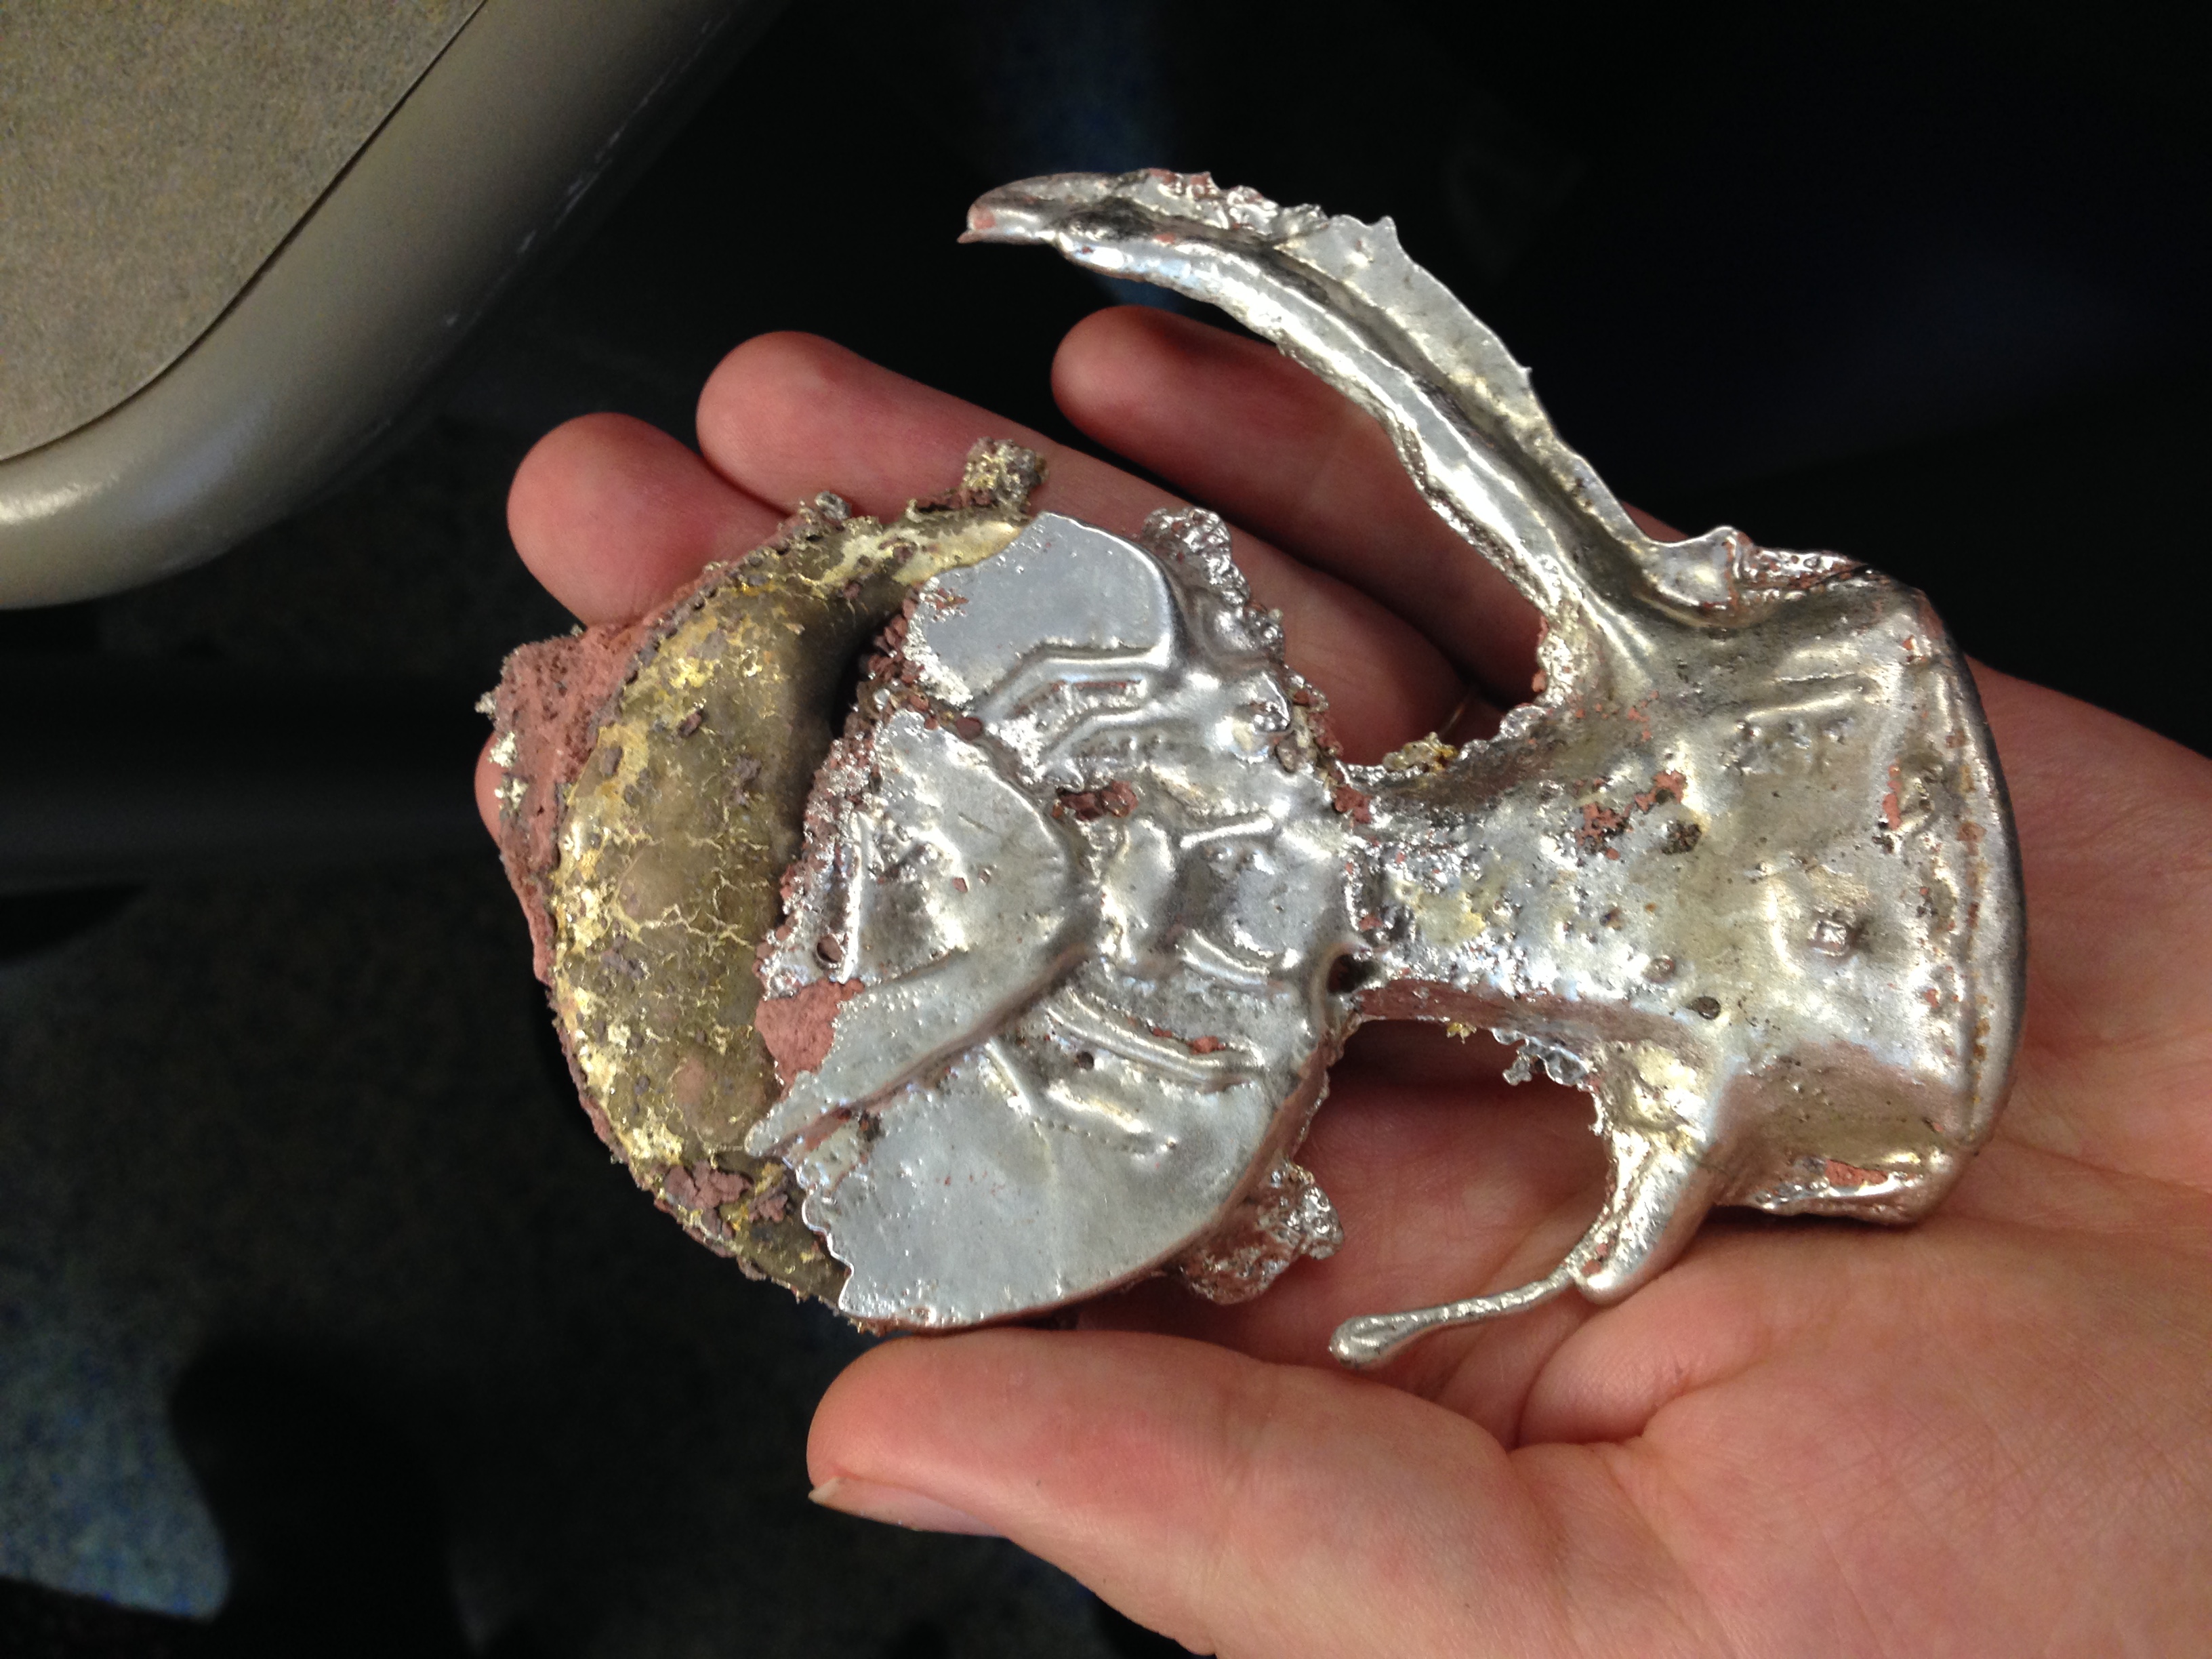
Oct. 4: Wax Model
Table of Contents
DATE AND TIME: 10/14/14, 12:32 am (updated 10/16/14, 7:27 pm)
LOCATION: 142nd St.
SUBJECT: Carving the wax model
Author: Emogene
I had started a practice medallion in class trying to create a portrait of my dog's head. This was very difficult and I hadn't been sure of how to use the tools to get the kind of effects I wanted. I was not very happy with the results of this practice medal, which I had spent most of class making. I found that it was best to use a sharp tool and stick with it, using it carefully instead of using a wide range of tools that produce different effects. Over the course of carving my second medal, the honeybee, I really felt that I got to "know" my primary tool, a very sharp X-acto blade, and was able to use it with much more precision even than the wax carving tools that we had in the lab. When I picked up a new tool to work on my model, I would often be frustrated that it did not help me achieve the effect I wanted or was imprecise. The X-acto blade, while not ideal for carving in narrow crevices or other tools, became my go-to tool of choice. Even though it wasn't perfect for all situations, I had a sense of familiarity with this tool that made it easier to make shapes and forms more precisely.
So when it came time to carve my final design, I had some experience with the tools and formulated a general plan for how I would go about carving. The temperature in the apartment was 80-81 degrees, making the wax soft and malleable---I didn't know the temperature of the lab, but the wax had seemed much harder when I had made my practice wax medal. I started by drawing a design into the wax surface, a little drawing of a honeybee. I remembered from the manuscript mentions of the importance of temperature in working with wax; I found that the warm temperature in my apartment made it easy to remove large amounts of wax at once, but more difficult to produce finer details.
After making the initial design, I started to carve away the background of the image.
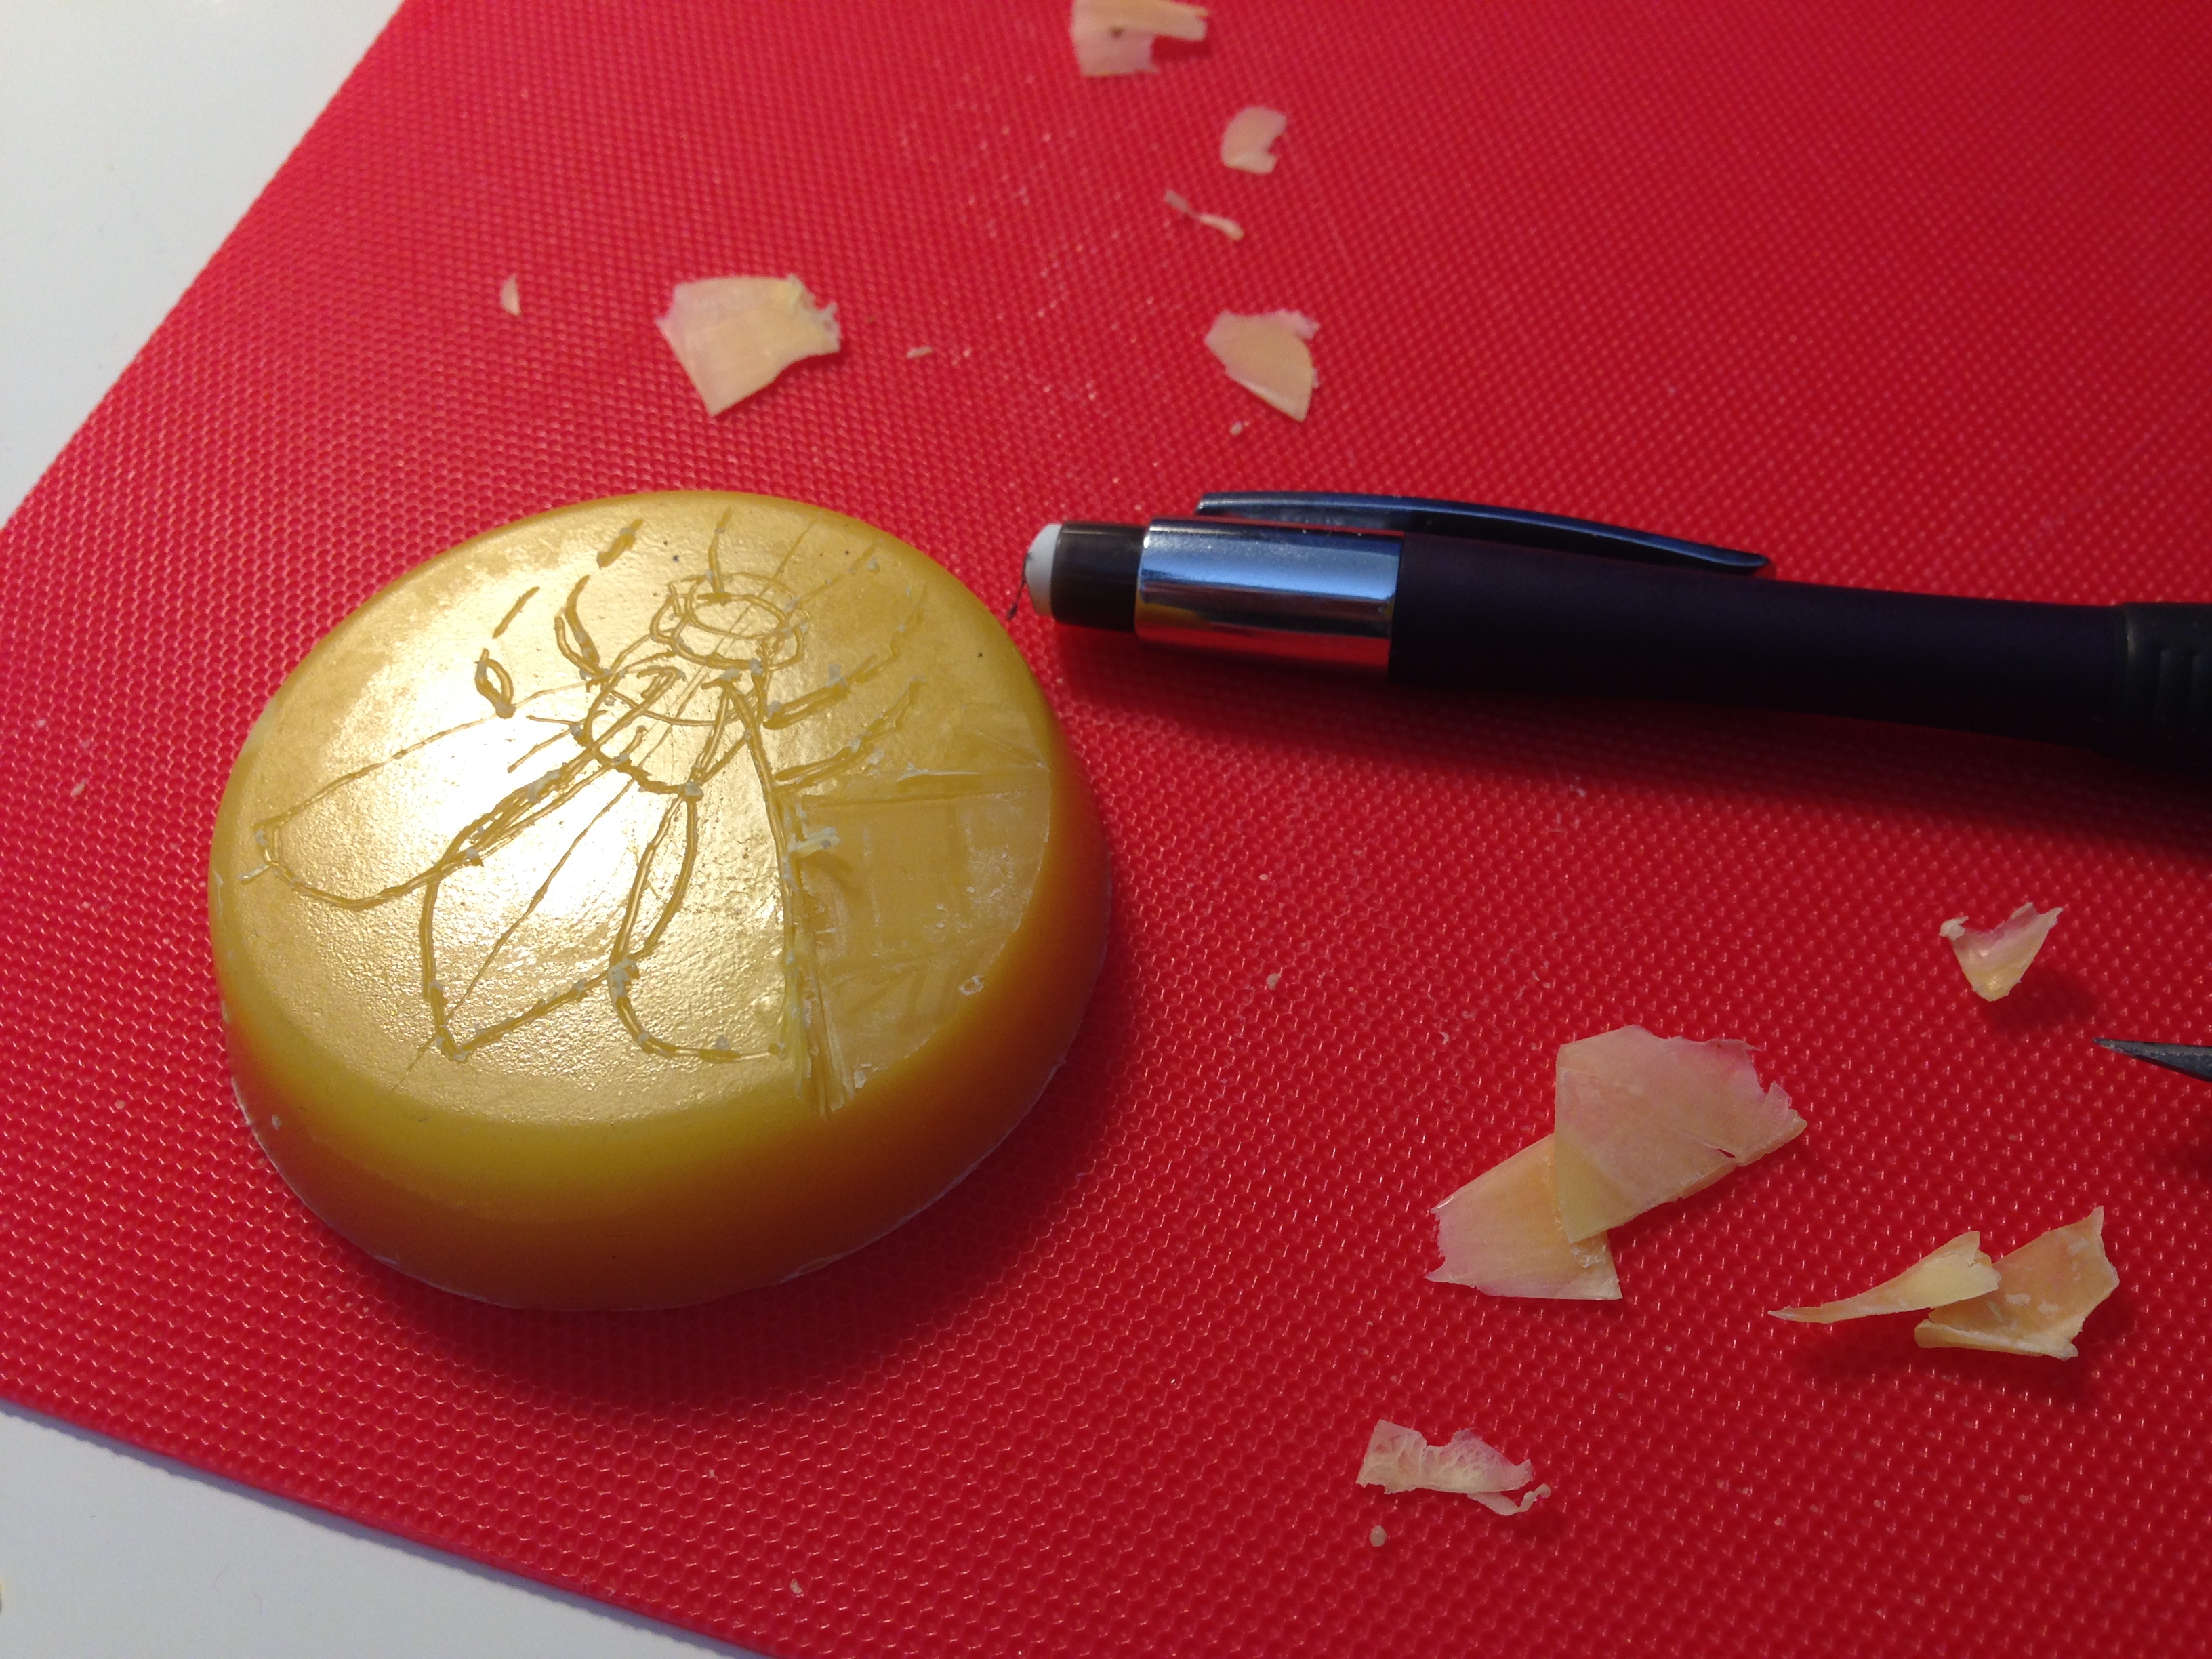
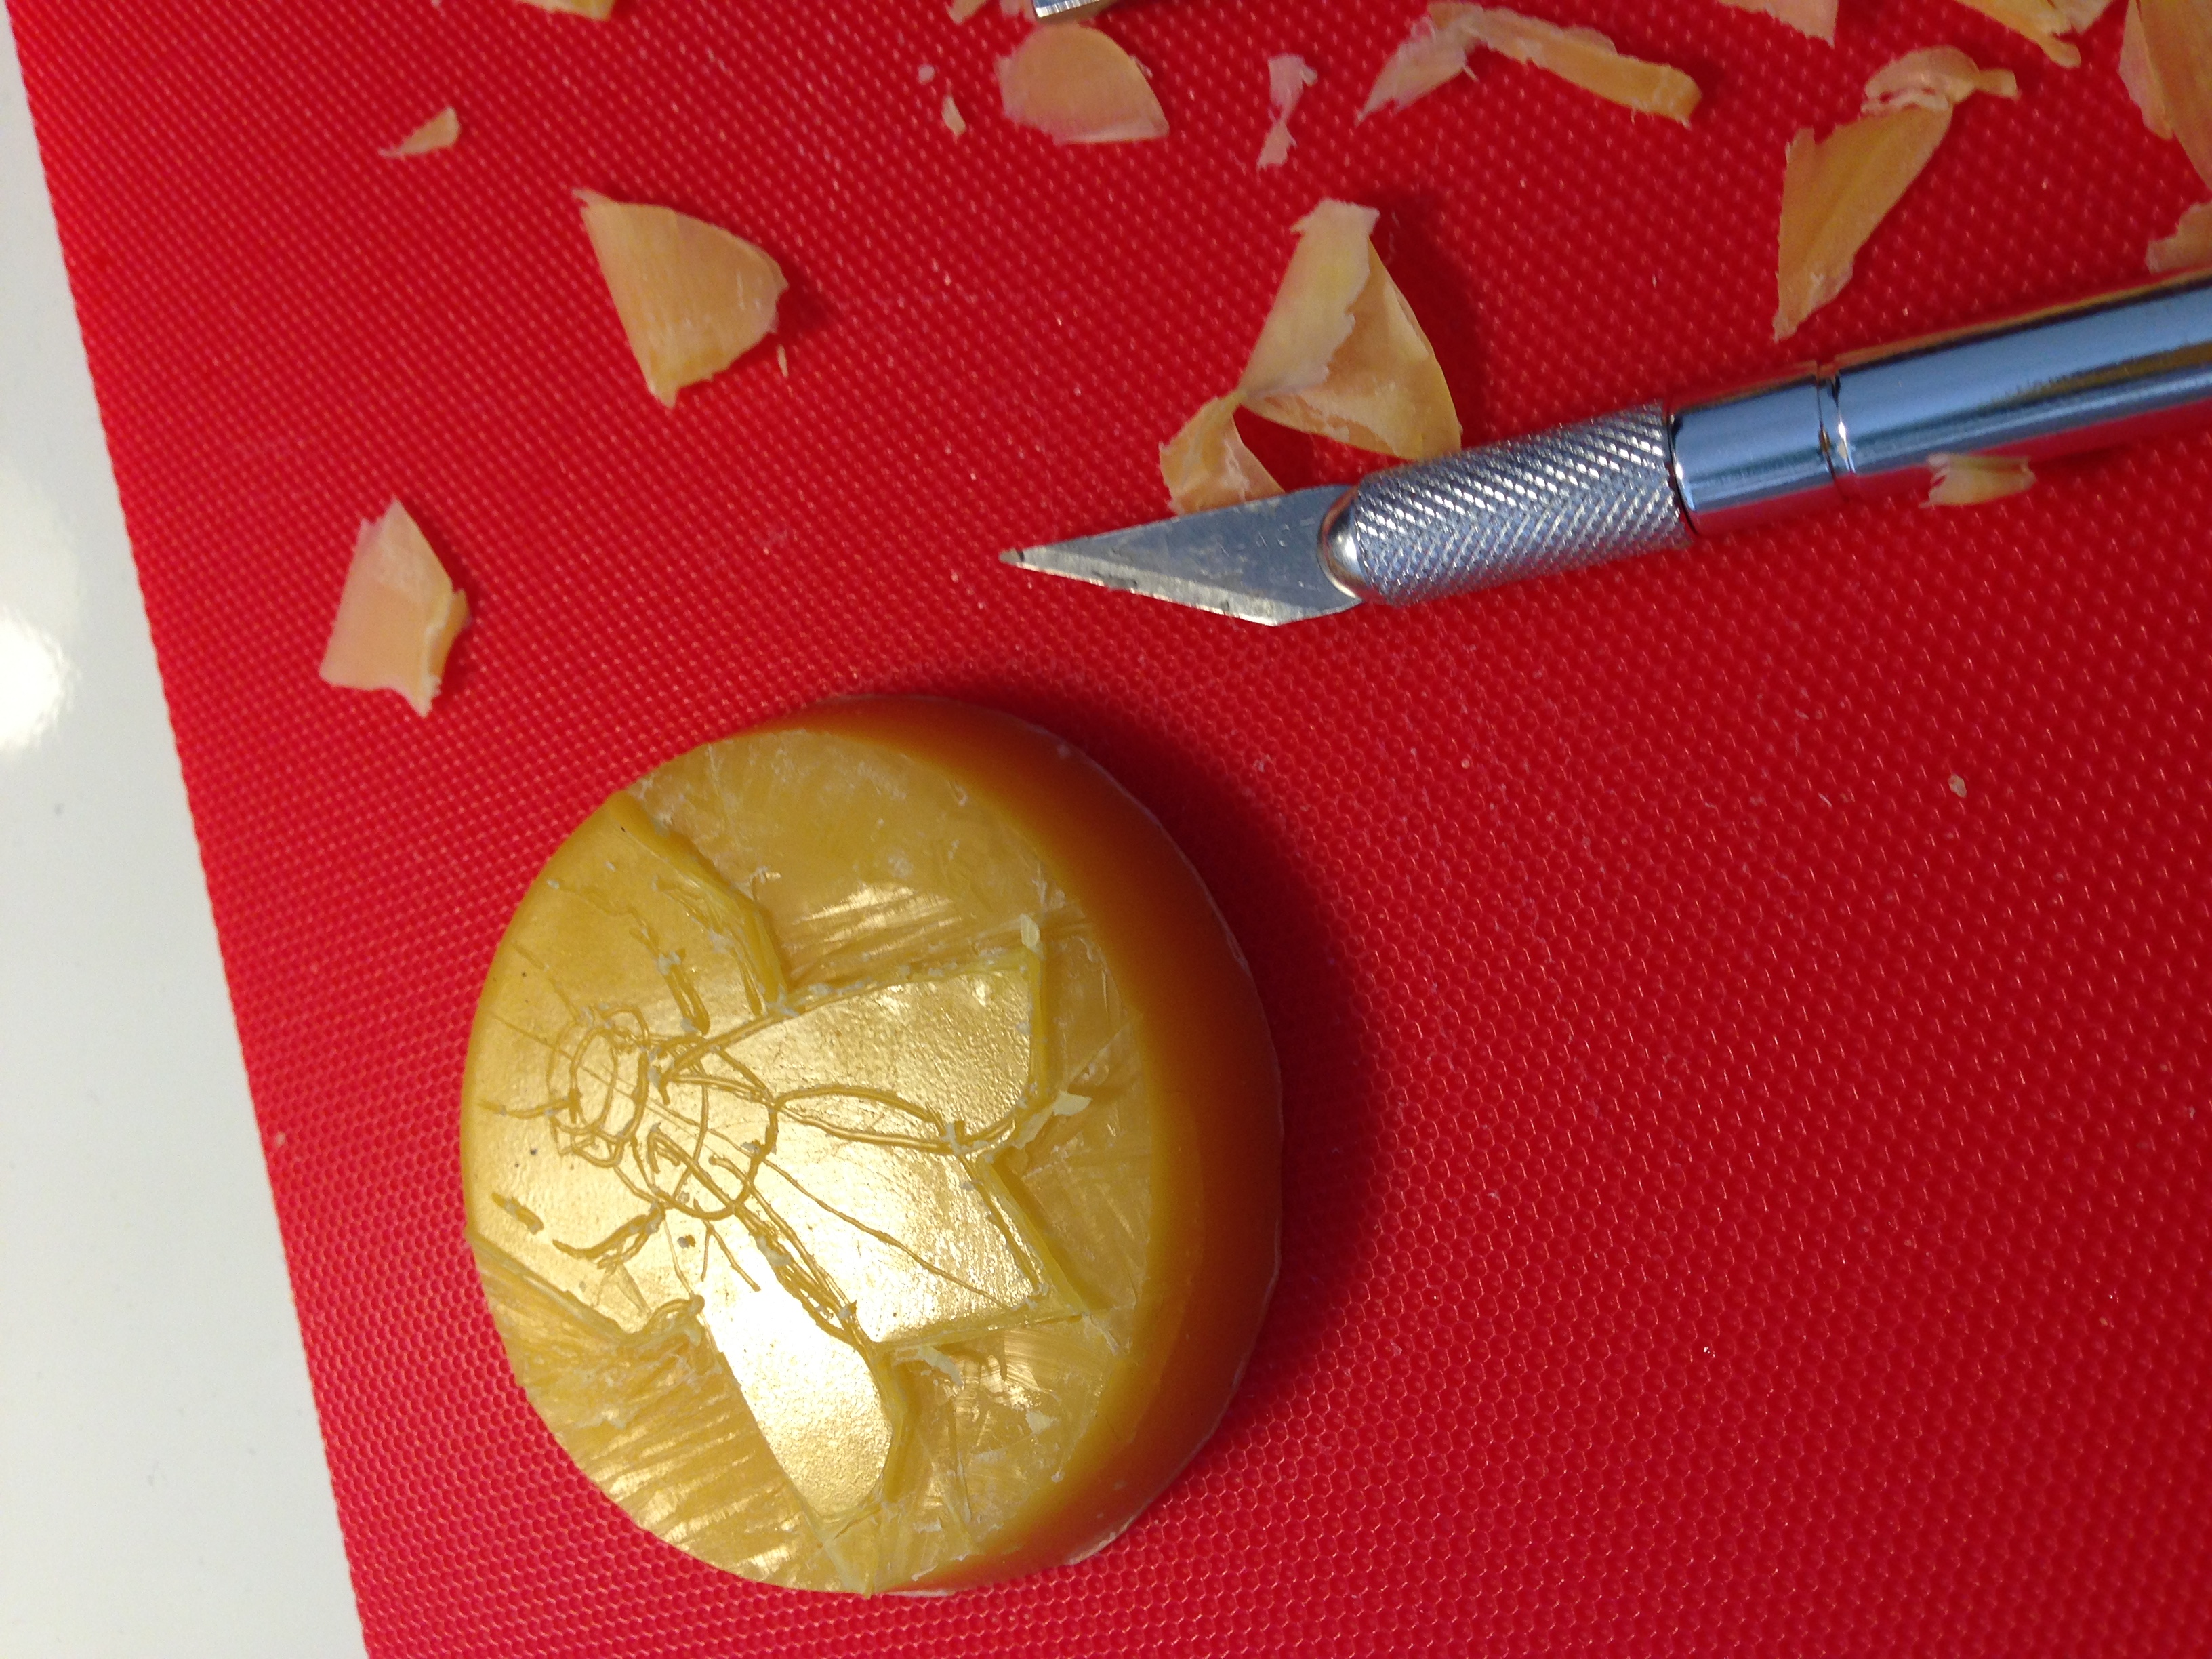
The areas around the legs and antennae gave me the most trouble---it was very difficult to carve between the these small areas with my X-acto blade. It took a good deal of focus and patience (as well as steady hands) to remove this wax. I had to translate some elements from line drawing to a 3D relief design; for example, it was necessary to make the legs a good deal thicker in order to read on the object.
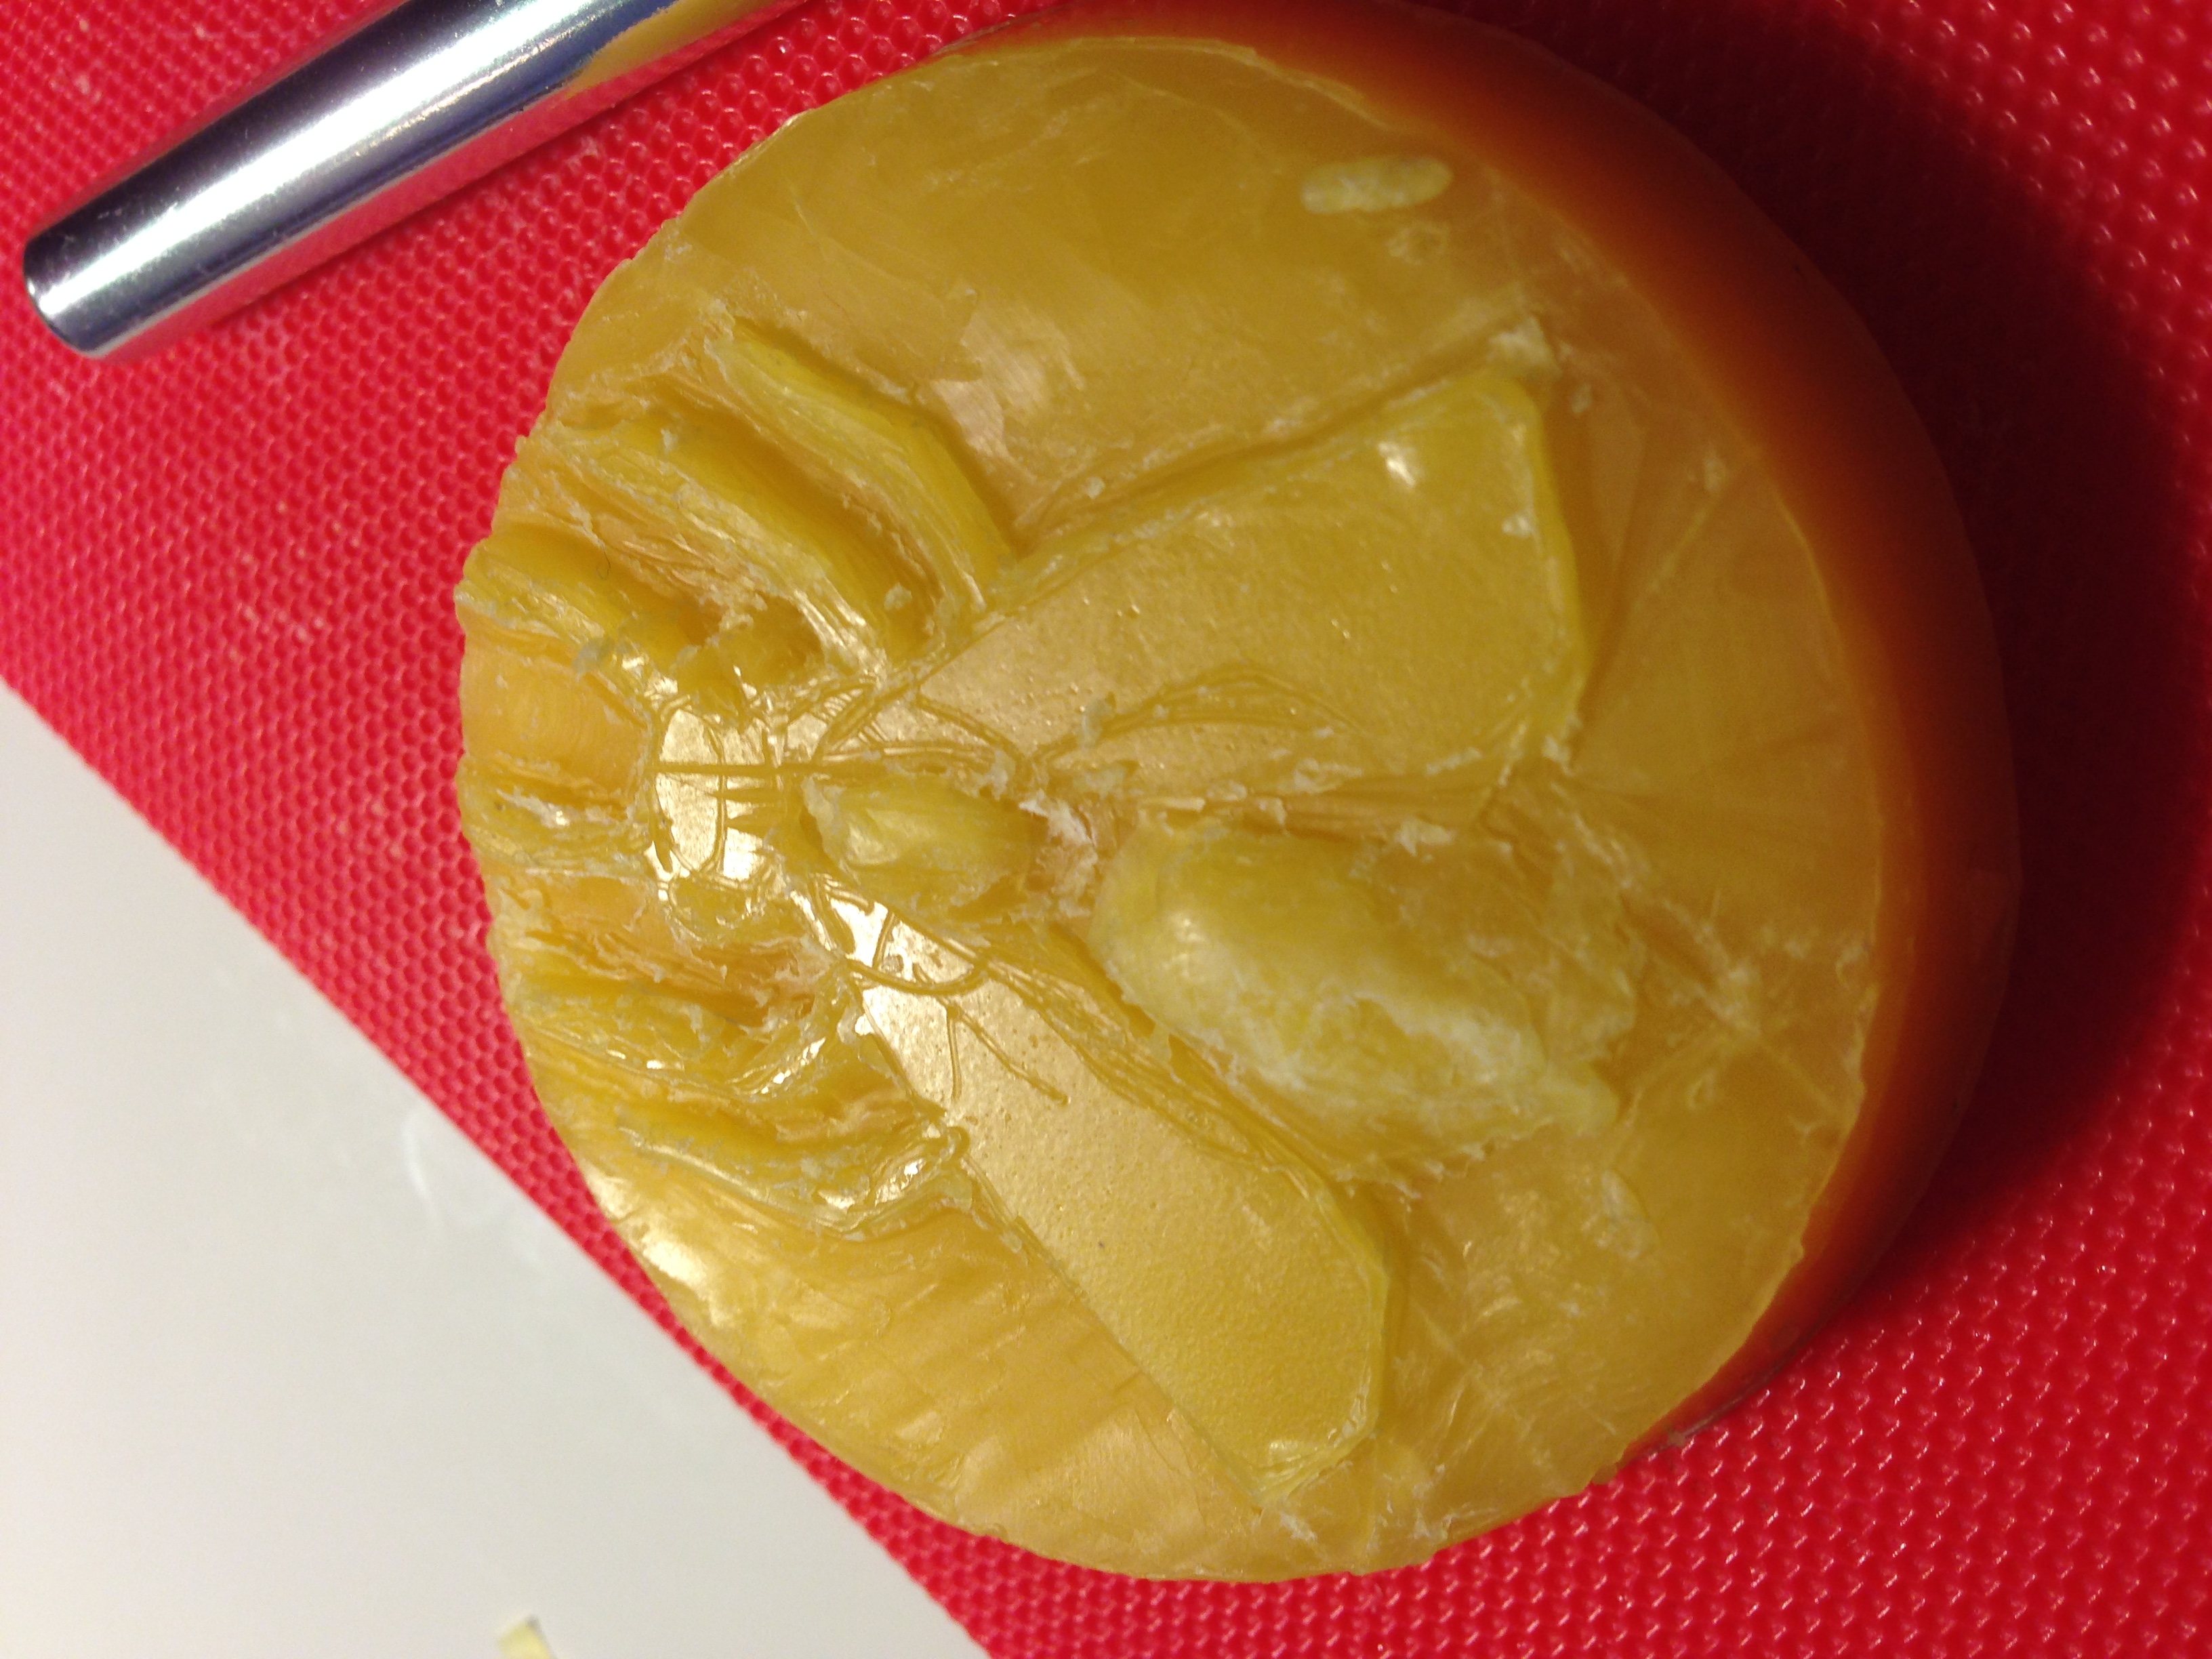
After I had removed the background, I started to carve the body into relief. It was much more difficult than I expected to carve successfully in low relief, so I started adding some wax back onto the model and carving it down again. Adding wax was easy in the warm apartment; but it was difficult to avoid making the wax look messy. Every mark I made in the wax made it ball up and shave off.
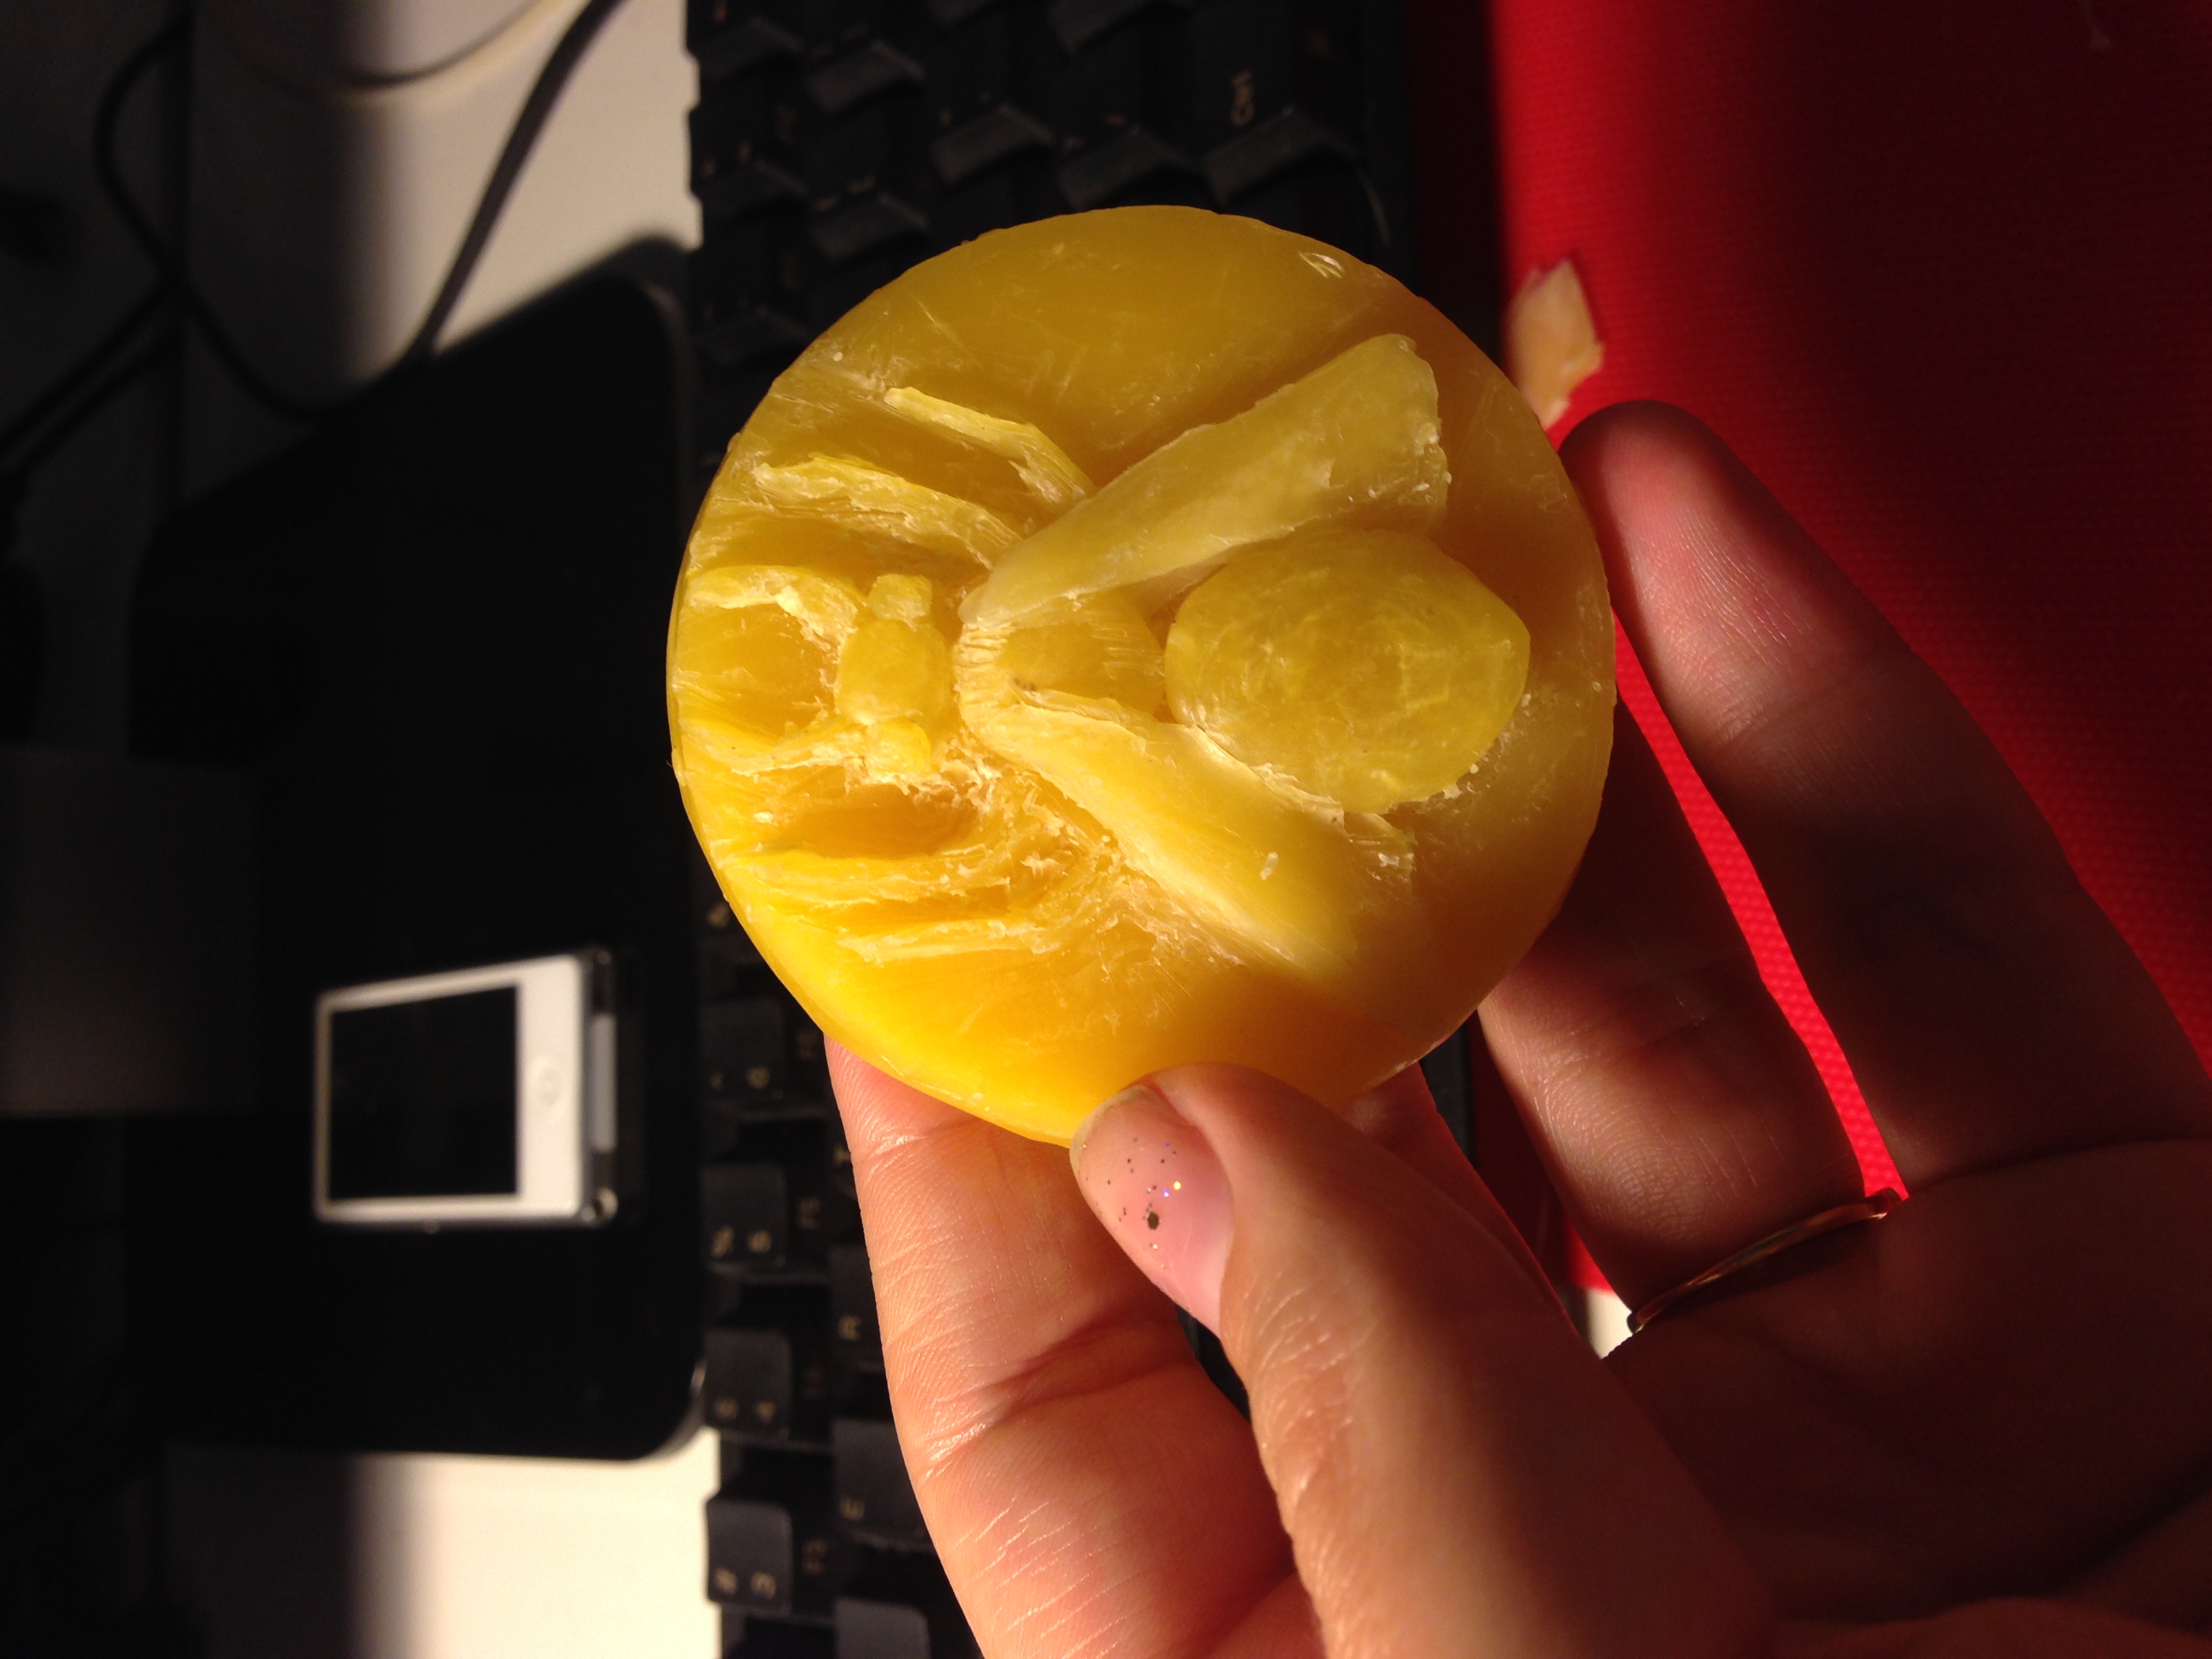
After working more with the wax by carving, adding wax, and carving again, I got a basic shape that I was happy with. I was still feeling anxious about not being able to get the form to be as clean as I would like, but I thought that it was at least readable as a bee and that seemed like an accomplishment!
Oct. 8: Portrait medals at the Met
NAME: Emogene Cataldo & Julianna ViscoDATE AND TIME: 10/8/14 12:00pm (updated 10/16/14 8:20pm)
LOCATION: Metropolitan Museum of Art
SUBJECT: Viewing portrait medals
It was truly amazing to see portrait medals at the Met today; we were able to handle the medals (with gloved hands), inspect them closely, and learn from conservators and curators. Here are some brief notes from the visit.
Francis, Duke of Valois, later Francis I
- Salamander
- pale area - crystallization of material while cooling; tells us that part of the metal was kept hot or reheated
- French metals show Italian influence int he later 15th century
- but, Italian medals never have added hole for hanging, this is a French feature
Commemoration of the Visit of the Dauphin Francis, Son of Francis I, to the City of Lyon in 1533
- has been reworked post-cast
- orientation of obverse --> reverse
- carving after casting can be seen on the metal
- distingishing casts from "after-casts" - 1/2% shrinkage from casting process
Henry IV of France
- Lead medal
- this material made sharper images because the metal is soft
- more vulnerable to damage, however
- best examples of portrait medals are cast in lead
- lead medals could be used as subsequent casts
- (wax models rarely survive)
Charles I Dominion of the Seas medal
Silver
- AMAZING detail
- ladder going into the boat; much easier to see without glasses
- this detail can't even be photographed well because of the color of the silver
Louis XIII and Richelieu
bronze
- patina: hard to know what it was, since the objects were meant to be handled
- in the case of varnishes, it is hard to know original through the object; a text (like Ms Fr 640) is actually the best bet for determining what kind of varnish or patina an object might have had
Francis I, king of France
- bronze
- notice avoidance of undercutting
Mars
- 1-sided; other side is "waxy" -- like our models!
Oct. 10: Plaster Model
NAME: Emogene Cataldo & Julianna ViscoDATE AND TIME: 10/16/14 8:20pm
LOCATION: Chandler Lab
SUBJECT: Casting a plaster model
Author: Emogene
I had a couple more carving sessions working on my wax model before I was ready to cast it in plaster; I was careful to not make any undercuts in the surface so that the wax would not get "hooked" on the clay. This produced quite a bit of anxiety not only for me but for my classmates. I spent a significant amount of time filling in small gaps with small balls of wax and then smoothing it down with my X-acto blade. This step was much easier done at my warm apartment than in the lab; I tried filling in gaps in the lab and was quite frustrated that I could not easily "adhere" new wax to my model in the slightly cooler lab.
I also changed some of the detail of my design to be more general rather than using lots of incised lines---again, I was hoping to avoid the undercutting issue.
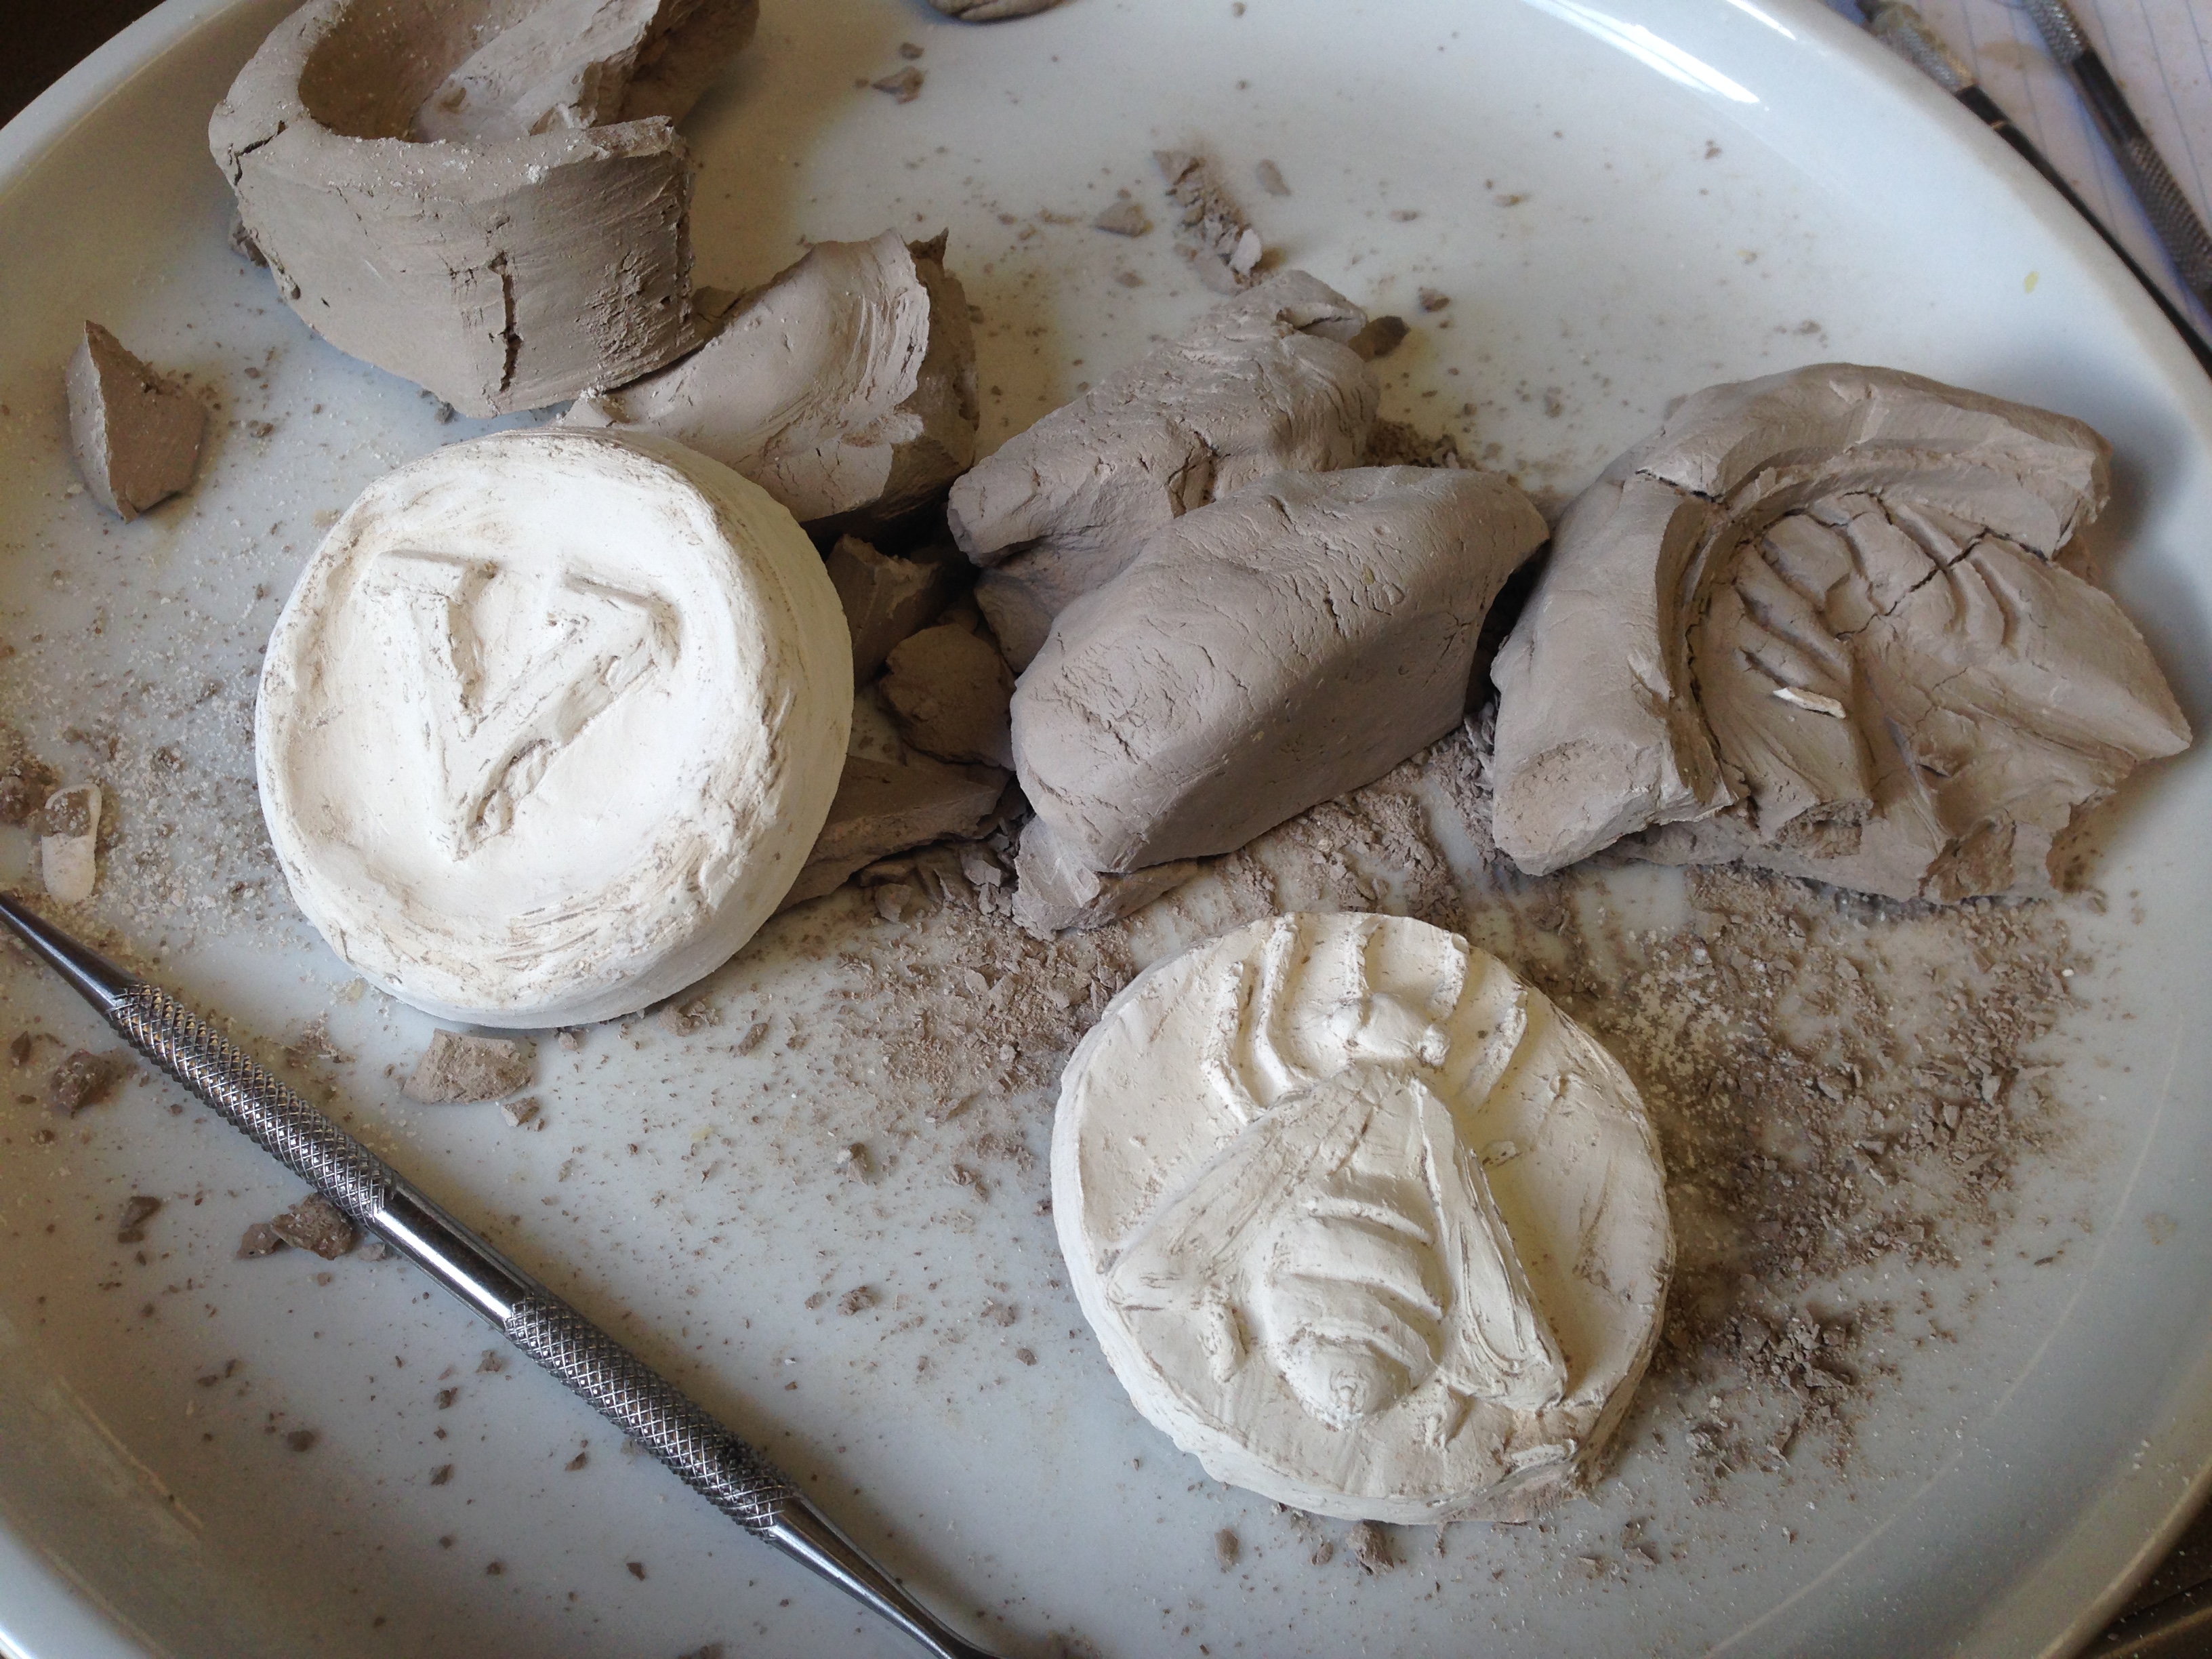
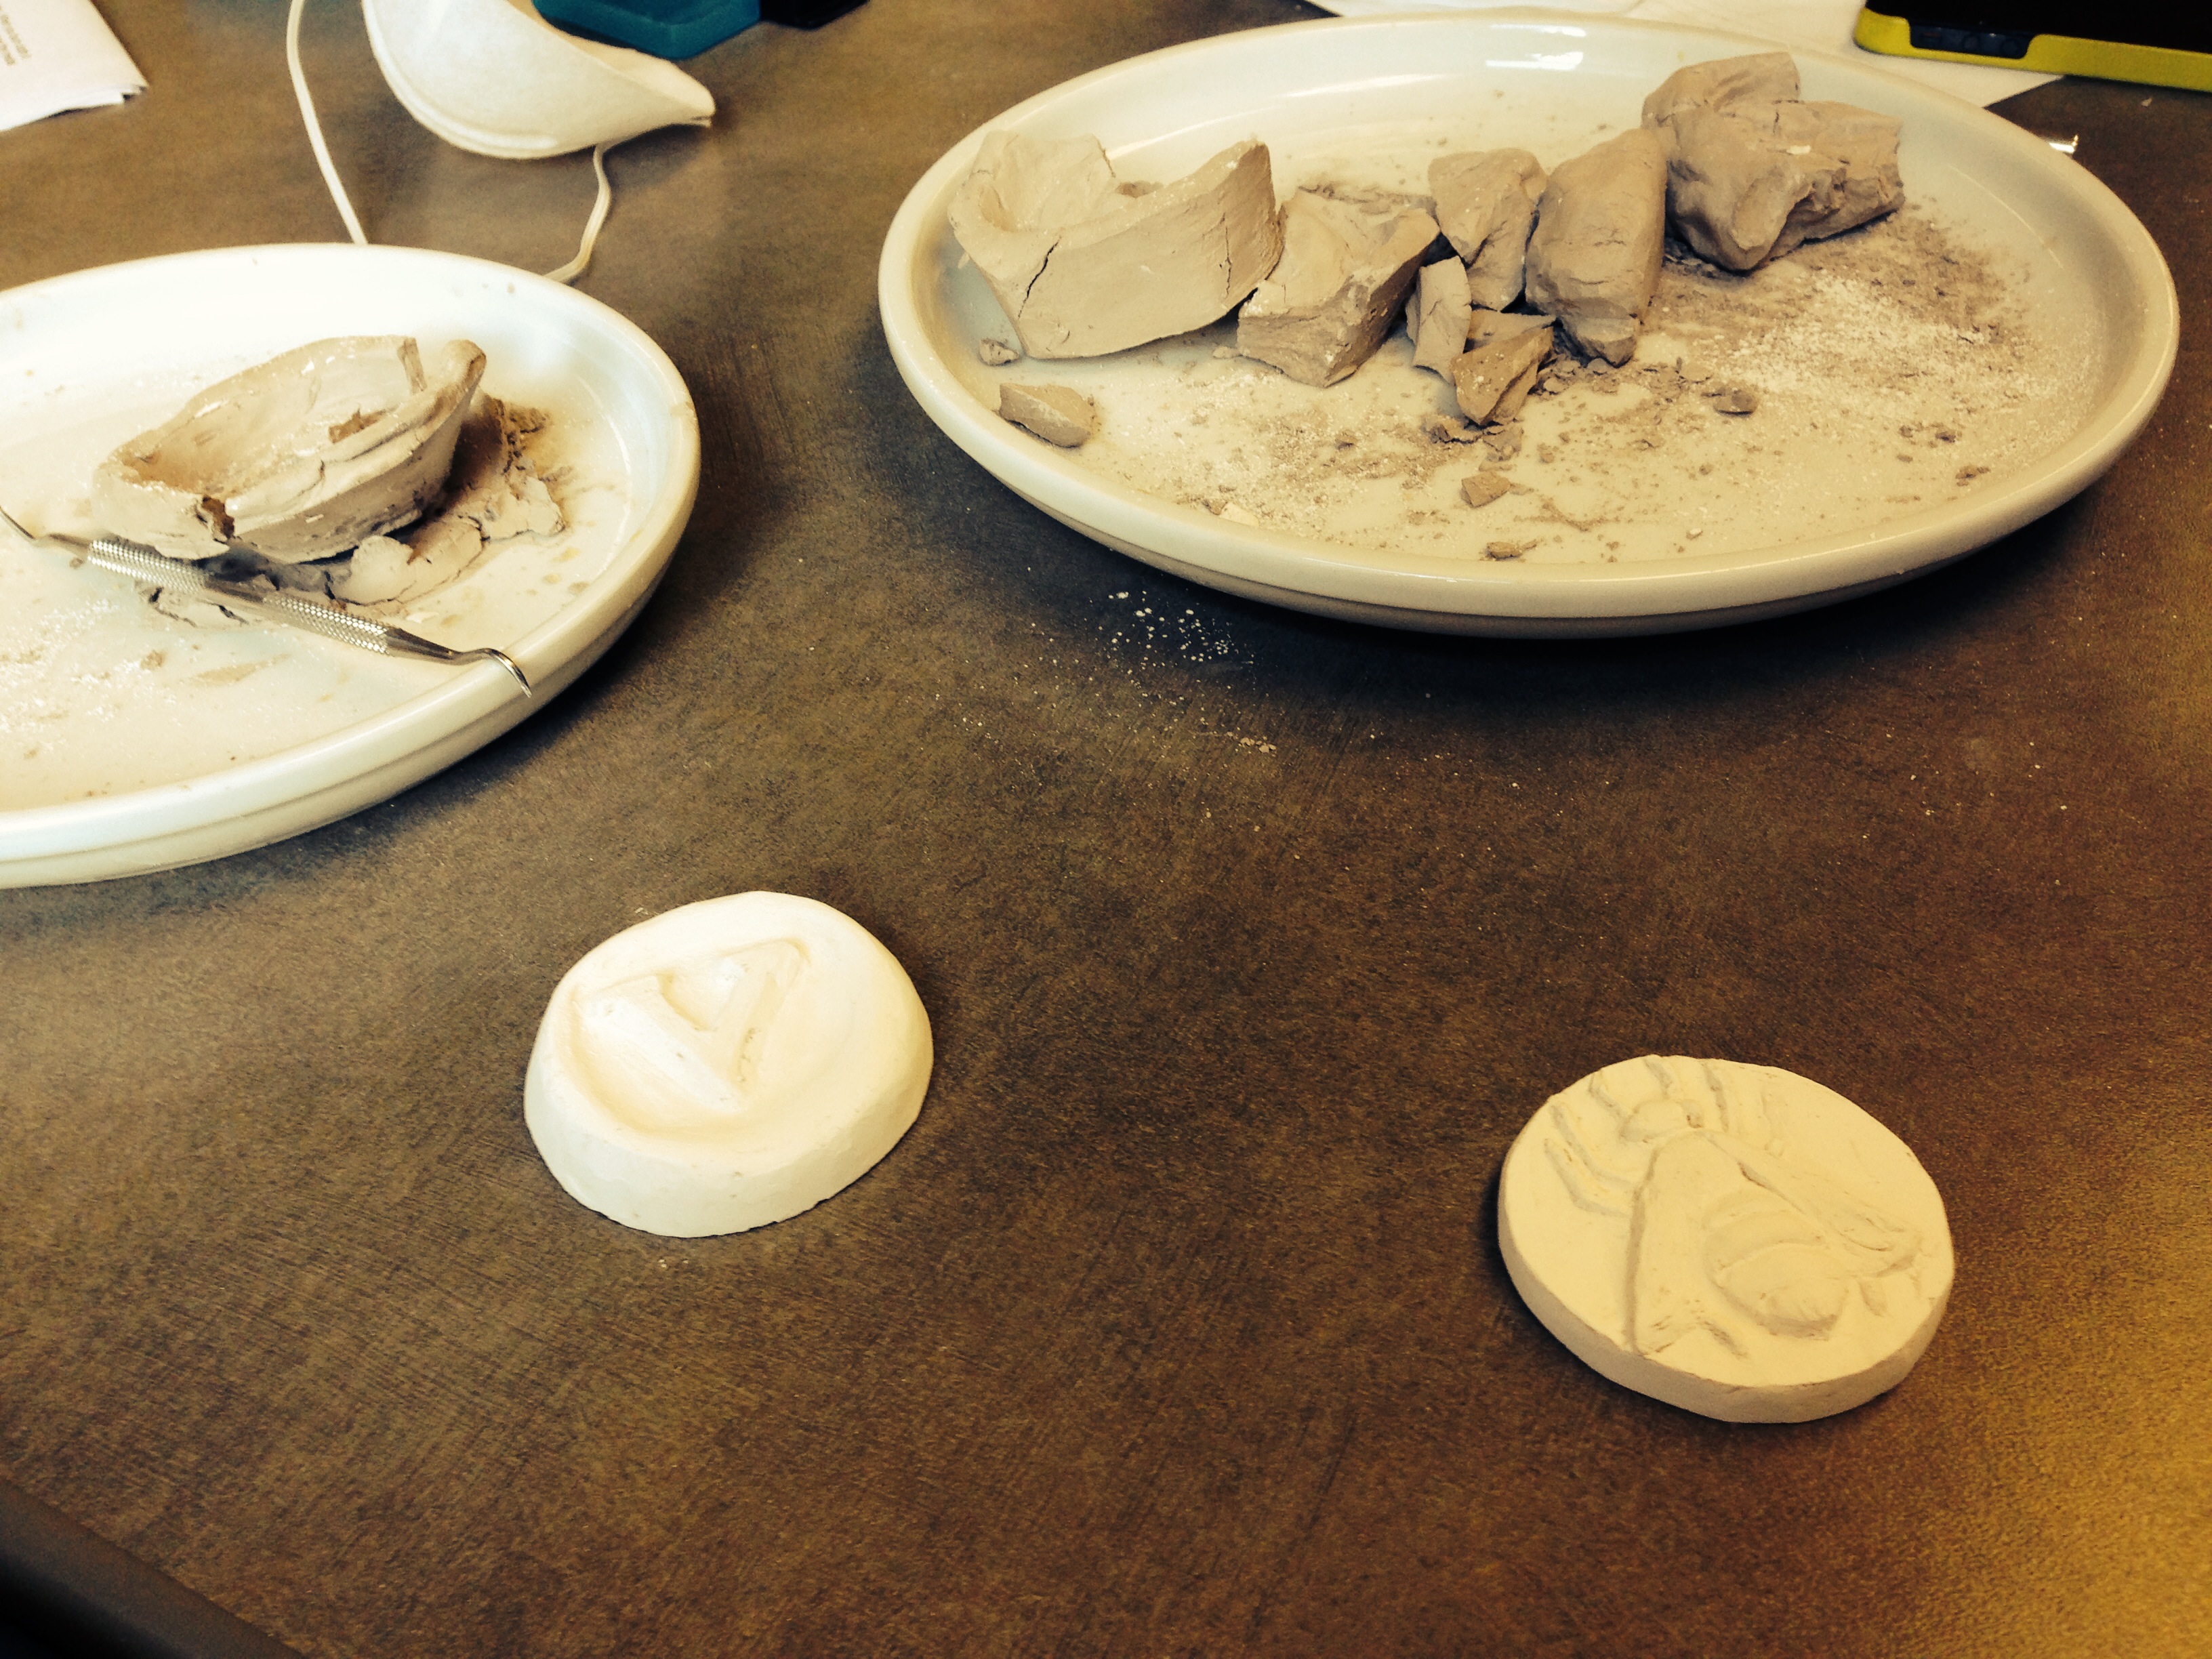
The time had come to cast our wax models in plaster, so Julianna and I first got fistfuls of wet clay, formed them into balls, and then pressed them gently onto plates. We then applied a layer of dish soap to our wax model as a releasing agent, and then pressed our models into the wet clay. Then, we gently fished out the models and cleaned up the impression. Though I had much anxiety about the undercutting, the clay was so soft that it filled in the extra spaces around the bee's legs and left a fine impression, which was easy to clean up. When I was trying to fish out the wax model with a sharp tool, I accidentally cut down into the clay. This was very easily mended by cleaning the mold gently with the wax carving tools.
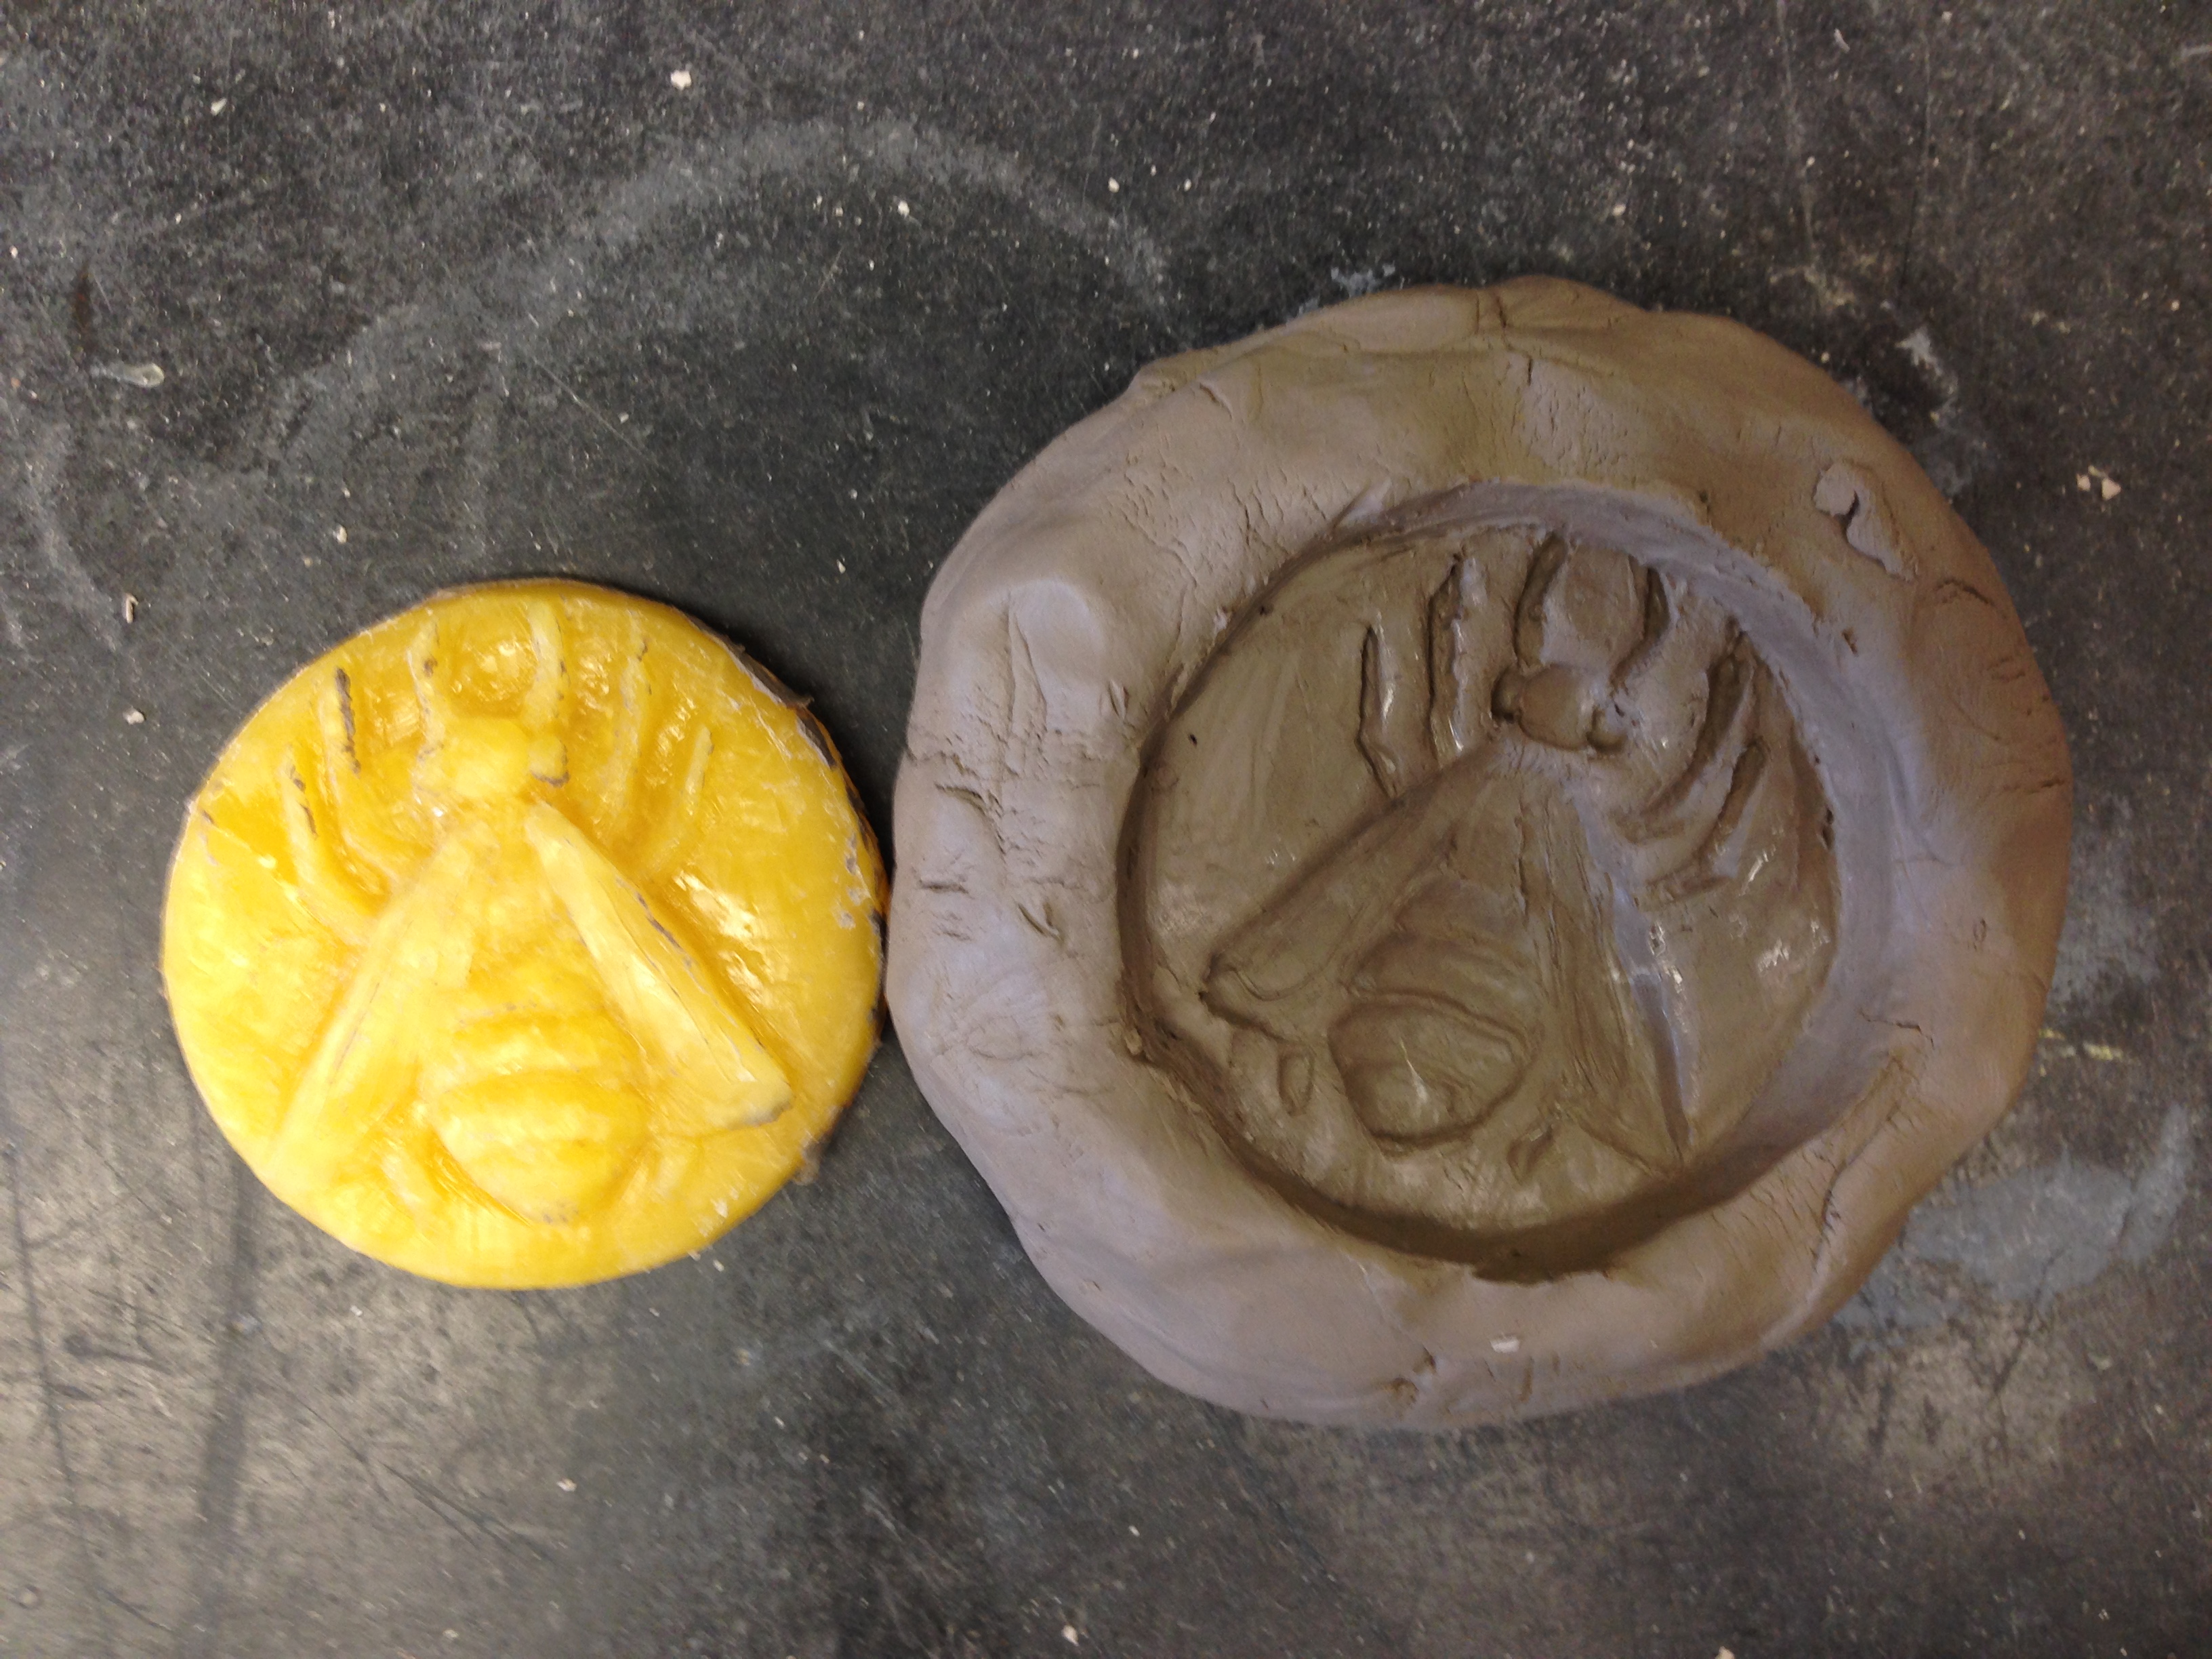 |
| The wax model and the clay impression. Notice how clay stuck to the slightly undercut sections of the bee's legs. |
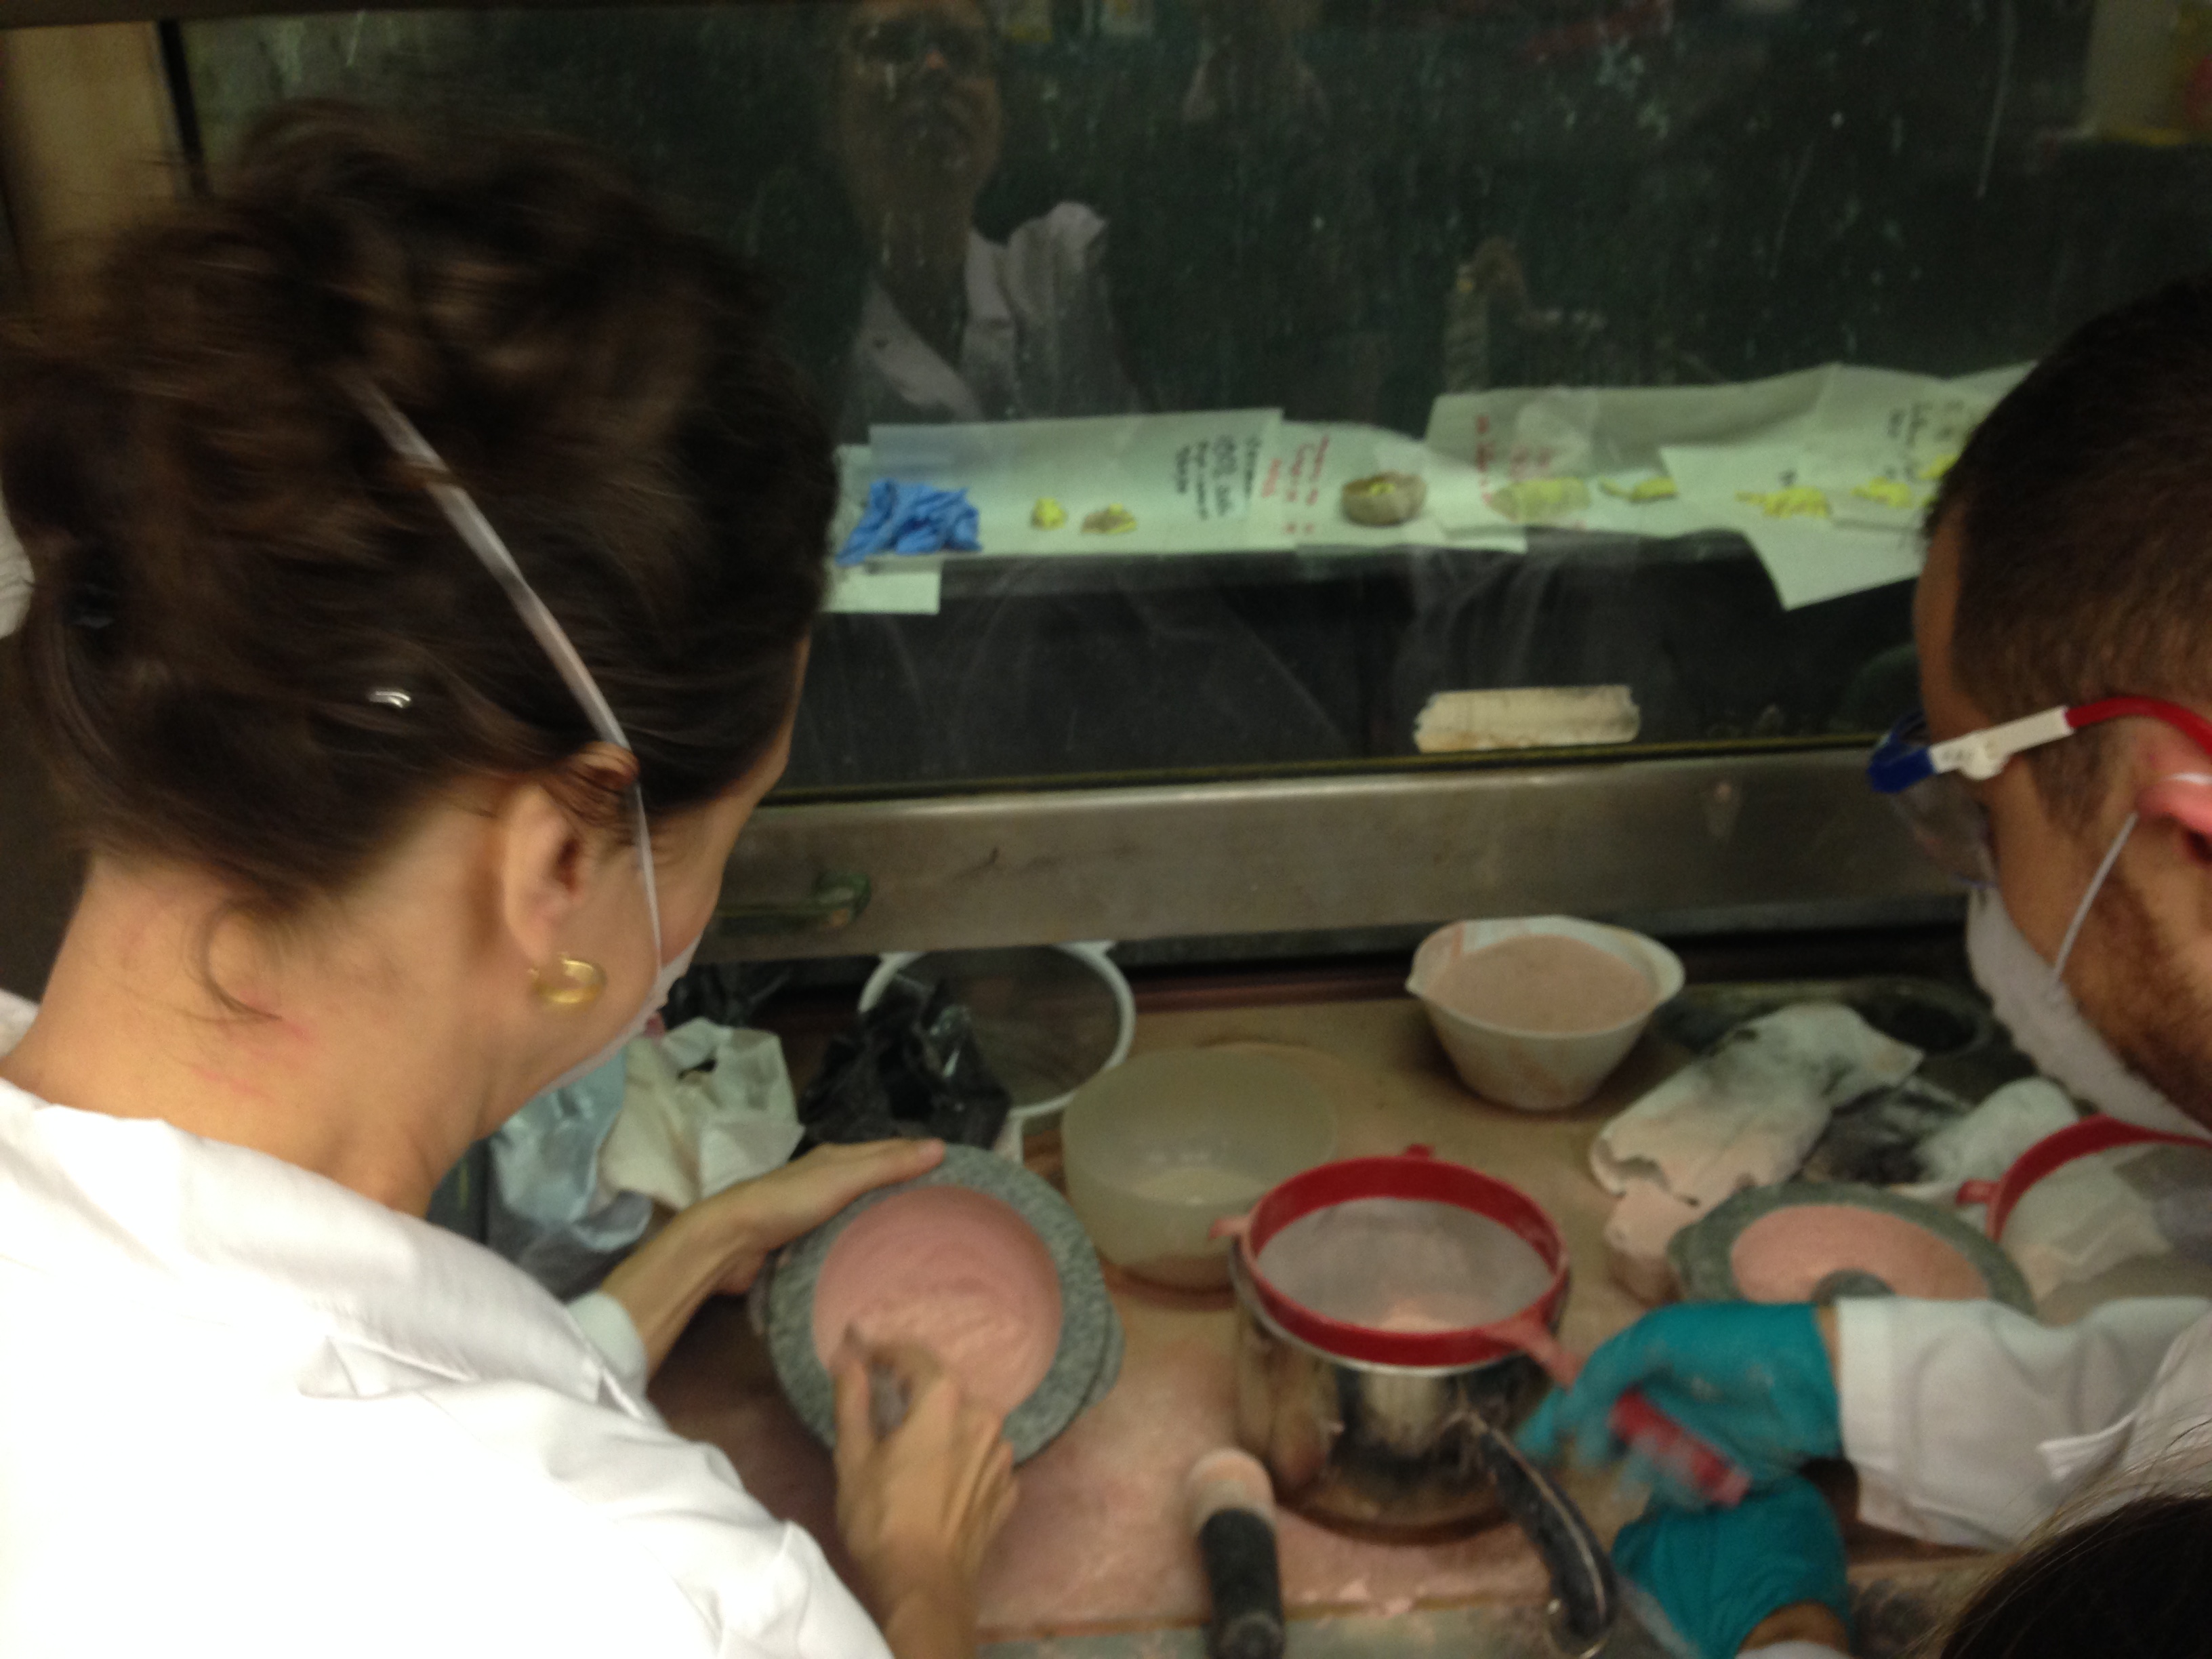
Very satisfied with the result, we began mixing the plaster with the help of Tonny Beentjes, our expert maker in residence. He mixed the plaster under the fume hood, using a sieve. A small amount of water (possibly 1-2 cups?) was poured into a bowl, and the plaster was added gradually. All the while, Tonny was monitoring the consistency of the plaster, which must be just thick enough. The final consistency poured into the molds was just thicker than pancake batter; if I can be specific, I would call it a Trader Joe's European Yogurt consistency. Here is a video of Tonny pouring the plaster into the molds.
Tonny poured the plaster slowly, and then gently tapped the plates on which the molds were resting to help settle the plaster into the crevices of the molds.
Oct. 14-15: Sand Casting
NAME: Emogene Cataldo & Julianna ViscoDATE AND TIME: 10/16/14 9:50pm
LOCATION: Chandler Lab (notes recorded at 142nd St.)
SUBJECT: Plaster model to sand cast
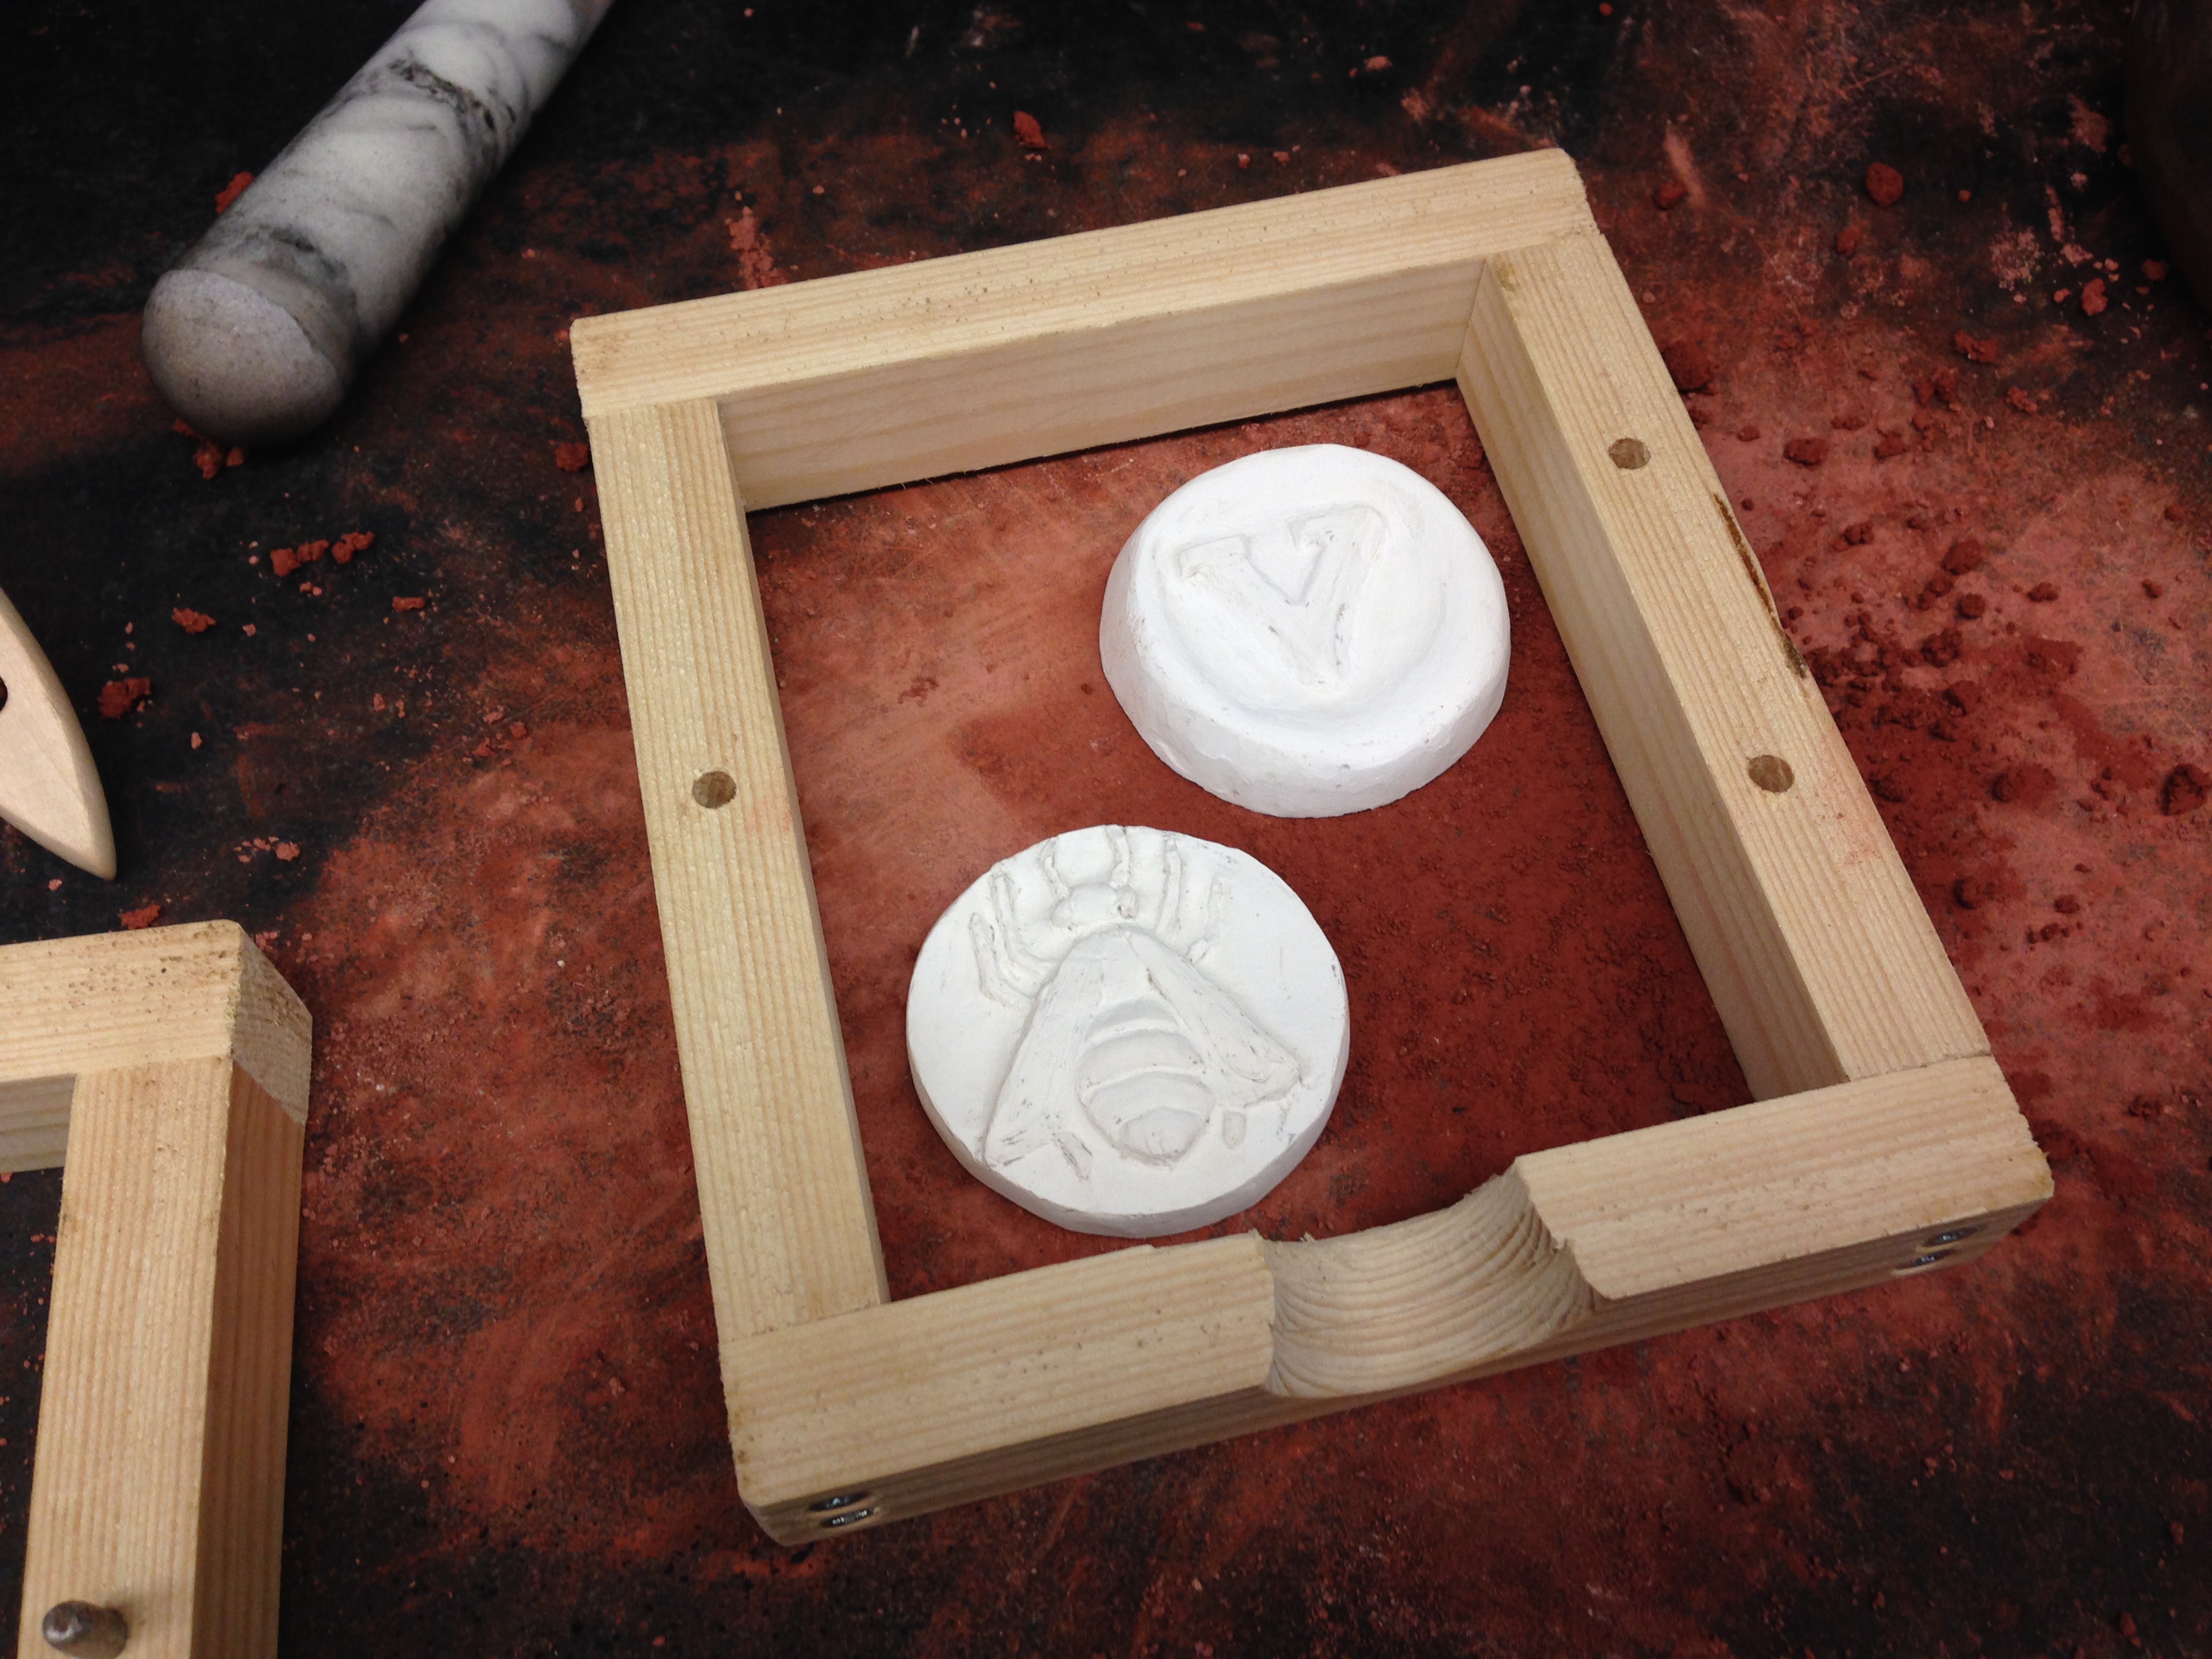
On Tuesday, we came in and released our hardened plaster models from the clay. Julianna's model came out pretty easily from the clay, but mine was tough to remove. I cut through the cracks in the dried clay to try and weaken the stress points, and after doing this for 10-15 minutes I was able to start breaking away the clay and free my model. It took some effort! One of the bee's legs came off during the removal.
We then set about refining our plaster models with sharp tools, files, and sand paper. The plaster felt rather soft to me, softer than expected, like chalk. I was able to clean up my surfaces really nicely and file the edges of the model to make them smooth and circular.
After finishing our plaster models, we began to prepare our sand molds for casting. The first step in this process is to make the sand, for which we had powdered molds (previously ground by a mortar and pestle by our classmates), a water-ammonium-chloride solution, and a small bottle of brandy. The two latter ingredients we used as "magistry" to bind our molds together.
There was a shortage of mixing bowls in the lab, so we watched carefully how the other groups were mixing their sand before we began. Most groups started with 3 1/2 cups of dry sand and then added a variable amount of the magistry to make the sand moist, but not wet. (See Julianna's notes for measurements & quantities). We noted that it was very easy to make the sand too wet, and then groups would have to add more of the dry sand to compensate for sand that was too wet. The best sand seemed to be that that could be gathered into a small ball in your fist, but then easily crumbled by pinching it with your fingers. This was a very tricky task---it also seemed that the consistency changed before our eyes. Our station was underneath an air vent blowing warm air into the room, so the sand we worked with would dry out. When we got to the stage of pounding the sand into the mold (more on that process presently), we noticed that the sand seemed to become wetter, and the moisture came out of the sand and even made it muddy at times.
We started with sand that had already been mixed by Ray and Jordan (thanks guys!). We understood the process of sand casting to be this:
- First, dust the plaster models lightly with powdered charcoal.
- Set one half of the box mold on a clean surface. Position the metals facing up, in such a way that the molten metal will be able to flow from one to the other (we needed Tonny to verify our arrangement of medals; we ended up using a larger iron box frame to accommodate three medals in a pyramidal arrangement)
- Sprinkle a layer of sand on top of the plaster models so that it just covers them.
- With your hands, press the sand down firmly around the outside of the models, being careful not to displace the models as the sand is compressed. The aim here is to build a solid foundation to keep the medals from moving in the model---the edges around the medals themselves are much more important to pack in than the edges of the box frame. Build this layer up to be the same height as the medals, but do not cover the medals yet.
- With the medals secure, sprinkle more sand on top of the medals and press down firmly---the impression of the medal is the most important area here. You want to be sure to get the best impression possible.
- Keep packing in sand until you fill the box mold. Then, using a rubber mallet, gently pound the sand into the mold.
- Use a knife or sharp edge to level the sand smoothly on top of the mold.
- Flip the mold over, so the backs of the plaster models are facing up. Brush the whole surface generously with charcoal.
- Put the other half of the box mold on top; if the two halves do not fit securely together, make impression "keys" in the sand itself to help with alignment
- Fill the other half with sand, sprinkling and packing it in. Once the second half of the box mold has been filled, pound the sand and level it with a straight edge or knife.
- Let both halves of the mold dry; before the molds dry completely (Tonny did this step for us), carve out a network of channels to pour in the molten metal.
Observations from going through this process:
- We had to mix sand several times to fill our box mold---we used a mold that was a bit larger than the other smaller wooden ones. While we were mixing sand, the packed sand in our mold would dry a bit (again, our work station was under an air vent). Mixing sand each time got a little easier, but it was still very challenging to get the right consistency.
- We packed our mold very tightly. We were impressed with how hard the sand felt to the touch when it was being packed down.
- When pounding sand in our mold, we observed that the moisture comes out of the sand and makes the sand muddy. We were advised to sprinkle a generous amount of dry sand on top of this muddy layer to absorb the moisture. This seemed to work well for improving the texture of the wet sand in the mold.
Some of the pictures uploaded below are upside down! Not sure how this happened, but apologies for this...
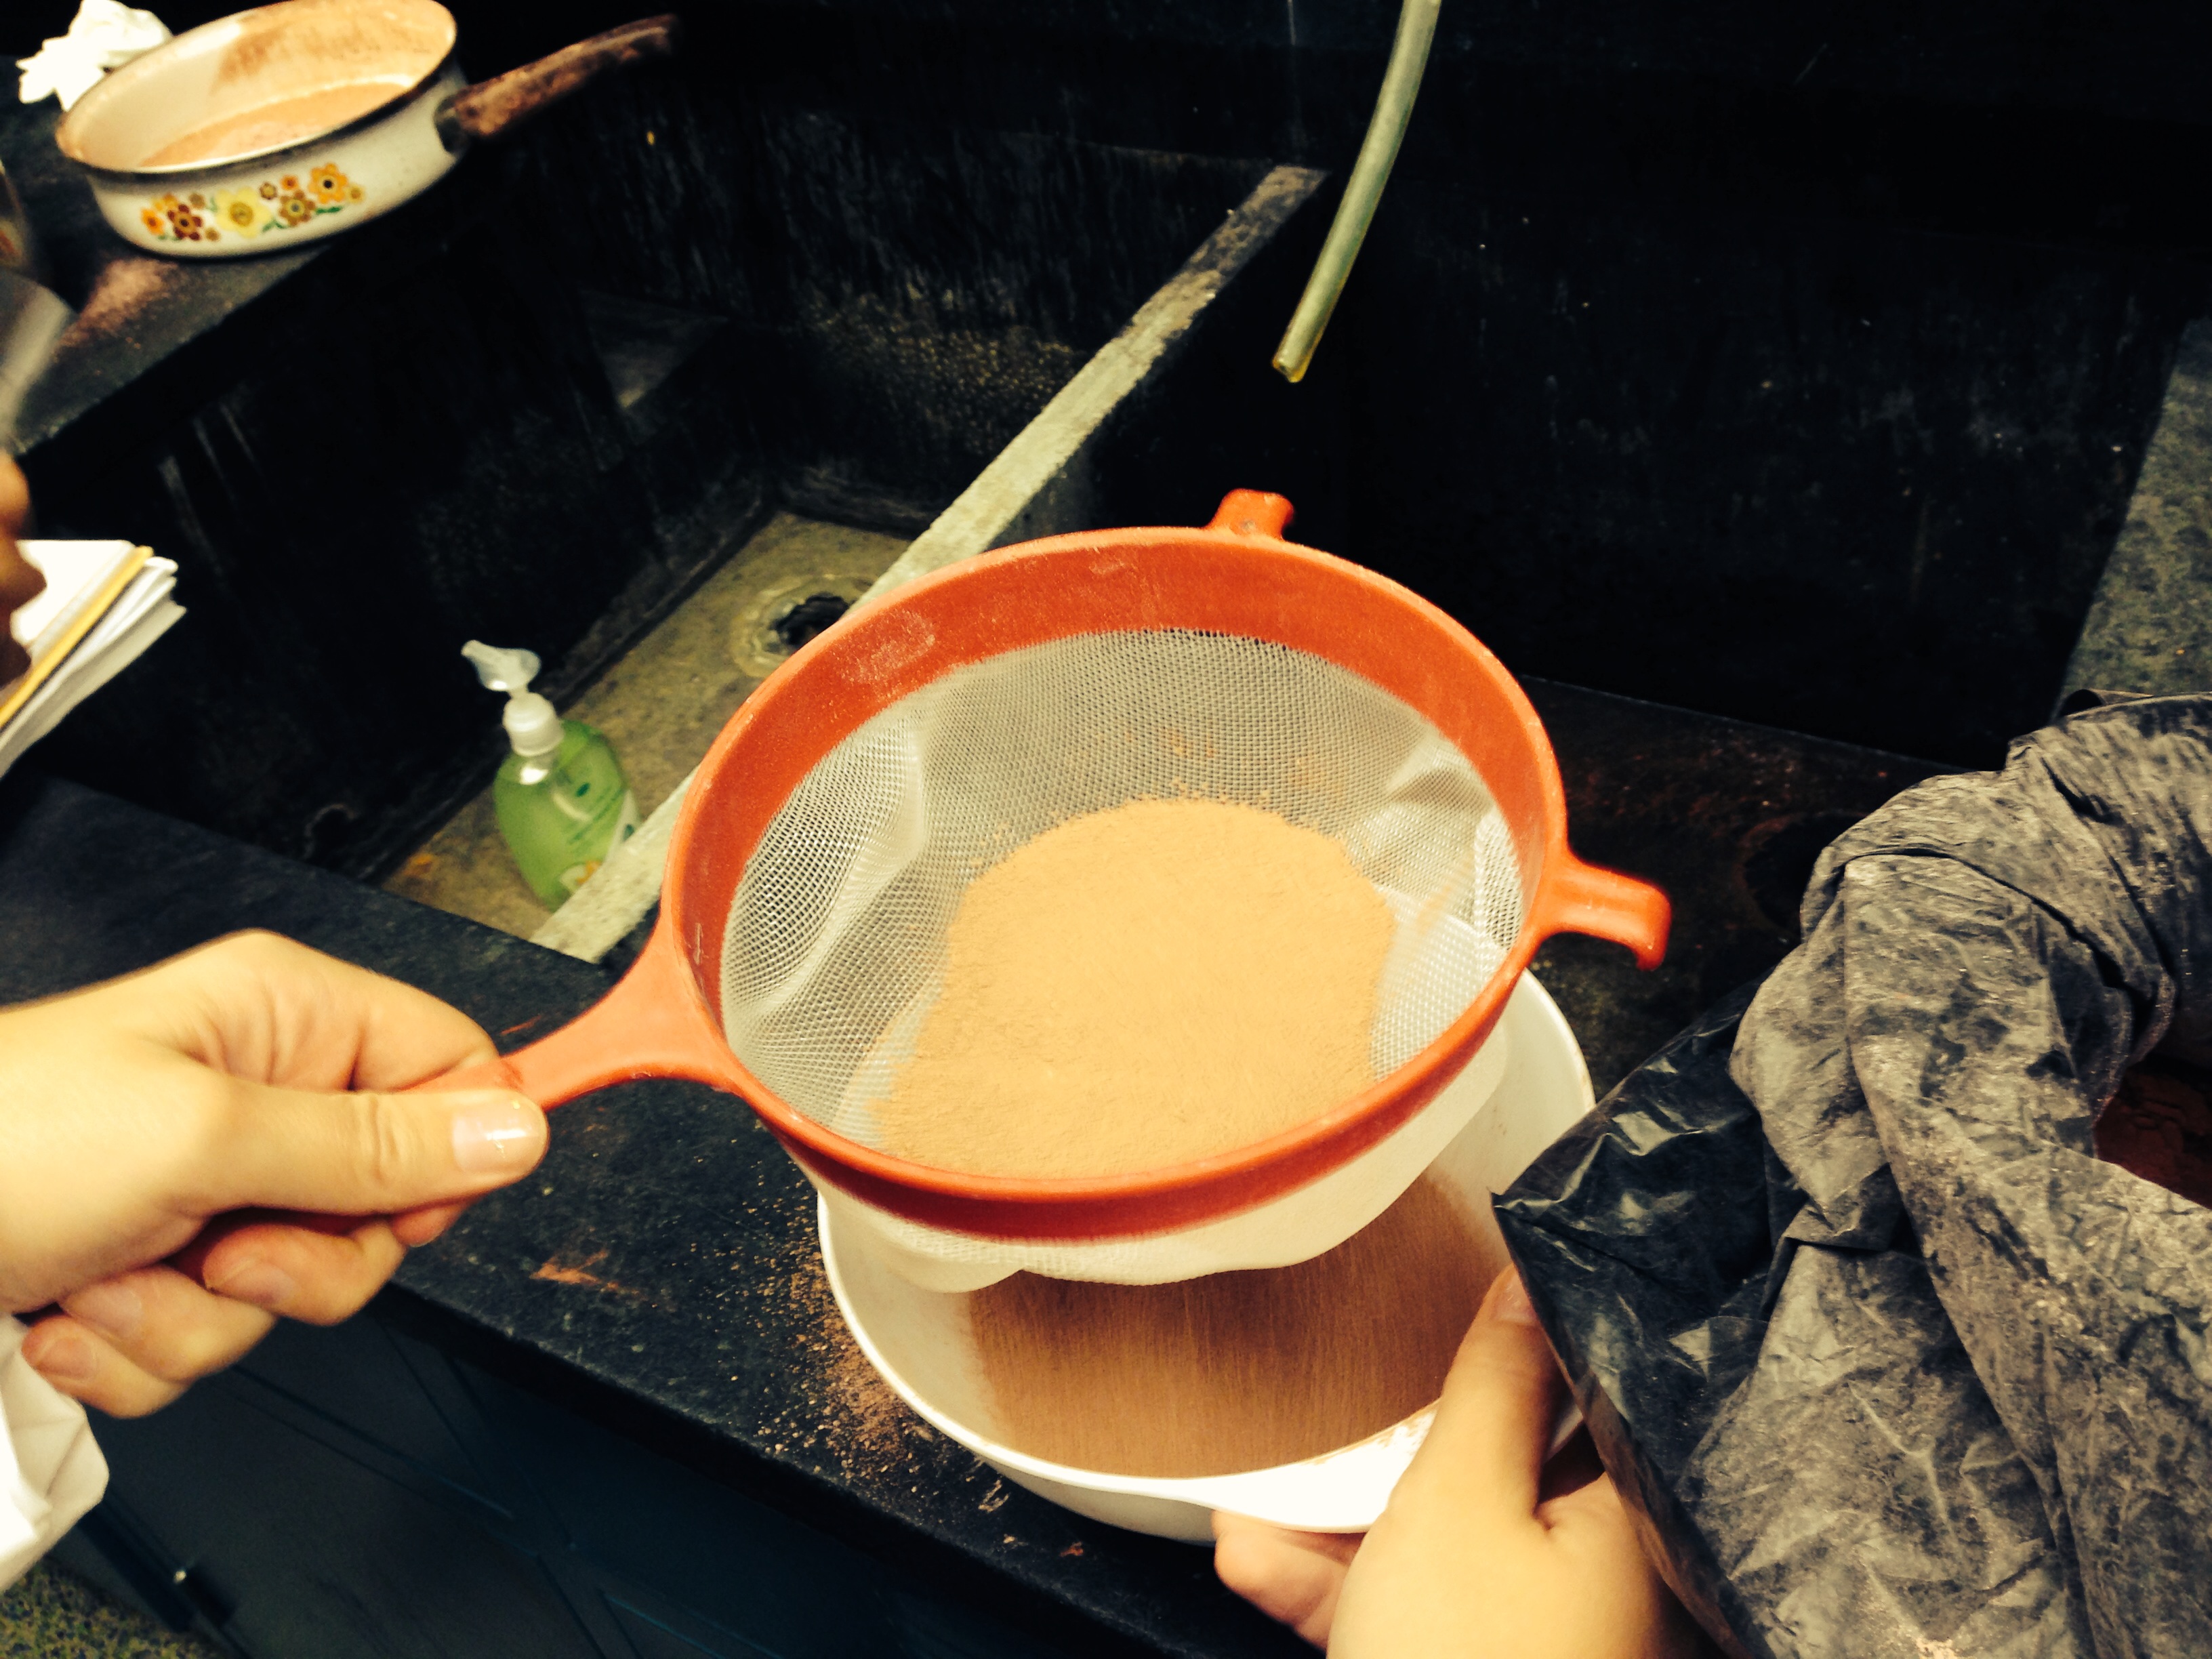 |
| Sifting the dry sand with a sieve. |
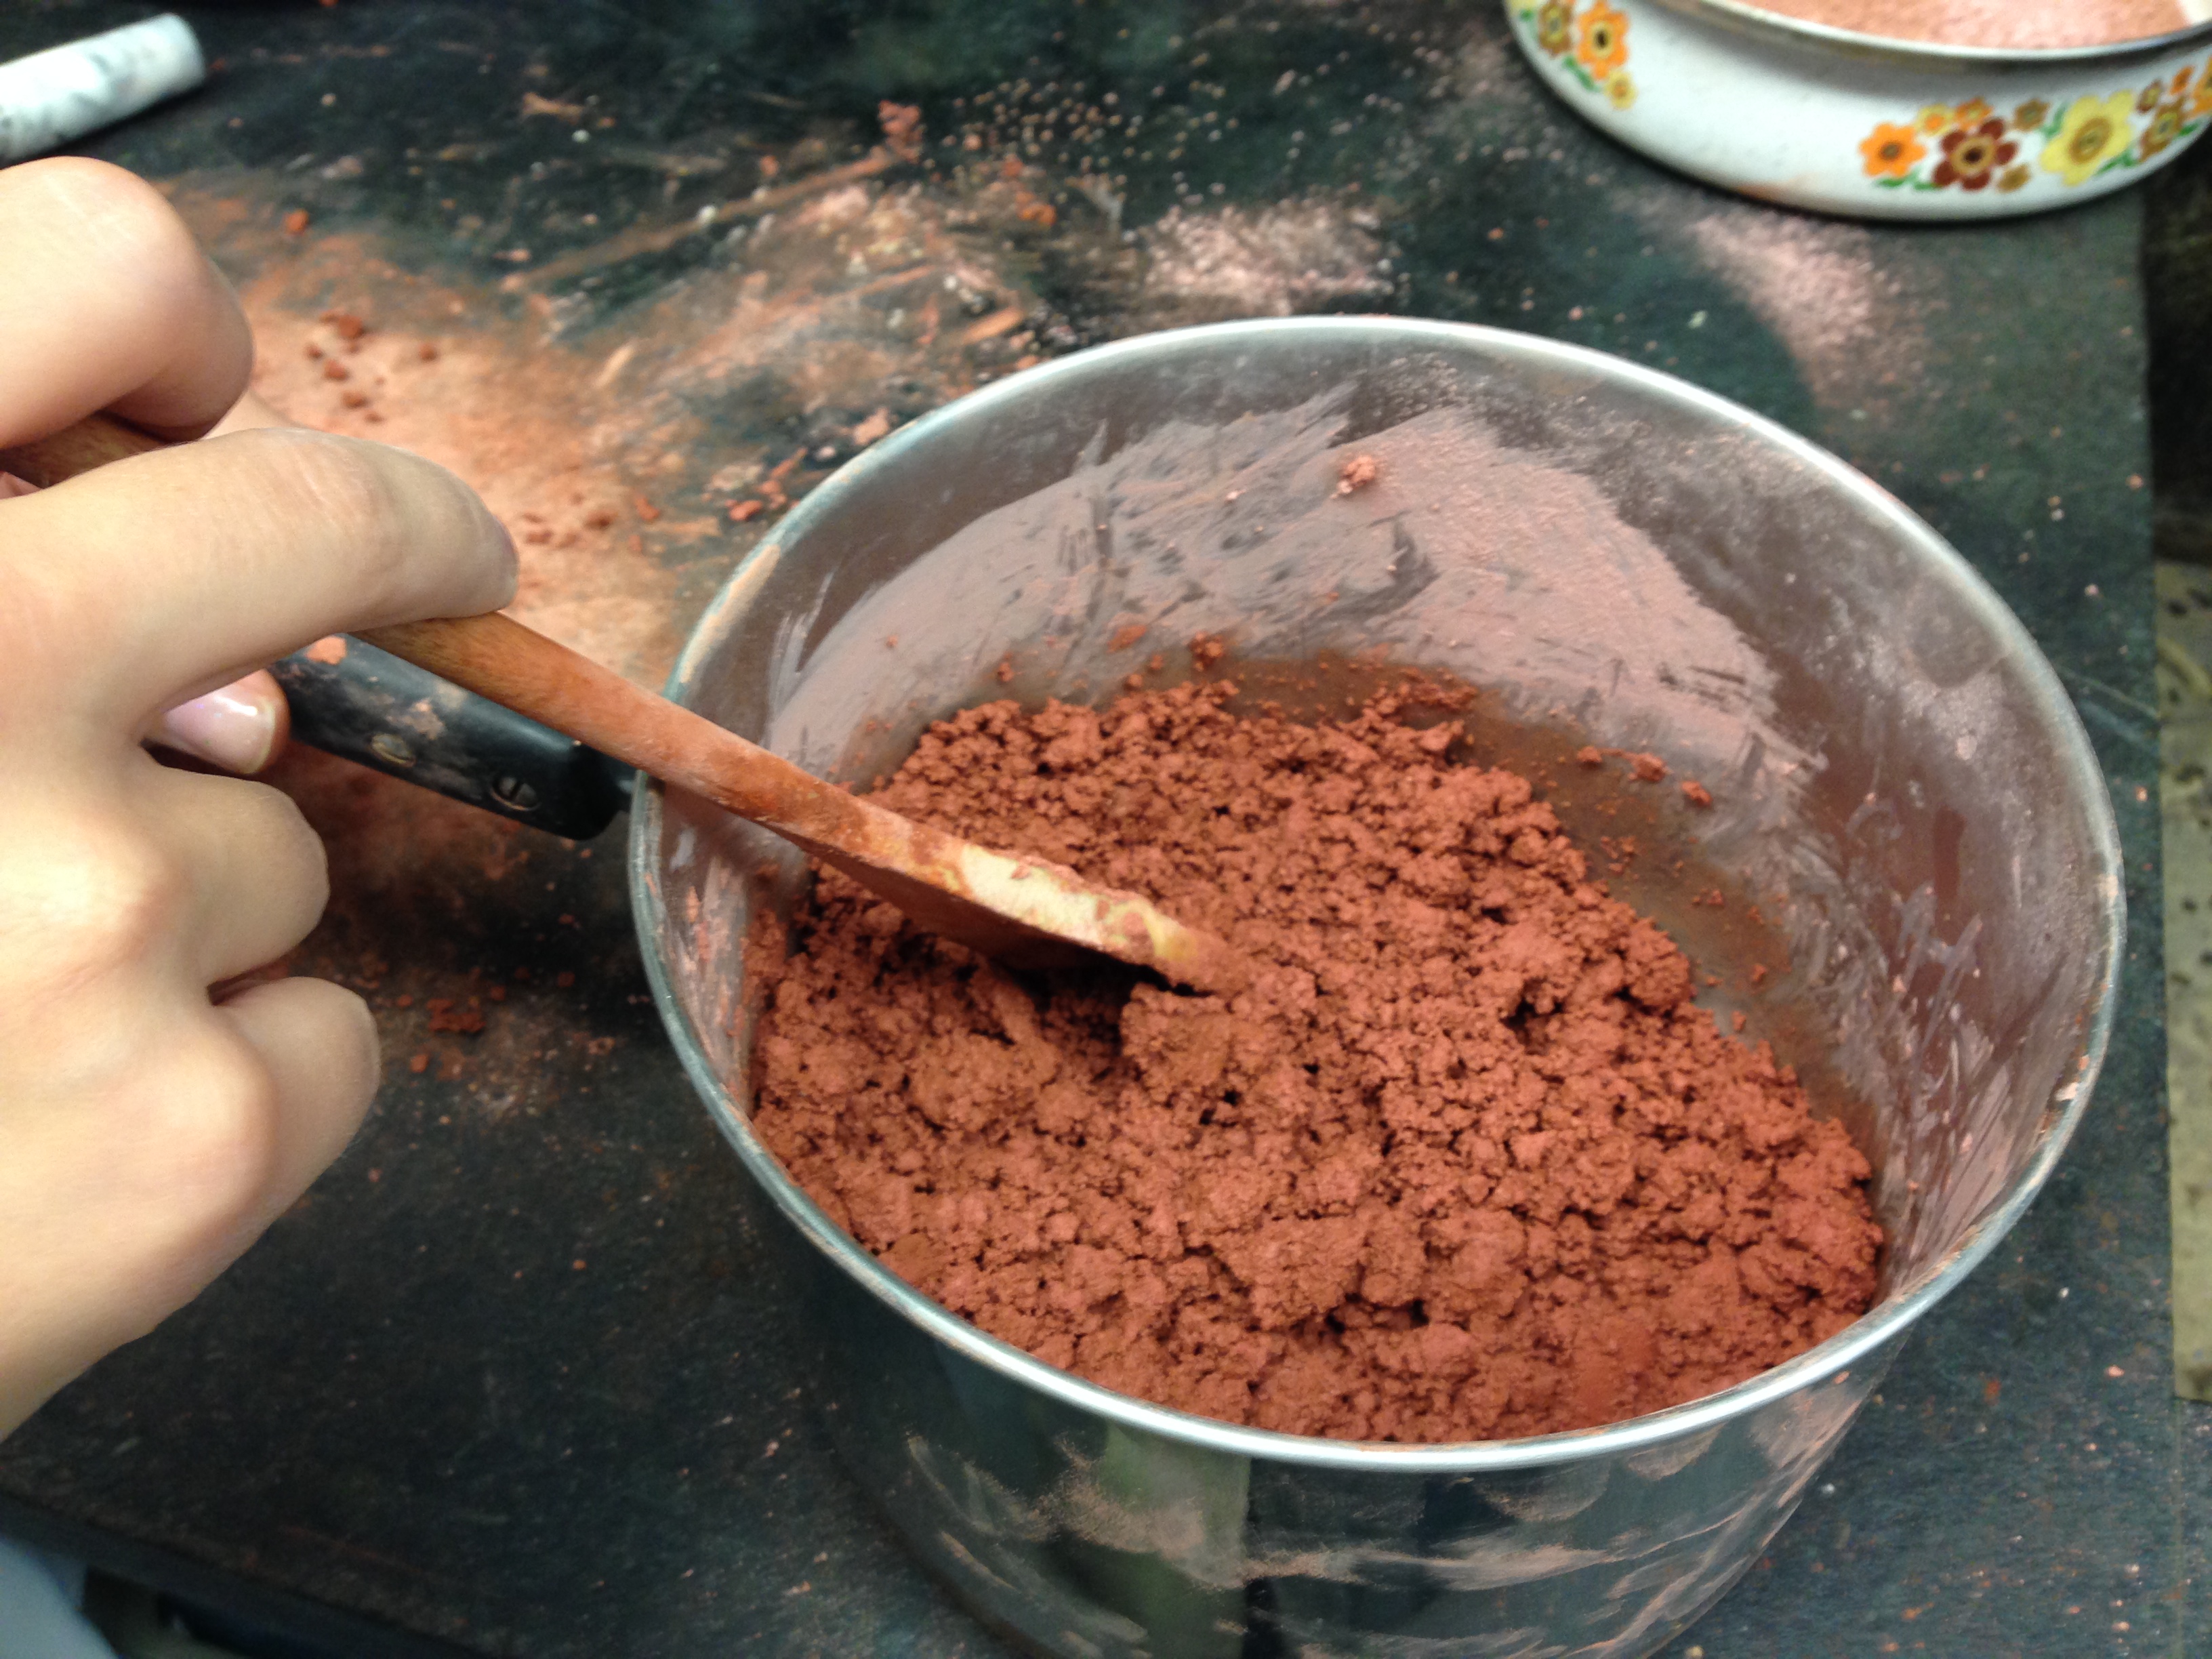 |
| This sand consistency looked and felt good, but it ended up being too wet. |
 |
| Grinding the old molds down into sand with mortar and pestles. |
 |
| Initially, we were going to try to fit our medals into one smaller box mold, but Tonny advised that there was not quite enough space to do this successfully. |
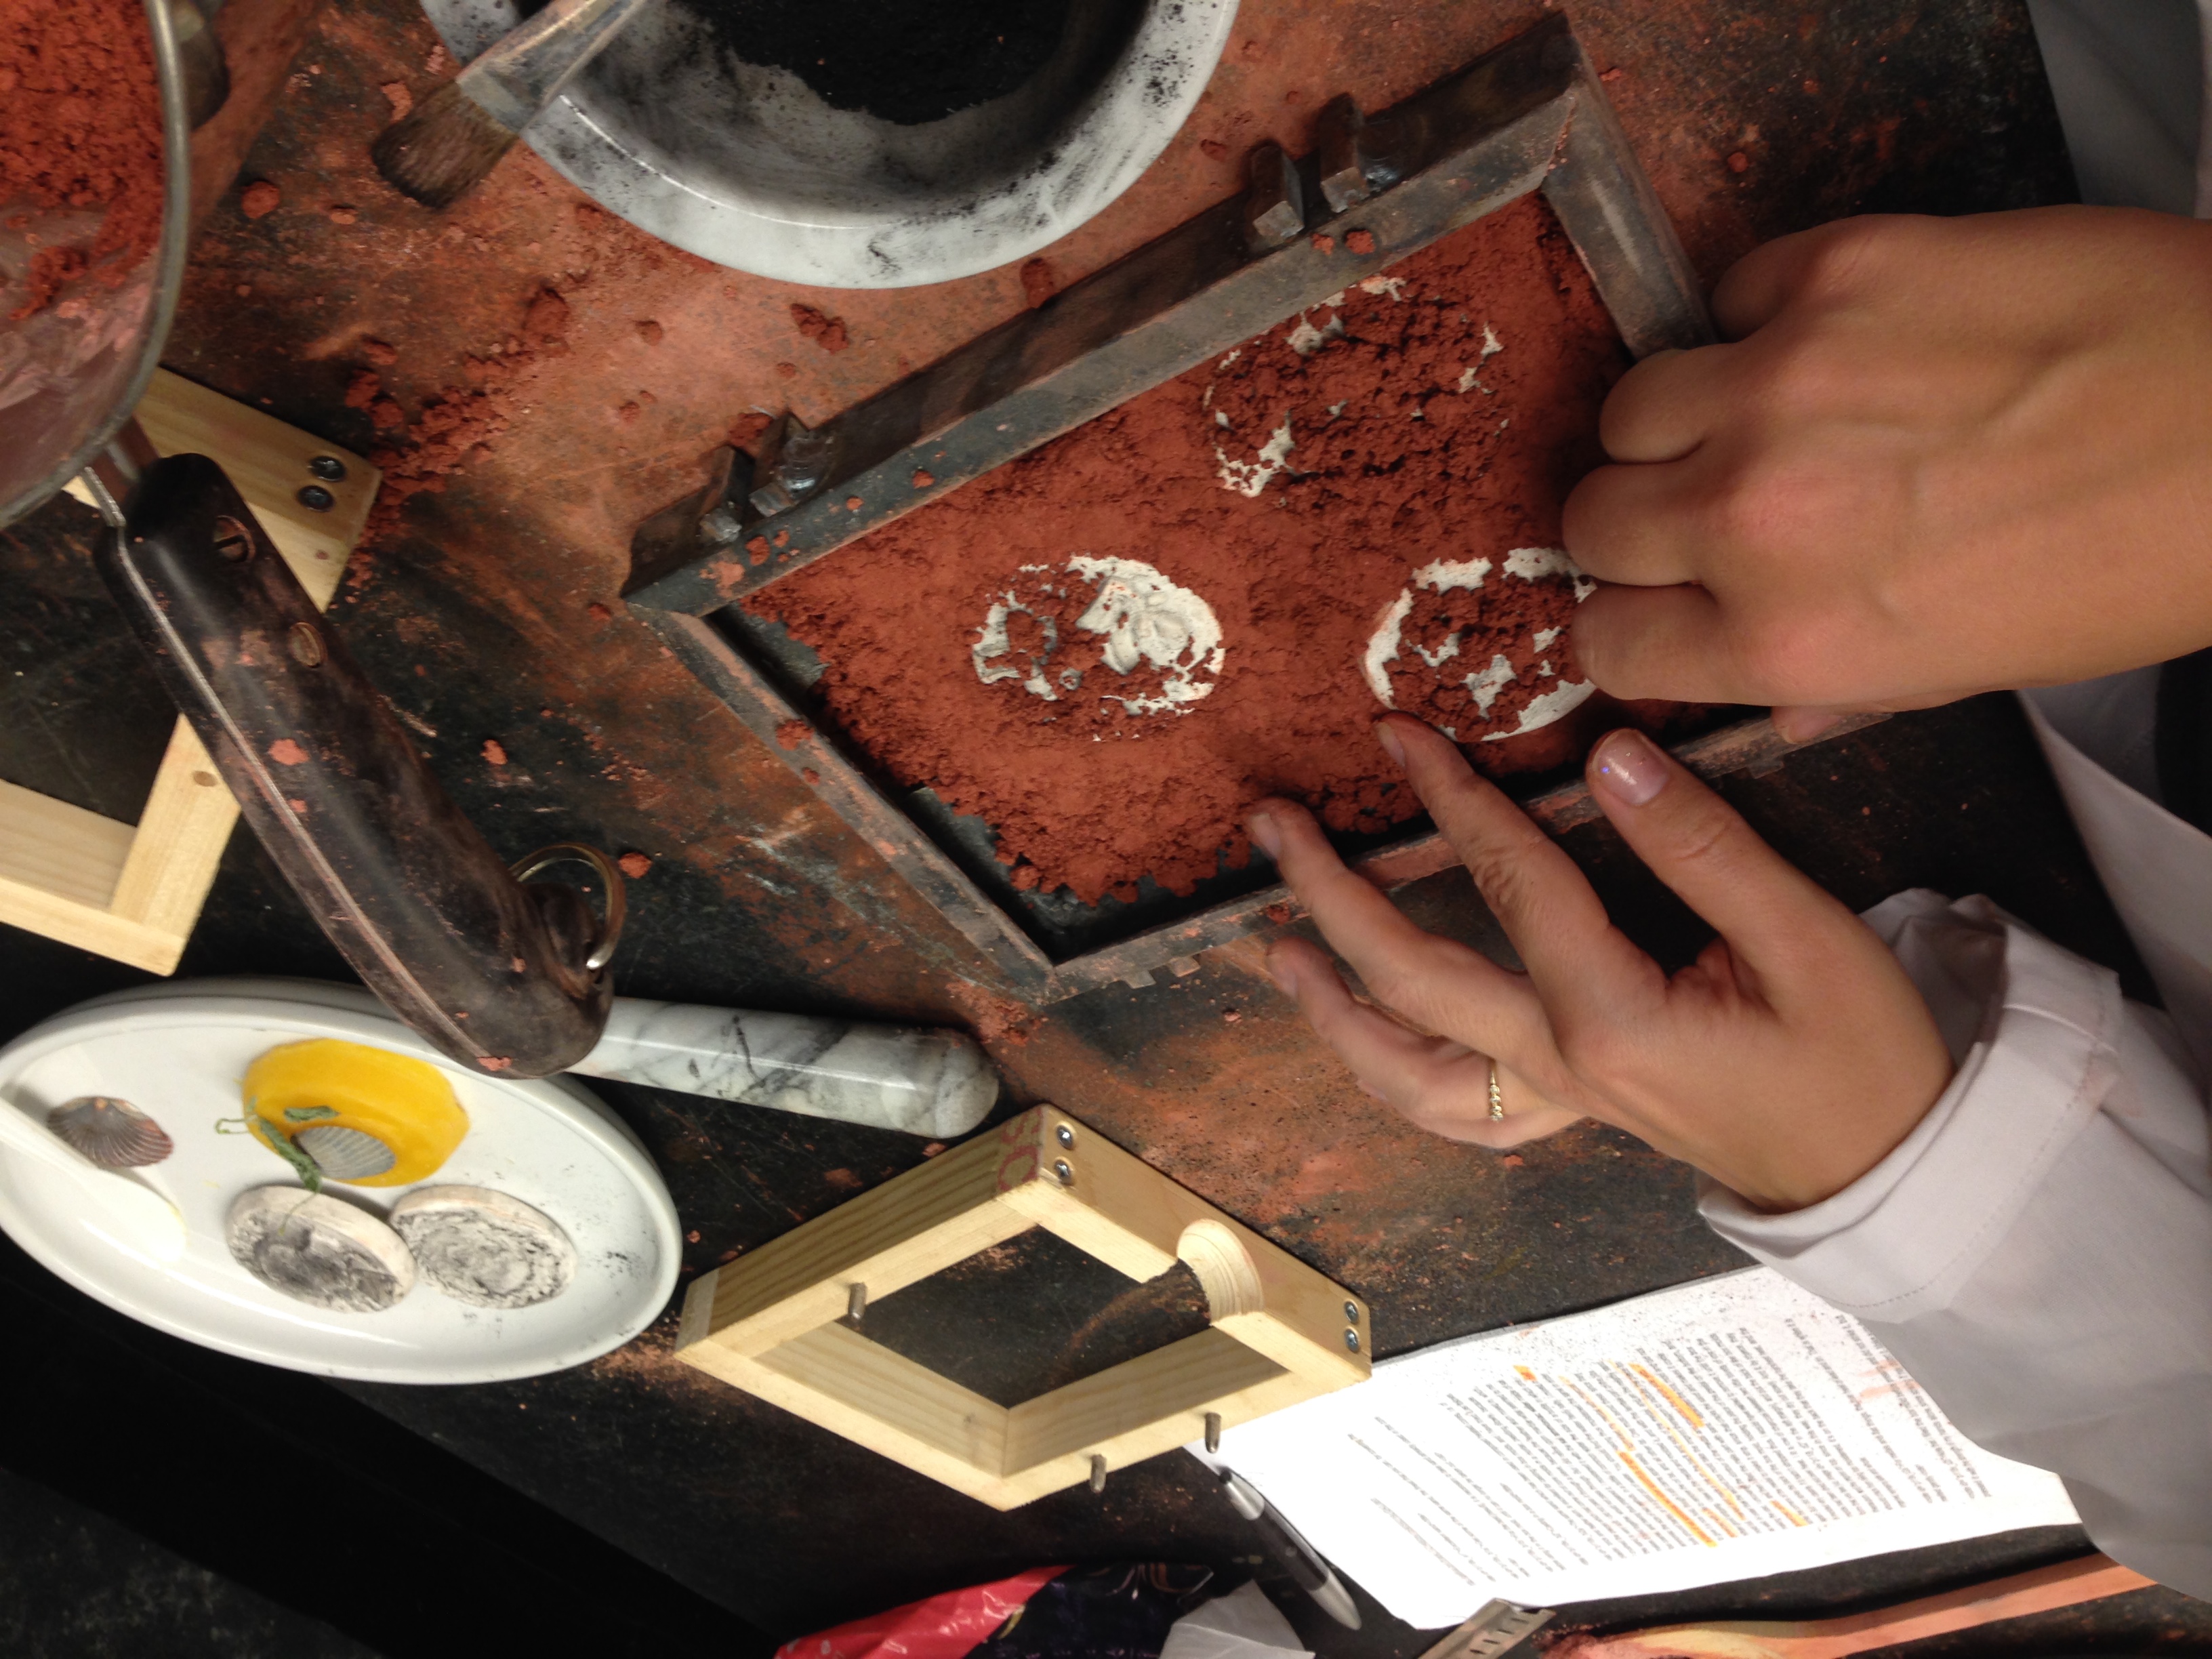 |
| Instead, we used this larger iron box mold and fit three models into a pyramidal arrangement. Here, we are pressing the sand around the plaster models. |
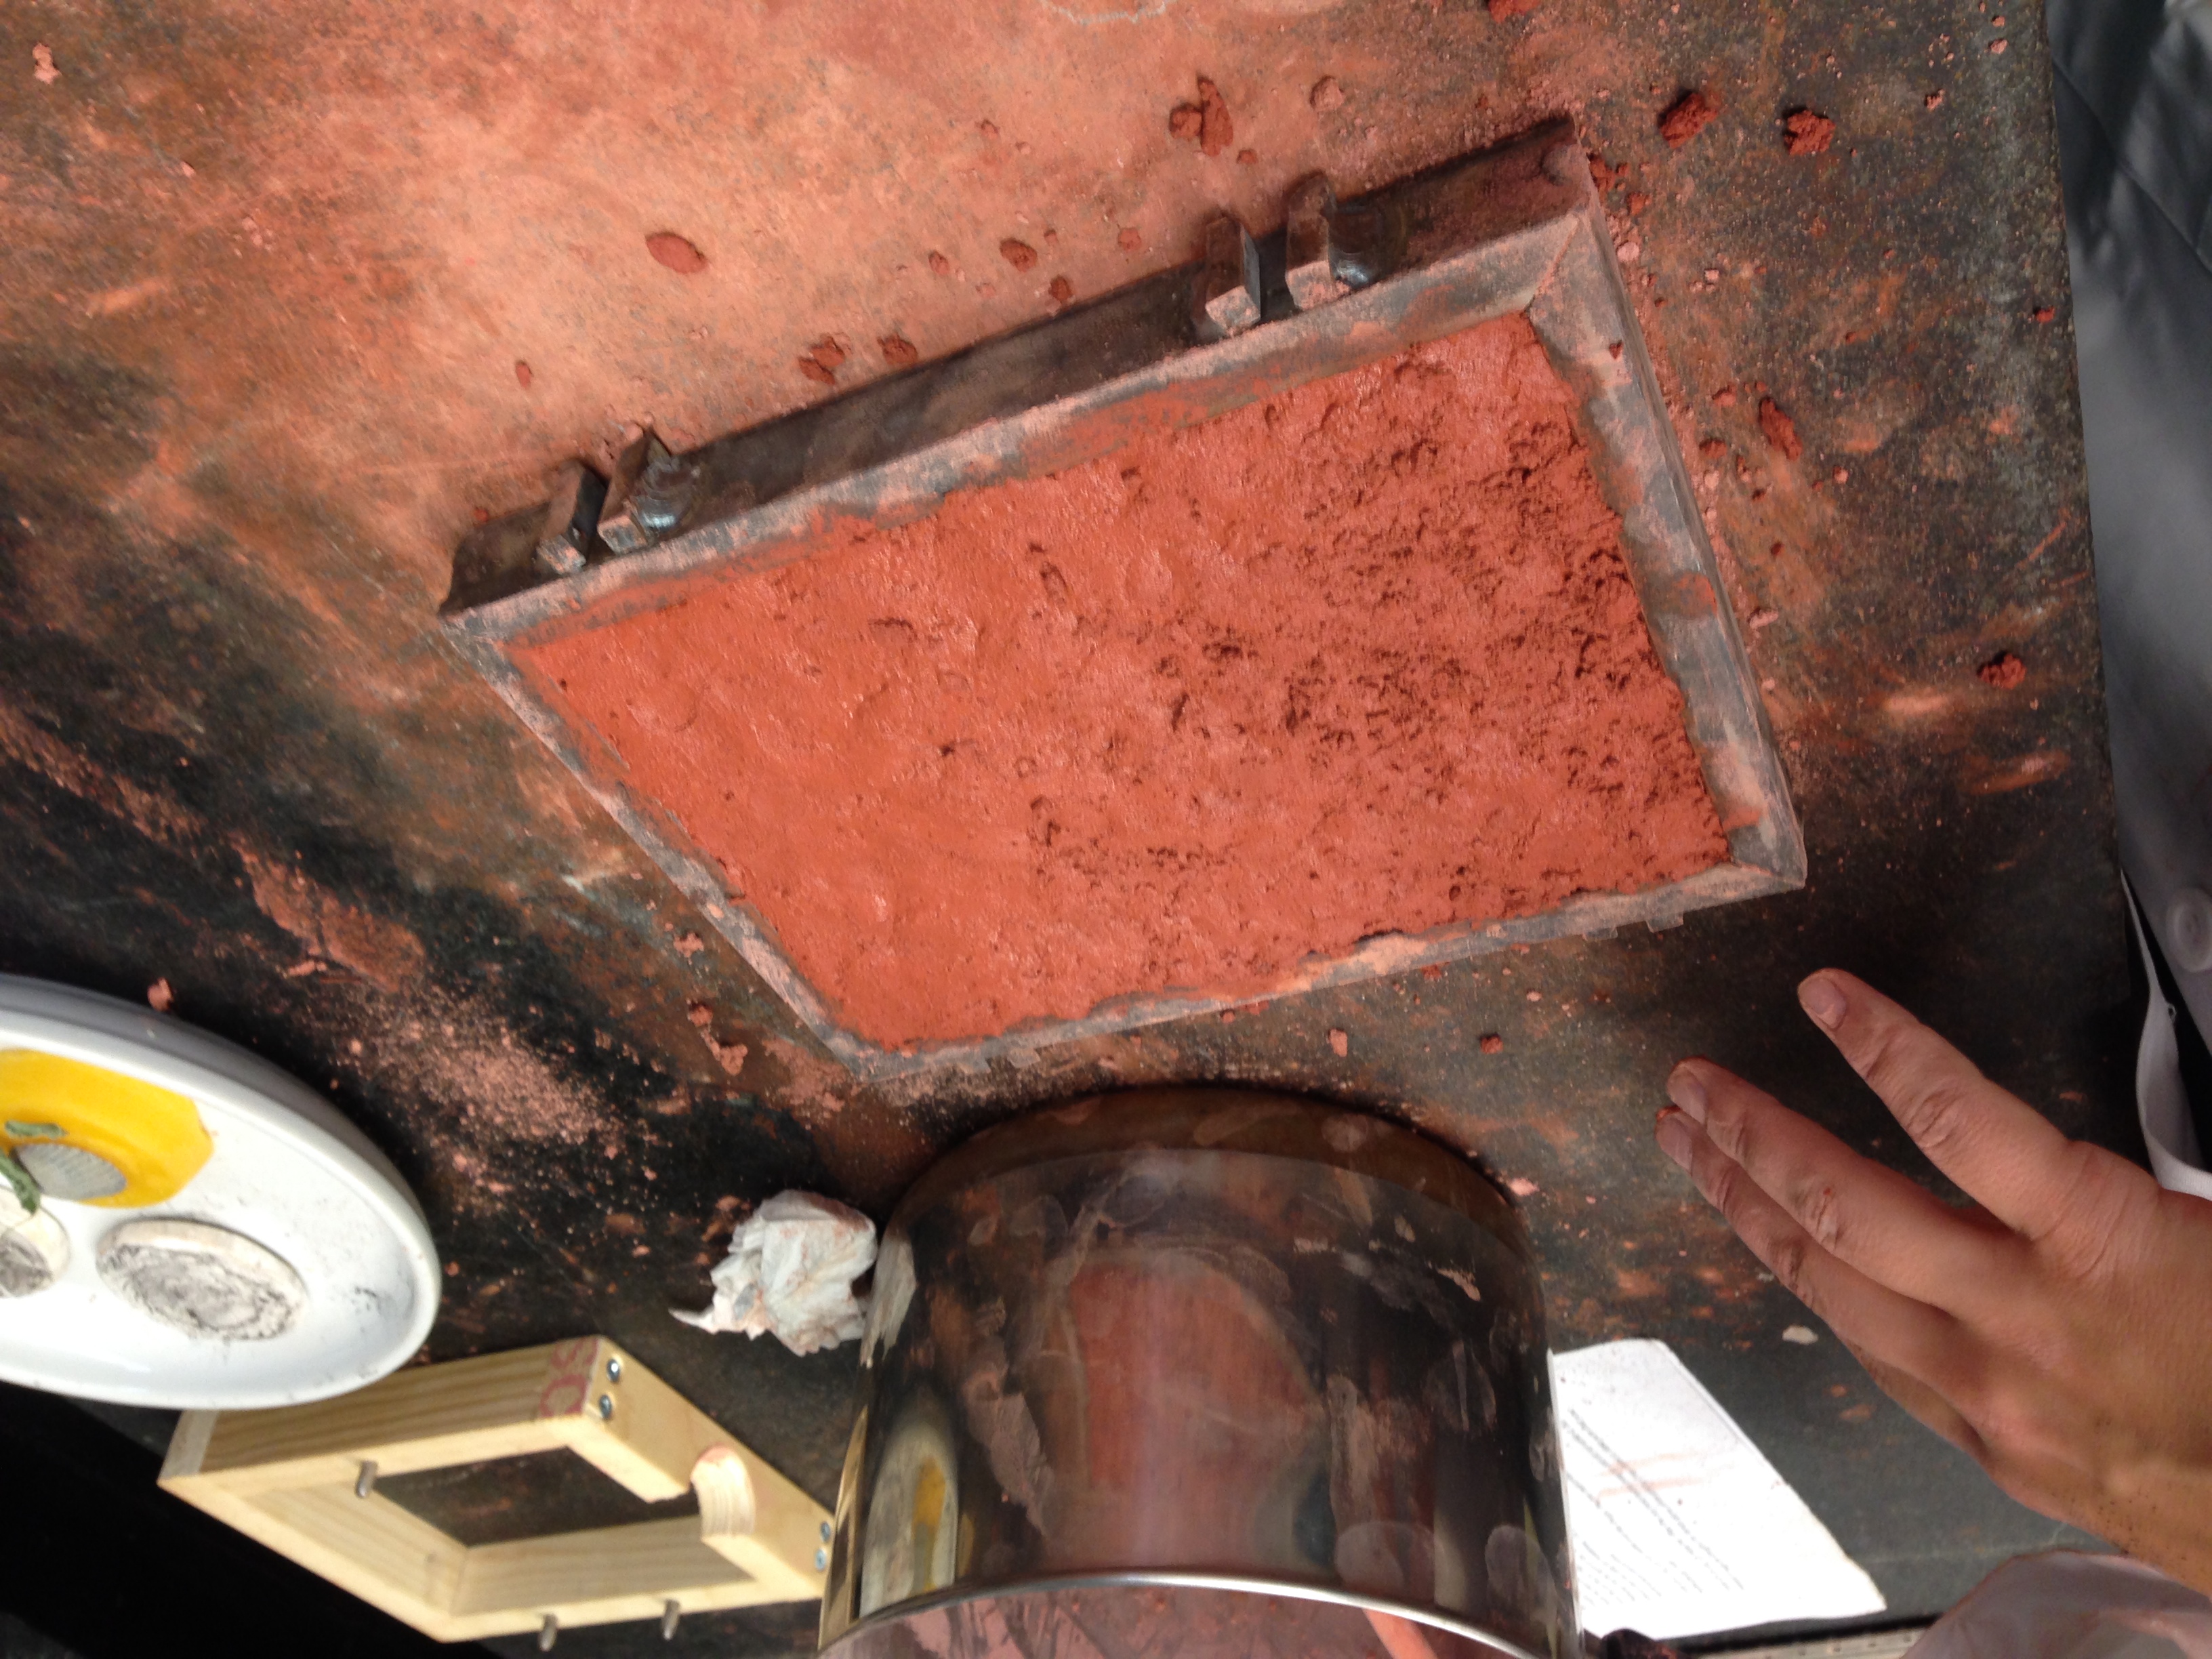 |
| The first half has been filled with compact sand and pounded; the moisture seems to "rise" to the top. |
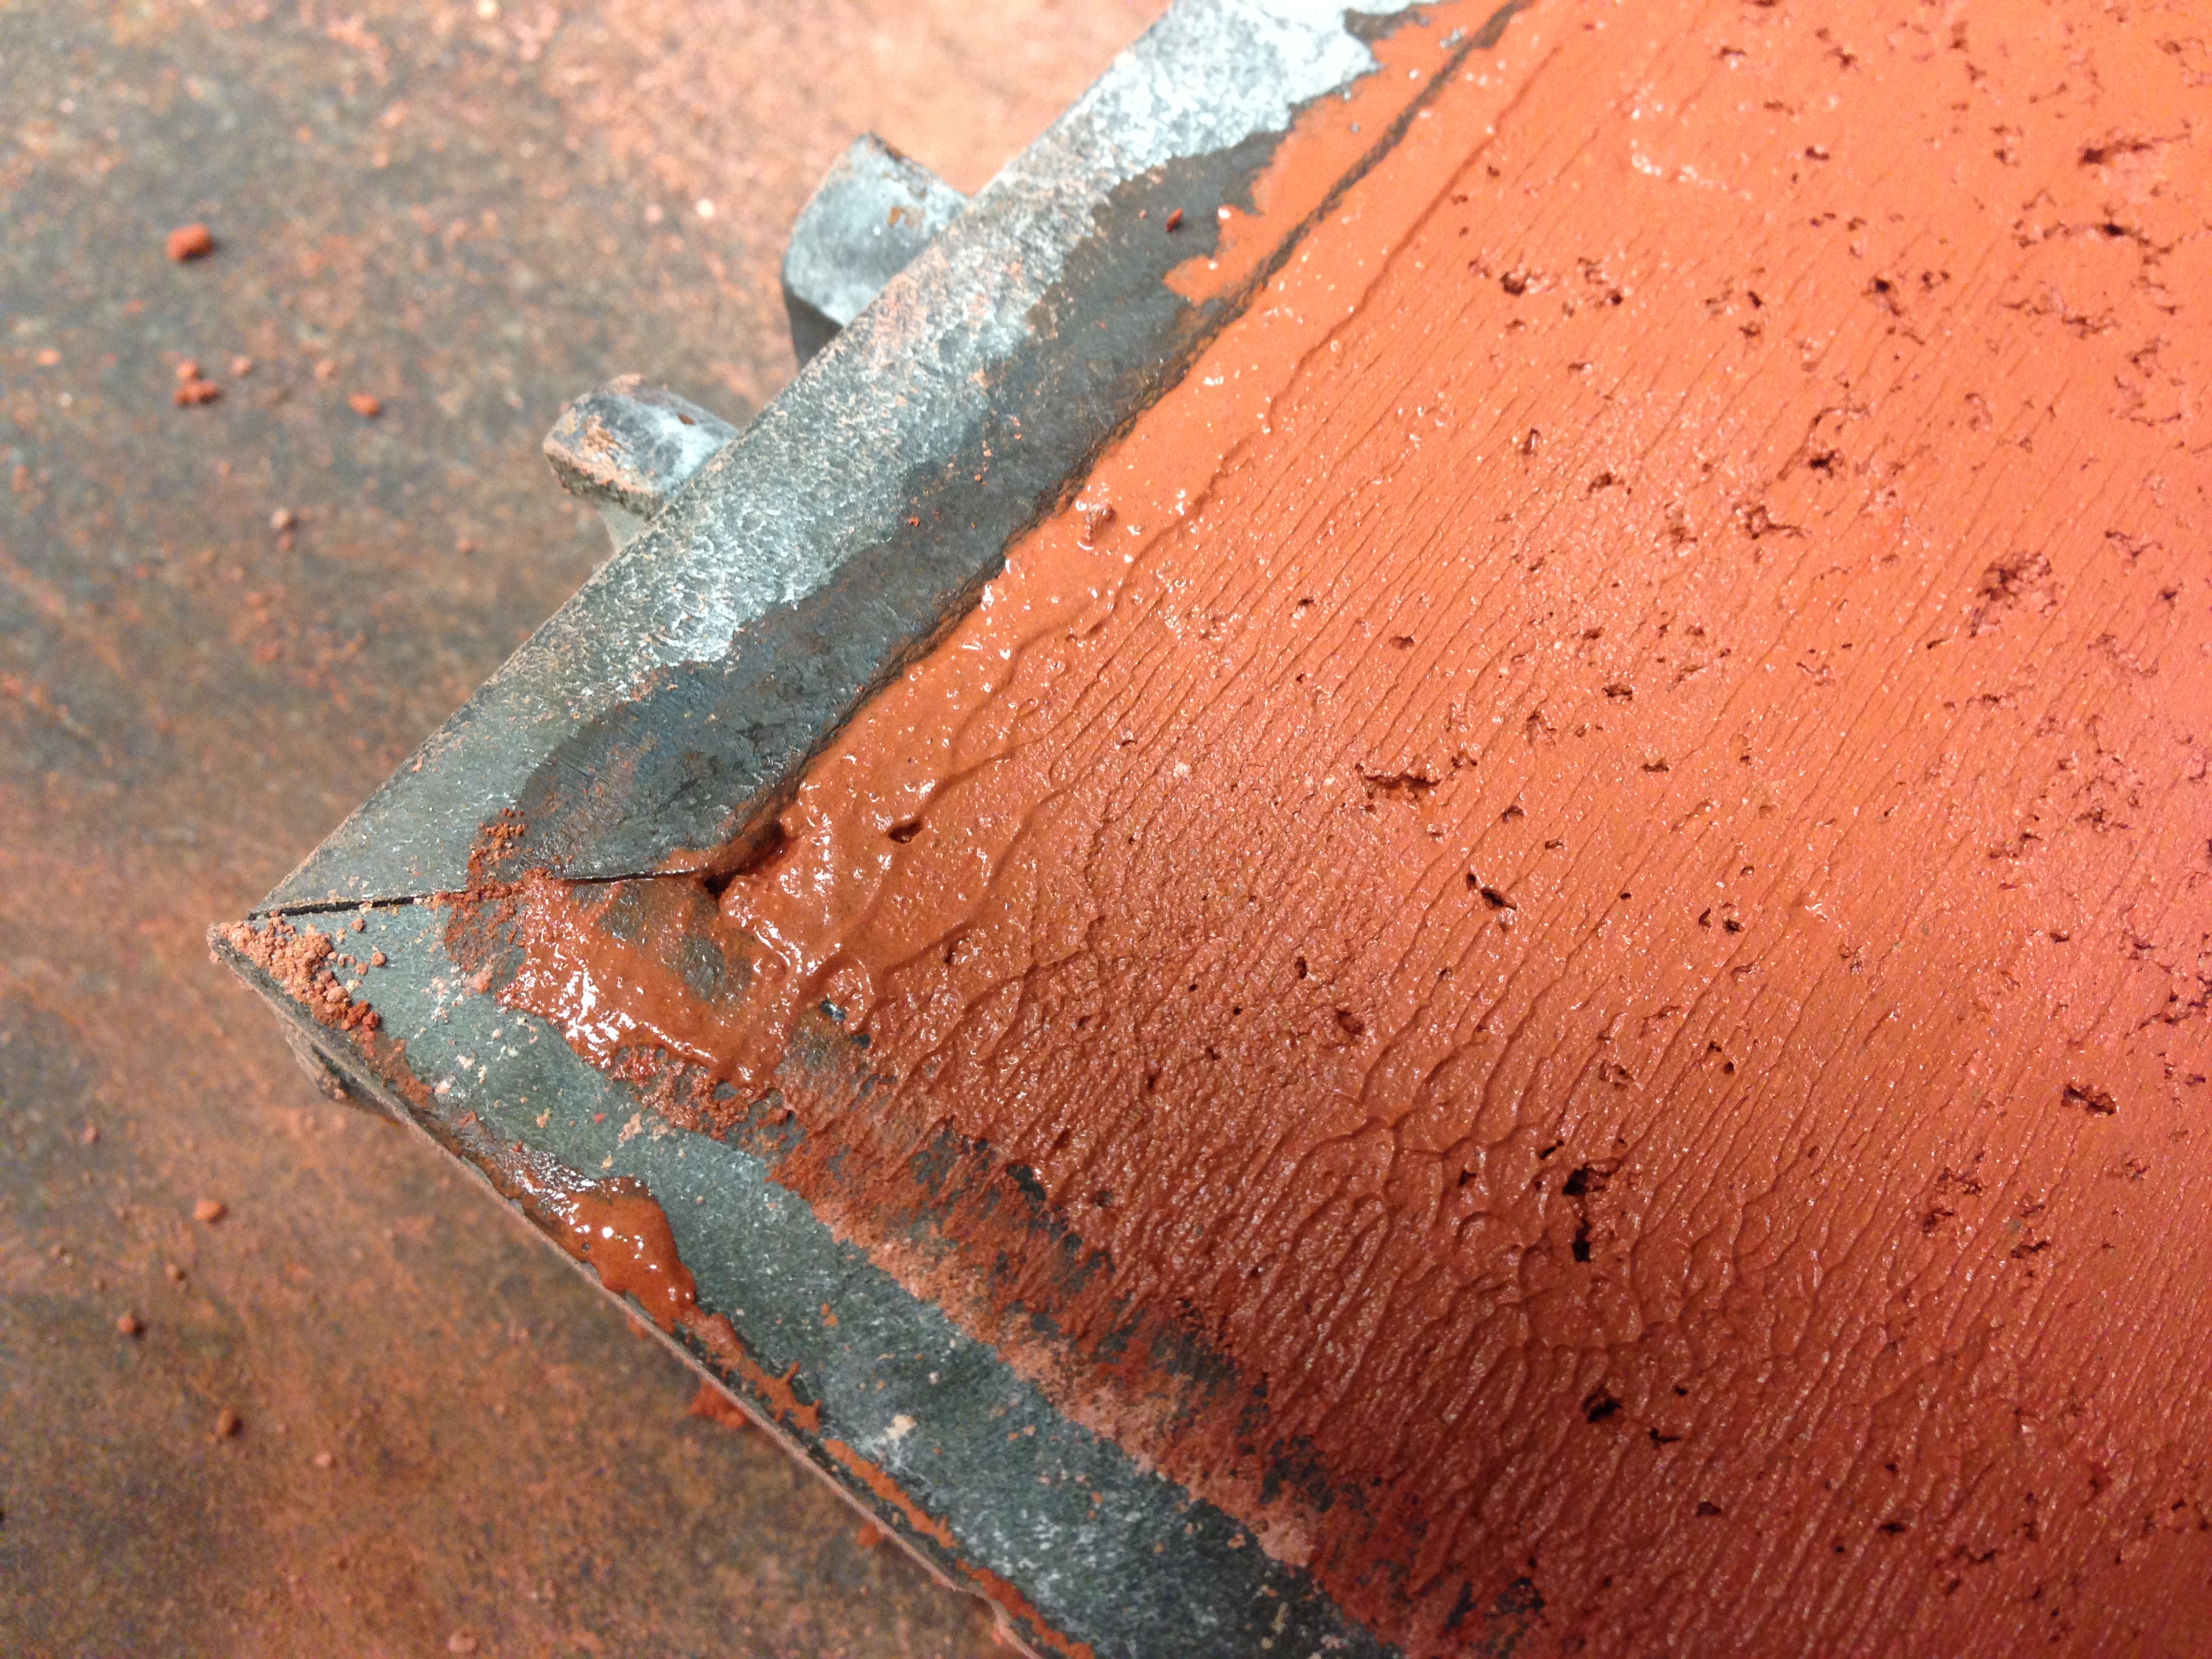 |
| Much too muddy. |
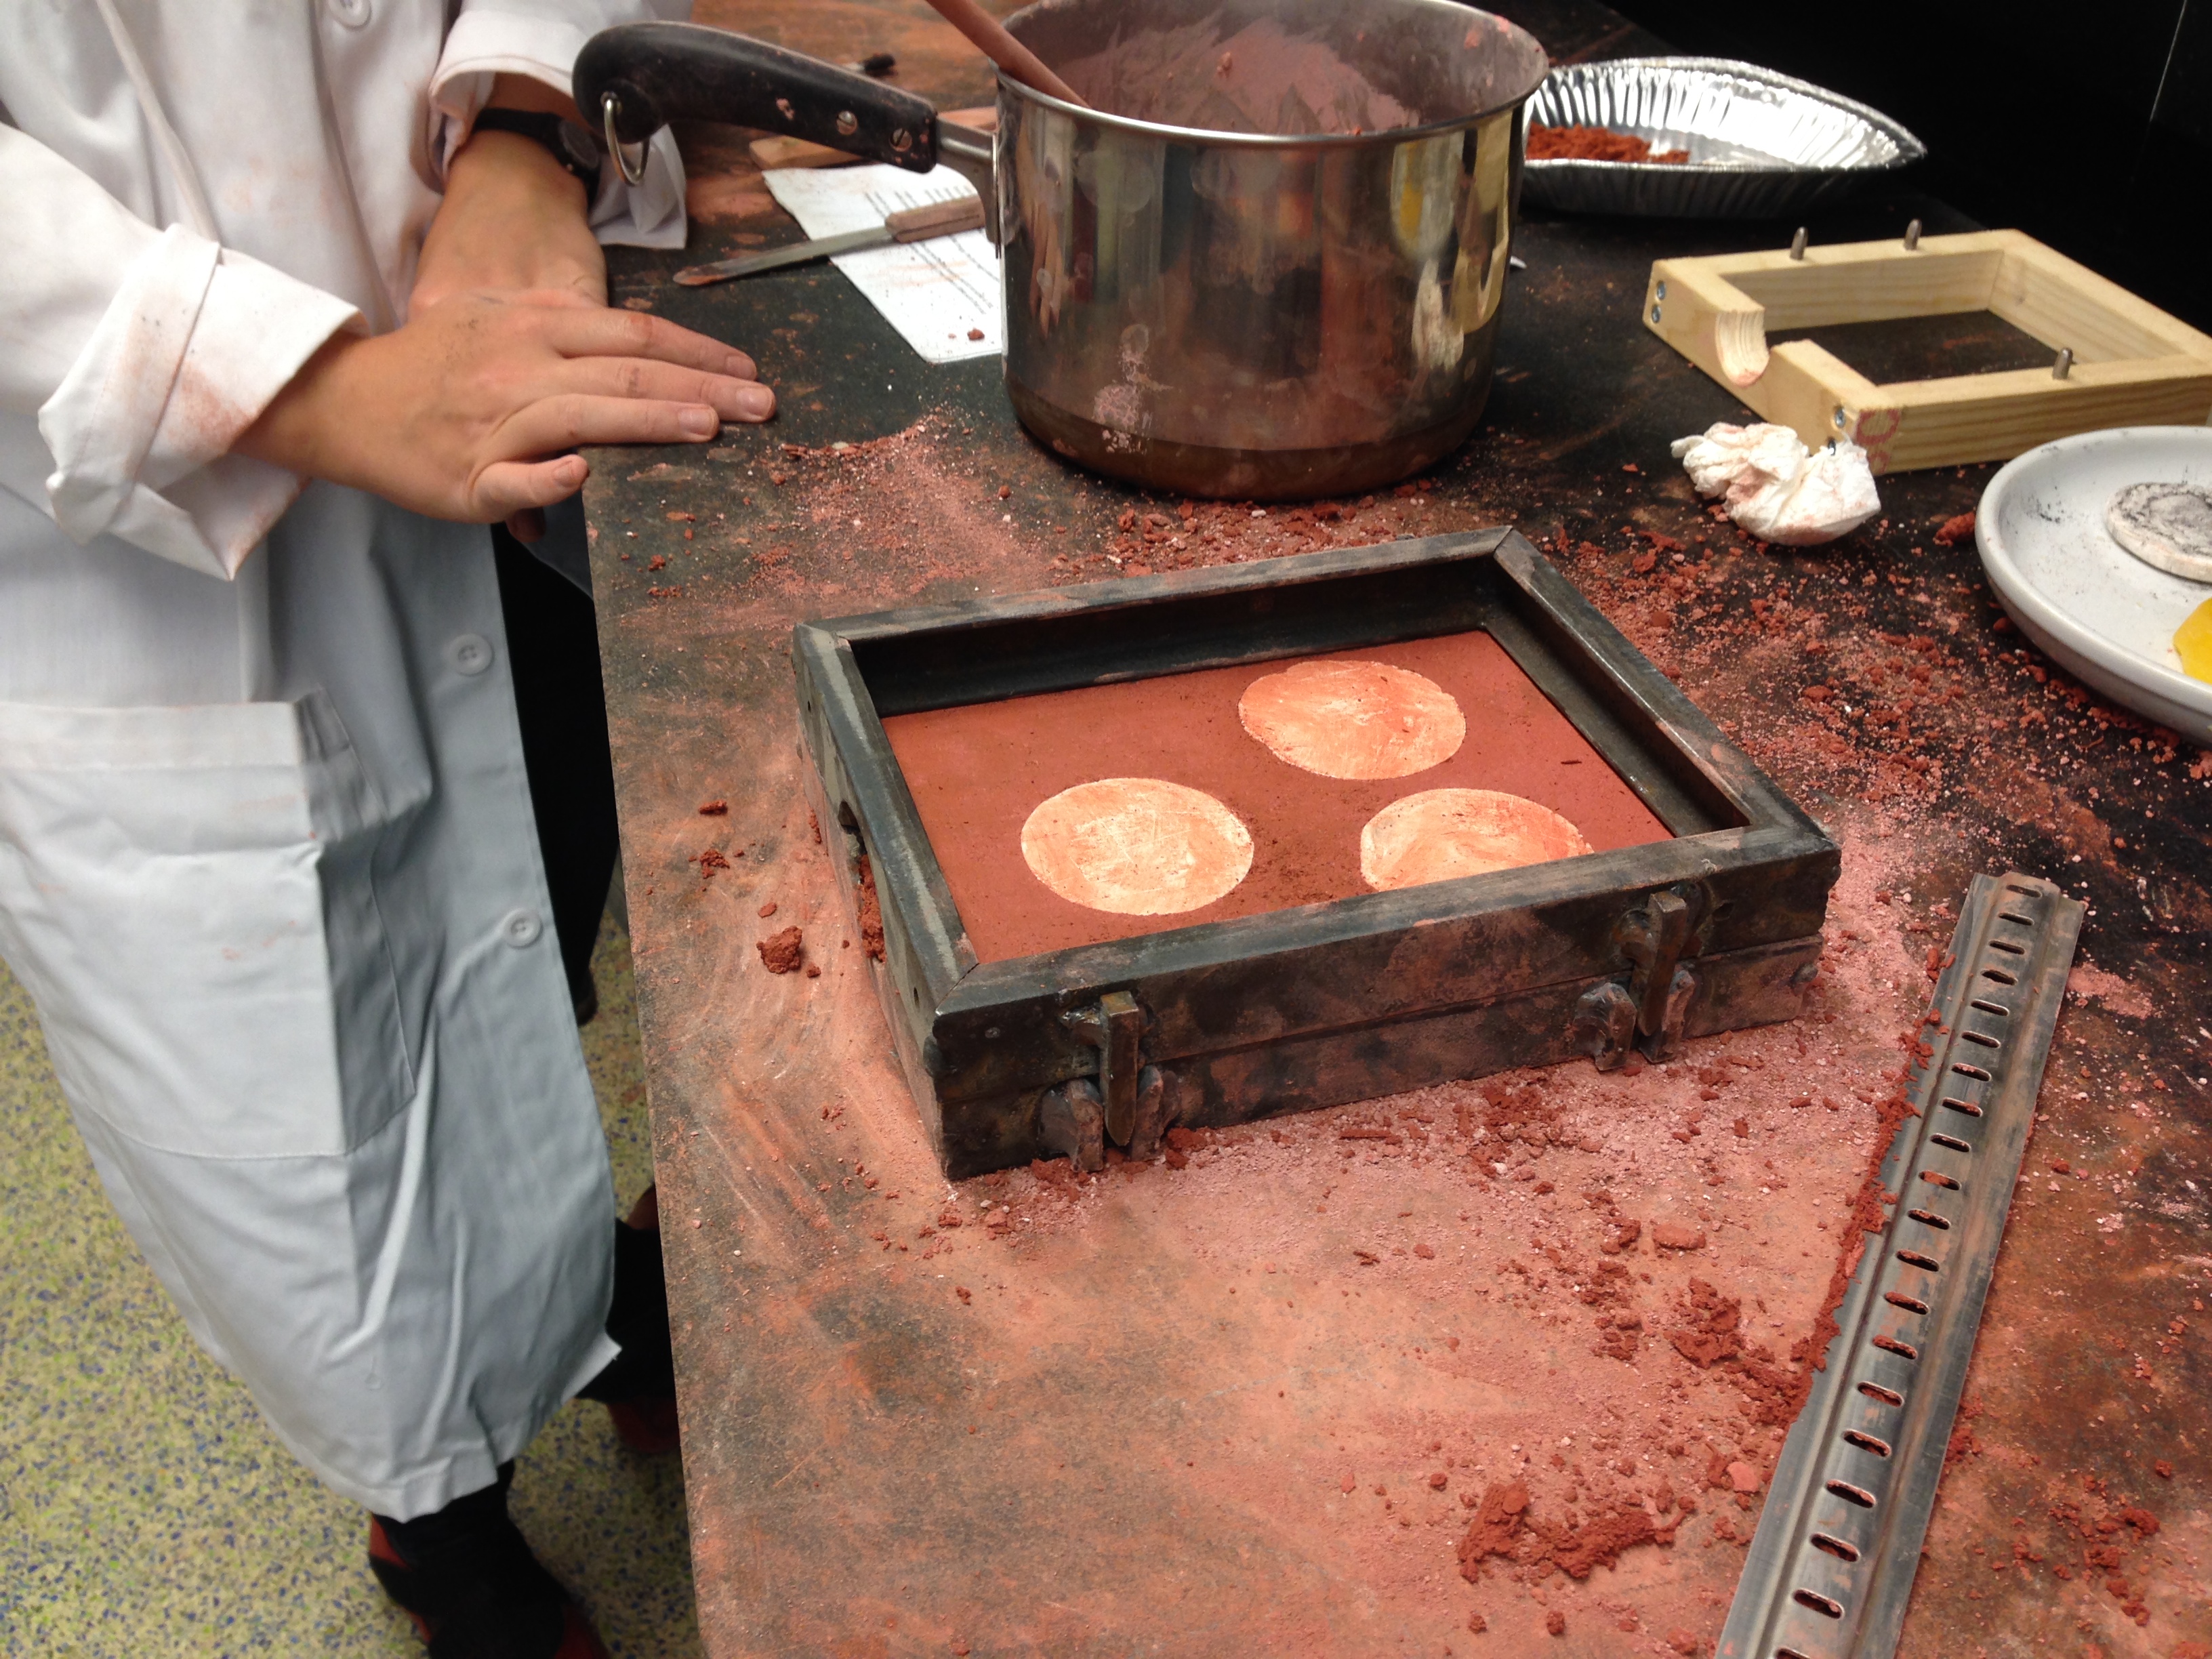 |
| We decided to add dry sand to the mold to soak up the moisture, then we turned it over to finish the other side. |
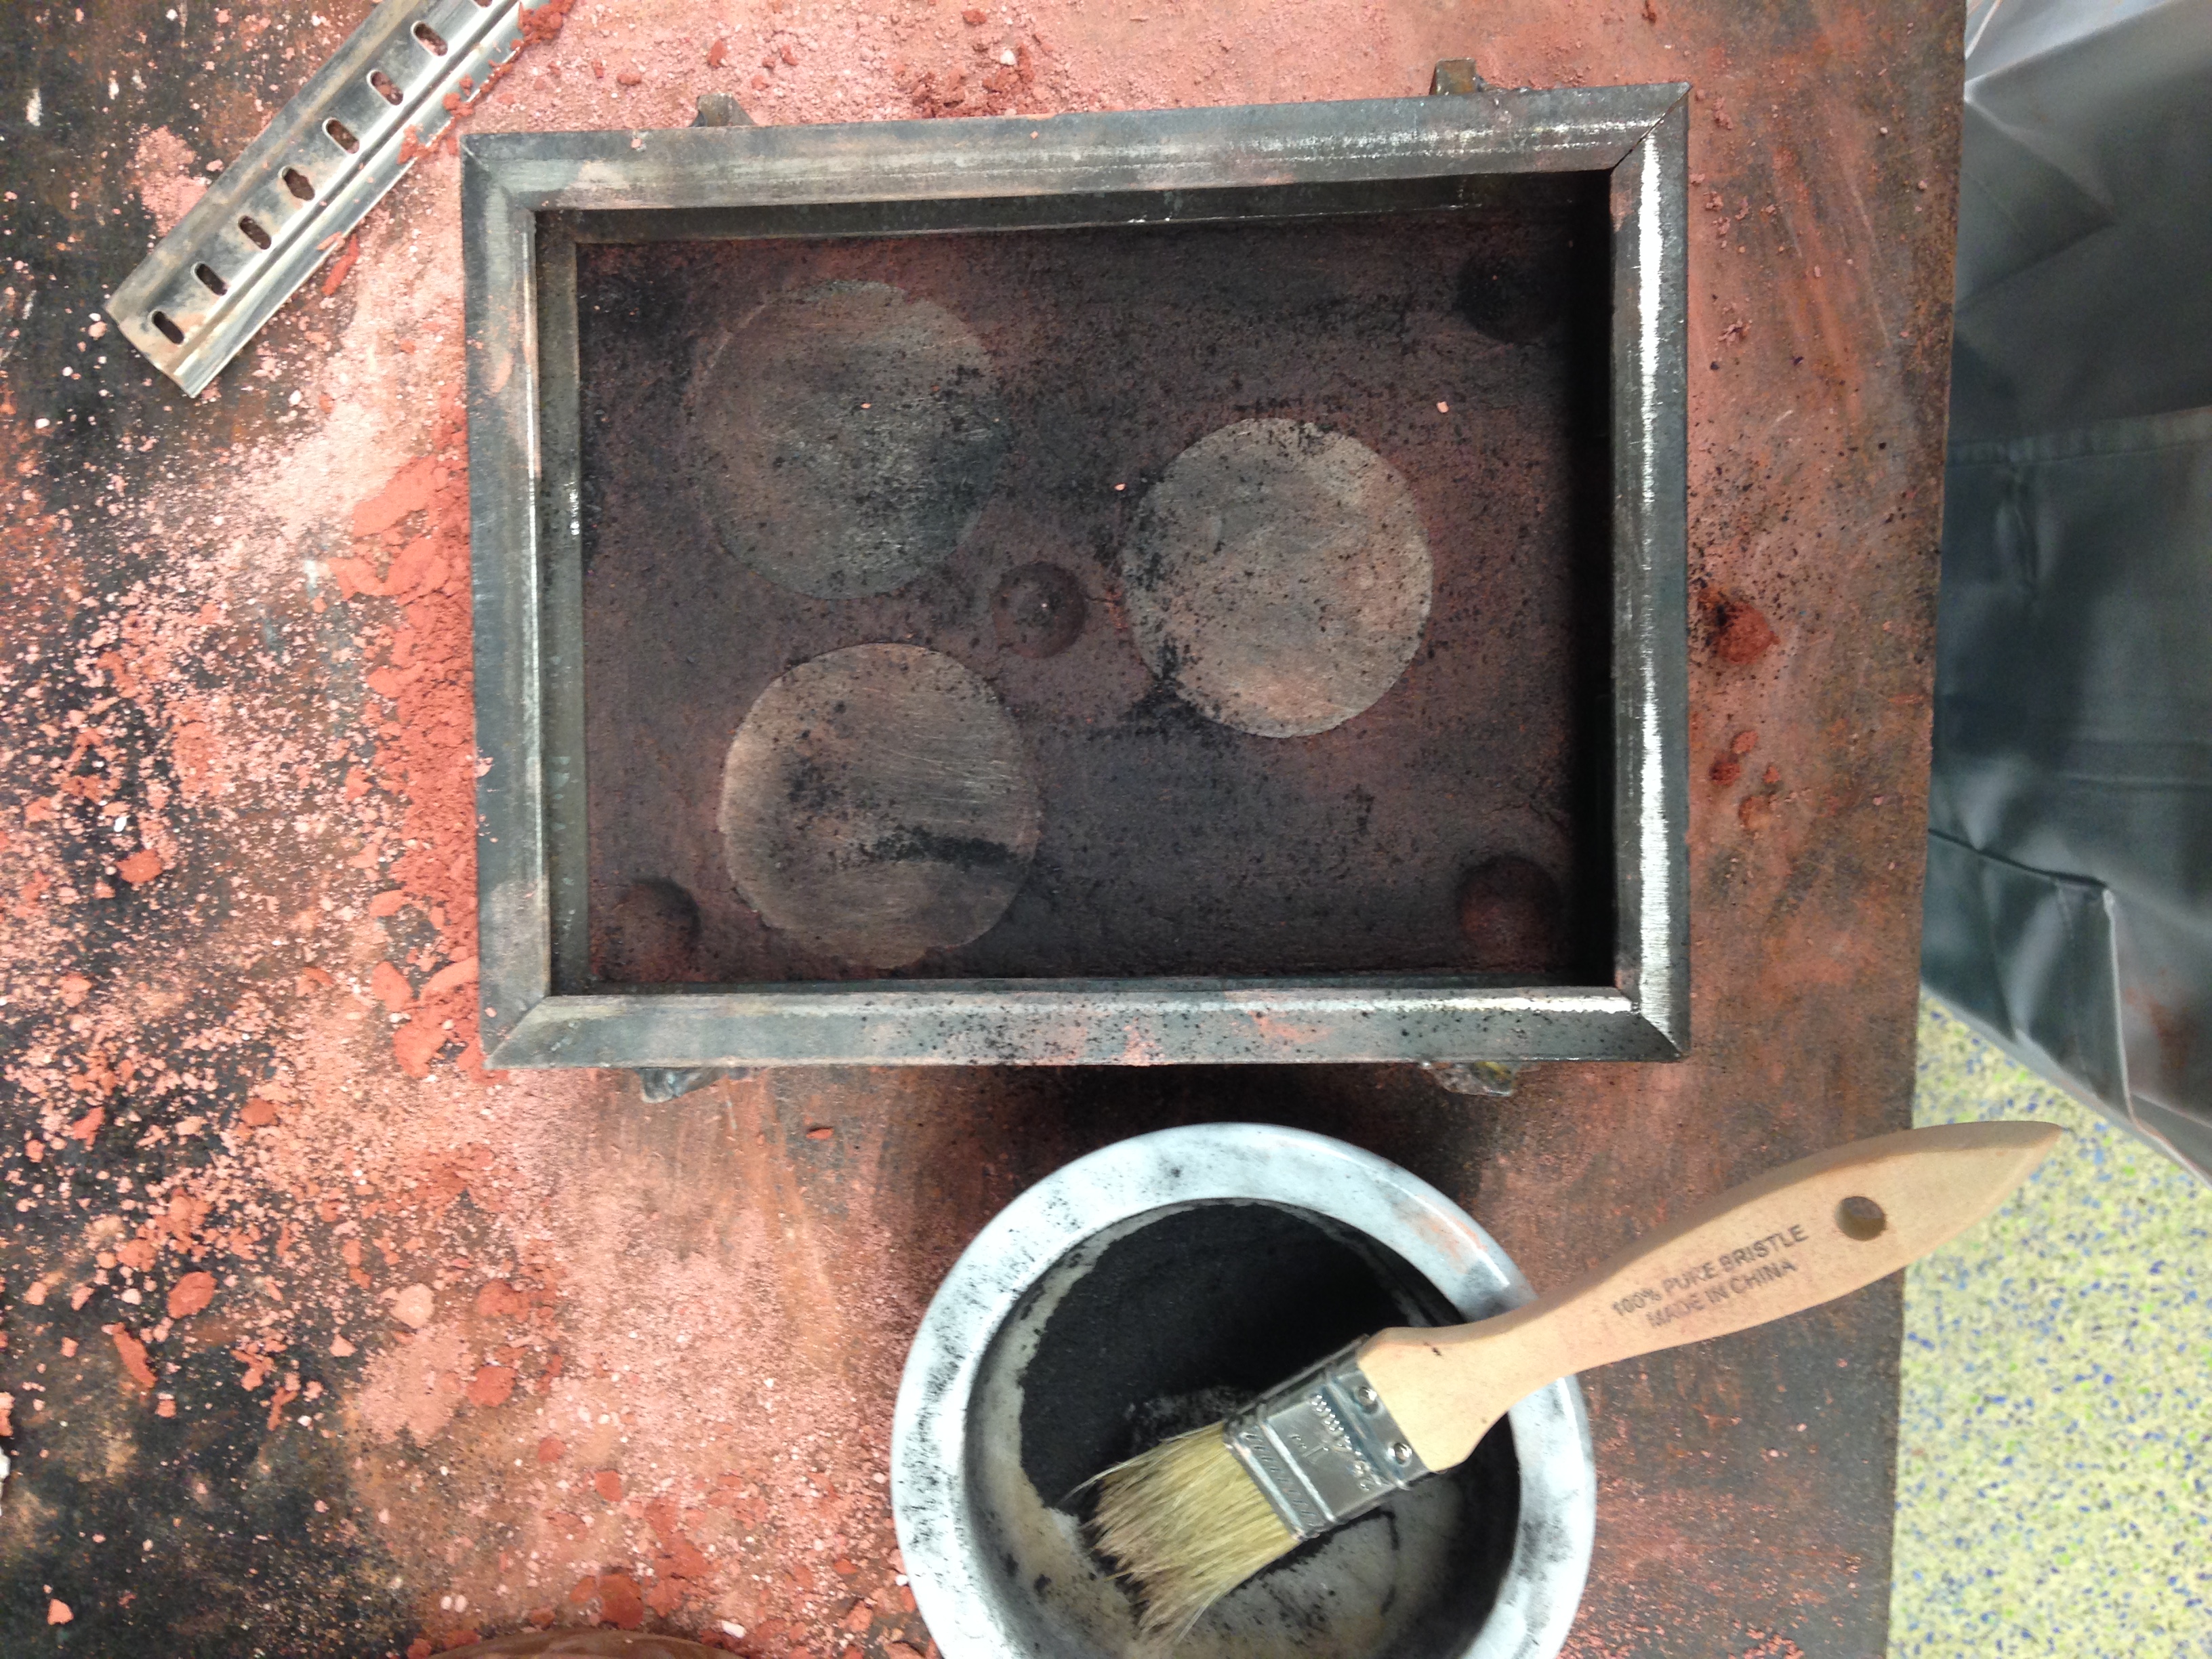 |
| Crush charcoal brushed on the surface (excess was removed under the fume hood). |
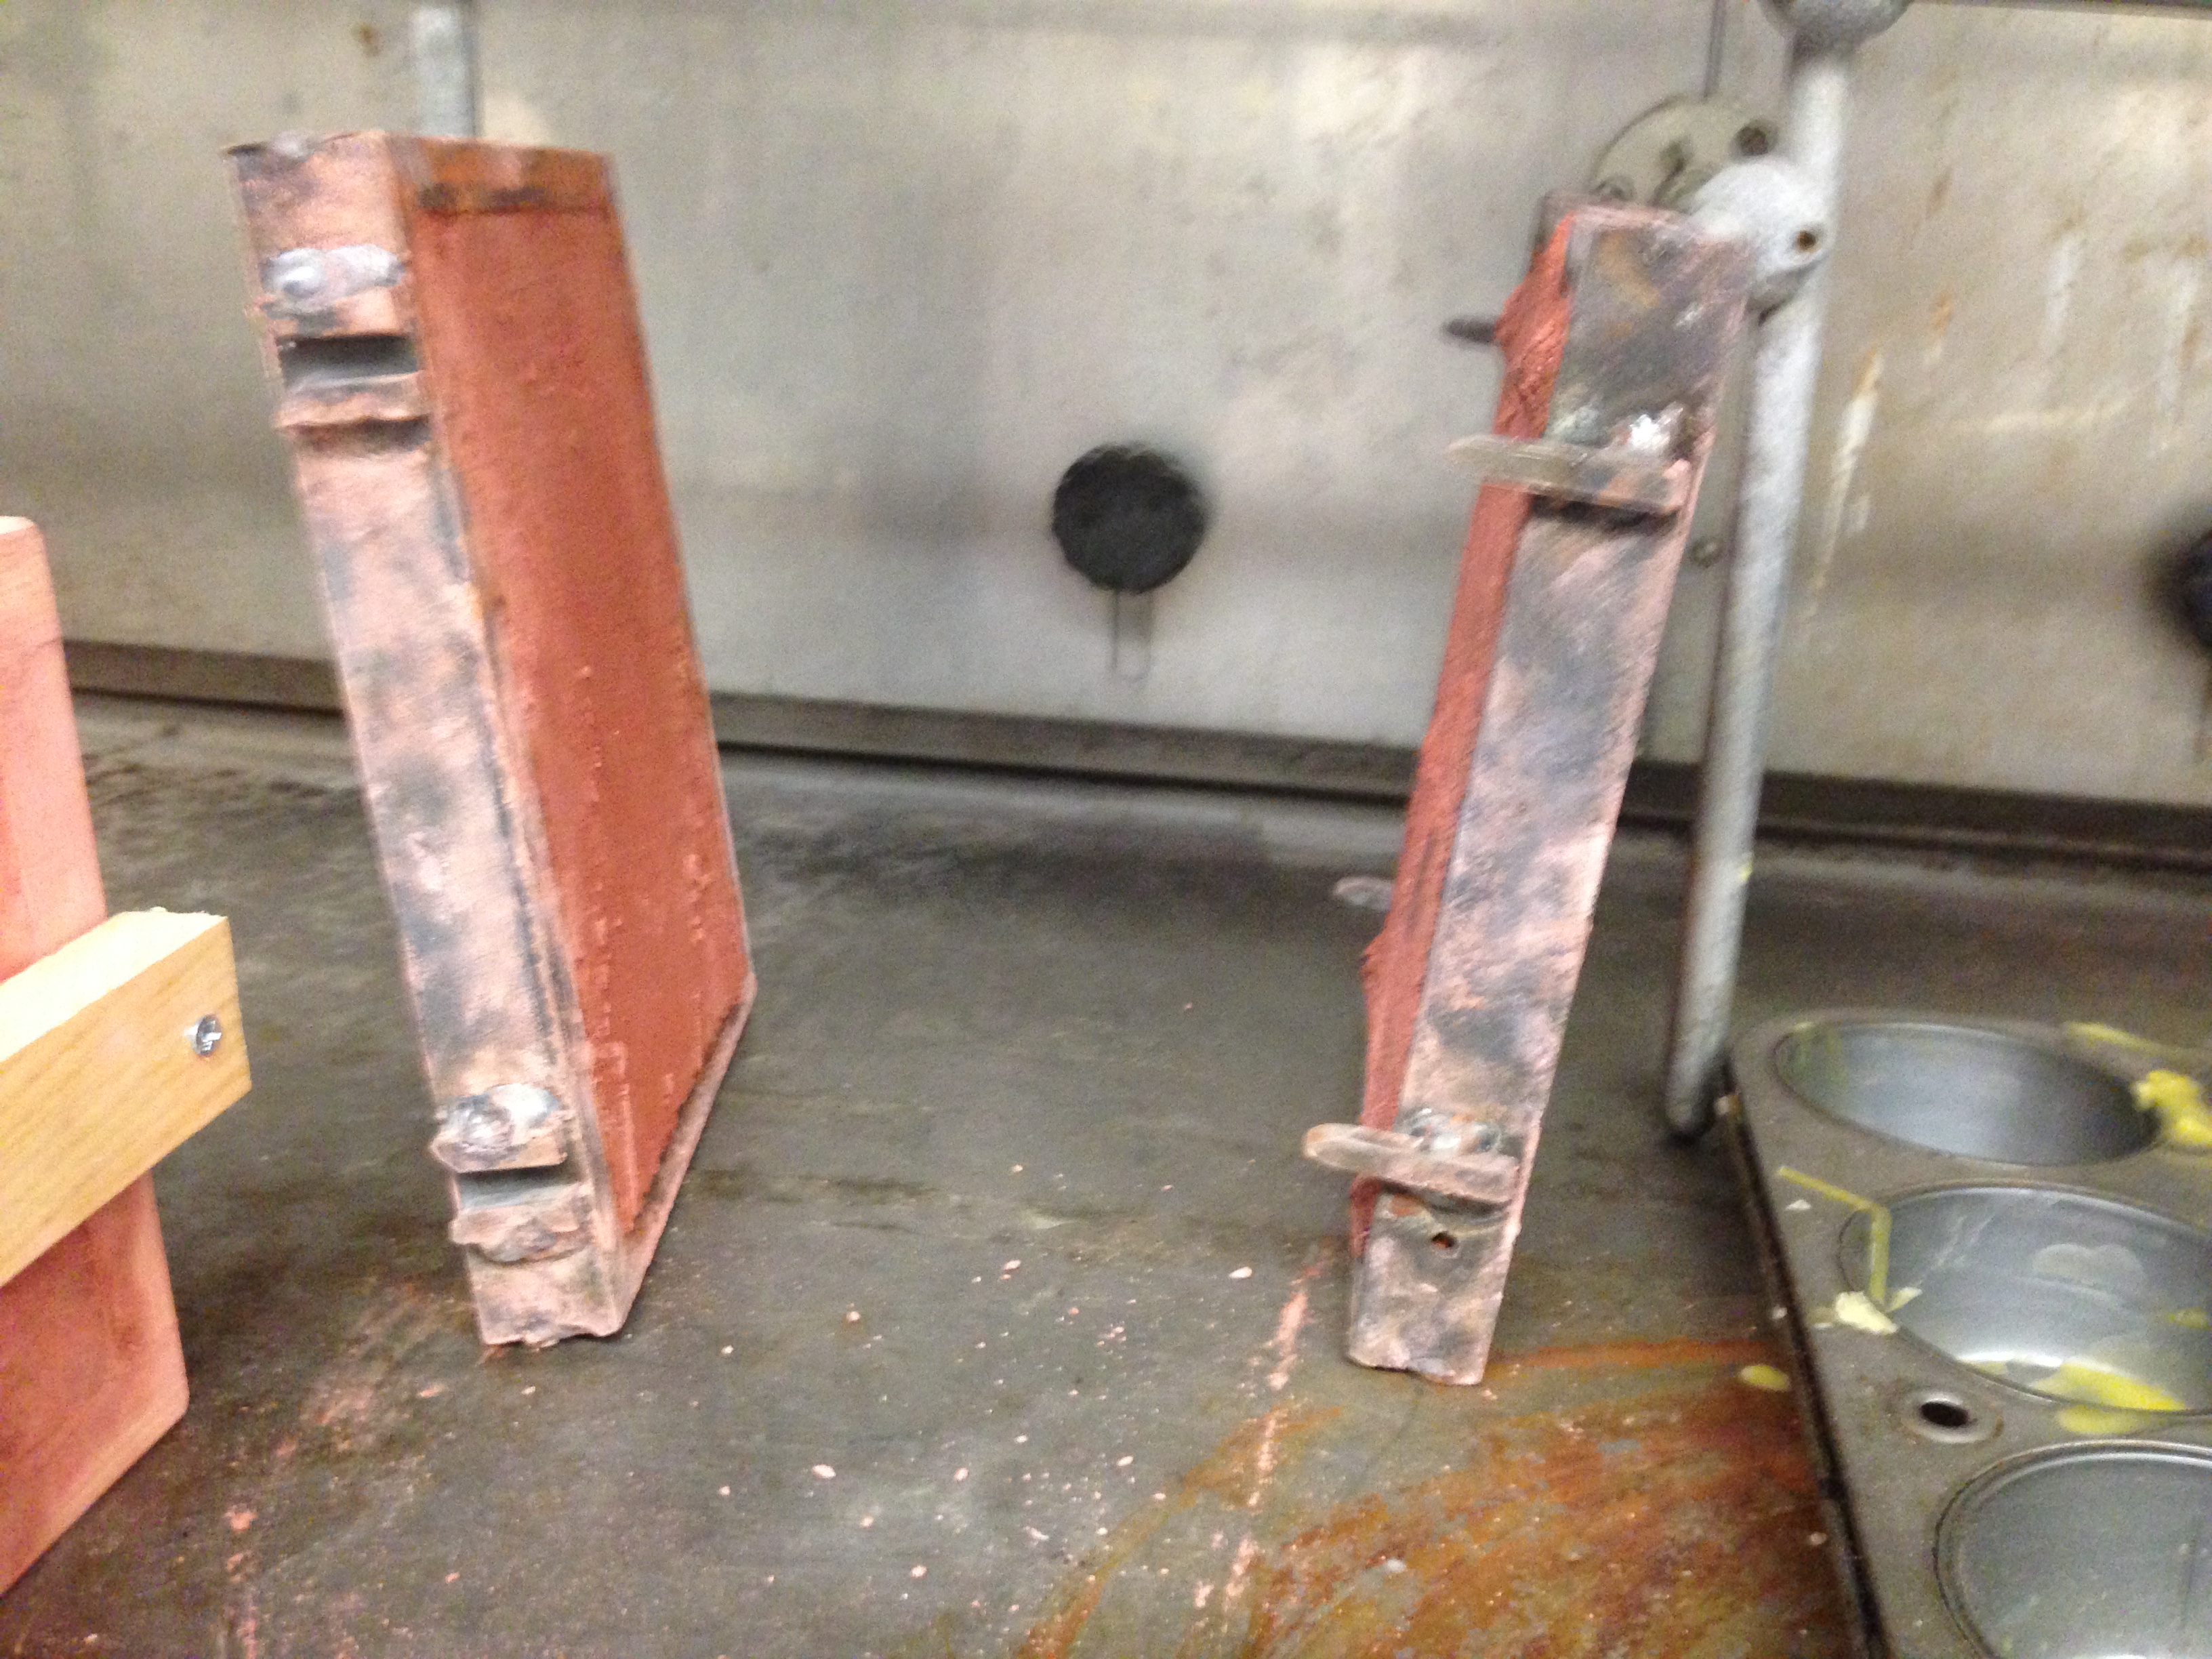 |
| Finished box mold drying in the fume hood. |
Oct. 16: The Pour
NAME: Emogene Cataldo & Julianna ViscoDATE AND TIME: 10/16/14 10:50pm
LOCATION: 142nd St.
SUBJECT: Pouring molten metal at Ubaldo's workshop
Author: Julianna
Ubaldo welcomed us with a beautiful talk regarding stepping back in time and how this is an opportunity to visualize the author of the manuscript and try to understand how he thinks.
Experimentation
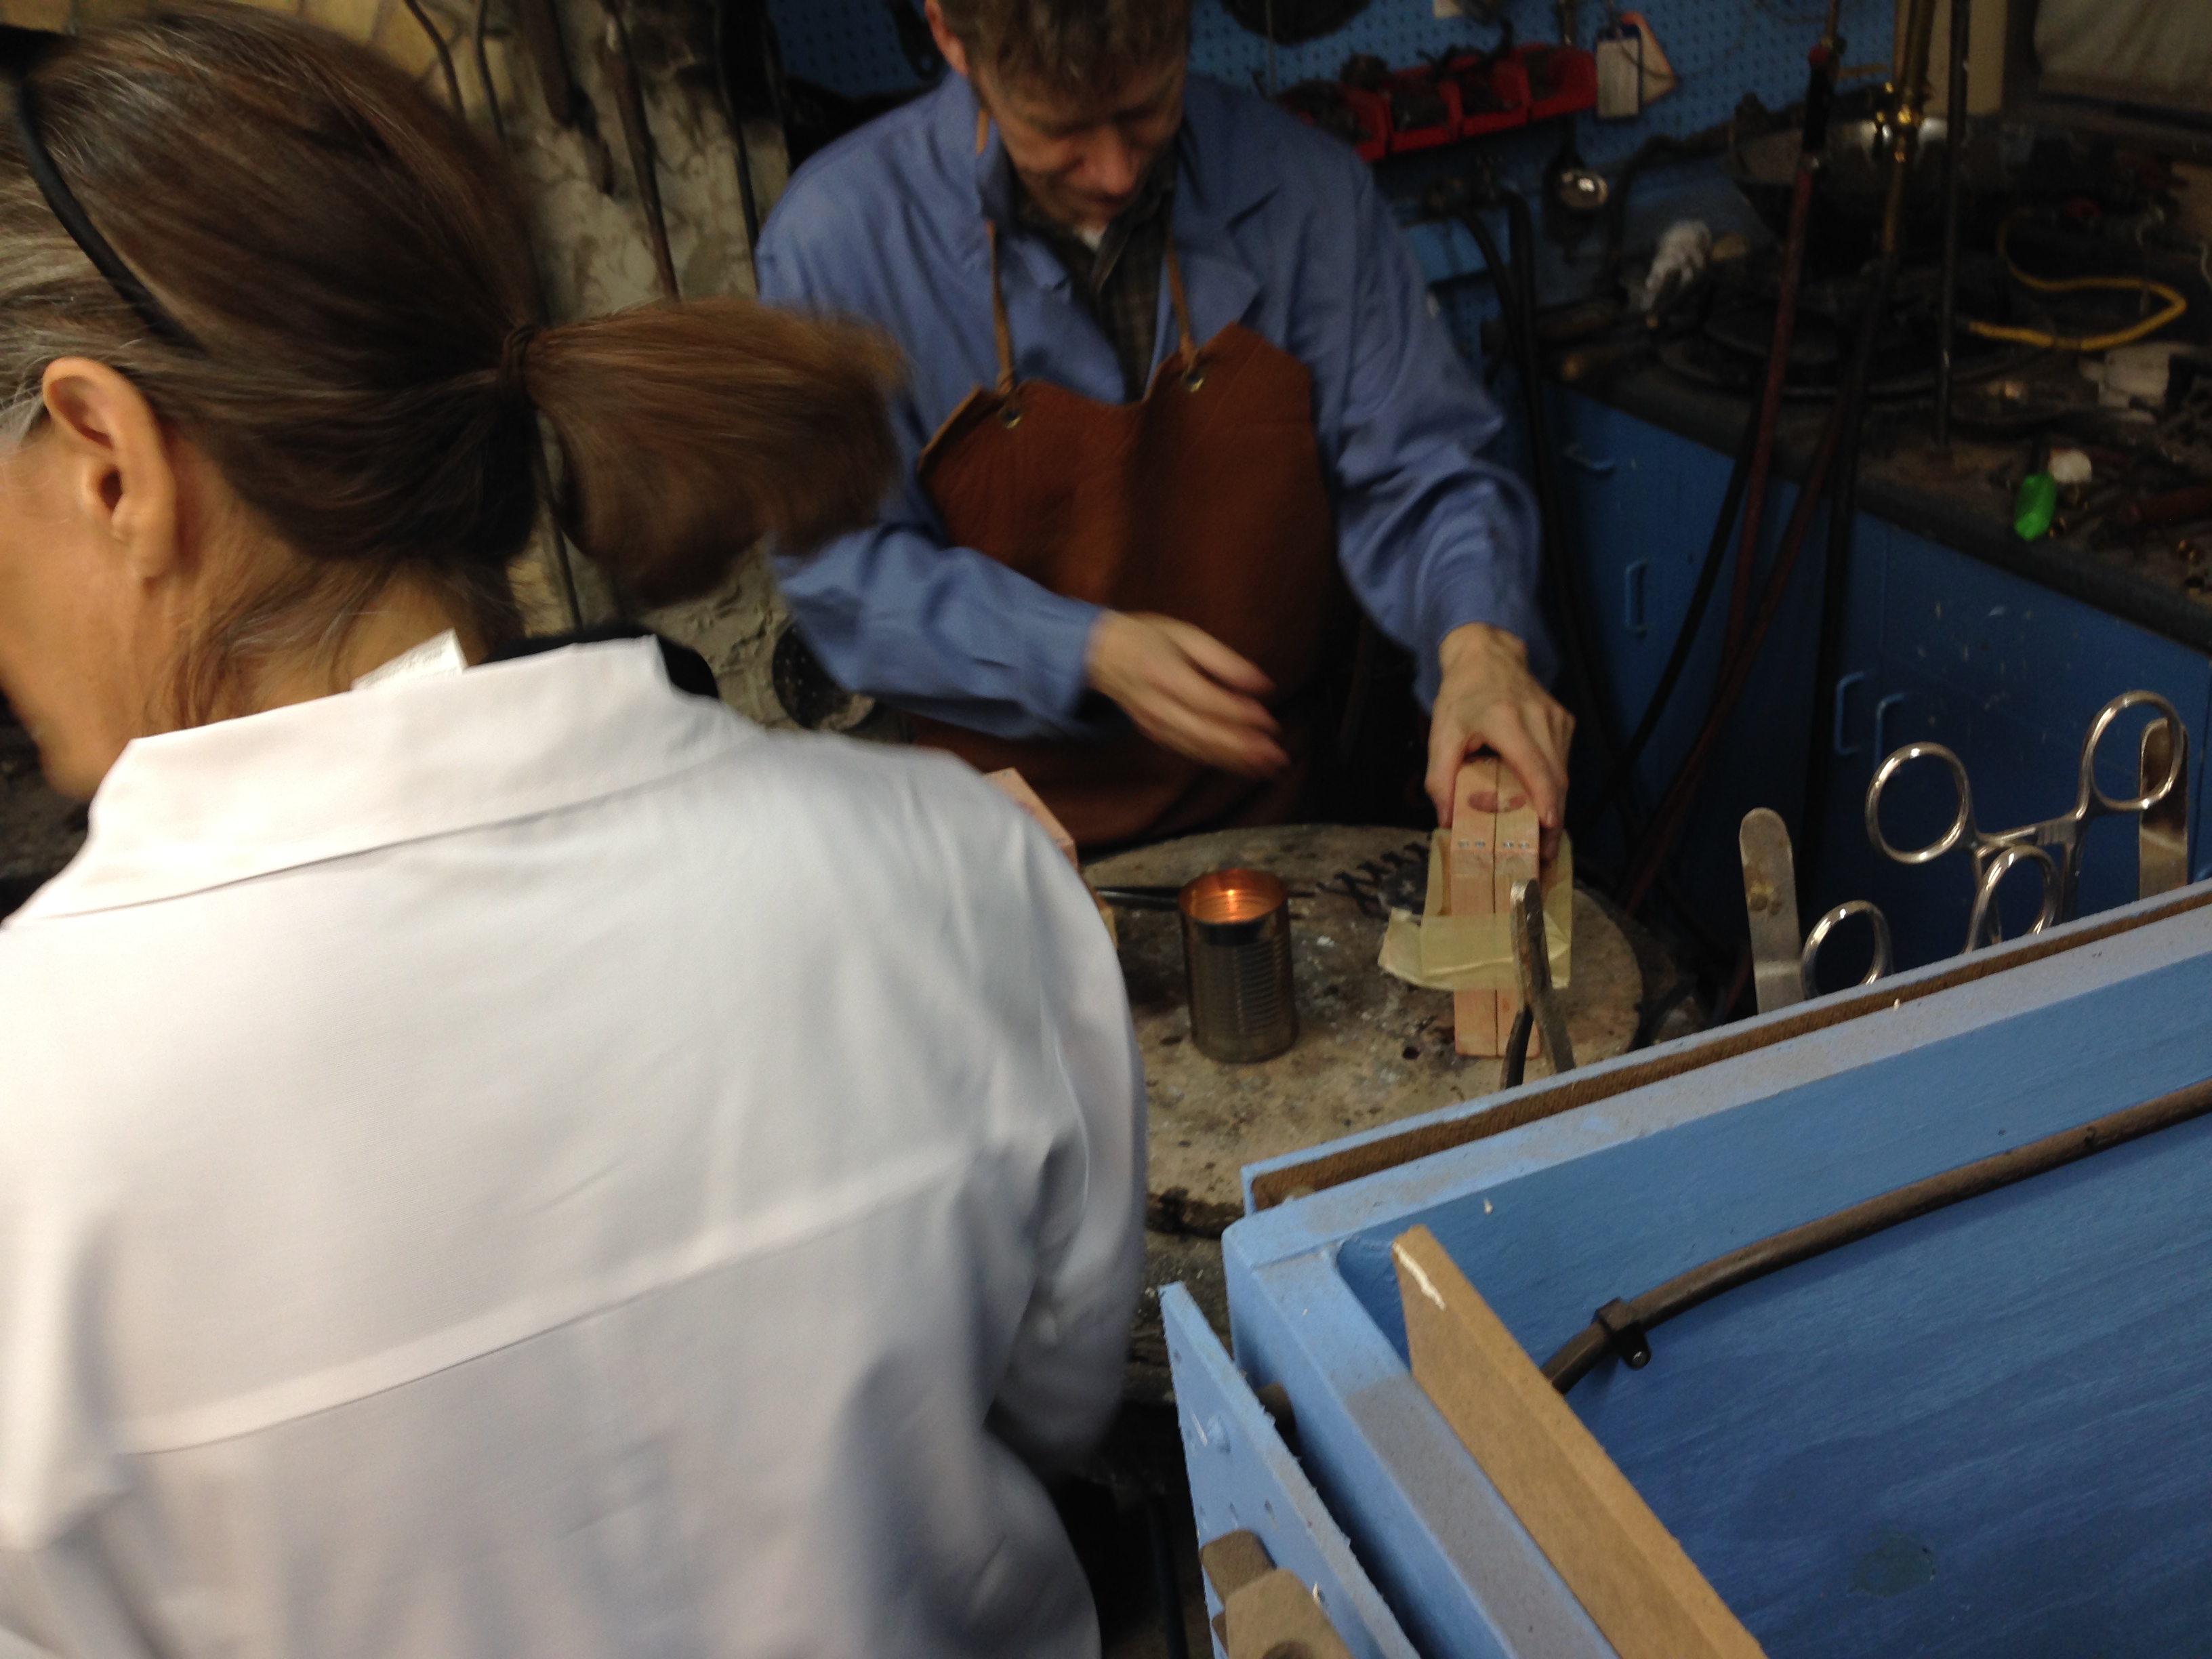
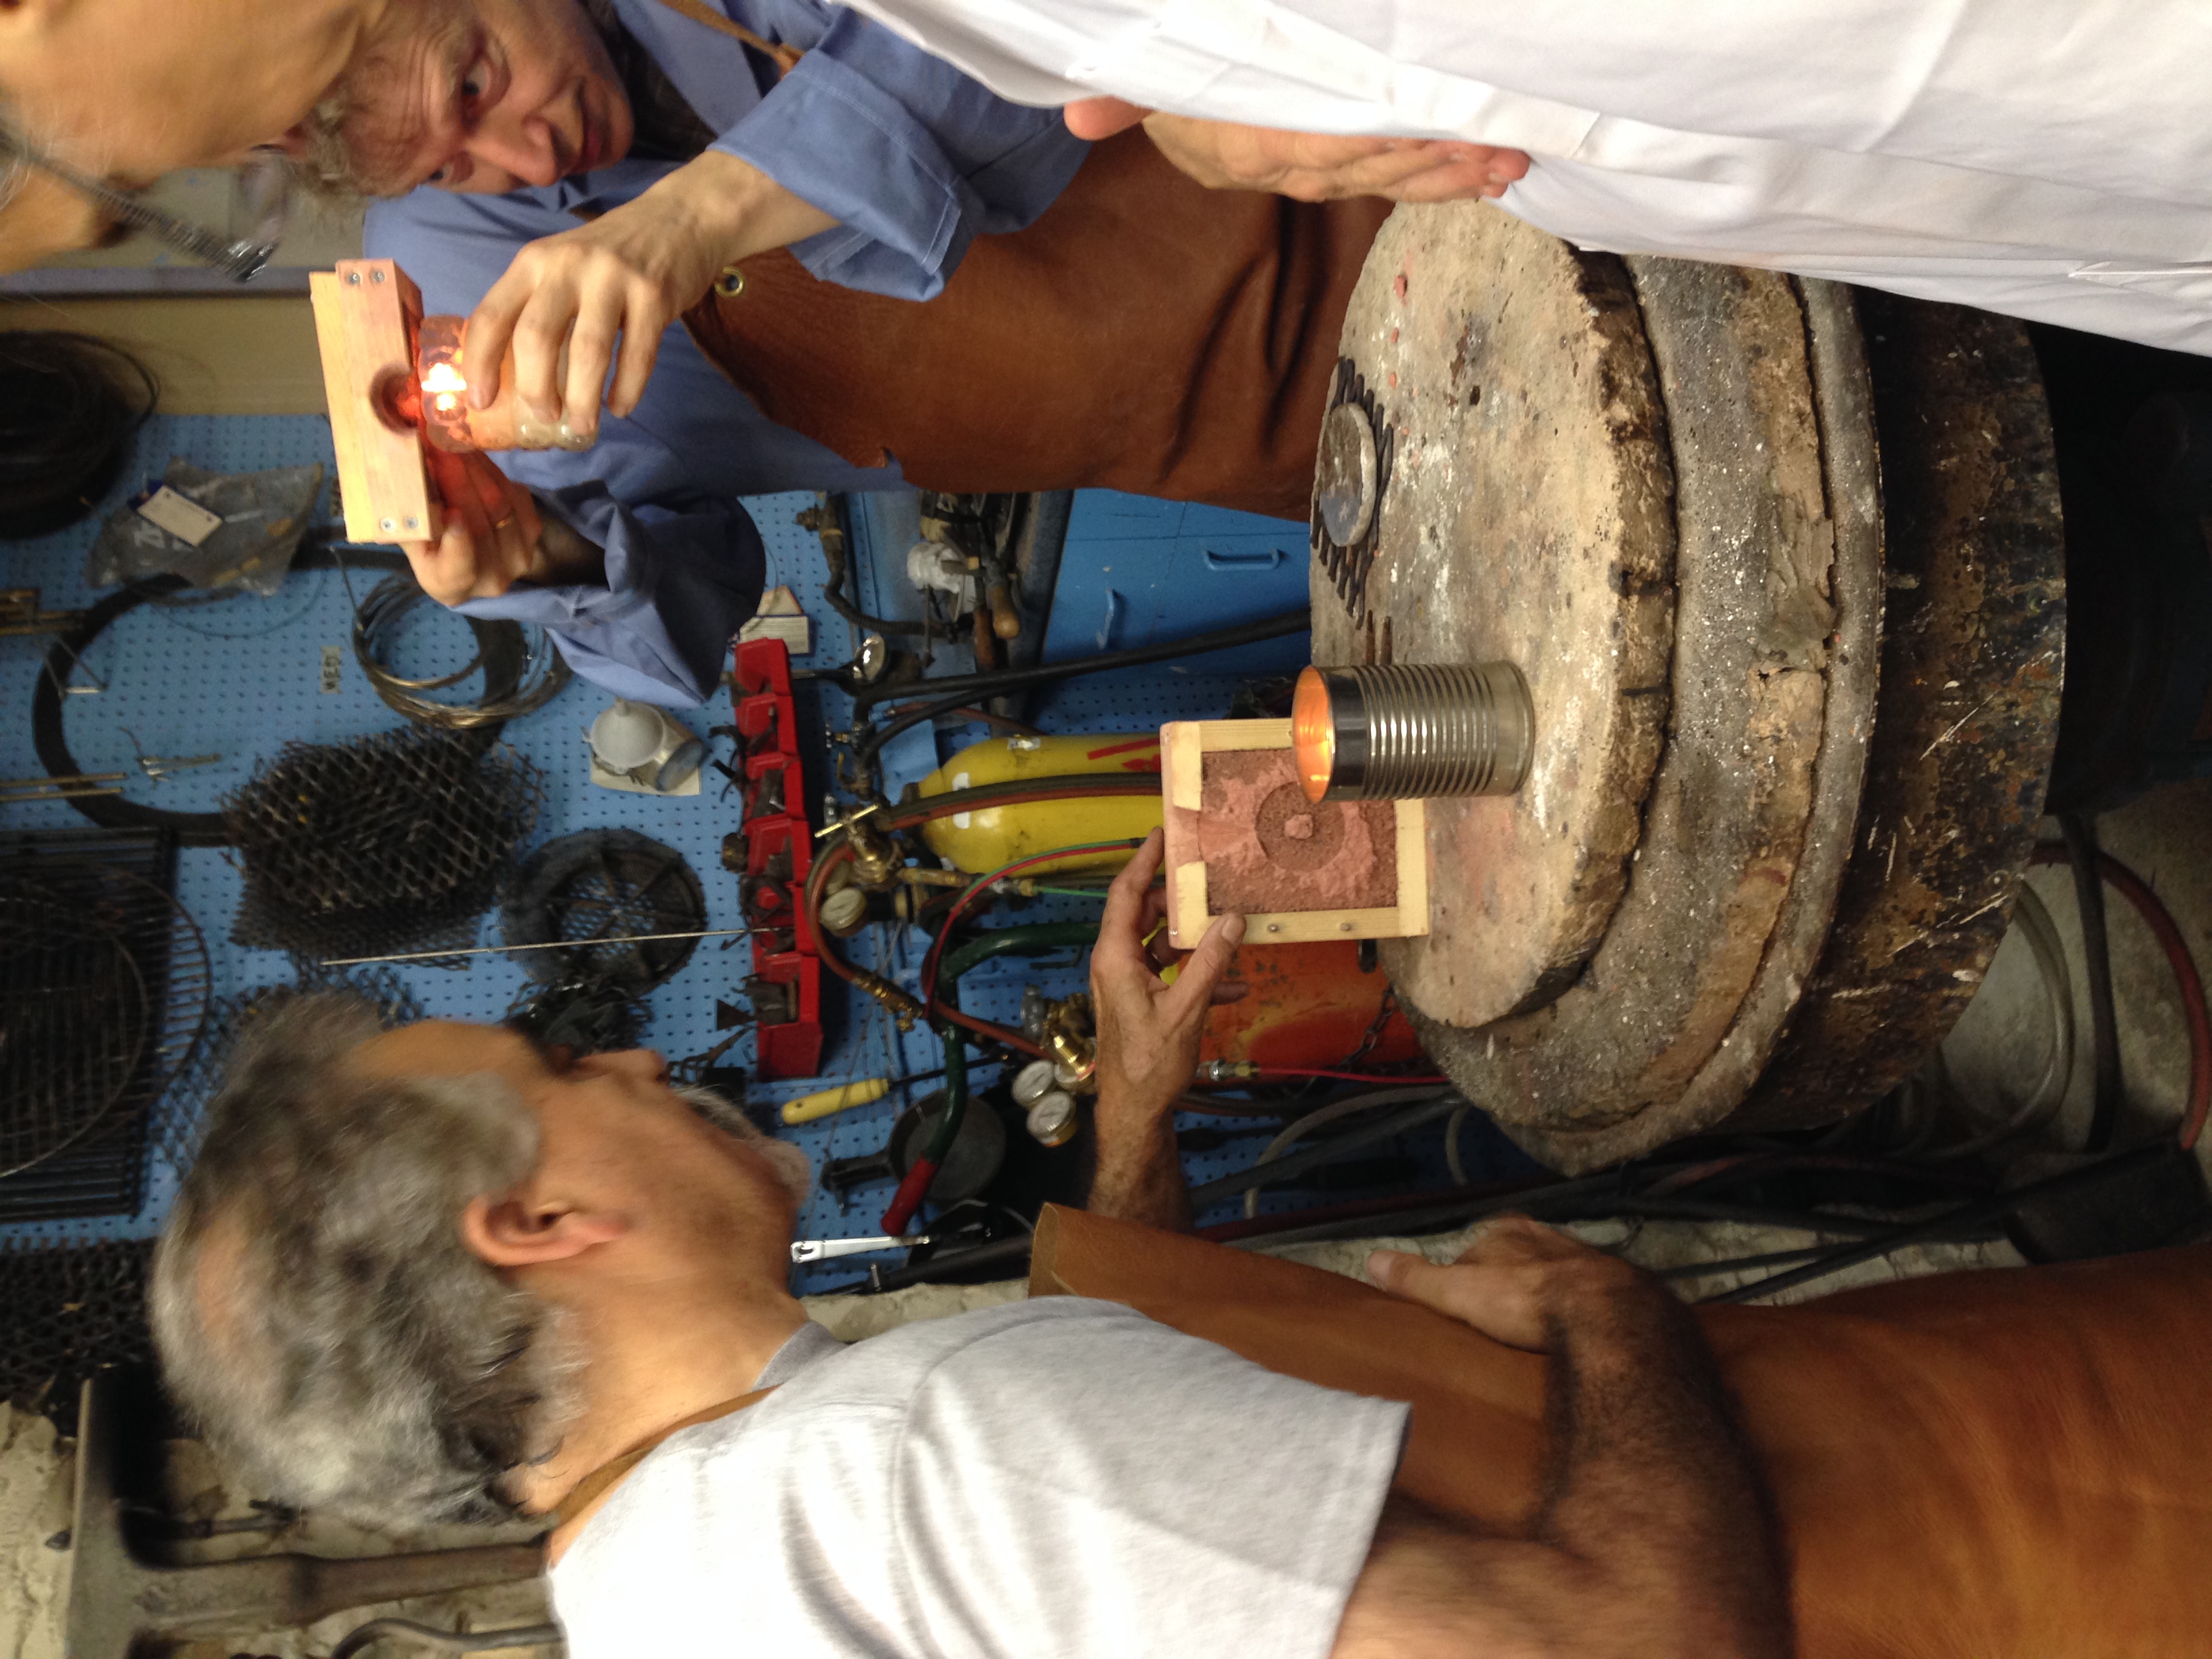
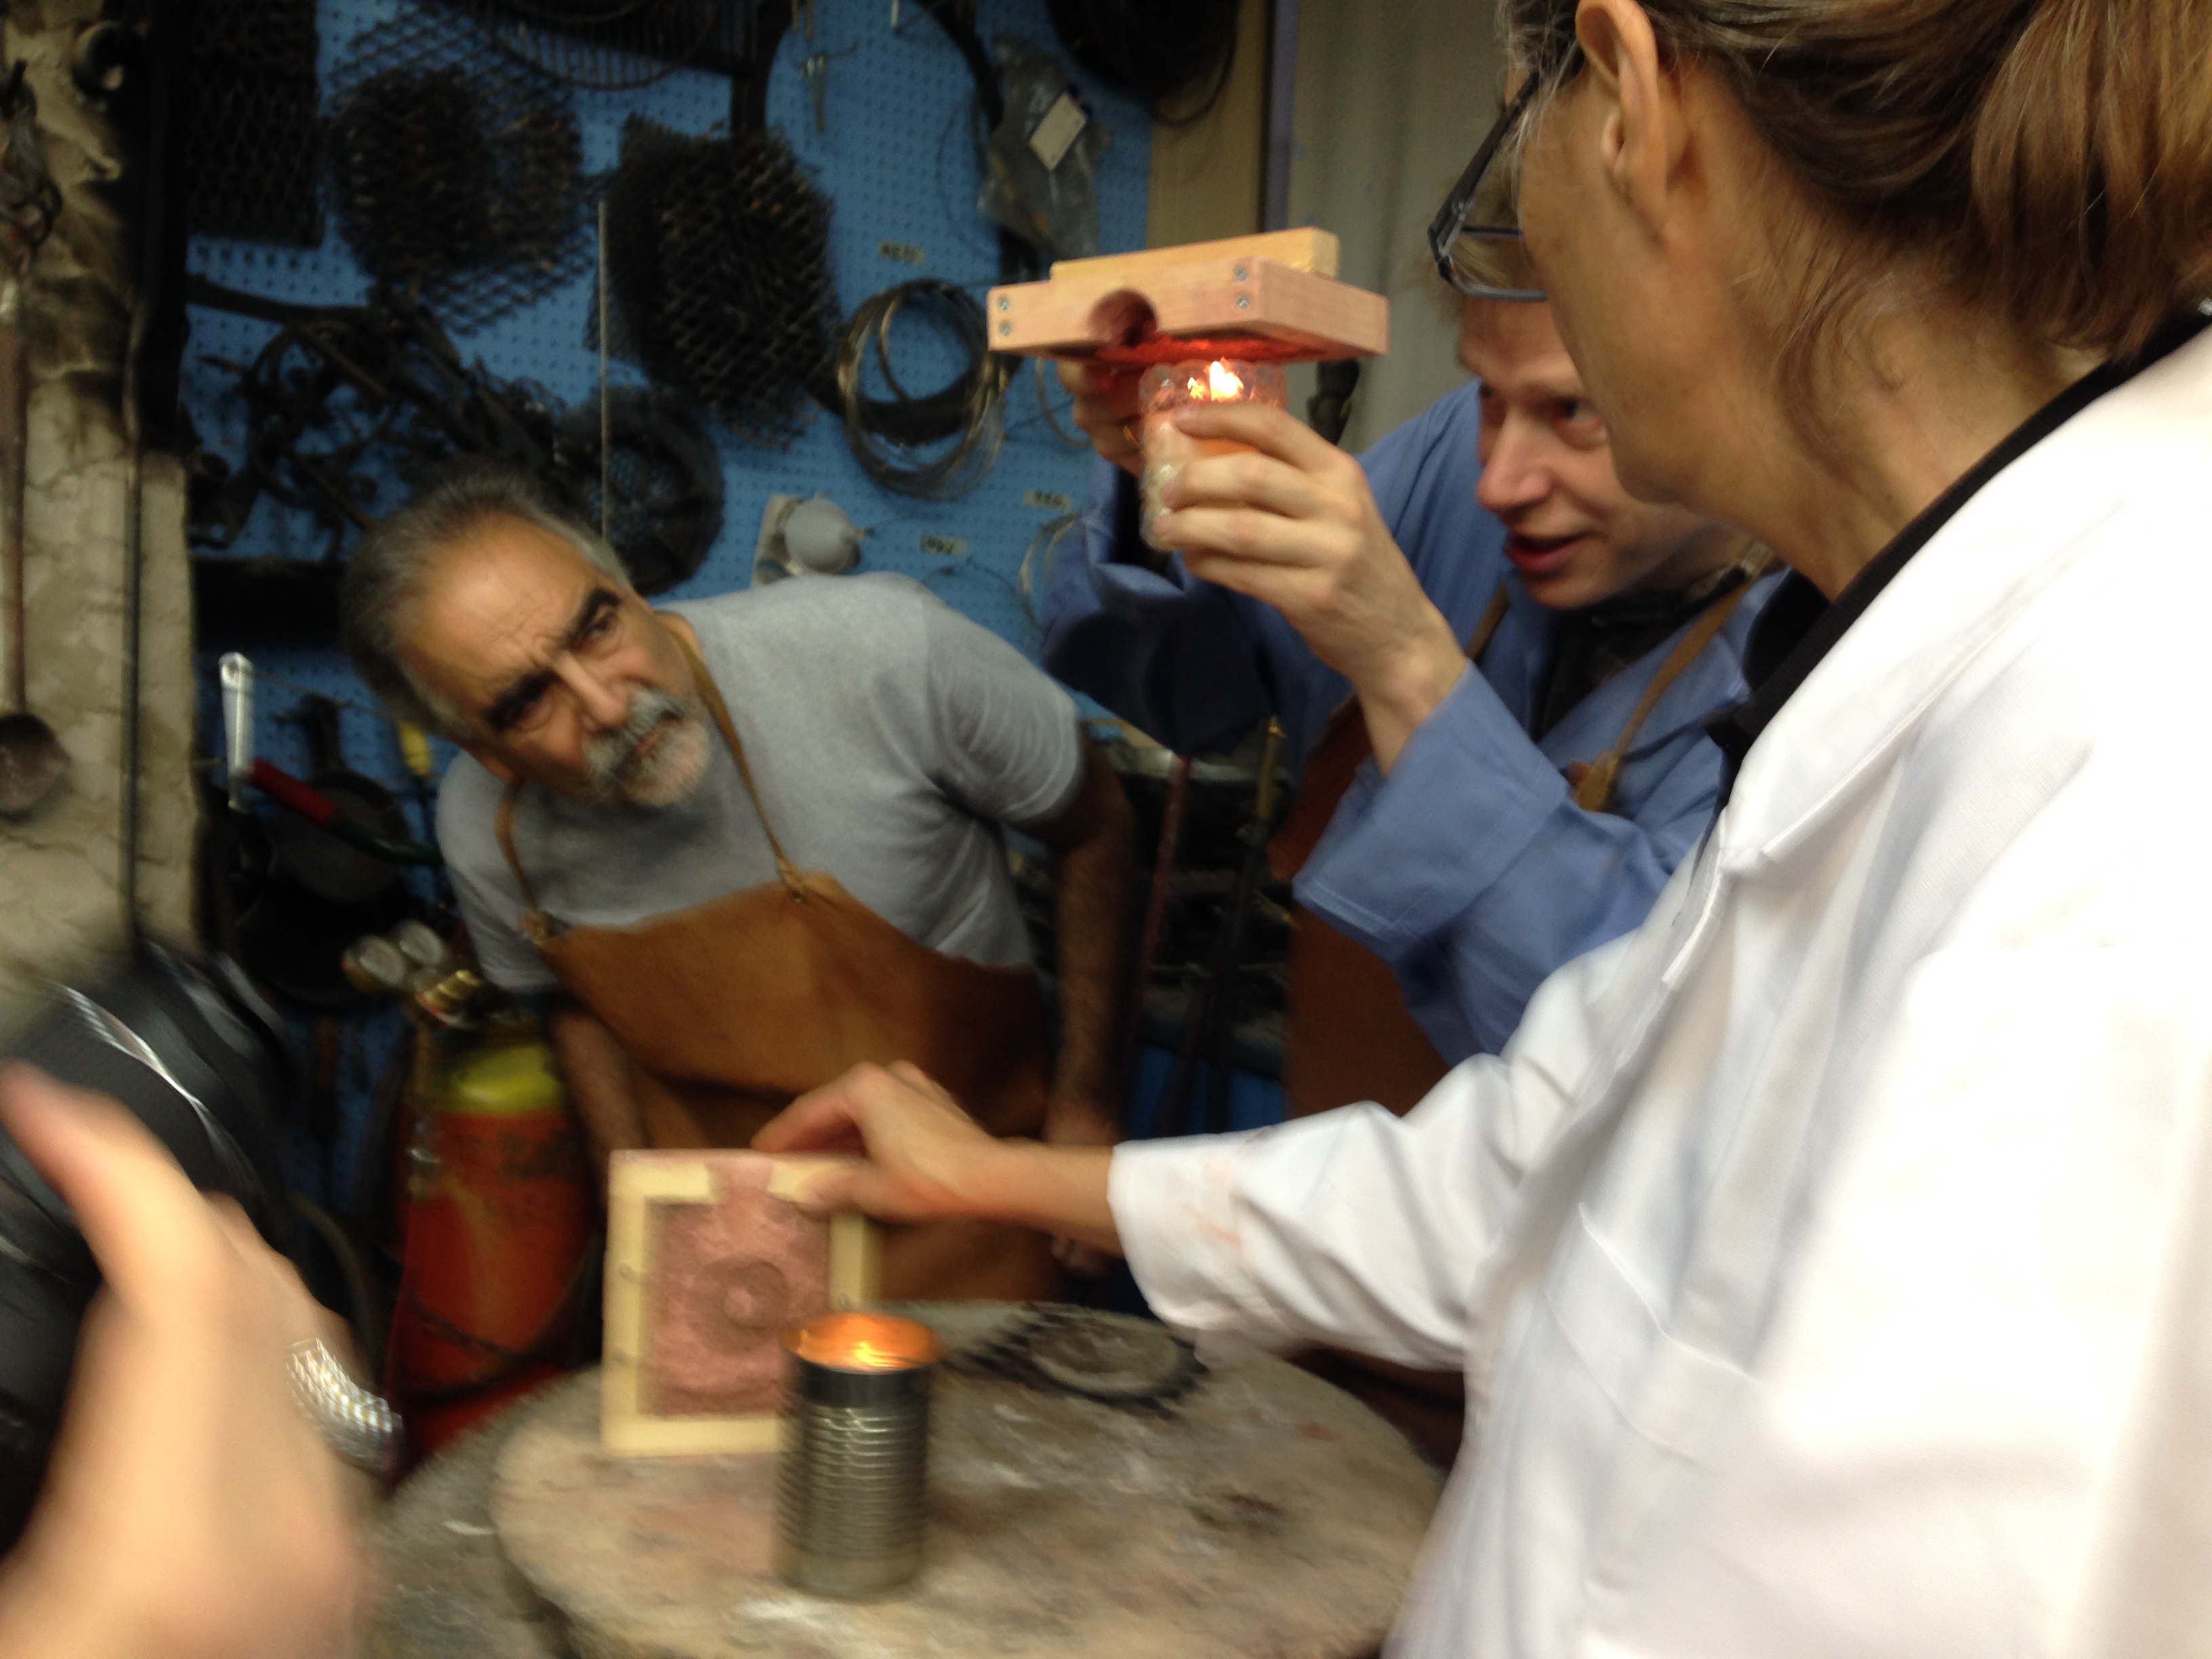
First we heated the molds for 10 minutes in the kiln to drive off moisture.
The tallow candle was lit to smoke the molds, but was too clean and soft, so an alternative conventional candle was used.
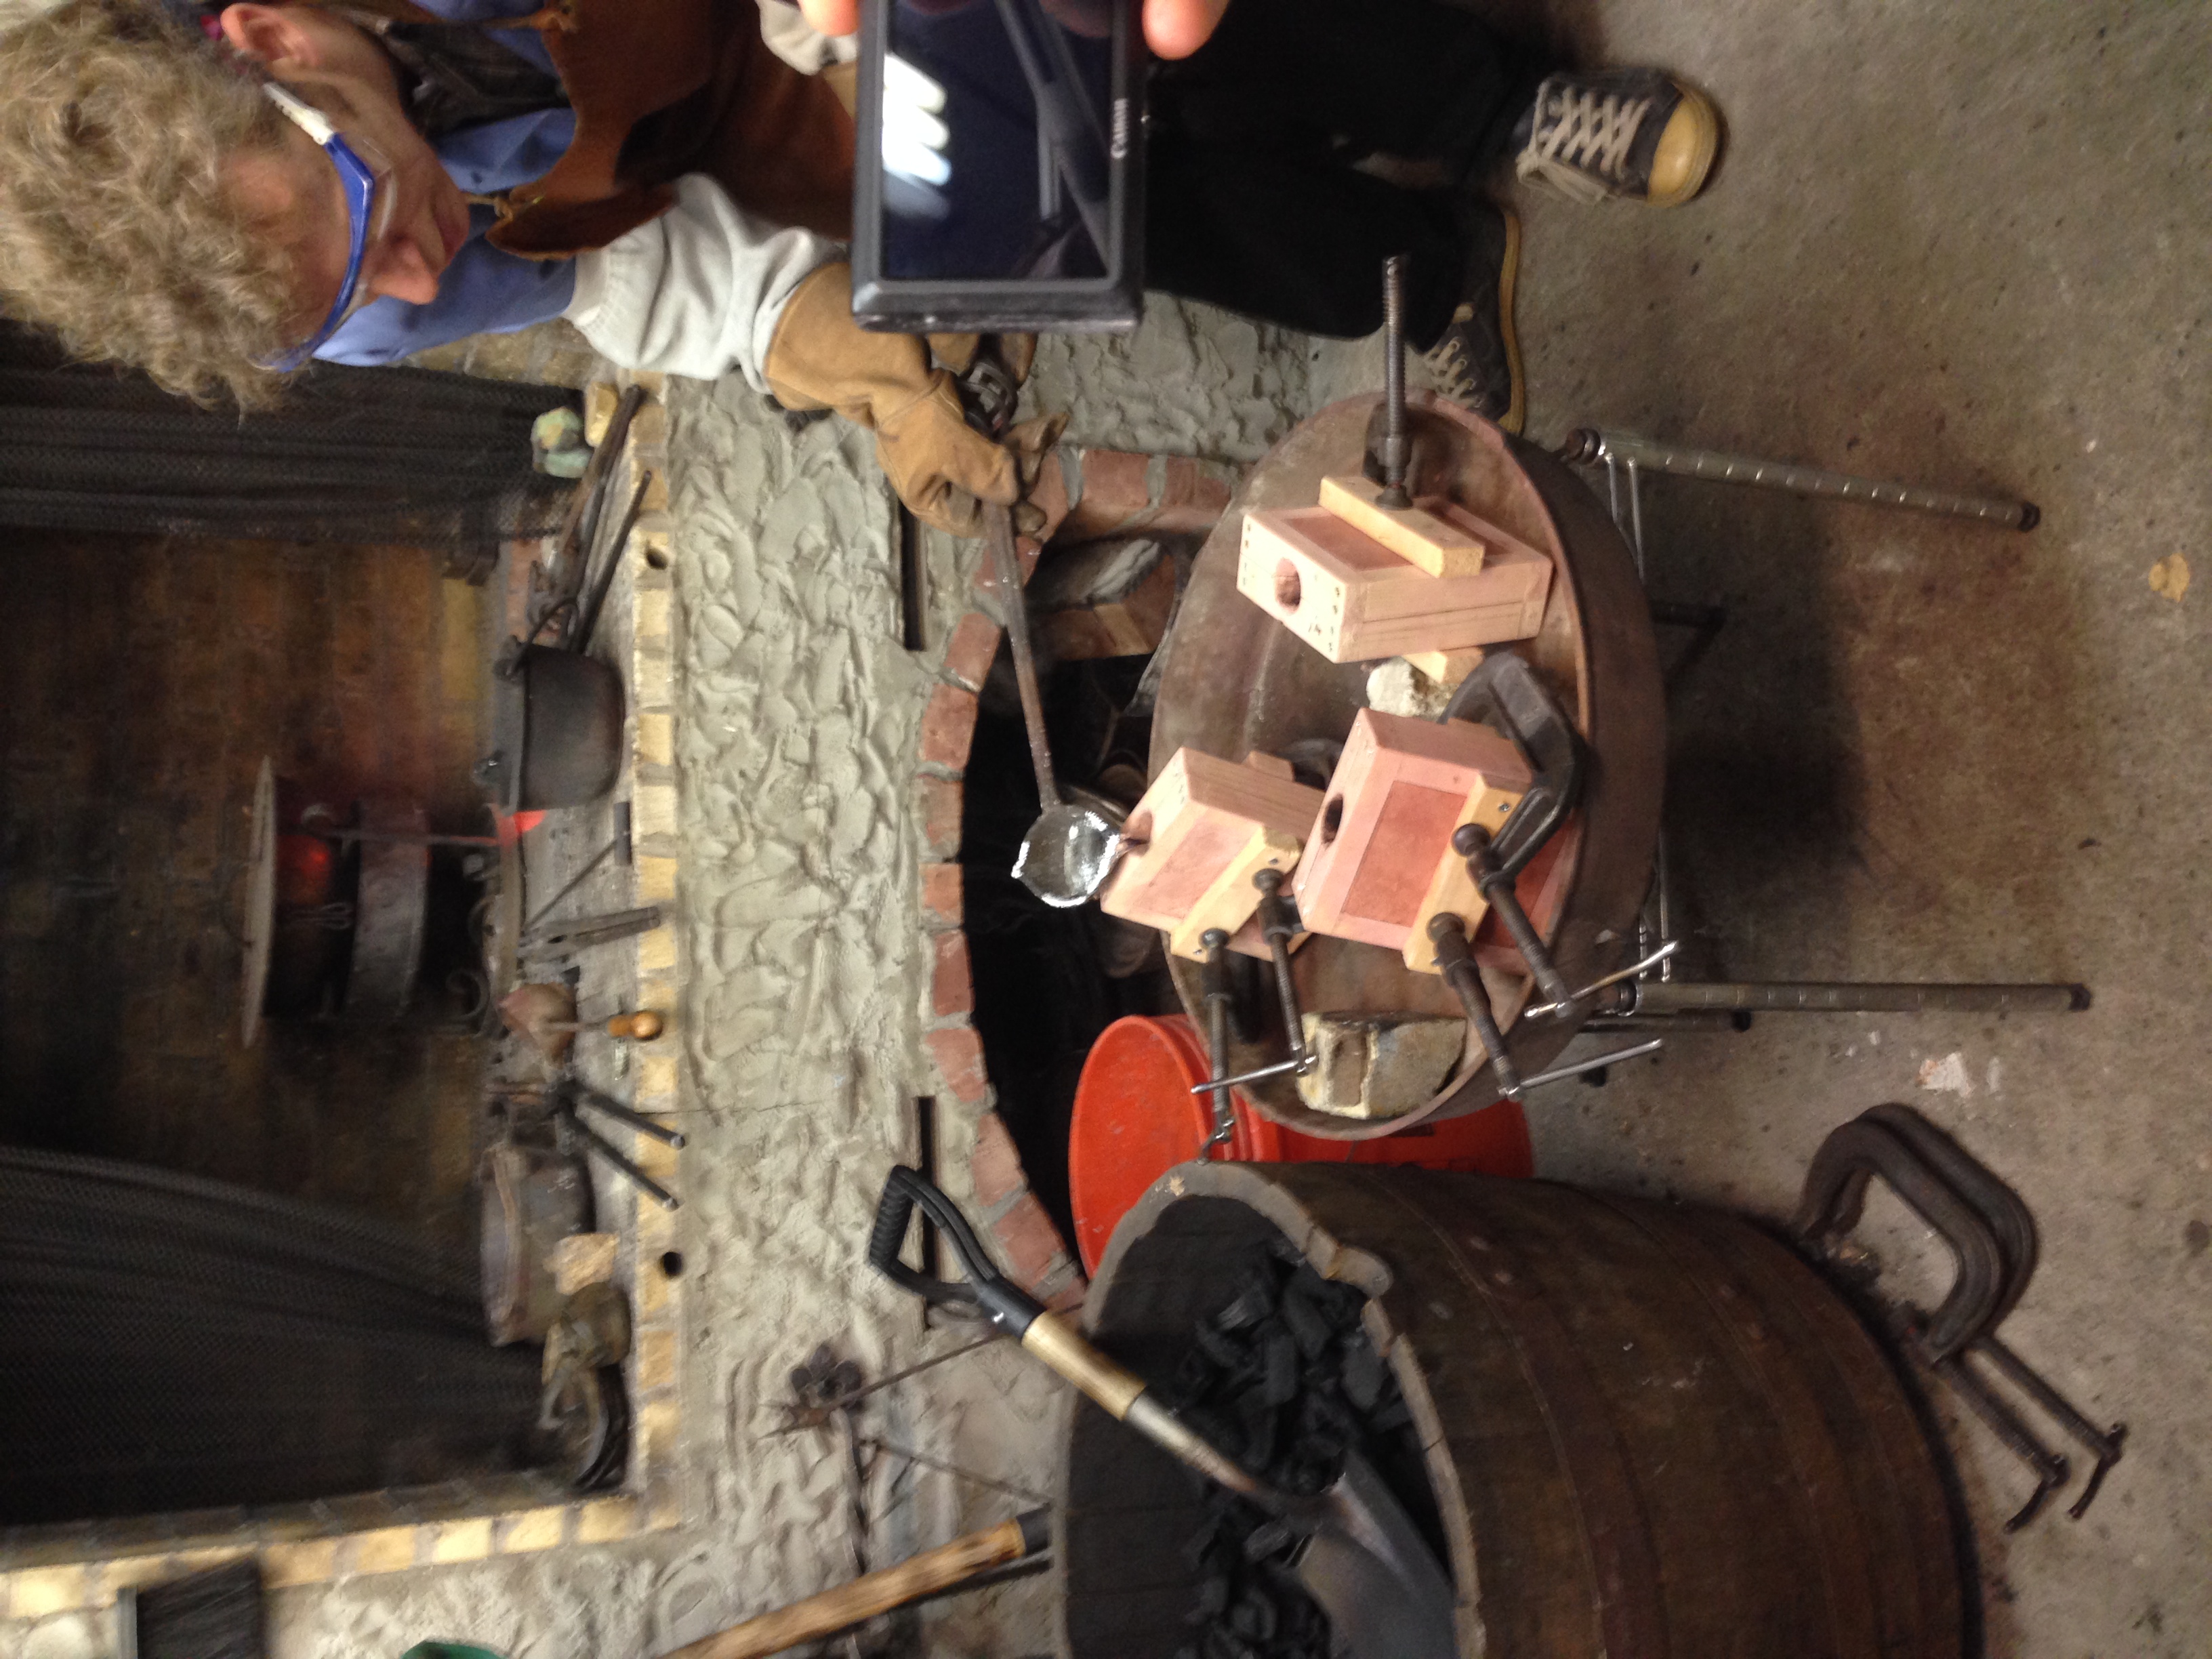
Molds were place in vice grips, rosin added to the liquid metal to clean the metal (pellets of tin were melted) and the transformation begins. We note the flat surface of the molten tin is reminiscent of glass.
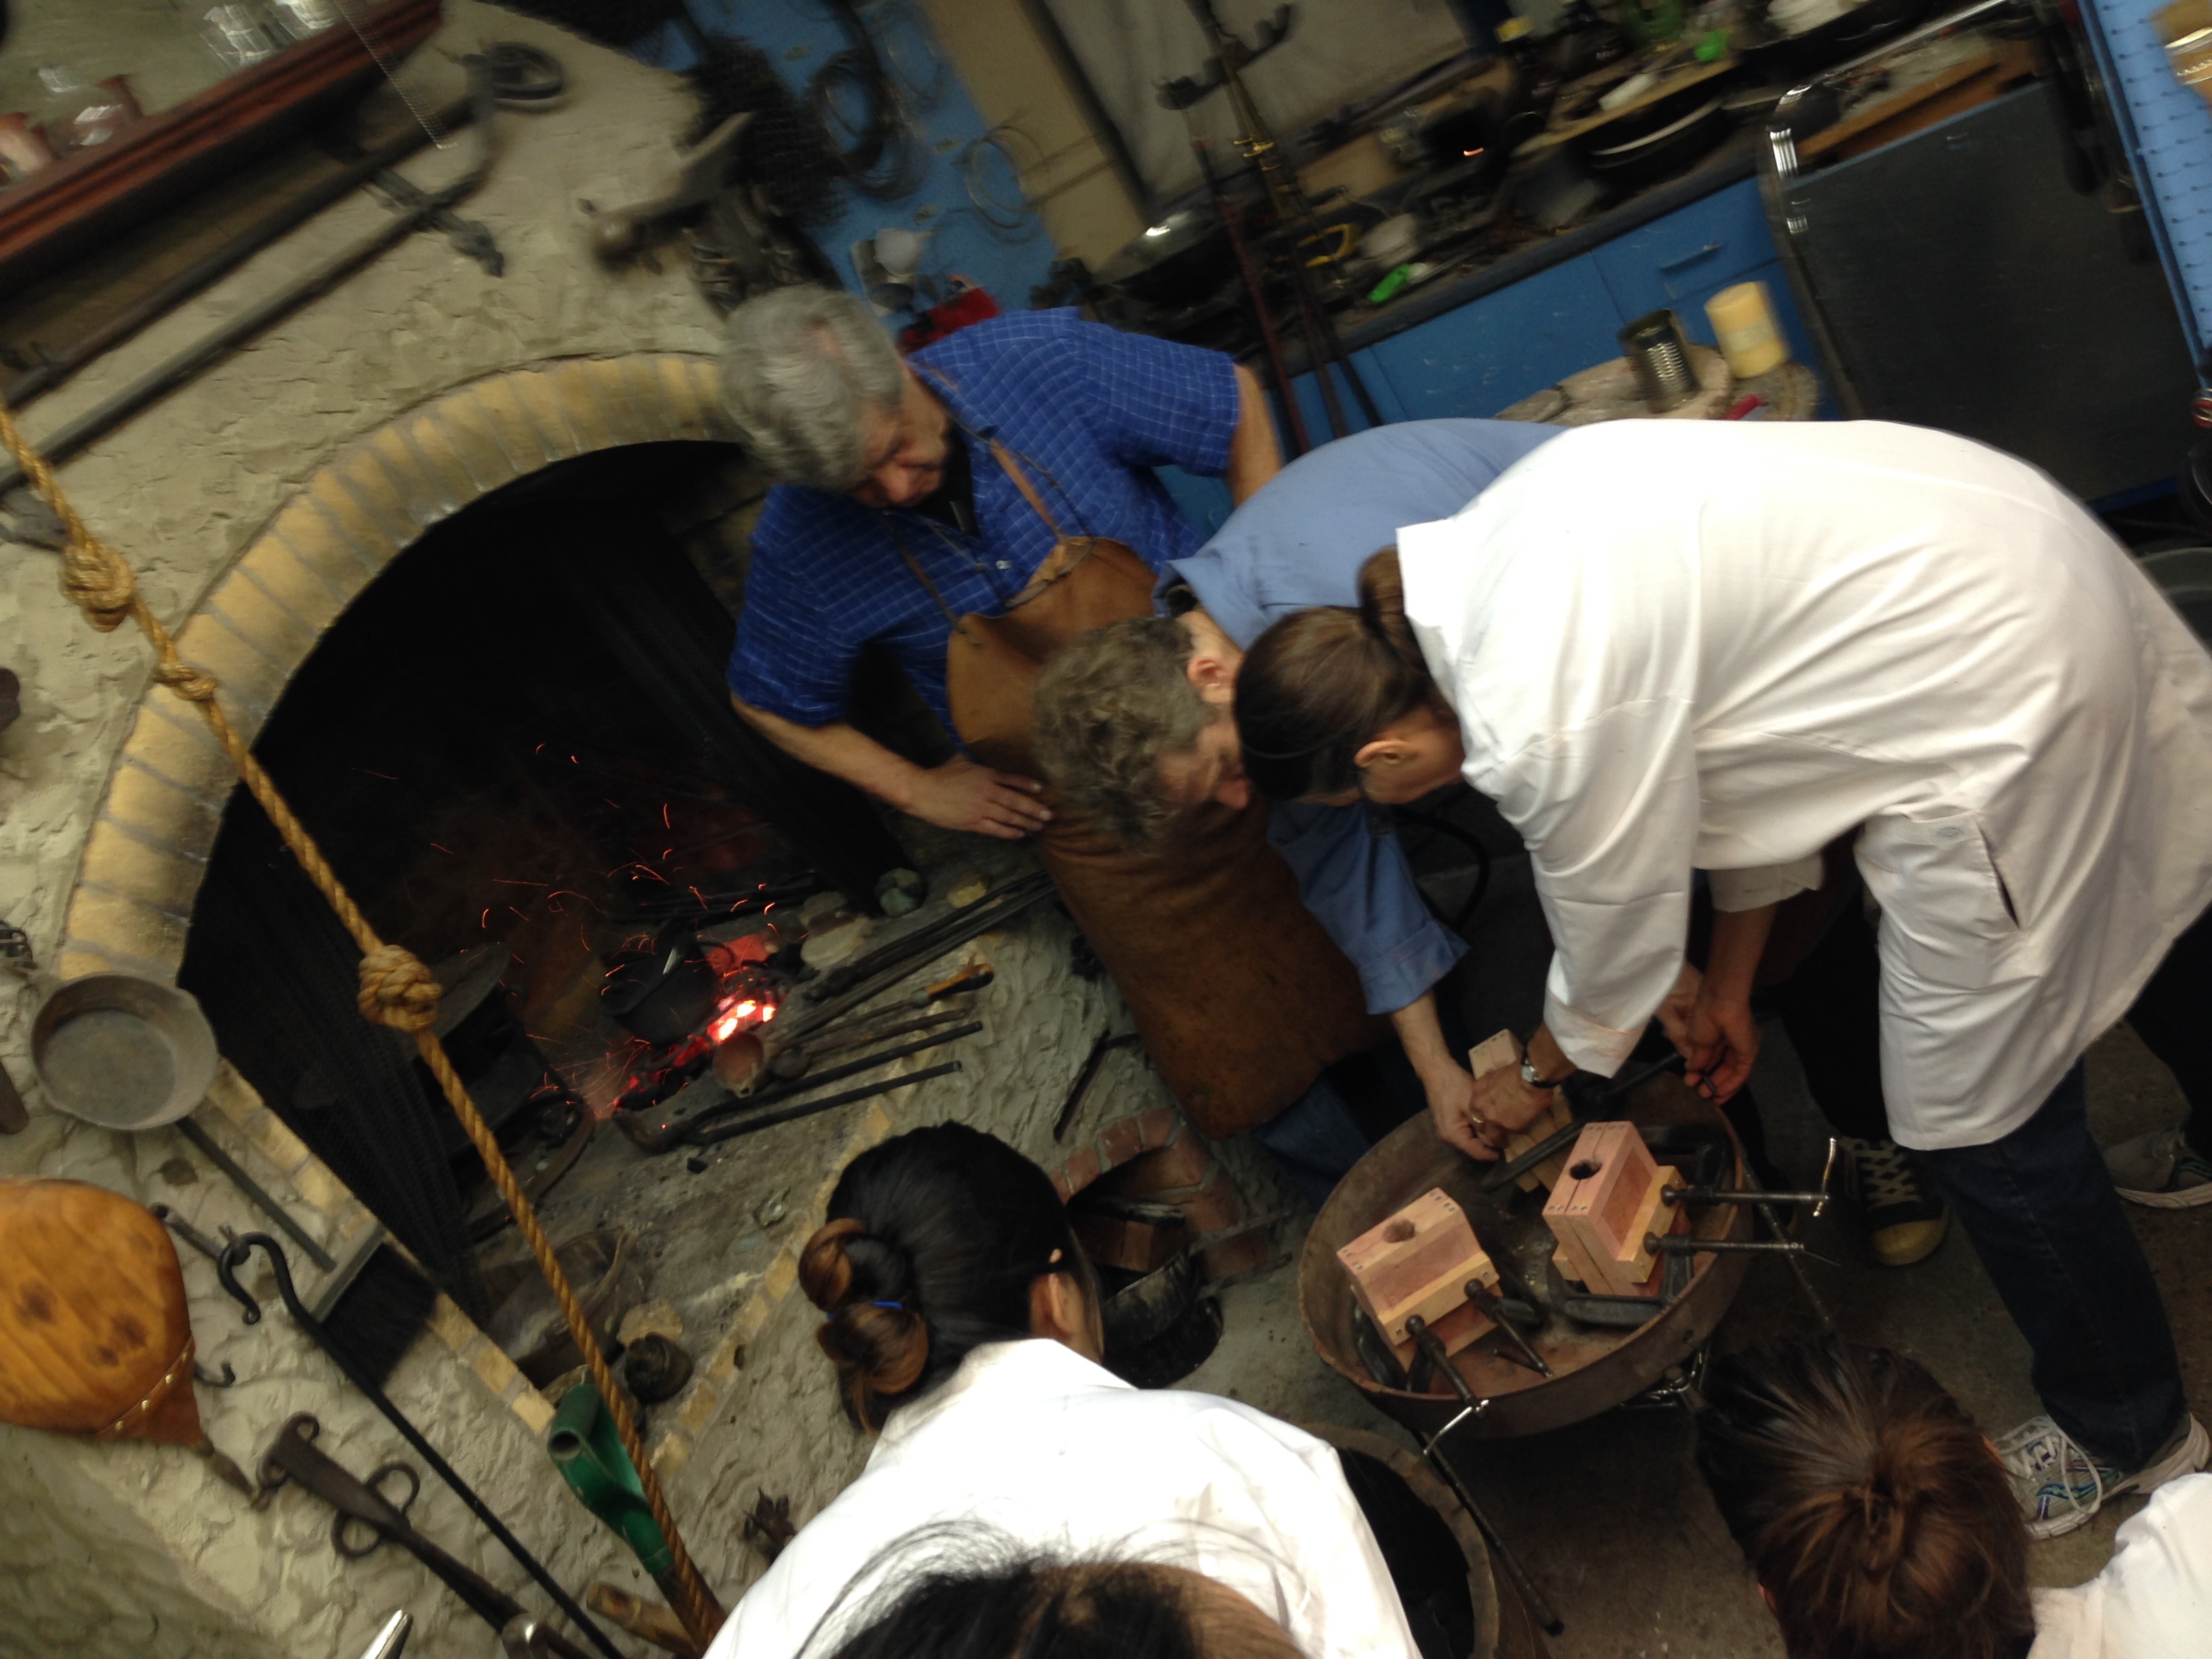
We had a discussion about assumptions and grogg (inert sand that makes it resist fire), the molds that we used were from previous experiments that used commercial sand. Some hypothesize that the reason ti came out well was the pressed patterns into the clay (although this was disputed in the debrief the day after, post --examination of results)
Hardwood charcoal - oak and other woods.
Rosin is added and stirred into molten tin.
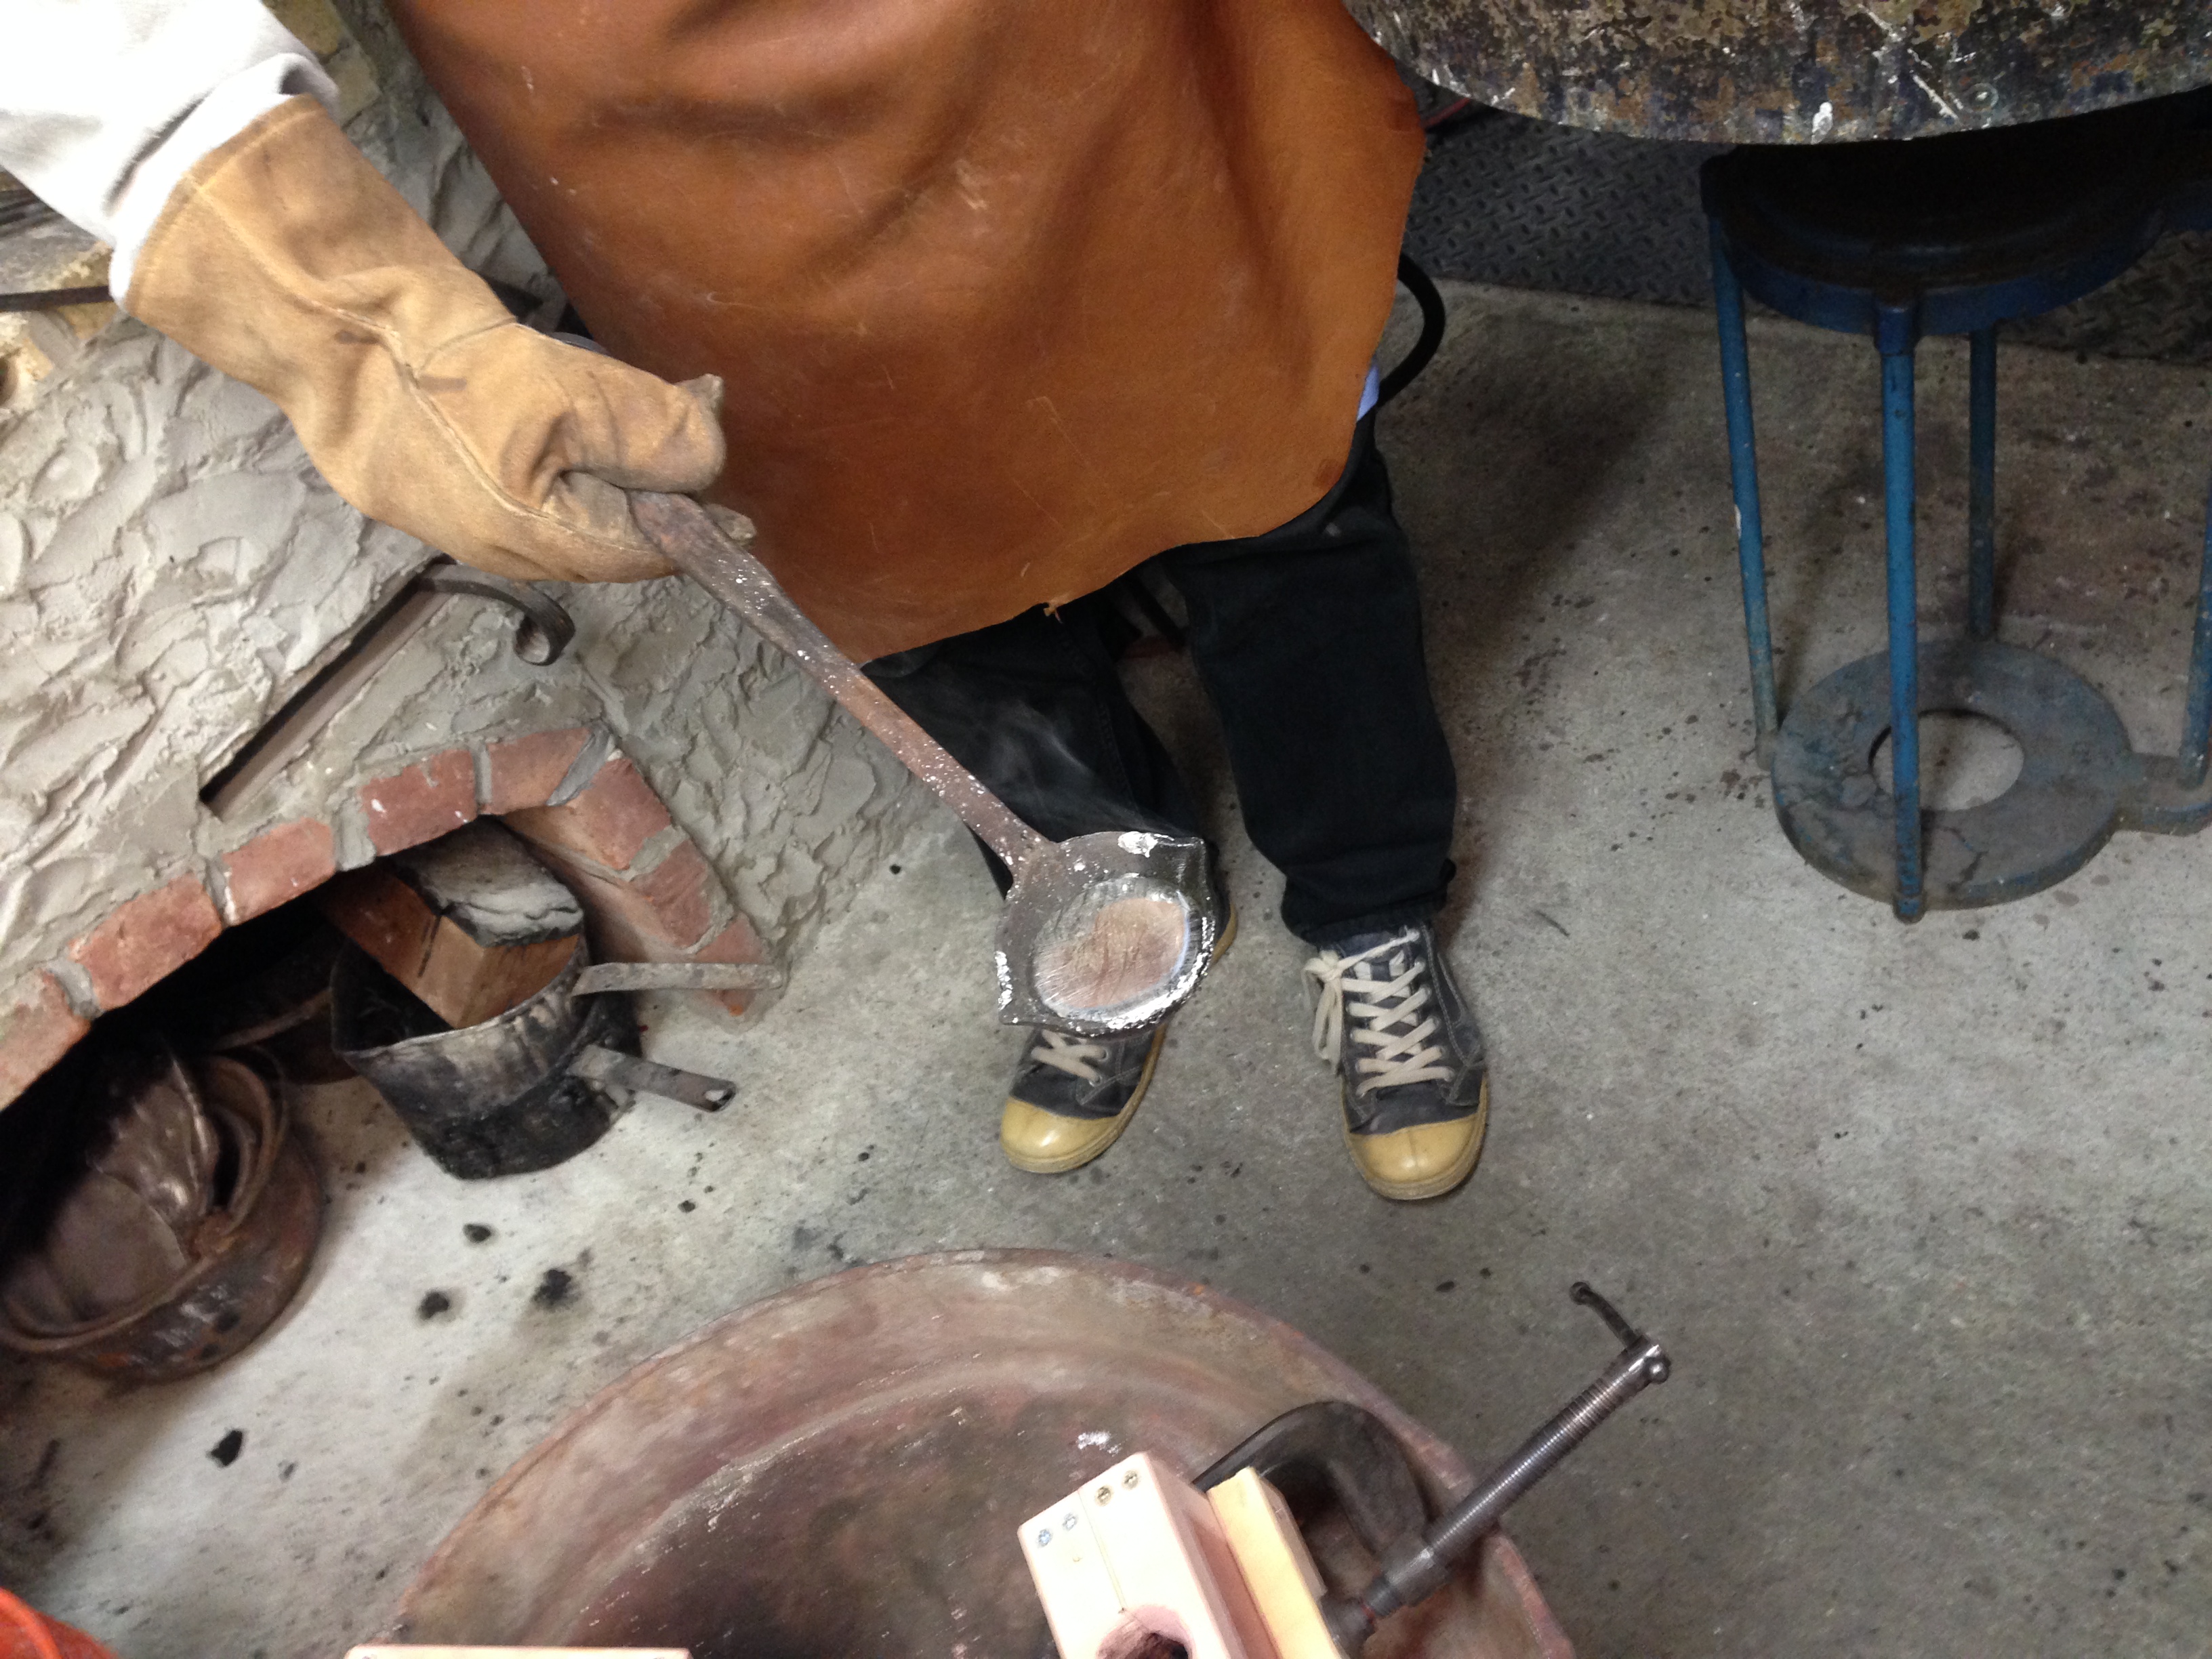
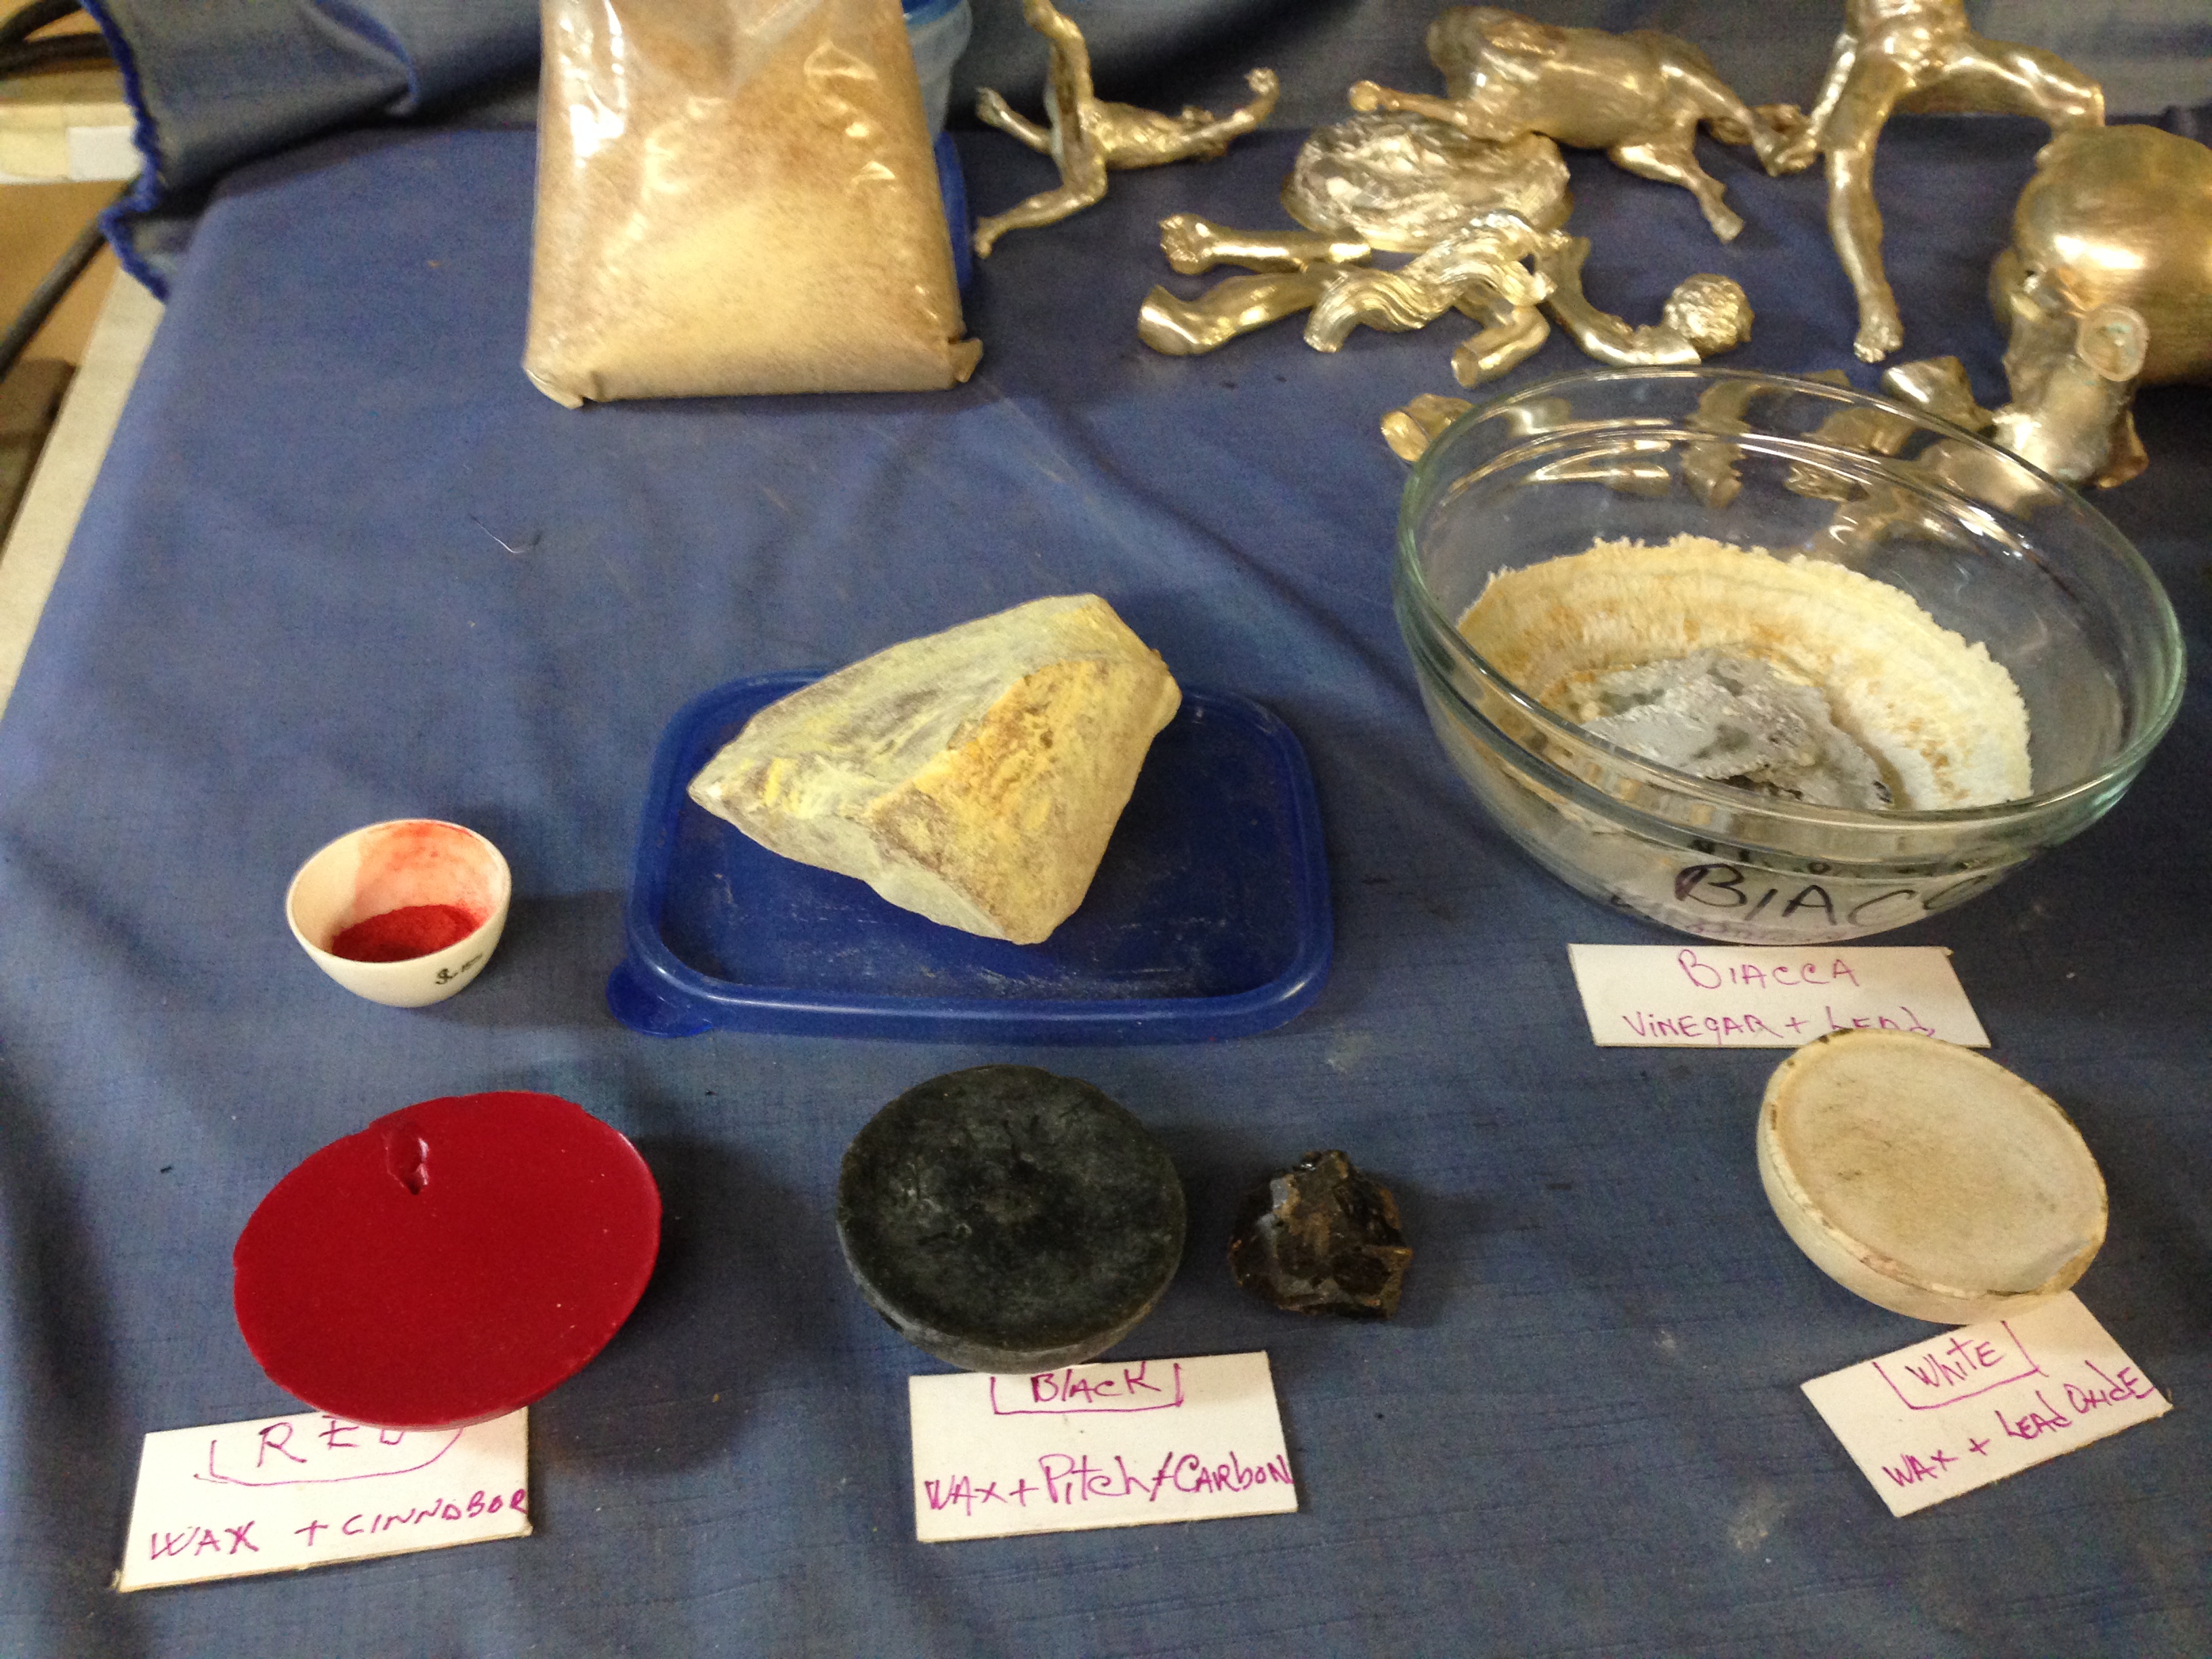
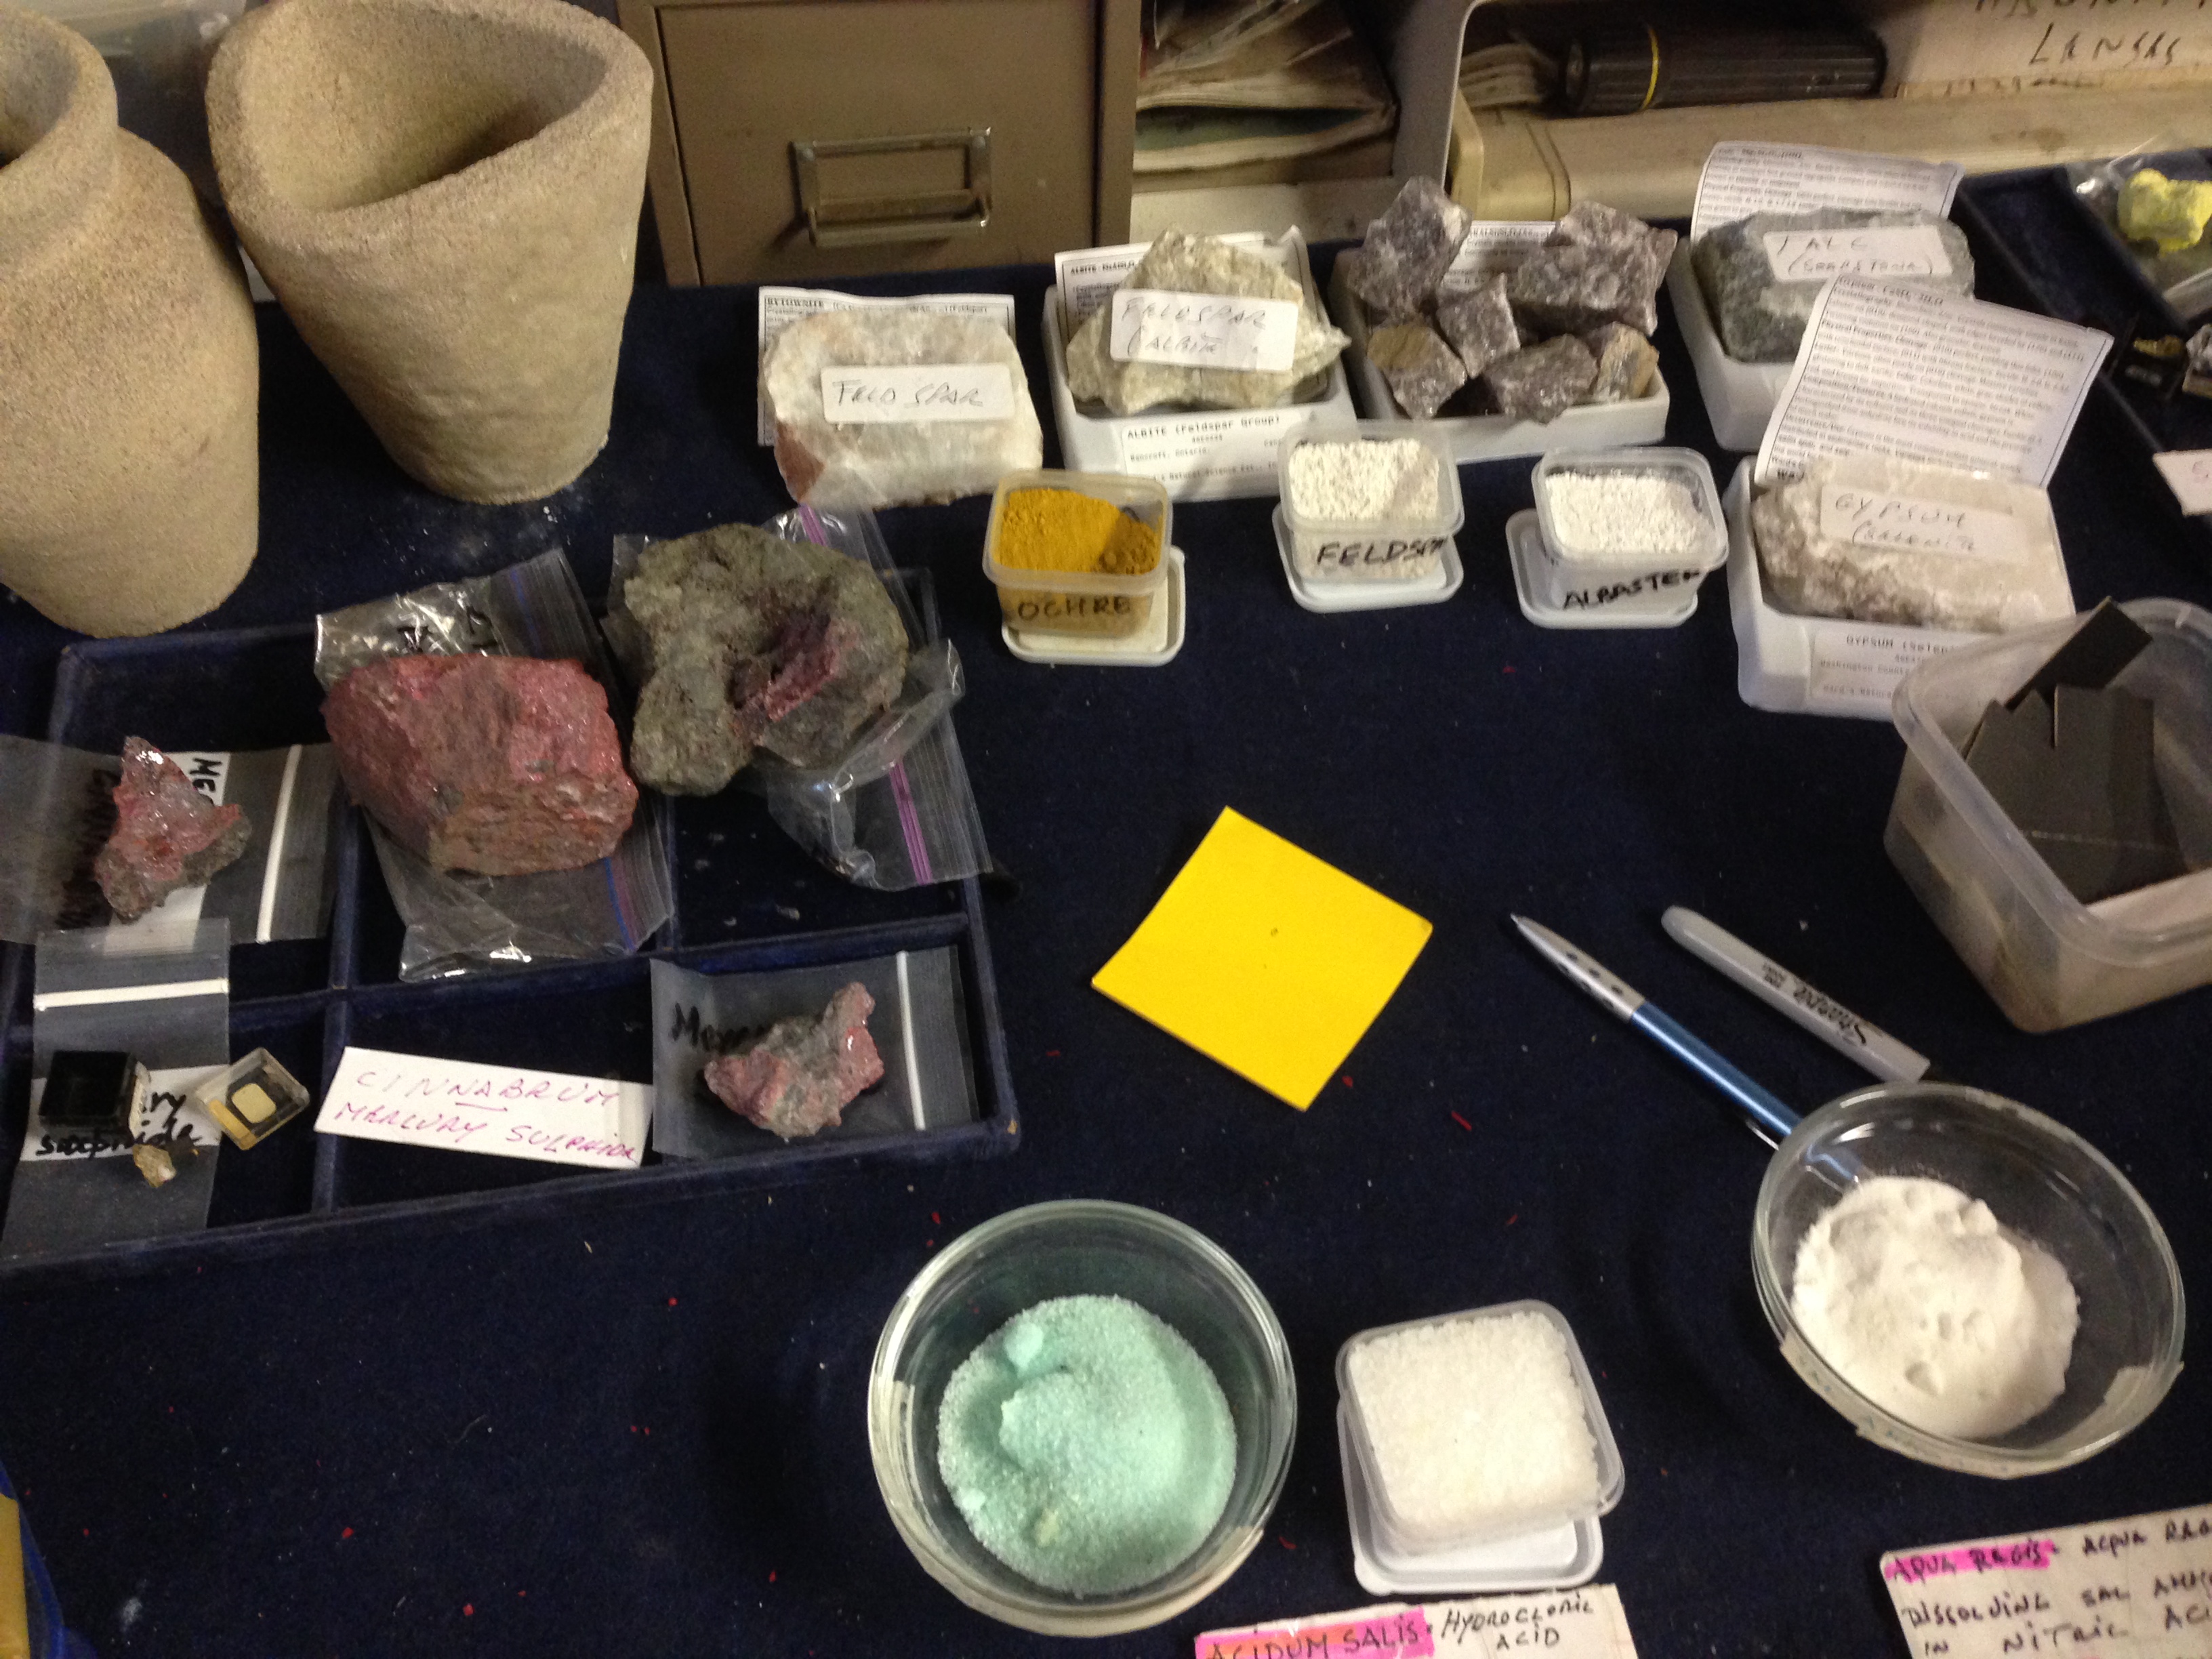
There was an opportunity to examine many ingredients/materials that Ubaldo put out on display for us including a selection of wax mixtures.
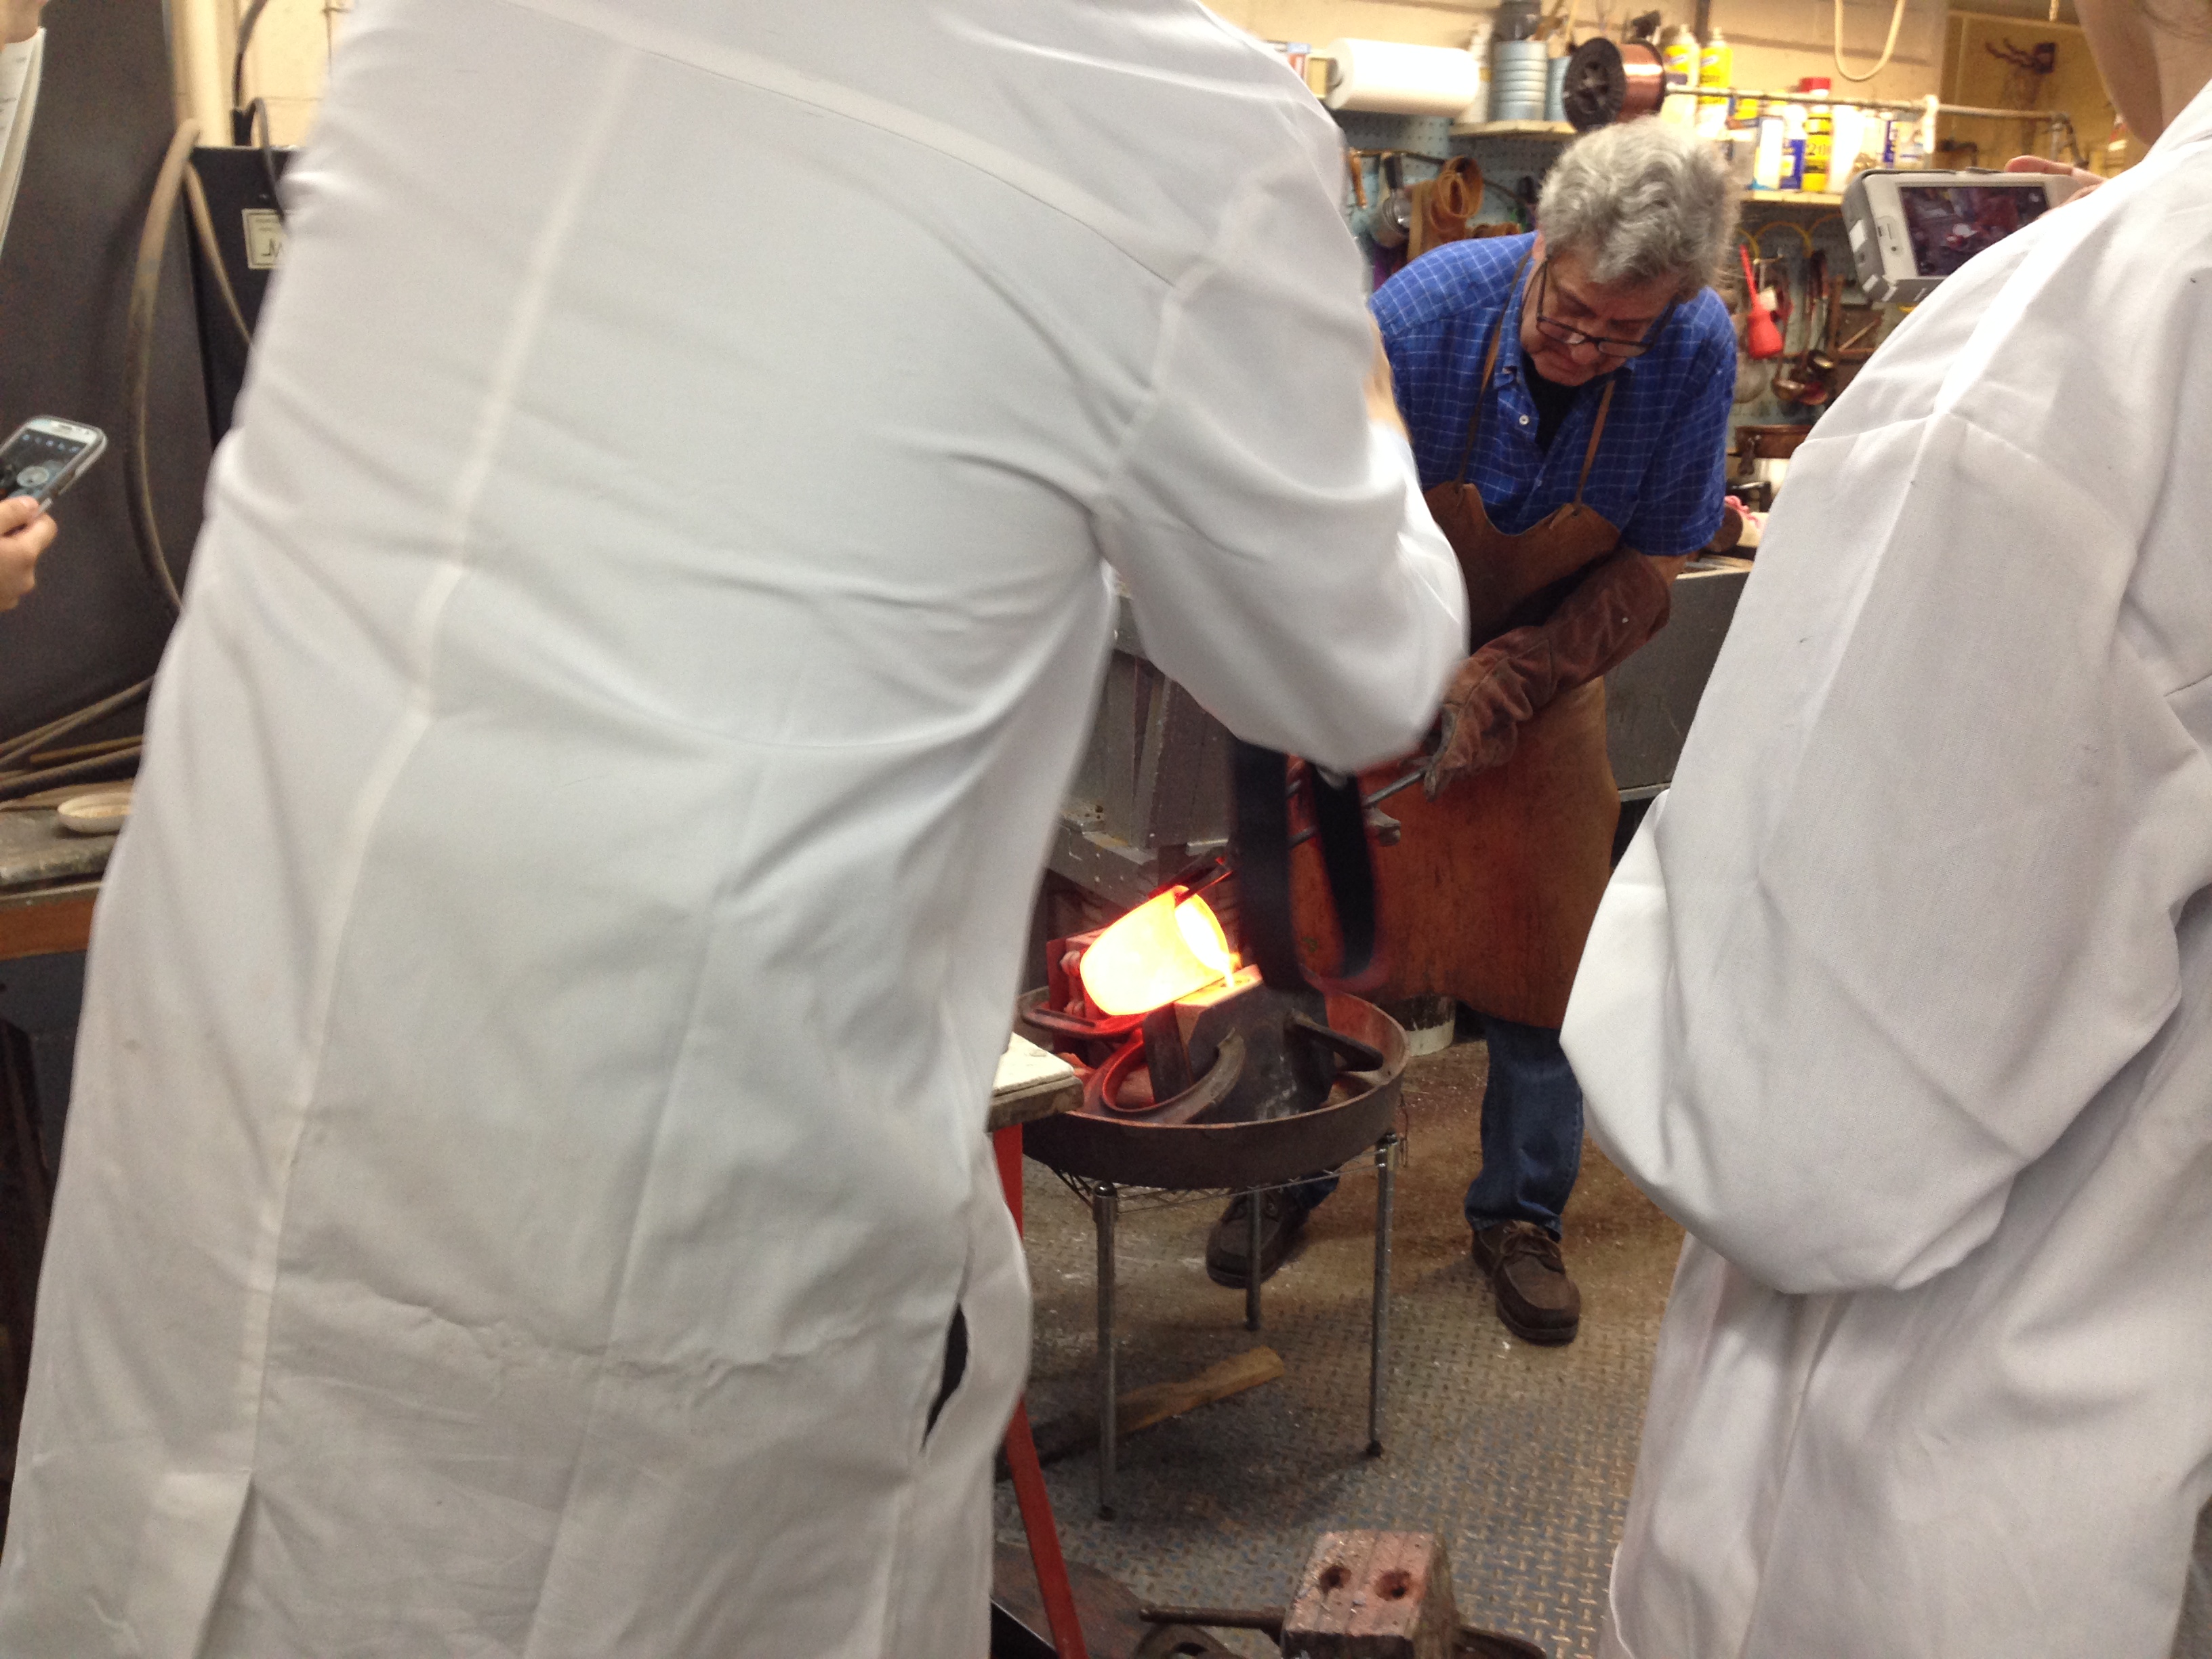
Ubaldo heated up the silver in a separate furnace, and we placed our molds ready for the pour.
We hear the loud sounds of air. During the pour is the explosion. Why? feather alum issue? Wet molds? Ubaldo places a rock over the opening to decrease oxygen and put out the fire.
The steam pushes everything out. Once they cool down, tin was poured in afterwards in an attempt to salvage medallion construction.
Once the molten silver was added, sparks flew in the air and the mold caught fire! (presumably due to excess moisture)
Ubaldo's second talk "toilet seat analysis" ; smell of metal, the color of the stone, the taste.
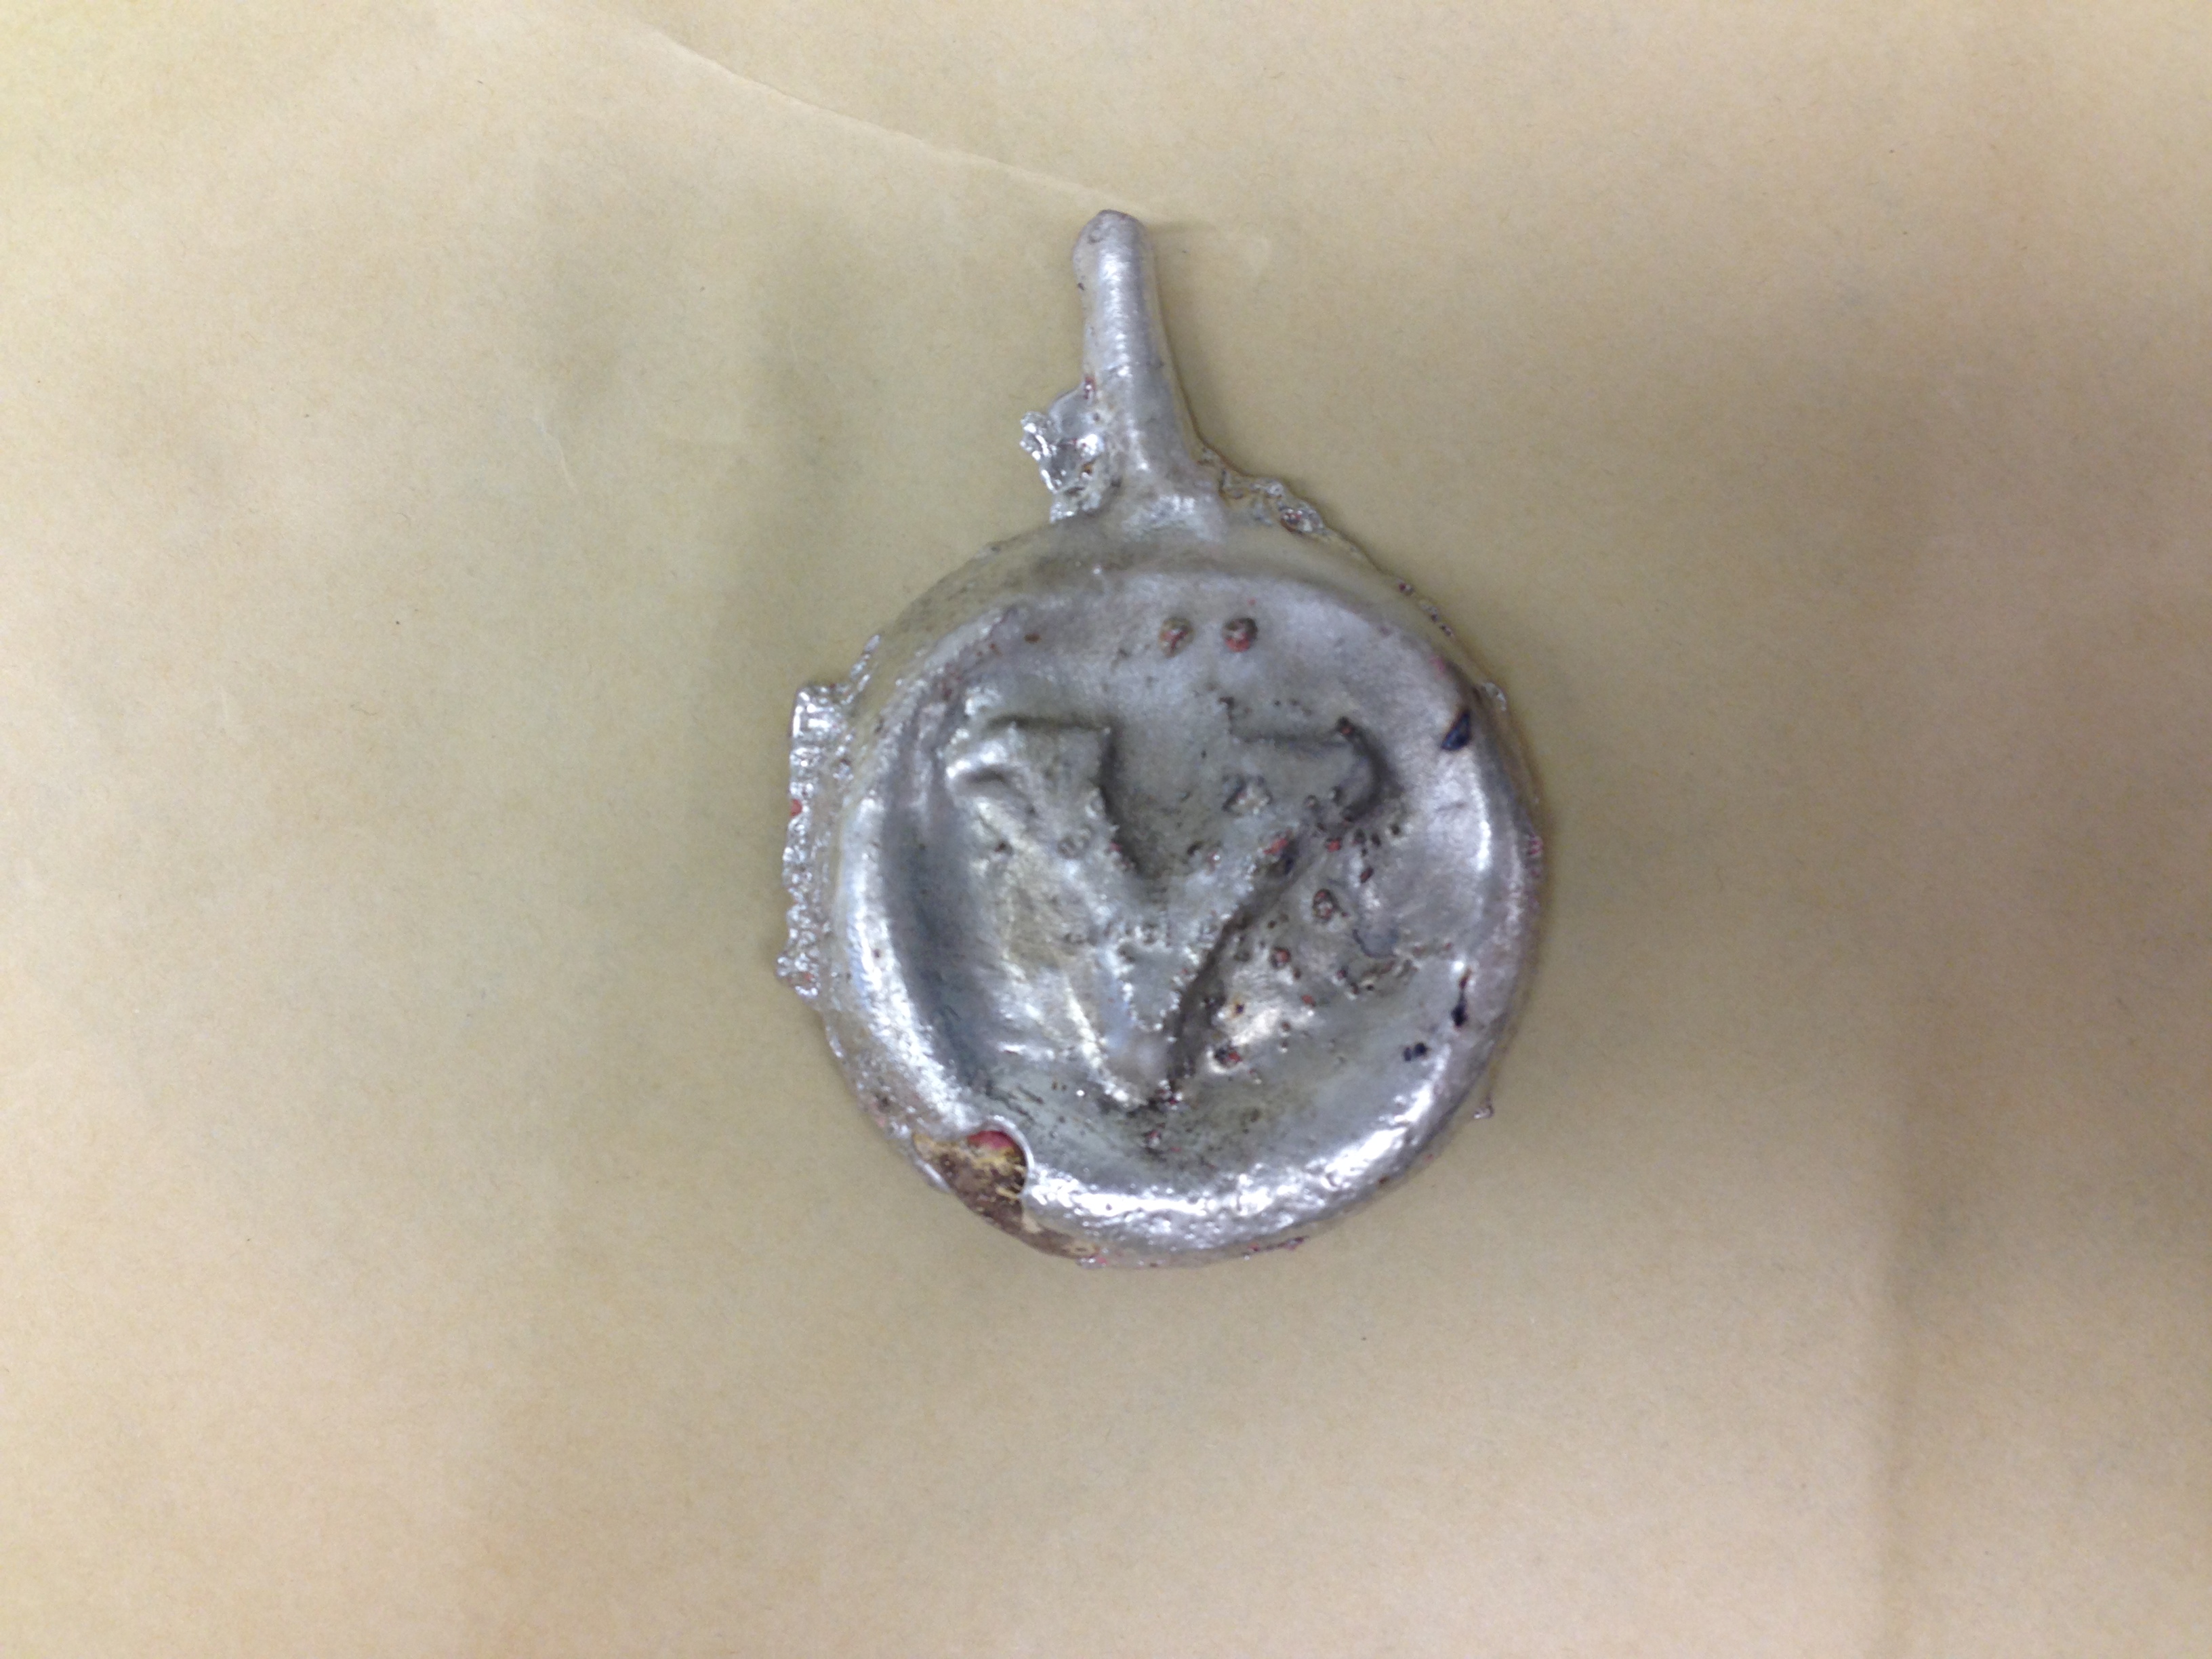
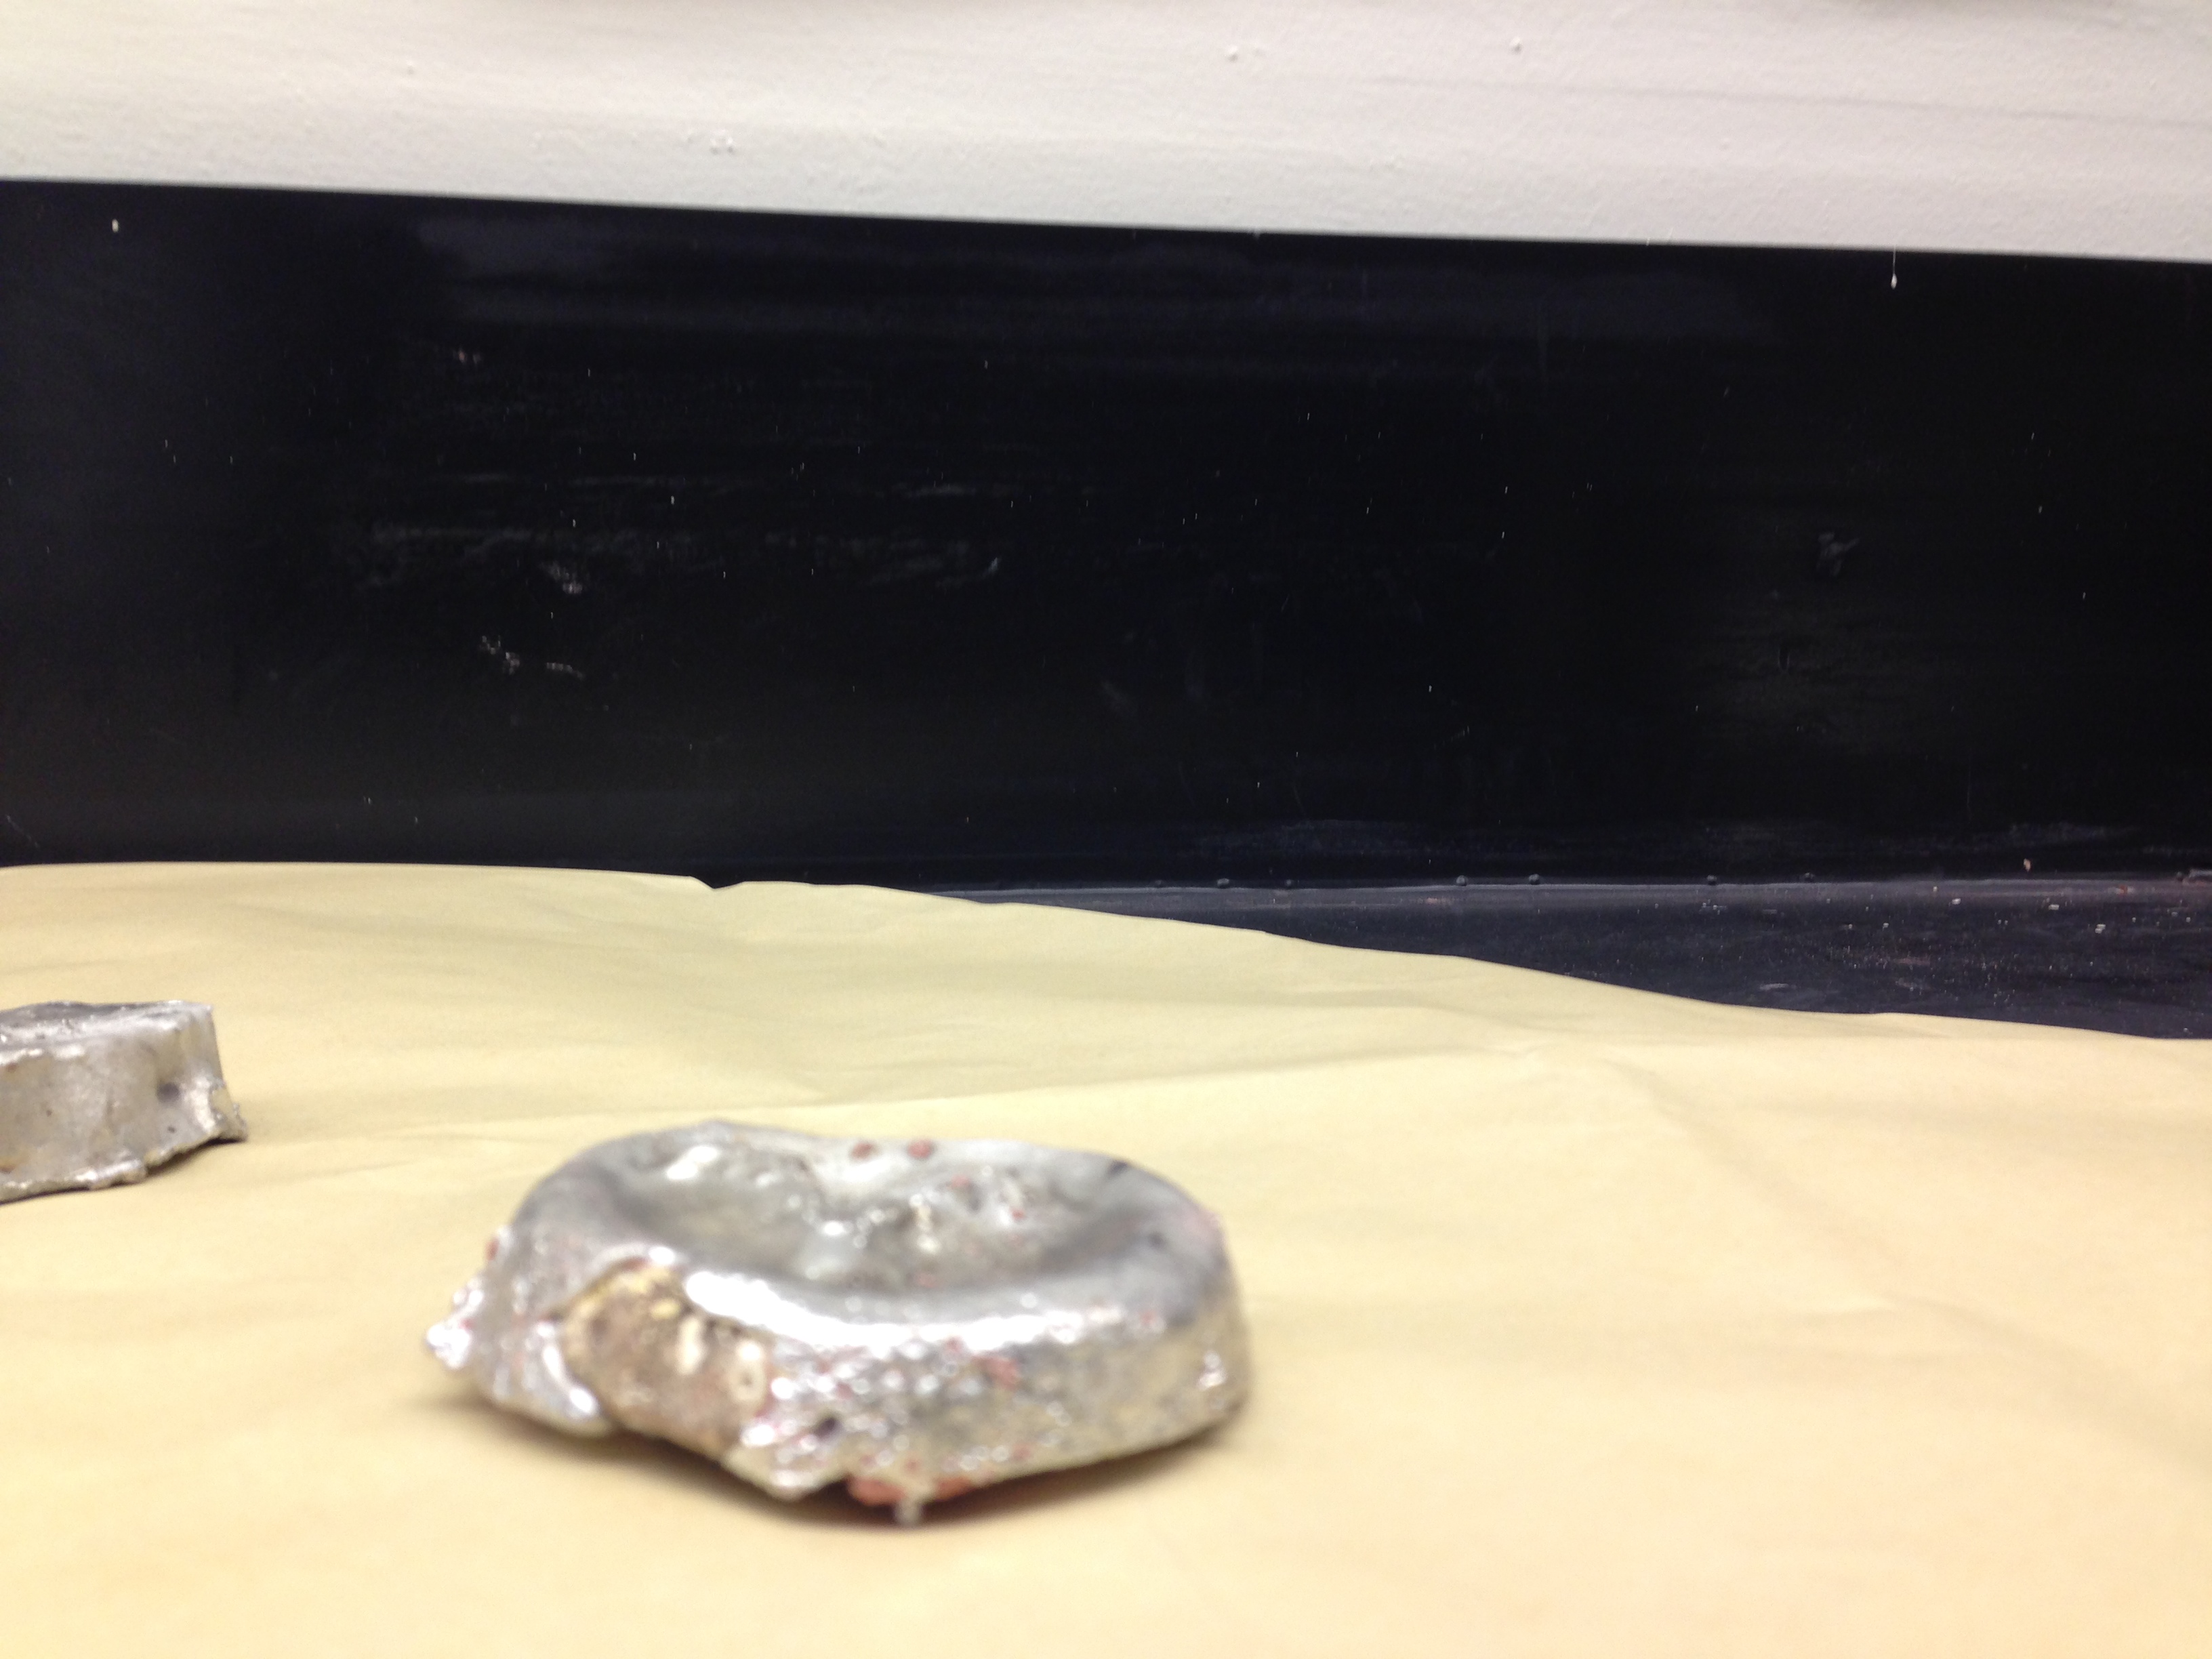
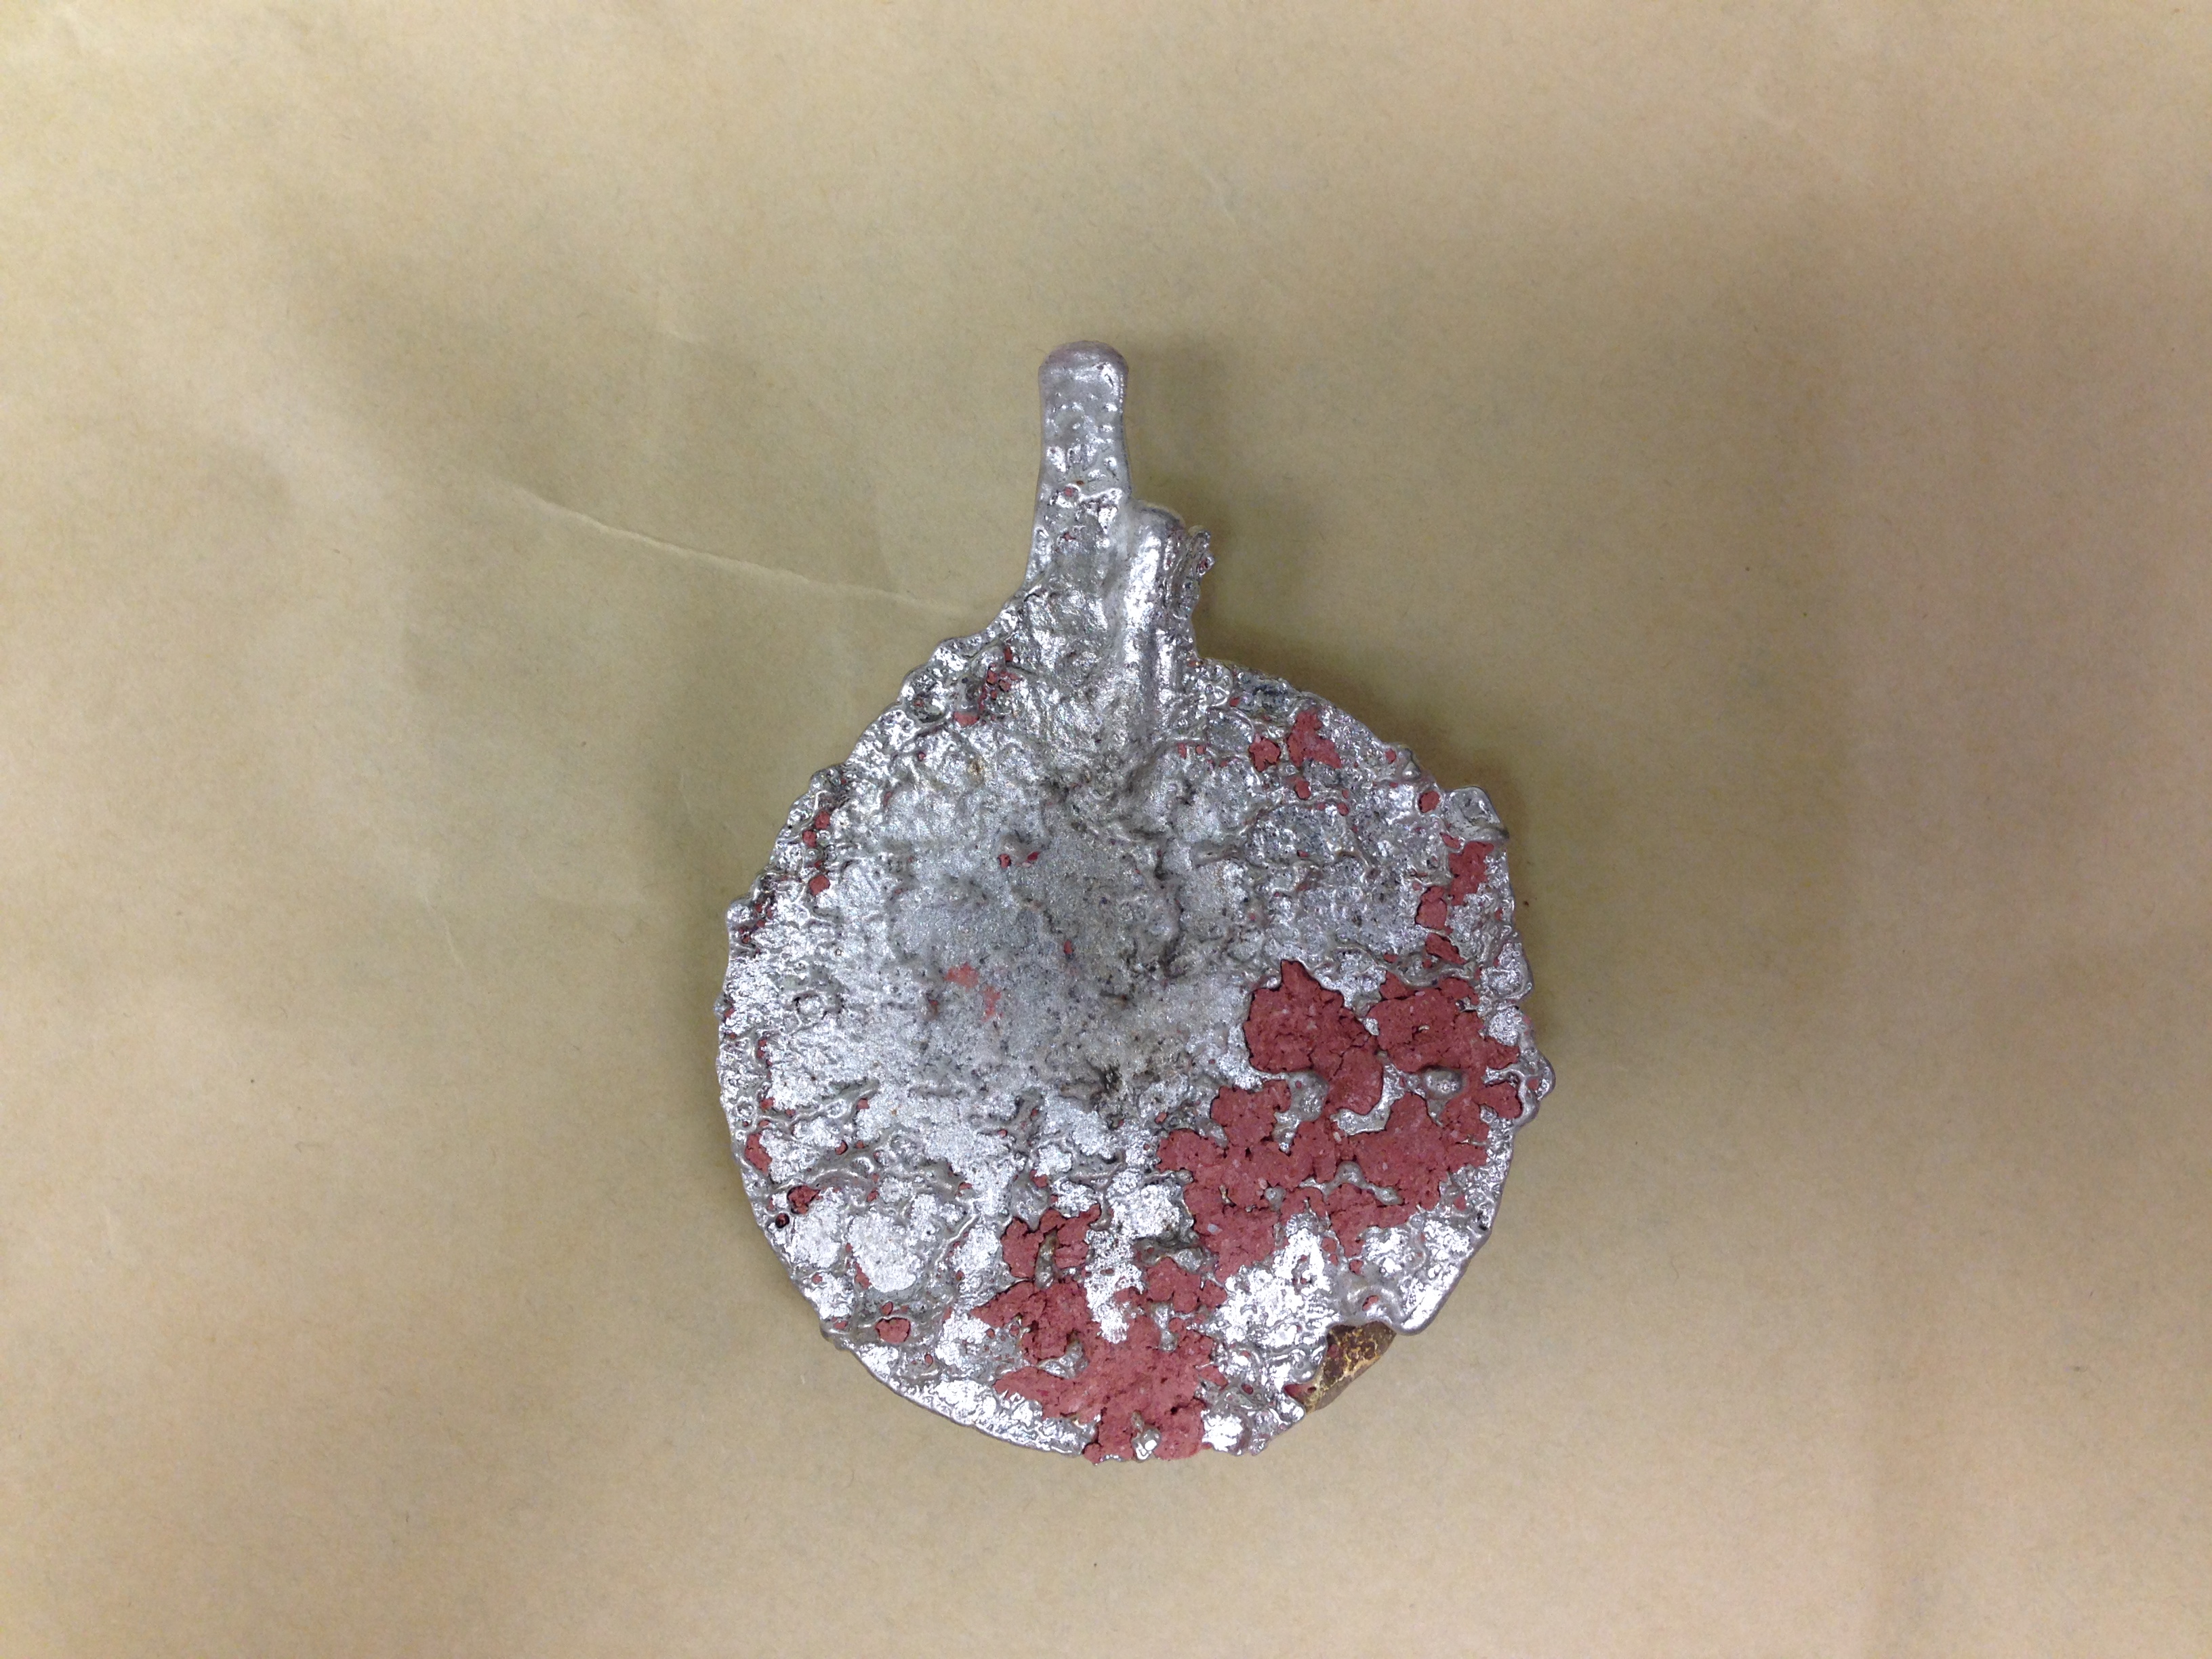
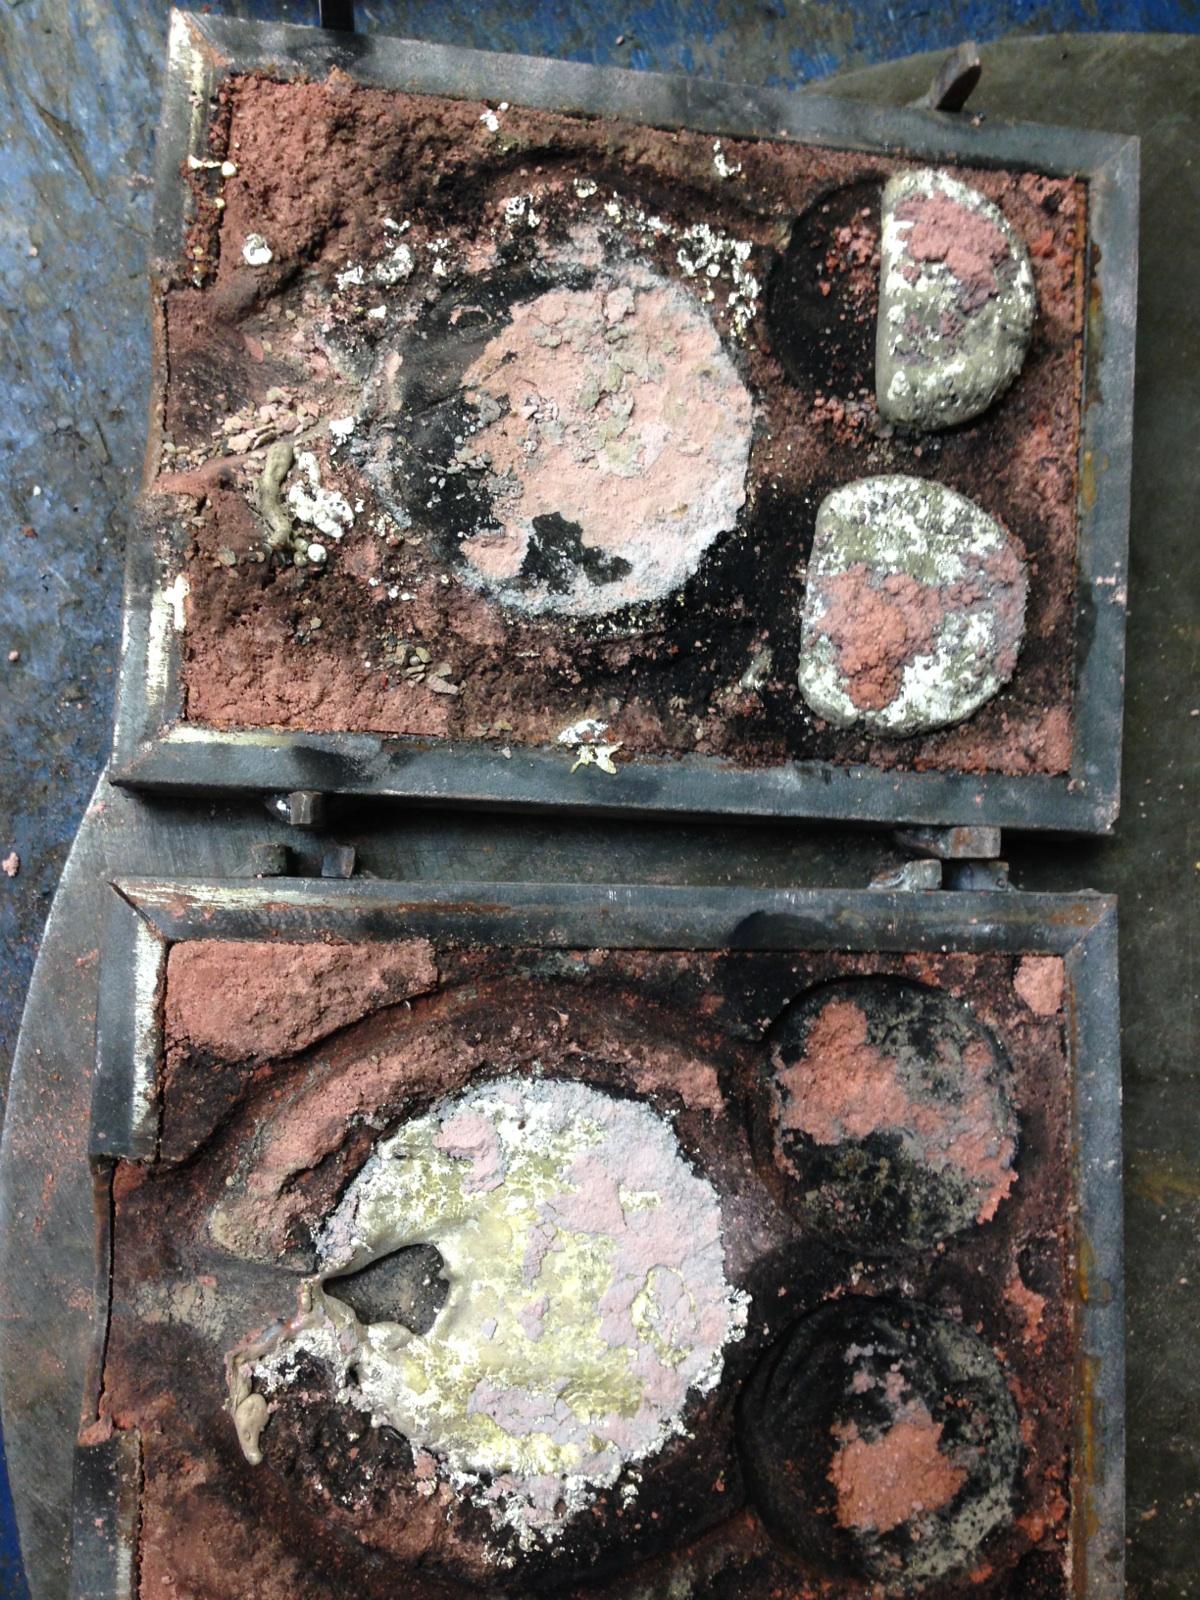
After the discussion we opened up our (now) cooled off molds. See results below.
Oct. 17: The Debriefing, Further Questions
NAME: Emogene Cataldo & Julianna ViscoDATE AND TIME: 10/17/14 10:50am
LOCATION: 560 Chandler (lab)
SUBJECT: Notes from class discussion
pewter medal
don’t cut off the gate because it makes it easier to handle
it would then be filed with a coarse file
pewter is a softer metal, but it is sticky, somewhat viscous
flashing;
chasing - small punches, blunt chisels — push the material, more dfinition. chaser would have 100s of different tools
engraving - more detail
filling
not much mention of chasing in the manuscript
ideal of a founder: no chasing work is needed after casting
matter of pride; 19th c. “cast from one piece without chasing”
life casting — this would be an area that chasing would not be ideal
pewter with small percentage of silver
alloy
atinmony and copper
dissimilar to what manuscript writer was using
he was probably using led
more pressure in the mold — make the gate larger
metalcasting is not really about the metal — it’s about the mold
it’s about the sand
our sand was not as good as the delft sand
consistency of wax pattern — harder produces more detail
coins are struck, milled
metal is hard
force
anneal - heating the metal to a point where the metal is “relaxed”
working with it, it gets harder and harder, it gets brittle
then you need to relax it
tacit knowledge — sensory information of the metal
when you anneal the silver, it turns black — this is the copper oxidizing
10% sulfuric in water - “the pickle”
soak it, and it comes out white
it takes off the oxide layer
if you’ve done soldering, it helps the flux
borax as a flux: late medieval sources
(check in theophilus)
table salt as a flux
silver, copper, bronze
tin is lower range - use more resin-type fluxes (sheep’s fat, other greasy types of flux)
soldering - hydrochloric acid saturated with zinc
manuscript: “a secret” — is this a flux
rosin was the flux to clean the surface
binds with the oxide, oxide layer refers to as scum
used for future oxidation as well
solder won’t adhere if the surface is dirty
flux: use it to clean the layer of oxide off molten metal
also used in soldering,
sal ammoniac/ammonium chloride
why? we don’t know exactly
possibly: it acts as a flux
might help prevent a buildup of oxidizing
you don’t need a pickle for tin
"The same sand which has been used in composed heated cores, i.e. of plaster, brick and feather alum, is excellent for casting in box molds, and I have tried it as follows. I crushed the pieces which had come out of core molds in a mortar, pestling slowly, because this sand is very soft. I did not pass it through a sieve, because the feather alum mixed in, which makes it bind together, would not pass through."
1. we did not use “feather alum” because we think that this is asbestos.
- we need to make a study of what feather alum is and its properties are.
- maybe we could use talc?
- gypsum is a calcium hydrate; feather alum can be several different chemical compounds
- sulfates to try out the clay: cornstarch?
2. drying the molds: biggest problem was that our molds were wet
3. what is the temperature to pour metal
4. grinding
- the finer your sand is, the better
- "But I did refine upon marble what seemed to me too coarse, and having thus prepared it”
- we need to make finer sieves
- horsehair sieve, tammy cloths (tamis in French)
5. proportions of sal ammoniac?
- could we look for illustrations of workshops and see the size of the pots?
- it might not be as big of a deal
- controlled experiments: we shouldn’t write off the sal ammoniac yet because we haven’t used the feather alum
- maybe we should look at barley recipes to determine the size of the barley-boiling-bottle
6. what was in the sand?
- made of previous molds
- grog - additive used now, make the molds resist the heat
- fire resistant
- manuscript: ground bricks
- probably replicating other medals, already in metals
7. does he reuse sand molds?
- the oil-based delft sand — probably can’t reuse it, because it burns
- the other molds (no oil) could be used again, didn’t burn out
- look for references in the manuscript and other sources
- are there references to using oil?
- how does he describe the properties of the binders
- can we re-use any of these molds?
8. does he mold after existing medals? might say something about his profession.
9. could we experiment with drying the molds? “make them ring”? the drawing shows particular concern for drying the molds.
- experience is helping us sharpen our attention to the text
- but there is a lot of repetition
- for the “doer”
"Having thus moistened the sand in order to give it a nice hold, though it still came apart easily, I sprinkled my medal with charcoal pulverized with a file to remove the oil fat, and all other fat”
What is the fat?
Tonny: perhaps this is the fat/oil from the fingers?
Make it less sticky
Tonny: empathy for materials
we have to work with the realities of the material
29r — concerns with costs
choosing recipes that may be able to used 2nd half of the semester
recipes that predate the manuscript that are similar
with french - can use any of those recipes
nature casting - has already been done
anything that is done with the molding
Oct. 28 - Results
NAME: Emogene Cataldo & Julianna Visco
DATE AND TIME: 10/28/14 12:20pm
LOCATION: Chandler Lab
SUBJECT: Images of our final portrait medals
